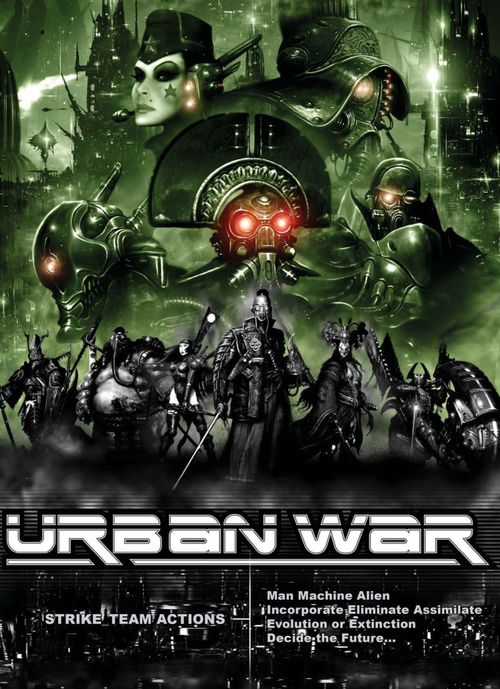
Urban War
Urban War Rulebook
Table of Contents
Table of Contents
- VOID 1.1 Players
- What You Will Need to Play
- Dice and Dice Use
- The Rules
- Setting Up the Battlefield
- The Game
- Your Forces
- Profiles
- Models Facings
- Force Points Limits
- Victory Conditions
- Deployment
- Awareness and Line of Sight
- Game Turns
- Markers
- Measuring Distances
- Command Checks
- Actions
- Calibre
- Follow-on Actions
- Morale
- Movement
- Shooting
- Templates
- Speculative Shooting
- Evading Incoming Fire
- Shooting into a Close Combat
- Terrain and Cover
- Weapons
- Close Combat
- Combat Modifiers
- Special Rules
- Armoury
- Templates
- The Forces on Iskandria
- Creating your Force
- VASA Force List
- Syntha Force List
- Junker Force List
- Viridian Force List
VOID 1.1 Players
If you already play VOID1.1 the basics of many of the Urban War game rules will already be familiar to you, and you'll find it easy to get started with this game. You should still take the time to read through this book though, as despite the similarities, there are many important differences between the two games. VOID1.1 is a game of conflict between two or more armies, composed for the most part of squads, while Urban War is a game where conflict occurs between forces composed of individual troopers. As a result you'll find that some rules from VOID1.1, like unit coherency for example, don't exist at all in Urban War, while others, like the turn sequence and some special rules, have changed dramatically. You'll also find new rules like those covering actions and shock for example, which reflect the more individual nature of conflict in Urban War.
What You Will Need to Play
Before you play a game of Urban War you should have a few things on hand that you will need to use throughout the game. The following things will be useful:
- Pens and Notepaper: We have tried to keep the amount of notes you will need to take during a game to a minimum; even so it is always handy to have a pen and notepad to hand. If you are playing your own scenarios you will need to note down successes and failures in gaining objectives. You'll also need them at the end of a game to add up victory points if you're using them.
- A Ruler or Tape Measure: A ruler marked in inches is essential; all measurements in the game are in inches. You will need to measure how far your troops can move, shoot or even run for cover! A retractable steel rule is ideal.
- Markers or Counters: A supply of counters or markers of some kind will usually be useful, especially in larger games. They can be placed beside models that have taken their turn, are waiting to see what the enemy does, are panic stricken, or are subject to a variety of other helpful or harmful effects. Different coloured card markers, coins of various sizes, or coloured tiddlywinks can all be useful as markers. Just as long as you and your opponents know what they indicate and they're not too obtrusive.
- A supply of snacks and drinks: A commander has to keep his or her strength up if they are to lead their troops successfully. However it's usually a good idea to keep your provisions on a side table, unless you like your armies fighting around soft drinks cans!
Dice and Dice Use
Although good tactics are the basis of victory in a game of Urban War, nothing is ever certain. Dice are used in the game and these will often decide how luck (or fate) affects your well-laid plans. In any situation where there is an element of chance the dice will decide. Will your troops survive when they charge that enormous monster, or will it crush them? Good tactics will swing the odds favourably, but they are never a guarantee of success.
The Urban War game system uses an ordinary ten-sided dice, and we will refer to this as a d10. At some points you may need to roll two or more dice at once. This would be stated as roll 2d10, roll 3d10 etc.
Sometimes there will be modifiers to a particular dice roll. For example when you are rolling a dice to see whether one of your models can hit an enemy model the roll may be modified by a particularly powerful weapon, or because the target is in cover. Modifiers like this are always applied to the dice roll, so for example, a +1 modifier (+1 mod) would mean that you would roll your dice and add 1 to the score. At all times, when you are rolling a dice to see whether one of your models succeeds in a particular task, a roll of a natural 10 is successful and a roll of a natural 1 fails.
In addition sometimes you will need to use a ten-sided dice as a 'direction' dice. This is used to generate a random direction for things like a stray shot from a grenade launcher etc. If you take a look at a ten-sided dice you will see that its faces are shaped very much like an arrowhead. When this use is called for, simply roll the die and the imaginary 'arrowhead' that is its uppermost face indicates the direction.
The Rules
This section deals with all the concepts and mechanisms that you will need to become familiar with as you learn the game. It will take you through setting up your playing area, choosing and deploying your forces and fighting battles. Later sections cover special rules that apply only to certain troops, force lists and background information including troop details for the main races in the Void1.1 universe, and sample forces to use as a guide for building your own forces. Also included in this book are some blank rosters for keeping track of your troops, some quick reference play sheets that summarise the most important rules, and some templates for area effect weapons (more on this later). Feel free to photocopy these as many times as you like.
Setting Up the Battlefield
The first thing you will need to do in order to play a game is set up your battlefield. The minimum sized area you will need to play a game of Urban War is a flat area of about 4 feet by 4 feet, though for larger battles 6 feet by 4 feet would be better. This can be an area of floor, a tabletop, or any other clear flat space you can find. For example a heavy cloth or blanket draped over a table or spread on the floor would provide a good surface to play on. Wherever you decide to play, you need to be able to tell where the edge of the battlefield is. During a game models cannot move off the edge of the battlefield.
Terrain
Urban War is a skirmish game, and you will want the troops in your force to take as much advantage as possible of whatever cover is available. It's always wise to minimise their exposure to enemy fire, and to keep a look out for enemy troops that are exposed and therefore vulnerable to your fire. Having a reasonable quantity of terrain for models to hide in or sneak around is very important in Urban War, and terrain can be very enjoyable to build and paint up. The more interesting and attractive your terrain is, the more enjoyable your games will be.
In whatever form it takes, terrain will provide much needed cover from incoming fire as you advance, or strong points for your troops to defend. Ruined buildings, factories and warehouses, multi level gantries and walkways, hills, swamps, sludge pools, clumps of forest or even the remains of a crashed spacecraft can all be used as terrain. You're limited only by your imagination. For some ideas and suggestions see the section on depicting terrain shortly.
Areas and Obstructions
When considering terrain try to think of it in terms of 'areas' and 'obstructions'. Examples of terrain 'areas' are a patch of ruins and rubble, an expanse of ruined industrial complex, thick smoke and fumes from underground fires or industrial waste, a clump of forest, a piece of marshland, a broken rocky piece of land, an expanse of soft sand or a hill. Basically most 'areas' are terrain that covers a reasonably sized sector of your battlefield. Examples of 'obstructions' are a piece of machinery, a large rock, an alien obelisk, a single tree or a section of wall. Basically 'obstructions' are single relatively small pieces of terrain.
Terrain Types
Terrain can be divided into three basic types: 'normal', 'rough' and 'impassable'. At beginning of a game you will need to decide what the terrain you have decided to use should be classed as. Sections later in this book that cover movement, shooting and combat, will describe how various terrain types affect these activities. You and your opponents should agree before the game starts how to treat terrain. Use the following suggestions as a guide.
- Normal: Roads, paving, steps, asphalt, plains, grassland, fields, gently sloped hills, shallow streams, sand, sparse undergrowth, shallow snow, ice sheets, slightly rocky plains, low walls. A significant proportion of your battlefield will usually be normal.
- Rough: Ruins, rubble piles, slag heaps or city dumps, steeply sloped hills, soft or shifting sand, broken rocky ground, thick mud and bogs, thick vegetation, forests and jungles, deep snow, waist to chest deep water.
- Impassable: High walls and extremely steep slopes, deep fissures, corrosive sludge and acid pools, lava, quicksand, deep water, cliffs.
Depicting Terrain
You can use all sorts of things to depict terrain. If you are using a heavy cloth to represent your battlefield you could use books or video cases placed under the cloth to represent raised areas of ground or hills. You can depict other terrain areas by cutting out an irregular shape from a piece of cloth or felt and placing it on the table. Areas of any size can be depicted in this way, from small patches a few inches across, to large areas that take up much of the tabletop. If you wish to depict an area of ruins or wreckage you could use a dark coloured material, and place individually modelled bits of rubble or machinery on the cloth to indicate the nature of the area. A suitable shade of an unpleasant green material cut into shape could represent a pool of industrial waste or sludge, or similarly a piece of material could represent an area clouded by thick fumes or smoke that would hinder visibility.
Those are just a few suggestions. There are lots of commercially available models and scenic accessories you can use. And if you use your imagination and keep your eyes open many household items and bits and pieces can be scavenged to use as scenery. Its amazing what can be done with bits of card tubing, empty cartons etc given a bit of time and effort.
Placing Terrain
You and your opponents will need to agree on a mutually acceptable method of how and where to place terrain pieces on your battlefield. Terrain can make your battles very interesting, but too little or too much of it, or unfairly placed pieces can mess up a game.
One good way of placing terrain is to mark out the playing area in a grid, of say twelve-inch by twelve-inch squares. Use dice, coins or counters to indicate the corners of the grid squares. Players can then take it turns, one grid square at a time, to place a piece of terrain or declare the grid square empty (i.e. normal). No subsequent player may place terrain in a square that already has a terrain piece, or has been declared empty. Once all the grid squares are accounted for, the battlefield is complete.
Remember the object of the game is to have fun and for all players to enjoy themselves. It's in everybody's interest to make the playing area as fair and interesting as possible.
The Game
Once you have your playing area set up you're ready to begin. All you need now are the models that will represent your troops, and one or more players to fight against. The battle will be played out over a number of turns that give each player the opportunity to do something with his or her force. Strategy, tactics and fate (dice rolls to you!) will determine the eventual winner. Hopefully you will emerge victorious and your opponents will be routed, or better still obliterated without trace.
Your Forces
Before you can fight a battle you will need a force of troops. Read through the introductions in the force list section later in this book and pick the force that appeals most. You will find that each of the races have their own strengths and weaknesses, and each will require slightly different tactics and strategies if you are going to vanquish your enemies.
Once you've chosen a force you'll need to know how to build your force, and what the capabilities of your troops are. Each troop type has a variety of strengths and weaknesses, and many have special capabilities and powers. Some troops are particularly good at shooting, while others excel in close combat. Some are fast and nimble, and others are fearless or camouflage experts. This is described in a model's 'profile' as detailed shortly.
Force Creation and Leaders
The force lists later in this book contain all the information you'll need in order to select the models that will make up your force. There may be some models that always form the backbone of a force, and so are compulsory choices, and others that perform backup or specialist roles, and so will be more limited in numbers.
Additionally, all forces must contain one model that has been designated as the leader, and any limitations on your choice of model are likewise detailed in the lists.
Profiles
A model's profile contains all the information needed to use it in the game. The profile shows how your troops interact on the battlefield. They represent model's strengths and weaknesses with a set of statistics that are used to define how the models move and attack. You will find profiles for your models in the force lists; each one contains the profiles for all the troops available to that particular force. Profiles are all presented in the same basic format (see the sample profile).
Sample Profile
Colonial Marine
Colonial marines are the staple of the Viridian Forces. Their hard suits are perfect protection for an urban environment, a lightweight combination of ballistic armour and hazard suit, proof against chemical and biological attacks as well as coraline infection. A sophisticated optics and communications package rounds out the new battle gear, greatly increasing the effectiveness and survivability of the common infantry soldier.
| AS | SH | ST | T | W | CD | SZ | MV | CAL |
|---|---|---|---|---|---|---|---|---|
| 3 | 4 | 4 | 4 | 1 | 4 | 2 | 4 | 0-2 |
| Equipment | Cost CAL 0 | Cost CAL 1 | Cost CAL 2 | Cost CAL 3 |
|---|---|---|---|---|
| Gauss Rifle, Combat Blade | XX | XX | XX | N/A |
- Special Rules: None
- Options: None
The Stat Line
The stat line is a row of characteristics that show a model's strengths and weaknesses. We refer to these characteristics as 'stats'. The characteristics included in the stat line are shown below.
- Assault (AS): This stat shows how good the model is when attempting to hit an enemy in close combat. It can range from 1 to 10, a 1 is very poor and a 10 extremely good. On this scale the average human trooper rates at 4. Models with a high stat have more chance of hitting an enemy.
- Shooting (SH): This stat shows how accurate the model is when shooting (or throwing) weapons in ranged combat. It can range from 1 to 10, a 1 is very poor and a 10 extremely good. On this scale the average human trooper rates at 4. Models with a high stat have more chance of hitting an enemy.
Strength (ST): This stat shows how strong the model is. It can range from 1 to 10, a 1 is very poor and a 10 extremely good. On this scale the average human trooper rates at 4. Models with a high strength have more chance of causing damage if they physically hit an enemy in close combat.
Toughness (T): This stat shows how tough and resistant to damage the model is. It can range from 1 to 10, a 1 is very poor and a 10 extremely good. On this scale the average human trooper rates at 4. Models with high toughness have less chance of taking damage if they are hit.
Wounds (W): This stat shows how much damage a model can take before it is killed or destroyed. It can range from 1 upward. The average human trooper has 1 wound; heroes, larger creatures and vehicles will often have more.
Command (CD): This stat gives an indication of the model's self-control, training and bravery. It can range from 1 to 10, a 1 is very poor and a 10 extremely good. On this scale the average human trooper rates at 4. Models with a high score are more likely to stand their ground or react quickly to enemy action.
Size (SZ): This stat indicates how large a model is. It can range from 1 upward. The average human trooper is size 2. Large creatures and vehicles are easier to hit when shooting at them.
Move (MV): This stat shows the model's normal move distance in inches. It can range from 1 upward. The average human trooper has a move of 4. A high score can allow you to outrun or manoeuvre your enemies.
Calibre (CAL): This stat gives an indication of the model's quality and effectiveness. It represents its ability to focus and concentrate under fire, and its ability to take advantage of chance opportunities thrown up in the heat of battle. It also indicates its general proficiency in a variety of practical battle skills, including the use of cover, movement under fire, and ranged or close combat techniques. It can range from 0 upward. The average human trooper has a calibre of 0 or 1. A model's calibre may be due to its experience, training, natural ability, or inbuilt design and programming.
Other Information
Below the stat line is all the other information you will need to enable you to choose your models, equip them with weaponry and use them to fight battles. This is presented as shown below.
- Equipment: This lists the model's basic load out of weapons and equipment.
- Cost: This shows the point cost of the model when it is equipped with its basic weapons and equipment. The point cost of models is important when building forces; it's used to make sure that you and your opponents have armies of roughly the same power.
- Special Rules: This shows any extra rules that apply to the model. It may be particularly brave, very heavily armoured, or subject to some other (not always beneficial) effect.
- Options: Some models may have the option of additional weaponry or special abilities; this would be detailed here along with any associated additional points cost.
Models Facings
The models comprising your units all have 'facings'. Most models have two facings: front and rear. A model's front facing is in the direction to its front (i.e. the direction in which it is looking), and its rear facing is in the direction to its rear. Facing is important because most models can only shoot at enemy models that are in their front facing. For most models their front facing is a 180-degree arc to their front. Some models may have more restricted facings, but these will be detailed in their profiles or in future supplements.
Force Points Limits
Before playing a game you and your opponents will need to agree on how many points to spend on building your forces. The higher the point limit the more models will be in your force, and the longer the time required to complete a game. For normal games all players should have forces of equal points total. There is no minimum or maximum points limit, it's entirely up to you how large you want your games to be. We suggest that for your first few games you may want to keep things simple and play with just a few models a side. Once you're comfortable with the rules you can expand your games.
Victory Conditions
In addition to deciding how big your forces are you will need to agree how to decide the eventual winner. It is often useful to set a time limit on how long the game should last. You can either set this by the clock or decide on a set number of game turns for the battle to last. Once the time is up, or you've played the specified number of turns, you can work out who won.
The most obvious way to win a game is by destroying your opponent's force or accepting his surrender, irrespective of time or turn limits a player can choose to surrender at any point. There are plenty of other ways that victory can be decided. If you decide to set specific victory conditions the most important thing is to make sure all players understand and agree the conditions before you begin the battle. Future supplements for Urban War will include new scenarios and victory conditions, but for now here are a few suggestions for ways to work out winners and losers.
Most Survivors
When the time or turn limit is up each player adds up the total point value of the models that they have remaining in play. This is your victory point total. Whoever has the highest point value wins the game.
Strategic Withdrawal
With this method each side must try to kill or destroy enough of the enemy to compel them to make a 'strategic withdrawal', or to put it another way, to chicken out and head for the hills.
Before the battle starts, decide with your opponent the level of losses that your forces can sustain before they start to get nervous and consider beating a hasty retreat. This could be once a quarter (25%) of the force has been killed, or a half (50%), it's entirely up to you, but the opposing forces should both be able to sustain the same level. Whichever of the forces withdraws first will lose the battle, and by default its opponent will win. The following rules apply.
- At the start of any game turn in which a player's force is below its sustainable loss level, before any models do anything, the leader of the force must make a command check. Command checks and how to make them are detailed later in their own section.
- If the command check is passed, the force keeps its nerve and can continue as normal. If it is failed a strategic withdrawal is made, all models are assumed to have retreated off the playing area and the battle is lost.
- If the force's leader is out of action the command check should be made by whichever model has the highest command (CD) stat in the force.
Objectives
Instead of comparing victory points at the end of a game, you could set a number of objectives or missions for the forces to accomplish. These could be such things as occupying a fortified outpost, liberating a prisoner or blowing up an ammo dump. Once the game ends the player who accomplished the most objectives is the winner. To make this more interesting you can grade the importance of objectives so that maybe occupying an area is worth 1 point, freeing a prisoner is worth 2 and blowing up the ammo dump is worth 3.
Scenarios
You could also play a battle around a particular scenario. Here are some ideas for simple scenarios that you might like to try:
- Hold the pass / bridge: one player must prevent their opponent(s) from getting their troops through a pass or over a bridge for a set number of turns, or until reinforcements arrive.
- Take the position: one player must defend a particular area or position while the enemy attempts to take it from them.
- Seek and destroy: each player nominates one of their units as a primary target and it is their opponent's objective to destroy that unit.
These are just a few suggestions to give you some ideas. You can try these out, combine them or come up with new ones for yourself. If you're playing a scenario battle you will probably need to adjust the point values of the opposing forces. For example if a player has to take a heavily fortified position from a defender, you might increase the attacking forces points by 50% or 100%. A good way to play scenarios is to fight the battle; then for your next battle, use the same scenario but swap roles with your opponent.
Just remember to make sure that everyone is clear on his or her mission before you begin.
Deployment
Before starting a battle players need to place their models in their starting positions on the battlefield. This is known as 'deployment' and the area in which you can place your models is your 'deployment zone'. If you're playing a specific scenario or a game with particular objectives the deployment zones may vary, one player might be defending a position in the middle of the table for example. Future supplements for Urban War will include different ways of deploying, but for now we'll just deal with a normal game.
The exact size and shape your deployment zones will depend upon the size and shape of your playing area but the idea is to keep some tactical space between the forces. Ideally there should be a distance of at least 24 inches between opposing forces at the beginning of a game. For example if you're playing on a table just specify two opposite sides as deployment zones.
Assuming you're playing on a table or similar rectangular area, and you've decided which sides are the deployment zones, you need to deploy your forces. Both players should roll a d10; the player with the highest score gets the choice of deployment zone, the losing player taking the opposite one. Then, starting with the winner, both players take it in turns to place one model at a time in their deployment zones until all models are on the table. Once all models are deployed the game can begin.
Deployment Zones (diagram: Deployment Zone 1 at the top and Deployment Zone 2 at the bottom of the table, each 12 inches deep, with a minimum of 24 inches between the zones.)
Awareness and Line of Sight
Your troops need to be able to see the enemy if they are to shoot at them or charge into close combat. Irrespective of the direction a model is facing it is assumed to be aware of everything on the battlefield that is not hidden by intervening terrain or other models etc. There's nothing to stop them looking over their shoulders after all.
A model with an unobstructed view of another model is said to have 'line of sight' (LOS) to it. Having a clear LOS to the enemy is important later when you will want to be able to shoot at them etc. Sometimes it can be difficult to tell whether a model has LOS to another model. In cases like this try to get down to the model's eye level, or take a straight line (e.g. the edge of a retractable steel measuring tape or a piece of string) from any point on the looking unit to any point on the target unit.
Players' models are assumed to be acting as a team and trying to make sure they do not block each other's view. The following rule applies.
- Friendly models within 2 inches don't block each other's LOS. All other models, however, can block their LOS.
Game Turns
In a real battle opposing troops are moving about shooting and fighting simultaneously. In order to be able to play a game we have to be able to split the action up into a series of manageable chunks so that we can keep track of what's going on. We use 'Game Turns' to divide up the action. All games will consist of a series of game turns, during each of which players can do something with each of their units.
Each game turn is divided into three phases; these are, in order:
- The Marker Phase
- The Orders Phase
- The Activation Phase
The Marker Phase
During this phase all markers that are being used to show models that have been 'activated' or that are on 'overwatch' are removed. Don't worry about the terms 'activated' and 'over-watch' just now, they will be explained in detail later.
The Orders Phase
During this phase players issue each of their models one of three orders. The choice of order will determine the kinds of things the model will be able to do during this turn. The orders you can issue your models are listed below.
-
Over-watch
-
Snap-fire
-
Lock-fire
-
Over-watch: A model with over-watch orders is waiting to see what the enemy does, holding itself poised ready to react to enemy action. Its main purpose is to use its firepower to disrupt the actions of enemy models. The ways over-watching models can attempt to react to enemy action are detailed later. However the following limitations apply.
- A model that is in base contact or close combat with an enemy model cannot be given this order; it can only be given snap-fire orders.
- A model with any enemy models in LOS and short range cannot be given this order.
-
Snap-fire: A model with snap-fire orders is staying alert to possible enemy action, while at the same time leaving itself options to proactively take the fight to the enemy. It's operating 'on its toes' able to quickly take offensive or defensive action as the opportunity presents itself. The options available to models with snap-fire orders are detailed later. The following limitation applies.
- This is the only order that a model that is in base contact or close combat with an enemy model can be given. A model in this situation must be given this order.
-
Lock-fire: A model with lock-fire orders is focussing on performing a particular task well, to the exclusion of all else. The model will not be able to react very effectively to unexpected enemy action. The options available to models with lock-fire orders are detailed later. The following limitation applies.
Order Tracking
On the roster sheets that we've supplied there are a line of small numbered boxes for each of the model entries. These can help you keep track of the orders you've issued to your models, simply dot in a blob of an appropriate colour with a marker or pen to indicate which order was issued for that turn. Perhaps green for over-watch, red for snap-fire and blue for lock-fire. The specific colours don't really matter as long as all players use the same ones to indicate the different orders. Once a model has been activated (activating models is explained below) and completed its turn, simply cross out the box.
Alternatively, if you don't want to use the tracker boxes you could use counters that are blank on one side, and have the appropriate colour on the other. Place the counters blank side up beside your models when you issue orders. After all players have finished issuing orders, flip your models' counters to reveal their orders. During play remove each model's counter as it finishes its turn (or leave it in place to indicate a model on over-watch).
The Activation Phase
During the activation phase players take it in turns to make their models perform various tasks or 'actions'. Models that have not yet done anything in the current activation phase are referred to as 'inactivated'. When a player takes his or her turn they can pick one (or sometimes more) of their inactivated models to do something. This is known as 'activating' the model. Once a model is 'active' the controlling player can make it perform one or possibly more actions. A model that has finished its action(s) is referred to as 'activated' and cannot be used again in the current game turn.
Initiative - Who Goes First
Before anybody gets to activate any of his or her models you need to decide who goes first. All players should roll 1d10 and the player that gets the highest score wins the initiative. The winner can then go first or nominate one of the other players to go first. In this way the winner can seize the initiative and get into action or wait and see what his opponents do.
Order of Play
Once the first player has been decided, and he or she has activated their model(s), that model(s) turn is over. Play then passes to their opponent, who then activates their model(s). At the completion of their model(s) turn play then passes back to the first player. This process continues until all of the models on the tabletop have been activated. In multi-player games play passes clockwise around the table from the first player to the next, and so on.
Activation and Activation Sequence
The stage during a game turn at which a model becomes eligible for activation depends on its orders. Some orders take priority over others and allow models to activate before models issued a different order. The 'activation sequence' defines at what stage during the activation phase models become eligible for activation. All models with orders of higher priority must activate and complete their action(s) before any models with the next lower priority order can be activated. See below.
- Priority 1: Over-watch
- Priority 2: Snap-fire
- Priority 3: Lock-fire
In each part of the sequence (i.e. Over-watch, Snap-fire and Lock-fire) the 'first player', as decided by the initiative roll earlier, will be the first to do something with his or her models.
- Over-watch: The first player activates all the models he or she has issued over-watch orders to, the next player then follows suit, and so on until all models with over-watch orders have been activated. Over-watching models can be thought of as being in a state of suspended activation. Subsequent enemy action in the current game turn may trigger them into activity, as detailed later. Once all models with over-watch orders have been activated play then moves on to the next stage in the activation sequence, activating models with snap-fire orders.
- Snap-fire: The first player selects one of the models he or she has issued snap-fire orders to and activates it. Once the model has completed its action(s) its turn is over. The next player then follows suit, and so on until all models with snap-fire orders have been activated. Once all models with snap-fire orders have been activated play then moves on to the next stage in the activation sequence, activating models with lock-fire orders.
- Lock-fire: The first player selects one of the models he or she has issued lock-fire orders to and activates it. Once the model has completed its action its turn is over. The next player then follows suit, and so on until all models with lock-fire orders have been activated.
Ending the Game Turn
Once all models on the tabletop have been activated the activation phase is finished and the current game turn is over. The next game turn begins with a new marker phase and the whole process is repeated.
Markers
In larger games you will probably find it useful to place a marker beside models that have been activated or are currently over-watching. A marker is a handy reminder of a model's current state. As long as the markers indicating activated models are a different colour from those indicating models on over-watch it doesn't really matter what you use, just remember to make sure that all players know which is which before you start a game. Additionally, and especially in multi-player games, you may find it handy to have some kind of marker that is passed to a player when it is his or her turn, at the conclusion of which, it then being passed to the next player, and so on.
Measuring Distances
Players can measure distances at any time during the orders phase and at any time during their turn. When measuring distances from model to model, measure from the nearest point on one model to the nearest point on the other model.
Command Checks
Although your troops will do their best to follow their orders, they are sometimes fallible. Their concentration can lapse; they can be surprised by incoming fire, an enemy charge, or other unexpected events. Your troops' training, determination and speed of reaction, as represented by their command (CD) stat, will often decide how well, or even if, they perform a particular action. In these cases a 'command check' will determine whether, or how well the action is performed.
Sometimes a command check can be made by a model in order to gain extra actions or bonuses, at other times it will be made when a model is attempting to react to the activities of an enemy model. The specific circumstances in which a model should make a command check can occur at various times, often at some point during an enemy model's turn. These are detailed later, in the sections on actions, movement, shooting, and close combat etc.
Making a Command Check
To determine whether a model passes a command check, roll 1d10 referring to the model's command (CD) stat. The Command Table shows the minimum d10 score needed to pass, and the following rules apply.
- If the command check is passed the model gains whatever benefits are relevant, or can act appropriately to its situation, as detailed later in the sections on actions, movement, shooting, and close combat etc.
- If the check is failed the model's circumstances will dictate the resulting penalties, if any. As above, the consequences are detailed later in the relevant sections.
Evade: A model that is the target of offensive enemy action can sometimes attempt to evade and get out of the way. The circumstances when an evade can be attempted are detailed later in the section on evading incoming fire.
Fight: The model initiates a round of close combat with an enemy model. Fight or 'Break off' as detailed below are the only actions that a model can perform if it activates in base contact or close combat with an enemy model. A model in this situation must perform one of these actions.
Command Table
| Models CD | 1 | 2 | 3 | 4 | 5 | 6 | 7 | 8 | 9 | 10 |
|---|---|---|---|---|---|---|---|---|---|---|
| Score to Pass | 9+ | 8+ | 7+ | 6+ | 5+ | 4+ | 3+ | 2+ | 2+ | 2+ |
Actions
The types of action available to a model when it is activated depend on the type of order that the model was issued. Some orders enable a model to shoot accurately or charge into combat, while others can allow the model to interrupt or react effectively to enemy models' actions. The actions available are shown below in the Actions Table.
In most cases when a model is activated it can perform one action. When the model has completed its action its turn is over and it cannot do anything else until the next game turn. In some cases however, models with a high calibre (CAL) stat can gain further 'follow-on' actions before their turn ends, or gain bonuses to their chance of success in performing an action. This is described in the calibre section shortly.
Actions Table
| Model's Orders | Available Actions |
|---|---|
| Over-watch | Disruption shot; Evade; Counter-charge; Fight; Break off |
| Snap-fire | Move; Snap shot; Move & Snap shot; Reaction shot; Evade; Charge; Counter-charge; Fight; Break off |
| Lock-fire | Rush; Aimed shot; Evade; Counter-charge; Fight; Break off |
- Disruption shot: A disruption shot is a quick but considered shot in response to an enemy model's activity. This kind of shooting tends not to be as accurate as an aimed shot, but is usually more accurate than a snap shot. For a full explanation of the various types of shooting see the shooting section later.
- Counter-charge: A counter-charge can be made by a model as a response to being charged by an enemy model. If a model is alert and can react quickly enough to counter-charge its attacker it can equalise the odds in the ensuing close combat. For a full explanation of the various types of action that relate to close combat see the close combat section later.
- Break off: The model attempts to withdraw from close combat with an enemy model. If successful it can move a distance up to its MV stat in inches away from the enemy model.
- Move: The model can move a distance up to its MV stat in inches. Models making a move of this type are taking their time and staying alert to enemy presence or action.
- Snap shot: A snap shot is a quick unpremeditated shot 'fired from the hip'. As no time is taken to aim properly this kind of shooting is very inaccurate at anything other than short ranges.
- Move & Snap shot: The model can move a distance up to half its MV stat in inches. In addition the model can also take a snap shot. The snap shot may be made at any point during the model's movement. This kind of shooting is even more inaccurate than a snap shot made while stationary.
- Reaction shot: A reaction shot is a quick unpremeditated shot in response to an enemy model's offensive action toward the reacting model. As with snap shots, this type of shot is not particularly accurate.
- Charge: A charge is the only way that a model can move into base contact with an enemy model. Only models not already in base contact or close combat with an enemy model can charge. The model can move a distance up to its MV stat in inches in an attempt to get into base contact. If successful, a close combat is then fought.
Calibre
As mentioned in the Profile section earlier, calibre (CAL) is a measure of a model's quality and effectiveness. A model with a high CAL stat is more at home in battlefield environments than others. Its general proficiency in a variety of practical battlefield and combat skills and techniques can make it a more difficult target, or enable it to do more, or perform better than a lesser model. To use human troopers as an example, you may like to think of CAL 0 troops as being new recruits just out of basic training, while CAL 1 troops have seen some action, and troops of CAL 2 or higher are veterans, elites or similar types.
In Urban War a high CAL stat can affect a model's performance in several ways. These are largely dependant on the type of order that the model was issued with. See below.
- Over-watch: A model with over-watch orders is watchful and poised ready to react to enemy activity. If it has a CAL stat of 1 or higher it gains bonuses to the chance of successfully reacting. This is detailed in the sections on shooting and close combat etc.
- Snap-fire: A model with snap-fire orders is alert and operating 'on its toes' able to quickly take offensive or defensive action as opportunities are presented. If it has a CAL stat of 1 or higher it gains the chance of additional 'follow-on' actions. This is detailed below in the section on follow-on actions.
- Lock-fire: A model with lock-fire orders is focussing on performing a particular task well. If it has a CAL stat of 1 or higher it gains the chance of bonuses to aimed shooting and movement. See later in the relevant sections.
In addition to the benefits described above, and irrespective of the orders issued to it, a model with a high CAL stat is often a more difficult target when being shot at, and has an increased chance of attacking first in close combat. See later in the relevant sections.
Follow-on Actions
In the heat of battle exceptionally proficient or experienced models can take advantage of opportunities, or minor errors on the part of the enemy, that others would be incapable of. Their coolness under fire, awareness of their surroundings, and ability to read a situation, mean that they are often capable of doing much more than lesser models.
When its controlling player activates a model with snap-fire orders during the normal course of his or her turn there is a possibility that it may gain additional follow-on actions. Any model with a CAL stat of 1 or higher can benefit; see the Follow-on Actions table for details.
After it has completed its first action, an eligible model may make a command check in order to try to gain a follow-on action. The following rules apply.
- If the command check is passed the model remains active and can perform another snap-fire action.
- After the completion of a follow-on action, if it is still eligible, the model may make another command check to attempt to gain another follow-on action.
- A failed command check ends the model's turn. No follow-on action is gained.
Follow-on Actions Table
| Models Calibre | Possible Follow-on Actions |
|---|---|
| 0 | 0 |
| 1 | 1 |
| 2 | 2 |
| 3 | 3 |
Morale
Although your troops will do their best to destroy the enemy they are only flesh and blood, and there are some situations that are so threatening or dangerous that a model may lose its nerve. At times like these you will have to check to see how the model reacts, and its training, determination and bravery, as represented by its command (CD) stat, will influence the result. There are two types of check that a model may have to make; these are the 'morale check' and the 'rally check'. These checks are detailed below.
Morale Checks
Models that perceive themselves to be in very threatening or dangerous situations must take a morale check. Losing a close combat, suffering damage, or seeing a comrade killed nearby can cause a model to lose its nerve or become demoralised.
A model can only ever be forced to take one morale check during any particular active model's turn. The model making the check should do so at the completion of the currently active model's turn. The circumstances when a model must take a command check are as follows.
- A model must check when it loses a close combat. This is described later in the close combat section.
- Unless it is currently in close combat or base contact with an enemy model, a model must check when a friendly model is killed or destroyed within 6 inches and LOS. A battle-hardened or experienced model is less likely to be affected by this, deduct 1 inch per point of its CAL stat from this distance. For example a model with a CAL of 2 would only be affected if a friendly model were killed within 4 inches.
- A model with more than one wound (W) must check when its wounds drop below 50% of the number it started the game with, unless it is currently in close combat. Then check for each subsequent wound it suffers, except those suffered in close combat.
Making a Morale Check
To determine whether a model passes a morale check roll one dice referring to the model's command (CD) stat. The Command Table shows the minimum d10 score needed to pass, and the following rules apply.
- If the morale check is passed the model keeps its nerve and can carry on as normal.
- If the check is failed the model's nerve has broken and it is overcome by panic, see below.
Command Table (Morale)
| Testers CD | 1 | 2 | 3 | 4 | 5 | 6 | 7 | 8 | 9 | 10 |
|---|---|---|---|---|---|---|---|---|---|---|
| Score to Pass | 9+ | 8+ | 7+ | 6+ | 5+ | 4+ | 3+ | 2+ | 2+ | 2+ |
Panic
A panicked model has lost its nerve, badly affecting its fighting capabilities. It has difficulty shooting straight, and is barely capable of defending itself in close combat. Panicked models can regain their nerve by rallying, as described shortly. Until rallied they suffer the following consequences.
- The model cannot charge, counter-charge or counter-attack. See later in the close combat section.
- The model suffers a -2 modifier to all d10 to hit rolls. See later in the sections on shooting and close combat.
Rallying
Panic is only a temporary state; your troops can attempt to pull themselves together, and this is more likely to happen if they put some distance between themselves and the enemy, or get behind cover. In order to recover from panic a model must rally, once it has done so it will be able to function as normal. A panicked model automatically rallies in the following circumstances.
- When it activates, and there are no enemy models within extreme range and LOS.
- At the end of a game turn during which it suffered no hits, and it is not currently in close combat or base contact with an enemy model.
Rally Checks
A model can make a rally check to try to recover from panic if its situation prevents it from automatically rallying. Rally checks are made in exactly the same way as morale checks, referring to the model's command (CD) stat and the Command Table as previously described. A panicked model can make one rally check each time that it is activated. Make the check as soon as it is activated, before it does anything else. The following rules apply.
- A model cannot attempt to rally if it is currently in close combat or base contact with an enemy model.
- If the rally check is passed the model regains its nerve and can carry out its orders as normal. If the check is failed the model continues in a state of panic.
Rally Check Modifiers
When there are no enemy models nearby, a model that is attempting to rally will be considerably less nervous, and therefore more likely to succeed. The following modifiers apply to the rally check dice roll. The modifiers are not cumulative, use only the best one.
- +1 if there are no enemy models within short range and LOS.
- +2 if there are no enemy units within medium range and LOS.
- +3 if there are no enemy units within long range and LOS.
Movement
This section deals with the movement of normal models travelling on foot; most models involved in your battles will be of this type. Some models may have slightly different movement rules, but any differences will be described in their profile.
As mentioned in the actions section, there are several actions that enable movement, additionally your models may sometimes move in response to enemy activity, for example if they evade (see later). The following general rules apply to movement.
- Unless charging into contact, models may not approach within 1 inch of an enemy model.
- Models may move any distance up to the maximum allowed for the type of move, i.e. move, rush etc.
- Models may turn by any amount you wish; there is no penalty for turning.
Rushing
In a battlefield environment proficient or experienced models are efficient at moving over broken ground, confidence in their own abilities also make them less likely to hesitate and waste time. When moving quickly is their primary focus, their decisiveness and know-how often enables them to move faster and further than others.
When a model with lock-fire orders rushes there is a possibility that it may gain bonuses to the distance it moves. Any model with a CAL stat of 1 or higher can benefit. Before moving the model, make a command check rolling 1d10 for each point of the model's CAL stat. Roll all the dice at the same time. The following rule applies.
- For each d10 roll that passes the check, the model gains half its MV stat in inches as a bonus to its move distance.
Movement and Terrain
As discussed in the section on terrain earlier in this book, terrain can come in a wide variety of different kinds. However the effect of terrain on movement depends only on the general terrain type. There are three types of terrain; they are normal, rough and impassable.
- Normal: Models moving through this suffer no penalties or other effects.
- Rough: Models count move distances through or over this type of terrain as double the actual distance travelled. For example a model moving through a one-inch strip of rubble or thick tangled bushes would treat the distance travelled as two inches.
- Impassable: As implied by the name this type of terrain cannot be moved through at all unless the model has special equipment or training. This would be shown in the model's profile, see the force lists later.
Optional Movement Types
You may wish to include types of movement that are not covered by the normal movement rules. Climbing and jumping are two examples. These can complicate your games a little, but can make for interesting play. We suggest that you agree beforehand with the other players if you wish to do so, and decide which terrain features can be climbed or jumped. Also climbing or jumping should only be allowed to models that realistically would be capable of it, a little good sense is required here.
Climbing
Some kinds of terrain piece can be climbed. You may decide a building or high wall can be climbed because it has access ladders, obvious handholds or other suitable features. Only models with lock-fire orders can climb, climbing requires concentration and precludes any other type of action. The following rules apply.
- The maximum distance a model can climb is equal to its MV stat in inches, movement bonuses cannot be added to this distance.
- The model must start its turn in contact with the base of the terrain to be climbed.
- The model must be able to reach the top of the terrain in one move, it cannot stop moving part way. If the climb distance is greater than the model's MV stat in inches it cannot make the climb.
You and your opponents should agree before the game starts how to treat terrain pieces that can be climbed. Use the following suggestions as a guide to classifying the difficulty of a climb.
- Easy climb: Anything with very good handholds, for example ladders, fences, very rough or sloping walls and embankments etc. Climbing models suffer no penalties or other effects when making an easy climb.
- Difficult climb: Vertical surfaces with few handholds, for example drainpipes, stone walls, cliff faces etc. Climbing models count distances as double the actual distance. For example a model climbing a one-inch drainpipe would treat the distance as two inches.
- Impossible climb: Smooth vertical surfaces, for example concrete walls, steel barriers, razor wire security fences etc. As implied by the name these surfaces cannot be climbed unless the model has special equipment or training.
Jumping
Some kinds of terrain can be jumped across. You may decide to allow models to jump between the roofs of buildings, across ruined or battle damaged bridges, or across fissures and chasms. The distance a model can jump depends on its orders; a model concentrating solely on moving can plan a jump properly, and take a longer run up etc. The following rules apply.
- The maximum distance a model with snap-fire or over-watch* orders can jump is equal to one quarter of its MV stat in inches.
- The maximum distance a model with lock-fire orders can jump is equal to one half of its MV stat in inches. Movement bonuses cannot be added to the distance the model can jump.
- A model cannot attempt a jump if the distance is greater than the maximum distance its orders allow.
- A model can include a jump in its normal movement; deduct the distance jumped from the rest of its movement. Movement bonuses can be added to the normal part of the model's movement in the usual way.
* Models with over-watch orders normally don't move. However they can sometimes move if reacting to enemy activity, for example if they attempt to evade incoming fire, in which case they may include a jump in their movement. Evading is described later in the section on shooting.
Shooting
Shooting describes all kinds of ranged combat attacks, from standard gauss rifles, auto pistols and blasters, to high powered plasma weaponry and missiles, it also includes thrown weapons like grenades and even rocks. When a model shoots it normally fires one shot at a single target enemy model. Some models may have weapons or skills that allow them to fire more than one shot, however even if this is the case, it cannot split its fire between target models.
Models can take snap shots or aimed shots when a player activates them during the normal course of a game turn. Disruption shots and reaction shots are slightly different in that models can only ever take them in response to the activities of an enemy model. Disruption and reaction shots are dealt with later in this section.
The sequence to follow when a model performs a snap shot or aimed shot is shown in order below.
- Check Range and LOS.
- Select a Target.
- Roll to Hit.
- Roll to Damage.
Checking Range and LOS
Measure the range to possible target models, checking to make sure that the shooting model can draw a clear LOS to the enemy models.
Models that can't draw a clear LOS to the target model can't shoot. Enemy models that are beyond the range of the shooting model's weapons can't be hit.
Target Selection
As its highest priority target, a model will default to the nearest enemy model in LOS that is not in close combat with a friendly model. To a trooper on the ground the nearest enemy is almost always the most threatening, and this will be its target unless its normal priorities are overridden.
Sometimes you may want one of your models to shoot at a different enemy model, so at your choice the model can attempt to override its normal target priority. Before the model shoots, make a command check for the model, and the following rules apply. Whatever the case, once a target model has been decided on; turn the shooting model to face it.
- If the check is passed the model can ignore its normal target priority and shoot at any valid enemy model of the controlling player's choice.
- If the check is failed, then the model hesitates and is momentarily confused. It does not shoot and its action is wasted.
Command Check Modifiers
Experienced and cool-headed models are better at assessing threats than others, and enemy models obscured by terrain are harder targets. These affect a model's chance of overriding its target priority. The command check d10 modifiers are shown below.
- +1: per point of CAL
- +2: its priority target is in cover
Rolling to Hit
To determine whether the shooting model hits its target roll a d10 for each shot. Normally each model will only get one shot; however certain weapons fire multiple shots, and some heroes, monsters etc are capable of multiple shots. Weapons are covered in detail later in their own section, and the force lists contain details of normal troopers, powerful heroes etc.
If, for whatever reason, a model gets multiple shots it's best if you roll all the 'to hit' dice together using different coloured dice to represent different shots. Leave the dice face up showing their scores, you and your opponent need to be clear on which rolls are for which shots. This may be important if there's the possibility of 'spread-over' hits later, this is covered later on in this section.
The dice score needed to hit depends on how good a shot the shooter is. The model's shooting stat (SH) indicates this. The Shooting Table below shows the d10 score needed to hit the target.
Shooting Table
| Model's SH | 1 | 2 | 3 | 4 | 5 | 6 | 7 | 8 | 9 | 10 |
|---|---|---|---|---|---|---|---|---|---|---|
| Score to Hit | 9+ | 8+ | 7+ | 6+ | 5+ | 4+ | 3+ | 2+ | 2+ | 2+ |
To Hit Modifiers
When a model shoots the chance of it scoring a hit can be affected by a variety of things. The range to the target model is important, and whether the shot is a snap shot or an aimed shot. Additionally the size of the target model, and its expertise in the use of cover and evasive movement can have an effect. Ranges are described later in the section on weapons.
Snap Shots and Reaction Shots
Snap shots and reaction shots are very inaccurate at anything other than very short ranges, and if the firing model also moved this too has an effect. The 'to hit' dice roll modifiers are shown below.
| Modifier | Situation |
|---|---|
| -1 | Short Range |
| -2 | Medium Range |
| -3 | Long Range |
| -4 | Extreme Range |
| -1 | Move & Snap shot |
Aimed Shots
In the heat of battle proficient or experienced models are efficient at making their shots count. Cool headed and observant, they know how to fire for best effect. When accuracy is their primary focus, this know-how often enables them to shoot more accurately than others.
When a model with lock-fire orders takes an aimed shot there is a possibility that it may gain bonuses to the chance of hitting the target. Any model with a CAL stat of 1 or higher can benefit. After selecting the target, make a command check rolling 1d10 for each point of the model's CAL stat. Roll all the dice at the same time. The following rule applies.
- For each d10 roll that passes the check, the model gains a +1 bonus to its d10 to hit roll(s).
Difficult Targets
Proficient and experienced models are better at minimising their exposure to enemy fire than others. They are accomplished at moving evasively and exploiting small areas of cover, shallow dips in the ground etc. As such they can be difficult targets, and dependent on the range, models shooting at them may suffer penalties to their chances of scoring a hit. The Difficult Targets Table shows the 'to hit' dice roll modifiers.
Difficult Targets Table
Modifier to shooter's d10 'to hit' roll.
| Target Calibre | Short Range | Medium Range | Long Range | Extreme Range |
|---|---|---|---|---|
| 1 | 0 | 0 | 0 | -1 |
| 2 | 0 | 0 | -1 | -2 |
| 3 | 0 | -1 | -2 | -3 |
Target Size
Irrespective of the type of shooting, the size of the target model affects the chance of scoring a hit. The 'to hit' dice roll modifiers shown below apply to all types of shooting.
- -1: Size 1 target
- +1: Size 4-5 target
- +2: Size 6-7 target
- +3: Size 8-9 target
Rolling to Damage
Just because a shot hits its target does not mean that the target is taken out of action. Not all hits cause damage to their target. Even if your shot does damage, many creatures and machines can absorb quite a bit of punishment before being destroyed or rendered inoperative. The more powerful the weapon that hits the target, the more chance of the hit causing damage. Similarly, the tougher the target is, the more chance it has of surviving a hit unscathed.
Normally, to determine whether hits cause damage you roll 1d10 for each hit. However some very powerful weapons allow you to roll 2d10 or more per hit. Weapons are covered in detail later in their own section.
To determine whether a hit causes damage to its target you need to compare the damage (Dam) stat of the weapon with the toughness (T) stat of the target. Don't worry about specifics just now, but as an example the standard Viridian marine Gauss Rifle has a Dam of 5.
In order to discover the chance of damage being caused you need to refer to the Damage Table below. Cross-reference the damage (Dam) of the weapon with the toughness (T) of the target. The number shown where they intersect indicates the d10 score needed to cause damage.
Damage Table
Rows: weapon Damage (Dam). Columns: target Toughness (T).
| Dam \ T | 1 | 2 | 3 | 4 | 5 | 6 | 7 | 8 | 9 | 10 |
|---|---|---|---|---|---|---|---|---|---|---|
| 1 | 6+ | 7+ | 8+ | 9+ | 10 | 10 | 10 | 10 | 10 | 10 |
| 2 | 5+ | 6+ | 7+ | 8+ | 9+ | 10 | 10 | 10 | 10 |
Damage and Casualties
Each successful damage roll inflicts one wound on the target model. The number of wounds a model can absorb before being killed or incapacitated is indicated by their wounds (W) stat. Most models only have one wound so a single successful damage roll will take them out of action, remove such casualties from the battlefield.
Some particularly resilient or tough models, for example heroes, large monsters and machines, have more than one wound. When such a model suffers a wound deduct it from the model's total. Note down the number of wounds it has remaining, or indicate it with a marker beside the model. Once the model loses its last wound it is killed, remove it from the table.
Shock Checks
Even when hits on a model do not cause any damage they can still affect it adversely. Being on the receiving end of incoming fire is not pleasant, and the model may be distracted or surprised by a close miss, ricochet or shot that glances off its armour. A model's bravery and training, as represented by its command (CD) stat affects the chance of suffering from shock. As do its experience and battle worthiness, represented by its calibre (CAL) stat.
A model must make a shock check when it has suffered hits from shooting, irrespective of whether any damage was caused, and the following rule applies.
- A model can only ever be forced to take one shock check during any particular active model's turn. The model making the check should do so at the completion of the currently active model's turn.
Making a Shock Check
To determine whether a model passes a shock check, roll 1d10 plus 1d10 per point of the model's CAL stat, and select the one with the highest score. Then refer to the model's command (CD) stat; the Command Table shows the minimum d10 score needed to pass, and the following rules apply.
- If the shock check is passed the model is unfazed by the hit and can carry on as normal.
- If the check is failed the model has been distracted by the hit; it is shocked, see below.
Command Table (Shock)
| Models CD | 1 | 2 | 3 | 4 | 5 | 6 | 7 | 8 | 9 | 10 |
|---|---|---|---|---|---|---|---|---|---|---|
| Score to Pass | 9+ | 8+ | 7+ | 6+ | 5+ | 4+ | 3+ | 2+ | 2+ | 2+ |
Shock
A shocked model has been distracted or surprised by the incoming fire, causing it to hesitate and lose concentration. The model misses a turn, and the following rules apply.
- An inactivated model counts as having been activated and completed its turn.
- An activated model loses its next turn; perhaps place a marker by the model to act as a reminder.
- A shocked model cannot be shocked again during the current game turn. There is no need to check if it suffers subsequent hits.
Spread-over Hits
As mentioned earlier in the section on rolling to hit, some models may have skills or weapons that enable them to fire multiple shots. When such a model shoots at an enemy model and scores multiple hits there may occasionally be spare hits left over after the target model has been killed or destroyed. These hits can be spread over on to a nearby enemy model. The following rules apply.
- In order to be eligible as a target for spread-over hits a model must be within 2 inches of the original target model, and within range and LOS of the shooting model.
- If the d10 score rolled when shooting at the original target model is sufficient to cause a hit on an eligible model work out damage as normal.
- If a model is killed or destroyed by a spread-over hit, and there are still any unused hits, then these may be spread on to another model within 2 inches of it, and so on.
Disruption Shooting
A model with over-watch orders can react to enemy activity by attempting a disruption shot. Such a model is in a state of readiness and if it spots an enemy model moving or firing it can attempt to disrupt, or even pre-empt its activities. The following rules apply.
- At any point during an opposing model's turn, so long as it is within range and LOS, a model on over-watch can make a command check in order to shoot at it.
- The command check can be made before, during, or after the enemy model's movement or shooting. The model's player halts his or her turn at the request of the player making the check until it has been resolved, and any resulting shots taken. The only restriction is that the check cannot interrupt dice rolls or their resulting effects.
- If the command check is passed play passes temporarily to the reacting model's player. Turn the model to face its target and work out the shooting and its results as normal.
- Irrespective of the check's result, and once any shooting has been resolved; the reacting model counts as having been activated and completed its turn. If the opposing model survived, play then passes back to its player in order to complete its turn.
- A disruption shot cannot be attempted in reaction to the activities of an enemy model that is itself reacting. Nor can it be attempted in response to spread-over hits.
- In a multi-player game, if two or more players wish to attempt a disruption shot against an active model, then each of them should roll 1d10. The player with the highest score can attempt a shot as described above. The other players' models don't react quickly enough, so can't attempt a shot. They remain on over-watch.
Command Check Modifiers
A model's chance of success when attempting a disruption shot is affected by the quality of its observational skills and the range to the enemy model. Experienced and competent models are better at forecasting possible enemy activity, while at longer distances the chance of noticing the enemy activity is reduced. The command check d10 modifiers are shown below.
- +1: per point of CAL
- -1: per range band beyond short
Reaction Shooting
A model with snap-fire orders can react to perceived threats by attempting a reaction shot. Such a model is alert, and if it is the target of offensive enemy action, it can sometimes pre-empt the enemy model's activity. The following rules apply.
- Whenever an opposing player declares that one of his or her models is going to fire at the model, an inactivated model with snap-fire orders can make a command check in order to try to pre-empt it.
- The command check must be made before the enemy model shoots. The model's player halts his or her turn at the request of the player making the check until it has been resolved.
- If the command check is passed each player should roll 1d10 and add his or her model's CAL stat to the score, then compare totals. The player with the highest total gets the first shot, working out any hits scored and damage caused by his or her model's shots. If its opponent is killed or destroyed by the damage caused it is removed from play, and does not get to shoot. In the event of a tie both models shoot simultaneously. For simplicity resolve the shots for the model that triggered the reaction first. If its target is killed or destroyed it is still allowed to shoot before being removed from play.
- Irrespective of the check's result, and once any shooting has been resolved; the reacting model counts as having been activated and completed its turn. If the opposing model survived, play then passes back to its player in order to complete its turn.
- A reaction shot cannot be attempted in reaction to the activities of an enemy model that is itself reacting. Nor can a model that is the target of spread-over hits attempt one.
Command Check Modifiers
The range to the enemy model affects a model's chance of success when attempting a reaction shot, at longer distances the chance of noticing the enemy activity is reduced. The command check d10 modifiers are shown below.
- -1: per range band beyond short
Templates
Some weapons when fired affect large areas rather than just individual models. They differ from normal weapons by using a template to determine which models the shooter hits. Weapons of this type can be very powerful, and are often carried by models that act as support for their comrades. Examples of weapons that use templates are flame-throwers and grenade launchers. There are two types of template, 'directly placed' and 'ranged', see below. These and other weapons are described in the weapons section shortly.
Directly Placed Templates
Directly placed template weapons usually use a teardrop shaped template that is relatively short ranged, but that affects all models within its area of effect indiscriminately. A flame-thrower is an example of this kind of weapon.
You do not need to roll to hit with a weapon of this kind. Place the template so the narrow end is touching the front face of the firing model, and the rest is covering as many enemy models as possible. All models covered or partially covered by the template are automatically hit. Make damage rolls for them as normal.
Ranged Templates
Ranged template weapons usually use a circular template. As the name implies they can operate at reasonable ranges. Examples of ranged template weapons are grenades, grenade launchers and mortars.
Roll to hit as normal, if a hit is scored centre the template on the target model. All models covered or partially covered are automatically hit. Make damage rolls for them as normal.
If a ranged template weapon misses it will still affect an area somewhere nearby, although not the one intended. Such a shot has strayed off target. It's important to know where a stray shot lands, as it may hit another (possibly friendly!) model. Use the following procedure to find out where it goes.
- Roll 1d10 so that it lands as close as possible to the original target model, the shot will deviate from the model in the direction indicated by the upper face of the dice.
- To determine how far the shot deviates roll 1d10 per range band to the target model, excluding the CC band. For example if the target is in short range roll 1d10, if in medium range 2d10 and so on. Total the d10 scores and divide the result by two; this gives the distance in inches that the shot deviates. Irrespective of the total score the shot cannot deviate by more than half the measured distance between the shooting model and the original target model.
- Centre the template on the point where the shot strayed to as generated above. Make damage rolls for models covered as normal.
Speculative Shooting
Speculative shooting allows a model to shoot over intervening terrain or other objects that lie between them and their prospective target. This might involve chucking grenades over a wall or launching mortar shells over a hill. Whatever the case, a model taking a speculative shot is attempting to land it in an area they cannot see, but that they suspect contains enemies.
- Speculative shooting is only possible to models equipped with indirect fire ranged template weapons. See the section on weapons later for more details.
- The shooting model does not require LOS to the target model, however the normal rules for selecting a target as detailed earlier still apply.
- Both the shooting model and the target model must be at least half as far from the intervening object as the object is high.
- Speculative shots are inherently fairly inaccurate; they suffer a -2 d10 to hit modifier.
Evading Incoming Fire
Models that are the target of incoming indirect fire often get enough warning to attempt to get out of the way. Grenades are relatively slow and often have a delayed fuse, while mortars and the like have a distinctive whistle as they descend towards their unfortunate targets. Inactivated models and those on over-watch can attempt to evade the incoming ordnance. The following rules apply.
- After the template has been placed, but before damage rolls are made, models covered by the template can make a command check to evade. If the check is failed make damage rolls as normal.
- If the command check is passed play passes temporarily to the evading model's player. The evading model can then move a distance up to its MV stat in inches to try to get away from the weapon's effects. Once all evading models have been moved make damage rolls as normal for any models still covered by the template.
- Irrespective of the check's result the target unit counts as having been activated and completed its turn. Play then passes back to the original player in order to complete his or her turn.
Command Check Modifiers
Models with over-watch orders are in a heightened state of alertness, and models with lock-fire orders, their concentration focussed elsewhere, are less alert than others. Models' experience and competence also affect their chances of successfully evading incoming fire. The command check d10 modifiers are shown below.
- +1: per point of CAL if model has over-watch orders
- -2: if model has lock-fire orders
Shooting into a Close Combat
Shooting into a close combat that involves one of your own models is not generally a good idea; the chances of hitting your own model are high. However for those of you who don't mind mowing down your own troops, here's how to do it. The following rules apply.
- The model you wish to shoot with must make a successful command check in order to do it; your troops are naturally reluctant to endanger their comrades. If the check is failed they don't shoot, and their action is wasted.
- Before rolling to hit, each player with a model involved in the close combat should roll 1d10. The player with the highest score decides which model will be the shot's target. Once the target is decided, roll to hit and damage as normal. If the shooting is with a directly placed template weapon the high scorer places the template. Irrespective of who places it, the template must at least partially cover one model.
Terrain and Cover
Some kinds of terrain can provide cover for your troops. Such terrain can interfere with an opponent's ability to harm your models in two ways: it may affect visibility by blocking LOS, and even when models can still be seen, it may offer some protection from damage by conferring a 'cover save'.
The way you treat terrain and cover in your games depends on how the terrain is represented on your playing area. As described in the terrain section earlier, things like pieces of machinery or large rocks are obstructions, and things like patches of ruins or wreckage are areas. Obstructions and areas affect visibility and protection in different ways.
Visibility and LOS
Usually it will be pretty obvious when an obstruction like a large rock blocks LOS entirely, because you won't be able to see the target model. Areas are different however; they reduce the range at which models are visible, blocking LOS to models further away.
We suggest that before you start a battle you agree with your opponents how far models can see through the terrain areas you are using. A reasonable distance for dense ruins, wreckage or jungle might be three or four inches, for a more normal area five or six inches, and for a sparser area seven or eight inches. It's entirely up to you. Whatever distance you decide on, troops in these types of terrain will become more difficult to see the further they are into the area. For the purposes of the following example we will assume that we are talking about an area of ruins with a visibility of five inches. Use it as a guide for all areas of this type. The following rules apply.
- Models inside the area, and within five inches of the edge of the area can see and be seen by models outside that edge of the area.
- Models inside the area can see and be seen by other models inside the area that are within five inches.
- Models outside the area on one side can not see through the area to models that are outside the area on the other side, no matter how narrow the area is.
Cover Saves
Cover saves are provided by terrain that is fairly substantial and partially obscures your troops from view. Your troops can still be seen by the enemy and can therefore be targeted, however the obstruction they are behind or the area they are within may absorb some damage and offer them protection. For example, if a trooper is firing from behind a piece of machinery, or from inside some ruins, he can still be seen and shot at, but some of the bullets destined for him could end up embedding themselves in the cover instead (much to his relief).
Models gain cover saves from obstructions and areas in different ways, and these are described below. However the following rule applies to both types of cover.
- If a model in cover receives wounds it may gain a cover save. If a cover save is gained, roll 1d10 per wound, if the save succeeds the wound is ignored and the model suffers no harm.
Obstructions
An obstruction, like a large rock or wall for example, can provide cover to a model that is being shot at from the other side. Only models that are actively attempting to use terrain for protection can gain the full benefits of any possible cover, an obstruction that just happens to partly obscure a target model provides little protection. The following rules apply.
- A model that is in contact with an obstruction gains the full benefits of any cover save conferred.
- A model that is within 1 inch, but not in contact with an obstruction, and that is closer to the obstruction than the shooting model, suffers a -1 penalty to its d10 cover save roll.
- A model that is more than 1 inch away from an obstruction, or that is within 1 inch, but is further away from the obstruction than the shooting model, does not gain a cover save.
When a model is using an obstruction for cover, the amount of the target model that is visible to the shooting model, and the solidity of the obstruction, determine how much protection it provides. The Obstruction Cover Table below shows the d10 score needed for a successful cover save.
Obstruction Cover Table
| Obstruction Solidity | Visibility of Target Model | Cover Save |
|---|---|---|
| Flimsy: individual crates, ammo boxes, wooden fences, furniture, light wooden or plastic doors and walls etc. | More than 2/3 | No |
| Flimsy | Up to 2/3 | No |
| Flimsy | Up to 1/2 | 10+ |
| Flimsy | Less than 1/3 | 9+ |
| Solid: stone, concrete or metal walls, rocks, bits of machinery, oil drums, fortifications, weapon slits, large trees etc. | More than 2/3 | No |
| Solid | Up to 2/3 | 10+ |
| Solid | Up to 1/2 | 8+ |
| Solid | Less than 1/3 |
Areas
The amount of protection that an area might provide to an occupying model is determined by the quantity, the size and the solidity of the material that the area contains. The Area Cover Table below shows the d10 score needed for a successful cover save.
Area Cover Table
| Area Cover Type | Cover Save |
|---|---|
| None: areas of scattered bits of lightweight furniture, sparse or broken up bits of crates and boxes, thick smoke or fumes, scrub vegetation, bushes etc. In general this represents any area that contains no substantial pieces of solid material that could protect an occupying model. | No |
| Partial: areas of wrecked wooden or prefab buildings, intact heavy furniture, intact or larger and more crowded crates and similar containers, open woodland etc. In general this represents any area that contains fairly substantial pieces of reasonably solid material that could protect an occupying model. | 10+ |
| Substantial: areas of ruined stone or concrete buildings, wrecked factories, the wreckage of a large spacecraft, forests or jungles etc. In general this represents any area that contains substantial pieces of very solid material that could protect an occupying model. | 8+ |
Weapons
The variety of weapons available in the universe is vast. Human technologies have developed a wide array of weapons ranging from the common autopistol and the standard issue marine gauss rifle to the high-energy laser pulse rifle and the brutally effective rotary mass driver. The exotic Koralon race wields strange symbiotic blades and powerful staves that seem to resonate with the forces that bind the dimensions. This section describes the powers and abilities of the weapons that your troops bear into battle.
Weapon Profiles
A weapon's profile contains all the information needed to use it in the game. The profile shows how a weapon performs on the battlefield. They represent weapon's strengths and weaknesses with a set of statistics that define how accurate and powerful the weapons are. You will find profiles for all the weapons your troops can use in the armoury list towards the back of this book. Weapon profiles are all presented in the same basic format (see the sample profile).
Sample Weapon Profile: Gauss Rifle
Gauss Rifles are the favourite standard issue weapons of most armies across the galaxy. Effective up to medium range, they are hard hitting and reasonably accurate. Gauss technology was an offshoot of VASA magnetic field research, and uses a so-called 'Gauss Field' to fire projectiles. The barrel of a gauss rifle contains a powerful magnetic rail, activated when the trigger is pulled. This lifts steel flechettes out of the magazine and accelerates them towards the target at hypersonic speed.
| CC | Short | Medium | Long | Extreme | |
|---|---|---|---|---|---|
| To Hit | -1 | 0 | 0 | (blank in source) | (blank in source) |
| Dam | 5 | 5 | 5 | (blank in source) | (blank in source) |
The Weapon Stat Line
A weapon's stat line is a row of characteristics that show the weapon's capabilities at a variety of ranges from their target. For game purposes we have split weapon range into five 'range bands'. The five range bands are CC, Short, Medium, Long and Extreme.
- CC: This shows the weapon's capabilities when the model using it is in base contact with an enemy model and is fighting hand to hand in close combat.
- Short: This shows the weapon's capabilities when the model using it is shooting at an enemy model at distances of up to 12 inches (short range).
- Medium: This shows the weapon's capabilities when the model using it is shooting at an enemy model at distances beyond 12 inches and up to 24 inches (medium range).
- Long: This shows the weapon's capabilities when the model using it is shooting at an enemy model at distances beyond 24 inches and up to 36 inches (long range).
- Extreme: This shows the weapon's capabilities when the model using it is shooting at an enemy model at distances beyond 36 inches and up to 48 inches (extreme range).
Weapon Capabilities
Weapons come in a vast array of different shapes and sizes, from small pistols to heavy chain guns and rocket launchers. Some weapons are particularly accurate or rapid firing, while others can inflict terrible damage. A weapon's capabilities within a particular range band are shown in two columns: 'To Hit' and 'Dam'. If a weapon has no entry in these columns for a particular range band, then the weapon has no capability at that range and the bearer must use a different weapon if he has one.
- To Hit: This shows how accurate the weapon is, and how many hits it is capable of inflicting.
- The accuracy of a weapon is expressed as a modifier e.g. +1, -1 etc. This modifies the d10 'to hit' roll of the user when attempting to hit an enemy model.
- If a weapon is capable of inflicting more than one hit this is expressed as a number in brackets e.g. (x2), (x3) etc. This shows the number of d10s the user should roll when attempting to hit an enemy model. Each successful roll scores one hit.
- Dam: This shows how powerful a hit scored with the weapon is, and how many wounds a successful hit can inflict.
- If the weapon is a firearm or such like, its power is normally expressed as a number e.g. 4, 6 etc. High numbers indicate a more powerful weapon. This is compared to a target's toughness to determine whether damage is caused.
- If the weapon is a melee weapon of some kind, its power is normally indicated as a modifier to the user's strength e.g. ST+1, ST+2 etc. This modifies the d10 'damage' roll of the user when determining whether damage is caused.
- If the weapon is capable of inflicting more than one wound with a successful hit, this is expressed as a number in brackets e.g. (x2), (x3) etc. This shows the number of d10s the user should roll when determining whether damage is caused. Each successful roll causes one wound.
Weapon Type and Special Rules
A weapon's type and special rules provide all the other information you will need to enable your troops to perform at their best in battle. The various types are as shown below, special rules cover unique capabilities and modes of operation.
- One-Handed: One-handed weapons are relatively light low powered weapons, troops can use one in each hand to gain a bonus in close combat.
- Two-Handed: These weapons require two hands to use them; gauss rifles and the like fall into this type. They tend to be more accurate and longer ranged than one-handed weapons, but less useful in close combat.
- Armour Piercing: These weapons are primarily designed for use against vehicles and other large heavily armoured targets. They tend to be inaccurate when used against small targets. A weapon of this type will be stated as being 'Armour Piercing 5', or 'Armour Piercing 7' etc. The number is a negative modifier to the d10 'heavy armour save' dice roll conferred by the 'heavy armour' special rule, e.g. armour piercing 5, deducts 5 from the d10 saving roll.
- Incendiary: Incendiary weapons envelop their targets in liquid fire that continues to burn and cause damage. When rolling to damage a model that has been hit by an incendiary weapon, a successful damage roll allows a subsequent roll, if this too is successful another can be made. This goes on until a damage roll is failed, at which point the flames go out, and no more rolls are made.
- Indirect Fire: These are weapons that do not need LOS to the target unit. Often useful for probing suspected enemy positions and flushing out dug in troops.
- Melee Weapon: Melee weapons are used to physically hit the enemy. This is the most basic type of weapon. Knives, blades, claws and teeth are all melee weapons.
- Mounted: Mounted weapons are those that are too heavy to be carried by normal troops. They are either mounted in vehicles or on collapsible bipods and tripods. Infantry versions often require more than one trooper to operate effectively.
- Template Weapon: These are area effect weapons. Instead of rolling to hit in the normal way, a template is used to determine the models that are hit by a firing unit. They cannot usually be used in close combat. The rare ones that can don't use the template in close combat, instead using the capabilities shown for the CC range band just like a normal weapon.
Close Combat
Close combat includes all kinds of close up and hand to hand fighting. Combatants may be using melee weapons like combat knives or other blades, fighting with natural weapons like teeth or claws, or dodging about taking snapshots with firearms. Close combats are initiated in one of following ways: when a model charges into contact, or when a model already in contact performs a fight action or attempts to break off. Follow the sequence shown below when models are involved in close combat.
- Determine who can fight
- Roll for first strike
- Roll to hit
- Roll to damage
- Determine combat results
Who Can Fight
When a model initiates a close combat it fights against a single target enemy model, no other models can participate. In most circumstances the target model can fight back, it doesn't matter whether it has previously been activated, or has yet to do something in the current game turn. The following rules apply.
- If an attacking model is in base contact with more than one enemy model the attacking player decides which one will be the target.
- A model that is attacked in close combat gets to fight back against the first enemy model that attacks it in the current game turn. If it is subsequently attacked by the same model with a follow-on action, or by another model, it does not get to fight back.
- After fighting back, models that were on over-watch count as having completed their turn. They are no longer on over-watch. Inactivated models do not count as having completed their turn, unless they attempted a counter-charge or counter-attack, as described shortly.
Breaking Off
When a model that is in base contact with an enemy model is activated it may choose to attempt to break off instead of fighting. Such a model is trying to extricate itself from the close combat (not always easy). The model must make a CD check in order to break off. If the check is failed the model cannot break off and must fight instead. The following rules apply.
- A model that breaks off can move a distance up to its MV stat in inches away from the enemy model. Before moving the model away its opponent may fight back, just as it would have if the breaking off model had opted to fight. The usual rules for fighting back apply.
- Experienced and proficient models are better at picking the right moment to break off than others. Models gain a bonus of +1 per point of CAL to their CD check d10 roll.
Roll for First Strike
Before the fighting commences it's important to find out which model strikes first. Striking first in close combat is a big advantage because a dead opponent can't strike back! Proficient and experienced models are more likely to strike first, as are those that charged or counter-charged. There are also some other situations or special rules that may affect the chance, and these are detailed later on. We use a 'first strike' roll to determine which model strikes first, and the following rules apply.
- The opposing players should roll 1d10 and add his or her model's CAL stat to the score, then compare totals. The player with the highest total gets to strike first, working out any hits scored and damage caused by his or her model's attacks. If its opponent is killed or destroyed by the damage caused it is removed from play, and does not get to strike back.
- In the event of a tie both models strike simultaneously. For simplicity resolve the attacks for the model that initiated the combat first. If its opponent is killed or destroyed it is still allowed to attack before being removed from play.
Rolling To Hit
To determine whether the attacking model hits its opponent roll a d10 for each attack. Normally each model will only get one attack, however some heroes, powerful monsters and machines get multiple attacks, and certain weapons can cause more than one hit per attack. Weapons are covered in detail elsewhere, and a variety of troops are detailed in the force lists later.
If a model has multiple attacks, roll all the 'to hit' dice that relate to one attack, and roll for the damage caused, before moving on to the next attack. This may be important if there is another enemy model in contact, as unused attacks can be 'spread-over' on to such a model if the original target is killed or destroyed. Spread-over attacks are detailed later in this section.
In close combat the more skilful an attacker is the more chance it has of scoring a hit. Similarly, the more skilful a defender is the more chance it has of fending off the attack. A model's assault (AS) stat indicates its skill in close combat. Comparing the opposing models' close combat skills will determine the chance of a hit.
In order to discover the chance of hitting you need to refer to the Close Combat Table below. Cross-reference the Assault (AS) stat of the attacker with the Assault (AS) stat of its opponent. The number shown where they intersect shows the d10 score needed to get a hit.
Close Combat Table
Rows: defender Assault (AS). Columns: attacker Assault (AS).
| Defender AS \ Attacker AS | 1 | 2 | 3 | 4 | 5 | 6 | 7 | 8 | 9 | 10 |
|---|---|---|---|---|---|---|---|---|---|---|
| 1 | 6+ | 7+ | 8+ | 9+ | 10 | 10 | 10 | 10 | 10 | 10 |
| 2 | 5+ | 6+ | 7+ | 8+ | 9+ | 10 | 10 | 10 | 10 |
Rolling to Damage
Just as with shooting, hitting your opponent in close combat doesn't guarantee a kill. The more powerful the weapon, or the creature, that hit the target the more chance of the hit causing damage. Similarly, the tougher the target is, the more chance it has of surviving a hit unscathed.
To determine whether a hit causes damage to its target you need to compare either the damage (Dam) stat of the weapon, or the strength (ST) of the attacking model, with the toughness (T) stat of the target. Weapons are covered in their own section; there you will find details on the types of weapon that use the ST of their wielder in place of the Dam stat.
In order to discover the chance of damage being caused you need to refer to the Combat Damage Table below. Cross-reference the weapon's damage (Dam), or the attacking model's strength (ST), with the toughness (T) of the target. The number shown where they intersect shows the d10 score needed to cause damage.
Combat Damage Table
Rows: weapon Damage (Dam) or attacker Strength (ST). Columns: target Toughness (T).
| Dam / ST \ T | 1 | 2 | 3 | 4 | 5 | 6 | 7 | 8 | 9 | 10 |
|---|---|---|---|---|---|---|---|---|---|---|
| 1 | 6+ | 7+ | 8+ | 9+ | 10 | 10 | 10 | 10 | 10 | 10 |
| 2 | 5+ | 6+ | 7+ | 8+ | 9+ | 10 | 10 | 10 | 10 |
Damage and Casualties
Just as with shooting, a successful damage roll inflicts one wound on the target model, and casualties are removed in exactly the same way as described in the shooting section.
Combat Modifiers
In close combat a variety of things can affect a model's chance of striking first, hitting or causing damage. Charging or counter-charging confers a temporary advantage, and defending terrain or using two weapons are also beneficial. Additionally some models may have special abilities or skills that make them particularly dangerous in combat, these are described elsewhere.
Charging
When a model charges its momentum and aggression give it a temporary advantage over its opponent. The following modifiers apply to its d10 rolls.
- +3: to first strike
- +1: to hit
- +1: to damage
Counter-charging
Models that are alert and on the look out for approaching enemy models can sometimes react quickly enough to counter-charge them, and so equalise the odds. When an inactivated model or a model on over-watch is the target of a charge, it can make a command check in order to counter-charge. The following rules apply.
- After the attacking model has been moved into contact make a command check for the defending model. If the check is failed the model did not react fast enough. No counter-charge took place and the model fights as normal.
- If the command check is passed the model counter-charged. It gains the normal d10 roll modifiers for charging.
- Irrespective of the checks' result, unless the attempt was made during a 'counter-attack' (see later), after the combat has been resolved the model counts as having been activated and completed its turn. And it cannot fight back against any subsequent attackers in the current game turn.
Command Check Modifiers
Models on over-watch are in a heightened state of readiness, and if very experienced or competent, are better at anticipating an enemy's movements and therefore more likely to successfully counter-charge. A model with lock-fire orders however, its concentration focussed elsewhere, is less likely to do so. The command check d10 modifiers are shown below.
- +1: per point of CAL if model has over-watch orders
- -2: if model has lock-fire orders
Melee Weapons
Some weapons are particularly useful in close combat; such weapons are described as 'melee weapons' in their profile, and they confer a +2 bonus to their user's d10 roll for first strike.
Using Two Weapons
Models with two 1-handed close combat weapons, for example a pistol and combat blade, are dangerous close combat opponents. They gain a bonus of +1 to their d10 rolls to hit and damage.
Attacking Panicked Troops
Panicked troops don't perform well in close combat; they're usually too shaken to put up much of a fight. Their opponents gain a bonus of +2 on d10 to hit rolls.
Terrain and Close Combat
Terrain that provides cover, as described in the section on shooting, is also extremely helpful to any occupying troops that are charged by the enemy. It provides a very strong defensive position. The following rules apply.
- If a model charges an enemy model that is occupying an area of partial or substantial cover from outside the area, all its charge bonuses are lost. In addition the defending model gains +3 to its roll for first strike, and +1 to its to hit rolls.
- If a model charges an enemy model that is in base contact with an obstruction from the opposite side of the obstruction, all its charge bonuses are lost. In addition the defending model gains +3 to its roll for first strike, and +1 to its to hit rolls.
- If a defending model attempts to counter-charge all the benefits of its cover are lost. The attacker does not lose any charge bonuses, and the defender gains none of the bonuses above.
Combat Results
Once all attacks have been made and damage inflicted, if one or both of the models were killed or destroyed, or if one of them broke off, the combat is over. However if both models are still alive and in contact, you need to work out which model lost. A model that loses a close combat may panic, and the following rules apply.
- Total up the number of wounds each model suffered; the model that took the most is the loser, and must make a morale check (see the section on morale earlier), suffering any resulting effect. The models remain in place, and combat will resume next turn.
- If both models suffered the same number of wounds, or neither took any, but both received hits, total up the number of hits each model received. The model that took the most hits is the loser; it must make a morale check, and the models remain in place etc as above.
- If neither model suffered any hits or wounds, or both took the same number of each, the fight is a draw. As above, the models remain in place and combat will resume next turn.
Counter-attacking
Experienced and battle-hardened troops can be particularly dangerous close combat opponents. If they are alert and seeking opportunities to take the fight to the enemy, they can sometimes seize the initiative and turn the tables on their foe. When an inactivated model with a CAL of 1 or higher and snap-fire orders is attacked, it can opt to react by making a counter-attack instead of fighting back in the normal way. The following rules apply.
- After the models are in contact, but before any counter-charge attempt is made, the defending model can choose to counter-attack.
- If the defender chooses to counter-attack it activates, doing so outside the normal order of play. It may now attempt a counter-charge if desired; then combat takes place, roll for first strike, to hit and to damage etc in the usual way.
- If both models survive the initial round of combat, they then check for follow-on actions if eligible, and if both gain one, another combat takes place. As previously, roll for first strike etc in the usual way. If both survive this, repeat the process until one of the models is either killed or fails gain a follow-on action, or neither gain one.
- If one of the models fails to gain a follow-on action or gets killed, its turn is finished. However its opponent is still active, and its action, and any further follow-on actions gained must be used to fight the inactive model if it still survives, or if not, another enemy model that is in contact, the normal rules for fighting back applying. If its opponent is killed, and there are no other enemy models in contact, an active model can carry on checking for follow-on actions if eligible, and can proceed with its turn just as any other model with snap-fire orders would.
- After completing its actions and any follow-on actions, a model that counter-attacked counts as having been activated and completed its turn. And it cannot fight back against any subsequent attackers in the current game turn.
- After the model that initiated the combat, the model that counter-attacked, and any other models that were activated as a result have completed their turns, the normal order of play resumes, play passing to the player whose turn would normally have been due.
Spread-over Attacks
As mentioned earlier in the section on rolling to hit, some models may be capable of making multiple attacks. When such a model attacks an enemy model there may occasionally be spare attacks left over after the target model has been destroyed. These attacks can be spread over on to another enemy model, and the following rules apply.
- To be eligible as a target for spread-over attacks, the enemy model must be in base contact with the attacking model.
- A model that is the target of a spread-over attack cannot attempt to counter-charge. In all other respects treat the ensuing combat as the start of a new fight, rolling for first strike etc just as you would for any other combat. The target model is subject to all the usual rules for fighting back, counter-attacking etc.
Special Rules
Camouflage
Models with this special rule usually have a combination of training and camo gear, some of which can be incredibly high tech. Such models are considered to be out of LOS to enemy models beyond medium range, and because they make particularly difficult targets, always receive a +1 bonus to cover saves. A model engaged in close combat gains no benefit from Camouflage, and similarly, if the model makes an aggressive action (for example charging or shooting at an enemy model) it gives its position away and can be targeted as usual for the remainder of the game turn.
Fast
Some models are capable of fantastic bursts of speed that allow them to temporarily move a lot faster than their normal movement rate. Models with this special rule add half their normal MV stat in inches to the total distance moved when rushing or charging.
Hard-to-Hit
Some units are so fast or agile, constantly darting and weaving in and out of cover that they are difficult to pin down in a firefight. Others utilize special equipment to baffle targeting devices or blur their own outlines in order to avoid enemy fire. Such models are very difficult to target with anything other than area effect weapons like flamethrowers or explosives. The following rules apply.
- When a Hard-to-Hit model is the target of shooting by an enemy model, before the shooting model's player makes any d10 to hit rolls, the target model's player should roll 1d10 per shot that the shooting model is entitled to make. For each dice that scores 9+, the shooting model loses a d10 to hit roll, the shot is assumed to have missed completely.
- Template effect weapons are entirely unaffected by this special rule, models shooting with them suffer no Hard-to-Hit penalties.
Heavy Armour
Some models are so heavily armoured that they are very difficult to damage with normal weaponry. Attackers need special armour piercing weapons in order to have a reasonable chance of damaging them. Models with this special rule gain a d10 'heavy armour save' that can negate damage they have suffered.
When a model has this special rule it will be stated as 'Heavy Armour (0)', or 'Heavy Armour (+4)' etc. If followed by a number greater than zero, this indicates a positive modifier to the d10 heavy armour saving roll, for example Heavy Armour (+6) adds a +6 bonus to a d10 heavy armour save roll. The following rule applies.
- Heavy Armour Save: If a model with heavy armour receives wounds, roll 1d10 per wound, adding the indicated modifier. On a score of 10+ the wound is ignored and the model suffers no harm.
High Morale
Models with this special rule are more steadfast than others and less likely to panic or take fright. High Morale is expressed as a number in brackets, for example High Morale (+1). The number indicates a positive modifier to the d10 dice roll when a model makes a morale check or rally check, for example High Morale (+1) adds a +1 bonus to a morale or rally check roll.
Immune to Panic
Models with this special rule are either exceptionally well disciplined or are simply incapable of losing their cool. They never panic, and therefore never make morale checks.
Jump Trooper
Some models are equipped with sophisticated devices such as grav-wings or graviton pulse packs, which enable them to make great controlled leaps over intervening obstacles. Others make use of natural or bio-engineered wing membranes or similar gliding surfaces. Such a model may attempt to make a long gliding jump in place of a normal move, charge or rush action. The following rules apply.
- Jumps can be of any distance up to a maximum of 10 inches, and must be made in a straight line; a model cannot make turns during a jump.
- When making a jump a model may pass over obstacles, including enemy models, up to 5" in height.
- If making a jump in place of a charge, the target of the charge must have been in LOS of the jumping model before the jump was attempted.
- An enemy model charged by a jumping model cannot attempt to counter-charge.
Jumps do not always go exactly to plan however, as the equipment involved is difficult to handle and subject to environmental influences such as weather, enemy fire and so on. Before a model attempts a jump it must make a command check, and the following rules apply.
- If the command check is passed the model succeeds in the attempt and performs the jump as described previously, continuing with its turn as usual.
- If the command check is failed the model does not make the jump, and instead can only make a normal move, or rush action (but not a charge), choosing whichever is appropriate and allowed by its orders. No other alternative actions are allowed.
Marksman
Some models are expert at pinpointing and hitting vulnerable points on a target. When such a model successfully hits a target with a ranged weapon roll one extra damage dice for every 2 clear points that the score required to hit was passed by. For example a Marksman armed with a Sniper Rifle fires at a short-range target. He needs 6+ to hit and gets a modifier of +2 for the weapon; there are no other modifiers. The dice roll is a very respectable 8 and 2 is added to this for the Sniper Rifle's range modifier, giving a total of 10. This is 4 clear points over the required total of 6, so three damage dice are rolled (2 extra for the 4 clear points).
Sniper
Snipers are trained to pick out important targets, assassinating key members of the enemy forces and causing maximum disruption with their choice of victims. If focussed exclusively on the task in hand snipers are very effective at spotting hidden or camouflaged enemy troops, and are expert at picking the best targets. When a sniper model has lock-fire orders the following rules apply.
- The model can spot enemy models with the Camouflage or Stealth special rules at a greater range than is usual. It can draw LOS to models with Camouflage at long range, and to those with the Stealth at medium range.
- When the model makes a command check in order to override its default target priority it gains a +3 bonus to the d10 roll.
SPOMM Hyper-thread Transceiver
The SPOMM Hyper-thread Transceiver is a high tech biocomputational device that is sometimes included in the design specifications of command oriented Biomechs and Androsynths. Within it's relatively short effective range it boosts the performance of nearby Synapsized Prime-Obsidian Matrix Minds (SPOMMs), such as those fitted to synthetic AI troops like Androsynths.
Androsynth models within 6 inches of a model equipped with a SPOMM Hyper-thread Transceiver can re-roll failed command checks. They only get to re-roll once per check and must abide by the result of the second dice roll.
Stealth
Models with this special rule are expert at remaining unseen. Highly trained and equipped with the best in camouflage technologies they are incredibly difficult to detect. Such models are considered to be out of LOS to enemy models beyond short range, and because they make particularly difficult targets, always receive a +1 bonus to cover saves. A model engaged in close combat gains no benefit from Stealth, and similarly, if the model makes an aggressive action (for example charging or shooting at an enemy model) it gives its position away and can be targeted as usual for the remainder of the game turn.
Strike First
Models with this special rule have superior reactions and close combat training, often enabling them to land blows before their opponents. Such a model gains a +3 bonus to its d10 roll for first strike.
Tactical Awareness
Models with Tactical Awareness are better than others at assessing nearby threats, in order to choose the best target to shoot at. When such a model makes a command check in order to override its default target priority it gains a +2 bonus to the d10 roll.
Armoury
Each weapon's stat line is shown as To Hit and Dam for each range band (CC, Short, Medium, Long, Extreme). A '-' means the weapon has no capability in that range band.
Autopistol
Autopistols are standard side arms. They come in a bewildering variety of different models with different styles of ammunition ranging from old-fashioned brass-cased rounds to high-tech flechette sprayers, but they all perform pretty much the same function on a battlefield. Small enough to use in close combat and reasonably effective at short ranges, autopistols are a favourite of light assault troops, particularly when used in combination with combat blades.
| CC | Short | Medium | Long | Extreme | |
|---|---|---|---|---|---|
| To Hit | +1 | 0 | - | - | - |
| Dam | 4 | 4 | - | - | - |
- Type: 1 handed
- Special Rules: None
Battle-shield
Battle-shields are essentially an extra piece of armour carried to protect the user, a new generation of ultra-light composite materials making this ancient form of protection a viable alternative once more. They are most commonly employed by assault troops that are required to storm enemy positions or advance under fire. Battle-shields are about 1.5 meters tall and are made of a hard, flexible ceramic layer on the outside, with an anti-ballistic gel filled cushion behind it.
| CC | Short | Medium | Long | Extreme | |
|---|---|---|---|---|---|
| To Hit | - | - | - | - | - |
| Dam | - | - | - | - | - |
- Type: 1 handed
- Special Rules: The shield gives good protection from frontal attack. It confers a +1 to Toughness to all attacks originating from within a model's front facing.
Blaster
Blasters are the energy weapon equivalent of auto pistols. The magazine consists of a particle smasher similar to the device that generates the flux field on negatron shields. When the trigger is pulled a hail of anti-matter bolts is sprayed out of the muzzle, disintegrating whatever they hit. Because of the nature of anti-matter it dissipates quickly, so the weapon is only useful up to short ranges. Within this bracket though, blasters are considerably more effective than auto pistols. They are expensive and usually only issued to key personnel.
| CC | Short | Medium | Long | Extreme | |
|---|---|---|---|---|---|
| To Hit | 0(x2) | 0(x2) | - | - | - |
| Dam | 4 | 4 | - | - | - |
- Type: 1 handed
- Special Rules: None
Broadsword
Broadswords are massive two-handed weapons that when wielded properly are able to wound even the toughest opponents. The sheer size of the broadsword does not allow the wielder to use any other weaponry though, leaving them vulnerable to ranged fire on the battlefield.
| CC | Short | Medium | Long | Extreme | |
|---|---|---|---|---|---|
| To Hit | 0 | - | - | - | - |
| Dam | ST+1 | - | - | - | - |
- Type: 2 handed, melee, armour piercing 1
- Special Rules: None
Castigator Flame Thrower
Like all flamethrowers, the Castigator is a particularly fearsome short-range support weapon. It sprays incendiary gel or liquid fuel in a curtain of searing fire, engulfing a wide area before it. Castigators are most often seen being wielded by Myrmillo gladiators, both in the arenas, and in the performance of their duties as public executioners. Though the Castigator can be used on the battlefield it was not designed for this role, the main drawback being its lightly armoured fuel tanks. There have been more than a few instances of the fuel tanks exploding as a result of enemy fire, immolating the unfortunate bearer and anyone nearby.
| CC | Short | Medium | Long | Extreme | |
|---|---|---|---|---|---|
| To Hit | - | - | - | - | - |
| Dam | - | - | - | - | - |
- Type: 2 handed, directly placed template weapon, incendiary
- Special Rules: Uses the large teardrop template. The weapon does 5 Dam. Castigators are vulnerable to damage from enemy shooting. Every time the model carrying it suffers such a hit, irrespective of whether it causes any damage, roll 1d10. On a score of 1 the weapon explodes, killing its user, and showering flaming fuel over a wide area. Centre the circular template over the model; any nearby models covered or partially covered take a Dam 5 incendiary hit.
Chain Gun
Chain guns are squad support gauss weapons. Heavy weapons specialists carry them into battle, usually on some sort of gyro-stabilised rig to cope with the recoil and shaking. They are stripped down versions of vehicle and tripod mounted chain guns, and are somewhat less effective due to the lack of a stable firing platform. However, chain guns are devastating anti-personnel weapons within their effective range and can spray a hail of heavy flechettes at a considerably higher rate of fire than a basic gauss rifle.
| CC | Short | Medium | Long | Extreme | |
|---|---|---|---|---|---|
| To Hit | -2 | 0 (x3) | -1 (x2) | - | - |
| Dam | 6 | 6 | 5 | - | - |
- Type: 2 handed
- Special Rules: None
Combat Blade
Combat blades are really anything that can be used to stab, slash, puncture or otherwise injure a close combat opponent. Swords, machetes and combat knives are examples of Combat Blades, and can prove an essential back up tool when confronted at close quarters or where stealth is required. Military grade combat blades tend to be incredibly hard, durable and sharp in order to penetrate modern armour and cope with possible exposure to corrosive climates.
| CC | Short | Medium | Long | Extreme | |
|---|---|---|---|---|---|
| To Hit | 0 | - | - | - | - |
| Dam | ST+0 | - | - | - | - |
- Type: 1 handed, melee
- Special Rules: None
Combat Shotgun
Combat Shotguns are constructed under the classic Junker design philosophy: robust, functional, and cheap to manufacture. These standard Convict issue weapons can operate in extremely harsh environments such as the Red Erg desert on Ironglass.
| CC | Short | Medium | Long | Extreme | |
|---|---|---|---|---|---|
| To Hit | 0 | +1 | 0 | - | - |
| Dam | 5 | 5 | 3 | - | - |
- Type: 2 handed
- Special Rules: None
Gauss Rifle
Gauss Rifles are the favourite standard issue weapons of most armies across the galaxy. Effective up to medium range, they are hard-hitting and reasonably accurate. Gauss technology was an offshoot of VASA magnetic field research, and uses a so-called 'Gauss Field' to fire projectiles. The barrel of a gauss rifle contains a powerful magnetic rail, activated when the trigger is pulled. This lifts steel flechettes out of the magazine and accelerates them towards the target at hypersonic speed.
| CC | Short | Medium | Long | Extreme | |
|---|---|---|---|---|---|
| To Hit | -1 | 0 | 0 | - | - |
| Dam | 5 | 5 | 5 | - | - |
- Type: 2 handed
- Special Rules: None
Grape Gun
A grape gun is a bulky rotary-barrelled cuff that fits on to the forearm of a power suit. It uses magnetic rail technology to fire a lethal shower of large ball bearings at an incredible rate of fire. It is very inaccurate beyond short range, but within that bracket it is one of the most devastating small arms around.
| CC | Short | Medium | Long | Extreme | |
|---|---|---|---|---|---|
| To Hit | 0 (x2) | 0 (x2) | -1 | - | - |
| Dam | 5 | 5 | 4 | - | - |
- Type: 1 handed
- Special Rules: None
Naginata Pole-arm
Usually carried by the more traditionally minded of the Triad Retainers, the Naginata pole-arm can be a dangerous weapon in the hands of an expert. The business end of the weapon is a long, slightly curved, and razor sharp blade, similar in shape to the legendary katana swords of the past. The blade is mounted on a pole of between 1.5 and 2 metres length, though longer versions are occasionally seen. Naginata pole-arms are based on ancient designs, and those who wield them are viewed with respect in the honour bound and ritualistic Triad societies.
| CC | Short | Medium | Long | Extreme | |
|---|---|---|---|---|---|
| To Hit | 0 | - | - | - | - |
| Dam | ST+0 | - | - | - | - |
- Type: 2 handed, melee
- Special Rules: Confers an additional +2 bonus to d10 roll for first strike.
Net Launcher
Net launchers are weapons specifically designed for gladiatorial use in the spectacular and bloody arena combats of Ironglass. Used by Retiarius gladiators in combination with the spear-like Shock Lance, the weapon is a forearm-mounted launcher that fires a weighted microfilament web. The webs entangle and distract close combat opponents, and leave them open to the strike of the Retiarius main weapon.
| CC | Short | Medium | Long | Extreme | |
|---|---|---|---|---|---|
| To Hit | - | - | - | - | - |
| Dam | - | - | - | - | - |
- Type: 1 handed, melee
- Special Rules: A model equipped with a Net Launcher is assumed to be using it to best effect at all stages of any close combat it's involved in, regardless of whether it charged or counter-charged, or whether it is the attacker or defender. The model is assumed to trigger the Net Launcher immediately prior to the exchange of blows in close combat, so the weapon doesn't confer the usual melee weapon bonus to d10 rolls for first strike, nor any bonus for using two weapons in close combat. Instead close combat opponents suffer a -2 penalty to their d10 roll for first strike, and -1 penalty to their d10 rolls to hit. Being forearm-mounted, a Net Launcher doesn't preclude the use of a 2 handed close combat weapon, however it isn't possible to wield both a net launcher and a 1 handed weapon in the same hand.
Pulse Rifle
Pulse Rifles are high-energy laser (HEL) weapons. The battery pack required to generate a laser beam of sufficient intensity to burn a hole though an enemy at range is way too heavy for a standard to carry. For this reason only androsynths and prosthenes with reinforced spines and upper body muscles can carry these weapons into battle, the alternative being mounted pulse rifle systems. Although clearly an effective piece of ordnance, it is expensive and bulky so most armies don't bother with it. The Syntha however, with their regiments of tactical androsynths and prosthene marines, issue this weapon as standard.
| CC | Short | Medium | Long | Extreme | |
|---|---|---|---|---|---|
| To Hit | - | +1 | 0 | -1 | - |
| Dam | - | 6 | 5 | 3 | - |
- Type: 2 handed
- Special Rules: None
Shock Lance
The double bladed Shock Lance is the favoured arena weapon of Retiarius gladiators, who use it in combination with a forearm-mounted Net Launcher. The weapon comprises a long pole with a forked blade at one end, and a secondary slashing blade at the other. High charge capacitors deliver electric shocks through both blades, accompanied by spectacular sparking displays that never fail to raise a cheer from the watching crowds.
| CC | Short | Medium | Long | Extreme | |
|---|---|---|---|---|---|
| To Hit | 0 | - | - | - | - |
| Dam | ST+1 | - | - | - | - |
- Type: 2 handed, melee
- Special Rules: None
Shuriken
Shuriken are small razor edged throwing stars commonly wielded by highly skilled Triad martial artists. Though based on ancient traditional designs, modern versions are often manufactured from the most up to date of current high tech materials, making them extremely dangerous in the right hands. They are completely silent in use, and can be thrown singly or in showers. If combined with quick acting neuro-poisons and the like they make almost perfect assassins weapons.
| CC | Short | Medium | Long | Extreme | |
|---|---|---|---|---|---|
| To Hit | - | 0 | - | - | - |
| Dam | - | ST+0 | - | - | - |
- Type: 1 handed
- Special Rules: Shuriken are very effective when thrown on the move. Models that move & snap shoot with shuriken are not restricted to the usual half move distance that such an action usually dictates. Instead they may move up to their full MV stat in inches.
Sniper Rifle
Sniper rifles are highly specialised long-range weapons that are lethal in the hands of a trained user. They fire self-propelled ammunition that requires the gun to have special shielding. Each round has a heat resistant steel tip with a solid fuel base that is activated by the powder, giving the weapon its massive effective range. Sniper rifles usually come with advanced scopes and imaging systems that require specialist knowledge to use to their full potential.
| CC | Short | Medium | Long | Extreme | |
|---|---|---|---|---|---|
| To Hit | -1 | +2 | +1 | 0 | -1 |
| Dam | 5 | 5 | 5 | 4 | 3 |
- Type: 2 handed
- Special Rules: None
Templates
The printed page 'Templates' carries two cut-out templates, a Circular Template (for ranged template weapons) and a Large Teardrop Template (for directly placed template weapons). No dimensions are printed on the page; use the printed templates from the book.
The Forces on Iskandria
Source note: the faction background essays on the Forces on Iskandria pages (VASA, Syntha, Viridians, Junkers) and the unit background text in the force lists are not reproduced; the force rules, stat lines, costs and special rules are transcribed in full. The printed blank roster sheets are also not reproduced.
Creating your Force
In the VOID1.1 universe most organised fighting forces contain a mix of troopers with a range of battlefield experience and capabilities. There are new recruits, veterans, various specialists and of course a leader. Some troops are more common than others, specialists and veterans by their very nature are less common, and there can only ever be one leader.
In the forces you create to fight for you in your games of Urban War, there are some models that form the backbone of any force and must always be present, and there are others that are only represented in small numbers. The following lists detail the limitations that apply to your choice of models as you create your force. In addition, whatever your chosen mix of models is, the force must always contain a leader.
Calibre
As you read through the force lists you will see that most of the available troops can be selected with a CAL stat of your choice. Such models cost more points if you choose to select a higher CAL stat, and these costs are shown in their profile. There are some restrictions on how many models with a high CAL stat you may include in your force, these vary depending on the specific force you are building and are detailed shortly in the following sections.
Leaders
Once you have selected your force from the relevant list you must designate one of the models as the leader. There are some restrictions on your choice of leader, and the following rules apply.
- In each force list there are specific models that, if present in the force, must be your priority choice as leader. If more than one such model is present you must choose the one with the highest calibre (CAL) stat. In the case of a tie you may choose between them.
- If there are no such specified leader models in the force, then you must choose whatever other model has the highest command (CD) stat. In the case of a tie you may choose between them.
Creating Viridian Forces
Colonial Marines are the mainstays of the Viridian armed forces in Iskandria, veteran Colonial Marine Sergeants usually lead them, and roving snipers provide support. When creating a Viridian force the following rules apply.
- Your force must contain at least four Colonial Marines.
- Your force cannot contain more CAL 1 models than it does CAL 0 models.
- Your force cannot contain more than one CAL 2 model for every two CAL 1 models.
- Your force cannot contain more than one CAL 3 model for every two CAL 2 models.
- If present in your force, a Colonial Marine Sergeant must be designated as leader.
Creating Junker Forces
Secutor gladiators form the backbone of the hastily scraped together Junker forces in Iskandria. They are usually led by combat-hardened Amazonia Decurions, with Retiarus and Myrmillo gladiators providing support. When creating a Junker force the following rules apply.
- Your force must contain at least four Secutors.
- Your force cannot contain more CAL 1 models than it does CAL 0 models.
- Your force cannot contain more than one CAL 2 model for every two CAL 1 models.
- Your force cannot contain more than one CAL 3 model for every two CAL 2 models.
- If present in your force, an Amazonia Decurion must be designated as leader.
Creating VASA Forces
As regular VASA armed forces are not currently available on planet, Triad gang Retainers provide the bulk of VASA forces in Iskandria. They are usually led by experienced Triad gang Bosses, and Dragonfly martial artists provide support. When creating a VASA force the following rules apply.
- Your force must contain at least four Triad Retainers.
- Your force cannot contain more CAL 1 models than it does CAL 0 models.
- Your force cannot contain more than one CAL 2 model for every two CAL 1 models.
- Your force cannot contain more than one CAL 3 model for every two CAL 2 models.
- If present in your force, a Triad Boss must be designated as leader.
Creating Syntha Forces
MKII Tactical Androsynths form the main part of the Syntha armed forces in Iskandria. Artemis Class Biomechs usually lead them, with 'Pointman' Heavy Androsynths and Achilles Class Biomechs providing support. When creating a Syntha force the following rules apply.
- Your force must contain at least four MKII Tactical Androsynths.
- Your force cannot contain more than one CAL 2 model for every four CAL 0 or CAL 1 models.
- Your force cannot contain more than one CAL 3 model for every two CAL 2 models.
- If present in your force, an Artemis Class Alpha Biomech must be designated as leader.
- An Androsynth may only be chosen as leader if there are no Biomechs present.
VASA Force List
Each entry gives the stat line, the equipment with its point cost at each CAL, and the special rules and options.
Triad Retainer
| AS | SH | ST | T | W | CD | SZ | MV | CAL |
|---|---|---|---|---|---|---|---|---|
| 4 | 4 | 4 | 4 | 1 | 4 | 2 | 4 | 0-1 |
| Equipment | CAL 0 | CAL 1 | CAL 2 | CAL 3 |
|---|---|---|---|---|
| Gauss Rifle | 18 | 23 | N/A | N/A |
| Naginata pole-arm | 15 | 19 | N/A | N/A |
- Special Rules: None
- Options: None
Triad Boss
| AS | SH | ST | T | W | CD | SZ | MV | CAL |
|---|---|---|---|---|---|---|---|---|
| 4 | 4 | 4 | 4 | 1 | 5 | 2 | 4 | 1-3 |
| Equipment | CAL 0 | CAL 1 | CAL 2 | CAL 3 |
|---|---|---|---|---|
| Autopistol, Combat Blade | N/A | 25 | 31 | 37 |
- Special Rules: High Morale (+1); Tactical Awareness
- Options: None
Dragonfly
| AS | SH | ST | T | W | CD | SZ | MV | CAL |
|---|---|---|---|---|---|---|---|---|
| 4 | 5 | 4 | 4 | 1 | 5 | 2 | 4 | 1-2 |
| Equipment | CAL 0 | CAL 1 | CAL 2 | CAL 3 |
|---|---|---|---|---|
| Two Combat Blades, Shuriken | N/A | 33 | 41 | N/A |
- Special Rules: Hard to Hit; Jump Trooper
- Options: None
Syntha Force List
MKII Tactical Androsynth
| AS | SH | ST | T | W | CD | SZ | MV | CAL |
|---|---|---|---|---|---|---|---|---|
| 4 | 4 | 6 | 5 | 1 | 5 | 2 | 4 | 0 |
| Equipment | CAL 0 | CAL 1 | CAL 2 | CAL 3 |
|---|---|---|---|---|
| Pulse Rifle | 25 | N/A | N/A | N/A |
| Grape Gun, Battleshield | 29 | N/A | N/A | N/A |
- Special Rules: Immune to Panic
- Options: None
'Pointman' Heavy Androsynth
| AS | SH | ST | T | W | CD | SZ | MV | CAL |
|---|---|---|---|---|---|---|---|---|
| 4 | 4 | 6 | 5 | 1 | 5 | 3 | 4 | 0 |
| Equipment | CAL 0 | CAL 1 | CAL 2 | CAL 3 |
|---|---|---|---|---|
| Chain Gun | 33 | N/A | N/A | N/A |
- Special Rules: Heavy Armour (+2); Immune to Panic
- Options: None
Achilles Class Biomech
| AS | SH | ST | T | W | CD | SZ | MV | CAL |
|---|---|---|---|---|---|---|---|---|
| 5 | 5 | 4 | 4 | 1 | 5 | 2 | 4 | 1-2 |
| Equipment | CAL 0 | CAL 1 | CAL 2 | CAL 3 |
|---|---|---|---|---|
| Chain Gun | N/A | 41 | 51 | N/A |
- Special Rules: High Morale (+1)
- Options: None
Artemis Class Biomech
| AS | SH | ST | T | W | CD | SZ | MV | CAL |
|---|---|---|---|---|---|---|---|---|
| 4 | 4 | 4 | 4 | 1 | 5 | 2 | 5 | 1-2 |
| Equipment | CAL 0 | CAL 1 | CAL 2 | CAL 3 |
|---|---|---|---|---|
| Blaster | N/A | 34 | 43 | N/A |
- Special Rules: Camouflage
- Options: None
Artemis Class Alpha Biomech
| AS | SH | ST | T | W | CD | SZ | MV | CAL |
|---|---|---|---|---|---|---|---|---|
| 4 | 4 | 4 | 4 | 1 | 5 | 2 | 5 | 3 |
| Equipment | CAL 0 | CAL 1 | CAL 2 | CAL 3 |
|---|---|---|---|---|
| Blaster | N/A | N/A | N/A | 61 |
- Special Rules: High Morale (+1); SPOMM Hyper-thread Transceiver; Stealth
- Options: None
Junker Force List
Secutor
| AS | SH | ST | T | W | CD | SZ | MV | CAL |
|---|---|---|---|---|---|---|---|---|
| 4 | 3 | 4 | 4 | 1 | 4 | 2 | 4 | 0-2 |
| Equipment | CAL 0 | CAL 1 | CAL 2 | CAL 3 |
|---|---|---|---|---|
| Combat Shotgun, Combat Blade, Battleshield | 20 | 26 | 33 | N/A |
- Special Rules: None
- Options: None
Amazonia Decurion
| AS | SH | ST | T | W | CD | SZ | MV | CAL |
|---|---|---|---|---|---|---|---|---|
| 4 | 3 | 4 | 4 | 1 | 5 | 2 | 4 | 1-3 |
| Equipment | CAL 0 | CAL 1 | CAL 2 | CAL 3 |
|---|---|---|---|---|
| Two Autopistols, Broadsword | N/A | 27 | 34 | 41 |
- Special Rules: High Morale (+1); Tactical Awareness
- Options: None
Retiarius
| AS | SH | ST | T | W | CD | SZ | MV | CAL |
|---|---|---|---|---|---|---|---|---|
| 4 | 3 | 4 | 4 | 1 | 4 | 2 | 4 | 0-2 |
| Equipment | CAL 0 | CAL 1 | CAL 2 | CAL 3 |
|---|---|---|---|---|
| Shock Lance, Net Launcher | 19 | 25 | 31 | N/A |
- Special Rules: Fast; Strike First
- Options: None
Myrmillo
| AS | SH | ST | T | W | CD | SZ | MV | CAL |
|---|---|---|---|---|---|---|---|---|
| 4 | 3 | 4 | 4 | 1 | 4 | 2 | 4 | 1-2 |
| Equipment | CAL 0 | CAL 1 | CAL 2 | CAL 3 |
|---|---|---|---|---|
| Castigator Flame Thrower | N/A | 35 | 44 | N/A |
- Special Rules: None
- Options: None
Viridian Force List
Colonial Marine
| AS | SH | ST | T | W | CD | SZ | MV | CAL |
|---|---|---|---|---|---|---|---|---|
| 3 | 4 | 4 | 4 | 1 | 4 | 2 | 4 | 0-2 |
| Equipment | CAL 0 | CAL 1 | CAL 2 | CAL 3 |
|---|---|---|---|---|
| Gauss Rifle, Combat Blade | 20 | 26 | 33 | N/A |
- Special Rules: None
- Options: None
Colonial Marine Sergeant
| AS | SH | ST | T | W | CD | SZ | MV | CAL |
|---|---|---|---|---|---|---|---|---|
| 3 | 4 | 4 | 4 | 1 | 5 | 2 | 4 | 1-3 |
| Equipment | CAL 0 | CAL 1 | CAL 2 | CAL 3 |
|---|---|---|---|---|
| Gauss Rifle, Autopistol | N/A | 27 | 34 | 41 |
- Special Rules: High Morale (+1); Tactical Awareness
- Options: None
Sniper
| AS | SH | ST | T | W | CD | SZ | MV | CAL |
|---|---|---|---|---|---|---|---|---|
| 3 | 4 | 4 | 4 | 1 | 5 | 2 | 4 | 1-2 |
| Equipment | CAL 0 | CAL 1 | CAL 2 | CAL 3 |
|---|---|---|---|---|
| Sniper Rifle, Combat Blade | N/A | 51 | 64 | N/A |
- Special Rules: Sniper; Marksman
- Options: None