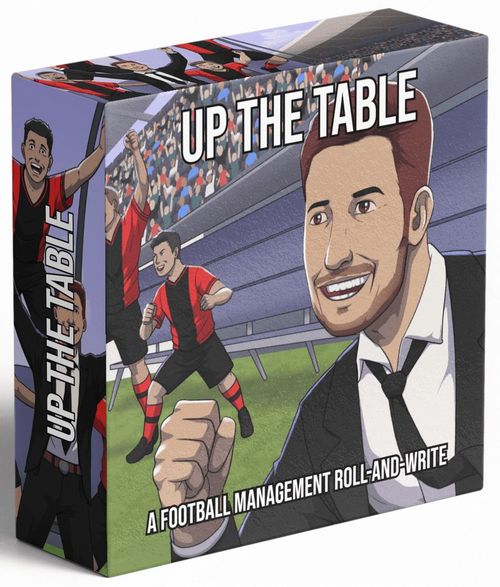
Up the Table
Up the Table Rulebook
Table of Contents
Table of Contents
Weekly Flow
Match Preparation
- Collect weekly income
- Erase loan/red card icons
- Determine next opponent
- Resolve staff activities
- Resolve 5 weekday activities
Matchday
- Set formation and tactic
- Arrange your players
- Set starting values
- Play first half
- Resolve halftime
- Play second half
Post-match Wrap-up
- Check for youth improvement
- Record your results
- Determine league results
Then proceed to the next week.
Components
Provided
- 1 Team Sheet
- 18 Match Sheets
- 6 League Sheets
You will need
- Pencil & eraser
- 9 six-sided dice
Some managers may prefer using page protectors and dry or wet erase markers in order to reuse their sheets.
Preseason (Setup)
To set up your club, gather the Team Sheet and follow these steps. The steps may be performed in any order.
- Enter club info: Name your club, select its colors, and enter its home city. Then, design your club's badge in the CLUB BADGE section.
- Distribute stars: Each of your players begins with a 1-star rating. You have 4 additional stars to distribute among your squad as you wish. No player may exceed 3 stars at the start.
- Enter starting money: Enter 0 for MONEY.
- Set up trackers: Shade in the leftmost circle for each of the three tracks in the top-right corner: INCOME, FITNESS, and CHEMISTRY.
- Name your players: Name each player in the rectangle. The circle on the left side of each player is reserved for skill icons, while the octagon on the right side tracks conditions.
- Choose positions for players: For each player, choose and circle one of the listed positions. The highlighted position is recommended, but not required. A player's position is made up of two parts: the first letter indicates the line (defense, midfield, or forward), while the second letter indicates the side (left, center, or right).
- Decide league settings: Choose your League Sheet and season length. Select either a Scaled or Realistic League Sheet. Scaled means you will face weaker teams earlier and stronger teams later, while Realistic means opponent power levels are randomized. There are three League Sheets available for each type. Pick one that appeals to you, or roll to choose randomly, then set the remaining League Sheets aside. Decide whether to play a half season (9 matches) or a full season (18 matches). If you are playing a half season, distribute an additional 4 stars among your squad.
Up the Table gives managers the chance to customize their club to their liking. However, if you're having trouble coming up with player names, or just want to get started as quickly as possible, these pre-generated names can be used instead.
- Goalkeeper: #01 Idoko
- Defenders: #03 Miranda, #05 Vladić, #04 Ballard, #02 Park, #15 Roy
- Midfielders: #11 Khumalo, #06 Alvarez, #08 Drakos, #07 Halliday, #14 Yokota
- Forwards: #12 Lobo, #09 Karim, #10 Arias, #13 Joshi, #16 Benally
Season Structure
A standard game of Up the Table spans 9 weeks (matches) for a half season and 18 weeks (matches) for a full season. After the final match, the season comes to an end. Compare your total league points against the points achieved by the other teams to determine your final position in the table.
Each week is split into three parts:
- Match Preparation
- Matchday
- Post-Match Wrap-Up
Match Preparation
Another week means another chance to climb the table. How will you spend your time?
First, collect your weekly income. The number of shaded spaces on the INCOME track tells you how much your club has earned. Add that number to your MONEY and write in your new balance.
Next, erase any loan icons and any red card icons for players who served their suspension last match.
Then, determine your next opponent. Check your chosen League Sheet for this week's fixture and find the matchup where YOUR CLUB is listed. If it's the first half of the season, or you are playing a half season, the first team listed is the home team. If it's the second half of the season, the first team listed is the away team. Gather the Match Sheet that corresponds to your opponent and whether they will be the home or away team. (There is a home and away version of the Match Sheet for each opponent.)
Now, resolve staff activities. For each Backroom Staff member with at least one checkmark, you may resolve the corresponding activity (see Backroom Staff) without assigning dice.
Finally, it's time to resolve weekday activities. Roll 5 dice, with each die representing a day of the week.
To get started, take 1 die and assign it to one of the 6 activities on your Team Sheet (without changing its face value):
- TRAINING GROUND – Sharpen the skills of your players.
- TACTICS BOARD – Prepare your strategy for the next match.
- CLUB UPGRADES – Improve your facilities.
- BACKROOM STAFF – Hire support for club operations.
- TRANSFER MARKET – Bring in new players for your squad.
- MANAGER'S OFFICE – Prioritize the most important activities.
Once you assign a die to an activity, carry out that activity fully before moving on to the next one. When completed, leave the die in place as a record of the number and type of activities completed. Repeat this process for the 4 remaining dice. There's no limit to how many dice you can assign to a single activity.
Once all dice have been assigned and all activities resolved for the week, remove all dice.
Training Ground
Time to put the squad through their paces. When you assign a die to the TRAINING GROUND, its face value tells you what kind of session you'll run. The training box represents a short-term boost from training in a specific zone, and each player in that zone gets a +1 bonus to their rating for all purposes.
- GK drills. Add a checkmark to the training box in the goalkeeper (GK) area of this week's Match Sheet.
- Defense drills. Add a checkmark to the training box in 1 defensive zone (DL, DC, or DR) of this week's Match Sheet.
- Midfield drills. Add a checkmark to the training box in 1 midfield zone (ML, MC, or MR) of this week's Match Sheet.
- Forward drills. Add a checkmark to the training box in 1 forward zone (FL, FC, or FR) of this week's Match Sheet.
- Team training. Add 2 to either the FITNESS or CHEMISTRY box on this week's Match Sheet.
- Individual work. Choose one player in your squad with no skill icon and roll the die again. If the result is lower than that player's star rating, draw a skill icon of your choice in their skill circle.
Tactics Board
No great manager leaves matchday to chance. When you assign a die to the TACTICS BOARD, its face value determines which tactic you'll prepare. Write that tactic in the Tactics Board on the next Match Sheet.
- Park the Bus. During all highlights in your defense zones, you may spend CHEMISTRY to bring in support players instead of FITNESS.
- High Line. When your opponent scores a goal, spend up to 3 CHEMISTRY and roll an equal number of dice. If any die shows a 1, the goal is called back for offside, canceling its effects.
- Tiki Taka. When you shift a die as part of a transition, spend 2 CHEMISTRY to shift it to any zone, including another midfield zone.
- Gegenpress. After your attacking highlight fails, spend 2 CHEMISTRY to keep the die on the pitch instead of removing it. Add an extra timer circle.
- Counter Attack. After your defending highlight succeeds, spend 2 CHEMISTRY to move the die to a forward zone on the same side instead of removing it. Add an extra timer circle.
- Total Football. Ignore penalties for players playing out of position. After your highlight resolves, you may spend 2 CHEMISTRY to swap two of your players on the pitch.
Extra Timer Circles: When a tactic allows you to keep a die on the pitch after a highlight is resolved, it will also instruct you to add an extra timer circle. Draw an additional circle next to the timer for the current half to represent the additional highlight to be resolved. Extra timer circles are counted as 45+' in the first half and 90+' in the second half.
Club Upgrades
The foundation for success goes beyond what's on the pitch. When you assign a die to CLUB UPGRADES, its face value determines where you focus your efforts.
- Youth Academy. Add a 1-star youth player to your squad. Choose (circle) a position for that player and enter a name. Draw a youth icon (Y) in their skill circle. Youth players have the potential to improve after each match. If your squad is full, you must replace a player by erasing their details.
- Treatment Room. Remove an injury condition from a player.
- Training Ground. Shade in the leftmost empty box on the FITNESS track.
- Clubhouse. Shade in the leftmost empty box on the CHEMISTRY track.
- New Sponsor. Shade in the leftmost empty box on the INCOME track.
- Additional Seats. Mark 1 momentum box on this week's Match Sheet. Then gain 1 MONEY for each marked momentum box on the Match Sheet.
Transfer Market
Get to work finding the next club legend. When you assign a die to the TRANSFER MARKET, its face value determines your next acquisition.
- Scout. Scout a player whose dice icon matches the face value of the assigned die. Shade in their leftmost empty star or circle 1 additional position, or draw a skill icon of your choice in their skill circle. When a player is scouted for the first time, write in a name and choose (circle) a position.
- Transfer. Attempt to buy a player whose dice icon matches the face value of the assigned die. The base transfer fee is equal to twice their star rating, plus 2 if they have a skill. Then negotiate by rolling the die and subtracting the result from the transfer fee (to a minimum of 1). If you accept this final fee, subtract it from your MONEY. Copy the player's details into an empty slot on the line that matches their position(s). If that line is full, you must replace a player. Erase the player's details from the TRANSFER MARKET.
- Sell player. Choose 1 player from your squad to sell. Add a number to your MONEY equal to their star rating, plus 1 if they have a skill. Erase all of their details from your squad.
- Loan player. Choose 1 player in the TRANSFER MARKET and pay 1 MONEY. If the player has a skill, pay 1 additional MONEY. Draw a loan icon (L) in their condition space. Use this player as part of your squad for the next match.
Available Skills
- Anchor – An anchor involved in a highlight prevents the opponent from bringing in support. (D/M)
- Distributor – A distributor may shift one of your dice from a defense zone to a midfield zone after a successful save. (GK)
- Dribbler – A dribbler involved in your highlight marks momentum in each zone on their line if you roll a 6. (M/F)
- Leader – A leader allows you to reroll 1 highlight per match.
- Playmaker – A playmaker with a die in their zone may assist with that die without removing it. (M)
- Poacher – A poacher counts as 1 opening when taking a shot from a forward zone. (F)
- Sniper – A sniper ignores location-based pressures when taking a shot from defense/midfield. (D/M)
- Speedster – A speedster may be brought in as support from the same side or line for a flat cost of 1 FITNESS.
- Sweeper – A sweeper may be brought in as support during opponent's attacking highlights for 1 FITNESS. (GK)
- Wonderkid – A wonderkid is a youth player with enhanced potential.
GK, D, M, or F restricts the skill to only the listed position(s).
Backroom Staff
A manager is only as good as the staff they trust.
When you assign a die to BACKROOM STAFF, its face value determines who you hire. Mark the next unchecked box for that staff member, then pay MONEY equal to their new number of checkmarks.
- Recruiter. During staff activities, resolve YOUTH ACADEMY once for each recruiter checkmark.
- Physio. During staff activities, resolve TREATMENT ROOM once for each physio checkmark.
- Coach. During staff activities, resolve 1 TRAINING GROUND activity for each coach checkmark.
- Scout. During staff activities, resolve SCOUT once (any player) for each scout checkmark.
- Assistant. During staff activities, resolve 1 TACTICS BOARD activity for each assistant checkmark.
- Liaison. During staff activities, resolve ADDITIONAL SEATS once for each liaison checkmark.
Manager's Office
- Plan week. When you assign a die to MANAGER'S OFFICE, adjust 1 unassigned die to the face value of your choice.
Matchday
The whistle's about to blow. You've spent the week preparing. Now it's time to put it all on the line. The action unfolds on the Match Sheet, which is divided into these key areas.
Zooming in a bit, each zone on the pitch provides space to track important information. The top half of each zone is for opponent dice and information, while the bottom half is for your dice and information.
Each matchday follows this sequence:
- Set your formation and tactic
- Arrange your players
- Set starting values
- Play first half
- Resolve halftime
- Play second half
1. Set Formation and Tactic
Pick a formation from the Available Formations that fits your players, your style, and your opponent. Write your choice in the formation section of the Tactics Board. Formations are written with the number of defenders listed first, followed by midfielders, then forwards. This determines how many players you're allowed to assign to each zone of the pitch in the next step.
Look at the tactics (if any) written in the tactics section of the Tactics Board. You may choose one to circle as your active game plan for the first half. You don't have to use a tactic, even if you have one or more prepared.
Available Formations
Each formation lists the number of players for the Forwards, Midfielders, and Defenders zones, read left to right (left, center, right).
| Formation | Forwards (L-C-R) | Midfielders (L-C-R) | Defenders (L-C-R) |
|---|---|---|---|
| 4-4-2 | 0 - 2 - 0 | 1 - 2 - 1 | 1 - 2 - 1 |
| 4-3-3 | 1 - 1 - 1 | 1 - 1 - 1 | 1 - 2 - 1 |
| 4-5-1 | 0 - 1 - 0 | 1 - 3 - 1 | 1 - 2 - 1 |
| 4-2-4 | 1 - 2 - 1 | 0 - 2 - 0 | 1 - 2 - 1 |
| 3-4-3 | 0 - 3 - 0 | 1 - 2 - 1 | 0 - 3 - 0 |
| 3-5-2 | 0 - 2 - 0 | 1 - 3 - 1 | 0 - 3 - 0 |
Assistant Manager: Want to make your own formation that isn't listed here? Fancy yourself the next special one? Feel free to flex your creativity. Simply assign 0–3 players to each of the 9 zones. You must assign exactly 10 players. You cannot assign more than 3 players to a single central zone or more than 1 player to a single left/right zone.
2. Arrange Players
For each zone on the pitch, select the number of players indicated by your formation for that position. Write each player's name and/or number in the appropriate zone. Add up the ratings of the players in each zone and enter the total in the star in your half of the zone.
You may play your players out of position, but doing so incurs a penalty. If a player is playing in a zone whose line or side doesn't match the line or side of any of their circled positions, their star rating is reduced by 1 (to a minimum of 0). If both the line and side don't match, their star rating is reduced by 2 instead. If you don't have enough players to fill a zone due to injury or suspension, a reserve player with a rating of 0 will stand in for the match.
Once your players have been placed, draw dice icons numbered 1 through 6 in 6 different zones of the pitch where you have players. Alternatively, draw 2 icons in 1 focus zone, then draw 1 icon each in 4 remaining zones. These icons represent the zones where you want to concentrate play.
3. Set Starting Values
Check the number of shaded spaces on the FITNESS track. Write that number in the FITNESS box on the Match Sheet. If there is already a number present from training sessions during the week, add the two numbers together and write the new total.
Now do the same for CHEMISTRY.
4. Play First Half
Each half is made up of 8 pivotal highlights: 4 for you and 4 for your opponent. You will alternate resolving your highlights and your opponent's highlights until all highlights have been resolved. The home team always resolves the first highlight each half.
At the beginning of the half, roll 4 dice to represent your highlights. Reroll duplicates. Place each die into the zone on the Match Sheet where you have drawn a matching dice icon. Use the bottom half of each zone to hold your highlight dice.
Then, roll 4 dice for your opponent. Reroll duplicates. Place each die into the zone on the Match Sheet where a matching dice icon is present in the opponent half of the zone. Use the top half of each zone to hold your opponent's highlight dice.
Note: You may use different colors of dice to help differentiate your highlights from opponent highlights at a glance.
To resolve one of your highlights...
Mark the next empty timer circle and pick one of your dice on the pitch. If it's in one of your defender zones (DL, DC, or DR), this is a defending highlight. If it's in a midfield zone (ML, MC, or MR), this is a transition highlight. If it's in one of your forward zones (FL, FC, or FR), this is an attacking highlight.
Each highlight plays out with a single die roll, capturing the drama of a key moment on the pitch. The base odds of success for a highlight are 50/50. On a roll of 1–3, the highlight ends in success for your opponent (and failure for you). On a roll of 4–6, the highlight ends in success for you. However, football is rarely that simple, as other factors may tip the balance. Use the Highlight Resolution Checklist on this page to resolve the highlight. After the highlight has been resolved, remove the highlight die from the pitch.
Highlight Resolution Checklist
- Determine your zone rating. Add the star ratings of all your players in the zone to find your base rating.
- Apply training. If the training box for the zone is marked, increase the rating of each of your players in that zone by 1.
- Determine opponent zone rating. Find the star rating shown in the star icon in the opponent's half of the zone.
- Bring in opponent support. If the opponent's zone rating is less than double yours, they bring in support. Mark one OPPONENT FITNESS, then add the rating of the highest-rated opponent player from the closest zone on the same side (breaking ties by higher rating). If no OPPONENT FITNESS remains or there is no available support player on the same side, skip this step.
- Bring in your support. You may add the rating of up to 2 support players from other zones on the same side (not line) to your rating. Spend FITNESS equal to how many zones away each support player is from the highlight zone. These players are now involved in the highlight.
- Calculate modifier. Compare your rating to your opponent's to find the die roll modifier.
- If their rating is at least double yours: -2
- If their rating is higher (but not double): -1
- If the ratings are equal: 0
- If your rating is higher (but not double): +1
- If your rating is at least double theirs: +2
- Check advantage. Roll with advantage if your momentum box is marked. Roll with disadvantage if your opponent's is marked.
To apply the results of your highlight...
If your highlight was a success for your opponent, they have halted what you were trying to accomplish and your highlight has no effect. If your highlight was a success for you, it will have a special effect depending on its type:
- If it was an attacking highlight, shoot in an attempt to score a goal.
- If it was a defending highlight, stop 1 opponent highlight.
- If it was a transition highlight, shift 1 of your dice.
Shoot: Choose one of your players in the zone, or a supporting player involved in the highlight, to take the shot. If you have no players in the zone, your shooter rating is 0. See Shot Resolution below to resolve the shot. If a goal is scored, add 1 goal to your score and erase all marked momentum boxes.
Stop: Remove one opponent highlight die from the pitch. Mark the next empty timer circle to indicate that the highlight will no longer be resolved. Instead of stopping a die, you may shoot using the shooting rules above.
Shift: Move one of your other highlight dice to a different zone on the same side of the pitch as that die (left, center, or right). After shifting, gain momentum in the shifted die's new zone. When you gain momentum, mark the momentum box in your half of the zone and erase any mark in the momentum box in your opponent's half of the zone. Instead of shifting a die, you may shoot using the shooting rules above.
Shot Resolution
- Set default shot quality. A shot's quality starts as AVERAGE when taken from a forward zone, MEDIOCRE from a midfield zone, and POOR from a defense zone.
- Count openings and pressures. Review each factor below and tally the total openings and pressures.
- Adjust shot quality. If openings exceed pressures, move up the Shot Chart by the difference. If pressures exceed openings, move down by the difference. Shot quality cannot rise above GOLDEN or fall below POOR.
- Optional assist. You may assist by removing 1 of your dice in the same line or side as the shot (marking off 1 timer circle). Opponents do not assist.
- Roll for shot. Roll a die. If the result is within the range for the shot quality, a goal is scored. If not, the shot is saved.
Opening
- Shooting side has momentum.
- Shooting side has more players in the zone (including support).
- Shooter's rating is higher than the keeper's.
- Shooter's rating is at least double the keeper's.
- Shooter has an assist.
Pressure
- Defending side has momentum.
- Defending side has more players in the zone (including support).
- Keeper's rating is higher than the shooter's.
- Keeper's rating is at least double the shooter's.
- Highlight is not attacking.
- Highlight is defending.
Shot Chart
| Quality | Roll to score | xG |
|---|---|---|
| GOLDEN | 2–6 | ~0.83 |
| GOOD | 3–6 | ~0.66 |
| SOLID | 4–6 | ~0.50 |
| AVERAGE | 4–6 | ~0.50 |
| MEDIOCRE | 5–6 | ~0.33 |
| POOR | 6 | ~0.16 |
To resolve an opponent highlight...
Mark the next empty timer circle. The current match state determines which opponent highlight die you resolve next. The line where the opponent highlight is located determines the type of highlight:
- Forward zone (FL, FC, FR) – Defending highlight
- Midfield zone (ML, MC, MR) – Transition highlight
- Defender zone (DL, DC, DR) – Attacking highlight
If your opponent is currently losing (fewer goals) or drawing (equal goals), they prioritize scoring. Resolve their attacking highlights (3) first, then transition highlights (2), and finally defending highlights (1).
If your opponent is currently winning (more goals), they prioritize stopping. Resolve their defending highlights first (1), then transition highlights (2), and finally attacking highlights (3).
If there are multiple dice of the same type to resolve, choose the zone where your opponent's rating exceeds yours by the largest amount. If none exceeds, resolve the zone with the smallest rating difference. If still tied, you choose.
To apply the results of an opponent highlight...
If the opponent highlight was a success for you, you have halted what they were trying to accomplish and their highlight has no effect. If the opponent highlight was a success for your opponent, it will have a special effect depending on its type:
- If it was an attacking highlight, they shoot in an attempt to score a goal.
- If it was a defending highlight, they stop 1 of your highlights. (If you have no highlights remaining or you are winning, they shoot instead.)
- If it was a transition highlight, they shift 1 of their dice. (If no shift in the specified direction is possible or you are winning by 2+ goals, they shoot instead.)
Shoot: The opposing player with the highest rating in the zone, including support players, takes the shot. If your opponent has no players in the zone, their shooter rating is 0. See Shot Resolution above to resolve the shot. (Note that opponents do not assist.) If the training box in your goalkeeper area is checked, increase your goalkeeper's rating by 1. If a goal is scored, add 1 goal to your opponent's score and erase all marked momentum boxes.
Stop: When stopping one of your highlights, your opponent stops a die in a forward zone first, then a midfield zone, and finally a defender zone as the last choice. If there are multiple dice in the same line, they stop the die in the zone where your rating exceeds your opponent's by the largest amount. If none exceeds, choose the zone with the smallest rating difference. If still tied, you choose. Mark the next empty timer circle to indicate that this highlight will no longer be resolved.
Shift: If your opponent is winning, they move one of their other highlight dice up to the forward zone on the same side of the pitch, creating a defending highlight. If they are currently losing or drawing, they move a die down to the defender zone on the same side of the pitch, creating an attacking highlight. If more than one shift is possible, compare the destination zones and choose the shift that makes the opponent's rating exceed yours by the largest amount. If none would exceed, choose the destination with the smallest rating difference. If still tied, you choose. After shifting, your opponent gains momentum in the shifted die's new zone. When they gain momentum, mark the momentum box in their half of the zone and erase any mark in the momentum box in your half of the zone.
Shift example. Your opponent has successfully resolved the 3 highlight die, resulting in a shift. Since your opponent is winning, they shift up to a forward zone to protect their lead. There are two dice (5 and 6) that are not located in a forward zone and can therefore be shifted. The 5 would shift to the FR zone, while the 6 would shift to the FC zone. Comparing FR and FC, your opponent exceeds your rating in FC by 1, while their rating doesn't exceed yours at all in FR. Therefore, they shift the 6 to the FC zone.
If your opponent was losing or drawing, they would shift the 1 to the DC zone instead in order to set up a shot. The only highlights that can shift to a defense zone are 1 and 5. The 1 highlight would shift to DC, while the 5 highlight would shift to DR. Since your opponent exceeds your rating in DC and not in DR, a shift into DC takes priority.
The half ends when... If either you or your opponent has no remaining dice on the pitch, that side has no more highlights for the half. Once both sides have no dice remaining, the half ends.
5. Resolve Halftime
Change formation and tactic. During halftime, you may change your formation by rearranging your players on the pitch accordingly. Whether or not you change formation, you may redistribute your dice icons on the pitch as desired. You may also change your tactic to a different one you prepared during the week. Cross out your previous selection on the Tactics Board and circle your new tactic.
Make substitutions. During halftime, you may make any number of substitutions, replacing players on the pitch with unused players from your squad. You have 3 total substitutions available per match. When you make a substitution (for any reason), mark 1 box in the SUBSTITUTIONS section of the pitch and add 1 to the FITNESS section of the Match Sheet. Substituted players cannot play for the rest of the match.
6. Play Second Half
The second half is played using the same rules as the first half. The key difference is that you may make substitutions during play. After any highlight concludes, you may make 1 or more substitutions. When making a substitution, you may also change your formation.
When the final highlight resolves in the second half, the second half and the match come to an end. The score is final at this point.
Match Events
The die roll that triggers a match event determines the target: a roll of 1 targets you, and a roll of 6 targets your opponent. Roll 1 die and consult the MATCH EVENTS table. Each event instructs you to select a player involved in the highlight (including support players), choosing from the targeted team's players. The following rules apply to selecting players:
- If no eligible players are available to select, cancel the event.
- A player with an injury cannot be selected for a red card (and vice versa).
- When selecting a player for a yellow card, you must choose a player who already has one, if able.
- If an event changes a player's rating or removes them, update their team's zone rating accordingly.
Match Events table. The table is printed as five event headings, each marked with the die face(s) that trigger it. The face mapping below is read from the pip icons printed beside each heading.
- Die 1 – Penalty. Select a player to receive a yellow card. If this event was triggered during an attacking highlight and the selected player is on the defending team, the attacking team is awarded a penalty (unless they already scored). If your opponent is awarded the penalty, their highest-rated player shoots. If you are awarded the penalty, select one of your players to shoot. Roll for the penalty shot using Golden Quality (Good Quality instead if the goalkeeper's rating exceeds the shooter's). Do not apply openings or pressures to penalty shots.
- Die 2 – Injury. Select a player to suffer a minor injury. If your player is injured, draw a minor injury icon in their condition space. If the opponent's player is injured, draw the icon next to that player on the pitch. A minor injury reduces the player's rating by half (rounded up). If the player already has a minor injury, fill in the icon to create a major injury. A player with a major injury has their rating reduced to 0. A player cannot be selected for injury if they already have a major injury.
- Die 3 – Serious foul. Select a player to receive a red card. If your player receives the red card, you may give momentum to your opponent in that zone to downgrade the red card to yellow (unless your opponent already has momentum there). If the opponent's player receives the red card, give yourself momentum in the zone and downgrade the red card to a yellow (unless you already have momentum there).
- Die 4 or 5 – Foul. Select a player to receive a yellow card. If that player already has a yellow card, they receive an automatic red card instead.
- Die 6 – Free kick. Select a player to receive a yellow card. If your player receives the yellow card, your opponent is awarded a free kick. Their highest-rated player shoots using Poor Quality. If the opponent's player receives the yellow card, you are awarded a free kick. Select one of your players to shoot using Poor Quality. Do not apply openings or pressures to free kick shots.
Red cards. When one of your players receives a red card, draw a red card icon in their condition space and erase them from the pitch. You will finish the match with one fewer player, and they will miss the next match. When the opponent's player receives a red card, draw a red card icon next to that player. Their rating is ignored for the rest of the match, and they no longer count as occupying the zone.
Yellow cards. When a player receives a yellow card, draw a yellow card icon next to that player on the pitch. Yellow cards last only for the current match and are not recorded in condition spaces.
Post-Match Wrap-Up
Once matchday ends, it's time to close out the week.
Check for Youth Improvement
For each youth who played, roll 1 die. For each wonderkid who played, roll 2 dice and keep the higher. If the result exceeds their current star rating, shade their leftmost empty star. If the result is equal to or lower than their rating, erase their youth/wonderkid icon as they have reached full potential and can no longer improve. When a youth's third star or a wonderkid's fifth star is shaded, they automatically reach full potential. Wonderkids gain a skill icon of your choice when they reach full potential.
Record Your Results
Using the League Sheet, record the match outcome in the FIXTURE LIST by writing your opponent's name, the result (win, draw, or loss), and the final score. Update your points total in the League Table, adding 3 points for a win, 1 point for a draw, and 0 points for a loss. Finally, add 1 to the CURRENT WEEK. You may now set aside the current Match Sheet.
The League Sheet is used to record your match results, as well as results from around the league.
Determine League Results
For each other fixture scheduled this week, roll 1 die to determine the result. On a roll of 1–2, the away team wins; on a 3, the match ends in a draw; on a 4–6, the home team wins.
Before finalizing the result, apply a modifier to the roll based on the difference in team reputation. The League Table indicates each team's reputation next to their name.
- If the home team is an underdog (1 reputation lower than their opponent), subtract 1 from the roll.
- If the home team is a major underdog (2+ reputation lower than their opponent), subtract 2 from the roll.
- If the home team is the favorite (1 reputation higher than their opponent), add 1 to the roll.
- If the home team is a strong favorite (2+ reputation higher than their opponent), add 2 to the roll.
Update the League Table based on each result, awarding points to the corresponding teams as you did for your own match.
End of Season (Game Over)
After completing 9 or 18 matches, the season comes to an end, which also marks the end of your game of Up the Table. Check your final league points total against those of each other club to determine your final standing in the league. Clubs are placed in order of league points from highest to lowest. The club with the most league points is the league champion. If one or more teams have the same number of points as you, use the head-to-head record as the tiebreaker. (Head-to-head means which team had the most points in matches played between the tied teams.) If you need to break a tie between other clubs, rank those teams in order of reputation. If reputation is also tied, resolve the tie with a die roll.
Playing Multiple Seasons
It is possible to play Up the Table over multiple seasons instead of ending the game when the season ends. While a single season of Up the Table is designed to be a satisfying experience, playing over multiple seasons allows you to experience the highs and lows of building a club from nothing over the long term. The following rules apply when playing this way.
Start of New Season
- Change Match Sheets: Print a new set of Match Sheets for the new season.
- Change League Sheet: Select a new League Sheet for the season. It should be different from the previous season's League Sheet.
- Set Objectives: Your board sets performance objectives based on the reputation of your squad. To determine your club's reputation, add up the star ratings of all your players and compare the total to the ranges below. Your reputation is based on this total star value.
- 1 Reputation [16–23]: The board expects you to barely avoid relegation. Finish at least 9th.
- 2 Reputation [24–39]: The board expects you to avoid a relegation fight. Finish at least 7th.
- 3 Reputation [40–55]: The board expects you to finish mid-table. Finish at least 5th.
- 4 Reputation [56–71]: The board expects you to qualify for continental competition. Finish at least 3rd.
- 5 Reputation [72–80]: The board expects you to bring home a championship. Win the league.
End of Season
- Check Objective: If you didn't meet your objective, you are sacked and your game comes to an end. If you met your objective, you may continue to the next season or choose to retire.
- Adjust Income: Set your income for the next season based on your final league position.
- If you won the league (1st), set your INCOME to 5.
- If you qualified for continental competition (2nd or 3rd), set your INCOME to 4.
- If you finished mid-table (4th or 5th), set your INCOME to 3.
- If you avoided a relegation fight (6th or 7th), set your INCOME to 2.
- If you barely avoided relegation (8th or 9th), set your INCOME to 1.
- Check for Decline: For each player in your squad, roll a die. If you roll a 1, reduce that player's rating by 1 to represent potential decline due to age, injuries, or other factors.
- Pay Player Wages: Pay 1 MONEY for each 2-star player on your squad, 2 MONEY for each 3- or 4-star player on your squad, and 3 MONEY for each 5-star player on your squad. You may subtract player wages from your INCOME track instead (to a minimum of 1). For any player you cannot, or choose not to, pay, erase their details from your squad. Each player who leaves in this way is replaced by a 1-star player. Enter a name and choose (circle) a position for each replacement.
- Pay Staff Wages: Pay MONEY for each staff member equal to twice their number of checkmarks. You may subtract staff wages from your INCOME track instead (to a minimum of 1). For any staff member you cannot, or choose not to, pay, erase all of their checkmarks.
- Send Players on Break: Reset your FITNESS and CHEMISTRY tracks to 1.
Transfer Window
The transfer window takes place after all END OF SEASON steps and before the start of the next season.
- Gain Summer Income: Add INCOME to your MONEY and write in your new balance.
- Select Summer Activities: Choose 1 summer activity from the list below. You may pay for additional activities at a cost of 1 MONEY per activity, up to a limit of 2 additional activities.
- Preseason Camp: Add 1 to your FITNESS or CHEMISTRY track.
- Scouting Mission: Resolve SCOUT once for any player in the TRANSFER MARKET.
- Youth Intake: Resolve YOUTH ACADEMY once. Roll 1 die. If the result is lower than your reputation, the youth player is a wonderkid instead.
- International Tour: Roll 1 die. Add the result to your MONEY.
- Preseason Match: Play 1 home match against an opponent of your choice. This match does not count for league results. Add MONEY equal to the opponent's reputation. If you draw, add 1 to your FITNESS or CHEMISTRY track. If you win, add both.
- Complete Summer Transfers: You may freely sell players from your squad and purchase new players from the TRANSFER MARKET as desired, and as your MONEY allows. (See Transfer Market for details on selling and buying players.)
Adjusting Difficulty
You can adjust the difficulty of the game via the number of stars you distribute among your squad at the start. Select a challenge level below, with 1 being the lowest difficulty and 5 being the highest:
- Challenge Level 1: 32 stars (half season), 16 stars (full season)
- Challenge Level 2: 16 stars (half season), 8 stars (full season)
- Challenge Level 3 (default): 8 stars (half season), 4 stars (full season)
- Challenge Level 4: 4 stars (half season), 2 stars (full season)
- Challenge Level 5: No stars. Good luck!
UTT Premiership: The storied UTT Premiership consists of the ten best clubs from around the country.
Manager's Training Course: Example of Play
Alright boss, it's matchday at home. Our club Payne Wanderers are hosting Blackford Town, and I'll talk you through this one so you can see exactly how a match unfolds.
First things first: pick a formation. Let's go with a 4-2-4. It's bold, aggressive, and built to put pressure on early. For this match, we'll skip selecting a tactic and focus on the core flow of play. The players are already placed on the pitch according to the formation.
Next, draw dice icons numbered 1 to 6. These show where your highlights can occur during the half. You're allowed to place 2 icons in a single focus zone, so let's make FC our focal point. Draw the 5 and 6, as we're clearly looking to score early.
You only have players in 1 midfield zone (MC), and you can't place dice icons in empty zones, so draw the 4 in MC to give yourself a transition option. To round things out, place the remaining 1, 2, 3 in the three defender zones.
Before the whistle blows, set your starting values. For this match, Payne Wanderers begins with 4 FITNESS and 2 CHEMISTRY.
Next, it's time to roll dice and place highlights.
- Roll 4 dice for your highlights and place them: 1 in DL; 3 in DR; 4 in MC; 6 in FC.
- Roll 4 dice for Blackford's highlights and place them: 2 in ML; 3 in ML; 5 in MR; 6 in DC.
The highlights are placed. The match is on, and the first half kicks off.
Because Payne Wanderers are the home team, you resolve the first highlight. Mark the first empty circle on the timer, corresponding to 10', to show when this moment takes place.
You can resolve your highlights in any order. Let's start in MC to see how a midfield battle plays out. Since this die is in midfield, it counts as a transition highlight.
Check your zone rating first. The star in your half of MC shows 6, so your base rating is 6. The training box here isn't checked, so there's no bonus this time. (If it were, each player would gain +1, pushing your zone rating up to 8.)
Now check Blackford's zone rating. Their star also shows 6.
Because Blackford's rating is less than double yours, they bring in support. Mark 1 OPPONENT FITNESS. Their highest-rated available player on the same side is Moreno (rating 3) from DC, raising their zone rating to 9.
You can respond by bringing in your own support. Spend 1 FITNESS to add Karim (rating 2) from FC, pushing your zone rating up to 8.
Comparing 8 to 9 gives you a -1 modifier. There's no momentum on either side, so it's a straight roll. You roll a 5, which becomes a 4 after the modifier. Success!
A successful transition highlight lets you shift one of your other dice. Slide the 3 from DR up to FR, keeping it on the same side of the pitch, and mark momentum in FR. (You could've chosen to shoot from midfield instead, but that's a lower-percentage option.)
Remove the resolved die from MC.
Blackford Town now resolves a highlight. Mark the next empty timer circle at 15'. Because Blackford is drawing, they prioritize scoring and choose their highlight in DC. Since this is one of your defender zones, it counts as an attacking highlight for them.
Your zone rating is 3. Blackford's rating is 5, so they bring in support again, marking their second and final OPPONENT FITNESS for the half. Gupta (rating 3) joins the play, raising their total to 8.
That's now more than double your rating, which would give you a -2 modifier, so let's not let that happen. Spend 2 FITNESS to bring in both Alvarez (rating 3) and Drakos (rating 3), increasing your rating up to 9 vs your opponent's 8.
With a rating higher than your opponent's, the modifier is +1. You roll a 1, which is a success for the opponent. Because the roll was a 1, a match event will trigger after the highlight resolves.
Since this is an attacking highlight, Blackford takes a shot.
The shot starts at AVERAGE quality. There's no momentum advantage. You have 1 more player than your opponent, which creates 1 pressure. The shooter is Moreno (rating 3), while your goalkeeper is rated 4, creating 1 additional pressure. The shot quality drops two steps down to POOR, meaning a 6 is required to score.
The roll is a 2! Your keeper reacts sharply and makes the save, keeping the match level.
Now resolve the triggered match event. Because the trigger roll was a 1, it targets your team. You roll again and get another 1. Penalty!
Choose one of your players involved in the highlight to receive a yellow card. Give it to Ballard, drawing the icon next to him on the pitch.
Because this happened during an attacking highlight and Blackford didn't score, they're awarded a penalty kick. Moreno (rating 3) steps up to take the kick. The penalty is taken at GOOD quality, requiring a 3–6 to score, since your keeper has the rating edge.
The roll is a 2, which is another save! Still level, and disaster narrowly avoided, the match rolls on.
Reference Sheet
The printed Reference Sheet repeats the Highlight Resolution Checklist, Available Skills, the openings and pressures used in Shot Resolution, and the Shot Chart. Those sections are transcribed above in full. Its icon key lists INCOME, FITNESS, CHEMISTRY, MOMENTUM, TRAINING, DICE ICONS, YELLOW CARD, RED CARD, MINOR INJURY, and MAJOR INJURY, which are referred to by name throughout this rulebook.