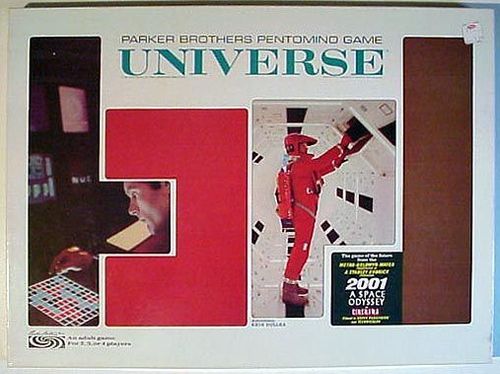
Universe
Universe Rulebook
Table of Contents
Table of Contents
Board
The board consists of a central 10x10 region and four additional regions arrayed along each side, in a rotationally symmetric fashion. The board is framed in plastic, with a raised border around the perimeter. This helps protect the board, and helps to align pieces that touch the edge.
The number of regions in use depends on the number of players:
- A four-player game uses the whole board.
- Three players use the central region plus any two outer regions.
- Two players use just the 10x10 region.
The board is empty of pieces at the start.
Pieces
Each player has a set of pentominoes. If you've played Tetris, you know what a tetromino is. A pentomino is five squares connected flush, side to side. There are 12 types, not counting rotations or reflections.
The pieces don't actually have numbers imprinted on them, but the document numbers them for the purpose of establishing an unambiguous syntax for move notation. Each piece shape has its own distinct number, 1 through 12. Pentomino 1 is the only piece that does not occupy different squares when rotated or flipped, so its location can be indicated with just one set of coordinates. All the other pieces use two sets of coordinates. The first set corresponds to the square indicated by 1 on the piece, and the second set of coordinates is the location of the square indicated by 2. See Move Notation below.
Each set is a distinct color: White, Yellow, Red, or Blue. (The two-player positions in the opening analysis use White versus Black.) Each player therefore has one piece of each of the 12 shapes.
The pieces are made of durable plastic and are fun to play with. The game includes several puzzles involving pentominoes.
Setup and Turn Order
The board is empty of pieces at the start. White moves first.
Playing a Move
Each move consists of placing one of your pieces on the board, aligned with the grid, on five previously vacant squares. Pieces remain where they are placed.
You may not "fence off" any region of 1-4 vacant squares with your move. The document's example (a diagram, not reproduced here) shows White's move 12-D3-C5 as legal and Black's move 1-B2 as illegal, because Black's piece fences off two regions of one square each.
Dead Zones
If a region of 6 to 9 vacant squares is fenced off, it becomes a "dead zone" where no one may play.
Ending the Game
If you have no legal move on your turn, you lose. The winner is the last player to make a move.
Move Notation
Moves are written as the piece number followed by the coordinates of its squares: the first set of coordinates is the square marked 1 on the piece, and the second set is the square marked 2. A piece that does not differ when rotated or flipped (piece 1) uses one set of coordinates only.
Examples from the document: 12-D3-C5 places piece 12 with its 1-square on D3 and its 2-square on C5. 1-B2 places piece 1 on B2.
Component Notes
The board is made of plastic with a raised border around the perimeter. The author notes that the border helps protect the board and helps to align pieces that touch the edge. The author's copy of the board was not quite true, so pieces could pop out at the edge when filling all 200 squares. The document's explanation for the 1-4 square fencing rule is that it speeds up the game and tends to leave more empty space, so play remains possible even if the board is a bit warped.
Strategy Notes
The Symmetric Strategy
Ironically, although the opening is the most difficult phase of the game to understand, it is possible to throw away the game on the first move of a two-player game. If the first move occupies either one or two of the four central squares, then in almost every case, the opponent can respond by making the rotationally symmetric move. The document calls this the "symmetric strategy." Once the central region is closed off, White cannot break symmetry, and Black will make the last move. There are a couple of exceptions to this. The question is how White can occupy one or two of the four central cells on the first move and yet not lose to the symmetric strategy. These moves might very well be losers, but Black will have to try another approach. Answer 1 (page 6) gives them.
If the board were 10x9 instead of 10x10, there would be just two central cells instead of four. White could make a first move that occupies precisely one of the two central cells. Black could respond with the symmetric strategy for as long as possible; if this strategy becomes impossible, Black makes the best possible sequence of moves. Even so, White is able to win the game. Answer 2 (page 6) explains how.
Opening Analysis
The move tree in the opening is quite dense, but each move drastically reduces the number of legal moves remaining for each player. For example, if White makes the initial move 12-D3-C5, Black's legal responses are reduced from 3960 to 2988, and White's choices go down from 3960 to 2632. As far as the first move is concerned, if you don't count symmetrically identical moves or moves that immediately lose, you need consider only 427. An exhaustive "brute force" search is not likely to get past 3 ply in the opening.
There are natural criteria for evaluating early moves. The asymmetric pieces 3, 4, 7, 12, and especially 6, can be placed on the board in lots of different ways, and are therefore more likely to be playable in the endgame. 12-D3-C5 is probably a bad first move; piece 12 should be saved for later. Piece 1 is a much better piece to "get rid of" early on: there are only 60 ways to play that piece on a blank board (as opposed to 568 ways for piece 6), and it is probably the most difficult piece for your opponent to try and fence off a region of that shape.
Reserve Moves
The most important goal to aim for is to fence off a move only you can make, and which your opponent cannot block. Such a region is usually 5 squares in size, but could also be a portion of a larger region (10 squares or more). Once you get this reserve move, if you can prevent your opponent from doing the same to you, a win is assured. Naturally, you'd want to keep that move in reserve until the end. A reasonable secondary objective in the opening is to reduce the opponent's responses as much as possible, while reducing your own future choices as little as possible.
Puzzles
Puzzle (page 5)
The document presents a puzzle to introduce tactics, with the regions labeled to help clarify the solution. The diagram is not reproduced here. The answer is on page 7.
Answers (page 6)
-
On a 10x10 board, if White plays 1.5-E5-D7 then Black cannot respond symmetrically, because that would fence off two regions of one square each. 1.10-D5-E7 is another exception.
-
Here's how White could defeat the symmetric strategy on a 10x9 board. After 1.6-E5-F7 2.6-F5-E3 3.7-H7-I4 4.7-C3-B6 5.8-C7-D9 6.8-H3-G1 7.4-E1-C2 8.4-F9-H8 9.2-D3-D7 we arrive at a position (diagram not reproduced).
Now Black cannot make the symmetric move, because that would fence off two regions of four squares each. The only other piece that might legally fit in the central region is piece 7, which has already been used. So, the central region is unplayable by either side. That leaves the two end regions. Black cannot place piece 2 in either region without illegally fencing off one to four squares. So, White can win from here by employing the symmetric strategy against Black.
The document notes a more elegant solution from Claude Chaunier, in which the symmetric strategy is stopped on the very last move: Black has no legal response at all, and the game is immediately over. The author invites readers to request that solution by email.
Endgame Example (page 7)
The document works through an endgame position (diagram not reproduced here) in which both players have used pieces 1 and 11, so no moves involving those pieces need be considered. Region A is in the range of 16-19 squares, so a maximum of 2 moves can be played there. There are 3 ways to move that would split region A into 2 dead zones, rendering further play there impossible. Region B is in the range of 11-14 squares, so only one move can fit there. Regions C and D are both 15 squares, which means dead zones cannot form there. There will be room for 3 moves in both C and D, unless the players have already played the required shape piece.
The first thing White should look for is a way to fence off a reserve move in the shape of piece 8 or piece 10, which Black alone has played. White might also seek to avoid giving Black the opportunity to fence off a region in the shape of piece 2 or 5 or whatever piece White is going to play this move. If the battle to reserve moves comes out equal, then affecting the parity of the remaining moves (odd or even) means you choose which side plays last. It might be possible to affect parity in each of regions A, C, and D.
There is a move in region A which fences off a reserve move for White: 1.7-B3-E4, which reserves 8-B4-D5. The only hope for Black now is to try to create a reserve move in region C or D. Black can do this by playing 2.7-B6-C9, which reserves 2-A6-A10, but after 3.12-I9-G10 Black is in parity trouble. There are precisely 6 moves remaining on the board, and it is Black's move. White cannot be stopped from moving last. Black could instead try 2.3-D9-B8 reserving 2-A10-E10, but then White has 3.4-G10-F8, which has the effect of reserving two more moves, one just for Black and one just for White. This leaves an even number of moves on the board, and both players have the same number of moves in reserve. Black has the move, and is therefore lost.
Does White have another winning move? Any other move in region A would allow Black to play 3-D9-B8 reserving 2-A10-E10, and White will not be able to catch up with Black in reserve moves. Parity doesn't matter if your opponent has more reserve moves than you do. White could play 1.4-B9-D10, which reserves 8-A8-B10, but Black can respond with 2.9-B2-C4, reserving 4-A1-B3. Now, strangely enough, there is no good move for White in region D. For example, after 3.12-I9-G10 there are 3 places on the board where only piece 6 will fit, but since each player has only one piece of each shape, these 3 places correspond to only 2 moves, so now Black can play 4.7-G1-J2 and White is facing a parity loss. If White tries 1.9-A10-C9 then 2.7-E3-B4 wins for Black. Or if 1.3-B10-D9 2.7-B6-C9 3.7-B3-E4 4.5-I7-H9 and only one move remains playable in region D, so White loses. Or 1.12-B8-A10 2.9-B2-C4, and again there is no good move for White.