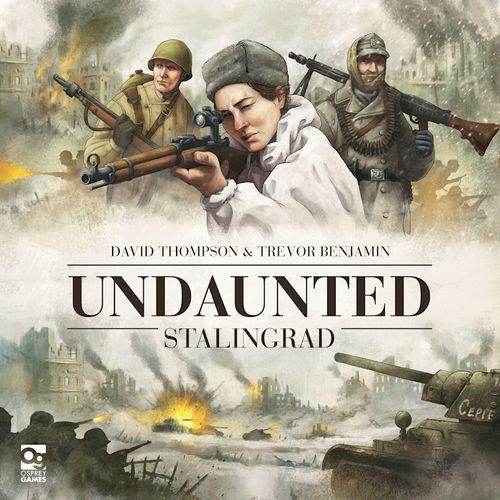
Undaunted: Stalingrad
Undaunted: Stalingrad Rulebook
Table of Contents
Table of Contents
Overview
Undaunted: Stalingrad is a narrative campaign game intended to be played by the same two players through a series of up to fifteen scenarios in sequence. Some games see you vying for control over key areas of Stalingrad, which you ultimately need to secure for your campaign to end in success. In others, you pursue tactical objectives that help you in future missions — or hinder your opponent.
At the end of each scenario, your deck changes as you suffer casualties and call in reserves. At the same time, some soldiers improve their combat abilities as they learn from their experiences or secure important equipment. In this way, each game sees your deck altered for the duration of the campaign.
Each player has their own scenario book, in which they track the progress of the campaign, receive unique mission briefings, and are given the objectives and special rules for each individual scenario. Do not read ahead in your scenario book, and never read your opponent's scenario book.
Three things are tracked between games through their placement in the box:
- The state of the campaign is tracked through a game state code, which you record in your scenario book.
- The state of your deck is tracked through its placement in the tray, with separate locations for cards available to you, cards you may unlock later, and cards permanently removed.
- The state of the city is tracked through the placement of tiles in the tray, with separate locations for tiles in use and those not in play.
At the end of the campaign, you can reset the game (see Resetting the Game) and replay the entire campaign in full.
If you have never played Undaunted before
Read the Components and Rules for Your First Game sections, then play a practice game: play the first scenario as normal, but skip the Campaign Step at the end. When you feel ready to start the campaign, play the first scenario again, this time performing the Campaign Step after completing the game.
Differences from previous Undaunted games
If you have played Undaunted before, be aware of these differences:
- Scale: Undaunted: Stalingrad uses the same scale as Undaunted: Normandy — your deck represents a platoon, each combat counter represents a small unit of soldiers, and each card represents an individual soldier or officer.
- Control: You can take control of a tile with an enemy combat counter if your opponent does not already control it.
- Inspire: When you take this action, you re-use an ability of a card in your play area instead of returning it to your hand.
- Spawning: There are no spawn markers. If you play a combat card that does not correspond to a unit on the board, it spawns on the same tile as one of your Riflemen. If you spawn a unit with a squad, it must spawn with the Riflemen of the same squad. The spawning unit can then immediately take an action.
- Beyond All Hope: The Beyond All Hope rule from previous games does not apply. You can end a scenario by achieving your objective, in a Full Rout (routing all your opponent's Riflemen), or in a Withdrawal (choosing to end a scenario in defeat).
- Routing: Combat counters are not removed from the board during the game. If a unit suffers a casualty and there are no cards to remove, the unit is routed and you place a routed marker on its counter. When a unit is routed, or a routed unit would suffer a casualty, your opponent may move that unit to an adjacent tile you have scouted. When you Bolster a routed unit, you immediately remove its routed marker.
Components
Cards
Each player has a removable card tray specific to their faction, split into several areas:
- Available pool: represents your deck in its current state. Gained cards are added here; lost cards are removed. At the start of the campaign, all your starting cards are in your available pool.
- Removed pool: cards here will not become available again for the rest of the campaign. Starts empty.
- Locked, upgrade, and reserve decks: cards here may be added to your available pool as the campaign progresses.
You can look at the cards in your available and removed pools whenever you like. Never look at the cards in your locked, upgrade, or reserve decks unless instructed. Never look at the cards in your opponent's card tray.
Combat cards represent units and vehicles under your command; each is associated with a combat counter. A card shows: Title (unit type), Initiative (value when bidding for initiative), Squad (A, B, or C, if any), Actions (possible effects when played), Name (flavour only), and a Card designation. The first letter of the designation indicates the faction (Soviet or German); the second indicates whether it is from the starting (S), locked (L), upgrade (U), or reserve (R) deck. The designation has no in-scenario effect — it is used to track campaign elements in the Campaign Step and to refer to individual cards in your scenario book.
Command cards represent the non-commissioned officers under your command and assets not represented on the board. They are distinguished from combat cards by the chevron underneath their initiative value and the faction symbols either side of their actions. Command cards are not associated with any combat counter.
Fog of War cards represent breakdowns in communication caused by the chaos of battle. They cannot be used for anything except to bid for initiative, and the only way to remove them from your deck is to take a Recon action (which requires a Scout).
Combat card classes: every combat card has a class — regular, reserve, or upgraded. All your starting combat cards are regular. During the Campaign Step you add reserve cards and upgraded cards to your available pool.
- Reserve cards replace lost Riflemen, Scouts, and Machine Gunners. They cannot be upgraded, but they cannot be lost as permanent casualties either. They are weaker than their regular counterparts — a lower initiative value, weaker actions, or actions not available at all (a card showing an unavailable action cannot be used to take that action). A reserve card represents a different soldier from the one it replaces.
- Upgraded cards are stronger than their regular counterparts — a higher initiative value, stronger actions, or new actions not available to other cards in the unit. Upgraded cards cannot be upgraded further but can be lost as casualties. You cannot use the Inspire action to take an upgraded action. An upgraded card represents the same soldier as the one it replaces.
Tiles
Players share a tile tray with two areas:
- Current city pool (the larger well): tiles used when setting up scenarios as the campaign progresses.
- Transformed city pool: as the city changes, tiles are removed from the current city pool and replaced with tiles from here, permanently changing the tiles used for the rest of the campaign.
Board tiles represent the city of Stalingrad. Each scenario specifies which tiles to use and where to place them. A tile shows: Tile designation (unique code used during setup) and Cover bonus (added to a unit's defence when attacked on this tile). If a tile is a building, it also has: Building cover bonus (a higher cover bonus used when the attacker is on a different tile — the normal cover bonus is used if the attacker is on the same tile), Building defence (the structural defence value of the tile itself), an Impassable symbol (vehicles cannot enter these tiles), and sometimes a Name (flavour only).
Tokens
Combat counters represent units on the board, controlled using your combat cards. A counter shows: Title (unit type), Squad (if any), Regular defence (the value your opponent must roll to hit it with a combat action), and a Ready/suppressed status. If a counter is face down it is suppressed — the soldier cannot take other actions until the counter is flipped to its ready side.
Control markers show which tiles you have scouted and which you control. Scouted: your units can move onto this tile. Controlled: your units can move onto this tile, and you control any objective points on it.
Routed markers indicate that a unit has been routed. Routed units are out of action until they are Bolstered.
Objective markers indicate the strategic value of a tile. You control an objective if you have a control marker (control side up) on the same tile.
The initiative marker indicates which player has the initiative this round and takes their turn first (Soviet side / German side).
Rules for Your First Game
Scenario 1 setup
- Choose a faction: choose a faction and take that faction's scenario book. You play as that faction for the rest of the campaign. Never look at your opponent's scenario book.
- Read the mission briefing: read briefing 1 in your scenario book.
- Find the scenario overview: find scenario #011 in your scenario book. It gives your objective, starting initiative, and starting deck and supply.
- Place tiles: find scenario #011 in the map book. Look in the current city pool for the tiles shown and place them as indicated. Do not use any tiles from the transformed city pool. Leave unused tiles in the box.
- Place tokens: place the combat counters, objective markers, and control markers as indicated in the map book. Return any unused objective markers to the box.
- Take initiative: give the initiative marker to the Soviet player.
- Assemble your supply: take from your available pool all the cards listed in the Supply section of the scenario overview (for this scenario, all the cards in your available pool). Sort your supply by title. The content of your supply is open information.
- Assemble your deck: take from your supply all the cards listed in the Starting Deck section of the scenario overview. Shuffle them and place the deck face down.
Scenario #011 (9 January Square, 27 September 1942) objective for both players: control 4 objective points. Starting initiative: Soviets. The winner takes control of 9 January Square.
How to play
Play takes the form of a series of rounds. Each round has three phases, after which the next round begins, continuing until a player wins:
- Draw cards
- Determine initiative
- Player turns
Draw cards: both players draw four cards from their deck to form a hand. Whenever you need to draw but your deck is empty, shuffle your discard pile into a deck. Never shuffle cards in your play area into a deck.
Determine initiative: both players secretly select one card from their hand and reveal it simultaneously. The player who selected the higher initiative takes the initiative marker, flipping it to show their faction's icon; they perform actions first this round. In a tie, the player who already has the initiative marker keeps it. Both players discard their chosen card.
Player turns: the player with the initiative marker plays cards from their hand, one at a time, into a play area in front of them. When they have no more cards they can or wish to play, their turn ends — all cards left in their hand and all cards in their play area move into their discard pile. The player without the initiative then takes their turn in the same way. You cannot save cards in your hand for future rounds.
Whenever you play a card, use it to do one of the following:
- Card action: choose one of the actions listed on the card and perform it in full.
- Ready: if the unit associated with the card is suppressed, flip its counter to its ready side.
- Hunker down: return the card to your supply.
Fog of War: you cannot play Fog of War cards during your turn — you can only select one when determining initiative. The only way to remove one from your deck is a Recon action. Usually a Fog of War card stays in your hand until the end of your turn, when it is discarded as normal.
Suppressed: if a combat counter is face down, that unit is suppressed and cannot perform card actions. When you play a combat card associated with a suppressed unit, you cannot take a card action; you must instead ready it (flipping the counter) or hunker down (returning the card to your supply).
Placing combat counters: when you take a card action with a combat card whose counter is not on the board, immediately place that counter. If the card has a squad designation, place it on the same tile as the Riflemen counter from the matching squad; otherwise place it on the same tile as any of your Riflemen counters. You can place a counter on the same tile as a routed or suppressed Riflemen counter. Then perform the action as normal. Do not place a combat counter when you hunker down.
Hunker down: return that card to your supply. It is then no longer part of your deck until you take a Bolster action to add it again. Be careful hunkering down with a card that has the Bolster action — you might not be able to add it back later. You cannot hunker down with Fog of War cards.
Scenario 1 actions
When an action's name is followed by X, it has a numerical value (e.g., Move 1). When followed by X A, it also may have a squad — A, B, or C (e.g., Bolster 3 or Bolster 2 A).
Movement actions:
- Move X: move the unit's counter up to X tiles. Each tile you move to or through must be scouted or controlled by your side.
- Scout X: move the unit's counter up to X tiles. If any tile you move to or through lacks one of your control markers, place a control marker there with its scouted side up. For each control marker placed, take a Fog of War card from your supply and place it in your discard pile (if there aren't enough, take as many as available).
Support actions:
- Bolster X A: take up to X cards from your supply and add them to your discard pile (if a squad is specified, only from that squad). If any chosen units were routed, immediately remove their routed marker.
- Command X: draw up to X cards from your deck and add them to your hand; you can play them this turn. If your deck runs out, shuffle your discard pile into a deck and continue drawing. Do not shuffle cards in your play area into your deck.
- Conceal: take a Fog of War card from your opponent's supply and place it in their discard pile. If there are none, this has no effect.
- Control: take control of the tile the unit's counter is on by flipping your control marker to its controlled side. If your opponent controls that tile, flip their control marker back to its scouted side. If your opponent controls that tile and has an unrouted unit there, you cannot take control.
- Inspire X A: choose up to X cards in your play area and take one non-upgraded action from each. If the card specifies a squad, choose only cards from that squad. (None of the scenario 1 card actions are upgraded.)
- Recon: choose a Fog of War card from your hand and set it aside (unused for the rest of the scenario), then draw a card from your deck. If your deck is empty, shuffle your discard pile and continue. If you have no Fog of War cards in your hand, you cannot take this action. At the end of the scenario, all set-aside Fog of War cards return to your available pool.
Combat actions (Attack X / Suppress X)
When you perform either combat action, take the following steps:
- Choose target: choose any enemy combat counter on the board.
- Determine total defence value: the sum of the counter's base defence (printed on the counter), the tile's cover bonus (printed on the tile), and the range bonus (the number of tiles away the defender is from the attacker, not counting the attacker's tile).
- Roll attack dice: roll the number of dice indicated by the value of the combat action. If any die shows a number equal to or greater than the total defence value, the attack is successful (how many dice succeed doesn't matter). A die showing 0 is always successful, no matter how high the total defence value.
- Determine casualties: if the attack is successful you inflict one casualty on the target. That unit's owner must find a card matching the attacked counter and place it in their casualty pile, searching in this order: (1) play area, (2) hand, (3) discard pile, (4) deck (then shuffle the deck). (5) If they have no card of that unit in their deck, the unit is routed — add a routed marker; the attacker may then move the unit to an adjacent tile the opponent controls or has scouted (if you move a suppressed routed unit, also ready it).
You can only inflict one casualty per attack, no matter how many dice succeed. If more than one matching card is in a searched area, the defender chooses which to place in their casualty pile. You may check your own casualty pile but not your opponent's; the number of cards in your casualty pile is open information.
Building cover bonus: some tiles have a building cover bonus as well as a normal cover bonus. If a counter on such a tile is attacked by another counter on the same tile, use the normal cover bonus; if the attacker is not on the same tile, use the higher building cover bonus instead.
Suppress: a Suppress action inflicts no casualties. Instead, flip the attacked counter to its suppressed side. If it is already suppressed, the attack has no effect.
Game end (Scenario 1)
The game continues until one of three things happens: a player achieves their primary objective, a player inflicts a Full Rout, or a player Withdraws. When the game ends, complete the Campaign Step before packing away any components (skip this for a practice game).
- Primary objectives: each scenario overview lists both players' primary objectives. In scenario 1, both players aim to control 4 objective points. If you control a tile, you control all the objective points on it; controlling the listed number wins the game immediately.
- Full Rout: unless the scenario says otherwise, if at any time all your opponent's Riflemen are routed, you have inflicted a Full Rout and win immediately.
- Withdraw: at the start of your turn, before playing any cards, you may choose to Withdraw; your opponent wins immediately. This is a way to end a scenario you have no chance of winning, worth considering only if the situation is genuinely hopeless and you want to avoid too many permanent casualties.
The Campaign Step
After every game, before packing away any components or continuing, both players resolve the Campaign Step in full, always in this order:
1. Victory phase
Track the campaign in your Campaign Record (page 2 of your scenario book). Record (a) who won the game, (b) what areas of the city you have claimed, and (c) your new game state.
Write the victor's faction in the row for the scenario just played. If the scenario overview specifies an area, record that the victorious faction now controls that area.
Your game state code includes a number (the campaign game you are on) and a letter. At the start of the campaign you are in game state 1a. At the bottom of your scenario overview, a table tells you which game state you enter next based on who won. Write that state on the next line of your Campaign Record. You and your opponent should always be in the same game state — your entire Campaign Records should look the same. (Example: current state 6b, German player won → new state 7d.)
2. Casualty phase
Count the cards in your casualty pile (cards set aside, such as Fog of War from Recon, should not be there). Shuffle your casualty pile and draw cards according to this table:
| Casualties | Cards to draw |
|---|---|
| 0 | 0 |
| 1–4 | 1 |
| 5–9 | 2 |
| 10+ | 3 |
If you draw a reserve card, return it to your supply and draw another to replace it. If you would draw more cards than there are non-reserve cards in your casualty pile, draw as many as possible. These are your permanent casualties.
For every Rifleman, Scout, and Machine Gunner card in your permanent casualties, take a reserve card to replace it (see below). No other permanent casualties are replaced — throughout the campaign you always have five Rifleman, three Scout, and three Machine Gunner cards in each squad, whereas other units dwindle and may be lost entirely. Then place all your permanent casualties in your removed pool, unavailable for the rest of the campaign.
Reserves: to replace a card with a reserve card, find the card designation of the soldier you are replacing and find the card in the reserve deck with the same three-digit code, then add it to your available pool. (For example, S-S-009 would be replaced with S-R-009.)
3. Upgrade phase
Shuffle all the cards in your play area, hand, deck, discard pile, and casualty pile into a face-down deck. Draw two cards. If you draw (a) an upgrade card, (b) a reserve card, (c) a command card, or (d) a Fog of War card, return it to your supply and draw another to replace it — only regular combat cards are eligible to be upgraded. If there are fewer than two eligible cards, draw as many as possible. These cards will be upgraded.
To upgrade a card, find its card designation, find the card in the upgrade deck with the same three-digit code, add that card to your available pool, then place the upgraded card in your removed pool. (For example, S-S-009 would be replaced with S-U-009.)
Once the upgrade phase is complete, the Campaign Step is complete.
Campaign Rules
The transforming city of Stalingrad
The city is tracked through the tiles present in the current city pool. There are always exactly 72 tiles in this pool. As the city is transformed, tiles are swapped one for one between the current city pool and the transformed city pool. The state of the city is only tracked between games by placement in the box, so place tiles in the correct location when you pack up.
Fortification: in some scenario overviews you are instructed to fortify a tile. Find the tile designation, then find the tile in the transformed city pool with the same three-digit code but the next letter of the alphabet (e.g., replace 503-A with 503-B). Replace the original with the new tile and place the original in the transformed city pool (not used again for the rest of the campaign). Fortified tiles have a fortification cover bonus: if the target of an attack controls the tile with the fortification, it uses the fortification cover bonus; otherwise it uses the normal cover bonus.
Destruction: every tile representing a major structure has a structural defence value and is considered a building. Buildings can be targeted with Antitank and Demo actions and must be targeted by Bomb actions that target that tile. If the attack hits, the building is damaged. Tiles without a structural defence value are not buildings — they cannot be targeted by Antitank or Demo and are unaffected by Bomb. When a building is damaged, find the tile designation and find the tile in the transformed city pool with the same three-digit code but the next letter of the alphabet (e.g., replace 109-A with 109-B). Replace the original with the new tile and place the original in the transformed city pool. A damaged building may eventually become destroyed. Destroyed buildings lose their building cover bonus, are no longer impassable for vehicles, have no structural defence value, and cannot be damaged further.
Campaign setup (scenario 2 onwards)
- Confirm the game state: always confirm that you and your opponent have the same game state code. The number corresponds to the campaign game you are playing.
- Read the mission briefing: on page 3 of your scenario book, find the briefing code corresponding to your game state and read it. Briefings may instruct you to unlock or replace cards.
- Unlocking a card: find the card with the correct designation in the locked deck and add it to your available pool. Replacing a card works the same, except you move the card being replaced to your removed pool.
- Find the scenario overview: your briefing tells you which scenario to play. The overview may tell you to unlock cards, fortify tiles, apply setup changes, note special rules and secret intel (for your eyes only — do not tell your opponent), point to reference sections, and give your objectives.
- Place tiles: find the scenario in the map book. Take the tiles shown from the current city pool and place them as indicated. Do not use any tiles from the transformed city pool. Unused tiles remain in the box.
- Place tokens: place combat counters, control markers, and any other tokens as indicated in the map book.
- Take initiative: give the initiative marker to the faction indicated in the scenario book.
Baseline deck: in most scenarios your starting deck is your baseline deck (or your baseline deck plus additional cards): 1 Platoon Sergeant, 1 Squad Leader A, 1 Squad Leader B, 1 Rifleman A, 1 Rifleman B, 1 Scout A, 1 Scout B, 2 Fog of War.
New components
Mines are placed on the edge separating exactly two tiles, so that one part of the marker touches each tile. They are placed through the Mine action or during setup. Each edge can have only one mine. When a non-vehicle unit would move across an edge with an enemy antipersonnel mine, immediately resolve an Attack 1 against it (no range or cover bonus). If it suffers a casualty, its movement ends before passing the mine, its action ends, and the mine is set aside for the rest of the scenario; otherwise its movement continues and the mine stays. When a vehicle would move across an edge with an enemy antitank mine, resolve a Demo 1 instead, otherwise as above. Do not resolve an Attack or Demo if a unit moves over a mine due to a Flame action or being routed. A mine's faction is shown by its colour (you are only affected by your opponent's mines). Most mines are associated with the Engineer of a particular squad; each Engineer can place up to four mines during a scenario. Mines removed after inflicting a casualty cannot be placed again in the same scenario. The antipersonnel side triggers when crossed by a non-vehicle unit; the antitank side triggers when crossed by a vehicle.
Overwatch markers are placed through the Overwatch action. Each is associated (through faction and squad) with a Machine Gunner unit; each Machine Gunner can have only one overwatch marker on the board at a time. If the associated Machine Gunner moves, suffers a casualty, or is suppressed, remove its overwatch marker (it can be placed again later). When a non-vehicle unit taking a movement action would move onto a tile with an enemy overwatch marker, that Machine Gunner immediately takes a Suppress 3 against it; if the unit is suppressed, its action ends immediately. Do not resolve this if the unit moves onto the tile due to a Flame action or being routed.
Tunnel markers: for movement purposes, all tiles with a tunnel marker are considered adjacent to one another. Vehicles cannot move through tunnels, and you cannot move your opponent's combat counter through tunnels (such as when routed or via the Flame action). Tunnels have a structural defence value of 7; they can be targeted by Antitank and Demo actions and are always targeted by Bomb actions that target their tile. If a tunnel is hit, it is removed from the game and can no longer be used for the rest of the campaign.
Smoke markers are placed through the Smoke action. Each is associated (through faction and squad) with an Engineer unit; each Engineer can place up to two smoke markers during a scenario. The total defence value of any unit on the same tile as a smoke marker is increased by 2 (in addition to any cover or range bonus); this bonus is not applied against mines or Demo actions. Each tile can have only one smoke marker. Smoke markers are only removed at the end of the scenario.
Escape markers are placed on tiles during setup for some scenarios and are referred to in players' primary objectives.
Mission markers are placed on tiles during setup for some scenarios and are referred to in players' primary objectives.
Mission point markers are placed near the board during setup for some scenarios. The scenario specifies how they are gained or placed. Each marker has a value of 1 mission point.
Vehicles function like normal units, with exceptions: they do not have a regular defence value and cannot be targeted by most attacks — instead they have an armoured defence value and can only be targeted by Antitank and Demo actions. Vehicles cannot be suppressed and cannot enter tiles showing the impassable icon. When you take a card action with a vehicle combat card whose vehicle is not on the board, place it on the same tile as any of your Riflemen counters that is not on an impassable tile, then perform the action (if all your Riflemen are on impassable tiles, you cannot take that action).
Campaign actions
Movement actions:
- Move X: move the unit's counter up to X tiles (each tile scouted or controlled by your side; a vehicle cannot move to or through an impassable tile).
- Guide X C: move any of your combat counters up to X tiles (from the specified squad if given). The destination must be scouted or controlled by your side. You cannot move a routed or suppressed counter; a vehicle cannot enter an impassable tile; you cannot move an Antitank Gun unit.
- Scout X: move the unit's counter up to X tiles; place a scouted control marker on any tile you don't already control, taking a Fog of War card from your supply into your discard pile for each marker placed (as many as available if not enough).
- Stalk X: move the unit's counter up to X tiles. The destination does not need to be scouted or controlled by your side.
Support actions:
- Antiair X: your opponent must remove X Bomber cards from the game (into their removed pool), searching hand, then discard pile, then deck (shuffling after). If they have no Bomber cards to remove, you may immediately return the card you played to your supply.
- Assault: take a movement action listed on the card, then you may take a combat action listed on the card.
- Bolster X A: take up to X cards from your supply and add them to your discard pile (from the specified squad if given). If any bolstered units were routed, immediately remove their routed marker.
- Command X: draw up to X cards from your deck and add them to your hand; play them this turn (shuffle discard into deck if needed; never shuffle your play area).
- Conceal: take a Fog of War card from your opponent's supply into their discard pile (no effect if there are none).
- Control: take control of the tile the unit's counter is on (flip your control marker to controlled). If your opponent controls it, flip their marker to scouted; but if they control it and have an unrouted unit there, you cannot take control.
- Inspire X A: choose up to X cards in your play area and take one non-upgraded action from each. You may not take multiple actions from the same card. If a squad is specified, choose only cards from that squad.
- Explore X: take a Recon action, then you may take a Scout X action.
- Force X: choose up to X cards in your play area and take one action from each; unlike Inspire, you may take upgraded actions. Then, for each chosen card, suppress the matching combat counter.
Combat actions
The combat actions are: Antitank, Area Suppress, Attack, Bomb, Demo, Flame, Grenade, Suppress. When you perform any of them, take the following steps:
1. Choose target:
- Attack, Flame, Suppress: choose any non-vehicle combat counter on the board.
- Antitank, Demo: choose any building, tunnel, or vehicle combat counter.
- Bomb: choose any tile; all buildings, tunnels, and non-vehicle combat counters on it are targeted (including your own). Perform a separate attack against each, in any order.
- Area Suppress, Grenade: choose any tile; all enemy non-vehicle combat counters on it are targeted. Perform a separate attack against each, in any order.
Some actions include X ≤R — the target must also be within R tiles of the attacker (e.g., Attack 2 ≤0 targets a counter on the same tile). Some include X ≥R — the target must be at least R tiles away.
2. Determine total defence value: the sum of base defence (printed on the counter), cover bonus (printed on the tile), and range bonus (tiles away, not counting the attacker's tile). No cover bonus is granted for the Demo action; no range bonus is granted for the Bomb action. For a tunnel or building, the total defence value is the printed defence value plus the range bonus — do not add a cover bonus.
- Building cover bonus: if a counter on a building tile is attacked from the same tile, use the normal cover bonus; if the attacker is not on the same tile, use the higher building cover bonus.
- Fortification cover bonus: if the target of a combat action is on a tile it controls, use the higher fortification cover bonus; otherwise use the normal cover bonus.
- Which attack value: the Antitank, Bomb, and Demo actions are followed by multiple values. When attacking a non-vehicle combat counter use the "unit" value; when attacking a vehicle use the "vehicle" value; when attacking a building or tunnel use the "building" value. (For example, a Demo 1/4 action rolls 1 die against a vehicle and 4 dice against a building.)
3. Roll attack dice: roll the number of dice indicated by the value of the combat action. If any die shows a number equal to or greater than the total defence value, the attack is successful (how many succeed doesn't matter). A die showing 0 is always successful.
4. Determine results:
- Unit: if successful, you inflict a casualty. The owner finds a matching card and places it in their casualty pile, searching in order: play area, hand, discard pile, deck (then shuffle). If they have no card of that unit in their deck, the unit is routed — add a routed marker; the attacker may then move it to an adjacent tile the opponent controls or has scouted (readying it if it was a suppressed routed unit). You inflict only one casualty per attack; the defender chooses among multiple matching cards in a searched area.
- Building: if successful, you have damaged the building (see Destruction).
- Tunnel: if successful, you have destroyed the tunnel — remove the tunnel marker.
If the attack was a Suppress or Area Suppress, no casualties are inflicted; instead flip the attacked counter to its suppressed side (no effect if already suppressed). If the attack was a Flame, in addition to inflicting a casualty the attacker may move the target into an adjacent tile the target has scouted (readying it if suppressed); this movement does not trigger mines or overwatch, and you may only move a counter once even if the unit was routed in the same action.
Combat action summary: Antitank targets a building, tunnel, or vehicle counter. Area Suppress makes a separate Suppress attack against each enemy non-vehicle counter on a chosen tile. Bomb makes a separate attack against every building, tunnel, and non-vehicle counter on a chosen tile. Demo targets a building, tunnel, or vehicle counter and ignores cover bonuses. Flame lets you move a hit target one space onto a tile scouted or controlled by the defender. Grenade makes a separate attack against every enemy non-vehicle counter on a chosen tile. Icons: ≥X is a minimum range; ≤X is a maximum range.
Game end (campaign)
The game continues until a player achieves their primary objective, inflicts a Full Rout, or Withdraws. Complete the Campaign Step before packing away. Each scenario overview lists the primary objectives for both players; possible objectives include:
- Control objective points: if you control a tile, you control all objective points on it. Controlling the listed number wins immediately.
- Rout: rout the specified enemy combat counters (specific counters or a number of them). If you need to rout multiple units, they must all be routed when you claim victory; a unit that removes its routed marker (via Bolster or Support) no longer counts.
- Gain mission points: the scenario tells you how to gain them and how many you need.
- Control mission points: the scenario specifies how mission points are placed on tiles and how many you must control; the total mission points on tiles you control must equal or exceed the required total.
- Occupy tiles: occupy the indicated tiles (with mission or escape markers, or both) with the required units, all present at the same time. Routed units do not count.
Full Rout: unless the scenario says otherwise, if at any time all your opponent's Riflemen are routed you win immediately. Withdraw: at the start of your turn, before playing any cards, you may choose to Withdraw; your opponent wins immediately.
Campaign end
Over the campaign you vie for control of different areas of Stalingrad, tracking progress in your Campaign Record. If one side dominates the city, they claim the ultimate victory; if the two sides are evenly matched, the campaign is settled in an epic finale. If you reach a game state with a code that starts with END, the campaign has concluded — skip the rest of the Campaign Step and go to page 3 of your scenario book for the final briefing.
Resetting the game: place all tiles with a designation ending in 'A' in the current city pool, and all tiles ending in 'B' or 'C' in the transformed city pool (72 tiles in the current pool, 57 in the transformed pool). Sort all cards by card designation — the second letter determines the starting (S), locked (L), upgrade (U), or reserve (R) deck. Sort each deck in ascending numerical order (some numbers will be missing); the starting deck contains cards X-S-001 to X-S-035. Print a new Campaign Record for both players for your next campaign (available at the Osprey Games gaming resources page).
Integrated squads
During the campaign you may be instructed to integrate two squads (your scenario book tells you how). Integrating squads lets you bolster a squad that has suffered many permanent casualties by replacing reserve cards with regular and upgraded cards; the newly integrated squad has the standard five Rifleman, three Scout, and three Machine Gunner cards. Two integrated squads count as the same squad when setting up and during the scenario, including for actions referencing specific squads such as Bolster or Inspire (e.g., if squads X and Y were integrated, you could use Bolster X to add a squad Y card to your discard pile). The integrated squad has a single integrated combat counter showing the designation of both squads. If a Rifleman, Scout, or Machine Gunner of the integrated squad becomes a permanent casualty, you gain a reserve card to replace it — but instead of the normal procedure, you find and choose a card in the reserve deck of the same unit belonging to either squad and add it to your available pool.