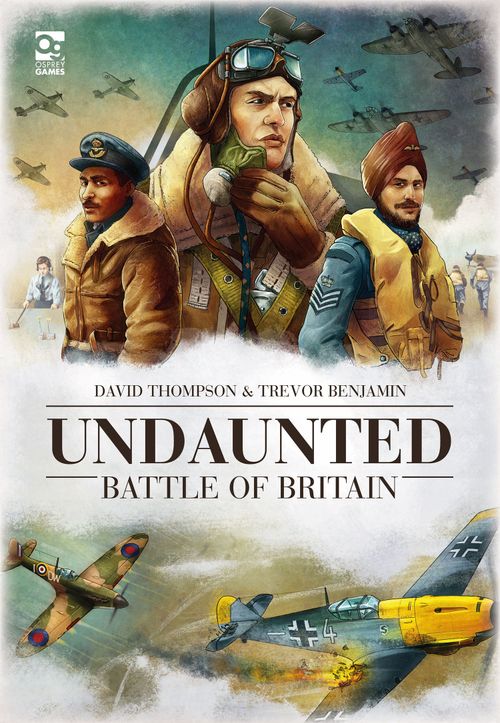
Undaunted: Battle of Britain
Undaunted: Battle of Britain Rulebook
Table of Contents
Table of Contents
If You've Played Undaunted Before
If you have played Undaunted before, you should still read this rulebook. Here are some differences to be aware of before you start:
Terminology
Sections are the equivalent of squads in other Undaunted games, though some differences apply. Communications cards are the equivalent of command cards.
Scale
Each combat counter represents an aircraft and its crew. Fighter planes might have a single pilot, whereas bombers are usually crewed by teams of pilots, co-pilots, gunners, and other specialists.
Tiles
The board for each scenario is built from larger tiles, each made up of smaller hexes.
Facing Direction
Aircraft and ships always face the centre of one edge of the hex they are in. This affects movement and combat.
Movement
Every time you play a combat card, you move that aircraft's combat counter and perform one other action. This simulates the continual movement of air combat.
Dice
Unlike other Undaunted games, a die showing a 10 is not an automatic success. This means some combat actions have no chance of success.
Hunker Down
You cannot remove combat cards from your deck using a Hunker Down action. You may remove communications cards using the Go Dark action.
Communications
When you play Section Comms cards, if aircraft in the corresponding section aren't close to each other, you add useless Discord cards into your deck. This replaces the Fog of War system used in other Undaunted games.
Components
This section is intended as reference. To start playing straight away, go to the How to Play section and refer to this section as needed.
The game includes: 51 RAF cards, 11 RAF combat counters, 65 Luftwaffe combat cards, 15 Luftwaffe combat counters, 4 Luftwaffe decoy combat counters, 31 board tiles, 7 structure markers, 6 ship markers, 4 anti-aircraft artillery markers, 6 cloud markers, 4 barrage balloon markers, 4 dice, and an initiative marker.
Cards
Cards in your deck represent pilots and aircraft in the air, support staff on the ground, other assets at your disposal, or the chaos and confusion of battle. You will begin the game with some cards in your deck and others in your personal supply, as specified by the scenario. Playing combat cards from your deck will let you seize the initiative, fly your aircraft, destroy ground targets, and fire upon the enemy. Communications cards, such as Section Comms, will let you bolster your forces by adding cards from your supply to your deck – but with every hit you take from enemy fire, you must permanently remove a card from your deck.
Each side has its own card back: an RAF card back and a Luftwaffe card back.
Combat Cards
Combat cards represent pilots and aircraft under your command. Each is associated with a combat counter.
- Title: the type of aircraft.
- Initiative: the value of the card when used to bid for initiative.
- Section: the section the aircraft belongs to.
- Rank designation: the star indicates that an aircraft is an ace. Non-ace aircraft do not have a rank designation.
- Movement: the maximum number of hexes the aircraft can move.
- Actions: the possible effects from playing the card.
- Name: the name of the depicted pilot or crew, which has no gameplay effect.
- Aircraft Image: the aircraft the card corresponds to.
Communications Cards
Communications cards represent support staff on the ground and other assets at your disposal.
Communications cards are not associated with a specific combat counter, so do not have an aircraft image on the bottom left of the card.
- Title: the role of the support staff or the name of the asset.
- Initiative: the value of the card when used to bid for initiative.
- Section: the section the card is associated with (if any).
- Actions: the possible effects from playing the card.
- Discord icon: if the card's associated section is out of comms (see Important Concepts), taking actions displaying this icon or using the card to bid for initiative will force you to take a Discord card.
- Comms-required icon: if the card's associated section is out of comms (see Important Concepts), you cannot take actions that display this icon.
Discord cards
Discord cards represent breakdowns in communication that are caused by the chaos of battle and made worse by splitting up your sections. Discord cards cannot be used for anything except to bid for initiative.
- Title
- Initiative: the value of the card when it is used to bid for initiative.
Tokens
Combat counters
Combat counters represent aircraft on the board, which you control using your combat cards.
- Title: the aircraft type.
- Section: the section the aircraft belongs to.
- Rank designation: the star indicates that an aircraft is an ace. Non-ace aircraft do not have a rank designation.
- Facing direction: The direction in which the aircraft is flying. This affects movement and combat.
- Firing Lines: the direction the aircraft can attack from.
- Base defence: the value your opponent must roll to successfully hit this counter with a combat action.
- Ready/out of action: the aircraft status. If the counter is face down on its dashed side, it is out of action. The aircraft cannot take other actions until the counter has been flipped to its ready side.
Decoy Combat Counters
Decoy combat counters have a ready side, which matches a specific Luftwaffe aircraft, and a decoy side. They are used in scenario 9, and the rules are set out in the scenario book.
Structure Markers
Structure markers represent important buildings, assets, and infrastructure. Each scenario will tell you which structure markers to use and which hexes to place them on.
Structures have a base defence: the value you must roll to destroy the target with a Bomb action.
Ship Markers
These markers indicate that a hex contains ship. Each scenario will tell you where to place ships, which direction they will face, and whether to place them face up or face down.
Ships have a base defence: the value you must roll to destroy the ship with a Bomb action.
Their facing direction shows the direction in which the ship will move if you take the Sail action.
Anti-aircraft Artillery markers
These markers indicate that a hex contains anti-aircraft artillery. Each scenario will tell you where to place the anti-aircraft artillery.
Anti-aircraft artillery have a base defence: the value you must roll to destroy the anti-aircraft artillery with a Bomb action.
Cloud markers
These markers indicate that a hex contains a cloud. Each scenario will tell you where to place the clouds.
Clouds give a cover bonus in combat (see Combat Actions).
Barrage Balloon markers
These markers indicate that a hex contains a barrage balloon. Each scenario will tell you where to place the barrage balloons.
Barrage balloons affect movement (see Move Action) and give a cover bonus in combat (see Combat Actions).
Initiative marker
The initiative marker indicates which player has the initiative this round and takes their turn first.
Board Tiles
The board tiles represent the skies in which you will be fighting. Each tile contains a number of hexes. Tiles have a land side, which is unique to each tile, and an ocean side, which is the same on all tiles. Each scenario will tell you which tiles to use and where to place them.
Tile designation: the unique letter designation of the tile, which is used during setup.
Setup
- Choose a scenario: Pick a scenario from the scenario book. We recommend that you play the scenarios in order, starting with scenario 1: First Contact, but they can be played in any order.
- Choose a side: Both players choose a side and take all the cards and combat counters indicated in the scenario book for their chosen side.
- Place tiles: Find the tiles listed under the chosen scenario and place them land side up as indicated. Then, use the remaining tiles ocean side up to create the rest of the board. Return all unused tiles to the box.
- Place tokens: Place the combat counters, structure markers, ship markers, anti-aircraft artillery markers, cloud markers, and barrage balloon markers in the hexes indicated in the scenario book. Ensure all aircraft and ships are facing in the direction shown in the scenario book and are the correct side up.
- Take initiative: Give the initiative marker to the side indicated in the scenario book.
- Assemble decks: Find the 'Starting Cards' table in the scenario book for your side, take all the cards marked [D], shuffle them, and place the deck face down.
- Assemble supplies: Find all the cards marked [S] for your side and place them nearby, face up. Sort the cards in your supply by title. The content of your supply is open information.
- Return remaining cards: Return all leftover cards for your side to the box.
(Example: Scenario 1: First Contact, with the RAF deck and supply set up according to the scenario book.)
How to Play
Play takes the form of a series of rounds, during which both players will play cards to move aircraft, attack the enemy, and work towards their objectives. Each round consists of three phases:
- Draw cards
- Determine initiative
- Player turns
Once the last phase is complete, the round is over and the next round begins. This continues until a player has won.
Draw Cards
Both players draw four cards from their deck to form a hand.
Whenever you need to draw a card but your deck is empty, shuffle your discard pile into a deck.
Never shuffle cards in your play area into a deck.
Determine Initiative
Both players secretly select one card from their hand and reveal it simultaneously. The player who selected the card with the highest initiative takes the initiative marker, flipping it so it shows their side's icon. That player will perform actions first during this round.
In the case of a tie, the player who already has the initiative marker keeps the initiative.
Both players discard their chosen card.
Player Turns
The player with the initiative marker plays cards from their hand, one at a time, into a play area in front of them. Once they have no more cards in their hand that they can (or wish to) play, their turn ends. All cards left in their hand and all cards in the play area are moved into that player's discard pile. The player without the initiative then takes their turn in the same way.
You cannot save cards in your hand for future rounds.
When you play a combat card, you must take a Move action and you may take a card action. You may do these in either order.
When you play a communications card, you must take a card action or go dark. You may not do both.
Important Concepts
Go dark
When you go dark, return that card to your supply. It will not be part of your deck until you choose to take a Bolster action to add it to your deck again.
You can only go dark with communications cards.
Discord
You cannot play Discord cards during your turn.
You can select a Discord card when determining initiative.
The only way to remove a Discord card from your deck is to take a Coordinate card action (see Card Actions).
Usually, a Discord card will stay in your hand until the end of your turn, when you will discard it as normal.
Out of Comms
Communications, or comms for short, are vital for aircraft. A section is out of comms if the two aircraft in it are separated by more than one hex. A section is also out of comms if one or both aircraft in the section have been neutralised.
When you determine initiative with a card that has the Discord icon next to its initiative value and the corresponding section is out of comms, take a Discord card from your supply and place it in your discard pile.
When you take a card action that has the Discord icon next to it and the corresponding section is out of comms, take a Discord card from your supply and place it in your discard pile.
You may not take a card action that has the comms-required icon next to it if the corresponding section is out of comms.
If you have no Discord cards in your supply, the Discord icon has no effect. However, you may still not take card actions with the comms-required icon if the corresponding section is out of comms.
(Diagram: aircraft within one hex of each other are in comms; aircraft separated by more than one hex are out of comms.)
The Discord and comms-required symbols appear only on Section Comms cards. Some Luftwaffe aircraft do not have a matching Section Comms card. For these aircraft, being out of comms has no gameplay effect.
Ready / Out of Action
If a combat counter is face up it is considered ready and takes actions as normal.
If a combat counter is face down on its dashed side, it is considered out of action. It cannot perform any actions. When you play a combat card associated with that aircraft, do not perform Move or card actions. Instead, flip the counter to its ready side.
Suppressed/Grounded
Out-of-action Luftwaffe aircraft are suppressed, which happens when the RAF player makes a successful Anti-air attack.
Out-of-action RAF aircraft are grounded, which happens during the scenario setup. Grounded aircraft cannot be targeted by normal attacks, but are vulnerable to Bomb attacks.
Facing Direction
Aircraft and ships always face the centre of one edge of the hex they are in. This affects movement and combat.
Move Action
When an action is followed by X, it has a numerical value. For example, Move 1.
Move X
Move the aircraft's combat counter between one and X hexes in the direction it is facing.
You may not change the direction the aircraft is facing unless you first chose the Manoeuvre action (see Card Actions).
If you would move into a hex that contains a barrage balloon, the aircraft is instead neutralised. Remove its combat counter from the board and remove all the matching cards from your play area, hand, deck, discard, and supply.
You may move aircraft into and through hexes containing any other tokens.
Unless the scenario says otherwise, aircraft cannot move off the edge of the board. If an aircraft would move off the board, instead choose a hex edge immediately to the left or right of the one it is currently facing, and turn the counter to face that edge. Do not move the aircraft any further. Then take a Discord card from the supply and place it in your discard pile. You may not take a card action with the combat card after moving in this way, but you may take a card action before such a move.
Card Actions
When the name of an action is followed by X A, it has a numerical value and may also have a section (Y, R, G, P, or B). For example, Bolster 3 or Bolster 1 Y.
Manoeuvre X / X
If you want to take the Manoeuvre action, you must announce this before you take the Move action on the same card.
The Manoeuvre action modifies your Move action by allowing you to turn the aircraft up to X times.
You may only turn the aircraft immediately after you have moved it at least one hex. You may not manoeuvre twice in a row; each manoeuvre must be separated by at least one hex movement.
To turn the aircraft once, rotate it 60 degrees to face the hex edge immediately to the left or right of the one it is currently facing.
If the Manoeuvre action is followed by X, you may manoeuvre once before moving through any hexes. This counts towards the limit of X manoeuvres.
Bolster X A
Take up to X cards from your supply and add them to your discard pile.
If the card specifies a section, you must choose cards from that section only.
If this action has the Discord icon next to it and the associated section is out of comms, take a Discord card from your supply and add it to your discard pile.
Command X
Draw up to X cards from your deck and add them to your hand. You can play those cards as normal this turn.
If your deck runs out before you finish drawing, shuffle your discard pile into a deck and continue drawing. Do not shuffle any cards in your play area into your deck.
Coordinate
Choose a Discord card from your hand and set it aside. It will not be used for the rest of the scenario. Then draw a card from your deck.
If your deck is empty, shuffle your discard pile into a deck and continue drawing. Do not shuffle any cards in your play area into your deck.
If this action has the comms-required icon next to it and the associated section is out of comms, you cannot take the action.
If you have no Discord cards in your hand, you cannot take this action.
Guide A
Choose a ready aircraft and move it one hex in the direction it is currently facing. You may then turn the aircraft to face the hex edge immediately to the left or right of the one it is currently facing.
If the card specifies a section, you must choose aircraft from that section only.
If this action has the Discord icon next to it and the associated section is out of comms (before moving any aircraft), take a Discord card from your supply and add it to your discard pile.
Inspire A
Choose a card in your play area. You must take a Move action and you may take a card action with the chosen card. You may do these in either order.
If the card specifies a section, you must choose cards from that section only.
If this action has the Discord icon next to it and the associated section is out of comms, take a Discord card from your supply and add it to your discard pile.
Sail
Choose any number of ship markers. Move each ship one hex in the direction it is facing.
Ships never change the direction they are facing.
Ships may move into hexes containing any other tokens.
If a ship would move off the edge of the board, it instead escapes (see Game End).
Combat Actions
Attack X Y / Anti-Air X / Bomb X
Only the RAF player has access to the Anti-air action. Only the Luftwaffe player has access to the Bomb action.
When you perform any of the combat actions shown above, take the following steps:
1. Choose Target
Choose a target for the attack.
For an Attack action, choose a non-grounded enemy aircraft in a hex that is in the firing line of the aircraft taking the action.
For an Anti-air action, choose any enemy aircraft.
For a Bomb action, choose a ship, structure, anti-aircraft artillery marker, or a grounded aircraft that is in the same hex as your attacking aircraft.
Firing Line: Each aircraft has firing lines shown on its combat counter. In each direction indicated by a firing line, all hexes in a straight line from the aircraft are considered to be in the firing line. Firing lines are not blocked by other aircraft or tokens in their paths. An aircraft's firing line always includes the hex that it is in.
2. Determine Total Defence Value
For an Attack action, an aircraft's total defence value is the sum of its base defence, the cover bonus, and the range bonus.
For an Anti-air action, an aircraft's total defence is the sum of its base defence and the range bonus.
For a Bomb action, the total defence value of a structure, ship, anti-aircraft artillery, or an out-of-action aircraft is its base defence.
If the total defence value of an aircraft is greater than 10, the combat action cannot succeed!
Base defence: The value printed on the combat counter or marker.
Cover bonus: Add 1 for every other aircraft in a hex between the attacker and the target, including the attacker's hex and the target's hex, but not including the target or attacker. Add 2 for each cloud in a hex between the attacker and the target, including the attacker's hex and the target's hex. Add 2 for each barrage balloon in a hex between the attacker and the target.
Range bonus: The number of hexes away from the attacker that the defender is, not including the attacker's hex. For an Anti-air action, the attacker is considered to be the closest Anti-aircraft Artillery marker for the purpose of determining range bonuses.
3. Roll Attack Dice
Roll the number of dice indicated by the value of the combat action.
Which Attack Value to Use: Attack actions are sometimes followed by multiple values. If you are taking an Attack action with an aircraft that has an X and a Y value, check if you are attacking the target's rear. If you are attacking the target's rear, roll Y dice. Otherwise, roll X dice.
You are attacking the target's rear if:
- the target and the attacker are in different hexes and the target is facing in the opposite direction to the attacker, or
- the above statement would be true if the target was facing the hex edge immediately to the left or right of the one it is currently facing.
If any of the dice rolled show a number that is equal to or greater than the target's total defence value, the attack is successful.
How many dice are successful does not matter.
4. Determine Results
If the attack was unsuccessful, nothing happens.
If the attack was successful, the results of the attack depend on the type of target and the type of combat action:
Combat Actions Targeting Aircraft
If the combat action was an attack, you have inflicted a hit.
Your opponent must find a card that matches the defending aircraft and remove it from the game.
- If possible, they must remove the card from their hand.
- Otherwise, they must remove it from their discard pile.
- Otherwise, they must remove it from their deck. They must then shuffle their deck.
- If they do not have a matching card in their deck, the aircraft is instead neutralised. Remove its combat counter from the board and remove all the matching cards from the supply.
You can only ever inflict one hit with an attack, no matter how many dice are successful. You can always check cards that you have removed from the game. You cannot check cards that your opponent has removed.
If the combat action was a Bomb action, the out-of-action aircraft is neutralised. Remove its combat counter from the board and remove all matching cards from your opponent's hand, discard, deck, and supply.
If the combat action was an Anti-Air action, no hits are inflicted. Instead, flip the defending combat counter to its out-of-action side. If it is already out of action, the action has no effect.
Combat Actions Targeting Structures, Ships, or Anti-Aircraft Artillery
If the Bomb action was successful, you have destroyed the target. Remove the marker.
Example Turn
It is scenario 1: First Contact, and David and Trevor each draw a hand of four cards from their decks. The players each choose a card from their hand and reveal it simultaneously.
Trevor's card has the highest initiative value, so he places the initiative marker in front of him and gets to play his cards first. He bid for initiative with a Section B Comms card, which has the Discord icon next to its initiative value, so he checks if Section B is out of comms. It is not, so he does not add a Discord card to his discard pile. David and Trevor then discard the cards they used to bid for initiative.
Trevor wants to score some hits on David's aircraft. He plays his BF 109E Y2 combat card and chooses to take a card action before the move action. The card action he chooses is Manoeuvre 2. He then begins his Move 3 action, moving Y2 one hex forwards. He then manoeuvres once, rotating the aircraft to face the hex edge to the left of the one that it had been facing. He could move the aircraft up to two more hexes and manoeuvre one more time, but he decides not to.
He then plays his second Y2 card, choosing this time to take the Move 3 action first. He moves the aircraft one hex forwards and again decides not to move it further. Then he takes the Attack 2 3 card action against Defiant G1, the only enemy aircraft in Y2's firing line. The target's base defence is 4. Its cover bonus is +1 because of the presence of the Y1 aircraft. The range bonus is +1. So, its total defence value is 6. The target is facing away from the attacker, so Trevor rolls three dice. He scores 2, 7, and 8 – a hit! David reveals a G1 card from his hand and removes it from the game.
Trevor cannot use the Discord card in his hand, so he ends his turn. He discards that card as well as the cards in his play area.
David now takes his turn. David is keen to replenish his losses, and intends to play his G Section Comms card to take the Bolster action. However, if he plays the card now, he will have to add a Discord card to his discard because Section G is currently out of comms. Instead, David chooses to play his G2 card. He wants to attack Y1, but it is currently outside G2's firing lines. He chooses to take its Move action first, which allows him to move G2 one hex forwards. Now that his target is in his firing line, he takes an Attack 1 2 action. The target's base defence is 5. Its cover bonus is +1 and its range bonus is +2. The target is facing away from the attacker, so David rolls two dice. He scores 2 and 3 – a miss!
Next, he plays his G Section Comms. Because Section G is no longer out of comms, he does not add a Discord card to his discard. David chooses to Bolster 2 G, adding two G1s to his discard.
With no cards left in hand, he ends his turn. Now that both players have taken their turns, the next round begins.
Game End
The game continues until a player achieves their objective. Here are the objectives that you might encounter.
Neutralise Enemies
Each scenario will tell you which enemy aircraft you need to neutralise to claim victory. You will need to neutralise either specific aircraft or a certain number of aircraft. When you have neutralised an aircraft, place its combat counter in front of you to show that you have done so.
Destroy Ships and Structures
The scenario will tell you how many ships or structures you need to destroy to claim victory. To destroy a ship or structure, you need to target it with the Bomb action. When you have destroyed a ship or a structure, remove its marker from the board and place it in front of you to show that you have done so.
Escape
The scenario will tell you which aircraft or ships you need to escape with to claim victory. You will need to escape with either specific aircraft and ships or a certain number of them.
To escape with an aircraft, you must move it from one of the escape hexes indicated in the scenario. To escape with a ship, you must move it from a hex at the edge of the map. Only the aircraft and ships specified by the scenario are allowed to escape. When an aircraft or a ship escapes, place its combat counter or marker in front of you. When an aircraft escapes, find all its associated combat cards that are face up on the table, in your hand, in your deck or discard pile, and in the supply. Remove all those cards from the game. If you have removed an aircraft from the board because it has been neutralised, it has not escaped.
Score Points
Each scenario will tell you how to score points and how many points you need to claim victory.
Historical Note
Undaunted: Battle of Britain follows the dynamic struggle between the formidable Luftwaffe and the RAF for control of the skies of Britain and the English Channel. At stake is nothing less than the fate of Europe. The game recreates the conflict in some detail and features aircraft and scenarios that have a historical basis. However, this is not a simulationist game. The core mechanic of deck-building is an obvious abstraction of the individual agency of the pilots who were involved. The technical capabilities of aircraft in the game have been tweaked in favour of gameplay. Throughout development, historical accuracy has been one value among several, and the core aim has always been to create a game that might emulate the experience of command, rather than its exact reality. Should you commit your aircraft to the fight quickly, or attempt to outmanoeuvre your opponent and engage on your terms? Should you maintain close formation for ease of communication, or break off to pursue tempting targets? These are the decisions forced upon you in Undaunted: Battle of Britain.