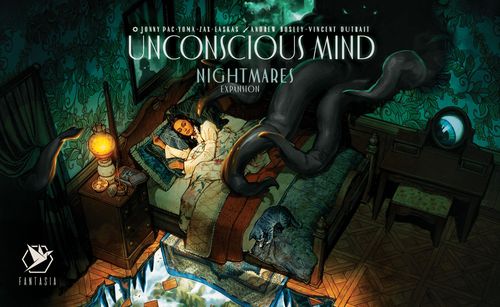
Unconscious Mind: Nightmares
Unconscious Mind: Nightmares Rulebook
Table of Contents
Table of Contents
Components
- 6 Uncanny Routine Client cards
- 4 Uncanny Case-Study Client cards
- 21 Nightmare Dream cards
- 1 Madness reference card
- 12 Metamorphosis Grief Layer cards (translucent)
- 4 Cracked Insight dials
- 1 Treatise of the Dead tile
- 1 Haunted Location Goal tile
- 1 Madness Check token
- 12 Wild Research cards
- 6 Mad starting Notebook tiles
- 6 Dark Insight pieces
- 28 Madness tokens (24 value one, 4 value five)
Pets module:
- 4 Pet tiles (double-sided)
- 4 Pet figures
Gramophone module:
- 1 Gramophone standee
- 1 Gramophone reference card
Setup
Set up the game as usual with the following modifications.
City Map & Location Goals
During step 2 of the standard setup, place the Madness Check token on the "6" space of the Reputation track.
When creating the Location Goal tiles display during step 4 of the standard setup, place the Haunted Location Goal tile near the others.
Clients and Dreams Display
To create the Clients and Dreams display, replace steps 10–14 of the standard setup with the following:
- Shuffle the Routine Clients deck and form two face-down stacks of roughly equal heights.
- Shuffle the Uncanny Routine Client cards into one of the two stacks, then place this stack on top of the other to create the Routine Clients deck.
- Draw two Routine Clients and arrange them in a face-up row to the right of the deck.
- Repeat steps 1–3 above, using the Case-Study Clients and Uncanny Case-Study Client cards to create the Case-Study Clients deck.
- Shuffle the Latent Dream deck and place it face down in the area above the Client display.
- Shuffle the Manifest Dream deck and place it face down to the right of the Latent Dreams deck. Then, draw the three topmost Manifest Dream cards and arrange them in a face-up row to the right of the deck.
- Shuffle the Nightmare Dream deck and place it face down to the right of the Manifest Dreams. Then, draw the top Nightmare card and place it face up to the right of the deck.
- Shuffle the Grief Layer deck and form two face-down stacks of roughly equal heights.
- Shuffle the Metamorphosis Grief Layer cards into one of the two stacks and place this stack on top of the other to create the Grief Layer deck. Put this deck inside the dispenser box and set the box to the left of the Routine Clients deck. Then, draw and place a Grief Layer on top of each face-up Client in the display.
Wild Research Cards and Treatises
While creating the Research card display in step 15 of the standard setup, first shuffle the Research cards deck and form two face-down stacks of roughly equal heights. Then, shuffle the Wild Research cards into one of the stacks and place this stack on top of the other to create the Research card deck.
While creating the Treatise tile display in step 17 of the standard setup, place the Treatise of the Dead tile near the others (not covering any other Treatise tiles).
Player Setup
During step 1 of player setup, take a Cracked Insight dial (instead of a dial from the base game).
During step 13 of player setup, randomly deal one Mad starting Notebook tile to each player in addition to their three starting Notebook tiles. Choose one of these four Notebook tiles to keep and remove the others from the game.
If you choose the Mad starting Notebook tile, refer to its banner and place your Professor onto the City Map Location matching the tag, as usual. Then, move a common Insight from your center reserve to any crack within the indicated dial section—which may result in gaining Madness (see page 6). Then, flip and place the tile in your player board, as usual.
General Supply
After creating the general supply during step 18 of the standard setup, place the Dark Insight pieces and the Madness tokens near the Bright Idea tokens. Place the Madness reference card visible to all players with the standard side facing up.
Mad, Mad Variant
To increase the tension, you may place the Madness reference card with the variant side facing up. This doubles the Victory Point penalty during Madness Checks (see page 5).
Madness
Gaining Madness
Effects that give you Madness are mandatory when you trigger them.
Whenever you gain a Madness, take a Madness token from the general supply and place it near your player board in a personal supply. Your Madness level is equal to the Madness you currently have.
Note: The Madness supply is considered unlimited; if you run out of tokens, use any adequate substitutes.
Madness Effects
Your Madness level unlocks ongoing beneficial effects. You may trigger the effects indicated on the Madness reference card if your Madness level is equal to or greater than the thresholds shown (e.g., if your Madness level is "6," then you may trigger the "3+" and "5+" effects).
- 13+ Madness: When you Recall Ideas, return 6 Madness to the general supply.
- 8+ Madness: You may freely Transfer Median Insights.
- 5+ Madness: When placing two Ideas (including Bright Ideas) on the Meeting Table, you may point them at two different action spaces. Then, you may trigger each action space once (in either order).
- 3+ Madness: When moving your Professor on the City Map, you may move 1–2 spaces counterclockwise (instead of 1–2 spaces clockwise).
Madness Checks
Madness Checks may happen up to three times per game.
Perform a Madness Check at the end of any turn in which one of the following conditions occurs:
- Freud's marker reaches or crosses the Madness Check token on the Reputation track (discarding the token from the game).
- One player's Madness level reaches 13 or more for the first time, claiming the Haunted Location Goal tile (page 8).
Note: If both of these conditions occur in the same turn, perform two consecutive Madness Checks.
In addition, perform one final Madness Check at the end of the game (before Final Scoring).
To resolve a Madness Check:
- The player(s) with the lowest Madness level announces their current number of Madness.
- All players return this number of Madness to the general supply.
- Each player with remaining Madness loses Victory Points equal to their level (or twice their level with the variant), adjusting their scoring markers accordingly.
Note: Scoring markers may go below the "0/100" space to indicate a negative score.
Note: If the lowest Madness level is zero, players do not return any Madness before losing Victory Points.
Cracked Insight Dial
The Nightmares expansion replaces the base game's dials with Cracked Insight dials, which give you access to Mad Insights.
Mad Insights
There is a new Insight level beyond Major: Mad. Any Insight inside a crack is a Mad Insight.
- Each colored dial section has three cracks: small, medium, and large.
- Each time an Insight enters a crack, you must immediately gain the indicated amount of Madness (if any).
- You may not exceed each crack's Insight capacity (see the table below).
- When using a Mad Insight, remove it from its crack and place it into your dial's center reserve.
| Crack | Effect | Capacity |
|---|---|---|
| Small crack | Gain 0 Madness | 1 Insight |
| Medium crack | Gain 1 Madness | 2 Insights |
| Large crack | Gain 2 Madness | 3 Insights |
Important: You may not Elevate, Suppress, or Transfer Mad Insights (i.e., once an Insight is inside a crack, you may not manipulate it in any way).
Gaining Mad Insights
Generate Effects
- Place an Insight from your center reserve into a crack within the indicated dial section.
- Place an Insight from your center reserve into any crack.
Transfer Effects
Whenever you Transfer a Median or Major Insight, it moves into an adjacent crack (instead of an adjacent colored section). Transferring an Insight clockwise increases its level to Mad, whereas counterclockwise increases its level to Mad and changes its quality.
Example: The teal player may Transfer their Major Passion Insight into a Mad Insight by moving it into the small or medium crack within their dial's Passion section, or they may move it counterclockwise into the large crack of the Freedom section. They may Transfer their Median Passion Insight into a Mad Insight by moving it into the large crack within their dial's Passion section, or they may move it counterclockwise to the large crack of the Freedom section.
Elevate Effects
An Elevated Minor, Median, or Major Insight may move directly into a crack instead of the next ring outward.
- An Elevated Minor Insight may move into the large crack in its dial section.
- An Elevated Median Insight may move into the medium crack in its dial section.
- An Elevated Major Insight may move into the small crack in its dial section.
Overcompensating with Mad Insights
You may overcompensate using a Mad Insight instead of any Minor, Median, or Major of the same quality (e.g., you may use a Mad Passion Insight instead of a Major, Median, or Minor Passion Insight).
Dark Insights
The Nightmares expansion introduces Dark Insight pieces. They function like common Insights, except you do not gain Madness when placing them into cracks.
You may gain Dark Insights by reaching Catharsis with Uncanny Routine Clients. When you gain one, immediately place it into any available crack within the indicated dial section.
Example: The pink player has an Uncanny Client that reached Catharsis, giving them a Dark Insight piece. They must place the piece into a crack within the Freedom section. They place it in the large crack—without gaining any Madness.
Gameplay
Wild Research Cards
Wild Research cards differ from the base game Research cards in the following ways:
- Each Wild Research card shows a gray Volume, which may substitute for a Volume of any color when Publishing Treatises.
- Six Wild Research cards show two different Location tags. When you play one of these cards, you must gain 1 Madness.
- Three Wild Research cards show a wild Location tag. When you play one of these cards, you must gain 2 Madness (and one Minor Insight in the quality shown).
- Three Wild Research cards do not show any Location tags. When you play one of these cards, you may immediately spend one Minor Insight in the color shown to Generate one Mad Insight of the same quality.
Treatise of the Dead
To Publish the Treatise of the Dead, you must gather two gray Volumes (from your in-play Research cards or by Citing one or both of them).
When you Publish the Treatise of the Dead, immediately score 13 Victory Points. Each time a player Cites from it, you gain 1 Madness and a Bright Idea.
Mad Starting Notebook Tile Effects
Whenever you trigger a Mad starting Notebook tile, you must gain 1 Madness in addition to the effects shown.
Haunted Location Goal
The first player to reach 13 Madness (or more) must claim the Haunted Location Goal, signaling a Madness Check (page 5). Then, they place the tile face down in their play area (providing a wild Location tag).
Note: The Haunted Goal tile does not provide a Reputation point like the base game's tiles.
Nightmare Dreams
Instead of a Manifest Dream, you may choose the face-up Nightmare Dream card (or draw one from the deck). If you choose the face-up card, refill the Nightmare Dream display by drawing and placing a card face up.
Each Nightmare Dream card requires using one Mad Insight (in addition to other specified Insights/Coffee) to produce a Catharsis Therapy point. If the Client's Therapy marker is on any space to the right of the space with the Catharsis icon, move the marker onto this space (and score any Victory Points and resolve Catharsis, as usual). Otherwise, you may use the Catharsis Therapy point as a single standard Therapy point.
If you use a Nightmare Dream with this Metamorphosis icon to Treat a Client with a Metamorphosis Grief Layer, gain a Heart-Shaped Box.
Final Scoring
Before Final Scoring, perform one final Madness Check (page 5).
During Final Scoring, each Uncanny Case-Study Client that has reached Catharsis scores Victory Points for having specific qualities of Mad Insights.
- 6 Victory Points for each Mad Insight within the indicated dial section (max. 18 points).
- 6 Victory Points for each dial section with at least one Mad Insight (max. 18 points).
Solo Mode
Setup
When placing Location Goal tiles in step 4 of the standard setup, first place the Cure five Clients and Haunted Location tiles next to each other (in either order), and then place three random tiles on either side of them.
Nightmare Dreams
If the Id drafts a Client with a Metamorphosis Grief Layer, it takes the face-up Nightmare Dream from the display (instead of a Manifest Dream). Otherwise, the Id does not take Nightmare Dreams.
Madness
The Id gains Madness and participates in Madness Checks like a player.
When the Id Recalls its Ideas, it must return 6 Madness to the general supply.
The Id may move its Professor counterclockwise on the City Map, choosing the Location that will trigger the most effects (either from counting figures or tags). Break ties using the Compass Arrow: right for clockwise, left for counterclockwise.
Haunted Location Goal
If the Id reaches 13 (or more) Madness and the Haunted Location Goal tile is in the display, it claims it (signaling a Madness Check, as usual).
Note: If the Id uses a Notebook tile effect to take the Haunted Location Goal, it signals a Madness Check.
Pets Module
You may use the Pets module with the base game or with the Nightmares expansion, adding an emotional support animal by your side. Your Pet allows you to Treat Clients more effectively—and with Nightmares, dispel Madness. Your Pet also gives you more tactical control over your Inkpot's pace.
Components: 4 Pet tiles, 4 Pet figures
Pets Setup
Place the Pet tile in your player color to the left of your player board with the corresponding Pet figure on the bottom of the tile.
If you are playing with the other contents of the Nightmares expansion, you must use the side of the Pet tile showing the Metamorphosis icon; otherwise, use the standard side.
Pets Gameplay
Advancing Your Pet
Each Pet tile has a track with four levels (featuring four effects). When determining your Inkpot's movement value, you may subtract one or two from the number and apply these movements to your Pet instead, advancing it up the track one space per movement applied.
Important: You may not subtract your Inkpot's movement value to zero (i.e., you must move your Inkpot at least once).
Note: If your Pet is on the highest level, you may not advance it.
Using Your Pet
On your turn—anytime before or after resolving other actions or effects—you may trigger the effect shown on your Pet's current level (or a lower one). After resolving the effect, return your Pet to the bottom of the tile.
| Standard Effects | Nightmares Effects |
|---|---|
| Perform one Treatment action (i.e., use one Dream to Treat one Client) | Perform one Treatment action (i.e., use one Dream to Treat one Client) |
| Gain a Heart-Shaped Box | Generate a Mad Insight |
| Trigger the effect of any one Notebook tile in your player board | Return 2 Madness to the general supply |
| Elevate an Insight | Transfer an Insight |
Solo: The Id does not use a Pet.
Gramophone Module
The Gramophone's haunting melodies may inspire you to exceed your limits.
Components: 1 Gramophone standee, 1 Gramophone reference card
Gramophone Setup
Place the Gramophone standee and reference card near the Meeting Table board. If you are playing with the other contents of the Nightmares expansion, you may use the side of the card showing a Mad Insight; otherwise, use the standard side showing a Heart-Shaped Box.
Gramophone Gameplay
- Standard: Anytime on your turn, you may use one Heart-Shaped Box to take the Gramophone and place it near your player board.
- Nightmares: Anytime on your turn, you may use one Mad Insight to take the Gramophone and place it near your player board.
After you take the Gramophone, you must keep it until another player takes it from you (or the game ends).
While you have the Gramophone, you may add one gear (the upper limit of times you may perform an action or trigger an effect) to any limited actions or effects showing this icon.
The following examples show how the Gramophone may affect different parts of the game.
- Standard: You may perform up to six Location effects after moving your Professor or Freud on the City Map (granted you have six matching tags or use Bright Ideas to reach this limit, etc.).
- Nightmares: You may Treat each of your Clients twice during a Treat Clients turn. This means you may Treat each Client with a Manifest Dream immediately followed by a Latent Dream.
- Standard: You may place up to three Ideas on the Meeting Table, triggering the action space once for each Idea placed.
- Nightmares: You may subtract up to three from your Inkpot movement value, advancing your Pet once for each.
Gramophone Solo
Whenever the Id's Inkpot moves past the marked icon (a multicolored disc, which the rulebook does not list in its icon key), it takes the Gramophone from you (if you have it) and returns it to the area beside the Meeting Table.
Note: The Id does not keep the Gramophone or use its effects, nor does it need to use a Heart-Shaped Box (or Mad Insight) to take it.
Icon Reference
The rulebook's icon key, as printed. Icons are rendered as their names.
Mad Insights and Dark Insights
- Madness
- Growth, Freedom, and Passion Mad Insights
- Mad Insight of any quality
- Gain a Dark Insight (+ Dark Insight piece)
- Catharsis Therapy point
- Advance your Pet once
Advancing your Professor and Freud
- Advance your Professor 1–2 Locations and trigger the end Location's effect(s)
- Advance your Professor directly to Freud's Location and trigger the Location's effect(s)
- Advance Freud 1–3 Locations and trigger the end Location's effect(s)
- Advance Freud 1 Location clockwise (without triggering the Location's effects)
- Professor/Freud in a Location
Location tags
- Location tags (the six base-game tag icons, as shown in the key)
- Any Location tag (i.e., a wild tag)
- Trigger a tag's Location effects using the count tags option (once for the tag shown plus any matching)
Ideas and the Meeting Table
- Idea
- Unlock the leftmost Idea from your player board
- Unlocked Idea
- Different Idea spaces on the Meeting Table
- Recall Ideas
- Bright Idea
- Coffee
- Reputation point
- Trigger the Reputation track
- Freud's Reputation marker
- End-game signal
- District token
- Player-color Insight in a District (above a bonus slot)
Insights and dials
- Minor, Median, and Major Growth Insights
- Minor, Median, and Major Freedom Insights
- Minor, Median, and Major Passion Insights
- Minor, Median, and Major Insights of any quality
- Elevate an Insight
- Suppress an Insight
- Disregard an Insight Suppression
- Transfer an Insight
- Discard your Office Room card
Other
- Therapy Point
- Heart-Shaped Box
- Treat a Client once
- Cured Client
- Cured Routine Client
- Cured Case-Study Client
- Gain a Research card
- Play a Research card
- Publish a Treatise
Notebook tiles
- Gain a Notebook tile from the leftmost column
- Gain a Notebook tile and trigger the banner effect
- Gain a Notebook tile and trigger the main effect and the banner effect
- Trigger any Notebook tile effect in your player board
- Trigger all the effects of an unlocked column on your player board
Inkpot and limits
- Advance your Inkpot up to the number of icons shown (and trigger the effects)
- Upper limit of times you may perform an action or trigger an effect (gear icon)