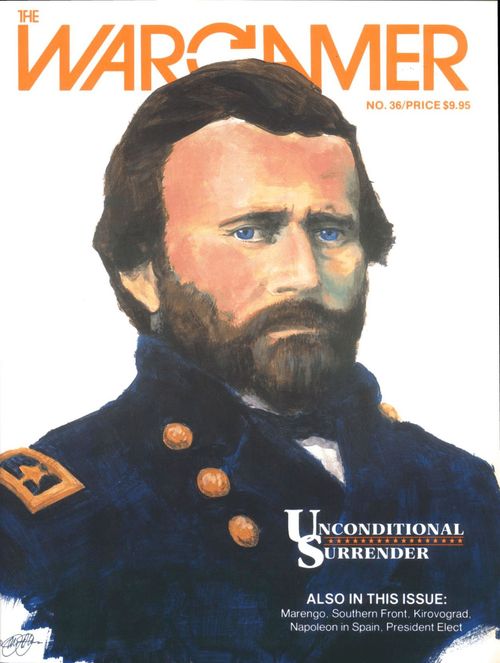
Unconditional Surrender
Unconditional Surrender Rulebook
Table of Contents
Table of Contents
- 0.2 Abbreviations
- 1.0 Game Equipment
- 2.0 Sequence of Play
- 3.0 Movement
- 4.0 Command Control, Initiative, and Fragmentation
- 5.0 Combat
- 6.0 Disorder and Rally
- 7.0 Artillery
- 8.0 Detachment of Regiments
- 9.0 Shatter
- 10.0 Transfer of Brigades
- 11.0 Army Morale
- 12.0 Rifle Pits and Fort Donelson
- 13.0 Night
- 14.0 Setup and Reinforcements
- 15.0 Surprise Effect
- 16.0 Victory Conditions
- 17.0 Optional Rules
0.2 Abbreviations
| Abbr | Meaning | Abbr | Meaning |
|---|---|---|---|
| CRT | Combat Results Table | MA | Movement Allowance |
| DRM | Die Roll Modifier | MP | Movement Point |
| EZOC | Enemy ZOC | SP | Strength Point |
| GTM | Grand Tactical Movement | TRT | Turn Record Track |
| HQ | Headquarters | ZOC | Zone of Control |
| LOS | Line of Sight |
1.0 Game Equipment
1.1 Map
1.1.1 Features
The map shows the most important features of the battlefield, including streams, woods, thickets, roads, rifle pits (trenches), Fort Donelson, and the town of Dover. The map also shows initial deployment areas, battery site hexes, and Confederate garrison hexes. The map also includes a Turn Record Track (TRT) to mark the passing of time during the game.
1.1.2 Map Errata
A. On the terrain key, the captions for rifle pit and battery have been reversed; the road symbol has disappeared into the background color, but is readily identifiable on the map.
B. To avoid possible play imbalance, treat hexes 2101, 2201, and 2301 as impassible.
1.2 Counters
The die-cut cardboard playing pieces represent military units, leaders, and informational markers. Union units and markers are blue, and Confederate are butternut.
1.2.1 Sample Counters
Counter types shown in the rules: Leader/Headquarters, Artillery, Infantry Brigade, Infantry Regiment.
1.2.2 Combat Units
A. Combat units represent the infantry brigades and regiments and artillery batteries that took part in the battle.
B. Brigades are represented by up to three counters. The term brigade refers to all of the counters of the brigade, while unit refers to an individual counter.
C. Units are identified by the name of their brigade commander.
Example: Baldwin A is a unit in Baldwin's brigade.
D. Regiments are identified by their historical designation.
E. The strength of a unit appears on the roster sheet instead of on the unit.
1.2.3 Leaders
A. The commander of each army and their subordinate division commanders are represented by counters.
B. Combat units are identified as to which division they are initially attached to.
-
Confederate divisions are identified by the name of their commander.
-
Union divisions are numbered.
C. Army Commanders have a Leadership Bonus instead of an Initiative Value.
1.2.4 Dummy Counters
The Union has several counters marked Dummy. These counters are placed inverted on the map during the initial Union setup to disguise its true deployment.
1.2.5 Markers
A. There are two types of markers which show the state of units in special circumstances (disorder and engagement).
B. There is also a game-turn marker used on the TRT to mark the passing of a turn.
1.3 Roster Sheets
A. Each side has a roster sheet showing all units and their starting strength. Players may photocopy these sheets, as they will need to mark them during play.
B. Beside each unit's designation is a group of boxes showing the initial number of strength points (SPs) in the unit. Changes to a unit's strength due to losses, detachment, or attachment are recorded on the roster.
C. A unit which has all of its boxes marked off is removed from play. One unit of a brigade may be so removed while others remain in play.
1.3.1 Shatter
For each brigade's shatter level (9.0), there are no actual boxes on the roster sheets, instead there are two figures for each brigade (e.g., Baldwin: 9/4). Keep a running total of losses relating to these figures.
1.3.2 Army Morale
At the bottom of each roster sheet is a group of boxes used to record changes in army morale (11.0).
1.3.3 Secrecy
Players may keep their roster sheets out of view of their opponent. Players may not write down or otherwise record the strengths of enemy units, nor may they consult a blank copy of the roster sheets.
1.4 Charts and Tables
Sheets of charts and tables needed to play Unconditional Surrender are included in the center of these rules.
1.5 Scale
A. Each hex represents 200 yards from side to side.
B. Each SP of infantry represents 200 men.
C. Each artillery unit represents from 4 to 12 guns.
D. Each turn represents one hour and twenty minutes.
2.0 Sequence of Play
Unconditional Surrender is played in a sequence of turns, each of which consists of a Confederate player-turn and a Union player-turn. Each player-turn consists of the following phases which must be executed in the exact order listed. (The active player or side refers to the player whose player-turn is in progress.)
2.1 First Movement Phase
A. The active side may move any or all of its units subject to certain restrictions. For each division whose units are to move, check division initiative, brigade integrity, and command control.
B. The movement of one division's units must be completed before any units of another division may move.
2.2 First Combat Phase
The active side resolves its attacks. Active units that are engaged or have just moved adjacent to enemy units may be required to attack.
2.3 First Rally Phase
Each side may attempt to rally its disordered units not adjacent to enemy units.
2.4 Face Change Phase
The inactive side may change the facing of any of its units not adjacent to enemy units.
2.5 Second Movement Phase
This is identical to the First Movement Phase (2.1), except that units that attacked in the First Combat Phase (2.2) may not move, but they may change facing. Exception: Artillery (7.0).
2.6 Second Combat Phase
This is identical to the First Combat Phase (2.2), except that units that attacked in the First Combat Phase may attack only if they become engaged. Exception: Artillery (7.0).
2.7 Second Rally Phase
This is identical to the First Rally Phase (2.3).
2.8 Turn Advance Phase
At the end of the Union player-turn, advance the Game Turn marker one box. If it is the last turn, determine the winner.
3.0 Movement
A. In each Movement Phase, the active side can move all, some, or none of its units up to the limit of their movement allowance (MA). Only units of the active side may move.
B. Once a unit's movement is completed and the player has begun to move a different unit, s/he may not go back and change the move of the first unit. (Players in friendly games may, of course, ignore this restriction.)
3.1 Basic Movement Rules
3.1.1 Movement Allowances
A unit's MA determines how far it can move each phase. MAs are in terms of movement points (MPs).
| MA | Type |
|---|---|
| 6 | Infantry in good order |
| 4 | Disordered or out of command infantry |
| 4 | Artillery |
| 12 | Headquarters (HQ) |
3.1.2 Movement Procedure
Move units one at a time, tracing a continuous path of hexes through the hex grid. The number of MPs expended from a unit's MA is determined by the terrain (3.1.3) and the unit's facing.
3.1.3 Terrain Effects on Movement
The terrain in a hex from or to which a unit moves, or the hexside it crosses determines the number of MPs expended according to the following cases.
3.1.3.1 Streams
A. Infantry and HQs pay one extra (+1) MP to cross a stream hexside.
B. Artillery may cross streams only on roads.
C. Hexside 2602/2701 is impassable; it was flooded.
3.1.3.2 Thicket
A. There is no extra cost to enter a thicket hex.
B. For each unit (not stack) attempting to leave a thicket, roll one die and consults the Terrain Effects Chart to determine the cost to leave the hex. Before rolling, the player must specify the unit's intended destination. If the thicket penalty plus the normal entry cost of the hex exceeds the unit's remaining MPs, its move ends immediately; it cannot move to a different hex, change facing, etc.
3.1.3.3 Elevation
There are two levels of elevation, level ground and high ground.
A. A hex is high ground if completely or almost completely filled with darker color. Players must apply their common sense in interpreting this.
B. Certain hexsides are colored as high ground, but both connected hexes are level. Such ridges have no effect on movement but do affect line of sight (LOS).
C. Artillery pays +1 MP to move from level ground to high ground.
3.1.4 Enemy Units
A. A unit may not enter a hex containing enemy combat units.
B. A hex containing only enemy HQs may be entered; any HQs are displaced one hex toward the nearest friendly unit.
3.1.5 Stacking
A. No more than two infantry units may occupy a hex at the same time.
B. Additionally, up to two artillery units may occupy a hex.
C. HQ units may stack freely. (Thus, a single hex may contain two infantry, two artillery, and an unlimited number of HQ units.)
D. Stacking limits apply at all times during movement and at the end of the Movement Phase, thus an infantry unit may not move through a hex containing two infantry units.
E. Players may examine each other's stacks freely.
3.2 First and Second Movement Phases
A. Each player-turn has two Movement Phases.
B. Artillery units may move in each phase.
C. Infantry units which attack in the First Combat Phase cannot move in the Second Movement Phase, but may change facing within their hexes.
3.3 Facing and Zones of Control
3.3.1 Facing
Each combat unit must be positioned on the map so as to place the top of the counter at a particular corner of its hex. Adjacent hexes are called front, flank, or rear according to this facing.
Example: A unit occupies hex 1807 and faces the corner with hexes 1906 and 1907. Its front hexes are 1906 and 1907. Its flank hexes are 1806 and 1808, and its rear hexes are 1706 and 1707.
3.3.2 Zones of Control
A. All combat units exert a zone of control (ZOC) into their two front hexes.
B. ZOCs extend into and across all types of terrain. ZOCs do extend into enemy occupied hexes.
C. A hex on which a unit exerts a ZOC is a controlled hex.
D. Friendly ZOCs have no effect on friendly units.
E. There is no additional effect if multiple units exert a ZOC on the same hex.
F. If units from both sides exert a ZOC on a hex, both sides control the hex.
3.3.3 Facing and Movement
A. A unit maintains the same relative facing in moving from hex to hex (although it may change facing, 3.3.4).
B. A unit may enter any adjacent hex, paying +1 MP to enter a flank or rear hex.
3.3.4 Changing Facing
Units may change their facing in the following ways:
A. During movement, units may expend 1 MP to reorient their facing to any hex corner.
B. At the end of Grand Tactical Movement (3.4), units may freely face any hex corner.
C. After an advance or retreat due to combat, units may freely face any hex corner.
D. During the Face Change Phase of the enemy player-turn, any unit not adjacent to an enemy unit may change facing to either adjacent hex corner.
3.3.5 ZOC Effects on Movement
A. A unit which enters an enemy-controlled hex may change facing in the hex but may not move further in that Movement Phase.
B. A unit which begins a Movement Phase in an enemy ZOC (EZOC) may leave it, at a cost in MPs.
C. Units may move from one EZOC to another.
3.3.5.1 Movement Costs for ZOCs
| MPs | Action |
|---|---|
| +1* | Entering an EZOC |
| +1* | Placing an enemy unit into the ZOC of the moving unit without entering an EZOC |
| +1 | Leaving an EZOC if a friendly unit remains in the hex |
| +2 | Leaving an EZOC if no friendly unit remains in the hex |
*Only one of these can apply.
3.3.5.1.1 Example: Placing an Enemy Unit in the ZOC of the Moving Unit
Unit A pays +1 MP in its first hex to put X into its ZOC, and +1 MP in the second to enter Y's ZOC; it does not then pay to put Y or Z into its ZOC. (Recall that X's ZOC is just its two front hexes, and so A does not enter X's ZOC.)
3.3.5.1.2 Example: Leaving an EZOC
Unit A could turn and move to Hex 1, paying 1 MP to change facing, 1 MP to enter Hex 1, and +1 MP to leave the ZOC. Unit B could then back up into Hex 1, but would pay +2 MPs to leave the ZOC.
3.3.5.2 Flanks
A. Units must avoid placing their flanks or rear in an EZOC during movement.
B. A unit cannot enter or change facing in an EZOC unless:
-
Its move places the enemy into its ZOC at the same time, or
-
The hex contains a friendly unit which has the enemy in its ZOC, thus being protected by the friendly unit.
3.3.5.2.1 Example 1
Unit A could not enter Hex 1 with the facing shown, since this would expose its flank to X.
3.3.5.2.2 Example 2
A. In (a), Unit B could not rotate as shown, since this would expose its flank to Y.
B. In (b), Unit B could rotate back to reach the first.
3.3.5.2.3 Example 3
Unit C could move into D's hex, then rotate to conform to D's facing. D protects its flank from Z. C could not first rotate and then enter D's hex, because that would expose a flank to W.
3.3.5.3 Unit in Flank at Beginning of Movement Phase
A. A unit which begins a Movement Phase in violation of 3.3.5.2 must change facing or move so as to correct this condition.
B. If it cannot do so, it suffers no penalty, but may not move or change facing.
3.3.5.4 Applicability of Flank Restrictions
The restrictions of 3.3.5.3 apply only during Movement Phases; advances and retreats are not affected.
3.3.5.5 Artillery Restrictions
Artillery units may not enter an enemy-controlled hex unless it already contains a friendly infantry unit.
3.3.6 Facing and Stacking
At the end of every phase, all units stacked together must have the same facing. A unit may never enter a hex containing a unit with a different facing if it must end the phase in violation of this restriction.
3.4 Grand Tactical Movement
Grand Tactical Movement (GTM) is a way of transferring units rapidly from one part of the battlefield to another.
3.4.1 Restrictions
A. To use GTM, a unit must spend its entire move on roads.
B. Each hex entered must be at least three hexes from every enemy unit, unless already occupied by a friendly unit. However, a unit using GTM may never move adjacent to an enemy unit.
C. A unit using GTM cannot pass into or through another unit which has already moved by GTM in that phase.
3.4.2 GTM Allowance
A. The MA infantry using GTM is doubled, and is tripled for artillery. Each hex costs just 1 MP, regardless of terrain or facing.
Example: An artillery unit simply moves twelve hexes along roads in any direction.
B. After movement, the unit can be given any facing desired. Confederate units can exit the map using GTM, paying 1 MP to leave the last hex.
C. Disordered, out-of-command-control, or fragmented units can use GTM.
Example: A Union unit could move along the path shown above. To move from Hex 1 to 2 would cost 5 MPs out of its GTM MA of 12. It can move through the Rollins house, three hexes from a Confederate unit, only because the other Union unit is there. No other Union unit could enter Hex 2 by GTM in this phase (3.4.1.C).
4.0 Command Control, Initiative, and Fragmentation
4.1 Command Control
A. All units must be in command control to move normally. A unit is in command control if it is within the command radius of its divisional leader.
B. A unit's command control status is checked at the start of each Movement Phase and applies throughout that phase and the following Combat Phase.
4.1.1 Control Requirements
A. A unit is in command control if there exists a path of hexes from the unit to its divisional leader, no longer in hexes than the leader's command radius printed on the leader's counter. The path cannot pass through enemy units, nor through hexes adjacent to enemy units unless occupied by friendly units.
B. Units are also in command control if stacked with their army leader. HQ are always in command control.
C. If any unit of a brigade is in command control, then the entire brigade is in command control unless the brigade is fragmented (4.3).
4.1.2 Lack of Control
A. A unit out of command control has an MA of 4.
B. It may not move adjacent to any enemy unit. If it begins a Movement Phase adjacent to an enemy unit, it can move away or change facing in its hex, but cannot enter another hex adjacent to an enemy unit.
C. Units out of command control may attack and suffer no combat penalty.
4.2 Initiative
A. The movement of the units in one division must be completed before any unit of another division moves. Exception: Units of divisions within the army commander's radius that are in command control (4.2.2).
B. Before moving any units of a division, roll two dice, comparing the total to the initiative rating of the division commander.
C. If the total is greater than or equal to the commander's rating, the units of the division move normally.
D. If the roll is less than the initiative rating, all units of the division are considered out of command control except units stacked with their army commander.
E. Once the active side rolls for a division, no units of a previously checked division can move.
4.2.1 Army Commanders
Army Commanders do not have initiative ratings. A division leader stacked with his army commander adds that commander's leadership bonus to his initiative dice roll.
4.2.2 Effect of Army Commander's Command Radius
A. A player can check the initiative of all the leaders lying within his/her army commander's command radius before moving any units. The player may then move the units of those divisions that are in command control in any order desired. (Thus the army commander allows better coordination of units of different divisions.)
B. Players must check initiative in each Movement Phase.
4.3 Fragmentation of Brigades
Brigades incur penalties if their units do not operate together (fragmentation). A brigade is fragmented if any one of its component units starts the Movement Phase adjacent to none of the others. Fragmentation, like command control, is checked before any unit of the brigade is moved, and applies for the entire phase.
4.3.1 Effect of Leaders
Units that begin the Movement Phase stacked with their army or division leaders are not subject to the effects of fragmentation.
Example: Oglesby/A is stacked with McClernand; Oglesby/B is two hexes away. Oglesby/B suffers the fragmentation penalties, but Oglesby/A does not.
4.3.2 Fragmentation Penalty
A fragmented unit suffers the same penalties as a unit out of command control (4.1.2). There is no further penalty if both conditions apply.
5.0 Combat
A. Combat may occur during each of the Combat Phases of a player-turn. Infantry units of the active side may (and in some cases must) attack adjacent enemy units, and artillery of both sides may support with ranged fire.
B. Attacks are declared and resolved in any order the active player wishes.
C. All losses, retreats, and advances for one combat must be executed before proceeding to the next.
D. All units in a hex under attack defend (except artillery without the appropriate field of fire.)
5.1 Combat Procedure
Each combat is resolved according to the following steps:
- Active side specifies the target hex and the attacking units, including supporting artillery.
- Defender allocates artillery support.
- Determine whether the attack is frontal or flank.
- Each side totals its infantry and artillery SPs involved in the combat, modifying for terrain.
- Determine artillery superiority and compute the combat odds.
- The active side rolls one die and consults the appropriate combat results table (CRT) to determine the outcome.
- Mark off SP and morale losses, then conduct any retreats and advances.
5.2 Attack Declaration and Requirements
5.2.1 Which Units May Attack
A. Infantry units are limited to attacking enemy units in their front hexes.
B. Artillery units may support fire to an infantry battle.
C. Disordered units cannot attack.
D. Fragmented units or units out of command control can attack.
E. Artillery out of command control is restricted in its support fire.
5.2.2 First and Second Combat Phase
A. Infantry that attacked in the First Combat Phase cannot attack in the second, unless it became engaged.
B. Artillery is not restricted in this way.
5.2.3 Mandatory Attacks
A unit which enters an EZOC in its Movement Phase must attack unless one of the following applies:
A. Another friendly unit spent the entire preceding Movement Phase in that hex.
B. Another unit in the same hex attacks.
C. The unit is disordered.
D. The unit occupies a rifle pit or Fort Donelson hex.
Example: Units C and D move into hex 1, and A moves to join B. E and B remain stationary. Either C or D will then have to attack. A, B, and E need not attack, by provision A above.
5.2.4 Effect of ZOCs
A. Every enemy unit which has an attacking unit in its ZOC must be attacked in the Combat Phase. (Artillery bombardment is not enough to satisfy this requirement.)
Example: In the example above, if C attacks X then another unit must attack Y, because Y has C in its ZOC.
B. It can happen that a unit will be required to attack but cannot satisfy this requirement. In such case the combat result is automatically ret 20/0.
5.2.5 Multi-Hex Combat
A. A unit can attack both front hexes. Sum the opposing strengths in both hexes and resolve the battle as one combat. Several attacking units can combine against one or two defending hexes, with all strengths added together for one combat, provided each attacker is in position to attack each defending hex.
Example: In the example above, units C and D could attack X and Y. A unit in Hex 2 could join in. Unit E could not, not being adjacent to X. For E to attack, X and Y would have to be attacked separately.
B. A unit may attack only once per phase.
C. A defending hex may be attacked only once per phase.
5.3 Frontal and Flank Attacks
A. Each attack is classified as either a frontal or flank attack. An attack against a single defending hex is a flank attack if:
- An attacker is in a flank or rear hex of the defenders, and
- That attacker is not in an EZOC.
B. For a flank attack, an attacker includes artillery firing canister but not artillery giving ordinary support.
C. An attack against two defending hexes is a flank attack if the conditions above hold for both hexes.
D. If an attack is not flank, it is frontal.
E. Frontal attacks are resolved using the Frontal CRT and flank attacks using the Flank CRT.
Examples: A has a flank attack in Example #1. But in Example #2, if A attacks X, it will not be a flank attack, because A is in Y's ZOC.
F. Units in a rifle pit cannot be flanked through rifle pit hexsides; the attack is a flank attack only if, in addition to the requirements above, the flanking unit attacks through a hexside that is not a rifle pit.
G. Attacks against Fort Donelson are always frontal.
5.4 Restrictions
5.4.1 Combat Strength
A unit may not be able to use its full strength in combat. The strength attacking out of a hex may be further reduced for terrain.
5.4.2 Limits on SPs per Hex
A. At most five infantry SPs may attack from or defend in a single hex. If the total combat strength of units defending a hex is more than five, then all are still considered to be defending, but excess SPs are ignored.
B. When two units attack from one hex, the attacker can reduce the strength of each however desired (although not below 1 SP) to make the sum equal to five.
Example: Infantry units A and B have 4 SPs each. A could attack X with 3 SPs and B attack Y with 2 SPs, or A could attack X with 4 SPs and B attack Y with 1 SP, and so on. The artillery unit C can support either combat at full strength.
Comment: This rule reflects the physical limit on the number of men that could fit into the frontage across one hex. It is a generous estimate.
5.4.3 Terrain Penalties
A. The strength of an attacking stack is further reduced if the attack is made:
- Across a stream (the stream symbol is not reproduced in the text of the source; the word is supplied from the printed diagram); or
- To a higher ground level hex. (Attacks across ridges do not suffer this penalty if the target hex is not of a higher level).
B. Each stack in such a situation has 1 SP subtracted from its strength after the strengths have been reduced to satisfy 5.4.2.
Example: The most SPs that can attack from a single hex against higher ground is 4 SPs.
C. A stack attacking both across a stream and against higher ground is reduced by only 1 SP, not 2 SPs.
Example: Infantry units A, B, and C attack X. A has 6 SPs, B and C 2 SPs each. Battery D is supporting. The value of unit A is reduced first to 5 SPs (by 5.4.2) and then to 4 SPs for attacking across the stream and uphill. D's support value is unaffected. Unit E suffers no penalty for attacking across the thin ridge line; both its hex and the defending hex are at the same level.
5.5 Combat Results Tables
A. Use the CRTs to determine the outcomes of attacks. To calculate the combat odds, divide the total strength of the attacking units by the defense strength in the target hex. Round the ratio down to one of the odds ratios shown on the CRTs.
Examples: 19 SPs attacking 5 SPs rounds down to 3-1. 6 SPs attacking 7 SPs rounds down to 2-3.
B. Retain fractions when computing odds, thus 7.5 to 2.5 is 3-1.
C. Attacks at greater than 5-1 use the 5-1 column and attacks at less than 1-2 use the Less than 1-2 column.
D. The attacker locates the appropriate CRT (Frontal for frontal attacks, Flank for flank attacks) and column, and rolls one die. Apply die roll modifiers (DRMs) per 5.5.1, then read the result from the row corresponding to the modified roll.
5.5.1 Die-Roll Modifiers
| DRM | Reason |
|---|---|
| +2 | if any defending unit is disordered |
| ±1 | to the side with superior artillery |
| ±2 | fresh strength in engagement |
| ±1 | generals in combat (Optional Rule 17.2) |
| -1 | attack into rifle pits or Fort Donelson |
A. Most DRMs can apply to either side.
Example: If the defender has superior artillery, the attacker subtracts one.
B. All DRM are cumulative.
Example: If the defender has fresh strength and superior artillery, but is disordered, the net DRM is -1.
5.5.2 Combat Results
A. Results given as SP losses, retreats and engagements. Attacker results are to the left of the slash and defender results to the right.
B. The results R1, R2, and R3 indicate retreats of 1-3 hexes.
C. The SP loss is the total which must be removed from among the units involved, not an amount lost by each unit.
D. All SP losses are taken from infantry, never from artillery. If all infantry are eliminated, ignore excess losses. (Printed as "ff all infantry"; the leading letter is a typographical error in the source.)
E. Losses must be distributed as evenly as possible, e.g. no unit can lose 2 SPs before each has lost 1 SP.
F. The owner chooses which units take losses.
G. A retreat applies to all units (including leaders) in the defending hex, or to all attacking infantry. See 5.5.3 for effects on artillery.
H. When a unit attacks and another stacked with it does not, any attacker-retreat applies only to the unit that attacked.
I. When defending units retreat, their army suffers a morale penalty (11.0). Attacker retreats carry no such penalty.
Example: R1/0 indicates all attackers retreat and one attacking unit loses 1 SP. 0/1 R2 indicates all defenders retreat two hexes and one defending unit loses 1 SP.
5.5.3 Effects on Artillery
A. Artillery in a hex under attack may not aid the defense when the attackers are outside its field of fire. Any defender retreat in such a situation applies to the artillery as well.
B. Whenever all defending infantry is eliminated, any artillery in the hex suffer an R2 result, if the result was not already an R1 or R3.
C. In the same way, if all infantry in an attacking hex is eliminated or retreated, any artillery in the hex suffers an R2.
D. Retreat or engagement results apply to batteries defending their own hexes, and to attacking batteries firing canister, otherwise they do not apply to batteries giving support fire. Example: A battery supporting at three hexes is not required to retreat.
5.6 Retreat and Advances
A. A retreat indicated on the CRT must be made immediately.
B. Retreated units (except for leaders) become disordered.
C. Retreat is not movement.
5.6.1 Retreat Priority
A. Units can retreat without regard for facing or exposing their flanks. At the end of the retreat, they can assume any facing.
B. Units cannot voluntarily retreat further than indicated.
C. Each side retreats its own units. They must finish at least the stated number of hexes away from their original hex.
D. Retreating units must avoid passing through EZOCs if possible.
E. Subject to that restriction, they must avoid overstacking.
F. If possible; union units must retreat west, otherwise, they retreat south.
G. Confederate units retreat toward the nearest rifle pit hex when outside the confederate perimeter, toward Fort Donelson when inside it.
Examples: Union unit A can retreat to Hex 1 or Hex 2; it avoids the ZOC in Hex 4, and moves west into Hexes 1 or 2 rather than east into Hex 3. If there were two units each in Hexes 1 and 2, then A would retreat through Hex 3 if it could, or failing that, Hex 4.
5.6.2 Retreat through ZOCs
A. An infantry unit that retreats through an EZOC loses 1 SP for each such hex; artillery loses one gun point.
B. If a stack retreats, each unit in the stack suffers these points.
C. Friendly units in the EZOC do not negate this effect.
D. Retreating units cannot stop in an EZOC; they must continue retreating, beyond the required number of hexes, until they reach an uncontrolled hex.
5.6.3 Enemy Units
A retreat cannot be made through an enemy combat unit. It can be made into or through a hex containing only an enemy leader; the leader is displaced in the same way as during movement.
5.6.4 Stacking during Retreat
Units can retreat in violation of stacking but must continue until they reach a hex in which they can stack legally. Retreated units do not count in the defense of their new hex, if it is attacked in the same Combat Phase, but they do suffer any retreat result obtained against the hex.
5.6.5 Units that Cannot Retreat
A. A unit which cannot make its required retreat is eliminated; all SPs are considered to be lost. The unit can still be reorganized.
B. Units may not retreat off the board.
5.6.6 Advance After Combat
A. When a defending hex is vacated as a result of combat, attacking units may advance one hex. Advance is never required.
B. When advancing, at least one advancing unit must occupy the vacated hex. Other attacking units advance into hexes adjacent to that hex.
C. All attacking units, whether they advance or not, can immediately change facing by one hex corner (60 degrees).
D. Artillery can advance only if it fired canister.
E. Defending units may never advance or make face changes after combat.
F. All advances and/or face changes must be made immediately after the defeated units have retreated.
Example: Suppose, A, B, C, and D have just defeated the unit in Hex 1. They might advance as shown in the second diagram. C occupies the vacated Hex 1, A and B advance into Hex 2 adjacent to it, and D rotates 60 degrees. A, B, and C also could rotate 60 degrees in their new hexes.
5.7 Engagement
A. Engagement is combat lasting beyond the end of the current Combat Phase. Place Eng markers on top of all units in the defending hex (including artillery), all attacking infantry, and attacking artillery that fired canister. Leaders never become engaged.
B. Mark units with a counter of their own color and showing the player-turn in which the engagement occurred.
Example: During the Union Combat Phase, Union units get blue markers noted Union Turn; Confederate units get butternut markers also noted Union Turn.
C. If an already engaged unit receives another Eng result, replace its old marker by the marker appropriate to the new situation. Arrows on the engagement markers are to help keep track of which units are engaged with which specific enemies. It is quite possible to engage with some enemies and then later become engaged with others.
5.7.1 Effects on Movement
A. Unlike other games, a unit covered by an enemy-turn engagement marker may move, but it must remain adjacent to at least one of the units with which it engaged throughout its move.
B. A friendly turn marker carries no such restriction.
5.7.2 Effects on Combat
A. Engaged units are sometimes required to attack if they wish to keep the engagement going.
B. When new units join an engagement, they give large benefits for their freshness.
5.7.2.1 Mandatory Attack
A. In the First Combat Phase of a player's turn, a unit covered by a friendly-turn engagement marker must attack, unless:
- Another unit in the same hex attacks, or
- The unit is disordered.
B. Units covered by an enemy-turn marker are not bound in this way.
Example: Confederate units A and B move into Hex 1 on Turn 4. A attacks X and becomes engaged. In the Union player-turn, X could move to Hexes 2 or 3 but not to Hex 4. On Turn 5, A and B could move away. If they do not, then either A (the engaged unit) or B (another unit in its hex), or both, must attack. (See diagram below.)
Comment: 5.7.1 and 5.7.2.1 together reflect the fact that the attacker normally can break off and move away, whereas the defenders are pinned down. To keep the defenders pinned (covered by an enemy turn marker), the attackers must continue the assault. Therefore an enemy turn marker limits movement but requires no combat, but to keep a friendly-turn marker in place requires combat.
5.7.2.2 Ability of Engaged Units to Attack
A. A unit which starts its Second Combat Phase engaged can attack even if it did so in the First Combat Phase.
B. Engaged units which attack in the First Combat Phase may not move in the Second Movement Phase.
5.7.2.3 Restriction Attacks
A. Whenever an engaged unit attacks, at least one defender must be a unit with which it is engaged.
B. In the diagram, if another Union unit were in Hex 2 at the start of Turn 5, then A could attack it, but it would have to attack X also (a multi-hex battle).
5.7.3 Fresh Strength
Any time an engaged unit fights an unengaged unit, the latter may receive the fresh strength benefit.
5.7.3.1 Definition of Fresh Strength
A. If the total modified strength of unengaged infantry is 50% or more of the total strength of enemy infantry, then the former are considered to have fresh strength. Apply a DRM of 2 in their favor. If both sides meet the requirement then the benefits cancel out.
B. Only infantry counts in determining fresh strength. The fresh troops need to be at least 50% of the total enemy strength both engaged and unengaged.
Example: Units A and B attack X and Y. B and Y are engaged from the previous turn. Strengths are A = 5, B = 2, X = 3, and Y = 4. A's 5 or more than 50% of the attacking 7; the attackers will apply a +2 DRM.
5.7.3.2 Engaged and Unengaged Units
A. When engaged and unengaged units in the same hex are in combat, count all the unengaged points first when determining combat strength. This can be important in computing fresh strength.
Example: If units of 3 SPs and 4 SPs attack, the former being fresh and the latter engaged, the attacker is considered to have 3 fresh SPs and 2 engaged SPs.
B. It can happen that no strength at all is counted from a defending unit. It still is considered to be defending.
5.7.4 Engaged Artillery
An engaged artillery unit can fire only at units with which it is engaged or in defense of its own hex.
5.7.5 Ending Engagement
A. Immediately remove an engagement marker from a unit at the instant any of the following is satisfied:
- A second unit in its hex attacks one of the enemies with which the unit was engaged, and the unit does not take part. (Think of this as being relieved by the second unit.)
- All units with which the unit was engaged, are no longer adjacent as a result of movement, retreat, or elimination; or have had their own markers from the engagement removed. (When one side breaks off or is pushed away, the other is no longer engaged.)
- The unit fights a battle (attacking or defending) and obtains a result other than Eng.
B. Engagement markers remain in place until removed for one of these reasons.
Example: Confederate units X and Y attack A and B, and Z attacks C; both results are engagements. In the Union turn, B attacks both X and Y, obtaining R1 1/0. Engagement markers then are removed from B, X, and Y; the marker is also removed from A. If B's attack had resulted in engagement, the marker would still have been removed from A. Finally, if Z moves away in the next Confederate turn; C's marker will be removed immediately.
Example: Union Unit B is engaged by X and Y, receiving a Confederate-turn engagement marker. Then B moves into Hex 1 (remaining adjacent to X). At that point Y loses its engagement marker, since B is no longer adjacent. A moves into Hex 2 and attacks X and Y, with a result of engagement. A, X and Y get Union-turn engagement markers, and the marker is removed from B.
6.0 Disorder and Rally
A. Combat units become disordered at the end of retreats (and only due to retreats).
B. Leaders never become disordered.
C. Place on top of the unit a Disorder marker of the same color.
D. A disordered unit's ZOC and facing remain the same as a normal unit. (Printed as "ZOC a facing"; the missing conjunction is supplied.)
6.1 Movement of Disordered Units
A. All movement penalties for being out of command control apply to disordered units (4.1.2); there is no additional penalty if both apply.
B. If a disordered unit ends any phase in a hex with other friendly units, all such units are immediately disordered.
C. Disordered Union units may never move north (that is, to a lower-numbered hex row (such as 1900 to 1800).
D. Confederate units may never move south (such as from 1800 to 1900).
6.2 Combat With Disordered Units
A. Disordered units cannot attack.
B. Whenever disordered units are present in a defender's hex, the attacker applies a +2 DRM.
6.3 Rally
A. In each Rally Phase, both sides may attempt to remove the disordered markers from any of their disordered units that are not adjacent to enemy units. There are no other restrictions on eligibility to rally.
B. A disordered unit stacked with the leader of its division or the Army Commander rallies on a die roll less than or equal to the leader's rally value.
C. Disordered units not stacked with a leader rally on a roll of 1 for infantry or 1-3 for artillery.
D. Remove the Disordered marker from a unit that rallies. It may immediately begin to operate normally.
7.0 Artillery
Artillery exists to support the infantry, not to fight on its own; therefore the artillery units have special properties. In combat artillery may give support fire to an infantry battle, or bombard targets not under infantry attack. In either case, the artillery unit will be said to fire at some target; the word fire includes both types of combat.
7.1 The Artillery Units
Artillery counters are printed on both sides, one side representing the unit in limbered formation (ready to move) and the other unlimbered (ready to fire).
7.1.1 Combat Strengths
A. The combat strengths appear on the roster. Each unit has a support fire strength, bombardment strength, and range.
B. An asterisk means the battery has rifled guns, which are better for bombardment (Optional Rule 17.4).
7.1.2 Gun and Crew Points
The rosters show gun and crew points, which are lost separately. If either type is completely lost, remove the unit from play. Up until that time, an artillery unit's support values do not change. (If players wish, they can reduce strengths proportionately for gun points lost. A reduction for crew lost would be inaccurate.)
Design Note: Each artillery unit represents a battery or two batteries, of four to six guns. Artillery units will sometimes be referred to as batteries. This usage is separate from the terms in battery and out of battery.
7.1.3 Field of Fire
A. The Field of Fire diagram shows an artillery unit's field of fire. Artillery can fire only at units in its field of fire.
B. If stacked with infantry, artillery unable to fire at the attackers is not considered to be defending that hex.
7.2 Formation
A. Artillery units can be in unlimbered (ready to fire) or limbered (ready to move), formation with the corresponding face of the counter displayed faceup.
B. A unit can change formation only during a friendly Movement Phase.
C. To unlimber costs 3 MPs. To limber costs nothing.
D. An artillery unit which retreats automatically limbers. An unlimbered unit cannot move, but it can change facing within its hex. It fires normally.
E. A limbered unit cannot fire; it moves normally.
F. Having fired in a Combat Phase does not affect the artillery's ability to move in a later Movement Phase, except insofar as the unit must be unlimbered to fire.
G. Artillery can cross streams only on roads, and cannot enter a ZOC except to join an infantry unit (3.3.5.5).
7.3 Support Fire
Artillery can support infantry combat by adding on its support fire strength.
7.3.1 Procedure
A. At the time an attack is resolved, first the attacker, then the defender, announce which batteries will give support fire. Both sides announce their fires before any strengths are revealed.
B. Each adds the support fire values on to the infantry strengths.
C. The artillery units' basic strengths are modified for canister, and for enfilade (Optional Rule 17.3).
D. Artillery strengths are never modified for terrain.
7.3.2 Requirements
To give support fire, a battery must have an enemy infantry unit in range, in its field of fire, and in sight (7.6).
7.3.3 Self-Defense
A. A battery in a hex under attack must support the defense of that hex, if its field of fire permits.
B. A battery defending its own hex always fires canister.
C. Limbered batteries in a hex under attack automatically unlimber.
7.3.4 Canister
A. Artillery firing canister doubles its support fire strength.
B. Attacking batteries can choose whether to fire canister; they do so at a cost.
C. Batteries supporting the defense of their own hexes always fire canister.
D. Units supporting the defense of other hexes never fire canister.
E. An attacking battery adjacent to the defending hex can fire canister. If the attacking battery is in any EZOC at that point (not necessarily the ZOC of the target), it immediately loses one crew point. Defending batteries do not suffer this crew point loss for firing canister.
F. The attacker declares the fire type when announcing support fire.
7.3.5 Limits
A. Each battery can support only one combat per phase. A battery which supports cannot bombard in that same phase.
B. Any number of batteries can support the same combat.
7.3.6 Effects of Command Control, Disorder, and Engagement
A. Command control has no effect on artillery fire.
B. A disordered battery cannot give support fire.
C. An engaged battery can fire only at units with which it is engaged, or in defense of its own hex.
7.3.7 Supporting Batteries and Attack Requirements
A. Supporting batteries, other than those firing canister, are ignored for the purposes of 5.2.4; it is not necessary to attack every unit which has them in a ZOC.
B. Batteries firing canister do count as attacking units under 5.2.4.
7.3.8 Supporting Batteries and Flank Attacks
A. Supporting batteries, other than those firing canister, are ignored in deciding whether an attack is flank or frontal.
B. Batteries firing canister do count as attacking units in making this judgment.
7.4 Artillery Superiority
A. A combat DRM of one is received by the side which has artillery superiority.
B. Artillery Superiority means:
- One side has supporting artillery, however much, and the other has none; or
- Both sides have supporting artillery, and one has at least two points more.
7.5 Artillery Defending Alone
A. If artillery is attacked when not stacked with infantry, use the normal combat procedure. The artillery's defense strength is twice its support fire strength. Each side can use supporting artillery as well, (but the artillery being attacked does not count for determining artillery superiority) and all DRMs apply.
B. Disordered artillery defends at full strength.
C. The combat results are interpreted in a special way:
- On any engagement result, each battery loses one gun point and retreats two hexes;
- On a defender loss of one, each battery loses one gun point;
- On a defender loss of two, each battery loses two gun points.
- On any R result, the artillery is eliminated.
Example: On 0/1 Eng, each defending battery would lose two gun points and retreat two hexes.
7.6 Line of Sight
A. Artillery can fire only if a line of sight (LOS) to its target exists.
B. Players first determine which hexes between the firing unit and the target need to be clear for the LOS to be clear. The LOS Key aids in this task.
Design Note: Many games appeal to a straightedge to judge LOS. The LOS Key simply shows which hexes a straightedge from firer to target will pass through. Players comfortable with a straightedge should feel free to use one. (The designer acknowledges John R. Popiden for suggesting the LOS Key.)
C. Players then determine whether each hex is clear. Terrain or units can block the LOS, as described below.
D. Terrain or units in the firing unit's or target's hexes never block LOS; only intervening hexes need be clear.
7.6.1 Using LOS Key
A. The key shows a battery's field of fire, with each hex identified by a letter or number. Line up the key so that the firing unit corresponds to the battery at the bottom.
B. The target's hex will then correspond to a hex on the key. In each target hex, the key lists which intervening hexes must be clear in order for the target to be in sight.
C. When two hexes are together in parentheses, then it suffices for either to be clear.
Example: The battery in hex 1006 wishes to fire at 1405. Hex 1405 corresponds to 7 on the LOS Key; 1306 to 5, 1205 to 2, and 1206 to 3. From the key, hexes 1106, 1205, 1206, and 1306 must all be clear. To fire at 1206, either 1106 or 1107 must be clear.
7.6.2 Terrain
A. High ground blocks LOS unless both firer and target are on high ground.
B. Woods block LOS unless both battery and target are on high ground and the woods is not.
C. Thicket does not block LOS. (It represents dense but low-growing brush.)
D. Buildings do not block LOS.
E. A ridge running along a hexside blocks just like high ground when the LOS crosses it. (When using the LOS Key, the LOS crosses any hexside between two of those listed, or between a hex listed and the target or firing hex.)
7.6.3 Units
A. Combat units of either side block LOS of both sides, as described below. Exception: Units making an attack do not block LOS of artillery firing in support of that attack.
B. The LOS is still blocked by attacking batteries giving ordinary support fire; only infantry and artillery firing canister do not block. (The idea is that attacking troops can arrange to stay out of the way, but artillery firing at a distance, being stationary, cannot do so.)
C. Combat units block LOS in these cases:
- Between two level ground hexes, units always block;
- Between two high ground hexes, units on high ground (only) block;
- Between high ground and level ground, units on high ground block.
- Units on level ground block only if adjacent to either the firing unit or the target.
D. Leaders never block LOS.
Example: In the diagram, Y is out of sight of battery E; the high ground in hex 1310 blocks. W is out of sight of D; the ridge running between 1311/1411 and 1312/1411 blocks. Also, suppose A attacks X, B attacks Y, and C attacks Z. Battery F could support A against X; it could not support B against Y, because A blocks the LOS. D could support either B or C. E can support C against Z. But if C attacked W, then E could not support anyone against Z, because C would block its LOS.
8.0 Detachment of Regiments
A. Individual regiments can be detached from brigades during the game. (At the start of play, with a few exceptions, only brigade counters are on the map.) Each division has a number of regiment counters which can detach from brigades in the division. This represents a unit ordered to fight independently for a time.
B. A brigade may detach any available regiment of its division. If all a division's regiment counters are in play, its brigades can detach no more regiments. Eliminated regiment counters can be reused.
C. The state designations on the regiments are those of units which fought in the battle, but they have no effect on play.
D. Mark off a regiment's losses in the appropriate place on the roster sheet; losses to a regiment do not count against the parent unit. Instead, detaching a regiment lowers the shatter value of the parent unit (9.0).
E. Detached regiments follow command control and initiative rules in the same way brigades do. All regiments are just one counter, so fragmentation does not apply.
8.1 How to Detach Regiments
A. Regiments may only be detached at the beginning of the movement of any one unit of a brigade. Mark off three SP boxes (the initial strength of all detached regiments) from the parent unit's strength. This should be done with some distinctive symbol, for example a small d, since these are not combat losses.
B. Detachment does not expend MP.
C. A brigade counter must have at least 4 SPs to detach a regiment.
D. An engaged or disordered unit may not detach a regiment.
8.1.1 Status after Detachment
A. When put into play, a detached regiment has the same facing as the parent unit.
B. Regiments may not be detached during the Second Movement Phase from units that attacked in the First Combat Phase.
C. A regiment detached from a fragmented or out-of-command-control brigade is treated as out of command control for that phase.
8.1.2 Stacking and Detachment
Stacking can be violated at the instant of detachment, provided it is satisfied as soon as either the regiment or parent unit has finished moving.
8.2 How to Attach Regiments
A. A detached regiment can be reattached to any brigade of the same division; it need not be the original parent unit. A detached regiment cannot attach to other divisions.
8.2.1 Procedure
A. To reattach, a regiment must start the Movement Phase in the same hex but need not have the same facing.
B. An engaged or disordered regiment cannot be reattached nor may an engaged or disordered brigade reattach a regiment.
8.2.2 Strength Adjustment
A. For each SP in the regiment, erase one box of detached or eliminated from the brigade unit.
B. Erase detached before losses. Attachment is allowed only if that unit does not exceed its printed strength due to the attachment.
C. The brigade's shatter value increases whenever a regiment fills the place of detached troops (9.3).
Example: Head's brigade detaches the 10th Tennessee. Three boxes of his roster are filled in with a small letter d. Suppose the 10th Tennessee suffers one loss and reattaches to Brown, who suffered two losses and detached nobody. Then Brown's two losses are erased, being filled in by the 10th Tennessee. If Brown has also detached a regiment, then two of the three d places would be left with one box marked d and two marked for losses.
9.0 Shatter
Shatter represents a unit temporarily out of action as a result of losses. When a unit's losses reach the shatter number printed on the roster, remove the unit from play. It can return after reorganization. Only infantry shatters; artillery units never shatter.
9.1 How Units Shatter
9.1.1 Brigades
A. Each brigade has two shatter numbers printed on the roster.
B. A brigade can shatter twice. The first shatter number is the number of losses which shatters it for the first time; the second is the number of additional losses which will shatter it for the second time (after it has been reorganized).
C. At the instant the sum of all losses to units of the brigade reaches the first shatter number, all the brigade's counters are removed from play. (If the combat results call for losses in excess of the shatter number, those losses are ignored.)
D. Detached points do not count as lost for army morale (11.0).
E. After reorganization, the brigade reenters play. When the number of losses inflicted on the brigade after reorganization, reaches the second shatter number, the brigade shatters again and is permanently removed from play.
F. Surviving SPs of a brigade removed in this manner are not considered lost for army morale; they do not affect the demoralization level.
Example: Suppose each of McArthur's counters loses 2 SPs. If either loses another SP, the brigade will shatter, and both will be removed.
9.1.2 Regiments
A. An infantry regiment shatters when it has only 1 SP remaining. The last point is then automatically lost, and counts against army morale.
B. The number of losses is the number of SPs marked off at a given time. If a brigade loses 3 SPs and then replaces them by attacking a regiment, its losses then would be considered zero.
9.2 Reorganization
A. A brigade reorganizes on the third turn after shatter.
Example: A brigade shattered on Turn 3 reorganizes on Turn 6.
B. When shattered a second time, a brigade is lost for good.
C. Regiments never reorganize.
9.2.1 Strength
A. A reorganized brigade recovers one-third of the SPs it has lost. Round this quantity off to the nearest whole number (round ⅔ up).
Example: Out of 4 SPs lost, 1 SP would be recovered, out of 5 SPs lost, 2 SPs would be recovered.
B. The reorganized brigade uses the smallest number of counters to fit its new strength.
Example: If Brown's brigade reorganizes with 6 SPs, it would use just the A counter; if it had 7 or more SPs, it would use both.
C. When two counters are used the player can split up the points however he likes between them, erasing old loss marks where necessary.
9.2.2 Placement on the Map
A. A reorganized brigade is placed onto the map at the start of its First Movement Phase in the turn it reorganizes. It must be stacked with some unit of its division (possibly just the leader), or with its army commander, and may not be placed adjacent to an enemy unit.
B. If these conditions cannot be met, the brigade must wait until a later Movement Phase to reorganize.
9.2.3 Army Morale Bonus
When placing a reorganized brigade into the map, that side's demoralization level (10.0) is reduced by however many SPs the brigade recovered under 9.2.1.
9.3 Effects of Detachment and Reattachment
Detaching troops lowers a brigade's shatter number. Attaching troops increases it. These changes must be recorded on the roster.
9.3.1 Detachment Penalty
When a regiment is detached, reduce the detaching brigade's shatter number by 2 SPs. If the brigade has already suffered equal or greater than this new value, it does not shatter immediately, but shatters with its very next loss.
Example: A brigade with shatter number 8 detaches a regiment. The brigade's shatter number becomes 6.
9.3.2 Reattachment Bonus
When a brigade attaches a regiment, and the regiment fills the place of detached points, increase the brigade's shatter number by one less than the number of detached points replaced.
Example: A brigade having shatter number 6 detaches a regiment with 3 SPs. The brigade's shatter number becomes 4. If the brigade attaches a regiment of 3 SPs, these will replace the detached three; the shatter number goes back up to 6. If it attaches a regiment of 2 SPs, the shatter number increases only to 5.
9.4 Advance After Shatter
When a brigade shatters, leaving one or more hexes vacant, and an attack had been announced against any of those hexes, but not yet resolved, the attacking units can occupy the hex as though they had successfully attacked it. The same holds if an attack had already been made and resulted in engagement: the engaged units may advance.
10.0 Transfer of Brigades
10.1 Procedure
A. A player may attempt to transfer a brigade from control of one division to another. Announce this when moving the brigade, and roll one die. On a 1-3, the transfer succeeds. Otherwise no brigade can be transferred from that division in that turn. (See also 10.2.) The new subordination should be noted on the roster.
B. The brigade gets command control from its old division in the phase it is transferred, and from its new division thereafter. It continues to get rally benefits from its old commander, not its new one. (The rally benefit comes from the officer being known and respected by his men; an unfamiliar general would not inspire a unit.)
C. Each division can have no more than one of its original brigades assigned elsewhere at any time.
D. Each division can have no more than one transferred brigade attached at any time.
E. It is not possible to transfer only part of a brigade.
10.2 Effect of Army Commanders
A. When a Union division starts the phase with its leader inside Grant's command radius, the Union does not need to roll the die to transfer a brigade.
B. The Confederates can only transfer a brigade from a division whose leader starts the phase inside their army commander's command radius. They then must roll the die as above to make the transfer. (Confederates were more protective of their divisional organizations.)
C. Union divisions must be activated before they may move (15.0). However, a brigade may be transferred
C. Union divisions must be activated before they may move (15.0). However, a brigade may be transferred from an inactive division. To do this successfully, the Union must roll a 1 or 2 (rather than 1-3).
11.0 Army Morale
The overall morale of each side is represented by a Demoralization Level, a number which fluctuates during play according to the course of the action. When the level increases, the army gets closer to demoralization (its morale weakens).
11.1 Demoralization Records
A. Keep track of demoralization on the roster sheets, marking off boxes when the level increases, and erasing them when it decreases.
B. The number of boxes marked off is the current demoralization level. (The level can be negative, indicating very good morale.)
11.2 Changes in Demoralization Level
A side's demoralization level changes for losses, retreats, when a brigade is shattered or reorganizes, and for other events. See the table for a list of all factors affecting each side's demoralization level. (The table is not reproduced in this text.) They are explained below.
11.2.1 Retreat Penalty
A. The penalty for suffering a retreat when defending applies whenever an R result is obtained, even if no units actually retreat. The penalty is only one even if several units retreat from the same attack.
B. Attacking units never suffer a morale penalty for retreat.
11.2.2 Battery Sites
A. The battery site symbols represent places from which Union batteries could do a great deal of harm to the Confederate position. These symbols appear in groups of two or three adjacent to one another (except for one lone battery which is a group all by itself).
B. Whenever the Union gains control of an entire group, the Union demoralization level decreases by two. (If the Confederates take back any hex of a Union-held group, the level increases by two again, to compensate.)
C. In a similar vein, the Confederate level increases by 3 per Union artillery unit in a battery hex.
D. Control means that a Union unit most recently moved through each hex, and any hex adjacent to a Confederate unit is Union-occupied.
Example: In the diagram above (not reproduced here), A shows a group of three battery sites, hexes 1920, 1919, and 1820. In A, the group is Union-controlled. In B, it is not Union-controlled because of Confederate unit X.
11.2.3 Isolated Headquarters
A. The Union suffers a morale penalty for having an HQ cut off from the army's base. An HQ is cut off if it cannot trace a path of four hexes or fewer to a road, and from there along continuous roads to the Fort Henry road exit (hex 1225).
B. If an HQ is cut off at the end of a Union player-turn, increase the Union demoralization level by three.
C. There is no additional penalty if the same headquarters unit remains cut off on subsequent turns.
D. Once the HQ is no longer cut off, decrease the demoralization level by 2 (rather than 3) points, and the HQ is again subject to the demoralization penalty if it subsequently becomes cut off.
11.2.4 Reinforcements and Night
A. The Union receives reinforcements on Turns 3 and 6. The Union demoralization level is reduced by 3 when the Turn 3 reinforcements arrive and by 5 when the Turn 6 reinforcements (Grant) arrive.
B. In addition the Union level is reduced by 5 on the first night turn.
11.3 Demoralization
A. The demoralization records show a number corresponding to the higher demoralization levels. When a demoralization level reaches such a value, roll one die. If the result is less than or equal to the number shown, the force is demoralized.
B. If both sides need to roll after the same combat, the defender rolls first.
C. If either army becomes demoralized, the game ends immediately and the other side wins.
12.0 Rifle Pits and Fort Donelson
A. Rifle pit symbols represent shallow trenches with a large barrier of cut branches and earth (abatis) in front. They run along hexsides, but lie within particular hexes. Units in these hexes are inside the rifle pits. In general they receive benefits when combatting units across rifle pit hexsides.
B. Fort Donelson consists of hexes 1116 and 1217. The Confederate side must keep one unit (of any size) inside Fort Donelson throughout the game.
C. If the Union takes either hex, this rule no longer applies. (A garrison under 12.5 is not enough; it must be an actual unit.) [Editorial note: the printed reference "12.5" matches no rule in this text; it appears to mean the garrison rules of 12.4.] The 49 Tenn and 50 Tenn regiments start inside the fort.
12.1 Movement Effects
A. To move across a rifle pit hexside from the outside costs +4 MPs. To cross from the inside costs +1 MP. However, units using GTM may ignore rifle pit hexsides.
B. On Turn 1, Confederate units do not pay the +1 MP to cross a rifle pit hexside from inside.
C. Artillery can cross rifle pits (in either direction) only along roads. The artillery do not need to be using GTM, but must be moving along a road.
D. Fort Donelson does not affect movement.
12.2 Effects on Zones of Control
A. A unit inside a rifle pit exerts a ZOC through every rifle pit hexside, regardless of its facing. It still has the usual front, flank, and rear hexes for other purposes.
B. A unit inside Fort Donelson controls all six adjacent hexes.
C. ZOCs do not extend across rifle pit hexes from the outside. This means, among other things, that units in rifle pits can expose a flank, provided it is guarded by a rifle pit hexside.
12.3 Combat Effects
12.3.1 Mandatory Attack
Units inside rifle pits or Fort Donelson need not attack even though they have moved into an EZOC. This applies only if the enemy units are across rifle pit hexsides (or in the case of Fort Donelson, outside).
Example: Unit A can move to 0721 without having to attack a unit in 0821. It would have to attack a unit in 0820. (Diagram not reproduced.)
12.3.2 Flank Attacks
A. Units attacking across a rifle pit hexside against a unit in the rifle pit hex cannot be used to achieve a flank attack.
Example: The attack in A is frontal. B is flank. (Diagrams not reproduced.)
B. An attack against Fort Donelson always is frontal.
12.3.3 DRMs and Retreats
A. In an attack made against a Fort Donelson hex or entirely across rifle pit hexsides against a defender in a rifle pit, the attacker applies a +1 DRM.
B. The defender reduces the length of any retreat by one, ignoring R1 results, and treating R2 and R3 results as R1 and R2, respectively.
C. An R1 result against a rifle pit does not affect the defender's demoralization level.
12.3.4 Effect on Combat Strength
A unit defending in Fort Donelson doubles its effective strength.
Example: A defender with 6 SPs would be reduced to 5 (the 5-SP-per hex limit) and then doubled to count as 10.
12.4 Garrisons
In the actual battle the Confederates screened their entire right wing with only a few hundred men in the rifle pits. This rule allows the Confederate side to do the same.
A. Confederate infantry can be dispersed to garrison the rifle pits. Only infantry can be dispersed. Place a garrison marker on top of the unit to be dispersed. The unit must have at least 2 SPs.
B. Every rifle pit hex within four hexes of the dispersed unit is then considered to have an intrinsic garrison worth 1 SP.
C. The dispersed unit is considered no longer to occupy the hex in which the counter is located; it becomes, in effect, a marker showing which hexes are garrisoned.
D. A garrisoned hex counts as occupied for preventing Union release (14.2). If the Union ever occupies the hex containing such a unit, the Confederates may displace the unit to any adjacent hex unoccupied by Union units.
12.4.1 Garrisoned Hexes
A. A garrisoned hex defends and has a ZOC as though it contained a unit worth 1 SP. A hex within range of two or more dispersed units still has a garrison of only 1 SP. (There can never be more than one garrison per hex.)
B. If ordinary Confederate combat units also occupy the hex, ignore the garrison.
C. A garrison may never attack.
D. A loss of 1 eliminates a garrison.
E. The first Confederate Movement Phase in which the hex is not occupied by a Union unit, if a dispersed unit is still within four hexes, the hex becomes garrisoned again.
F. For every two garrisons eliminated, mark off 1 SP from the dispersed unit. (Suggested mnemonic: mark off half a box for each one.)
G. However, the elimination of a garrison SP and any retreat result against garrisons reduce army morale as if they were normal 1-SP units. (Do not double count for the loss of SPs to a dispatched unit).
12.4.2 Regrouping
A. A dispersed unit can be regrouped (no longer dispersed). This takes one full Movement Phase. A regrouping unit may not move in that phase. Remove the marker at the end of the phase.
B. A unit adjacent to a Union unit cannot be regrouped.
13.0 Night
A. Two night [turns] follow Turn 9. After the second night turn players put the Turn Record marker in the 6 am box again, and begin the second day.
B. Night is a time for reorganization; both sides recover some strength, and there is no combat.
13.1 Movement, Combat, Rally
A. At night, units cannot enter hexes adjacent to the enemy. No combat is allowed.
B. All engagement markers are removed at the start of the first night turn.
C. Rally is automatic in night turns.
13.2 Reorganization and Strength Recovery
A. Any unit shattered on Turn 9 reorganizes during the second night turn; thus all units will be reorganized.
B. All brigades still in play recover one-third of their losses during the first night turn, following the same rules as for reorganizing brigade. Losses as used here means simply however many SPs they are below their original strength at that time.
Example: A brigade which had 9 SPs at the start of the battle and now has 6 SPs recovers 1 SP.
C. The Union also recovers 15 additional SPs, distributed in any fashion among the Union units (i.e. the Union player just adds a total of fifteen points, assigning to any eligible units as desired).
D. If not all 15 points can be used to replace losses, then the Union can place additional detached regiments on the map, stacked with any units of the division they belong to, to use up the remaining points.
14.0 Setup and Reinforcements
Each side sets up its own units, Union first. Units must obey stacking restrictions.
14.1 Union Setup
A. The Union starts with all brigade units, all artillery, and all leaders except Grant.
B. Union regiments may begin the game on the board if the Union detached them. They must be stacked with or adjacent to their parent units.
C. The Union sets up its units in the three divisional areas marked on the map. The units of each division go inside that division's area.
Exception: The McClernand counter can start one hex south of the First Division area.
D. Units can deploy in any fashion inside their areas.
E. All Union infantry counters deploy facedown. In addition the Union places dummy counters: up to six may be placed in the First Division area, and up to three in each of the other two areas. They deploy just like units of the division, and count as infantry for stacking.
F. After the Confederates have set up, the Union flips its units faceup and removes the dummies.
G. Artillery units are set up in battery. They can be concealed by placing them under other units.
H. The Confederates cannot examine Union stacks before setting up.
14.2 Confederate Setup
A. The Confederates start with all brigade counters, artillery, and leaders, plus the 49 Tenn and 50 Tenn regiments. The two regiments start in Fort Donelson.
B. The Confederates set up their other units anywhere north of the deployment line marked on the map.
C. Artillery units must deploy in a rifle pit hex.
D. Regiments may be detached, and deployed anywhere in the area (they need not be near their parent units).
E. Units can start the game dispersed (12.4).
14.3 Reinforcements
A. The only reinforcements are three Union infantry regiments (the 46th, 57th, and 58th Illinois of the 3rd Division) on Turn 3, and General Grant on Turn 6. They all arrive at hex 2125 (the Fort Henry Road) in the First Movement Phase.
B. The first unit pays 1 MP to enter 2125, the second 2 MPs, the third three. They can use GTM that turn.
C. The Union can attach them to either the First or Second Division instead of the Third, by announcing this at the time they enter. This is over and above any transfer under 10.0.
D. If no Union division has yet been released on Turn 3, the three regiments move directly to the 3rd Division area and stay inside that area until release.
15.0 Surprise Effect
The Confederate attack took the Union by surprise. The Union divisional commanders were under orders not to bring on a major engagement, and interpreted this to mean that each should hesitate to support the others in case of attack. This rule simulates their hesitancy.
15.1.1 Situation at Start
A. The units of each Union division cannot move (not even change facing) until the division is activated.
B. The only exception is that a brigade can still transfer to an active division, under 10.0, and move as part of that division.
C. Divisions are more likely to be activated the farther the attack progresses. The Union must roll a 1 or 2 to transfer from an inactive division.
15.1.2 When Activation Takes Place
The Union may attempt to activate any division during each friendly Movement Phase, but after all activated divisions have completed their movement.
Exception: No activation attempts are allowed during the Turn 1's First Movement Phase.
15.2 Procedure
A. To activate a division, the Union rolls one die, modifying the roll using the Division Activation Matrix and other Activation DRMs. If the modified die roll is 6 or greater, the division is immediately activated and may move normally for the remainder of the game.
B. Furthermore, if the Confederates fail to garrison certain rifle pit hexes, Union divisions are automatically activated.
15.2.1 Division Activation Matrix
A. The Division Activation Matrix shows the basic activation DRM as a function of which division the Confederates have attacked.
B. To use the matrix, locate the number of the division the Union player wishes to activate on the left hand column. Cross-index these to determine the base DRM. (Use the one most advantageous to the Union if there are two possibilities.) The letter A means the division automatically activates.
Example: If the Confederates attack units of the First Division, that division is activated and the base DRMs for the Second and Third Divisions are -2 and -1, respectively.) (The matrix is not reproduced in this text.)
15.2.2 Other DRMs
A. Refer to the table beneath the Division Activation Matrix for DRMs. (That table is not reproduced in this text.)
B. All DRMs are cumulative.
15.2.3 Confederate Garrison Requirement
A. A division is automatically activated if the Confederates fail to protect the rifle pits to its front. Opposite each division's deployment area, certain hexes in the Confederate perimeter are marked with the division's number. At the start of a Union Movement Phase, if there is no Confederate unit either in or adjacent to such a hex, the division is released.
B. Having the hex garrisoned under 12.4 counts as occupying it.
16.0 Victory Conditions
A. Historically, the Donelson battle was a confused affair in which an apparently successful Confederate attempt to break the ring of Union forces and escape from the fort was followed by a withdrawal back to their previous lines, some of which, however, were captured by the Union before the Confederates could reoccupy them.
B. In an attempt to reproduce some of this confusion, the Confederates do not know for sure what their victory conditions will be until they has achieved some level of success. Either they will have to exit SPs from the map or inflict severe damage on the Union Army and retain possession of Fort Donelson and the dominant high ground.
C. In either case, the Confederates automatically win by demoralizing the Union.
16.1 Selection of Victory Conditions
A. Two different sets of Confederate objectives are possible, breakout and defend. The Confederates have a chit labeled with each objective.
B. At the end of the first player-turn in which the Confederates hold at least seven Union deployment hexes, draw one of these chits at random to determine which set of objectives apply in this game.
C. The Confederates hold a hex if a Confederate unit moved into or through the hex at some point and no Union unit has entered it since.
D. If the chit drawn is defend, the Confederates win by satisfying the conditions in 16.2.
E. If the chit drawn is breakout, the Confederates win by satisfying 16.3.
16.2 Defend Victory Conditions
A. The Confederates win by holding Fort Donelson (both hexes) and hex 1309 (the river landing) and by holding or having a Confederate unit adjacent to every high ground hex within five hexes of these two locations.
B. Exception: Hex 1421 does not have to be held.
C. These conditions must be met at the end of Turn 9 on each day.
D. In addition, the total number of Union infantry and gun SPs currently shown as lost on the Union roster sheet must exceed 45.
E. Any other result is a Union victory.
16.3 Breakout Victory Conditions
16.3.1 Confederate Exit
A. To satisfy the breakout victory conditions the Confederate must exit infantry (which may include Forrest) and gun points from the hexes labelled Confederate Exit.
B. Units pay 1 MP (plus any applicable costs for exiting an EZOC) to leave the map from such a hex.
C. Once a unit has left the board it may not return.
D. The Confederates may declare the game over at any time after they have exited 50 or more SPs.
E. Victory levels are:
| SPs Exited | Victory Level |
|---|---|
| 65+ | Confederate Decisive |
| 50-64 | Confederate Tactical |
16.3.2 Union Victory
A. The Union can win the game under Confederate breakout objectives by avoiding Confederate victory and, in addition, by capturing battery groups (all hexes) as follows:
| # Battery Groups | Victory Level |
|---|---|
| 4+ | Union Decisive |
| 1-3 | Union Tactical |
B. If the Union has satisfied the conditions at the end of the first day (Turn 9) for either decisive or tactical victory, the game ends immediately.
16.3.3 Draws
If neither side achieves the appropriate conditions by the end of the second day, the game is considered a draw.
16.4 Demoralization
If either side is ever demoralized, the other side automatically wins a decisive victory, regardless of what the Confederate victory conditions are.
17.0 Optional Rules
A. The following rules may be used at the players' discretion. If players do not mind the complexity, it is recommended that they use the rules for Forrest, and also the rules allowing Grant and Smith to modify combat rolls. The rules for cavalry charges and gunboats are only for players who desire these pieces of historical color.
B. The rule for Union slowed movement early in the game should not be used except to balance the game should the Rebel player be inexperienced.
17.1 Forrest Cavalry Unit in Combat
The Confederate cavalry unit Forrest (Nathan Beford [sic] Forrest in command) has two special abilities: it can retreat before combat, and it can charge.
17.1.1 Retreat Before Combat
A. When the Union announces an attack against the Forrest unit, the Confederates can choose to retreat before combat. He decides immediately, before strengths are announced.
B. To retreat before combat, simply retreat Forrest two hexes per 5.6. There is no battle (unless there were other units defending, in which case the attack is now resolved against them).
C. If the retreat leaves Forrest's hex empty, the Union units can advance (5.6). They are not considered to have attacked, thus if it is the First Combat Phase, they can still move and fight normally in the Second Movement and Combat Phases.
D. Forrest does not become disordered following a retreat before combat.
E. There is no penalty to Army Morale when Forrest retreats before combat.
17.1.2 Charges
A. A charge is a special type of attack that the Forrest unit may make against a single defending hex. It can be made in addition to a normal attack against that hex in the same phase. (This is the only exception to the rule that a hex is attacked just once per phase.)
B. To resolve a charge, the Confederate player rolls two dice. The table below gives the dice sums needed for the charge to succeed. The dice roll needed depends on whether the hex is defended by only artillery, or includes infantry. If all units are disordered, apply a -3 DRM. Success also depends on whether the charge is frontal or flank. (The charge table is not reproduced in this text.)
C. If the charge succeeds, then any artillery in the defending hex is eliminated.
D. Defending infantry suffers a result of 1R2 as if it were normal combat.
E. If the charge fails then the Forrest unit loses 1SP and retreats two hexes, effectively suffering a 1R2 combat result.
F. A charge is not considered an attack; it does not compel attacks on other hexes.
G. Forrest cannot charge a level ground hex from a high ground hex. He also cannot make a charge across a stream.
Design Note: I include these rules reluctantly. I certainly do not wish to glorify Nathan Bedford Forrest, who was a slave trader in peace. At war at Fort Pillow, he was the murderer of troops that had surrendered. But he was indeed a gifted trainer and leader of troops, as these special rules show.
17.2 Generals in Combat
A. The Union generals U.S. Grant and C.F. Smith can influence combat die-rolls. Each can assist attacks or defenses by units with which he is stacked.
B. When attacking, the Union applies a +1 DRM to the combat die roll.
C. When defending, the Confederates apply a -1 DRM to the combat die roll.
D. Only one of the two generals can benefit a particular combat. The effect is the same if both are present for the same combat (+1 or -1).
E. When using the benefit, the Union must make an additional die roll after the combat is resolved. On a 6, the general is killed.
F. If Grant is killed, remove his counter from the map.
G. If Smith is killed, leave the counter in play. Its values become 4-3-3 (the leadership qualities of his successor).
H. Smith can benefit only combats involving at least one unit of his division.
I. The Union is never required to use this benefit.
17.3 Enfilade Fire
A. Using this rule, artillery firing on the enemy's flank may gain a substantial increase in effect.
B. Using the Enfilade Key, determine the side of the target hex a battery's fire is passing through. If that hexside is a flank or rear hexside for every enemy unit in the target hex, then the battery is said to enfilade the hex. The strength of an enfilading battery is tripled. If the battery is firing canister, its strength is just tripled, not sextupled.
C. The Enfilade Key shows a target hex and a quarter-circle of the hexes surrounding it. Each hex in the quarter-circle has a number, or pair of numbers. By orienting the diagram properly, the firing unit's hex can be matched up with one of the numbered hexes. (The Enfilade Key is not reproduced in this text.)
D. The sides of the target hex also are numbered. The number in each hex identifies the side of the target hex through which the fire passes. When a pair of numbers appears, the fire passes through the corner between those two hexsides. In such cases, an enfilade is achieved if the enfilade requirement above is satisfied for either of those two hexsides.
17.4 Bombardment
A. Bombardment allows artillery to attack separately from infantry. Bombardment slows down enemy infantry, sometimes putting it out of command control; it will prevent enemy artillery from firing, or force it to retreat. It never inflicts strength losses.
B. Bombardment takes place at the end of each side's First Combat Phase, after combats involving infantry. Both sides bombard in each side's player-turn. The results last until the end of the next First Combat Phase (the other side's). All fires are considered to occur simultaneously, although the phasing side resolves its fire first.
17.4.1 Targets
A. Infantry or artillery can he attacked by bombardment; leaders cannot. A bombardment attack is made against one unit, not all units in the hex. The firing side chooses the unit to be attacked. The target cannot have been involved in a battle in that phase.
B. If a hex contains multiple counters, the firing side chooses one (such as "the second unit in the stack"), without seeing any in the stack. If the counter is a leader, the bombardment has no effect.
C. All artillery bombarding the same target is added together into one attack.
17.4.2 Requirements for Bombardment
A. Artillery must be in battery to bombard. It must have a clear LOS to the target.
B. Only units which did not give support fire that phase can bombard.
C. Each artillery unit bombards just one target per phase.
17.4.3 Using the Bombardment Tables
A. There are two tables, one for infantry targets, the other for artillery. Sum the attacking factors. Halve the bombardment factor of any non-rifle battery (those without an asterisk, 7.1.1) firing at a range five or greater, dropping any fractions. (The bombardment tables are not reproduced in this text.)
B. Next, find the corresponding column of the table.
C. Shift one column to the left when a target inside a rifle pit is bombarded only across rifle pits, but do not shift when using the lowest column (1-3 or 1-5).
D. Roll one die, applying a -1 DRM if the target is in woods, and read the result. Results are explained on the table.
E. Because results last through the next First Combat Phase, artillery suffering SUP results may not bombard in that later phase. Such units can still bombard in this phase because fires are simultaneous.