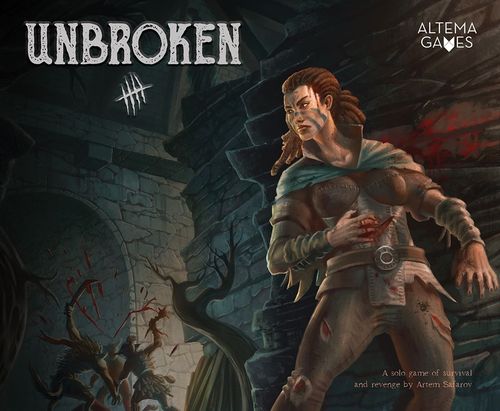
Unbroken
Unbroken Rulebook
Table of Contents
Table of Contents
- Gameplay Overview
- Components List
- Components
- Setup
- Resource Types
- Response and Passive Effects
- Monsters
- Skills
- Weapons
- Characters
- Conditions
- Difficulty Settings
- Gameplay
- Travel Phase
- Combat Phase
- End of Combat Phase
- End of Game
- Scoring and Achievements
- Welcome to the Dark
- Sneak Class
- Sage Class
- Hunter Class
- Brawler Class
- Glossary
Gameplay Overview
Unbroken is a solo game of survival and revenge. You play as an unfortunate adventurer who was left for dead in monster-infested caverns. Your goal is to collect enough resources to defeat 4 progressively-tougher monsters on your way to freedom and vengeance. If you are to succeed, you will need to gather every bit of your resolve and be smart with the resources found in these catacombs.
The game is played over the course of 4 Levels. In each Level, you begin with the Travel Phase, in which you collect resources and prepare yourself for the coming battle. Then you encounter a monster in the Combat Phase. Should you survive the battle, you progress to the next Level. If you defeat the monster on Level 4, and manage to not starve to death, victory is yours! You have reclaimed your freedom and exacted your vengeance.
The game's flow is best learned from the Quickstart Guide and Quickstart Reference Sheets.
This Fox, a mysterious icon known in the lands as an ancient Altema™, is used to go through each step of the game with the Quickstart Reference Sheets and will guide you in your journey through the Dark.
Throughout the Rules Reference Guide, key game terms are set in bold for quick, easy reference.
Visit www.PlayUnbroken.com to watch the How to Play video, learn more about the world of Unbroken, access the game's original musical score, record your game results, and more. Enjoy!
Components List
- 1 Quickstart Guide and 1 Quickstart Reference (2 double-sided sheets)
- 1 Actions Guide and Symbol Guide (double-sided)
- 2 Dual-Layered Tracker Sheets (single-sided)
- 5 Character Sheets (double-sided and 1 Blank Sheet)
- 9 Weapon Sheets (single-sided and 2 Blank Sheets)
- 28 Monster Sheets (6 monsters for 4 different Levels and 4 Blank Sheets)
- 1 Achievements Sheet (double-sided)
- 1 Scorepad (20 Pages)
- 100 Encounter Cards (including 8 Blank Cards)
- 28 Skill Cards (including 2 Blank Cards)
- 12 Condition Cards (including 2 Blank Cards)
- 23 Tokens (12 Blue Tokens, 11 Red Tokens)
- 1 Custom 6-sided Slashes Die
- 1 Altema Fox Tracker Token
- 1 Embroidered Velvet Bag
- 1 Poster (double-sided)
- 1 Rules Reference Guide
Components
CHARACTER SHEETS contain information about abilities specific to the character you are playing. Only 1 character will be in play for any given game. The opposite sides of the Character Sheets have different art but are mechanically identical.
MONSTER SHEETS represent the enemies that you encounter. They are organized into 4 Levels, with higher Levels representing more difficult monsters. The monster Level is displayed on the back of every sheet, while the bottom shows the monster number in that Level.
WEAPON SHEETS allow you to spend Effort to break Armor and inflict Wounds, helping you defeat monsters. You can only have 1 Weapon in play at a time.
SCOREPAD/ACHIEVEMENTS SHEET are both used to keep track of your accomplishments. Record your score from each game you win and challenge yourself to gain these achievements.
ENCOUNTER CARDS represent the encounters you face during your travels, offering opportunities to obtain or exchange resources. If the deck ever runs out of cards, reshuffle the discard.
SKILL CARDS are usually obtained after victories in combat and offer additional abilities to help you on your quest. There is no limit to how many Skill Cards you can possess. Skills stay with you for the entirety of the game (unless instructed to discard).
CONDITION CARDS indicate temporary effects that apply to your character. These cards usually come into play through combat with monsters and are mostly negative.
Unbroken uses a custom 6-sided Slashes Die. Each face of the die represents a number from 1 to 6.
The Actions Guide, Time/Monster Tracker, Resource/Effort Tracker, blue, and red tokens will comprise your Display and are used to track information during the game. The back of the Actions Guide includes the Symbol Guide for easy reference.
The Fox Tracker Token/Quickstart Reference Sheets are used to track the phase you are on, the decisions you are able to make, and where they branch off. Use these to follow game flow step-by-step!
Setup
Note: Review the components laid out here. For quick and easy Setup follow these guidelines.
Also, flip over the Quickstart Reference Sheets for the Quickstart Guide to start playing Unbroken right out of the box!
- Place your Bare Hands Weapon Sheet face-up. Active Weapons are always face-up.
- Shuffle Encounter Deck and place face-down.
- Shuffle the Skill Deck and place face-down. Active Skills are always placed face-up.
- Place the Condition Deck face-down and unshuffled. Active Conditions are always placed face-up.
- Select a Character Sheet and place a blue token as shown on the Character Sheet.
- Place the rest of the Weapon Sheets face-down, grouped together from Basic to Advanced.
- Place Monster Sheets ordered top to bottom from Levels 1-4, setting the 6-sided Slashes Die aside. Active monsters are always placed face-up.
- Place Scorepad and Achievements Sheet to the side until the end of the game.
- Place the Tracker Sheets and blue/red tokens as shown. This is your Display. Every Tracker is dual-layered for easy sliding.
- Place the Quickstart Reference Sheets and the Altema Fox token on Travel Phase, Step 1: Preparation Step.
Resource Types
Resources are crucial to your success. They allow you to stay alive and fight monsters. Effects appearing on a variety of cards and sheets allow you to exchange certain resources for other types.
EFFORT
Effort is the most important resource. It is a measure of your life force, stamina, and determination. It is used to pay for many of your actions and, most importantly, to attack monsters. There are 3 categories of Effort: Small, Medium, and Large.
Each category is a distinct resource and is spent independently. However, you can spend Effort of a higher category in place of Effort of a lower category. To do so would be a desperate measure, but might just save your life! If you ever must lose Effort but do not have enough — you lose the game.
You are still alive if you have no Effort left. However, you will die when you must spend any Effort you do not have — for example, losing Effort when at 0 Effort to a Wound or hunger will kill you.
CUNNING
Not all problems are solved with brute force. Some obstacles will require a smarter, craftier approach. Cunning is a representation of how inventive and sneaky you can be. This is a resource that you use to learn more about your foes and to trick them without fighting.
FOOD
Revenge is hungry work! At the end of every Level, you will need to eat something. Being unable to do so will sap you of much-needed strength, and you could even die of starvation.
WOOD
You will not last long fighting with your bare hands, but crafting Weapons requires materials. Wood will help create these deadly instruments to bludgeon your enemies.
METAL
Metal will surely come in handy for the encounters to come. Also, Wood and Metal have uses, often violent, in addition to crafting so keep your eyes open and these resources in mind during your game.
TREASURE
Ah yes, the purpose of your original expedition! You will seldom find it useful down in the depths, but if you emerge alive, Treasure yields the most points in calculating the impressiveness of your unlikely victory.
TIME
On each Level, you only have so much Time to spend preparing and exploring before the monster becomes aware of you and attacks. Each Encounter Card carries a Time Value, and some actions do too, bringing you closer to the inevitable monster confrontation.
Track your current supply of resources by adjusting your tokens on the sheets in your Display — increasing when you gain a resource, and decreasing when you spend or lose a resource.
There is a separate resource bar for each type. You can never have more of any resource than the corresponding resource bar has space for; if you would gain more, the excess is lost.
Blue tokens are used on the Resource Tracker and Effort Tracker. Red tokens are used on the Time Tracker and Monster Tracker.
Response and Passive Effects
RESPONSE and PASSIVE, these types of effects appear on most of the cards in Unbroken. Remember to pay attention to these effects and take them into account when appropriate!
RESPONSE effects are triggered after a specific event or at a specific time, outlined in the description. Response effects listed on Monster Sheets and Condition Cards are mandatory, while those on Character Sheets and Skill Cards are optional. Unless noted otherwise, Responses can only activate once per trigger (e.g., you can only use the Brawler's Power Through once per attack, but you can do so again next turn). Responses are not actions and triggering these does not consume your turn in combat. If the same trigger activates several Responses, the player may choose the sequence in which these are resolved.
PASSIVE effects apply if the card with the effect is in play. Passive effects are always resolved after any applicable Responses. If several Passive effects are in play, the player chooses the order in which these are applied.
Monsters
You will face 4 different monsters (1 per Level) over the course of the game, and each successive monster is harder to defeat than the previous foe. Each monster has several statistics listed on its sheet:
ARMOR — Certain monsters are well protected, and you will need to break their Armor before you can inflict any Wounds. Some Weapons are more efficient than others at breaking Armor. Certain Skills allow you to bypass Armor altogether.
HEALTH — A measure of the monster's toughness, which indicates how many Wounds you must inflict in order to defeat it. Use your Weapons and Skills — these offer a way to convert Effort (and sometimes other resources) into powerful attacks that inflict Wounds.
AMBUSH EFFECT — This effect occurs if you were ambushed by the monster due to running out of Time in the Travel Phase. Try to avoid being ambushed! If the monster does not have an Ambush Effect listed — no Ambush can occur!
TRICKERY COST — You can spend the listed resources in order to trick the monster and escape the Level without engaging them in combat. If the monster does not have a Trickery Cost listed — it cannot be bypassed this way.
COMBAT ACTIONS — When it is the monster's turn to act in combat, the 6-sided Slashes Die is rolled to determine the result of their attack. Consult the Combat Actions table after each roll, then apply the corresponding effect.
MONSTER NUMBER — When rolling the 6-sided Slashes Die to randomly select a monster, consult this number.
REWARD — If you defeat the monster in combat, you gain all of the Rewards listed here. If you bypass a monster with Trickery, you do NOT gain these Rewards.
Skills
Skills offer a host of benefits to survive the Dark in the form of effects, both Passive and Response. As long as you do not use Trickery to bypass the monster, you receive a Skill following every monster for the first 3 Levels. You draw 2 and pick 1. Skills remain in your possession for the entirety of the game. There is no limit to how many Skills you may own.
Skills can also be gained through rare encounters. Spend your resources wisely as you may find yourself a lot more effective depending on the choices you make in the game.
Some Skills even allow you to bypass Armor which can be helpful, while other Skills help you find new and violent uses for your resources.
Note: A few Skills allow you to use resources to inflict damage to foes so you stand to survive tight battles that much more. Manage your resources well enough, and you'll have more options during the Combat Phase.
Weapons
Each Weapon Sheet lists ways you can spend Effort (and possibly other resources) to break Armor or inflict Wounds on a monster. Different Weapons are better at dealing with different monsters, and you can only have 1 Weapon equipped at a time, so plan wisely. Some Weapons are listed as "Basic Weapons" and others as "Advanced Weapons," and certain in-game effects will trigger based on which type of Weapon you have equipped.
You can Upgrade Weapon using the Craft General Action. Some Weapons list 2 potential upgrade options along with the cost of each upgrade in resources and Time. When you Craft a new Weapon, lay the new Weapon Sheet on top of the old sheet. You can upgrade a Weapon during the Battle Step, with the Time Value counting against the next Level (or paid in Small Effort, if Level 4). For example, the Knife is placed over Bare Hands; then an Advanced Weapon (the Sword) is placed over the Knife as you upgrade your weapons in this instance.
You may voluntarily downgrade a Weapon as a General Action. This downgrade is permanent. This does not cost any resources but consumes your turn during combat as a General Action.
Some effects in the game can temporarily or permanently downgrade your Weapon. If an effect is temporary, set the Weapon Sheet aside for the noted duration. If it is permanent, return the Weapon Sheet to the Weapon Deck. In both cases your previous Weapon becomes your new current Weapon.
Note: You can never downgrade your Bare Hands Weapon or have 2 Weapons at the same time.
Characters
Each character has several unique Abilities listed on their Character Sheet. These Abilities can either be actions or Responses. In each Level, you can use your Character's Abilities a number of times equal to the current Level. This is tracked by removing a token from the Ability Use Tracker on your Character Sheet each time you use the Ability.
Using any of the Character's Abilities consumes 1 of the available Ability Uses. Ability Uses are recharged at the end of the Combat Phase.
The opposite side of every Character Sheet contains different art but otherwise remains mechanically identical.
Conditions
Certain monsters may inflict long-lasting, usually negative effects — called Conditions — on you in combat. There are 2 different ways that Conditions might affect you:
- First, if a monster effect causes you to gain any Conditions for the next Level, find the relevant Condition Card(s) in the Condition Deck and place it next to the Monster Sheet.
- Second, if a monster effect causes you to gain a Condition immediately, find that Condition Card in the Condition Deck and place it above your Character Sheet. The Condition is active for the current combat, but will be discarded at the end of the Combat Phase. Sometimes you will gain a Condition immediately, but it will only be active for a specified number of combat rounds.
When you reach the end of a Level, discard all previously active Conditions. To mark that any new Conditions are active, move them from next to the Monster Sheet and place them above your Character Sheet. These affect your character for the duration of the next Level.
Certain Encounter Cards allow you to get rid of active Conditions. While some Conditions also make use of tokens, in which case, use the red tokens! For instance, the Poisoned Condition Card enters play and instructs players how many tokens are placed on the card indicated in the brackets of the specific Monster Sheet (see the Basilisk enter play with 2 tokens in the Combat Example).
If a monster's Combat Roll would cause you to gain a Condition you have already gained for the next Level, re-roll the monster's Combat Roll.
If 1 of your Skills allows you to ignore a specific type of monster effect (to receive a Condition), nothing happens when that Combat Action is rolled. Your experience taught you to resist this particular threat!
Note: Armored Condition is 1 example of a Condition that can stay with you permanently, rather than being automatically discarded at the end of every Level.
Difficulty Settings
EASY — (You want to learn the game or test out new strategies.) This difficulty setting is for players who find NORMAL to be a bit too challenging or for those who want an easier time while learning the rules.
On EASY, you roll the 6-sided Slashes Die once during Setup to determine an extra starting resource: Metal (1), Wood (2), Food (3), Cunning (4), Medium Effort (5), or Treasure (6). The player takes the first turn during the Battle Step. You also begin the game with a Skill Card — draw 2 and keep 1, then discard the other.
For an easier game, begin with 15 Small Effort.
NORMAL — (You are ready to face the monsters and make them pay.) This is the standard difficulty setting. You do not start with any extra starting resources. The player takes the first turn during the Battle Step. You start the game with 13 Small Effort.
HARD — (You are a seasoned veteran, ready for a brutal challenge.) On HARD, you begin the game with only 10 Small Effort, instead of 13. You do not start with any resources. In addition, monsters attack first during the Battle Step.
Gameplay
In Unbroken, the game consists of 2 phases in this order:
- Travel Phase
- Combat Phase
Each phase is broken down into steps that will be explained in the following pages. While playing, refer to the Quickstart Reference Sheets and Quickstart Guide for simple instructions.
Use the Fox token. A mysterious icon from the Scarred Wastelands, it's known as an ancient Altema, and is meant to track each step of the game with the Quickstart Reference Sheets. Your journey through the Dark needed a guide to aid you in your survival.
Flip the sheets over for the Quickstart Guide. These directions will get you started and allow you to play Unbroken right out of the box!
Go online and listen to the Unbroken original musical score for an enhanced experience! While each of your foes (and characters) in the game has a story, with flavor text on every card and sheet in the game.
For more about the Dark and its characters read ahead (see Welcome to the Dark, below).
Watch the How to Play and join the leaderboard online by visiting www.PlayUnbroken.com. Share your scores and join the Unbroken Community!
Travel Phase
In the Travel Phase, you will spend Time preparing for battle. Look around for supplies and rest up for the combat that will ensue, but don't take too long or you'll get ambushed by the monster! Follow these 3 steps:
Step 1: Preparation Step
You may take as many General Actions and Travel Actions as you wish during this step. Available actions are described on the Actions Guide, your Character Sheet, Skill Cards, and any other cards currently in play. For each action you take, you must spend the listed resources. If you don't have the resources, you cannot take the action. General Actions can be done both in the Travel Phase and Combat Phase. Remember, Crafting a Weapon is the only reliable way to inflict heavy damage on stronger monsters.
Travel Actions can only be taken during the Travel Phase. Opting to Scout yields crucial information about the upcoming fight, while Orienteer gives players extra cards to choose from if their options are limited. These actions provide more opportunities to gain resources and stay ahead of the monsters in the next phase. Make sure you're prepared!
GENERAL ACTIONS
- Focus: Spend 4 Small Effort, gain 1 Medium Effort.
- Inspiration: Spend 2 Medium Effort, gain 1 Large Effort.
- Plan: Spend 4 Small Effort, gain 1 Cunning.
- Craft: Cost is listed on the Weapon Sheet, spend the listed cost to Upgrade Weapon.
TRAVEL ACTIONS
- Orienteer: Spend 1 Small Effort and reveal 2 extra Encounter Cards during the Exploration Step.
- Scout: On Level 1, spend 1 Small Effort and 1 Time, then reveal. On Level 2, spend 2 Small Effort and 2 Time. On Level 3, spend 1 Cunning and 1 Time. On Level 4, spend 1 Cunning, 2 Small Effort, and 2 Time. After spending these various resources, you reveal the monster you will face.
SYMBOL GUIDE
Refer to the Symbol Guide on the back of the Actions Guide. Keep in mind that Levels 1-4 are indicated by the slash marks.
REVEALING A MONSTER THROUGH SCOUTING
When you take the Scout Travel Action during the Preparation Step — roll the 6-sided Slashes Die. Pick the monster marked with the number you have rolled from the Monster Sheets of the Level that you are on. Place the Monster Sheet next to your Display — this is the revealed monster you will face this Level. Set the monster's Health/Armor Values using the red tokens. You can see all the monster's strengths and weaknesses and prepare for the fight accordingly.
When you are finished taking actions, move on to the Decision Step unless taking an action causes your Time Tracker to reach 0. In which case, you proceed immediately to the Ambush Step of the Combat Phase, and begin your battle against the monsters of the Dark.
Step 2: Decision Step
During this step, you must make a decision:
- Are you ready to fight the monster? If you are, skip the rest of the Travel Phase and proceed immediately to the Trickery Step of the Combat Phase.
- However, if you think you need more time to prepare for the fight, proceed to the Exploration Step.
Note: If you chose to "commit to the next encounter" as a part of a previous Exploration Step, you must continue on to the Exploration Step.
Step 3: Exploration Step
Reveal 2 cards (certain effects may increase or decrease this number) from the Encounter Deck. Choose 1 of these cards, putting the other(s) in the Encounter Discard Pile. Now you must choose whether to Resolve Encounter or Rest:
Note: If the Encounter Deck ever runs out of cards, take all of the discarded Encounter Cards, and reshuffle them to form a new Encounter Deck.
- Resolve Encounter — To resolve an encounter, apply the effect on your chosen card by spending and gaining the resources as indicated. Spending and gaining resources in this manner is known as the Exchange. If you do not have the resources listed in the Spend Field, you cannot choose to resolve the encounter.
- Rest — To Rest, gain a number of Small Effort equal to the Time Value of the card.
COMMITTING TO AN ENCOUNTER
If you previously resolved an Encounter Card that instructed you to "commit to the next encounter," you reveal only 1 Encounter Card — regardless of effects or modifiers — and must resolve the encounter; you cannot Rest instead.
If you cannot perform the Exchange on an encounter you have committed to (because you lack the resources), you do not get any benefit from the card, and you must still advance the Time Tracker.
Once you have carried out your Rest or Resolve Encounter (or were forced to do nothing), lose the Time on the Time Tracker according to the Time Value of the chosen Encounter Card — this represents how much Time you spent — then discard the card (i.e., if you had 5 Time and just Rested through an encounter with Time Value 2 — you now have 3 Time remaining). If this causes your Time Tracker to reach or go below 0, your preparations took too long and the monster Ambushes you — proceed immediately to the Ambush Step (1A) of the Combat Phase.
Even if your Time drops to 0, you still receive the full benefit of the card you had used during the Exploration Step (i.e., if you had 2 Time left and chose to Rest through a card with Time Value 5: you receive 5 Small Effort, move the token on your Time Tracker to 0, and proceed to the Ambush Step).
If you were not ambushed during the Exploration Step, repeat the steps: Preparation Step — Decision Step — Exploration Step. Repeat these steps until you either decide you are ready to face the monster or the monster Ambushes you.
Combat Phase
Step 1A: Ambush Step
If the monster has not yet been revealed, reveal it now. Roll the 6-sided Slashes Die and randomly determine the monster for this Level. The slash marks on the die indicate the monster you will fight. Pick the monster out of the Monster Sheets that matches both the slash number from the die roll and your current Level. Place the Monster Sheet next to your Display — this is the monster you will fight. (Alternatively, you may randomly draw from the Monster Sheets by your Level instead of rolling the die.) On the Monster Tracker, set the monster's Armor and Health Values as listed on the Monster Sheet using the red tokens.
Reset the token on your Time Tracker to the space with the Level icon corresponding to the next Level (e.g., the Level 4 icon indicated by the slashes, if you are currently on Level 3). If this is the final (Level 4) monster, remove the token from the Time Tracker. You have reached the last challenge of your journey! The slash marks on the Time Tracker show where the next Level begins.
If you were ambushed (e.g., your Time Tracker reached 0), apply the monster's Ambush Effect (if any) and then proceed directly to the Battle Step.
Not all monsters have Ambush Effects. In rare cases a "—" shows that there is no effect. You may proceed to the Battle Step unhindered and unwavered. Learning that a monster won't Ambush you ahead of time can allow you to take advantage, so use that knowledge to prepare longer.
Note: Revealing the monster by Scouting during the Travel Phase does not prevent an Ambush! You are always ambushed if your Time Tracker reaches 0.
Step 1B: Trickery Step
If the monster has not yet been revealed, reveal it now. Roll the 6-sided Slashes Die and randomly determine the monster for this Level. The slash marks on the die indicate the monster the player will fight. Pick the monster out of the Monster Sheets that matches both the slash number from the die roll and your current Level. Place the Monster Sheet next to your Display — this is the monster you will fight. (Alternatively, you may randomly draw from the Monster Sheets by your Level instead of rolling the die.)
On the Monster Tracker, set the monster's Armor and Health Values as listed on the Monster Sheet using the red tokens.
Reset the token on your Time Tracker to the space with the Level icon corresponding to the next Level (e.g., the Level 4 icon indicated by the slashes, if you are currently on Level 3). If this is the final (Level 4) monster, remove the token from the Time Tracker. You have reached the last challenge of your journey!
You may now choose to trick the monster, avoiding combat entirely, if you can pay the Trickery Cost, which is listed on the Monster Sheet. Some monsters do not have a Trickery Cost and cannot be tricked.
If you pay the Trickery Cost, proceed to the Hunger Step. You do not receive any Rewards if you bypass the monster this way.
If you choose to fight the monster, continue to the Battle Step.
Step 2: Battle Step
The battle takes place over a series of rounds, which continue until either you have defeated the monster or you cannot spend Effort when required. This happens either from collapsing from Wounds or if Food Requirements cannot be met following the monster's defeat. See more about Combat Outcomes below.
REMEMBER: If playing on Hard difficulty, the monster will get to take the first turn.
On the Monster Tracker place red tokens on the spaces corresponding to the monster's Armor and Health Values as listed on the Monster Sheet. Make note of your active Weapon and current Skills before beginning.
PLAYER TURN
Note: Conditions will often modify the base combat rules. Make sure you keep any active Condition Cards handy to remind yourself of their effects.
During your turn in combat, choose 1 of the following options:
- Attack with a Weapon
- Take an Action
- Skip Your Turn
ATTACK WITH A WEAPON
To attack with your Weapon, spend the Effort indicated on your current Weapon Sheet and then apply the listed result. Attacks inflicting Wounds are referred to as Wounding, while those that get rid of Armor are considered to be Armor-Breaking. You may only choose to perform an Armor-Breaking attack if the monster still has at least 1 Armor left. The amount of Wounds inflicted or Armor broken is known as Attack Power.
Move the token toward the 0 on the monster's Health resource bar 1 space for each Wound inflicted. If the token reaches 0 — you have defeated the monster!
Check for any Response effects that would be triggered and then proceed to the Rewards Step.
Reminder: On the Monster Tracker, reset the monster's Armor and Health Values to 0 following a victory in the Battle Step. Keep an eye always on your Display to ensure your managing your Time and Monster Trackers properly.
Any Armor the monster has must be broken before you can inflict any Wounds, unless noted otherwise. Move the token toward the 0 on the monster's Armor resource bar 1 space for each Armor broken. Until the Armor resource bar reaches 0 — you may not inflict Wounds through Weapon Attacks and Actions, unless specifically noted otherwise.
Some monsters force you to spend additional resources to attack with a Weapon. These additional costs do not apply when you inflict Wounds through using actions or Responses.
Whenever an effect instructs the monster to gain a certain amount of Armor or Health, both their current and maximum amount goes up. Effects that heal a certain amount move the Health resource bar up by the indicated amount, but cannot increase the monster's Health beyond its maximum value.
TAKE AN ACTION
In order to take an action, you choose any currently available to you, as noted on your Actions Guide, Character Sheet, Skill Cards, Monster Sheet, or other cards in play. (At this time, you can take General or Combat Actions but not Travel Actions.)
Certain Combat Actions allow you to inflict Wounds on the monster you're fighting without using your Weapon and some may even ignore the monster's Armor! If a Skill inflicts Wounds or breaks Armor — follow the instructions above for tracking these using the Armor/Health resource bars.
SKIP YOUR TURN
If you're not able to take an action for any reason, or just choose to skip your turn, end your turn.
MONSTER TURN
During the monster's turn, you will roll the 6-sided Slashes Die to determine what action the monster will take. This is known as the monster's Combat Roll. Consult the Combat Actions table on the Monster Sheet and apply the monster effect that matches the die roll.
DEFEND actions allow monsters to ignore your next attack. This applies to attacks made with Weapons only, not to actions that inflict Wounds. The effect remains in place until the next time you perform an attack, possibly lasting several rounds. Additional DEFEND effects do not stack and are ignored.
Reduce effects cause you to lose certain resources and gain other resources instead (usually forcing you to exchange higher-value resources for Small Effort).
Certain Skills and Character Abilities will allow you to manipulate the monster's Combat Rolls or mitigate the consequences of the monster's attacks. Regardless of modifications, the roll result cannot exceed 6 or fall below 1.
- If a monster effect cannot be applied (most likely because you don't have the resource you are instructed to lose), apply the alternative effect (listed in brackets) instead. If there's no alternative effect, nothing happens.
- If a monster effect would cause you to gain a Condition you have already gained for the next Level, re-roll it. If it would cause you to immediately gain a Condition you already have active — re-roll it or, if you have the Condition for a specific number of turns, extend the duration of the Condition by the number of turns indicated.
- If a monster effect causes you to lose Time, adjust the token on your Time Tracker accordingly — you'll have that much less Time for the next Level. For a visual example of where to reset the Time Tracker before fighting the monster, see the Ambush Step.
- If a card in play (e.g., a Skill Card) allows you to ignore a specific type of monster Combat Action (like WOUND or STEAL), nothing happens when that Combat Action is rolled.
Your experience, once again, serves you well.
COMBAT OUTCOMES
There are only 2 possible outcomes of the Battle Step:
- If the token on the monster's Health resource bar reaches 0 — it is immediately defeated! Proceed to the Rewards Step.
- If you are ever forced to spend Effort and cannot, then you have fallen to the perils of the catacombs, and you immediately lose the game.
If neither of these conditions is met, the sequence of turns continues until either you or the monster is defeated.
Some Monster Actions cause you to gain Conditions. When you need to lose or spend Time during a Level 4 Combat Phase — lose an equal amount of Small Effort instead.
COMBAT EXAMPLE
The Sneak is facing a Basilisk known for its dreadful, petrifying gaze.
As the Battle Step starts, the Sneak must activate a few Response effects that trigger at this time:
- He gains the Paralyzed Condition and places 2 tokens on it as indicated on the Monster Sheet.
- Consulting the Monster Sheet, the Sneak uses the Monster Tracker to indicate that the Basilisk starts with 1 Armor and 12 Health.
- Combat with a Dark Elf on the previous Level left the Sneak with a Paranoid Condition, so the Basilisk's Health is immediately increased to 14.
- The Sneak also has the Daring Skill that grants him 4 Small Effort at the beginning of the Battle Step (the number is equal to the Level of the monster rolled for the Combat Phase).
The round starts and the Sneak goes first (the game is set on Normal — on Hard the Basilisk would get the first turn). Usually, the Sneak would need to roll to avoid being paralyzed, skipping his turn, but the Response effect on the Monster Sheet indicates he can spend a Metal instead of rolling and does so.
His first goal is to get rid of the Basilisk's Armor, an easy task with the Sword crafted earlier. The Sneak chooses an Armor-Breaking attack from the Sword Weapon Sheet, spends 1 Small Effort and breaks the Basilisk's Armor, moving the token to 0 on the Armor resource bar. Activating a Response from their Wrecker Skill he can make another attack! He spends a Large Effort and 2 Small Effort for an attack that would normally inflict 5 Wounds! However, the Basilisk's Passive effect prevents it from suffering more than 4 Wounds. The Sneak moves the token 4 spaces down on the Health resource bar — the Basilisk is down to 10 Health!
For the Basilisk's Combat Roll, the Sneak gets unlucky and rolls a "6." The WOUND effect they would suffer is significant (and would make them even more paralyzed) — so, he decides to use his Dodge Character Ability (activating it as a Response), spending a Small Effort and turning the roll into a "5" — he can afford to lose 1 Food. Using the Dodge Character Ability costs him 1 of his remaining Ability Uses. He still has 1 left as he started the combat with 2. He adjusts his Food and Small Effort resource bars and proceeds to the next round, hoping he has what it takes to resist the monster's petrifying gaze.
Step 3: Rewards Step
For defeating the monster, you gain the resources listed in the Rewards section of the defeated Monster's Sheet. In addition, you reveal the top 2 cards from the Skill Deck, keeping 1 and putting the other in the corresponding Discard Pile.
Note: Skill Cards you gain stay with you for the rest of the game unless an effect specifically instructs you to discard any. There is no limit to how many Skill Cards a player can own.
REMINDER: If you tricked the monster, you do not gain any of the Rewards listed on the Monster Sheet. You do not gain a new Skill.
Step 4: Hunger Step
You may now eat Food equal to the Level of the monster you have just defeated — this is known as your Food Requirement. You gain 1 Small Effort for each Food that you eat. If you don't eat Food during the Hunger Step, you will lose a significant amount of Effort.
If you cannot (or choose not to) meet the Food Requirement, you must spend 1 Small Effort for the first Food you do not eat, 2 Small Effort for the second Food, 3 Small Effort for the third Food, etc. If you do not have enough Effort to spend for Food you do not eat; then, you die of starvation and lose the game. Players will need to choose how they manage their hunger throughout the course of every game.
If you have plenty of Effort remaining, you can decide to eat less Food than the current requirement, in order to save the Food for a more crucial moment later on.
Example: After defeating the Level 3 Minotaur, the Huntress has a Food Requirement of 3. She only has 2 Food. Further, she decides to save a Food for the final Level and only eats 1 Food. She regains 1 Small Effort for eating it. Then, because she ate 2 Food less than required, she loses 3 Small Effort (1 for the first missing Food, 2 for the second missing Food).
End of Combat Phase
If you have defeated the monster you must proceed to the next Level. Before you do, prepare by doing the following:
- Place tokens on your Character's Ability bar equal to the Level you are about to start (e.g., if starting Level 2, place 2 tokens on the Character Sheet).
- Discard any currently active Conditions you have, putting them back in the Condition Deck, and move any new Conditions — which you would have gained during combat — above your Character Sheet. These new Conditions will be active for the next Level.
- Discard the defeated monster, removing it from the game.
If you did not die of hunger and the monster you have just defeated was Level 4, congratulations, you won the game! You exacted your revenge and made it out of the hellish pits of the Dark! Calculate your score as described below.
End of Game
The game will end in 1 of 2 ways:
- You defeat the final monster in Level 4 and do not die of starvation — you win!
- You cannot spend Effort when required to either during the Battle or Hunger Step (defeat/death by starvation) — you lose. Reset your Trackers and try to make your way through the Dark on another failed expedition!
Scoring and Achievements
If you managed to win, your final score is calculated based on the remaining resources you possess. Each remaining resource (except Small Effort) has a point value:
| Resource | Points |
|---|---|
| Medium Effort | 3 |
| Large Effort | 5 |
| Cunning | 2 |
| Metal | 3 |
| Wood | 2 |
| Food | 3 |
| Treasure | 10 |
After totaling your points, check the scale below to see how impressive your victory was!
| Points | 0 | 1-10 | 11-20 | 21-30 | 31-40 | 41+ |
|---|---|---|---|---|---|---|
| Title | Prey | Cast-off | Survivor | Avenger | Revenant | Nemesis |
Use the Scorepad that comes with the game to keep track of your scores, while the Achievements Sheet allows you to strive for especially impressive feats once you've mastered the game.
Think you have what it takes to keep up with the best? Stay up to date with every sneak, sage, hunter, and brawler who have conquered the Dark. Compare final results and outscore fellow adventurers and share your tales of survival and revenge with us at www.PlayUnbroken.com. Also, share your character creations, monsters, Encounters, Skills, and Conditions online with the tag #PlayUnbroken. We love to see your creations!
Visit www.PlayUnbroken.com to share achievements, record your results, and read up on tips and strategies to conquer the Dark. Post your scores to our leaderboards, give us feedback on what you liked about the game, and read stories that expand the entire world of Unbroken. Contact [email protected] with any questions or suggestions you might have! Keep making them pay and Remain Unbroken!
Welcome to the Dark
Since the Calamity, things haven't been the same... a world of darkness created by the absence of light. Everyone can see it.
Sneaks make the best of these times the only way they know. Sages try to help others but get lost in helping themselves. Hunters live by avoiding everyone and everything. While brawlers never back down from a good fight.
The world is scarred in so many places, I feel it's almost useless to do much of anything. No one dares to venture away from their village homes. The hearths are only so warm after all. But we keep going... We keep the candle burning. You know, just like I know, that our home isn't broken. It just needs time to heal.
There are things we can all do to help. I know a place, where there are untold riches waiting to be discovered. There's lots of talk of adventurers finally making it back from exploring unseen places. Some of these stories are, admittedly, exaggerated. Men often mask their own greed with childish folktales so I wouldn't pay these horrific rumors any mind.
Whatever waits out there, it could help you. It could help your family. And it may even help guide this world out of these miserable times we find ourselves in.
For this expedition I promise you won't be alone. You'll have help. The job is simple and you'll be rewarded handsomely! Take this map... You're going to need it.
Good luck, a friendly stranger
The Map of the Dark
Sneak Class
"Unseen and unknown."
The grungy, lower class bottom feeders of the world, sneaks on their own are nothing but opportunistic scum. Always looking for simple marks, they play everyone for short-term gain. And why not? The world's going the way of the Dark and, apparently, it's not even the first time it's happened. No reason to believe in any silly religions or corrupting magic to make all the pain go away. Life's all about finding the next shiny ware to sell off to the highest bidder. So, they make a bit of coin trading in rare materials like obsidian and shade crystal, enough to potentially make it to the western sphere. There, rumors whisper of a secret ring of thieves living comfortably and offering shelter for those who choose to avoid the greater conflicts of the outside world.
Maxyn Zenma — Remembering back to a time when you were pitched some fool's hero quest, you laugh at having to fight for your survival now. But those promises of gold still fill your head and motivate you more than fighting this grumbling creature just up ahead. No way you're getting mixed up in brawling with monsters in every corner of the Dark if you don't have to! One thing's for certain, if you make it out of here, that hooded stranger's going to get his coin purse's worth of a thrashing. Or maybe you'll just keep his share...
Mae'el — "You will be led in circles...over and over," a voice keeps you up, as flashes of that blasted map haunt your dreams. It almost makes you wish you were sleeping safe and sound in your warm bed. You wonder if anyone at the castle even remembers your face. At least you're close now. As you yearn to hold every map and chart again, what you've been searching for all these years is almost within your grasp.
Sage Class
"Wisdom before knowledge."
With various circles of thought occupying their hallowed tradition, sages study the "science" behind magic. Very few of them practice actual sorcery, aside from the sects splitting away from the Circles. Studying at the great library in Aulstrad, protected from the Calamity, many understand alchemy and how various medicines treat certain ailments. Roaming hunters provide the school with rare herbs from their treks through the Scarred Wastelands, while the wise teachers research old crystals and keep their oath to fear magic's glamorous shortcuts. Some of the elders are aware of prophecy, but they rarely seek out the gift for fear of corrupting their minds with the delicate knowledge of potential futures and other worlds beyond the veil. Always respectful of the first gods, nevertheless, some of the cast-offs betray this ancient trust and craft talismans of their own to conjure magic, attaining more power under the cover of darkness.
Tomu — You are old, yes, but alive and keen to stay so for a long, long time to come. With your studies of the Dark and knowledge from Aulstrad as your aid, these battles will be your last stand. Memories of sleepless nights imprisoned in Purgatory, and later, searching through old tomes and scrolls with your masters keep you moving through this maze. Praying you aren't going mad, everything foretold is coming to light. You know what must be done...and knowing the weaknesses of the creatures lurking here will either help you or anyone else in desperate need.
Helena — Your entire lifetime. That's how long you've prepared for this moment. Looking back without regret, you know your sacrifices are nothing compared to what's been written before. For it is you who bears the weight of the Circles on your shoulders. And, exiled or not, without your protection the darkness will surely spread. The worlds, once separated, are finally converging down here in the Dark. The beasts, like the ones in these tombs, are a sign from the gods. Our ending has begun.
Hunter Class
"Rooted in strength."
Clusters of hermits and vagabonds live outside of the capitals and holdfasts in roving hunting parties, shying away from the decaying civilization around them. Instead, hunters and huntresses work together, staying close to the natural world they revere. In remaining parts of the map still untouched by the spreading corruption, they hunt and follow safe pathways to ensure they're far from the Dark's strengthening influence. Sometimes, their caravans can be seen moving with families, tents, and furs they sell en masse, making their way through the Scarred Wastelands. A procession of people always on the move without a real home to call their own.
Kirilla el Kaer — Whatever this sickness is, it isn't fair. Sages from every Circle and corner tell you it's not possible, but still you push on. The leaves are turning black, and it isn't the seasons. Holding back any last words or promises, you leave her safe in the hands of an elder. Your little star. They say she might be saved, but you can't know until this next expedition pays for her healing. Bracing for your last hunt, you step back out into the shadows and pray you'll see her again.
Huckdorf — Leaving the rest of the hunting clans is the best decision you've ever made. You can walk all of the Wastelands now without anyone holding you back. All of your past heroics seem to have built up quite the reputation, not that you can remember anyway. People talk and they keep talking about you. Stopping the monstrous horrors from tearing this land apart is just another day's work at this point. And it looks like someone new is knocking around, asking about another dreadful beast hunt.
Brawler Class
"Fight for no one."
A group of fighting miscreants and ne'er-do-wells brawl in their own underground guild, separate from the revered Greyguard and Templar contingents. Meeting in secret in the seedy districts of their protective kingdom, its members actively avoid the interference from the swords of the capital guards. When not causing a raucous circus at the local tavern, brawlers are usually a cheap hire away from serving as some much-needed muscle — especially for discreet expeditions.
Caellahan — Never cut out to be in the illustrious Greyguard, you fight for every scrap across the 13 cities. Doesn't matter, life isn't what it used to be so there's no reason to be any gilded cloak's guard dog when the Dark could spread and take over at any moment. Hey, it's not so bad. Knock around a few drunkards and the occasional hire puts some coin in your pocket. Now some stranger in a muddy cloak motions you from across the bar. Good. You're itching for another job.
Niola — Rambling from hamlet to hamlet, you hear the road treats anyone kindly so long as they mind their own business. You never heeded this advice. Maybe that's why you've always been a fighter. Ever since your pa said you were born to be a Templar, you just can't stay away from a good brawl. Leaving him behind, you run around with a new family, taking out caravans and bandits for easy money. But even that can't last, and you're slumped over waiting for something exciting when a dark figure approaches you with a contract.
Glossary
Actions – Helpful effects you can activate during the Travel or Combat Phase listed on the Actions Guide, Character Sheets, Monster Sheets, or Skill Cards.
Advanced Weapon – These include the Spear, Sword, Axe, and Maul. Weapons provide ways to inflict Wounds on monsters.
Altema Fox - A mysterious spiritual guide of sorts. A tracker token to help guide you through the steps and phases in the game.
Ambush Effect/Ambush Step - As the Combat Phase begins, resolve any Ambush Effects before fighting the monster if your Time Tracker red token reaches or exceeds past 0 during the Travel Phase. Ambush Effects are listed on the specific Monster Sheet.
Armor-Breaking - A type of attack. You must first break the Armor of the monster before you can Wound their Health.
Attack Power - Number of Wounds inflicted or Armor units broken by a Weapon Attack.
Attack with a Weapon - Spend Effort or other resources as instructed on your Weapon to inflict Wounds or break Armor during the Battle Step.
Basic Weapon – These include the Bare Hands, the Club, and the Knife. Weapons provide a way to inflict Wounds on monsters.
Battle Step - During the Combat Phase, you take Turns fighting the monster until either one of you is defeated.
Character Ability - A Response or action that may be activated, consuming 1 use per Level (each Ability Use is tracked with up to 4 tokens total on the 4 slash marks located on the top right of your Character Sheet).
Combat Actions - Actions that you may only take during the Battle Step of the Combat Phase. These sometimes inflict Wounds.
Combat Phase - The second phase of the game, this is where you will try to fight the monster or die trying.
Commit to the Next Encounter - A Travel Phase effect that forces you to only draw 1 Encounter Card during the next Exploration Step and prevents you from Resting.
Conditions - Mostly negative effects usually inflicted by monsters. Some encounter effects will allow you to discard them.
Craft - To make Weapons you need resources like Wood, Metal, and Time to Upgrade Weapon as a General Action in the game.
Decision Step - During this step, you must choose whether you will continue exploring in the Travel Phase or fight the monster.
Difficulty Settings: There are 3 ways to play the game: Easy, Normal, and Hard.
Display - The arrangement of the game on your table. Your Resource Tracker/Effort Tracker and Time Tracker/Monster Tracker should always be clearly visible.
Downgrade Weapon - Sometimes a monster will force you to use a lower Weapon temporarily or permanently.
Effort - Ranging from Small Effort, Medium Effort, and Large Effort is the resource in the game you cannot live without and it also inflicts Wounds against the monsters in the game.
Encounter - An event in the game where you spend and gain resources as shown on the Encounter Cards.
Exchange - You choose to lose whatever resource(s) in order to gain something else. This is the Exchange on every Encounter.
Exploration Step - This step you must decide which encounter to resolve, performing the Exchange on the card or Resting.
Flavor Text – Every card and sheet in the game has a story from the world of Unbroken. Get to know the characters, monsters, Weapons, Conditions, and even Skills in this dark fantasy universe!
Focus - Perform this General Action to gain more Effort in the game, spending Small Effort for Medium Effort to increase stamina.
Food/Food Requirement - The amount of Food you must eat during every Hunger Step following the Battle and Rewards Steps. Every Food eaten also grants you 1 Small Effort.
Gain Field - The area on the Encounter Card where you receive resources during the Exchange.
General Action - Actions you can perform during the Preparation Step of the Travel Phase or the Battle Step of the Combat Phase.
Hunger Step - The step where you must eat Food or risk starving and losing the game.
Inspiration - Spend Medium Effort to gain Large Effort and become more determined.
Level (1-4) - Indicated by the slashes, there are 4 Levels in Unbroken displayed on your Character and Monster Sheets.
Losing - Losing a resource is mandatory. Sometimes, you will reduce or downgrade it from a higher valued resource.
Orienteer - Perform this Travel Action in order to reveal 2 extra cards during Exploration.
Passive Effects - These effects are applied as long as the card that lists them is in play. Applied after Response effects.
Plan - A General Action, spend multiple Small Efforts to gain a single Cunning.
Preparation Step - Where you may take as many General and Travel Actions as possible to prepare for the Combat Phase.
Quickstart Guide - A condensed version of the Rules Reference Guide to begin playing Unbroken quickly.
Resolve the Encounter - Perform the Exchange on the revealed Encounter Card you choose, spending and gaining as noted.
Resource - Cunning, Food, Wood, Metal, Treasure, and Time are all resources needed to survive the catacombs.
Response Effects - These effects trigger after a specific event or at a specific time, outlined in the text.
Rest - If choosing to not Resolve Encounter, you may Rest and gain Small Effort equal to the encounter's Time Value.
Rewards Step - Following the Battle Step, you gain Rewards from the monster once you've defeated it in combat.
Round - A unit of time in the Battle Step, a round consists of both the player turn and the monster turn.
Scout - Reveal the monster before the Combat Phase, a Travel Action is used to properly plan your survival ahead of time.
Slashes Die – The 6-sided Slashes Die is used to determine random outcomes in the game such as selecting monsters you will face, determining monster Combat Actions, and resolving Condition effects. Use the Slashes Die just as you would numbers.
Skill - Gain a Skill either during the Rewards Step or from other in-game effects. Skills remain with you throughout the course of the game (unless otherwise noted) and provide additional options to survive the dangers of the Dark within Unbroken.
Skip Turn - An action you may take if necessary when it's your turn during the Battle Step.
Spend Field - The area of your Encounter Card where you spend the resource and perform the Exchange for the gain you need. Also, spending a resource implies that you have a choice on whether to do so and you usually get something in return.
Time Value - The number of Time indicated on the Encounter Card you'll lose after you perform the Exchange.
The Dark - The underground catacombs the characters find themselves lost in. It is said the monsters originate from the Dark.
Tokens - Blue tokens are used to track resources lost and gained, while red tokens are used to track monster Armor, Health, and Condition effects.
Travel Action - Actions that may only be performed during the Preparation Step of the Travel Phase.
Travel Phase - The first phase of the game where players perform actions to explore the Dark in order to better prepare for the Combat Phase.
Trickery Cost/Trickery Step - Trickery, listed on the Monster Sheet, indicates which resources need to be spent. An opportunity to trick and bypass the monster without fighting it during the Combat Phase. The Trickery Step follows the Ambush Step.
Turn - Specifically referring to you, the player, and the monster taking an action during the Battle Step.
Upgrade Weapon - Upgrade your Weapon through use of the Craft General Action (or, rarely, through other game effects).
Wounding - A type of attack that inflicts Wounds to a monster's Health. You may not inflict Wounds while the monster has any Armor left. When the monster's Health is reduced to 0 through Wounds, it is defeated.