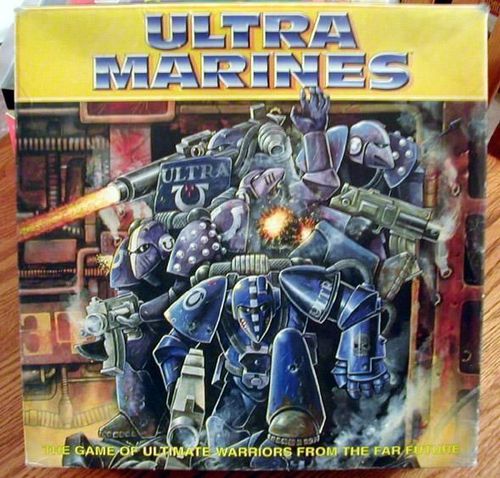
Ultra Marines
Ultra Marines Rulebook
Table of Contents
Table of Contents
Object of the Game
The object of Ultra Marines is to teleport your Scouts aboard the spacehulk and capture the most alien artifacts.
Setting Up
-
Separate the Space Marine Scouts, arms and bases from their sprues and stick them together.
-
Each player takes a Space Marine Scout data card, a hellfire reloading counter, and a squad of Space Marine Scouts - a Captain, one Scout with a heavy bolter and three Scouts with bolt pistols. If you are playing Ultra Marines with only two people, you may take two squads each.
-
Shuffle the event cards. Deal three to each player. Don't show your cards to the other players. Place the remaining cards in a pile face down by the board. This is the event deck.
-
Separate the board sections and sort them out into rooms and corridors. Take it in turn to choose a section and place it on the table. Slot the pieces together to make the most interesting spacehulk you can - if you find it's not working, just start again. To help you get the idea we've included a couple of sample layouts on the back of this rules sheet.
-
Once the spacehulk is set out, each player chooses one of the six rooms as their teleport zone. Place your Scouts in your teleport zone. Each Scout in the squad may start facing in any direction, and you can place them in any order. There will of course be at least two rooms with no Scouts.
-
Take it in turns to place the eight alien artifact counters on the spacehulk. They can't be placed in any of the rooms, or in a corridor which is within 2 board sections of any player's teleport zone. You can't place two artifacts in the same board piece.
-
Roll a dice to see who goes first - the player with the highest score starts. The player on his left goes next, and so on, clockwise around the table.
How to Play
Each player's turn is divided into stages. These must be completed in order, with all of your Scouts finishing one stage before going onto the next. For instance, you cannot move a Scout, fire his bolt pistol, and then go back and move another Scout.
Turn Sequence
- Roll for Event Cards on the Board
- Teleport artifacts
- Moving
- Firing
- Hand-to-hand combat
- Roll to see if your stunned Scouts recover
- Draw one event card
Note that the event card rules are optional. If you want to get to grips with moving, firing and combat, you can play Ultra Marines without the event cards. Just play the game as usual, but ignore stages 1 and 7 in the turn sequence above. You can then start using the event cards when you have worked out how to play the basic game.
Roll for Event Cards on the Board
Throughout the game you use the event cards to stop the other players getting alien artifacts, or to help you get them first! There are three different types of event cards - objects, commands and hazards.
Objects represent equipment the Scouts carry with them and items which they discover as they explore. These cards usually stay on the board for a few turns, causing trouble for someone!
Commands represent the Scouts' commanders on their ship radioing extra orders to your Scouts.
Hazards are unexpected things that happen to the Scouts as they explore the spacehulk. They are generally quite nasty!
Some event cards are played immediately, whilst others (such as blind grenades) stay on the board for a few turns. Once the game is underway, you may find that there are quite a few event cards on the board at the start of your turn. Roll a dice for each card and follow the instructions written on them to see if the card stays or vanishes. If a card vanishes, place it on the discard pile.
Event cards are explained in full later in the rules.
Picking Up and Teleporting Artifacts
If a Scout moves into a square containing an alien artifact he may pick it up. Place the artifact under his base. As the Scout moves, he takes the artifact with him. After picking up an artifact a Scout may continue with his move as normal. A Scout may only carry one artifact at a time. A Scout may still shoot and fight when carrying an artifact.
Take the artifacts back to your teleport zone and place them in the centre square of the room. Once he's placed an artifact on your teleport square, the Scout can carry on as usual. Of course, the artifact may still be picked up by an enemy Scout, so it's a good idea to stay and guard it.
At the start of your turn roll a dice for every artifact on your teleport square: on a 1, 2 or 3 the teleport fails and you must try again next turn. On a 4, 5 or 6 the artifact is successfully teleported off the board. Keep any artifacts you have teleported off the board by your data card.
Moving
At the start of your turn roll a dice. You may move each of your Scouts up to that number of squares. You do not have to move a Scout the full distance if you do not want to.
Scouts can move in any direction, including diagonally and backwards. Scouts may move through a square containing another Scout from the same squad. Scouts may not move through squares containing enemy Scouts, or end their moves in occupied squares.
Firing
Once all of your Scouts have finished their movement, any Scouts that can see enemy Scouts may fire.
A) Tell your opponent who you are firing at and which weapon is being used. Check that the firer can see the target.
If you can draw a line from the centre of the square where the firer is standing to the centre of the square where the target is standing, without crossing a wall or going through another model, you can see him.
B) Look at your data card to see how many damage dice your Scout gets when firing. Drop that number of dice into the combat tray from a height of about 30cm.
If any dice land in a Hit square the shot is successful. If you're not sure whether a dice is a Hit or a Miss just roll that dice again. Any dice that bounce out of the box have missed.
C) Look at any dice that landed in Hit squares and pick the one that has the highest number. Look up this number on your attack chart to find the result of the shot. These are as follows:
Ricochet: Your shot glances off your opponent's armour and has no effect.
Stunned: The bolter shell slams into your enemy, knocking him to the ground. His armour absorbs most of the damage and he is only stunned. Place the enemy Scout face-down in the square where he was standing.
Killed: The shot hits the enemy Scout full on the chest, killing him instantly. Remove him from the board - his body is teleported back to his assault ship. If the Scout was carrying an artifact he drops it in the space where he was standing.
Heavy Bolter
One member of each Scout squad is armed with a heavy bolter. This is a specially modified heavy weapon, which can fire either heavy bolter shells or the dreaded hellfire shell.
If you fire standard heavy bolter shells you simply follow the instructions on your data card. The optional rules for hellfire shells are printed at the end of the rulesheet.
Hand-to-Hand Combat
If any of your Scouts move into a square next to an enemy Scout (even just touching on corners) he may make a hand-to-hand attack against him with his combat blade. You have to choose whether to attack with your bolt pistol or combat blade - you cannot use both in the same turn.
Hand to hand combat works as follows.
A) Look at your data card to see how many damage dice your Scout rolls in hand-to-hand combat. Drop that number of dice into the combat tray.
B) Look at any dice that landed in Hit squares and pick the one that has the highest number. Look up this number on your attack chart to find the result of the blow.
No Effect: Your ill-aimed blow doesn't manage to penetrate your opponent's armour.
Stunned: The impact of your attack knocks your opponent to the ground. However, his armour absorbs most of the damage and he is only stunned.
Killed: Your opponent is killed instantly from the force of your blow. Remove him from the spacehulk - his body is teleported away. If the Scout is carrying an artifact he drops it in the space where he was standing.
Recovering Stunned Scouts
After you have finished moving, firing and fighting any hand-to-hand combat, you may see if any of your stunned Scouts have recovered.
Roll a dice for each of your stunned Scouts on the following chart.
- 1, 2 or 3 - Still Recovering: the model remains lying on the ground.
- 4, 5 or 6 - Fighting Fit: stand him up. He may act normally next turn.
Attacking a Stunned Scout
Any successful attack, whether firing or hand-to-hand, made against a Scout while he is stunned automatically kills him, regardless of the score on the dice.
Drawing Event Cards
If you have less than three event cards at the end of your turn you may draw another one from the event pack.
This finishes your turn. The player on your right now takes his turn.
Winning
When there are no more alien artifacts on the board, the player with the most is the winner. If this is a draw, then the game goes on until only one player has any Scouts left.
Optional Rules
You do not have to play Ultra Marines using the event cards or hellfire shells. However, they make the game a lot more fun once you understand the basic rules, and are explained in detail below.
Event Cards
You may have up to three event cards in your hand at one time. You may play any or all of them at any time during your turn. You may play them on any player anywhere on the spacehulk.
You can also discard any or all of your cards at the end of your turn without using them. This lets you get rid of any cards that you don't want. These cards are placed to one side to form the discard pile. As cards are used or discarded they join the pile.
When the whole of the event pile has been used, the discard pile is shuffled to make a new event card pile.
A summary of the effects of each card is printed on it. A few of the cards need a bit more explanation.
Objects
These are placed on the board so that they cover one or more squares. If the card is designed to cover a four square area you can still place it in a corridor, but one or two of the squares covered will be walls which the card cannot affect.
Objects are only removed from the board when the conditions on the card have been satisfied. For most objects you must roll a dice at the beginning of every player's turn to see if it disappears. The score needed to remove each card is printed on it. Once objects are removed they are placed on the discard pile.
Vortex Grenade: The vortex grenade stays on the board for more than one turn, moving around randomly and causing destruction wherever it goes. If a vortex moves into a space containing a locked door, a cave-in or an alien artifact, they are destroyed by the vortex and automatically removed from the board. The vortex then continues on its path of destruction.
[Diagrams A and B are not reproduced here.] In the diagram above the vortex has just been played. Four damage dice are rolled against the Scout affected by the card. At the start of the next player's turn a dice is rolled for the vortex's movement. The result is 2, so it moves into the position shown on diagram B. The Scout is still affected, so takes another 4 dice of damage. The locked door is now affected by the card so it is removed.
A vortex cannot move through walls. For instance, a result of 3 would have moved the vortex into the position shown by the grey square. This would have meant it had moved completely into the wall, which is not allowed. The vortex vanishes instead - remove the card.
Frag Grenade: When a frag grenade explodes, roll a total of 4 damage dice against the models covered by the card. It is a good idea to roll each dice separately, deciding which model you are attacking with each dice.
A frag grenade is placed to cover four squares. Although one of the four squares is a wall square, this doesn't matter - the grenade just won't affect it.
The player who placed the grenade now chooses which Scouts he will attack. He has a total of four dice to split between the models covered by the card.
[The grenade diagram is not reproduced here.] He decides to roll three of the four dice against Scout 2 and the last dice against Scout 1. He decides to ignore Scout 3 totally. Scout 4, of course, is outside the grenade's area of effect, and so couldn't be chosen.
Commands
These cards are marked with a square symbol. They are played and then discarded immediately.
Hazards
These cards are marked with an asterisk symbol. They are played then discarded immediately.
Hellfire Shells
If you wish, you can let your heavy bolter Scouts fire hellfire shells. You must tell your opponent that you are firing a hellfire shell before you roll the dice. The hellfire shell uses the combat tray in a different way to other weapons. A hellfire shell sprays poison and glass fragments that cover an area of 9 squares. For this attack you use the 9 squares of the combat tray to represent the 9 squares on the board that you are attacking.
A) Choose your target. Unlike a normal shot, you may pick an empty square as your target. The firer must still be able to see the target square or model. The target is represented by the middle square in the combat tray.
B) Take 4 dice and drop them into the combat tray. It doesn't matter whether the squares are marked Hit or Miss. The squares that the dice land in show you which squares on the board have been hit. Place the four hellfire counters in the squares that have been hit. If there are two or more dice in the same square, the hellfire counters are stacked up in that square.
C) If a Scout has been hit by a hellfire counter, look at the number on the dice for that square. Find this number on your attack chart to get the result of the shot.
If more than one hellfire counter lands in one square, the numbers on all of the dice for that square are added together. Look up this total on your attack chart.
For instance, the Scout on the right in the diagram is hit by two hellfire counters. The dice for the first is a 4 and the dice for the second is a 3. This is a total of 7, which is a damage result of Killed.
D) Once you have looked up the damage results for all of the Scouts that have been hit, remove the hellfire counters from the board. Place your hellfire reloading counter next to the Scout who fired. He is reloading, and may not fire again next turn, even with standard heavy bolter shells.
At the end of your next turn remove the hellfire reloading counter. Your Scout may now fire as usual, using either standard or hellfire shells.
Sample Spacehulk Layouts
The back of the rules sheet shows two sample spacehulk layouts. These are board diagrams and are not reproduced here.