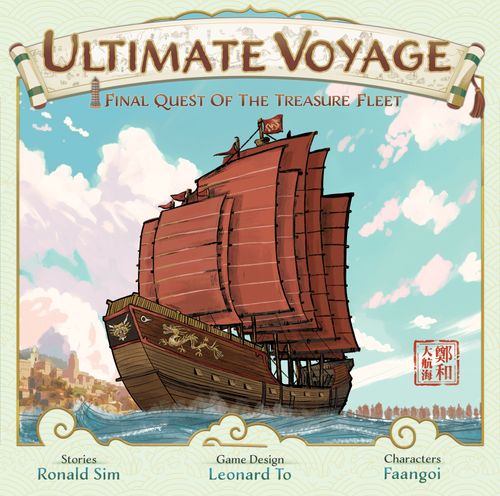
Ultimate Voyage: Final Quest of the Treasure Fleet
Ultimate Voyage: Final Quest of the Treasure Fleet Rulebook
Table of Contents
Table of Contents
- Game Components
- Setting Up the Game
- Key Concepts
- Encounter Cards
- Objective Cards List
- Prestige Points
- Profit Points
- Story Points
- The Porcelain Tower of Nanjing
- Bonus Tokens
- Playing a Round
- Historical Notes
- Winning the Game
- The Actions
- Historical Notes (Timur and Chen Zhuyi)
- Round Example
- Game Variants
- Objective Cards List
- Encounter Cards List
- Encounter Cards List (continued)
- Historical Notes: What Drives Zheng He's Voyages?
Game Components
- 1 Game Board
- 6 Double-sided Character Mats
- 18 Double-sided Tower Levels
- 1 Tower Board
- 1 Rulebook
- 3 Deity Dice
- 37 Encounter Cards
- 23 Objective Cards
- 1 Zheng He Marker
- 1 Round Marker
- 93 Trade Goods Tokens
- 8 Red Bonus Tokens
- 8 Yellow Bonus Tokens
- 1 Storm Marker
- 1 Action Strength Marker
- 10 Generic Markers
- 30 Porcelain Tokens
- 30 Troops Tokens
- 1 Draw Bag
- 48 Knowledge Tokens (12 x 4 colors)
Players Components (for each of the 4 colors)
- 1 Flagship and 2 Regular Ships
- 5 Structures
- 10 Player Markers
- 1 Victory Point Marker
- 3 Deity Dials - Sun, Moon, Star (4 player sets + 1 public set)
- 1 Prestige Point Marker
- 1 Profit Point Marker
- 6 Story Point Markers
- 1 Turn Order Marker
- 5 Double-sided Action Cards
- 2 Double-sided Player Aids
Setting Up the Game
On the Game Board, place the:
- Zheng He marker with the colored side up on the first (leftmost) space of Zheng He's Health Track.
- Round marker on the first (leftmost) space of the Round Track.
- Action Strength marker at 0 on the Action Strength Track.
Global Setup
- Position the Game Board and the Tower Board in the middle of the table. Place the Tower Levels adjacent to the Tower Board.
- Based on the number of players listed in the lower-left corner of the page, place a player marker of an unused color on each bazaar in all unused regions. Whether a region is used at a given player count is also indicated in the lower-left corner of its Region Box on the Game Board.
- Place the three Deity Dials in the designated space at the top-left corner of the Game Board, and the three Deity Dice next to them.
- Shuffle all Encounter Cards and put them face down next to the Game Board.
- Trade Goods Tokens are region-specific. Randomly place a number of trade goods tokens face down, as indicated by the number on the bazaar of every used port in the corresponding regions (these are referred to as "trade goods of the port"). Place the remaining trade goods face down below the corresponding Region Box (these are referred to as "trade goods of the region" and are not available through Trade action).
- Place the Knowledge Tokens on the utilized regions according to the colors indicated. For 2 or 3 players, form a supply of unused tokens in the Draw Bag.
- Shuffle all Objective Cards with the same background together, and draw the top cards from each of the three decks (gray, red, and yellow). If this is your first game, it is recommended to start with the three initial Objective Cards, numbered I (yellow), II (red), and III (gray) instead of drawing the top card from the three decks.
- Form a supply of the generic markers, the Porcelain tokens, the Troop tokens, the Storm marker next to the Game Board.
Bonus tokens
- Yellow Bonus Tokens: These are used for the Prestige Track. Prepare a number of yellow bonus ship tokens and yellow bonus upgrade tokens equal to the number of players. Shuffle them, then randomly place an equal amount of these tokens face up onto each of the upgrade spaces (5 and 8) for the Prestige Track.
- Red Bonus Tokens: These are used for the Profit Track. Similarly, prepare a number of red bonus ship tokens and red bonus upgrade tokens equal to the number of players. Shuffle them, then randomly place an equal amount of these tokens face up onto each of the upgrade spaces (7 and 10) for the Profit Track.
- Example: In a 3 player game, you will use 3 bonus upgrade tokens and 3 bonus ship tokens of each color. Shuffle bonus tokens of the same color, then randomly place 3 of them face up onto each of the upgrade spaces of the corresponding track.
Players Counts
| Players | Regions NOT in use | Objective Cards NOT in use |
|---|---|---|
| 2 Players | Burma and Bengal, East Africa, Arabia | 1, 7, 8, 10, 11, 13, 14 |
| 3 Players | Burma and Bengal, East Africa | 6, 7, 8, 10, 11, 13, 14 |
| 4 Players | Use all | Use all |
Player Setup
- In reverse turn order, each player selects a Character Mat. Every Character Mat corresponds to a character with varying initial quantities of Porcelain and Troops, distinct starting positions for Action Cards, and a unique special ability.
- Note: A backstory of the character is shown on the back of each Character Mat.
- Every player receives the following player components in their chosen color: all Ship and Structure meeples, 6 Story Point markers, and 10 Player Markers. They also receive 1 set of 5 Action Cards, 2 Player Aid Cards, and 3 different Deity Dials, along with the number of Porcelain and Troops corresponding to their chosen Character Mat.
- Example: The navigator has 5 Porcelain and 5 Troops.
- Each player places the Flagship meeple in the Nanjing Zone, 1 Prestige Point Marker at value 0 on the Prestige Track, and 1 Profit Point Marker at value 0 on the Profit Track.
- Arrange your Action Cards with their non-upgraded sides (no arrow on the top right) face up, above your Character Mat, according to the order indicated on your Character Mat. You are ready to play!
- The player who was most recently on a ship becomes the first player. In the first round, play proceeds in clockwise order. Record the turn order on the Turn Order Track (leftmost position being the first player) using the players' turn order markers.
Character Mats
| Character | Character Ability |
|---|---|
| Commander | +2 on the strength of all Combat and Construction actions |
| Interpreter | +2 on the strength of all Diplomacy actions |
| Navigator | +1 on the strength of all Sail actions |
| Healer | Lose 1 less Troop on 1 occasion every round selected by the player. Place a player marker over the corresponding icon on your Character Mat when it is activated. Remove the marker during the Administration Phase. |
| Merchant | +1 on the strength of all Trade actions |
| Diviner | May reroll 1 Deity Die for a single player (including yourself) during the Administration Phase in every round |
Note: You may skip the Key Concepts section from p.6-11 and jump to the main game mechanics, which start from the Playing a Round section on p.12. Refer to Key Concepts when you need clarification on any unfamiliar terms.
Key Concepts
Zones, Regions, Oceans
The Game Board depicts the historical landscapes of the early 15th century, divided into 16 distinct zones, each representing the territorial influence of a historical port (the terms "zone" and "port" are used interchangeably in the rules). These zones are grouped into 6 regions (separated by white region boundaries) and 2 oceans: the Southern Ocean (in blue) and the Western Ocean (in green). Serial numbers for each port can be found in the table below, and beside the port icon within the Region Boxes.
Historical locations of the ports are represented by region icons on the Game Board. These icons are also used in the Objective Cards. Each port, except for Nanjing, includes:
a. An iconic landmark representing the port. b. The port's name. c. A number indicating the Port Strength. d. A construction site, where players may construct a depot. e. A Bazaar, where trade goods can be acquired; the number on the lower left indicates the maximum number of goods available. f. A number of printed Knowledge Tokens to indicate initial token setup. g. A vertical Affiliation Track, which measures the port's affiliation towards the Ming Empire.
| Ocean | Region (icon) | No. | Port | Strength | Landmark |
|---|---|---|---|---|---|
| - | - | - | Nanjing | - | Porcelain Tower of Nanjing |
| Southern Ocean | Mainland Southeast Asia | 1 | Champa | 2 | Dương Long Tower |
| Southern Ocean | Mainland Southeast Asia | 2 | Ayutthaya | 3 | Wat Mahathat |
| Southern Ocean | Mainland Southeast Asia | 3 | Malacca | 2 | Melaka Sultanate Palace |
Deity Dice
The crews of the Treasure Fleet worship three religions. The Deity Dice represent the intervention of their respective deities.
-
The 6 sides on the magenta color Sun die are: -2, -1, 0, 0, 1, and 2.
-
The 10 sides on the olive color Moon die are -3, -2, -1, 0, 0, 1, 2, 3; plus a Yin "-" and a Yang "+" side.
-
The 8 sides on the turquoise color Star die are -3, -2, -2, -1, 1, 2, 2, 3.
-
If the Yang "+" result is rolled, count it as +1, then roll again. Treat the next result as a positive number regardless of its original sign, and add the results together. If Yang "+" is rolled again on the second roll, repeat this process.
- Example: A roll of "+" followed by a "-2" results in a total of 3 (1 + 2).
-
If the Yin "-" result is rolled, count it as -1, then roll again. Treat the next result as a negative number regardless of its original sign, and add the results together. If Yin "-" is rolled again on the second roll, repeat this process.
- Example: A roll of "-" followed by another "-", then a "1" results in a total of -3 (-1-1-1).
-
If a Yin "-" result is immediately followed by a Yang "+" result, or vice versa, stop rolling. The result of the entire roll becomes 0.
- Example: A roll of "+", followed by another "+", and then a "-" results in a total of 0.
Affiliation
Affiliation measures a port's relationship with the Ming Empire. Since players are captains of the same Treasure Fleet, affiliation value is identical for all players. The value ranges from 3 to -2, from top to bottom:
- 3 (top): Represents a tributary relation (most friendly).
- 0 (marked with the sun die): Represents a neutral relation.
- -2 (bottom): Represents a hostile relation.
You cannot improve an affiliation when it is already at 3, nor deteriorate it when it is already at -2.
- Example: If the die result is 1, place a generic marker on the third spot from the top (one spot above neutral). Note that the initial affiliation of any port can never be tributary.
Establishing a Tributary Port
Affiliation can be affected by Diplomacy and Combat actions, as well as Encounters. You establish a tributary relation with a port if, during your turn:
- A port's Affiliation reaches 3, and
- There is a generic marker on the port's Affiliation track.
When this happens, replace the generic marker with your player marker to indicate that you have established the tributary relation. As long as your player marker remains on the Affiliation Track, no player may take Combat actions against that port—even if the affiliation later drops below 3.
Hostile Ports
A port becomes Hostile when its affiliation reaches -2. Place a generic marker above the trade goods in its Bazaar to indicate this.
- No Trade action is allowed in a hostile port.
- No Depot construction is allowed in a hostile port.
- Remove any previously built Depot in the port from the game; it is not returned to the player.
- You may still explore in, or attack a hostile port.
- The only situation where a hostile port actively attacks your ship is when you arrive at a port with undetermined affiliation and roll a -2 on the affiliation check. In this case, you must resolve a Combat action against the port on your next turn.
Deteriorating Affiliation
At the beginning of every round, non-hostile ports with known affiliations will deteriorate their affiliation by 1 if no ship is present in the port.
- If the affiliation of a Tributary port deteriorates to 0, it loses its tributary status. Replace the player marker on the affiliation track with a generic marker.
- If the affiliation of a port deteriorates to -2, it becomes Hostile.
When the first player scouts, or finishes a sail action of a ship at a port, roll the 6-sided Sun Die to reveal the port's affiliation. Place a generic marker over the corresponding spot to indicate the port's current affiliation. Once a port's affiliation is revealed, it remains known to all players for the rest of the game, though it may be affected by the passage of time or player actions.
Encounter Cards
Drawing Encounter Cards
Encounter Cards are drawn during Sail and Scout actions, including any FREE Sail actions. The Encounter Card icons printed on the Game Board indicate when you will draw a card from the top of the deck:
- Icon on a Region Boundary: Draw and resolve an Encounter Card when you sail across the boundary in either direction.
- Example 1: Sailing either way between Samudera and Kotte triggers an Encounter Card.
- Icon on One Side of a Region Boundary: Draw and resolve an Encounter Card only when you sail toward the side where the icon is printed.
- Example 2: Sailing from Nanjing to any other location triggers an Encounter Card, but sailing back to Nanjing does not.
- Multiple Region Boundaries: If a single ship crosses multiple region boundaries during an action, consider only the last boundary it crossed.
- Example 3: Sailing from Palembang to Nanjing involves crossing 2 region boundaries: between Palembang and Malacca, and between Champa and Nanjing. However, no Encounter Card is triggered, as only the last region boundary between Champa and Nanjing is considered.
- Multiple Ships: If multiple ships take different paths (their sail paths do not completely overlap) during a single Sail action, consider each ship separately. Draw one Encounter Card per ship that meets the conditions above, announcing which ship the card is for. After drawing all the cards, choose one to resolve and discard any others.
- Example 4: You have two ships anchored in Kotte. One sails to Pegu, while the other sails to Mogadishu. Both trigger encounters. Draw one Encounter Card for the ship in Pegu, then another for the ship in Mogadishu. You must then select one of these two cards to resolve. The effects of the chosen card apply only to the corresponding ship, the other card is discarded without being resolved. If the ship going to Pegu had gone to Malindi instead, you would only draw 1 Encounter Card since the sail paths are completely overlapped.
- Notes: You can sail between Kotte and Mogadishu, even though part of the zone division line is obscured by the scroll on the game board.
Notes: In the rare event that the Encounter Card deck is depleted, reshuffle the discard pile to form a new deck.
Resolving Encounter Cards
"Port" and "Region" mentioned in an Encounter Card refer to the port and region where your ship ends its Sail action. Encounter Cards typically offer a choice among 2 or 3 options:
- You cannot select an option that you cannot perform.
- If you have pending actions, you cannot choose an option that requires another pending action unless it is of the same action type (you must then distribute your action strength among these actions).
- If the card's effect is immediate, resolve the effect, and then remove the card to the discard pile.
- If the card's effect is not immediate, place it face-up to the right of your Character Mat. Remove the card to the discard pile after all of its effects are fully resolved.
Adjusting Prestige, Profit, and Story Points
- If an Encounter improves affiliation to above 3, add the extra value to your Prestige and/or Profit Points.
- Similarly, if an Encounter reduces affiliation to below -2, deduct the extra value from your Prestige and/or Profit Points. If both Prestige and Profit Points are already at zero, there are no further effects.
- Players can gain Story Points when resolving encounters (such as by winning a combat or establishing a tributary relation), but no additional rewards are granted unless explicitly stated on the cards.
- Example: An Encounter improves affiliation by 2 steps when it was originally at 2. The affiliation first improves 1 step and becomes 3. You gain Story Points for establishing a Tributary Relation. For the extra 1 step, you may choose to add it to either your Prestige Points or Profit Points.
Special Encounter Rules
- Once-per-round effects: Rotate the card sideways when its effect triggers. Return it to an upright position during the administrative phase.
- Wild Knowledge Tokens: If the card provides wild Knowledge Tokens, remove it to the discard pile as soon as any of these tokens have been used. You cannot use some of the tokens and save the rest for later.
- "!" Symbol: If your selected option includes a yellow "!" or a purple "!" symbol, place a player marker on the corresponding top-right space of the card to remind yourself that your future actions will be affected.
- Absolute Sign "| |": Treat the corresponding die result as positive, regardless of its original sign.
- The text on cards takes precedence over the rulebook.
Objective Cards List
Objective Cards are decrees from the Emperor. They reward players who achieve them with Victory Points (VP) indicated on the top right corner of the cards. They are divided into 3 decks, distinguished by the illustrations and colors on the back, and the colors of the scroll in the front:
- 7 Trade-related Objectives (yellow)
- 6 Combat & Construction-related Objectives (red)
- 10 Other Objectives (gray)
Claiming Objective Cards
- An Objective Card may require you to place your marker on it when you satisfy its condition, serving as a reminder that you are about to claim it.
- If you are the first to fully meet its requirements, claim the card by removing all markers on it and placing the card face-up to the left of your Character Mat. Once claimed, an Objective Card cannot be claimed by other players.
Discarding Objective Cards
Discard a revealed Objective Card and reveal another one if:
- The card is not used at the current player count, as indicated by the icon below the VP awarded.
- Its requirements have already been attained by one or more players.
- Example 1: The card requires collecting a specific set of trade goods, but one or more players have already done so.
- Example 2: The card requires having the highest Prestige or Profit Points, but one or more players have already reached 15 points on the required track.
- It can no longer be achieved by any player.
- Example: The card requires a condition in the following round but this is already the last round of the game.
Note: If an Objective Card uses "when" instead of "if", consider only player actions that occur after the card is revealed.
Wordings on Objective Cards
- Use Perfect tense and "if": Consider player actions both before and after the card is revealed.
- Use Present tense and "when": Consider only player actions after the card is revealed.
Public Objective Cards
- 3 face-up "Public" Objective Cards are always displayed near the Game Board for all players to complete.
- When a card is claimed, reveal a new card from a deck that does not already have a card of the same category on display. If all decks of a category are depleted, the first player of the round decides which deck to draw a card from.
- Private Objectives Cards are explained in the Explore section.
Prestige Points
Prestige Points represent honors you earn for the Emperor and the country. They are tracked on the yellow Prestige Track on the Game Board, and you can gain or lose them as follows:
- +1 point for every step of improvement in affiliation achieved through your non-military action.
- +1 to +3 points equal to the value of each different animal (different animal icon) acquired in your Trade actions.
- Up to 2 points (3 points if the Combat and Construction card is upgraded) for every successful Combat action against a port. You may gain these points in any combination of Profit Points and Prestige Points.
- -2 to +2 points: As the war with the Mongols progresses, the Emperor's expectations change. Adjust each player's Prestige Points at intervals depicted on the Round Track.
- Various effects from Encounter Cards.
Note: The maximum Prestige Points a player can achieve is 15. You cannot advance further once you reach 15 on the Prestige Track. The ways to gain Prestige Points are also listed on the Player Aid Cards.
Profit Points
Profit Points represent income you bring to the imperial coffers. They are tracked on the red Profit Track on the Game Board, and you can gain or lose them as follows:
- +1 to +4 points equal to the values of Regular Trade Goods collected in your Trade action.
- Up to 2 points (3 points if the Combat and Construction card is upgraded) for every successful Combat action against a port. You may gain 2 (3) points in any combination of Profit Points and Prestige Points.
- Various effects from Encounter Cards.
Note: The maximum Profit Points a player can achieve is 15. You cannot advance further once you reach 15 on the Prestige Track. The ways to gain Profit Points are also listed on the Player Aid Cards.
Story Points
There are six Region Boxes on the lower section of the Game Board, each with its own unique Story Track. To advance on these tracks, you must craft a captivating travelogue for each region.
Story Track
- Story Point Marker: Each player can have only one Story Point Marker on each Story Track. Place a player's Story Point Marker on the Story Track the first time you gain a Story Point in the region. Only one marker can occupy each space on a Story Track.
- Skipping Occupied Spaces: If a space is already occupied by another player's marker, you advance to the next unoccupied space while progressing. (Thematically, you are incorporating their stories into your own travelogue.)
- Example: If you are at position 1 on a Story Track and positions 2, 3, and 4 are occupied by other players, gaining 2 story points will move you to position 5 (skipping 2, 3, and 4) for the first point, and position 6 for the second point.
Gaining Story Points
You gain Story Points on a region's Story Track as follows:
- Establishing a tributary relation with a port in the region without using Combat action.
- Performing a successful Combat action in the region against a port.
- Performing a successful Combat or Diplomacy action in the region against an encounter.
- Gaining Knowledge Tokens in an Explore action at a port in the region.
- Sailing through a storm into the region without losing any Prestige Points.
- Obtaining Trade Goods marked with a blank icon from the region through Trade action.
Note: Story Points gained are never lost. Refer to the respective Action Card for the number of Story Points gained. The ways to gain Story Points are also listed on the Player Aid Cards.
Victory Points from Story Tracks
Each Region Box features two VP values on its lower right:
- The top value is awarded to the player with the highest Story Point in that region at the end of the game. (Thematically, folks at home will prefer your book over those of other players.)
- The lower value is awarded to any player who has a Story Point Marker in that region.
- VP Limitation: The number of VP you receive from a Story Track is limited by the number of steps you have advanced on that specific track.
- Example: If you have progressed 1 step on the East African Story Track, you will only gain 1 VP, even if you achieved the highest Story Point among all players in the region.
- Once you reach the final space of a Story Track, you cannot advance further. This also guarantees you the top VP of the region.
The Porcelain Tower of Nanjing
Constructed by Zheng He and his crews, the Porcelain Tower was recognized by visiting Europeans as one of the Seven Wonders of the Medieval World.
Returning Ships to Nanjing
Ships returned to Nanjing are no longer available to players, as the crews leave their ships to reunite with families. The first few ships to return gain Victory Points (VPs):
- 4 players: 1-3 VPs for the first 3 ships to return.
- 3 players: 1-2 VPs for the first 2 ships to return.
- 2 players: 1VP for the first ship to return.
Dock 1 ship on each of the available VP spots in Nanjing. Any ships that return afterwards are placed in the land area of China.
Thematic Note: By returning early, your ship's crew report to the Emperor first, gaining his trust and favor.
Building the Porcelain Tower
- Each ship returning to Nanjing fills 1 level of the Porcelain Tower with treasures.
- Your flagship (screen-printed ship) fills extra levels equal to the number of tributary relations you have, as shown by the number of your player markers on Affiliation Tracks. (This represents consulates and tributes you brought back.)
- For each level of the tower you complete, place a Tower Level piece (numbered 1-9) in your player color on the Tower Board. The tower must be completed from the lowest level upward. Each completed level gives you 1 VP at the end of the game.
- All players combined can fill up to 9 levels of the tower. Once all nine levels are filled, no additional VPs can be gained from building the Porcelain Tower.
Example:
- In a 4-player game, Penny has established tributary relations in three ports. When she returns her flagship to Nanjing, she places Tower Levels up to four in her pink color on the Tower Board (1 ship + 3 tributary ports, gaining 4 VPs). She also places her flagship on the 3 VP spot in Nanjing, gaining a total of 7 VPs (4 + 3) at the end of the game.
- George returns with two regular ships, so he places levels five and six on the Tower Board (2 VPs). His two ships occupy the remaining 2 VP and 1 VP spots in Nanjing, gaining a total of 5 VPs (2 + 2 + 1) at the end of the game.
- Tom returns his flagship with three tributary ports in his color. Normally, he would complete 4 levels of the tower, but since Penny and George have already completed 6 levels, only 3 levels remain (9 - 6). He places levels seven to nine on the Tower Board (3 VPs). Tom's returned ship is placed in the land area of China as all VP spots in Nanjing are already taken.
- Olivia decides not to return any ships, as all levels of the tower have already been completed and all VP spots in Nanjing have been taken.
Bonus Tokens
The first time you reach or advance past one of the bonus spaces on the Prestige Track (5, 8) or the Profit Track (7, 10), choose and remove one bonus token from the available options (Bonus Upgrade or Bonus Ship). Place the bonus token you choose on the right side of your character's illustration on your Character Mat.
Bonus Upgrade
- A Bonus Upgrade allows you to upgrade a selected Action Card by flipping it to the side with an upward arrow in the top-right corner. Each Action Card can only be upgraded once. Upgraded Action Cards provide unique perks, such as bonus action strength (shown on the cards' top right), or enhanced effects that make the action more powerful.
- You may distribute your action strength among your ships only if you have upgraded the corresponding Action Card.
- The maximum Action Bonus from an Upgraded Action Card and Character Ability combined is +2.
- Example: The Commander character starts the game with a "+2" action bonus on the Combat and Construction action. If you choose to upgrade this action, the action bonus does not increase further beyond +2.
Bonus Ship
- A Bonus Ship allows you to place an additional ship meeple at a port where you already have a ship or a depot. You can never have more than 3 ships in the game.
- When you have multiple ships on the Game Board, you can take action in all the ports where your ships are present.
Note: You are limited to acting with only one ship unless you have upgraded the corresponding Action Card.
Playing a Round
A game of Ultimate Voyage lasts for up to 9 rounds, with each round representing a season. Each round is divided into two phases: the Administration Phase at the start of the round, followed by the Action Phase. A graphical overview is displayed on the Game Board as a scroll with the heading "At the start of every round".
Administration Phase
- Start New Round (skip on round 1)
- Move the Round Marker to the next space on the Round Track.
- Check Events (skip on round 1)
- Determine Monsoon Wind: The background color of the current round on the Round Track is either blue, yellow, or black and white. It indicates the monsoon wind direction and affects all sail action of the round.
- Example: Round 1 is blue, Round 2 is gray, Round 3 is yellow, and so on.
- Adjust Zheng He's Health: If the current round space is marked with the Zheng He icon, the first player rolls the 8-sided Star die and moves the health marker to the right by the same number of spaces as the result on the die (1 to 3), regardless of its sign.
- Example: If the die result is -3 or +3, you would move Zheng He marker 3 spaces to the right. If there are no more spaces to move, Zheng He is considered dead.
- Historical Note: It is believed that Zheng He passed away in Calicut during his final voyage, at the age of 62.
- Resolve Mongol Campaign: If the current round space is marked with the spring icon (every spring round), the first player rolls the 6-sided Sun die and adjusts each player's Prestige Point according to the die result (positive values move right, negative values move left).
- If a player cannot lose the required Prestige Points because it is at 0, or chooses not to, they may sacrifice 1 Porcelain or 1 Troop for each Prestige Point they would have lost.
- Determine Monsoon Wind: The background color of the current round on the Round Track is either blue, yellow, or black and white. It indicates the monsoon wind direction and affects all sail action of the round.
Action Phase
In turn order, players take turns performing 1 of the 5 main actions as shown on the Action Cards, plus any auxiliary Scout actions. A round ends when no player can take any further actions.
- Check Pending Actions: Check your Encounter Cards for any pending actions from the previous turn. If any exist, you must perform them first.
- Choose an Action: Select an Action Card, and a Deity Dial on your Character Mat. Place a Deity Dial that you have not used this round on the selected Action Card; it is now considered used.
- Determine Base Action Strength: Calculate your base action strength by adding up the following:
- Position Value of the selected Action Card (ranges from 1 on the far left to 5 on the far right). If the Action Card was previously used in the same round (it has one or more Deity Dial on it), its position strength is 0.
- Deity Dial Value: The value of the selected Deity Dial.
- Action Bonus: A maximum +2 bonus, from your Character's Ability and upgraded Action Cards.
- +2 Bonus: For your ship taking an action in Nanjing, or at a port where you have built a Depot.
- Knowledge Cubes: +1 for each Knowledge Token you use that matches the color of the action.
Historical Notes
During Zheng He's voyages (1405-1433), Chinese communities expanded across Southeast Asia, South Asia, and even East Africa, fostering trade and cultural exchange. Malacca became a key ally of the Ming dynasty and a hub for Chinese settlers. Admiral Zheng He brought Chinese bachelors who married local women, contributing to the formation of the Baba-Nyonya (Peranakan Chinese) community, blending Chinese and Malay cultures. In Palembang, Chinese leaders like Shi Jinqing and Liang Daoming governed local communities under Ming protection. Java and Borneo also saw growing Chinese merchant populations.
Winning the Game
End Game Triggers
The end game is triggered when any one of the following conditions are met:
- Round 9 (for a full game) or Round 6 (for a quick game).
- The marker on Zheng He's Health Track reaches the rightmost space.
- A player achieves 15 Prestige Points and 15 Profit Points.
- A player completes and reveals 4 Objective Cards next to their Character Mat.
Once an end game condition is triggered, play continues until the player in the last turn order completes their turn. If the end game condition is triggered by the last player in turn order, the game ends immediately after their turn.
Final Scoring
At the end of the game, calculate each player's Victory Points (VP) by adding up the following:
- The lower value between Prestige Points and Profit Points.
- VPs gained from Objective Cards.
- VPs gained from all used Story Tracks.
- VPs gained from returning ships to Nanjing and constructing the Porcelain Tower.
- 1 additional VP for the player who triggered the end game condition by either reaching the end of the Prestige and Profit Tracks or completing 4 Objective Cards.
Tracking Victory Points
Use the Prestige and Profit Tracks as the VP tracks to track final scores:
- Each player removes their marker from the track (either Prestige or Profit) with the higher value. The remaining marker indicates the VP gained from these two tracks.
- As players gain VP from other sources (Objective Cards, Story Tracks, Porcelain Tower, etc.), advance their marker on the corresponding track (the track with the remaining marker).
- If a player reaches more than 15 VP, replace the Prestige / Profit marker with a VP marker with the "15 VP" side face-up. For example, a "15 VP" marker on 2 indicates 17 VP. Upon reaching more than 30 VP, flip the "15 VP" marker to the "30 VP" side.
- The player with the highest total VPs is the winner! In case of a tie, the tied player with the most presence (Ships, Structures, and Player Markers on Affiliation Tracks) on the map portion of the Game Board is the winner. If a tie still remains, the players share the victory.
Overall Victory
- If the winning player achieves a score of more than 30 VP AND all players have a score of more than 15 VP, the Emperor recognizes your remarkable accomplishments and pledges unwavering support for upcoming voyages. This leads to a momentous encounter with the Portuguese along the African coast.
- However, if these conditions are not met, all aspirations for future voyages are abandoned, and all maritime vessels are dismantled. Consequently, China adopts an isolationist stance for the next 500 years, while you and your fellow companions face a life of exile within the diverse diasporas once explored by the Ming armada.
The Actions
The following sections detail the five main actions (Sail, Combat & Construction, Diplomacy, Explore, Trade) and the auxiliary Scout action of the game.
Sail
Monsoon Wind
To sail, move your ship(s) from one zone to another along the blue and yellow arrows between the zones. These arrows correspond to the prevailing monsoon wind direction. You may sail through multiple zones in one action as long as you have enough action strength.
The Sail action cost table on the page gives the action strength spent per arrow, by round color (the "upgraded" icon marks the cheaper cost for an upgraded Sail Action Card):
| Round Color | Blue arrow | Yellow arrow |
|---|---|---|
| Blue round | 1 | 2; 1 if upgraded |
| Yellow round | 2; 1 if upgraded | 1 |
| Gray round | 1 | 1 |
- Region Boundary - You must always spend +1 action strength to sail onto a white region boundary (similar to paying a toll), regardless of the monsoon wind conditions. Thematically, you are sailing along the coastline when sailing within a region, and venturing into the open sea when crossing a region boundary.
- Sailing with the Wind - If the color of the arrow in your travel direction matches the current round's color (e.g., blue arrow during a blue round, or yellow arrow during a yellow round), you must spend 1 action strength to sail to an adjacent zone. As a bonus, sailing along the immediate next arrow of the same color is free, regardless of whether it crosses a region boundary. However, if an arrow of a different color interrupts the path, the bonus does not apply.
- No Monsoon Wind - If the round color is gray, there is no monsoon wind, you always spend 1 action strength to sail to an adjacent zone.
- Sailing Against the Wind - If the color of the arrow in your travel direction is blue during a yellow round, or yellow during a blue round, you must spend 2 action strength to sail to an adjacent zone for a non-upgraded Sail action, or 1 action strength for an upgraded Sail action.
Example: The monsoon wind is blowing in the blue direction. You start sailing from Nanjing with a non-upgraded Sail Action Card. You spend:
- +1 strength to sail onto the white region boundary between Nanjing and Mainland Southeast Asia.
- 1 strength to follow the blue arrow to sail from Nanjing to Champa. The second blue arrow to sail to Malacca or Ayutthaya is free.
- +1 strength to sail onto the region boundary between Mainland Southeast Asia and Majapahit.
- 2 strength to follow the yellow arrow (or 1 strength if the Sail Action Card has been upgraded) to sail to Surabaya or Palembang.
- 1 strength to follow the blue arrow from Palembang to Samudera. If you first sailed to Surabaya and spent 1 strength to follow the blue arrow to Palembang, then the second blue arrow to Samudera is free.
Sailing as One Fleet
When sailing, you may pick up and drop off your own ships at ports along your route. Ships sailing together are treated as a single ship for all purposes.
- You cannot pick up other players' ships.
- This action does not require additional action strength for the ships being picked up, nor does it require an upgraded Sail action card.
- All sailing must occur within a single route.
Sailing through Storm
Every time you sail across a region boundary into another region within an ocean affected by storms, roll the 8-sided Star Die once to determine your losses:
- For every point rolled (regardless of whether it is positive or negative), you lose either 2 Porcelain or 1 Troop (in any combination of your choice).
- If you do not have enough Porcelain or Troops to cover the loss, you must use 1 Prestige Point for every point to make up the difference.
- If you do not lose any Prestige Points during the entire Sail action, you gain 1 Story Point in the region you crossed into for each die roll you made due to storms. No Story Points are awarded for crossing the region boundary back to Nanjing.
Example 1: There are storms in the West Ocean this round. The following regions are affected: East Africa, Arabia, South India & Ceylon, and Burma & Bengal.
- A. If you sail from Mecca to Hormuz, do not roll any dice for storms because you did not cross any region boundary.
- B. If you sail from Mecca to Kotte, roll the Star Die once because you crossed 1 region boundary. If you do not lose any Prestige Points, gain 1 Story Point in the South India & Ceylon region.
- C. If you sail from Mecca to Pegu, roll the Star Die twice because you crossed 2 region boundaries. If you do not lose any Prestige Points on both rolls, gain 1 Story Point in the South India & Ceylon region and 1 Story Point in the Burma & Bengal region. If you lose any Prestige Points during this action, you do not gain Story Points in any region.
- D. If you sail from Pegu to Malacca, do not roll any dice for storms because, although you crossed a region boundary, the region you sail into is not affected by storms.
Example 2: You crossed a region boundary into a region affected by the storm. You roll the Star Die, the result is 3. Let's say you have only 3 Porcelain and 1 Troop:
- You lose 2 Porcelain (1 point) and 1 Troop (1 point) to satisfy the first 2 points.
- Your last remaining Porcelain is not enough to cover a single point, so you must also lose 1 Prestige Point for the 3rd point.
After Moving All Your Ships
- If the affiliation of the port(s) you've sailed to has not been revealed, roll a 6-sided Sun Die to determine the affiliation for each port. If there are multiple ports, players may decide the order in which affiliations are revealed.
- If the revealed affiliation of a port is not -2 (not hostile), reveal all Trade Goods in the bazaar of that port. These goods become visible to all players. Draw an Encounter Card if conditions are met.
- If the revealed affiliation is -2 (hostile), the port attacks you. This is the only occasion on which you are actively attacked. Do not draw any Encounter Cards.
- Note: In the rare case that you are attacked at multiple ports on the same turn, you cannot split your combat strength among different ships unless you have an upgraded Combat & Construction card. If you do not have an upgraded card, you must resolve one attack during each subsequent action. All attacks must be resolved before you can perform any other actions.
Combat and Construction
You may always distribute your action strength between your Combat action and Construction action. However, if your Action Card has not been upgraded, these actions must be performed at the same location.
Combat
A Combat action can be performed against a non-tributary port (one without a player-colored marker on the Affiliation Track) where your ship is docked, or against an opponent specified on an Encounter Card, but never against another player, or a tributary port.
Tips: Combat can be risky. Scout ahead if you do not want to engage in combat you are not prepared for.
When you perform a Combat action, compare your Action Strength against your opponent's total strength. The opponent's total strength equals the sum of the Port or Encounter Strength, and the absolute result of a 10-sided Moon Die roll. The Moon Die is rolled by the player who performed the immediately preceding action. The outcomes are:
- Succeed: If your action strength exceeds your opponent's total strength.
- Draw: If your action strength equals your opponent's total strength. Your action has no effect.
- Fail: If your action strength is lower than your opponent's total strength.
Against a Port
If you succeed:
- The port's Affiliation improves to the top (3, Tributary Relation). You install a friendly ruler at the port.
- Gain 2 points in any combination of Profit Points and Prestige Points (3 points after upgrading the Action Card).
- Gain Story Points based on your opponent's strength.
If you fail:
- The Port's Affiliation drops to the bottom (-2, Hostile Relation).
- For every point your action strength falls short, you lose 1 Troop. If you have no Troops remaining, lose 2 Porcelain for each Troop you would have lost. If you can make up the difference with your resources (troops and porcelain), you may retreat to the nearest non-hostile port with a known affiliation within the same region, if one exists.
- If you cannot make up the difference with your resources, you suffer a Humiliating Defeat. You must use your 1 Prestige Point to cover every action strength point you fall short. If you do not have enough Prestige Points, there is no further effect. You must then retreat to the nearest non-hostile port with a known affiliation in the same region, if one exists.
Against an Encounter
- You may gain Story Points or suffer combat loss as a result of your action. For any additional effects, refer to the text on the specific Encounter Card.
- Combat Example: Your combat action strength is 6. Your opponent has a strength of 4, and the result of the Moon Die is -3 (absolute value = 3). This gives your opponent a total strength of 7 (4 + 3).
- You fail the combat action and must lose 1 Troop (7 - 6 = 1).
- If you have no Troops remaining, you must lose 2 Porcelain.
- If you have less than 2 Porcelain, you will lose 1 Prestige instead and must retreat to the nearest non-hostile port with a known affiliation in the same region, if one exists.
Joint Combat Action
If you attempt a Combat action in a zone where other players have ships, you, as the initiating player, may invite one or more of those players (in turn order) to participate in a Joint Combat action, provided the player has at least 1 unused Deity Dial.
All participating players perform their Combat action simultaneously. Add up the Combat action strengths of all participating players to determine the total Combined Combat Strength against the opponent.
If you succeed:
- All participating players receive the same reward, as if they had won the combat individually.
- Any tributary relation is established by the initiating player.
- Story Points are awarded to the initiating player first, followed by each participating player in turn order.
If you fail:
- All participating players suffer the same combat loss, as if they had lost the combat individually.
Construction
Each player may build up to 5 structures during the game. Constructing a structure requires 4 action strength (3 if you have upgraded the Action Card). You may construct any number and types of structures in a single action, as long as you have enough action strengths and unbuilt structures remaining.
Three types of structures can be constructed:
- DEPOTS
- Construction: Built at designated construction sites in ports where your ships are currently docked. Each port may have only one Depot at a time.
- Effect: Your Depot provides a +2 bonus to the action strength of all your actions initiated from that port. This bonus does not apply to ships that are not at the port, nor to ships belonging to other players, even if they are at the same port.
- Note: A Government Depot in Nanjing is available to all players. It provides the same +2 bonus to all ships there.
- KILNS
- Construction: Built on the Porcelain Box of your Character Mat. You may construct multiple Kilns throughout the game.
- Effect: For each Kiln you have constructed, you gain 1 Porcelain on the Porcelain Box of your Character Mat during the Administration Phase of every round.
- TRAINING CAMPS
- Construction: Built on the Troops Box of your Character Mat. You may construct multiple Training Camps throughout the game.
- Effect: For each Training Camp you have constructed, you gain 1 Troop on the Troop Box of your Character Mat during the Administration Phase of every round.
Diplomacy
A Diplomacy action can be performed against a port where your ship is docked, or against an opponent specified on an Encounter Card.
Against a Port:
- To perform a successful Diplomacy action against a port, your action strength must be greater than the Port Strength.
- You may choose to either improve (+) or deteriorate (-) the port's affiliation by a number of steps up to the difference between your action strength and the Port Strength. You cannot improve affiliation above 3 (a tributary relation) or deteriorate it below -2 (a hostile relation).
- The diagram on the page lists the steps for each Port Strength: Port Strength 2-3 gives 1, Port Strength 4-5 gives 2, and Port Strength 6 gives 3.
- You gain 1 Prestige Point for every step of affiliation improvement. If you establish a Tributary Relation (affiliation at 3), you also gain Story Points based on the Port Strength.
- There is no reward for lowering affiliation, aside from its effect on another player.
Against an Encounter:
- To perform a successful Diplomacy action against an Encounter, your action strength must exceed the Encounter Strength plus the absolute result of the 6-sided Sun Die roll. The Sun Die is rolled by the player who performed the immediately preceding action.
- If successful, gain Story Points according to the Encounter Strength. For any additional effects, refer to the text on the specific Encounter Card.
Explore
With the Explore action, you acquire Knowledge Tokens at the port where your ships are currently docked. If no Knowledge Token is available at a port, you cannot perform an Explore action there. Tokens may be acquired in any order. The table on your Explore action card indicates:
- Action Strength required to acquire a certain number of Knowledge Tokens.
- Note: You need to spend 1 extra action strength if the port has been previously explored.
- Story Points advancement you receive (if any) on the Story Track of the region based on the number of Knowledge Tokens acquired during a single Explore action.
The Non-upgraded Explore action table reads, for Action Strength required (from left to right) 2, 4, 7, 9, 11, 14, which acquires 1, 2, 3, 4, 5, 6 Knowledge Tokens, with Story Points advancement of 0, 1, 1, 2, 2, 3 respectively. The table's bottom row notes "+1 if the port has been explored".
After exploring, place the Knowledge Tokens you've acquired on the left side of your Character Mat, next to the character's illustration. If this is the first time you have explored the port, place your player marker on the corresponding port icon above the Story Track in the Region Box.
Utilizing your Knowledge Tokens
Regular Knowledge Tokens are acrylic cubes you acquire through Explore actions. When used, return them to the draw bag. These tokens become available again for Port's Upkeep during the Administration Phase.
Wild Knowledge Tokens function as Knowledge Tokens of any color. You may acquire them from:
- Manuscripts through Trade actions - Flip the Manuscript Token to its back after using any Wild Knowledge Tokens printed on it; using the Wild Knowledge Token does not affect your ownership of the manuscript.
- Encounter Cards - Move the Encounter Card to the discard pile after using any Wild Knowledge Tokens printed on it.
- Note: You do not receive acrylic cubes when acquiring Wild Knowledge Token.
In addition to boosting action strength, you may use a combination of Regular and Wild Knowledge Tokens to perform any of the following actions, either before and/or after your Explore action:
- Acquire a Private Objective Card
- Use 3 Knowledge Tokens of different colors.
- Draw 3 Objective Cards from the top of any combination of Objective Card decks. These cards are subjected to the same discard conditions outlined in the Objective Cards section.
- Choose 1 card to keep. Return the remaining 2 cards face down to either the top or bottom of their respective decks.
- Reveal the selected card to other players, then place it face down to the left of your Character Mat. Only the player who acquired the card may later look at and accomplish this Objective Card.
- Ignore any text on the card instructing you to place your player marker on it.
- When completing a Private Objective Card, you must reveal it and place it face up to the left of your Character Mat.
- Upgrade an Action Card
- Knowledge Tokens come in 4 colors, each corresponding to a specific action:
- Red - Combat and Construction
- Yellow - Trade
- Brown - Diplomacy
- Green - Sail
- You may use 3 Knowledge Tokens of the same color to upgrade the corresponding Action Card of that color.
- Knowledge Tokens come in 4 colors, each corresponding to a specific action:
- Perform a Free Action
- Use any number ("n") of Knowledge Tokens of the same color.
Trade
When you take the Trade action, you spend your action strength to acquire trade goods from the port(s) where your ships are currently docked. Place the acquired Trade Good token(s) under your Character Mat, with the exception of the Religious Scroll, which should be placed adjacent to the corresponding Deity Dial instead.
- If your Trade Action Card is not upgraded, you may acquire only one trade good during the entire action.
- If your Trade Action Card is upgraded, you may acquire as many trade goods as you can afford.
Trade Goods belong to one of the following types:
(The page diagram shows the spend cost and reward icons printed on each type; the cost values are not restated here.)
- Regular Trade Goods: 9 types: Incense, spice, gem, pearl, bags of gold, ivory, color-glazed vase, carpet, fabrics. They provide you with Profit Points. Some may also grant you Story Points.
- Exotic Animals: 14 types: Lion, giraffe, elephant, horse, oryx, parrot, peacock, lynx, camel, zebra, ostrich, leopard, tiger, rhino. They provide you with Prestige Points if you have not previously acquired one with the same animal icon. Some may also grant you Story Points.
- Manuscripts: 1 Manuscript from each region. They provide you with the indicated number of Wild Knowledge Tokens and Story Points.
- Religious Scrolls: 3 types: Sun, moon, star. They provide you with a permanent +1 value to your corresponding Sun, Moon, or Star Deity Dial, and grant you 1 Story Point.
- Medicine: 1 Medicine: Each of your Troops can be used as 1 Porcelain now. It also grants you 1 Story Point.
- Labor: 1 Labor: Once per round, you may spend 1 Prestige Point to add 2 action strength to your Combat and Construction action. Flip the token over once you use it in a round. Flip it back at the Administration Phase of each Round.
Trade goods with the same icon may provide different rewards. Adjust Prestige, Profit, and Story Points immediately upon acquiring any trade good that awards them.
If a Trade Good is removed from your possession for any reason, adjust your Prestige and Profit Points accordingly. However, do not adjust your Story Points, as they represent recorded tales that remain unchanged.
Historical Note: Slavery in Africa has a long and complex history. We unequivocally condemn any infringement upon the freedom and dignity of individuals, past or present.
Scout
Scout is an auxiliary action that allows you to utilize a portion of your action strength, regardless of your selected action type, both before and after performing your main action during your turn. You may Scout as many times as long as you have sufficient action strength. The information you gather during Scout actions are private to you.
You may spend:
- 1 Action Strength to scout each of the following in the same region as your ship:
- A Port's Trade Goods: You may look at all the Trade Goods tokens in a Port.
- A Port's Affiliation: You may roll for a port's affiliation if it has not been revealed. Mark the port's affiliation track with a black generic marker to indicate that it has been scouted.
- 2 Action Strength to:
- Scout for trade goods or affiliation in any port within a region adjacent to your ship's current region. You cannot scout in regions that are not adjacent to at least one of your ships.
- Scout for an Encounter: Draw the top card from the Encounter Card deck, examine it, and place it either on the top or bottom of the deck without resolving its effect.
Example: You could spend action strength as follows in an Explore action with an upgraded Explore Card:
- Scout the Trade Goods in a port in the same region as your ship (1 point of action strength).
- Scout a port's affiliation in an adjacent region (2 points of action strength).
- Scout 1 Encounter Card (2 points of action strength).
- Explore the last 2 knowledge at the port your ship is in, plus 1 for port previously explored (3+1 = 4 points of action strength).
This totals 9 (1+2+2+4) points of action strength.
Historical Notes (Timur and Chen Zhuyi)
In 1405, Timur (Tamerlane), the founder of the Timurid Empire, prepared to invade China, seeing the Ming dynasty as a rival. The Timurid Empire, spanning Persia, Central Asia, and parts of the Indian subcontinent, was a formidable power built through conquest and marked by flourishing culture and trade. Timur's vast army, fresh from victories in Central Asia, was set to march east. However, fate intervened — Timur died before the campaign began, leaving his conquest unfinished.
One of the treasure fleet's most notable military encounters occurred in Palembang, on the island of Sumatra, where the notorious pirate leader Chen Zhuyi had seized control. Chen Zhuyi and his fleet terrorized merchant vessels, disrupting trade and threatening the safety of the maritime Silk Road.
In response, Zheng He led a swift and decisive campaign to eliminate the pirate threat. Using superior naval tactics and well-coordinated maneuvers, the Ming fleet engaged Chen Zhuyi's forces in a fierce battle. Despite the pirates' resistance, Zheng He's disciplined forces overwhelmed them, sinking numerous ships and capturing Chen Zhuyi.
Round Example
Round 1 Action 1
Olivia, the first player, plays the Diviner character. The Deity Dice she rolled for the round are: -1 (Sun), 1 (Moon), -3 (Star). These results apply to all players. Using her character ability, Olivia rerolls the -3 Star Die for herself. The result is -1, an improvement but still negative. Fortunately, there is a government depot in Nanjing that grants an additional +2 strength to all players' actions there.
The possible actions from Nanjing are: Sailing, Constructing a kiln or training camp, or combining one of these actions with an auxiliary Scout action.
Olivia decides to capitalize on the Nanjing depot and focuses on construction. Building any structure requires a minimum strength of 4. With her Combat and Construction card providing a position strength of 4, Olivia selects the largest Moon Dial, and spends 1 Troop, increasing her total strength to 8 (4 from position of action card, +1 from the selected Deity Dial, +2 from Nanjing depot, and +1 from resources), enabling her to construct two structures. Olivia opts to build a kiln and a training camp on her ship.
George, the second player, plays the Commander character. He sails to Champa, then rolls a 0 on the Sun Die for the port's affiliation, discovering it to be non-hostile. He places a generic marker on the 0 spot of the Affiliation Track and flips over all the trade goods. Crossing into the region also allows him to draw an Encounter Card. George draws Encounter Card #18, which allows him to exchange 2 Porcelain for the service of spies. He agrees and places the Encounter Card to the right of his character mat.
Tom, the third player, plays the Interpreter character. He sails to Ayutthaya. The affiliation roll yields a -2, indicating a hostile port. As a result, Tom does not draw any Encounter Cards. He marks the port's hostility by placing 1 generic marker at its bazaar (indicating no trade action can occur there), and another at the bottom spot of the affiliation track. Consequently, he will face an attack from Ayutthaya on his next turn. Tom's Combat card has a position strength of 1, and even with the largest remaining Moon Dial with a value of +1, his total strength only reaches 2 (1 + 1). This falls short against Ayutthaya's strength (port strength of 3, plus result on rolling the Moon Die). Tom seeks help from the other players, but both George and Penny have other priorities. In hindsight, Tom realizes that he could have spent 2 action strength to scout the port's affiliation before setting sail.
Penny, the fourth player, plays the Healer character. She sails to Palembang, where the affiliation is determined to be +1. Penny also resolves an Encounter Card as part of her action.
Round 1, Action 2
Olivia decides to be the good Samaritan and takes the Sail action to Ayutthaya to assist Tom. Her Sail card has a position strength of 1. Choosing the Sun Dial with a value of -1, her action strength becomes 2 (1 from position of action card, -1 from the selected Deity Dial, and +2 from Nanjing depot).
There is blue-colored monsoon wind on round 1, meaning that it requires a total strength of 2 to travel to any port in Mainland Southeast Asia from Nanjing (1 strength to move onto the region boundary before entering Mainland Southeast Asia, and an additional 1 strength to sail within the region in the monsoon wind's direction). Since Ayutthaya is hostile, Olivia neither rolls for affiliation nor draws any Encounter Card. The combat will be resolved on Tom's second turn.
George performs a Trade action at Champa with an action strength of 2. The bazaar offers incense (costs 6 action strength), an elephant (costs 2), and fabric (costs 2). Acquiring the incense would require 4 extra action strength (6 - 2), which can only be covered by exchanging 10 porcelain (1+2+3+4). Lacking the resources, George chooses the fabric, increasing his Profit Points by 1.
Olivia has already used her Combat and Construction Card, leaving its position strength at 0. Her remaining Star Dial has a value of -1, reducing her strength further. Olivia uses 3 of her 4 Troops, adding 2 points to her action strength. This brings her total to 1 (0 from the card, -1 from the Star Dial, and +2 from resources).
Tom's Combat and Construction Card has a position strength of 1, and his Moon Dial adds 1 more point. He spends all 6 Troops, contributing 3 more points to his action strength. Tom's total is 5 (1 from the card, 1 from the Moon Dial, +3 from Troops). Together, Tom and Olivia have a combined action strength of 6 (1 from Olivia and 5 from Tom).
George, the player before Tom, rolls the Moon Die for the port. The first roll results in Yin "-", which counts as "-1" and requires a second roll. The second roll results is 1, which is also treated as "-1". Combined, the total result of -2. Since we consider only the absolute numeric value, the result is 2. The total strength of Ayutthaya is 5 (3 from port strength, +2 from die result). Tom and Olivia's combined strength of 6 is just enough to win. If their combined strength had been 4 or less, they would have lost, and both players would have suffered the same loss of 1 Troop / 2 Porcelain / 1 Prestige Point for every point short.
Tom removes the generic marker from Ayutthaya's bazaar and replaces it with his affiliation marker in the top position (+3). The port becomes a tributary state under Tom's initiative. For this, Tom gains 1 Story Point in Mainland Southeast Asia for winning a combat against a port with a strength of 3. Olivia also gains 1 Story Point but, since she is not the player who initiated the combat, she bypasses Tom and takes the second spot on the Story Track.
For the successful combat action, both Tom and Olivia gain 2 points on the Prestige and/or Profit Track. Tom takes 1 Prestige Point and 1 Profit Point, while Olivia allocates both points to Prestige.
Penny takes the Diplomacy action with her action card at a position strength of 3. She uses the Moon Dial with a value of +1 and sacrifices a Porcelain, increasing her action strength to 5 (3 from the card, +1 from the Moon Dial, and +1 from resources). Penny improves Palembang's affiliation by 2 steps (action strength of 5 - port strength of 3), from +1 to +3, thus establishing a tributary relation. She replaces the generic marker with her own at the top spot of the Affiliation Track and gains 2 Prestige Points (for improving affiliation by 2 steps) and 1 Story Point (for establishing a tributary relation at a port with a strength of 3) on the Majapahit Story Track.
Tom, the third player, must now resolve the Combat action. Tom and Olivia have agreed to combine their actions (Tom's second action and Olivia's third action of Round 1) into a Joint Combat Action.
Note: the printed example contains minor typographical slips (e.g., "generic market" and a repeated "his Moon Dial adds 1 more point" clause), which are corrected in this transcription.
Round 1 Action 3
Since Olivia has completed her third action, she has no remaining Deity Dial for action and must pass.
George performs an Explore action with a position strength of 4 on his action card and a -1 from the last Sun Dial. He needs a strength of 4 to acquire the 2 Knowledge Tokens at Champa. Fortunately, with the help of "spies" from the previous encounter, he proceeds without sacrificing any troops. As a result, he gains 1 Story Point in Mainland Southeast Asia. With the first and second spots on the Story Track already occupied, George places his marker on the third spot.
Both Tom and Penny choose to perform a Trade action, thus concluding the first round.
Had the Star Dial shown a value of 0, Penny could have used the position strength of her Explore card at 5, plus spending 3 troops, to achieve an action strength of 7 (5 from the card, 0 from Star Dial, and 2 from resources), thus gaining all 3 knowledge tokens in Palembang. Since these are all different in colors, she could then use the tokens to acquire a private Objective Card, which she would then place face down to the left of her Player Mat.
Game Variants
Game Variant 1: Quick Game
The Quick Game provides streamlined rules designed to give players a taste of the game before committing to the full experience. It is recommended as an introduction game for less experienced players.
Note: This game variant is not compatible with any other game variants.
Setup and Rules Modifications
- Players begin the game with their ships in Samudera (port #6) at the start of Round 4. The game ends after all players have completed their first action in Round 7. Ignore all other end-game triggers.
- Do not set up any Trade Goods or Knowledge Tokens in Samudera. Samudera remains a tributary port throughout the game. Place a generic marker at +3 (the top) on its affiliation track.
- The unused Regions and Objective Cards in the Quick Game differ from those in the Full Game.
| No. of Players | Regions NOT in use | Objective Cards NOT in use |
|---|---|---|
| 2 Players | Burma and Bengal & Majapahit & Mainland SE Asia | II, III, 6, 7, 11, 13, 14 |
| 3-4 Players | Majapahit & Mainland SE Asia | II, III, 6, 8, 11 |
- After setting up Trade Goods in the bazaars, reveal them face up. They remain open information throughout the Quick Game, even when no ship is present at the port.
- During the Administration Phase of each round:
- Skip Event Checks, except for Monsoon Wind, which still applies (step 2).
- Do not perform any Port Upkeep (step 4).
- Players who sail their ships back to Samudera may then choose to immediately return to Nanjing, gaining the corresponding Victory Points.
Game Variant 2: Randomized Setup
Players may introduce one or more of the random mechanisms below to enhance replayability.
Random Round Tiles
This setup introduces randomness to the timing of monsoon winds and event occurrences, potentially diverging from historical accuracy. During setup, flip the six random round tiles to their backs and place one randomly on each space on the round track with a cloud symbol (all except round 1, 5, and 9). At the start of a round, if a random round tile occupies the space of the NEXT round, flip it over to reveal its contents.
Random Placement of Knowledge Tokens
During setup, randomly draw knowledge tokens from the draw bag and place one on each used space marked with a Knowledge Token.
Random Starting Locations
This setup assigns a home region to each game character. When selecting a character, ensure their home region is used in the game.
| Character | Home Region | Starting Prestige | Starting Profit |
|---|---|---|---|
| Merchant | Mainland Southeast Asia | 2 | 2 |
| Diviner | Majapahit | 1 | 2 |
| Interpreter | Burma and Bengal | 1 | 1 |
| Healer | South India and Ceylon | 1 | 1 |
| Navigator | East Africa | 0 | 1 |
| Commander | Arabia | 0 | 0 |
Setup and Rules Modifications
- The game begins at the start of round 2. Each player chooses a home port within their character's home region (refer to the table above) and begins the game with one ship anchored there. Mark your home port by placing a player marker on the port icon on the map. Then, mark the starting Prestige and Profit Points on the corresponding tracks.
- All players' home ports start the game with an affiliation of 0.
- Players NEVER gain any Story Points at their home regions.
Game Variant 3: Solo Game - East meets West
In solo games, you take on the role of Admiral Zheng He, competing against the automated Venetian explorer, Niccolò de' Conti. You win if Zheng's VP is higher than De Conti's at the end of the game.
Note: This game variant is incompatible with random placement of Knowledge Tokens.
Winning the Solo Game
- Zheng's VP are calculated as usual, except Zheng does not gain any VP for returning to Nanjing, whether by being the first to return or by building the Porcelain Tower.
- De' Conti's VP are calculated based on his position on the Profit Track, plus VP from the Story Tracks, and 1 VP for each Porcelain he possesses at the end of the game. De' Conti never gains Prestige Points or fulfills Objective Cards.
Setup Modifications
- Game Setup: Set up the game as you would for a 4-player game. Do not use any other variant rules when playing solo games.
- Remove Cards: Remove Objective Cards #19, 20 from the game (marked with an X under the VP). All other Objective Cards are used.
- Bonus Tokens: Do not set up any bonus tokens. When reaching a bonus spot on the Prestige and Profit Track, Zheng may choose either an extra ship or an action upgrade. De' Conti gains an extra ship at his current port upon reaching 5 Profit Points, and an action upgrade at 7 (Sail), 8 (Trade), and 10 (Explore) Profit Points respectively.
- Trade Goods: In solo games, trade goods in all bazaars are open information. Reveal them after setting up the game.
- Game End: The game ends IMMEDIATELY when Zheng He's marker reaches the rightmost space on the Health Track. Otherwise, complete the first turn of the 9th round and conclude the game. No other endgame triggers apply.
Special Rules for Zheng He
- Flag Captain: Zheng He begins with his flagship in Nanjing. Before rolling the Deity Dice in the Administrative Phase of the first round, choose one Character Mat as your flag captain for the round. Set up your action cards and resources accordingly.
- Character Mat Rotation: Before rolling the Deity Dice in the Administrative Phase of each subsequent round, turn your current Character Mat to its backstory side. Then, select a different Character Mat that has not been flipped, transferring all previously built structures and accumulated resources on the original mat to this new mat. Use only the abilities from the new character. Abilities from the previous character do not carry over.
- Character Mat Reset: At the start of Round 6, when only one Character Mat remains face-up, flip all Character Mats back to their front sides—except the one used in Round 5.
Special Rules for Niccolò de' Conti
- Starting Setup: De' Conti uses ONLY three action cards: Sail, Trade, and Explore with fixed position strength of 1 (Sail), 4 (Trade), and 5 (Explore). These cards are not reset during the Administrative phase and the strengths remain consistent across all rounds. A second action of the same type in the same round has an action strength of 0. Use Encounter Card #37 as De' Conti's Character Mat. Place the Action Cards above it near the top left corner of the Game Board. The three public Deity Dials in the top left corner serve as De' Conti's dials. (Refers to the image in Solo Game Example.)
- Starting Location: Choose a player color for De' Conti. He starts the game with his flagship at a port determined by rolling the 6-sided Sun Die:
- -2: Malindi (East Africa; Port #15)
- -1: Mogadishu (East Africa; Port #14)
- 0: Mecca (Arabia; Port #13)
- 1: Aden (Arabia; Port #12)
- 2: Hormuz (Arabia; Port #11)
- Resources: De' Conti does not start the game with any resources.
- Turn Order: Ignore turn order rules (Administrative Phase step 3). De' Conti always plays first each round, completing all three actions before Zheng He begins his turn.
- Profit Points: De' Conti's Profit Points is NOT capped at any number. If his Profit Points exceed 15, simply use a VP marker of the same player color on the Profit Track.
- Affiliation: Affiliation applies only to the Treasure Fleet. De' Conti never rolls for affiliation and is unaffected by it; even hostile ports will trade with him. The presence of his ship alone does not prevent affiliation from deteriorating during the Administrative Phase.
Movement rules for De' Conti's ship (Sail action)
- Never sail into a storm, or to Nanjing.
- Avoid sailing against the monsoon wind unless it's the only possible direction for a sail action.
- Always sail toward lower-numbered ports until the flagship reaches Champa (Port #1). Afterward, all ships sail toward higher-numbered ports.
- If De' Conti has multiple ships, always move the ship that is further behind (the one at the high-numbered port before reaching Champa, or the one at the lower-numbered port after reaching Champa). If both ships are at the same port, move only the flagship.
- Always sail to a port with higher valued regular trade goods when multiple destinations are possible.
Notes: The FIRST TIME flagships of Zheng and De' Conti dock at the same port, De Conti gains 1 porcelain; and Zheng resolves Encounter Card #37. If the meeting occurs as a result of Zheng's Sail action, resolve only Encounter Card #37 for Zheng, without drawing any other Encounter Card.
Action Matrix
FIRST ACTION (EXPLORE)
Are there any Trade or Sail Knowledge Tokens available at De' Conti's current port(s)?
- Yes: Explore - De' Conti attempts to gain the maximum number of Knowledge Tokens with the lowest-value Deity Dial that provides sufficient action strength, prioritizing Trade (yellow), and then Sail (green), but never Diplomacy (brown), or Combat and Construction (red). After the action:
- Can De' Conti use a combination of Knowledge Tokens and Porcelain to acquire any non-animal trade goods as a free action?
- Yes: Perform a free Trade action.
- No: Can De' Conti perform a FREE Sail action to reach a port where he can then use a FREE Trade action to acquire non-animal trade goods now?
- Yes: Use a free Sail action to go to that port and perform a free Trade action there, then proceed to the next action unless this is your last action.
- No: Proceed to the next action unless this is your last action.
- Can De' Conti use a combination of Knowledge Tokens and Porcelain to acquire any non-animal trade goods as a free action?
- No: Proceed to the second, then the third action, as if they are your first and second action, then come back to this as your last action.
SECOND ACTION (TRADE)
Can De' Conti acquire any regular trade goods (those that provide red Profit Points), using available Porcelain if needed, at the current port(s)?
- Yes: De' Conti attempts to acquire the trade goods offering the highest Profit Points, then proceed to the next action.
- No: Can De' Conti afford any religious scrolls that provide +1 to his Sun, Moon, or Star Dials?
- Yes: Acquire the religious scroll, then proceed to the next action.
- No: Can De' Conti afford any manuscripts that provide wild knowledge?
- Yes: Acquire the manuscript, then proceed to the next action.
- No: Forfeit the Trade action with the lowest-value Deity Dial to gain Porcelain, then proceed to the next action.
Note: When trading, always use the Deity Dial that minimizes wastage of action strength.
THIRD ACTION (SAIL)
Can De' Conti take any Sail action?
- Yes: De' Conti attempts to sail as far as possible from his current port. His sail action never triggers any Encounter Cards. (Movement rules above apply.)
- No: Can De' Conti take another TRADE action with a strength of 0?
- Yes: Trade as described in the second action.
- No: Forfeit the Sail action with the lowest-value Deity Dial to gain Porcelain. Proceed to Explore as described in the first action if this is not your last action.
Solo Actions Flowchart
The flowchart on the page restates the matrix above as decision steps:
- Are there any Trade or Sail Knowledge Tokens at the current port(s)? YES: Explore (lowest-value Deity Dial that provides sufficient strength, prioritizing Trade, then Sail). NO: Perform the 2nd action, then the 3rd action, as if they were the first and second, and return to this action as the last action.
- Can we acquire any non-animal trade goods as a FREE action? YES: Perform a FREE Trade action. NO: Can we use a FREE Sail action to reach a port where we can then use a FREE Trade action to acquire non-animal trade goods now? YES: Sail to that port and perform a trade action there as 2 FREE actions. NO: Proceed to the next flowchart if this is NOT your last action.
Solo Game Example
Setup: Rolling 0 on the Sun Die, De' Conti's ship starts at Mecca. Deity Dials are set to -1 (Sun), 0 (Moon), and +1 (Star).
De' Conti's 1st action: In Mecca, there are 2 Sail and 1 Trade Knowledge Tokens. De' Conti chooses the Explore action with a position strength of 5. De' Conti cannot reach the 7 action strengths needed to acquire all 3 tokens, even if he uses the +1 value from the Star Dial. He uses the Sun Dial, resulting in a total action strength of 4 (5 from the card, -1 from the Sun Dial) to acquire one Trade, and one Sail Knowledge Token instead.
In the Arabia Region Box, De' Conti places one player marker on the Mecca icon to indicate the port has been explored, and a second marker on the first space of the Story Point Track to indicate gaining 1 Story Point for acquiring 2 Knowledge Tokens. Since having one token of each color isn't enough for any FREE actions, he proceeds to the second action.
De' Conti's 2nd action: The available goods in Mecca include:
- A vase, a regular trade good that provides red Profit Points, costs 6 action strength.
- A camel, an animal that provides yellow Prestige Points, costs 3.
- A manuscript that provides 1 Story Point and wild Knowledge Tokens, costs 6.
- A Moon religious scroll that provides 1 Story Point and adds a permanent "+1" to the Moon Dial, costs 3.
Since De' Conti does not acquire animals, and is limited to a maximum action strength of 5 (4 from the card and +1 from the highest Star Dial), he proceeds to Trade with a strength of 4 (4 from the card, 0 from the lowest Moon Dial) to acquire the Moon religious scroll and place it adjacent to the Moon Dial.
De' Conti's 3rd action: De' Conti takes the Sail action with a strength of 2 (1 from the card, 1 from the remaining Star Dial). He sails to Aden, moving against the direction of the monsoon winds—the only direction in which sailing is possible. This concludes De' Conti's round. Play now proceeds to Zheng He.
Solo Actions Flowcharts: Second and Third Action
Second Action
TRADE - attempts to gain trade goods that provide the highest Profit Points with the lowest-value Deity Dial, use porcelain if necessary.
- Can we afford any regular trade goods at the current ports? YES: Acquire the goods that offers the highest Profit Points. NO: Can we afford any religious scrolls at the current ports? YES: Acquire the religious scrolls. NO: Can we afford any manuscripts at the current ports? YES: Acquire the manuscripts. NO: Forfeit the Trade action with the lowest-value Deity Dial to gain Porcelain.
- Then: Proceed to the next flowchart.
Third Action
- Can we take any SAIL action? YES: SAIL - attempt to sail as far from the original port as possible. NO: Can we take another TRADE action again? YES: TRADE as described in the 2nd action. NO: Forfeit the Sail action with the lowest-value Deity Dial to gain Porcelain.
- Then: Proceed to the first flowchart if this is NOT your last action.
De' Conti: (see the De' Conti movement rules in the Special Rules for Niccolò de' Conti section above.)
Objective Cards List
| No. | Title | Description | VP | Type |
|---|---|---|---|---|
| I | Specialist | Place your marker on this card if you have collected 2 trade goods depicted by the SAME icon. Claim this card if you have collected 3. | 4 | Yellow |
| II | Victories in the South Sea | Place your marker on this card when you perform 1 successful Combat action in Mainland Southeast Asia / Majapahit. Claim this card when you accomplish this twice. | 2 | Red |
| III | Đại Việt Rising | Place your marker on this card if you are the first to establish Tributary Relation (affiliation = 3) in a port in Mainland Southeast Asia with a Non-Combat action. Claim this card if you accomplish this in 2 different ports of the region. Remove this card if it is not claimed when every port in the region has an affiliation equals to 3. | 4 | Gray |
| 1 | Containing Timurid | Place your marker on this card when you are the first to establish Tributary Relation (affiliation = 3) in a port in Arabia with a Non-Combat action. Claim this card if you accomplish this in 2 different ports of the region. Remove this card if it is not claimed when every port in the region has an affiliation equals to 3. |
| 11 | Find the Deposed Emperor | Place your marker on this card when 5 ports in Mainland Southeast Asia / Majapahit / Burma & Bengal are explored and you have explored the most ports there. Claim this card when 6 ports in these regions are explored and you have explored the most ports there. | 4 | Gray | | 12 | Collector | Place your marker on this card if you have collected 5 trade goods depicted by DIFFERENT icons. Claim this card if you have collected 6. | 3 | Yellow | | 13 | Victories in the Indian Ocean | Place your marker on this card when you perform 1 successful Combat action in Burma & Bengal / South India & Ceylon. Claim this card when you accomplish this twice. | 3 | Red | | 14 | Victories in the Arab World | Place your marker on this card when you perform 1 successful Combat action in Arabia / East Africa. Claim this card when you accomplish this twice. | 4 | Red | | 15 | Show of Strength | Claim this card when you perform an action with Action Strength > 10. | 2 | Gray | | 16 | Through the Storms | Place your marker on this card when you perform a Sail action through storms without losing Prestige. Claim this card when you accomplish this twice. | 2 | Gray | | 17 | Ultimate Explorer | Place your marker on this card if you have explored in 3 regions (1, 3, or 4P), or 2 regions (2P). Claim this card if you have explored more regions than stated above in the game. | 4 | Gray | | 18 | Courier Service | Claim this card as part of a Trade action. Remove one of your trade goods with Profit Points ≥ 2 to supply, while performing a Trade action in a region not adjacent to the origin of the trade good. Adjust Profit Point accordingly. | 3 | Yellow | | 19 | Most Respected | Claim this card, if at the end of a round after the round this card is revealed, you have higher Prestige Point than all other players. | 2 | Gray | | 20 | Deepest Pockets | Claim this card, if at the end of a round after the round this card is revealed, you have higher Profit Point than all other players. | 2 | Gray |
Encounter Cards List
Each Encounter Card below lists its options. Options marked IGNORE, AVOID, QUARANTINE, NOT TAKING SIDE, NOT INTERVENE, FIGHT, SIDE WITH REBELS, SIDE WITH PORT, INTERVENE, SMALL HELP, BIG HELP or HELP are printed on the card and listed here as the rulebook prints them.
- Harvest
- IGNORE: Affiliation of the port -1.
- SMALL HELP: Action Strength -2 on your next action; Gain 1 random Trade Good of the region.
- BIG HELP: Remove a Deity Dial from your Character Mat; Lose 1 Troop; Prestige Points +1; Gain 1 Wild Knowledge; Gain 1 random Trade Good of the region.
- Construction
- IGNORE: Affiliation of the port -1.
- SMALL HELP: Action Strength -2 on your next action; Gain 1 random Trade Good of the region.
- BIG HELP: Remove a Deity Dial from your Character Mat; Lose 2 Troops; Affiliation of the port +2; Prestige Points +2; Gain 1 random Trade Good of the region.
- Famine
- IGNORE: Affiliation of the port -2.
- SMALL HELP: Action Strength -2 on your next action; Affiliation of the port +2.
- BIG HELP: Remove a Deity Dial from your Character Mat; Lose 2 Troops; Affiliation of the port +2; Prestige Points +2.
- Plague
- AVOID: Return to the last port you sailed past.
- QUARANTINE: Action Strength -2 on your next action; Gain 1 Wild Knowledge.
- HELP: Remove a Deity Dial from your Character Mat; Lose 3 Troops; Affiliation of the port +2; Prestige Points +2; Gain 2 Wild Knowledge.
Encounter Cards List (continued)
- Alliance
- REJECT: Affiliation of the port -1.
- ACCEPT: Your next action must be a Diplomacy action against an Encounter Strength of 3.
- If you succeed against the Encounter: Affiliation of the port becomes 2 unless it was 3; Prestige Point +1; Gain 2 Wild Knowledge.
- If you fail: Prestige Points -1.
- Bribery
- REFUSE: Affiliation of the port -1.
- SMALL GIFT: Remove 1 Porcelain to improve affiliation of the port +1.
- BIG GIFT: Remove 3 Porcelain to improve affiliation of the port +3.
- Love from Afar
- LEAVE: Affiliation of the port -1.
- STAY: Gain one random Trade Good of the region; Affiliation of the port +1. Place 3 player markers on this card. Remove 1 marker on each of your next 3 turns. You must keep at least 1 ship at the port and cannot perform Combat action against the port as long as there are any markers on this card. Remove this card to the discard pile after the last marker is removed.
- King's Tournament
- DECLINE: Affiliation of the port -1.
- ACCEPT: As your next action, forfeit one of your actions by placing a Deity Dial on a selected Action Card. Compare your Action Strength against an Encounter Strength equals to 2+ the absolute value from rolling the 10-sided Moon Die. Gain 2 Story Points of the region regardless of the die result.
- If you succeed (your Action Strength > Encounter Strength): Profit Points +1; Affiliation of the port +1.
- If you fail (your Action Strength ≤ Encounter Strength): Prestige Points -2 (no other loss even if it was a combat action).
- Monks
- IGNORE: Gain 1 Porcelain or Troop of your choice.
- LEARN: Remove 2 Porcelain to search Trade Goods in the region now. Gain the first Manuscript or Religious Scroll of your choice. You don't lose any Porcelain if there are no suitable trade goods in the region.
- Animals Traders
- IGNORE: Gain 1 Porcelain or Troop of your choice.
- DEAL: Remove 2 Porcelain to search Trade Goods in the region now. Gain the first ANIMAL you have not acquired. You don't lose any Porcelain if there are no suitable trade goods in the region.
- Market
- IGNORE: Gain 1 Porcelain or Troop of your choice.
- DEAL: Remove 2 Porcelain to gain +2 Action Strength to one future Sail action. Remove this card to the discard pile after use.
- Cannon Makers
- IGNORE: Gain 1 Porcelain or Troop of your choice.
- HIRE: Remove 2 Porcelain to gain +2 Action Strength to one future Combat action. Remove this card to the discard pile after use.
- Blacksmiths
- IGNORE: Gain 1 Porcelain or Troop of your choice.
- HIRE: Remove 2 Porcelain to gain +1 Action Strength to ALL your future Combat actions.
- Builders
- IGNORE: Gain 1 Porcelain or Troop of your choice.
- HIRE: Remove 3 Porcelain to construct a free Structure of your choice now.
- Spies
- IGNORE: Gain 1 Porcelain or Troop of your choice.
- HIRE: Remove 2 Porcelain to gain +1 Action Strength to ALL your future Explore actions.
- Travelers
- IGNORE: Gain 1 Porcelain or Troop of your choice.
- HIRE: Remove 2 Porcelain to perform a free Scout action with an Action Strength of 4 now.
- Interpreters
- IGNORE: Gain 1 Porcelain or Troop of your choice.
- HIRE: Remove 2 Porcelain to gain +1 Action Strength to ALL your future Diplomacy actions.
- Merchants
- IGNORE: Gain 1 Porcelain or Troop of your choice.
- HIRE: Remove 2 Porcelain to gain +2 Action Strength to one future Trade action. Remove this card to the discard pile after use.
- Historian
- IGNORE: Gain 1 Porcelain or Troop of your choice.
- HIRE: Remove 2 Porcelain to gain +2 Action Strength to one future Diplomacy action. Remove this card to the discard pile after use.
- Thieves
- IGNORE: Gain 1 Porcelain or Troop of your choice.
- HIRE: Remove 3 Porcelain to steal 1 random Trade Good from a player you choose now. Adjust only Prestige or Profit Points for both players if applicable.
- Mage
- IGNORE: Gain 1 Porcelain or Troop of your choice.
- HIRE: Once per round during your turn, you may remove 1 Porcelain to reroll the result on 1 Deity Dial of any player (including yourself).
- Mutiny
- IGNORE: Gain 1 Porcelain or Troop of your choice.
- GO AHEAD: Remove 2 Porcelain to take 2 Troops from any one player to your Character Mat now.
- Saboteurs
- IGNORE: Gain 1 Porcelain or Troop of your choice.
- SABOTAGE: Remove 2 Troops to remove ALL Porcelain from any one player now.
- Motivated
- IGNORE: Gain 1 Porcelain or Troop of your choice.
- MOTIVATE: Remove 3 Porcelain; Place one of your markers on this card at the beginning of every subsequent turn. Once per turn, you may perform one free action with Action Strength equals to the number of markers removed from this card.
- Settlers
- IGNORE: Place card at the bottom of the deck.
- AGREE: Remove 3 Troops to Construct a free Depot at the port now.
- Divine Wind
- ATTEMPT TO NAVIGATE: Compare the Action Strength of your last Sail action against the absolute value from rolling the 10-sided Moon die.
- If you succeed (your action strength > die value): Story Point of the region +1.
- If you fail (your action strength ≤ die value): For every point on the die value (positive or negative), lose either 2 Porcelain or 1 Troop (in any combination). If you don't have enough, use Prestige Points to cover the difference.
- GO WITH THE FLOW: Roll the 8-sided Star die for each of your ships here. Each ship is blown into an adjacent zone based on the die result, following this logic:
- Result = -3: Move the ship to the adjacent zone with the highest port number (refer to the region box or the table on p.6 for port numbers).
- Each incremental value: Move the ship to the next adjacent zone in clockwise order.
- Result = 3: The ship remains anchored at its current port.
- Example: If your ship is at Kotte, depending on the die result, it will be blown to: Mogadishu (if result is -3 or 2), Calicut (-2), Bengal (-1), Pegu (0), Samudera (1), and stays at Kotte if the result is 3.
- Bandits
- IGNORE: Affiliation of the Port -1.
- SUPPRESS: Your next action must be a Combat action against an Encounter Strength of 3. If you succeed in the combat: +1 Prestige Points; +1 Profit Points; Gain 1 Wild Knowledge.
- Chinese Diaspora
- COLD WATER: Affiliation of the Port -2.
- PARTY TIME: Gain a random Trade Good of the region; Affiliation of the port +2. Place 3 markers on this card. Remove 1 marker at the start of each of your next 3 turns. You must keep at least 1 ship at the port and cannot perform Combat action against the port as long as there are any markers on this card. Remove this card to the discard pile after the last marker is removed.
- Treasure Island
- IGNORE: Place this card at the bottom of the deck. Draw a new Encounter Card.
- VISIT: Action Strength -2 on your next action; Gain 1 random Trade Good of the region.
- Sea Monster
- AVOID: Prestige Points -1.
- FIGHT: Your next action must be a Combat action against an Encounter Strength of 5; Prestige Points +2 even if you lose. If you succeed in the combat, Profit Points +2.
- Merchant Ship
- AVOID: Replace all Trade Goods from the bazaar in this port with those under the region box. If there are fewer goods in the region box than in the bazaar, randomly choose the same number of trade goods from the bazaar to replace. No effect if there are no goods under the region box.
- DEAL: Action Strength -2 on your next action; Remove 1 Porcelain to gain 1 random Trade Good of the region.
- Ancient Ruins
- IGNORE: Place this card at the bottom of the deck. Draw a new Encounter Card.
- VISIT: Your next action must be an Explore action of the ruins (not the port); Troops -2. If your Action Strength > 1 + the absolute value from rolling the 8-sided Star Die, Profit Points +3.
- Coronation
- RECOGNIZE: Remove 1 Porcelain to improve affiliation of the port +1.
- DENOUNCE: Affiliation of the port -1; If affiliation becomes -2 (hostile), your next action must be a Combat action against the port.
- Niccolò de' Conti
- IGNORE: Place this card at the bottom of the deck.
- MEET: Remove 2 Porcelain to upgrade an Action Card of your choice.
Historical Notes: What Drives Zheng He's Voyages?
The debates surrounding Zheng He's voyages primarily revolve around the reasons behind China's significant investment in these lavish endeavors and the subsequent shift in policy after Zheng He's death. Leading to destruction of the treasure fleet, banning of maritime expeditions, and adoption of an isolationist stance.
To understand these debates, it is crucial to recognize the fundamental differences between Zheng He's voyages and the later European explorations. The Chinese fleet primarily served as a manifestation of Emperor Yongle's personal pursuits. The motivations behind the voyages, whether the search for a deposed emperor, the containment of regional powers, or the pursuit of recognition, were exclusively tied to the emperor's desires. With the emperor's passing, these reasons ceased to exist, rendering the maintenance of such an extensive armada impractical.
Moreover, the relocation of the capital to Beijing and the rebuilding of the Great Wall represented a shift in the center of gravity within the Ming Empire. The focus turned away from the ocean, leading to a change in the court's mentality. The challenges faced by the Ming Empire differed significantly from those during Zheng He's early voyages.
Another crucial aspect to consider is that these voyages were not purely exploratory in nature. They followed well-established trade routes, rather than aiming to "discover" new lands like America or Australia. A more fitting comparison might be to modern-day diplomatic missions by US fleets, emphasizing their role in fostering influence rather than exploration.
Nonetheless, Zheng He's voyages hold significant historical and cultural importance, particularly in the realms of diplomacy, trade, and cultural exchange. They remain a key component of China's historical narrative and continue to resonate within the context of contemporary geopolitical dynamics.
Transcription note: the final page of the printed rulebook carries an icon key (a pictorial legend of icons, Region names and Deity Dice symbols) and a credits block. The icon key is graphic-only and is not reproduced here; region names it lists are in the Key Concepts table above. Credits are omitted per house convention.