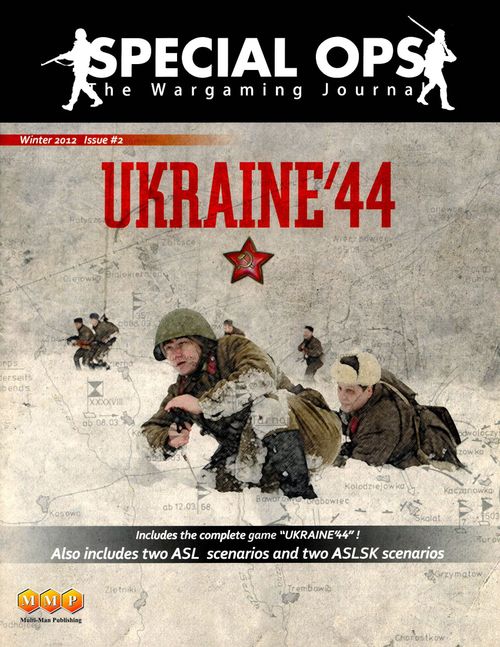
Ukraine '44
Ukraine '44 Rulebook
Table of Contents
Table of Contents
- 2.0 Game Contents
- 3.0 Starting the Game
- 4.0 Victory Conditions
- 5.0 Sequence of Play
- 6.0 Stacking
- 7.0 Zones of Control
- 8.0 Supply
- 8.1 States
- 8.2 Supply Check
- 8.3 German Supply Sources
- 8.4 Soviet Supply Sources
- 8.5 Tracing a Supply Line
- 8.6 The Dniester River
- 8.7 Supply Limit
- 8.8 In Supply
- 8.9 Out of Supply and Isolated
- 8.10 Effects of "Out of Supply" Status
- 8.11 Effects of "Isolated" Status
- 8.12 Voluntary Movement of Units into Out-of-Supply Areas
- 9.0 Reinforcements
- 10.0 Movement
- 11.0 Combat
- 12.0 German Tiger Tank Battalion
- Note
2.0 Game Contents
Rules, game map, 280 counters, a die.
2.1 Map
The main part of the playing board is a real map of the area where the battle took place. For gameplay reasons and for simplification, the map is divided into numbered hexagons. Each hexagon contains a portion of natural and/or man-made terrain, which affects both combat and movement. A hexagon containing any part of hilly terrain counts as a hill for combat. It also counts as a hill even if it contains a road (the same applies to forest). Map scale: one hexagon = 5 km.
2.2 Counters
There are two types of counters in the game: combat units and information markers. Combat units are color-coded to show side, type, parent formation and order of appearance in the game. They also reflect the combat strength of the real historical units. The game uses limited intelligence, and during most of the game you can see only the hidden sides of enemy counters. However, you may look at the characteristics of your own units at any time. * Throughout the rules: step, level and loss level mean the same thing.
2.3 Combat Units
Note: movement points are not printed on the combat unit counters; for convenience they are shown on the game map and are standardized for the main branches of service.
A counter shows: formation (parent unit), unit type, stripe, attack strength and defense strength.
- All German mechanized units have 8 movement points.
- All German infantry units have 6 movement points.
- All German garrisons have 0 movement points (these units cannot move for the entire game).
- All Soviet mechanized units have 7 movement points.
- All Soviet infantry units have 5 movement points.
2.4 Counter Colors
Soviet:
- Red with a red stripe (10 total) - mechanized units (set up at the start of the game on pre-designated hexagons).
- Brown with a black stripe (6 total) - infantry units of the 40th Army (set up in the 40th Army area).
- Brown with a white stripe (9 total) - infantry units of the 38th Army (set up in the 38th Army area).
- Brown with a red stripe (7 total) - infantry units of the 18th Army (set up in the 18th Army area).
- Light brown with a green stripe (10 total) - infantry units of the 60th Army (enter the game on turn 1 as reinforcements through hexagon D).
- Light brown with a gray stripe (17 total) - infantry units of the 1st Guards Army (enter the game on turn 1 as reinforcements through hexagon E).
German:
- Black with a white stripe 1PzA (10 total) - German mechanized units of the 1st Panzer Army (set up at the start of the game on pre-designated hexagons).
- Gray with a gray stripe 1PzA (11 total) - German infantry units of the 1st Panzer Army (set up at the start of the game on pre-designated hexagons).
- Gray with a gray stripe, but with no 1PzA marking on the stripe (2 total) - German infantry units not belonging to the 1st Panzer Army (set up at the start of the game on pre-designated hexagons).
- White (3 total) - German garrisons (set up at the start of the game on pre-designated hexagons).
- Light green (3 total) - Hungarian infantry units (set up at the start of the game on pre-designated hexagons).
- Light blue (3 total) - German infantry units (arrive as reinforcements on turn 7 through hexagons A, B or C, player's choice).
- Dark blue / green (2 total) - German mechanized units (arrive as reinforcements on turn 11 through hexagons A, B or C, player's choice).
- Dark green (2 total) - Hungarian mechanized and infantry units (arrive as reinforcements on turn 11 through hexagons A, B, C or H, player's choice).
In addition, the dark blue/green "Tiger" battalion arrives with the turn 11 reinforcements (pre-attached to some German unit arriving as a turn 11 reinforcement) or is placed in the Tiger Battalion box at the start of turn 11.
2.5 Hungarian Units
Hungarian units act exactly like German units unless the rules explicitly state otherwise. This applies to the light green Hungarian units (those that start the game on the map) and the dark green ones (those that enter the game as reinforcements), and directly concerns their movement (the same as the corresponding German branch of service).
2.6 Abbreviations
Soviet formations:
- GTC - Guards Tank Corps
- (G)MC - (Guards) Mechanized Corps
- G - Guards
- 40A - 40th Army
- 38A - 38th Army
- 18A - 18th Army
- 60A - 60th Army
- 1GA - 1st Guards Army
German formations:
- Pz - Panzer
- SS - SS troops
- J - Jäger
- PG - Panzergrenadier
- 1PzA - 1st Panzer Army
2.7 Unit Size
Although the formal size of units has no effect on the game, all Soviet mechanized units are corps, and all other units in the game on both sides are divisions.
2.8 Unit Types
Units may be mechanized, infantry or garrisons.
2.9 Markers
Markers: Game Turn; Out of Supply; Isolated; German Air Supply; German "Tiger" battalions.
Loss markers. Use these markers to record a unit's loss level.
"0 loss level" marker. There are 4 markers of this type. Each side may use 2 of them as decoys during the game. The use of this marker is explained later in the rules.
3.0 Starting the Game
3.1 German Initial Setup
The German player sets up his units on the game board first, on the designated hexagons. For example, the 1ssPz unit is placed in hexagon 23.24. At the start of the game two "Tiger" battalions are available to the German player. At the player's choice they may be attached to German units or placed in the German Tiger Battalion box. Place the Axis Air Supply marker in the Air Supply box.
3.2 Soviet Initial Setup
Soviet forces are set up after the Germans. Units of the 18th, 38th and 40th Armies are placed in any hexagon within their areas indicated on the game board. They may be adjacent to German units. In addition, for Soviet mechanized units, as for German ones, the hexagons on which they must be placed at the start of the game are indicated on the game board. For example, 6GTC must be placed in hexagon 30.24.
3.3 Reinforcements
The remaining units enter the game according to the reinforcement rules (see 9.0).
3.4 Game Turn Marker
Place the game turn marker in the first turn box of the turn record track.
4.0 Victory Conditions
4.1 How to Win
The winner of the game is determined by one of the following conditions:
- Automatic Soviet victory
- Victory points at the end of the game (Wehrmacht or Red Army victory)
4.2 Automatic Soviet Victory
At any moment in the game the Soviet player automatically wins if he controls at least three of the following cities at the same time:
- Berezhany (31.16)
- Stanislav (18.03)
- Chernivtsi (04.18)
- Ternopil (33.15)
Each of these cities is marked on the game board with a star.
4.3 End-of-Game Victory Conditions
If there was no automatic Soviet victory by the end of the last turn, each player counts his victory points, and the player with the most points is declared the winner.
German victory points:
Soviet losses: each destroyed defense factor of any Soviet unit: 1 victory point (i.e. a Soviet unit with a defense factor of 4 gives the German player 4 victory points at the end of the game).
Evacuation of the 1st Panzer Army: each defense factor of a mechanized unit belonging to the 1st Panzer Army that at the end of the game is north of the Dniester river and can trace a supply line to supply sources at A, B, C or H: 1 victory point.
Soviet victory points:
German losses:
- Each destroyed defense factor of a German mechanized unit: 2 victory points.
- Each destroyed defense factor of a German infantry unit: 1 victory point.
- Each destroyed "Tiger" battalion: 3 victory points.
- Each destroyed defense factor of a German garrison: 1 victory point.
- Elimination of the German Air Supply marker: 10 victory points (see 8.17).
When counting victory points at the end of the game, all German units that cannot trace a supply line to a supply source (whether at A, B, C or H; air supply; or limited city supply) are considered destroyed for the Soviet victory conditions. "Tiger" battalions are not considered destroyed when out of supply at the end of the game.
Control of victory cities: Soviet control of each victory city (a city marked with a red star on the map) that can trace supply to any Soviet supply source: 10 victory points. A victory city is controlled by the last player who entered that hexagon. All victory cities start the game under German control.
5.0 Sequence of Play
5.1 Turn Sequence
- Supply check phase
- A. Soviet supply check
- B. German air supply phase
- C. German supply check
- D. Allocation of "Tiger" battalions
- German player turn
- A. German movement phase
- B. German combat phase
- C. German mechanized re-movement phase
- Soviet player turn
- A. Soviet movement or combat phase
- or
- B. Soviet combat or movement phase
After all of the above steps are completed, the game turn marker is advanced to the next turn (one box forward). If turn 12 was just completed, the game ends and victory points are counted (see 4.3).
5.2 Special First Turn Rules
On the first turn, steps 1 and 2 (the supply check phase and the German player turn) are skipped, and the game begins with the Soviet player turn. The Soviet player may choose to begin with either the combat phase or the movement phase. All units on the map are in supply at the start of the game.
5.3 Soviet Player Choice: Movement - Combat, or Combat - Movement
Each turn the Soviet player chooses the order in which his turn will proceed: either movement - combat, or combat - movement. The Soviet player makes this choice before each of his turns. Note that the Soviet player cannot choose combat - combat or movement - movement.
If the Soviet player chooses combat - movement, then each unit that took part in combat at the beginning of the turn cannot then move (this is because of the request for artillery support, see 11.15).
6.0 Stacking
6.1 Stacking Limit
Only one unit, regardless of ownership, may be in a hexagon. A unit may not enter a hexagon if it is already occupied by another friendly unit, even while moving (for exceptions see 6.2 and 12.2). The limit remains in force during the movement phase. This means the order in which units are moved is critical for each player. Plan the movement of units carefully before you begin moving them.
6.2 Garrisons
The presence of a German garrison does not count for stacking during the movement of any other German unit. Any German unit may move through hexagons occupied by German garrisons. However, no unit may stack with garrisons at the end of its movement. Soviet units cannot move through German garrisons.
6.3 Markers
Markers (including "Tiger" battalions) have no effect on stacking.
6.4 Fog of War
Units are normally placed front side up, which shows only their nationality and branch of service. The reverse side (with the unit's characteristics) is revealed only when combat occurs. The owning player may look at the reverse side of his counters at any time during the game.
- "Tiger" battalions are always visible and their location is always known to the Soviet player. Loss point markers always lie under the unit counter and cannot be checked by the opponent, except during combat. There are four "0" loss point markers that may be used for bluffing. Each player may use up to two such markers in the game, in any way he needs.
7.0 Zones of Control
7.1 Projection
A non-isolated unit projects a zone of control (ZOC) into the six hexagons adjacent to the hexagon the unit occupies. The same hexagon may be in the zone of control of both the German and the Soviet player. Isolated units have no zone of control.
7.2 The Dniester River
Except where there is a road (bridge) between hexagons, a unit does not project ZOC into a hexagon on the other side of the Dniester.
7.3 Effects of ZOC
A. Movement (10.0). A unit entering a hexagon affected by an enemy ZOC stops immediately and must end its movement in that hexagon. A unit that begins its movement in an enemy ZOC cannot directly enter another hexagon in an enemy ZOC. To do so it must first move into a hexagon not affected by an enemy ZOC, after which it may enter a hexagon in an enemy ZOC.
B. Strategic movement (10.7). Units in an enemy ZOC cannot begin strategic movement that turn. Units using strategic movement cannot enter hexagons that are in an enemy ZOC.
C. Supply lines (8.5). A supply line cannot be traced through hexagons in an enemy ZOC. Only the presence of your own units in hexagons affected by an enemy ZOC cancels the effect of the enemy ZOC for tracing supply.
D. Combat (11.0). A unit may attack an enemy only if the enemy is in its ZOC. This means it cannot attack enemy units on the other side of the Dniester if there are no roads there.
E. Retreat (11.8). A unit that retreats through an enemy ZOC takes 1 additional loss level. The presence of a friendly unit's ZOC, or of a friendly unit itself, does not cancel the influence and effect of the enemy ZOC in this case.
7.4 Enemy ZOC
The presence of your own unit in a hexagon cancels the effect of an enemy ZOC when tracing a supply line.
8.0 Supply
8.1 States
A unit has four supply states: in supply, air supplied, out of supply, or isolated.
If a unit is in supply or in city supply, no markers are used to mark this state.
If a unit is in air supply, turn the counter 90 degrees so that both sides know it (or use any other convenient method).
If a unit is out of supply, place an Out of Supply marker on it.
If a unit is isolated, place an Isolated marker on it. Supply state is not subject to the fog of war rule, and your opponent must always be able to see the supply state of your units.
Units never take loss points or are removed from the board solely because of supply problems (there is an exception when counting victory points at the end of the game, see 4.3).
8.2 Supply Check
During the appropriate supply check phase, all units of each side check for supply. A unit's supply status remains unchanged until the next supply check phase for its side, regardless of anything that may happen during that game turn.
8.3 German Supply Sources
Reinforcement hexagons A, B, C, H are German supply source hexagons. If such a hexagon is occupied by Soviet units, that supply source becomes unavailable. If the Soviet units leave such a hexagon, it again becomes a German reinforcement and supply source.
8.4 Soviet Supply Sources
Hexagons D, E, F and G are Soviet supply source hexagons. If such a hexagon is occupied by a German unit, that supply source becomes unavailable. If the German units leave that hexagon, it again becomes a Soviet reinforcement and supply source.
8.5 Tracing a Supply Line
A supply line is traced from a unit to its supply (reinforcement) source. A supply line is an unbroken chain of hexagons that is not interrupted by enemy ZOC (unless a friendly unit is in such a hexagon). Supply may be traced for 5 hexagons from any road (not counting the road hexagon itself) that leads to its supply source. There must be no enemy troops on this road and it must not be in an enemy ZOC.
8.6 The Dniester River
Supply lines may not cross the Dniester river, except where a supply line along a road is used.
8.7 Supply Limit
There is no limit on the number of units that may be supplied from one supply source.
8.8 In Supply
A unit that can trace a supply line to a supply source is in supply and has no restrictions; any Out of Supply or Isolated markers are removed from it.
8.9 Out of Supply and Isolated
If a unit cannot trace a supply line to its supply sources, it becomes out of supply (and an Out of Supply marker is placed on it). If a unit already marked with an Out of Supply marker cannot trace supply in its supply phase, it becomes isolated (flip the Out of Supply marker to its Isolated side).
8.10 Effects of "Out of Supply" Status
A unit that is out of supply has the following restrictions:
- It cannot perform strategic movement (10.7).
- For German mechanized units, movement points are halved (rounded up) in the mechanized movement phase.
- A "Tiger" battalion cannot be attached to an out-of-supply unit, and the combat benefits of the "Tiger" battalion are lost if it is stacked with an out-of-supply unit.
8.11 Effects of "Isolated" Status
If a unit is isolated, all of the restrictions of "Out of Supply" status remain in force, and the following additional restrictions apply:
- All movement points are halved (rounded up).
- German mechanized units cannot move in the German mechanized movement phase.
- The unit loses its ZOC.
- Combat strength and defense factors are halved (rounded up). If two or more units "halved" in this way take part in combat, the combat strength of each unit is first halved and then rounded.
- "Tiger" battalions cannot be detached from units that are isolated.
8.12 Voluntary Movement of Units into Out-of-Supply Areas
A unit may be deliberately moved to a position where it will be unable to trace supply during its next supply phases.
8.13 Reinforcements
Each unit that enters the game as a reinforcement is automatically in supply for the entire turn in which it appears in the game.
8.14 Air Supply
The German player may use his Air Supply marker during the German supply phase, thereby creating an additional supply source. The German player may:
- Place the Air Supply marker on the map according to the rules below, or
- Remove an already placed Air Supply marker from the map. Note that the Air Supply marker cannot be moved directly from one hexagon to another. It must first be removed, and then it will be available for placement on the next turn.
- Any unit with air supply status must be turned 90 degrees (or marked in another convenient way) to show that it is in air supply. The Soviet player must know which units are in "air supply" status.
8.15 Placing the Air Supply Marker
The German player may place the Air Supply marker in any village, small town or city hexagon that is on plains. The Air Supply marker may not be placed in hilly terrain. This hexagon may not be in an enemy ZOC, except where one of your own units is there.
If the Air Supply marker is in an enemy ZOC, it cannot be used for tracing a supply line; the presence of your own unit in the hexagon with the Air Supply marker negates the enemy ZOC for this purpose. The Air Supply marker can provide air supply to any German unit within five hexagons of the marker, provided the unit can trace an unbroken chain of hexagons of no more than 5 hexagons to the Air Supply marker that does not pass through an enemy ZOC (a friendly unit cancels the effect of enemy ZOC).
If the Air Supply marker is placed in the hexagons Dunayevtsy (1729) or Kamenets-Podolsky (1126), the marker is treated as if it were a supply source hexagon, and supply is traced as described in rule 8.5 (five hexagons to a road, then along the road to the Air Supply marker). These units will be considered to be in air supply, not regular supply.
8.16 Effects of the Air Supply Marker
Units supplied by the Air Supply marker have the same restrictions as those under an Out of Supply marker, except that "Tiger" battalions fully retain their effect (see 12.5). An Out of Supply marker is not placed on a unit supplied through the Air Supply marker, and any Out of Supply or Isolated marker on such a unit is removed. "Tiger" battalions cannot be attached to German mechanized units supplied by air.
8.17 Destruction of the Air Supply Marker
If a Soviet unit enters any hexagon containing the Air Supply marker, the Air Supply marker is considered completely destroyed and the Soviet player receives 10 victory points (see 4.3).
8.18 Limited Supply in Cities
A unit in any large city hexagon receives supply automatically, but "Tiger" battalions lose their combat benefits and, if the unit cannot trace a supply line, they cannot be detached or attached.
9.0 Reinforcements
9.1 Overview
Reinforcements enter the game in the movement phase. They appear on hexagons with supply sources, then move. Reinforcing units arrive one after another. As soon as one unit has finished moving, the next may be brought in. Reinforcements are listed on the turn record track. All Soviet reinforcements enter the game on the first turn. German reinforcements arrive on turns 7 and 11 (but see rule 9.3). Reinforcements always arrive at full combat strength and in supply. A player may delay the turn in which a reinforcing unit arrives, but may not receive reinforcements earlier than they are scheduled to enter the game.
9.2 German Reinforcements
On the appropriate turn, reinforcements enter through one of the following hexagons:
German (non-Hungarian): supply sources A, B, C or (at the German player's choice, he may place all or some of them, or bring them into the game on any subsequent turn). German reinforcements are colored light blue (enter the game on turn 7) and dark blue (enter the game on turn 11).
Hungarian: supply sources A, B, C, H or (at the German player's choice, he may place all or some of them, or bring them into the game on any subsequent turn). Hungarian reinforcements are colored dark green and enter the game on turn 11.
9.3 Accelerated Arrival of German Reinforcements
German reinforcements normally arrive on turns 7 and 11 of the game. If, however, the Soviets take control of any victory city, reinforcements may arrive one turn earlier. The capture of each further victory city accelerates the arrival of German reinforcements by 1 turn. That is, control of 2 cities will accelerate the arrival of German units by 2 turns. There is no change to this rule if the German player recaptures a victory city.
9.4 Soviet Reinforcements
The Soviet player receives the following reinforcements, which enter the game on the first turn:
- All units of the 1st Guards Army: reinforcement hexagon E
- All units of the 60th Army: reinforcement hexagon D
These reinforcements arrive on the first turn and are colored light brown.
9.5 Restrictions on Reinforcement Arrival
If an enemy unit occupies a reinforcement hexagon during the reinforcement phase, reinforcements cannot be brought into the game through that hexagon. If the reinforcement hexagon has been cleared of enemy troops, it may be used again. If during the reinforcement phase the hexagon is in an enemy ZOC, only one unit may enter that hexagon.
9.6 Placement
Reinforcing units enter one at a time through the required reinforcement hexagon in the movement phase and move in any direction at the player's wish, according to their movement points. One reinforcing unit must finish its movement completely before moving on to other units.
10.0 Movement
Note to players: Strategic movement is used often in this game, but many first-time players forget to use it. See 10.7.
10.1 Overview
During his movement phase, each player may move his units across the map. Each unit has a certain number of movement points that it can spend in each movement phase. Movement points are not printed on the counters, but they are the same for all units of one type on each side.
- German mechanized units: 8 movement points
- German infantry units: 6 movement points
- German garrisons: 0 movement points
- Soviet mechanized units: 7 movement points
- Soviet infantry units: 5 movement points
10.2 Movement Points
A unit cannot transfer its movement points to any other unit, and it cannot save movement points for use on the next turn. Any movement points not used during the movement phase are lost. Units move one at a time, and once a unit completes its movement in the movement phase it cannot move again in the same movement phase, and the movement of another unit begins.
10.3 Enemy-Occupied Hexagons
You may not enter a hexagon containing an enemy unit.
10.4 Moving Off the Map
You may not move off the game map.
10.5 Terrain
There are two kinds of terrain on hexagons: man-made (artificial) and natural. Any hexagon may have both natural and artificial terrain.
Natural terrain. There are three types of natural terrain, with different movement point costs to enter.
- Plains: 2 movement points to enter.
- Forest: 3 movement points to enter for mechanized units, and 2 movement points to enter for infantry units.
- Hill: 4 movement points to enter for mechanized units, and 3 movement points to enter for infantry units.
Artificial terrain. There are 4 types of artificial terrain, with different movement point costs to enter:
- Road: 1 movement point for a unit to enter any hexagon, if following only the road.
- Bridge: along roads that cross rivers and of which bridges are a part: 1 movement point.
- Pontoon bridge (between hexagons 0824 and 0925): only up to 2 units may use the pontoon bridge in each of the three movement phases: the German movement phase, the German mechanized re-movement phase and the Soviet movement phase. A unit using the pontoon bridge to move in either direction counts as one of the two permitted in that movement phase.
- Village / Small town / City: has no effect on movement point expenditure, and the natural terrain of the hexagon is used to determine the movement point cost to enter.
Rivers. To cross a river a unit must spend one additional movement point. For example, the cost of entering a plains hexagon while crossing a river is 3 movement points (2 movement points to enter the hexagon and +1 movement point to cross the river).
The Dniester. Only infantry units may cross the Dniester without using bridges. The infantry unit must be in a hexagon adjacent to the Dniester at the start of its movement phase. Only then can it begin the crossing. To cross, the unit spends all its movement points. This is prohibited if both hexagons - the one from which the unit begins the crossing and the one in which the unit ends the crossing - are in an enemy ZOC. Remember that ZOC is not projected across the Dniester, except where there is a bridge.
10.6 Movement Restrictions of Soviet Units
When the Soviet player chooses on his turn to have the combat phase first and then movement, no unit that took part in combat may then move in the movement phase.
10.7 Strategic Movement
All Soviet units and German infantry units may perform strategic movement provided that it neither begins nor ends in an enemy ZOC. When performing strategic movement a unit doubles its base movement points. German mechanized units, units that are out of supply, and isolated units cannot use strategic movement.
10.8 German Mechanized Re-Movement Phase
After the German combat phase, German mechanized units may move again during the German mechanized re-movement phase. This phase is the same as the normal German movement phase, except that only mechanized units may move. Out-of-supply mechanized units may move in the mechanized re-movement phase, but only with half their movement points (rounded up). Isolated German mechanized units cannot move in the mechanized re-movement phase.
11.0 Combat
11.1 Overview
In the combat phase your units may attack enemy units. The active player is called the attacker and the other player the defender, regardless of the overall strategic situation. Combat is always voluntary and never mandatory.
11.2 The Attacker
An enemy unit may be attacked by one or more friendly units that are in hexagons adjacent to the enemy unit. A unit may be attacked only once per turn. A unit may attack only 1 hexagon. You may not attack from one hexagon into several, or from several hexagons into several.
11.3 Zero Combat Strength
When a friendly unit attacks, it uses its combat strength. An attacking unit whose combat strength is 0 cannot attack. This means that such a unit cannot be used to create a flank attack (see 11.12) or to absorb any damage to the attacker from the combat result.
11.4 Order of Combats
Several combats may be conducted in the combat phase. The attacker may conduct them in any order he wishes, and does not need to announce his combats in advance.
11.5 Combat Strength
Each unit has its combat strength (attack and defense strength), which is reduced by the value of the loss marker placed under the counter. When the number on the loss marker becomes equal to the unit's defense strength, it is immediately destroyed and removed from the game. Remember that they are worth victory points, so conserve them rather than throwing them into ill-considered attacks.
When units take losses, a marker with the current number of loss points is placed under the counter. The loss point marker is hidden from the opposing player, except when combat takes place. Each time a unit takes loss points, the value of the marker is increased by that number. The value of the loss point marker reduces both attack strength and defense strength simultaneously by that number.
11.6 Combat Result
To calculate the result of combat, add up the attack strength of all attackers, and then divide the total attack strength by the sum of the opponent's defense strength. This fractional number is rounded in favor of the defender. This gives the ratio for the combat results table (CRT). For example, if the total attack strength is 26 and the total defender strength is 7, the ratio is reduced from 3.61-1 to 3-1. To determine the result of combat, roll the die and look at the corresponding column of the CRT.
11.7 Combat Results
A combat result is two numbers. For example: 1/2, the first number is the number of loss points taken by the attacker, and the second is the number of loss points taken by the defender. If two or more units take part in combat on one side, their owning player may distribute the loss points among them as he chooses. Excess loss points, after all units have been destroyed in that combat, are lost.
11.7.1 German Tactical Superiority
If the Soviet player takes loss points sufficient to destroy all of his units taking part in the combat (whether attacking or defending), and there is at least one additional loss point that is ignored, the loss points of the German units are automatically reduced to zero (i.e. the German units take no losses in this situation). If all (and only) units in the combat are Hungarian, the number of loss points does not become zero.
11.8 Retreat After Combat
If the combat result includes an "R", the defender must retreat one hexagon. A unit cannot retreat into a hexagon that is already occupied by another unit (friendly or enemy). If there are two or more hexagons into which the unit can retreat, the owning player must choose one that is not in an enemy ZOC. He may choose any hexagon if there are two or more free hexagons that satisfy the retreat conditions. If a unit cannot retreat because it is surrounded, or must retreat into a hexagon in an enemy ZOC, the unit takes one additional loss point beyond the combat result. If a unit has a hexagon into which it can retreat, it MUST retreat. You may not retreat across the Dniester except over a bridge, even if it is an infantry unit. German garrisons always ignore all retreat results.
11.9 Movement After Combat
If a defending unit is destroyed in combat, or leaves its hexagon, one of the attacking units may advance after combat into that hexagon. This movement costs no movement points and may even go from one enemy ZOC into another enemy ZOC.
11.10 Maximum Combat Modifiers
The die roll result may be modified by terrain features and other factors. If after modification the die roll result is less than 1, it is treated as 1, and if the die roll result is more than 6, it is treated as 6. All modifiers are cumulative.
11.11 Terrain Modifiers
Terrain and relief defense may affect combat results.
Modifiers for the attacker:
- Forest: -1
- Hill: -2
- Village: -1
- Small town: -2
- City: -3 (A "Tiger" battalion always has an advantage of only +/-1; flank attack bonuses do not apply against a unit in cities)
- River: -1 (only if all attack across the river)
- Dniester: -2 (only if the attacker attacks across the Dniester over a bridge; otherwise it is not possible to attack across the Dniester)
11.12 Flank Attack
If two attacking units are on opposite sides of the defending unit, or three attacking units are not adjacent to one another, or four or more units attack the defender, this is a flank attack. Flank attacks give a +2 modifier. If the defender is in a city hexagon, this modifier does not apply.
(The original shows an illustration of an example of a flank attack here.)
11.13 Very High and Very Low Ratios
If the combat odds are lower than 1-3, the 1-3 column of the CRT is used in combat with a -1 modifier for each ratio step lower than 1-3; and if the odds are higher than 4-1, the 4-1 column of the CRT is used with a +1 modifier for each ratio step higher than 4-1. For example, a 7-1 attack becomes 4-1 with a +3 modifier.
11.14 German "Tiger" Battalions
A German unit to which a "Tiger" battalion is attached receives a defense or attack modifier equal to half of the die roll (rounded up).
11.15 Artillery Support
If the Soviet player chooses the combat - movement phase order on his turn, all Soviet attacks for that turn receive a +2 modifier.
12.0 German Tiger Tank Battalion
12.1 Overview
The German player may use "Tiger" battalions throughout the game. Two of them are available at the start of the game, and one arrives as a reinforcement.
12.2 Attaching and Detaching "Tiger" Battalions
A "Tiger" battalion can never be in a hexagon by itself. It must be stacked with a German (non-Hungarian) mechanized unit. During phase D of the sequence of play each "Tiger" battalion may do one of the following:
- Detach the "Tiger" battalion from a non-isolated German mechanized unit on the map and place it in the Tiger Battalion box;
- Attach the "Tiger" battalion to any German mechanized unit that is in supply, thereby forming a stack.
A "Tiger" battalion cannot be detached from a German mechanized unit and then attached to another German (or the same) mechanized unit in the same turn. It must first be removed from the playing board, and then it may be attached to another (or the same) German mechanized unit on the following turn.
12.3 Supply and "Tiger" Battalions
"Tiger" battalions cannot be detached from a unit that is isolated. "Tiger" battalions cannot be attached to a formation that is out of supply, isolated, in air supply or in city supply (in general, in all cases when a regular supply line cannot be traced).
12.4 Movement and Combat
A "Tiger" battalion must move and/or attack or defend stacked with a German mechanized unit. They are treated as one single unit.
12.5 Combat Support
12.5.1 If a unit (in supply) stacked with a "Tiger" battalion takes part in combat, each "Tiger" battalion provides a combat modifier equal to half of the die roll (rounded up) (either for attack or for defense). While only one "Tiger" battalion may be stacked with one unit, multiple "Tiger" battalions with multiple attacking units provide a greater benefit in terms of the total modifier applied to the attack.
12.5.2 When defending or attacking from a city hexagon, die rolls give no combat advantage to the "Tiger" tanks. The die roll modifier is always +/-1.
12.6 Effect of Supply on Combat
If a German unit is out of supply or isolated, the "Tiger" battalion adds no modifiers.
12.7 Destruction of a "Tiger" Battalion
If a unit with an attached "Tiger" battalion is destroyed, the "Tiger" battalion is also destroyed and removed from the game. Victory points are awarded for removed "Tiger" battalion counters.
Note
The combat results table (CRT), the turn track and the reinforcement table are printed on the game map and are absent from the translated rules document; they are not transcribed here.