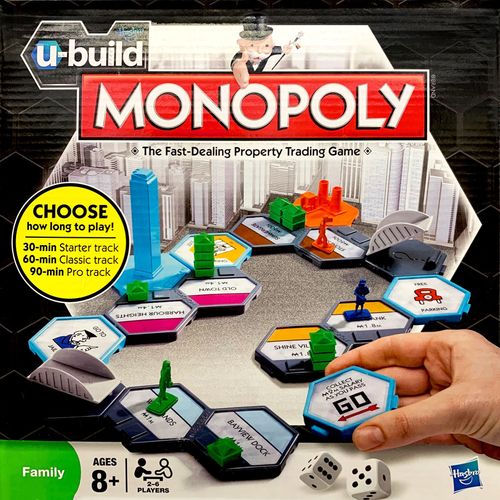
U-Build Monopoly
U-Build Monopoly Rulebook
Table of Contents
Table of Contents
- Contents
- What's New?
- Make Your Track
- Track 1: Starter
- How to Play
- Read Me!
- Buildings
- Stadium, Skyscrapers & Monopoly Tower
- Planning Permission, Bonus Buildings & Hazards
- Rent
- Deals
- Auctions
- Mortgages
- Jail
- Chance Cards
- Passing GO Twice in One Turn
- Running Out of Money
- Bankruptcy
- Ending the Game
- Track 2: Classic
- Track 3: Pro
- Freestyle Tracks
Contents
Ages 8+. 2-6 players.
- 12 double district tiles, 4 bridges, 4 single tiles, 2 railroad tiles
- 6 movers, 91 buildings
- 22 district cards, 17 chance cards, 4 reminder cards
- 2 dice, 1 money pack and track set-up sheet
What's New?
Play the way you want to with u-build! MONOPOLY u-build lets you control how long you play for. Choose a track to suit you!
Move around the track buying districts and building a Monopoly metropolis. If you land on an unowned district, buy it or put it up for auction. As soon as you own a district, you can build on it! Choose residential buildings for the cheaper option, or industrial buildings to keep your rent value safe from nasty hazards!
Choose your track, click your tiles into place and you're ready to go!
Make Your Track
- Choose your track – play Starter, Classic, Pro or Freestyle! The first time you play, play the STARTER track.
- Copy the picture to build your track. Clip the tiles together as shown.
TIP: It's important to click the tiles together exactly as shown in the track pictures.
- Use the colors and pictures to work out which way around they should be.
- Find the correct edges on the tiles and line them up so that they match the pictures, THEN click them into place.
- Want to go crazy with the shape of your track? Add railroads! See the Freestyle Tracks section.
Track 1: Starter
2-4 players. 30 mins (approx.)
- Take these tiles: (the tile set is shown as a picture in the printed rulebook: 4 single tiles, 4 double-district tiles and 2 bridges)
- Arrange them like this: (the arrangement is shown as a picture in the printed rulebook)
Mastered the Starter track? Flip to the Classic track on page 16!
What you need for this game
- 40 residential blocks
- 1 any hazard
- 1 any bonus building
- 2 skyscrapers
- 1 die (Starter uses one die)
- Chance cards: put them next to the track
Give each player
- 2 × $5M
- 2 × $1M
- 1 × $500k
- 1 × $200k
- 1 × $100k
- 1 × $50k
- 5 × $10k
Put the Chance cards next to the track.
How to Play
Here's how to play
- All choose a mover and put it on GO.
- Choose who'll be the Banker. The Banker is in charge of money, District cards and buildings.
- All roll both dice, or just one for the Starter game. The highest roller starts and play continues clockwise.
On your turn
- ROLL & MOVE CLOCKWISE.
- WHERE DID YOU LAND?
- OPTIONAL: BUILD up to 3 residential/industrial blocks on a district you own. See Buildings.
Where did you land?
- Unowned district: Buy it from the bank OR auction it. (See Auctions.)
- District owned by another player: Pay the rent. (See Rent.)
- District you own: Do nothing. (You can still build, if you want to.)
- Planning Permission: Build a hazard OR a bonus building OR move a hazard two spaces. (See Planning Permission, Bonus Buildings & Hazards.)
Read Me!
How to win: Be the richest player at the end of the game by buying districts, building on them and charging rent. The game is over as soon as one player goes bankrupt. See Ending the Game.
Other things to do on your turn: Use this as a checklist of things that can happen on every turn (as well as your basic move).
Did you:
- Pass a bridge? If it's UP, pay $1M to the bank and close it as you pass. If it's DOWN, pass it for free. (If you land on a bridge, see Chance Cards.)
- Pass GO? Collect $2M salary from the bank. (Collect $2M salary as you pass.)
- Free Parking: Do nothing. You can still: Build; Collect rent.
- Bridge: If it's UP, pay $1M to close it & take a Chance. If it's DOWN, open it & take a Chance. (See Chance Cards.)
- Go To Jail: Go straight to jail! Don't collect money if you pass GO. (See Jail.)
- Optional: Move a hazard 1 or 2 spaces. Cost: $1M per space. (See Planning Permission, Bonus Buildings & Hazards.)
- Roll a double? Take another turn right away. (If you roll 3 doubles in a row, go to jail!)
- Your turn is over.
Buildings
As soon as you own a district, you can build on it! You don't need to own a set before you can build.
- Build up to 8 blocks on each district to increase its rent value.
- On each turn, you can buy up to 3 blocks to build on one district that you own.
- Starter: you can build residential blocks only.
- Classic & Pro: you can build residential blocks, industrial blocks or a combination of both.
- Stack blocks of the same type on top of each other.
- You can't sell buildings back to the bank or move them to another district.
TIP: Protect the residential blocks on your districts by building bonus buildings next to them. No one can build a hazard next to a district which already has a bonus building touching it! See Planning Permission, Bonus Buildings & Hazards.
Building prices are shown on the District cards.
Residential buildings (Green)
- Residential buildings are cheaper to buy than industrial buildings.
- If another player builds a hazard next to your district, residential blocks become worthless and do not count towards its rent value. See Planning Permission, Bonus Buildings & Hazards.
Industrial buildings (Gray) (Classic & Pro tracks only)
- Industrial buildings are more expensive to buy than residential buildings.
- Industrial buildings are safe from hazards. If another player builds a hazard next to your district, all industrial buildings in that district still count towards the rent value.
Stadium, Skyscrapers & Monopoly Tower
Own 2+ districts of the same color? Build a stadium, skyscraper or the Monopoly Tower!
Skyscrapers – cost: see District card
Build a skyscraper to double the rent value of all the districts in a color group that you own.
- Once you own all of the districts in one color group, you can build a skyscraper next to any one of them. (You can't build residential or industrial blocks on the same turn.)
- You can build one skyscraper per color group.
- A skyscraper immediately doubles the rent value of all districts in its color group.
- If you build a skyscraper and it touches another player's district as well as your own, it does not affect the rent value of the other player's district. See Rent.
Stadium – cost: $2M
Buy the stadium to increase your salary. There's only one in the game, so be quick!
- Once you own 2 districts of the same color, you can build the stadium next to either one of them during your turn. (You can't build residential or industrial blocks on the same turn.)
- Collect $3M every time you pass GO (instead of $2M), even if the district is mortgaged.
- The stadium does not increase the rent value of a district.
- The stadium is not a bonus building and does not protect your district from hazards.
The Monopoly Tower – cost: $7M
Once you own all of the districts in TWO color groups, you can buy the Monopoly Tower and build it next to any district in those groups.
- The Monopoly Tower doubles the rent value of every district you own!
- If the Monopoly Tower touches another player's district as well as your own, it does not affect the rent value of the other player's district.
Planning Permission, Bonus Buildings & Hazards
When you land on a PLANNING PERMISSION tile or take a Chance card that lets you, you can:
- build a lime green bonus building next to a district you own
- OR build an orange hazard next to another player's district (to make their residential buildings worthless)
- OR move a hazard by one space.
On the Starter track, you can only build hazards and bonus buildings if you take a Chance card that lets you.
Note: the printed rulebook says "move a hazard by one space" here, and "move a hazard two spaces" in the Where Did You Land? summary and "up to 2 moves per turn" under Moving Hazards. Both are transcribed as printed.
Bonus buildings (lime green; the printed examples are Wind farm, School and Park)
- Put bonus buildings next to your districts to prevent other players from building hazards on them.
- A bonus building protects the rent value of every district it touches.
(The printed rulebook shows protected districts in a picture.)
IMPORTANT
- YOU CANNOT BUILD A BONUS BUILDING NEXT TO A DISTRICT WHICH HAS A HAZARD TOUCHING IT.
- YOU CANNOT BUILD OR MOVE A HAZARD NEXT TO A DISTRICT WHICH HAS A BONUS BUILDING TOUCHING IT.
For example, if you have a school touching your district, another player can't build a power station next to it, and vice versa.
You can't land on bonus buildings or hazards!
Hazards (orange; the printed examples are Power station, Prison and Sewage works)
- When you build a hazard, it affects every district it touches.
- All residential buildings on those districts immediately become worthless and do not count towards the rent value of that district. (Leave them on the track.)
- Industrial blocks are not affected.
Moving hazards
- You can move hazards away from your districts by paying $1M per move to the bank during your turn.
- You can move a hazard by up to 2 moves per turn.
- It's okay to move a hazard so that it's touching a non-district tile, e.g. Go to Jail or Free Parking.
(The printed rulebook shows "One move looks like this" and "Or this" as pictures of a hazard being moved, with affected districts marked.)
You can also move a hazard for free (by up to 2 moves only) when you land on a Planning Permission tile, instead of building a new hazard or a bonus building.
Rent
When another player lands on one of your districts, check the following to work out how much they owe you:
- No buildings? Charge 'Land Rent' only.
- Residential and/or industrial buildings? Count how many blocks there are and charge the matching rent value shown on the district card.
- Hazard? Count the industrial blocks only.
- Do you own a skyscraper (on a district in that color group) OR the Monopoly Tower? Double the rent! (If you have a skyscraper AND the Monopoly Tower, you cannot double the rent twice.)
If the paying player cannot afford the rent, they must mortgage a district or do a deal with you to raise the money.
Rent example
You own Central Quay, Old Town and Harbor Heights. Another player lands on Central Quay. There are:
- 2 residential blocks, which don't count because the hazard (power station) makes them worthless. Value = $0
- 4 industrial blocks. Value = $3.5M
- There is a skyscraper on Harbor Heights, which is in the same color group, so double the rent. 2 x $3.5M = $7M
Total rent value: $7M
Deals
Make deals with other players on your turn or in between other players' turns to raise funds or get the districts you need. If you swap or sell a district during a deal, any buildings already there must stay there.
Trading districts which have special buildings on them
- If you trade a district which has a stadium, you can no longer collect $3M when you pass Go, but the new owner can.
- If you trade a district which has a skyscraper, it still applies to all districts in that color group (rather than to the player who bought it). Both you and the new owner can charge double rent on districts you own in that color group.
- If you trade a district which has the Monopoly Tower next to it, the new owner can charge double rent on all districts they own, but you can't!
Auctions
- If you land on a district and don't want to buy it, put it up for auction.
- The player who landed there must make the first bid. The minimum bid is $10K, so any district could be a bargain!
- All players can bid (even the player who didn't want to buy it for the asking price).
- There's no time limit. Keep shouting out bids until no one wants to bid any higher!
- The person who bids the highest wins the district and pays the price they offered to the bank.
Mortgages
Mortgaging districts: The mortgage value is the same as the district's current rent value. Only count residential and industrial blocks, not skyscrapers or the Monopoly Tower. Collect that amount from the banker and turn the District card facedown in front of you. Any buildings on the district stay there.
Repaying a mortgage: Turn the District card over and pay the banker its current rent value. You can start charging rent on the district and building on it again right away.
You can't collect rent on mortgaged districts.
Jail
Going to jail. You will be sent to jail if:
- You get a Chance card which tells you to "Go to jail"
- You land on the 'Go to Jail' tile
- You roll a double three times in a row on your turn.
Your turn ends when you are sent to jail. Move onto the Jail tile and do not collect $2M if you pass GO.
While in jail you can bid in auctions and collect rent on unmortgaged districts, but you can't build or move hazards.
How to get out of jail. Stay in jail for 3 turns, but still roll the dice when it comes to your turn.
There are 2 ways to get out of jail more quickly:
- Wait until your next turn, then pay a $500k fine before you roll the dice. Then roll and move as normal.
- Roll a double on your turn and move that number of spaces. If you're playing the Starter track, you're out of jail if you roll a 6.
If you haven't rolled a double (or a 6 in the Starter game) after three turns, at the start of your next turn pay the banker $500k, then move according to what you rolled.
Chance Cards
- If you land on a bridge, open it (if it's down) or pay $1M to close it (if it's up) and take a Chance card.
- Most cards have two Chances – one for if the bridge is UP and one for if it's DOWN. Follow the Chance which matches the new position of the bridge.
- If you can't follow the instruction, e.g. if it's a FREE BUILD but you don't own any districts, return the card to the bottom of the pile. Too bad!
Passing GO Twice in One Turn
You can collect $2M wages twice in one turn. For example, if you get a Chance card immediately after passing GO that tells you to "Advance to GO".
Running Out of Money
If you are low on funds, you can raise more money by:
- Mortgaging districts
- Selling districts to other players
Bankruptcy
If you owe more money than you can raise from selling what you own, you are declared bankrupt and the game is over. See Ending the Game.
Owing the banker: If you owe money to the bank when you go bankrupt, return your District cards to the banker.
Owing another player: Give the other player any money you have left and any District cards that are not mortgaged. They can count what you give them towards their final total.
Ending the Game
The game ends as soon as the first player goes bankrupt. As soon as this happens, all other players add up how much they're worth by following these steps:
- Count your cash.
- Work out the rent value of all the districts you own and add them together. The rent value is the amount another player would pay you if they landed on that space. (See Rent.) Mortgaged districts do not count towards your total.
- Add your cash total to your district total. This is your final amount.
The richest player wins!
Track 2: Classic
2-6 players. 60 mins (approx.)
- Take these tiles: (the tile set is shown as a picture in the printed rulebook)
- Arrange them like this: (the arrangement is shown as a picture in the printed rulebook)
Mastered the Classic track? Flip to the Pro track on page 18!
What you need for this game
- 40 residential blocks
- 20 industrial blocks
- 1 school
- 1 park
- 1 power station
- 1 prison
- 1 Monopoly Tower
- 2 skyscrapers
- 2 dice
- Chance cards: put them next to the track
It's no problem if your track doesn't join up – just add stations! See Freestyle Tracks.
Give each player
- 4 × $5M
- 4 × $1M
- 1 × $500k
- 1 × $200k
- 1 × $100k
- 1 × $50k
- 5 × $10k
Track 3: Pro
2-6 players. 90 mins (approx.)
- Take ALL of the tiles except for the railroads.
- Arrange them like this: (the arrangement is shown as a picture in the printed rulebook)
Mastered the Pro track? Flip to the Freestyle tracks on the back cover!
What you need for this game
- Use ALL of the buildings for this game.
- 2 dice
- Chance cards: put them next to the track
It's no problem if your track doesn't join up – just add stations! See Freestyle Tracks.
Give each player
- 5 × $5M
- 5 × $1M
- 2 × $500k
- 2 × $200k
- 2 × $100k
- 1 × $50k
- 5 × $10k
Freestyle Tracks
Break the rules and design your own!
Starter track
- Replace the double-district tiles shown in the set-up picture with different-colored districts. DO NOT use the Planning Permission/dark-blue double tiles.
- You must use the same layout, but you can swap the single tiles (GO, Go to Jail etc.) around. Space the 2 bridges evenly around the track.
Classic track
- You must use the tiles shown in the picture, but you can swap their positions.
- Make sure there are 2 double-tiles in between each single tile (GO, Go to Jail, etc.). This includes the Planning Permission/dark-blue double tiles.
- Space the 2 bridges evenly around the track (like in the picture).
Pro track
- Use all of the tiles, but rearrange the double-district tiles however you want. Make sure there are 3 double-tiles in between each single tile (GO, Go to Jail, etc.)
- Space the 4 bridges evenly around the track – put one somewhere in between each single tile.
Use the 2 railroad tiles to make a track that doesn't join up!
Here's how:
- Choose the track you want to play: Starter, Classic or Pro, or one of the options above.
- Arrange them in the order they're shown, but in any shape. You can 'break' the track anywhere. For example, after the GO space, next to Jail or between property tiles.
- Clip a railroad onto each end of the track.
- Play as normal. When you reach a railroad, jump straight to the other end of the track to continue your move. (Don't count using the railroads as a move.)
Note: the printed rulebook numbers these steps 1, 2, 4 and 5, with no step 3. Transcribed as printed.