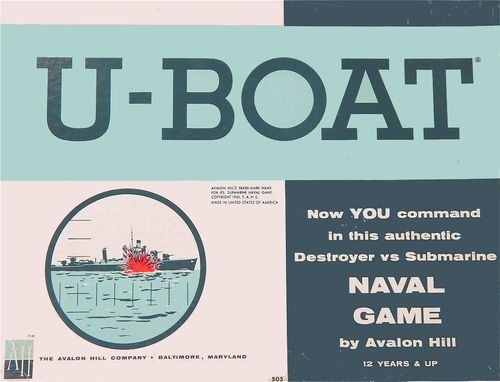
U-Boat
U-Boat Rulebook
Table of Contents
Table of Contents
How to Win
- DE wins if it sinks the UB.
- UB wins if: a) It enters the convoy submerged with at least three torpedoes remaining. b) It sinks the DE, even if it exhausts ALL of its torpedoes.
Merely entering the convoy is not sufficient... the UB must have three torpedoes remaining. If the UB has exhausted ALL torpedoes, it must surface and fight the DE to a conclusion.
Movement
Each player takes his Turn in rotation; the DE player being the first to move.
Destroyer Escort (DE) Movement
During each Turn, the DE must move at least one square and may move up to four squares. No stopping is allowed—a DE must move at least one square on each Turn.
The DE must always move to the square to which its bow is pointing, but having arrived on that square may turn right or left 45 degrees or continue on a straight course.
[Diagram: DE TURNING]
A DE cannot enter the convoy. If a subsequent move would take it into the convoy, it stops on its present square. On its next Turn, it cannot move from that square but adjusts its angle just enough so that it would not enter the convoy. On its following Turn, it may proceed at its normal rate.
Fleet Submarine (UB) Movement
A surfaced UB must move 1 square, but may move 2 squares per Turn.
A submerged UB must move 1 square each Turn, but can move 1 square only. Once submerged, a UB cannot surface until it has run out of torpedoes or been damaged.
The UB, submerged or surfaced, must move to the square to which its bow is pointing, but having arrived on that square may turn right or left either 45 degrees or 90 degrees... or it may continue straight.
[Diagram: UB TURNING]
The UB may change its depth by 100 feet per Turn. Thus a UB at 200 feet may, on the next Turn, stay at 200 feet, rise to 100 feet, or drop to 300 feet. It may operate on the surface, at 100, 200, 300, and 400 feet.
When submerged and under threat of imminent depth charge attack, a UB may use emergency speed for one Turn and increase its movement capability to 2 squares. While under emergency speed, the UB may still only change its depth by 100 feet per Turn even though it may move 2 squares.
Upon demand by the DE player, the UB must disclose his present depth unless he is under depth charge attack.
When the pieces approach the right or left edges of the board so that movement is restricted, simply move all pieces toward the center maintaining the same relationship between them.
The Die has nothing to do with movement... it is used in preparation of play and combat only.
DE Sonar Blind Zone
When the UB is submerged it always knows the location and direction of DE movement.
The DE always knows the UB's location, depth and direction except when the UB is under the DE or in a square adjacent to the DE. This zone is called the DE's blind zone—a zone which cannot be accurately tracked by Sonar.
[Diagram: DE SONAR "BLIND ZONE"]
Therefore, while under depth charge attack, the UB may be removed from the board requiring the DE to guess his location as it makes its depth charge run. (Removing the UB reflects the condition that Sonar is not very effective at close range.)
When a UB is under depth charge attack, placement of the Emergency Speed Range Card (as shown) tells at a glance the 6 squares it is possible for the UB to "hide" in.
[Diagram: EMERGENCY SPEED RANGE — 6 possible squares UB may hide in]
The UB commander records his new location, direction and depth on the Attack Record Pad, and then removes his piece from the board. This situation usually lasts for 1 Turn (until the DE has moved beyond the DE Sonar Blind Zone thus bringing the UB back into view.
Combat
DE Depth Charge
The DE approaches the submerged UB until such time as the commander feels that a depth charge attack is feasible. At the end... and only at the end... of the DE's Turn, the DE commander announces "attacking depth charge."
It is then the UB's Turn. As the UB is under imminent threat of attack, he may move two squares on that Turn—even though he is submerged.
The UB commander removes his piece from the board, makes a notation in a block on the Attack Record Pad of the square to which he has moved, the depth to which he has gone and the direction in which he is facing. This record is kept away from the sight of the DE commander. The UB commander then announces "ready."
The DE commander then moves his ship through the squares he wishes to attack, subject of course to his restricted turning ability. The DE may place depth charge patterns at any two depths in each square, may attack each square he can reach including the square in which he starts and stops.
The DE commander announces the squares attacked AFTER moving through all the squares he chooses in his Turn. If the UB commander asserts that his boat is not in any of those squares, the attack is unsuccessful and over. If the UB commander asserts that his boat is in one of the attacked squares, the DE commander announces the depths at which the charges were set to explode.
REMEMBER: at the end of his Turn, and only at the end, does the DE announce the squares he has placed depth charges in.
If the charges were set at the depth at which the UB is located, the UB is sunk and the game is over. If the charges exploded within 100 feet of the UB, the UB commander announces "near miss." After one near miss, the UB must surface and may not again submerge. If the charges exploded 200 feet or more away, the UB commander announces "miss."
It is then the UB's Turn to move, reverting to the usual submerged speed of one square per Turn. Whether or not the UB piece is placed back on the board is determined by whether or not the UB is in the DE's Blind Zone. If not, the piece is put on the board. If so, the piece is kept removed until the DE's movement places the UB back into view.
At any appropriate time, the DE commander may require that the UB commander prove his location by showing him the record in the block on the Attack Record Pad.
A DE commander is not required to actually drop any depth charge patterns in an attack, nor is he required to drop two per square. There could be several reasons for not dropping any charges... short supply, attempt to determine UB's method of evasion without wasting charges, etc.
The DE commander, on the Attack Record Pad, must subtract depth charge patterns used from the total available. If he should run out of charges, he is not required to so inform the UB commander.
NOTE: The UB is NOT removed from the board if it elects to fire torpedoes while under depth charge attack.
UB Torpedo
The UB may fire torpedoes to any square on board except:
- The FIRST square into which the DE must move;
- The square from which the UB is firing.
To fire torpedoes, the UB must be either on surface or at 100 feet... an important fact for the DE to remember if the UB is firing while under depth charge attack.
The UB always launches torpedoes at the END of its Turn. It may fire up to 4 torpedoes per Turn, and may launch a torpedo attack on every Turn, subject to the number of torpedoes available.
Routine is as follows: UB moves, then announces "torpedoes are running." The UB player then notes in a block on the Attack Record Pad the square(s) to which he is firing and the number of torpedoes launched to each square.
Under knowledge that torpedoes are running, the DE takes his Turn. He moves 1 square and HALTS. Since no torpedoes can be fired into this square, the DE may conclude its Turn by remaining on this square, thus avoiding torpedoes. If it elects to brave the torpedoes, it then moves into the next square to which its bow points and again Halts. UB indicates whether or not torpedoes have been fired into that square, and if so how many.
Assuming that the DE is in a square where say, two torpedoes have been directed, reference is made to the Attack Results Table—Torpedo. The die is rolled two times, once for each torpedo. If any one torpedo strikes, the DE is sunk.
If, however, all torpedoes miss, the DE commander may advance another square. UB indicates whether or not torpedoes have been fired into that square and so on.
The UB commander must keep a record on the Attack Record Pad of torpedoes expended.
NOTE: If the DE continues to play it safe by only moving 1 square every time it is under torpedo attack, it may not be able to catch up to the UB and prevent it from entering the convoy. Eventually, the DE must brave the torpedoes before it has a chance of winning.
The location of a UB is made certain when it launches torpedoes. Consider the case where a DE is coming down upon a UB for a depth charge attack, and the UB decides to risk a torpedo launching. Since its location is made certain by its act of launching, the UB in these circumstances is in a precarious position if the torpedoes miss.
In such a situation, the UB is not removed from the board. Thus if the torpedoes miss, the UB's destruction is certain unless the DE has run out of depth charges or cannot reach the UB's square.
It is assumed that the UB may fire to any square regardless of its own direction of movement.
Prepare for Play
Please examine the mapboard. Along the bottom edge of the mapboard appears a strip called the convoy zone. In squares S2, S5 and S8 appear DE hull outlines. Place one DE in S2 facing East. The top (or UB end) of the board is always North. In squares A7, A9 and A11 appear UB hull outlines. Place one UB in A11 facing South.
Each player takes an Attack Record Pad. Then each player throws the die secretly three times and marks down the total of the three throws. The DE player thus has a certain number of Depth Charge Attack Patterns and the UB has a certain number of Torpedoes, the totals unknown to each other except that neither can have more than 18 or less than 3.
Routine of Play
- DE moves first... from 1 to 4 squares per Turn.
- DE has option to announce "attacking depth charge" at end of movement.
- UB moves 1 square per Turn if submerged; 2 squares (emergency speed) if under depth charge attack or on surface.
- UB has option to announce "torpedoes are running" at end of movement, even if it is under depth charge attack.
- If DE is under torpedo attack, it moves 1, 2, 3, or 4 squares. As DE advances to each square it stops... UB commander must then announce whether or not torpedoes have been fired into that square. DE proceeds in this manner until its move is complete.
- Regardless of whether or not DE is under torpedo attack, it may drop up to 2 depth charges in each square into which it moves, including the square it starts in and the one it finishes its move in. (10 depth charges maximum per Turn.) DE has option to announce "attacking depth charge" at end of movement.
Surface Combat
Surface combat takes place when either ship is within a six square zone of the other.
The UB must surface if:
- It has completely run out of torpedoes;
- It has been damaged once by depth charge attack. If a UB has been damaged, it must rise at the rate of 100 feet per Turn. Once on the surface, it may move up to 2 squares per Turn despite the damage.
The DE, on its Turn immediately following the UB's surfacing, has an opportunity to fire at the UB while the UB cannot fire back. Players then consult the Attack Results Table, using the "DE FIRST SALVO" column. The DE player rolls the Die. If the UB is sunk, the game is over. If a miss is registered, the game proceeds to normal surface combat. In this case, the UB moves, then the DE moves. The DE then rolls the Die once. If neither piece is sunk, both players again move and then try to resolve combat. Play continues in this manner until one of the ships is sunk.
When the two combatants are adjacent to each other or both occupy the same square at the time the die is rolled, the UB may fire at the DE but the DE is unable to fire in return because it cannot depress its armament sufficiently. In such a case, the "DE-UB adjacent" column on the results table is used.
Once on surface, the UB may never submerge.
Ramming
It is possible for the DE to ram the UB and thus sink it. The blow must be struck, however, at a full 90 degree angle DE to UB. If such a sinking occurs, the DE is then dead in the water—but it has won by preventing the UB from entering the convoy.
[Diagram: RAMMING ANGLE]
Multiship Games
Once the Basic Game has been mastered, players should attempt the more exciting and dramatic Multiship Game—designed for 2 to 6 people. Basic Game rules apply, with the following additions:
- If there are several DE players, they may always talk to each other exchanging instructions and/or suggestions. UB players may do the same while both parties are on the surface, but there can be no communication whatsoever to or from a submerged UB. Radio communication from submerged UB's is not possible.
- Of course, in Multiship Games when only one player commands two or three UB's, coordination of movement is unavoidable. Thus players should always attempt to have the UB's commanded by individuals even if it is necessary to have one player commanding two or three DE's.
- In starting the game, place the additional ships in squares A7, A9, S5 and S8 as noted on the mapboard.
- Moves are taken in rotation. During the DE Turn, all DE's are moved. During the UB Turn, all UB's are moved.
- The UB side wins the game if any one UB fulfills the usual requirements for victory, i.e. if any one UB enters the convoy zone submerged with a minimum of three torpedoes or if all the DE's are sunk.
- Keep in mind that a UB may be in one DE's blind zone, but may be traced by the sonar of another DE. A depth charge attack, however, is done by the same rules. It is assumed that the attacking DE's propellers would confuse the sonar operator on a second DE; therefore, the UB is hidden from view regardless of the number of DE's, their location, and direction of depth charge attack.
- In the case where two UB's are firing torpedoes at one DE, players simply total up all the torpedoes fired and conduct combat according to Basic Game rules. Remember, however, it is not possible for two UB's to coordinate a torpedo attack if they are submerged. If one player is commanding two UB's it is absolutely prohibited for more than one UB to make a torpedo attack on a single DE during a given Turn. Of course, several separate attacks on separate DE's may be conducted.
- When two DE's are firing on a "just surfaced" UB under the first column on the ATTACK RESULTS TABLE, the die is rolled twice; when 3 DE's are firing, the die is rolled three times.
- UB's may fire at any DE's, including those not engaged in depth charge attack. Torpedoes may be fired at a DE who is attacking a different UB. It is also possible for a UB to launch torpedoes into squares occupied by other UB's not surfaced.
Commentary
The following historical commentary and examples of play are included for those players who desire additional clarification of rules and background information.
Toward the end of World War II, it was generally agreed that the two most evenly matched antagonists were the DE and UB engaged in single combat beyond the reach of aircraft. So the game U-BOAT is based on the late World War II situation.
In a war characterized by great, anonymous actions in which millions of participants clouded the feats of the individual, a DE-UB action was literally a contest between the two individual commanders. The crews of each ship, assuming that both operated with a high level of efficiency, were but an extension of the will of the commander. A slight slip by one commander, if discovered in time by the opponent, inevitably resulted in certain destruction, made more terrible because of the drag of time between the slip and the final blow. An errant commander had quite a few minutes to contemplate his mistake.
The game U-BOAT, while most simple to learn, becomes (as one player put it) diabolically involved as one begins to understand the true requirements of a fine player. Seldom seen in most games, U-BOAT has only one focal point and only two pieces. There are no false or easy moves—each single advance or turn taken by each player completely changes the balance of the situation and the opponent must react accordingly. In every sense of the word, one player's mind is pitted against the mind of the other.
DE Capabilities
A DE is characterized by high speed, no (or little) armor, light armament, powerful anti-submarine weapons in the form of depth charges and a fine submarine tracking device in the sonar (asdic to the British) set. This sonar emits a PING sound which, when reflected by a dense object, returns a PONK sound. By measuring the PING-PONK, the DE can determine a UB's range and an estimate of its depth.
Use of "cold water zones" has been deleted to avoid slowing up the game. A cold water zone reflects sonar sounds and confuses the operator.
Unfortunately, at the supreme moment in an attack, the Doppler Effect (caused by echo bounce-back) nullifies the use of sonar. It is in this gap of information that the UB has a chance for survival.
Use of the Pillenwerfer has been omitted from play on the assumption that it was an ineffective weapon once sonar operators were familiar with it. The Pillenwerfer was an "air bubble" emitted by a UB under depth charge attack which reflected sonar PINGS the same way the UB's hull would. But the "Pill" was always stationary, so after early success it became a relatively useless weapon.
UB Capabilities
A UB is characterized by medium surface speed but low submerged speed, an extremely stout hull little of which is visible in a surface action, light but effective surface armament, a powerful anti-ship weapon in its torpedo capability and a fine defensive mechanism in its ability to submerge. Vital to the submarine, and offsetting its slow submerged speed, is its relatively short turning radius as compared to the DE. This is an extremely important factor in this game.
Surface combat, although disadvantageous to the UB, is by no means a pushover for the DE. The DE has several main pieces of armament, fore and aft, but the UB (with its single weapon) can by adroit maneuvering place the DE where only a few pieces can be brought to bear. The DE has a relatively high profile, thus making an easier target. Since a DE is almost "half engine room" and lightly armored, a well placed round could cause nasty results. The UB, low in the water and with a strong, rounded hull, is hard to hit. And, remember, it is quite possible to fire torpedoes on the surface.
Thus it can be seen that, in submerged combat, the DE has the advantages of sonar, depth charges and high speed... offset by the UB's torpedo sting, shorter turning radius and the uselessness of sonar at close ranges.
In surface combat, the DE has the advantages of superior armament, high speed and a ramming capability... offset by the UB's torpedo sting, shorter turning radius, lower profile and stronger hull. Truly, two evenly matched antagonists!
Sample Depth Charge Attack
[Sample diagrams, as printed, with captions:]
- Stage One (DE Turn): DE commander announces "Attacking Depth Charge." DE knows UB is at 200 ft. Possible squares UB can reach as shown by "Range" card.
- Stage Two (UB Turn): UB moves secretly, records square, depth and direction; removes piece from board, DE must guess location.
- Stage Three (DE Turn): DE attacks squares A & B, places depth charge patterns at 200 ft. and 300 ft. in each, turns left in rear approach. DE can reach only 2 of the 6 squares in which the UB could possibly be located.
- Stage Four (UB Turn): Attack failed. As UB is not in Blind Zone, piece is placed on board. UB moves and turns.
DE Sonar Blind Zone (as shown in the stage diagrams).
Sample Depth Charge and Torpedo Attack
[Sample diagrams, as printed, with captions:]
- Stage One: Same as previous example.
- Stage Two (UB Turn): Since UB decides to fire torpedoes, it moves its emergency speed but must remain on board in view of DE. After moving to square (E), UB announces "torpedoes running". UB must rise to 100 feet.
- Stage Three (DE Turn): DE moves into square (A) where torpedoes cannot be fired. It decides to move to (C) instead of (B) and stops. UB player announces "no torpedoes in (C)".
- Stage Four (DE continues Turn): There was 1 torpedo fired into (D). Results from Attack Results Table calls for a "miss".
- Stage Five (DE completes Turn): Since torpedoes cannot be fired into (E), DE moves into (E) and drops depth charge at 100 feet. Since submerged UB must be at 100 feet to launch torpedoes, it is automatically sunk.
Important Rule Change
This insert was printed loose with the rules sheet. It amends the UB Torpedo rules (the rules referenced as pages 10 and 11 of the printed booklet).
Reference is made to Torpedo Attack rules on pages 10 and 11.
The U-BOAT may fire torpedoes to any square it wishes, except that it may not fire to the first square to which the DE must go.
This adjustment has been made to make play even more realistic.
Transcriber note: this insert overrides the UB Torpedo exception list printed above (which also excluded the square from which the UB is firing). Under this insert the only excluded square is the first square to which the DE must move.