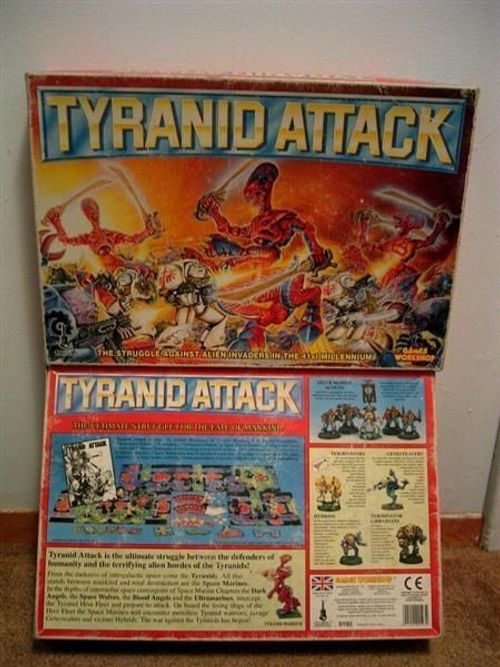
Tyranid Attack
Tyranid Attack Rulebook
Table of Contents
Table of Contents
- Introduction
- The Models
- Model Characteristics
- Cards, Counters & Templates
- Setting Up
- The Game Rules
- Movement
- Attacks
- Life Points
- Recycling Tyranid Models
- Exploration
- Weapons
- Tyranid Bio-Weapons
- Expanding the Game
- Objective Templates
- Tyranid Attack Force List
- Additional Force List
- Chaos Dreadnought
- Reference Sheet
Introduction
The Box
The box contains the following plastic models, card cut-out pieces, counters.
- 6 Tyranid Warrior models
- 8 Purestrain Genestealer models
- 2 Genestealer Hybrid models
- 4 Terminator models
- 1 Terminator Librarian model
- 6 Space Marine Scout models with bolt pistols
- 2 Space Marine Scout models with heavy bolters
- 2 Space Marine Veteran Sergeant models
- 6 Interlocking colour board sections
- 16 Exploration cards
- 4 Order cards
- 6 Objective templates
- 1 Space Marine entry area
- 6 Objective loction tiles
- 19 counters (representing hellfire shells, teleporter cysts, melta bombs, acid blobs, wounds and artifacts)
- 2 dice
The Rules
The best way to get to know Tyranid Attack is to play it. Before playing a game, you need to read through the rules at least once - but don't think you have to know every rule the first time round.
We suggest that you read through the book quite quickly first without worrying too much about every little detail. If a rule's not immediately clear, skip it for now - you'll work it all out once you start playing. What you need to do at this stage is get a broad idea of what happens in the game.
When you've read the rulebook, play a couple of quick games. The rules are laid out in the order that you'll need them so you can work your way through the book section by section. When you've played a couple of games and have got a good idea of what to do, read the rulebook again. Now's the time to start checking the tricky bits that you ignored before - once you have a good idea of how the basic game works, these special cases will quickly fall into place.
Reference Sheet
You will find a reference sheet on the back of the rule book which gives a brief summary of the rules and some other useful pieces of information. You are allowed to photocopy this sheet if you wish.
The Board
The board consists of a number of separate pieces called board sections. Each board section is the same size and shape with six passages leading onto it - one passage on each of the short sides and two passages on each of the long sides. You can only place the boards so that long side joins to long side and short side joins to short side. The boards are designed so they lock together to form a secure playing surface.
The board sections fit together in a vast number of different combinations. This means that as the Space Marine Scouts explore the Tyranid hive ship, they won't have any idea what order the boards will occur in, how they connect, or which way their objective is located.
The squares marked on the board sections are used to measure movement and range.
[Figure: This is board section 4.]
The Models
The forces under your command are represented by plastic Citadel Miniatures. Before playing Tyranid Attack, you need to glue together your plastic models as shown in the diagrams below. The tabs on the bottom of the models fit into the bases, so don't trim them off! Make sure the glue you use is suitable for gluing plastics - polystyrene cement is best. Be careful not to use too much glue as it can spoil the model by removing some of the detail.
There is plenty of helpful information about painting your models on the sides of the box bottom. If you buy a copy of Games Workshop's monthly magazine White Dwarf, you'll find lots more interesting painting and modelling tips, plus pages of photographs of painted miniatures. The staff at your local Games Workshop store will also be able to help you with modelling and painting and all the stores run regular painting demonstrations and competitions.
The model diagrams show the following assembly notes:
- Genestealer Hybrid: may be armed with a Bolter, Plasma-Gun or Chainsword.
- Tyranid Warrior: Upper Arms: either a pair of Boneswords or a Deathspitter.
- Genestealer: no special assembly notes.
- Terminator: may be armed with a Heavy Flamer by clipping the Heavy Flamer over the Storm Bolter.
- Librarian: assembled with a Force Axe and a Storm Bolter.
- Scout: assembled with a Bolt pistol or a Heavy bolter.
- Veteran Sergeant: no special assembly notes.
Model Characteristics
The different races and troop types in the Warhammer 40,000 universe carry different weapons and have their own particular strengths and weaknesses. To reflect this, some models move faster than others, some are better shots and so forth. These abilities are called characteristics.
The characteristics for Scouts and Tyranid Warriors are shown below so you can compare their relative strengths and weaknesses before you choose your forces. For all of the characteristics, the higher the number, the better the model's skill or ability. You will find the characteristics for these and many other models in the Force Lists at the end of the book.
| Name | Move | Armour | Weapons | Range | Fire | Hand to Hand | Notes |
|---|---|---|---|---|---|---|---|
| Scout | 8 | 4 | Bolt Pistol & Knife | 12 | 2D | 2D | None |
| Tyranid Warrior | 4 | 6 | Boneswords | - | - | 4D (+1) | Boneswords add +1 to the Tyranid's dice roll in hand to hand combat. |
MOVE determines how many squares the model moves.
ARMOUR rating measures the model's resistance to damage and is a combination of the model's innate toughness and the effectiveness of the armour it's wearing.
WEAPONS simply tells you what weapon or weapons the model is armed with.
RANGE gives you the maximum number of squares between the firing model and the target.
FIRE show you the number of dice you roll when shooting. For example, 1D means rolls one six-sided dice, 3D means roll three dice.
HAND TO HAND tells you how many dice to roll when you make a hand to hand attack.
NOTES gives a very brief summary of any special rules. You'll find the full explanation of the rules in the relevant section of the rule book.
Cards, Counters & Templates
Tyranid Attack also includes the following components. How and when they are used is explained in the rules that follow.
- Location Tile: a board-section tile of the Tyranid hive ship, marked with a number.
- 'Wounded' Counter: used to mark wounds on models.
- Artifact Counter: a numbered counter.
- Exploration Card: a card drawn during the Exploration phase.
- Order Card: a card used for Space Marine orders.
- Melta Bomb Counter
- Hellfire Shell Counter
- Teleporter Cyst
- Acid Blob Counter
- Objective Templates: Hive Mind Synapse, Sensory Cluster, Respiratory Vent, Energy Cortex, Dermal Sphincter, Teleporter Nexus.
Setting Up
Both players roll a dice, and whoever scores the highest is the Space Marine player. The other player is the Tyranid player. The Space Marine player takes all of the Scout models, the Terminator models and the Terminator Librarian models. At the start of the game he may only use the ten Scout models: six Scouts armed with bolt pistols and knives, two armed with heavy bolters, and two Scout Sergeants armed with a bolt pistol and chainsword. If the Space Marine player is lucky he will find the Terminators as he explores the ship. The Tyranid player gets all of the remaining models.
Next you must set up the board. Shuffle up the six game board sections. Take the top one and place it face up on the table, then place the Space Marine entry area along one long edge. Take the next board from the stack and roll a D6 to see where it is attached to the first board that you placed: 1-2 to the left of the Space Marine entry area, 3-4 straight ahead of the entry area, 5-6 to the right of the entry area.
Repeat this process until all six board sections have been placed, always attaching a new board to the last one that was placed. Sometimes a board won't fit, usually because there is another board in the way. If this happens, roll again till you can place it.
After the boards are set up, the Tyranid player shuffles the exploration cards and draws the top one from the deck. Without looking at it, he places the card face down on the last board section that was placed. The remaining exploration cards are placed to one side for the moment.
The Space Marine player takes the four order cards, the two melta bomb counters and the three hellfire shell counters. He then shuffles the six location tiles face down and takes the top one. This card shows the board section that will contain the Scouts' first objective. Objectives are hidden deep in the heart of the Tyranid ship. As the Space Marines advance, new board sections are laid by removing sections from one end and placing them at the other - this is explained later in the rules - revealing the ships inner area where the objectives are hidden.
The Space Marine player can now put his ten Scout models on the board. The Scouts can be set up on any squares on the first five board sections. Space Marine models may not be put on the last board section (the one with the exploration card), not even on the half squares at its entrance.
Set-Up Diagram
The set-up diagram shows the procedure step by step:
- Place the first board and put the Marine Entry Area along one edge. A dice is rolled to see where the second board attached to the first. The dice roll was a 5, so the board is placed to the right.
- A dice is rolled to see where the third board is attached to the second board. The dice roll was a 2 so the board is placed to the left.
- A dice is rolled to see where the forth board is attached to the third. The dice roll was a 2 so the board is placed to the left.
- You must roll the dice again if there is no room to place a board because there is another in the way. The dice roll was a 1 so the dice must be rolled again.
- Follow this procedure until all six board sections have been set up. Remember that you always attach a new board section to the last one that was placed.
The Game Rules
A game of Tyranid Attack is divided into turns. Each turn consists of the Space Marine player moving all his models and making all the attacks he wants to, then the Tyranid player moving and attacking with his models. The Space Marine player always goes first.
In your part of the turn, each of your models can move and/or attack. You move and attack with each model. A model may move first, then attack, or attack first and then move. A model does not have to move or attack at all unless you want it to.
Your models take their actions one at a time and you complete each model's movement and firing before you go on to the next. You can't go back and change any of a model's action once it's over. Each turn you can move and attack with all, some or none of your models - it's up to you how many you use.
The game turn is interrupted if a Space Marine model moves onto a board section that contains an exploration card, and the exploration sequence is carried out. The exploration sequence is fully explained in the exploration rules section on page 10.
Space Marine Order Cards
Order cards allow Space Marine models to make special moves and/or attacks. Exactly what each card allows you to do is written on the card itself. As long as the Space Marines have a Sergeant on the board then the card applies to all of the Space Marine models on the board. If both Sergeants are dead the card may only be used by one Scout model.
The Space Marine player may use one order card per turn. The card may be played at any time during the turn and is then discarded. However, it is usually a good idea to play the card at the start of the turn, as an order card may only be used by those models that have not moved and/or fired so far in the turn.
The rule for hellfire shells and melta bombs can be found in the Weapons section on page 12.
Tyranid Reinforcements
At the start of each of his turns the Tyranid player gets the chance to receive reinforcements. These represent Tyranid Warriors and bio-constructs waking from hibernation as the assault is under way. To see if you get any reinforcements simply roll a D6. If you roll 5 or more you get one reinforcement model which you are allowed to choose freely from any of your models that are not in play. Add 2 to the roll if no Tyranid models are in play on any board section, and subtract 1 from the roll if the Hive Mind Synapse objective has been destroyed.
Reinforcements enter the board on entry areas. An entry area is any half square on the outer edge of a board section, that is more than 8 squares away from a Space Marine model (see the diagram below). If no entry areas are available the reinforcement is lost.
[Figure: This entry area can be used. This entry area is within 8 squares of a Scout and may not be used.]
Movement
You may move each of your models in your turn, either before or after it has made an attack. You can move a model into any adjacent empty square, including moving diagonally, sideways, backwards or forwards. The number of squares that you can move a model depends on its move value (see Characteristics, above).
[Figure: The Genestealer has a move value of 8 and moves 8 squares.]
A model can move through a square that contains a friendly model, but it may not end its move in that square. A model can't move into the same square as an enemy model. Nor can a model move into a square that contains a wall or an objective template. These are called impassable squares.
Walls
It should be obvious which squares are walls. A few squares have a small amount of wall breaking into them, and these can be entered. A few wall squares actually contain a small amount of floor space but these clearly can't be entered. As a rough guide, if the centre of square is within the walls, you can't enter it.
Objective Templates
Objective templates (for example, the Energy Cortex) completely fill the squares they cover. You can't move a model into a square covered by an objective template.
Space Marine Entry Point
The Space Marine entry point represents the area beyond the battle zone that has already been explored and captured by the Space Marines. Because of this, you can't shoot or throw grenades into or out of this section and neither players' models can move onto it.
Attacks
In Tyranid Attack a model may make either a shooting attack or a hand-to-hand attack. A model may make an attack either before or after it moves, but it may not make more than one attack per turn unless a card is played that allows it to do so.
Shooting Attacks
For a model to make a shooting attack, it must have line of sight to the target, and the target must be within the range of the weapon being used.
To check line of sight, place a ruler from the centre of the shooting model's square to the centre of the target model's square - this is the line of sight between the two models. If this line crosses a square containing another model, a wall, or an objective marker, the line of sight is blocked and you can't shoot at the target. Teleporter cysts don't block line of sight because they are openings in the floor of the hive ship.
Next check that the target is in range. Count the number of squares between the shooting model and the target. Include the square the target is standing on but don't count the square the shooting model is on. This is the range to the target. If it's greater than the weapon's range, you can't shoot the target.
If you've got a clear line of sight to a target within range you can shoot. All models use their fire value for shooting. This given in the model's characteristics (see the Force Lists) and is written as a number of dice. For example, 1D means one dice, and 3D means three dice. If the model's fire value is shown as a dash, it can't make this type of attack.
When you shoot, roll the number of dice shown. You don't add the dice together - each dice represents a potential hit. If any of the rolls is equal to or higher than the target's armour rating, you have hit the enemy model. If it only has one life point left it is killed and removed from the board.
It doesn't matter how many hits you score as one is enough to kill a target - the remainder are lost and can't be used against any other targets. It's simply the difference between hitting with a single well-aimed shot and riddling it with holes - both are equally effective at killing the target.
Hand-to-Hand Attacks
Hand-to-hand attacks can only be made against a target in an adjacent square, including those that touch diagonally. You are never forced to make a hand-to-hand attack - you can simply ignore the enemy model, or make a shooting attack instead if you prefer.
The number of dice a model uses in hand-to-hand attacks is listed in its characteristics. For example, a Tyranid Warrior armed with a deathspitter has a hand-to-hand characteristic of 2D, which means it rolls two dice.
To make a hand-to-hand attack, the attacker and the defender roll their model's number of hand-to-hand combat dice. Each player picks their best dice roll, and the player with the highest dice roll wins the combat. Note that you don't add the dice together - it's only the best single dice roll that counts.
The model which has lost the combat loses one life point, which in most cases will be enough to kill it. Remove the dead model from the board. Note that the dice roll doesn't have to be higher than the target's armour rating, just higher than any of the dice the opponent rolled. In the case of a draw, both models are hit and lose a life point!
Follow-Up Attacks
If one of your models wins a round of hand-to-hand combat, you may immediately make another hand-to-hand attack. This is called a follow-up attack and is an exception to the rule that a model may only attack once per turn.
You are only allowed to make follow-up attacks in your own turn. If one of your models wins a hand-to-hand combat in the opponent's turn it is not allowed to make a follow-up attack. The follow-up attack is a bonus attack, taken outside the normal turn sequence. If it is successful you may take another follow-up attack, and so on until either:
A) There are no enemy models left in adjacent squares to your model
B) You lose a hand-to-hand combat
C) You decide not to take the follow-up attack even though there are targets available.
Life Points
In Tyranid Attack, every model has a number of life points, which show how hard it is to kill. Each successful attack made against a model reduces its number of life points by one. When a model has lost all its life points it has been killed and is removed from the board. Most models in Tyranid Attack only have one life point, and are killed immediately if an enemy model scores a hit against them.
A few very tough models, like the Scout Sergeant, have more than one life point, and these exceptions are noted in the Force List. When a successful hit is scored against a model with more than one life point, it is not killed, but loses a life point. When it has lost all its life points its has been killed and is removed from play just like any other dead model. To help you remember how many life points a model has lost use the counters that say 'wounded'. When a model loses a life point simply place a 'wounded' counter under its base to remind you how much damage it has suffered.
Recycling Tyranid Models
Killed Tyranid models can be recycled back into play, representing the huge numbers of Tyranids that are on board the ship. Whenever the Tyranid player is instructed to place models on the board, either as a result of an exploration card, as a reinforcement, or to defend an objective, he is allowed to choose freely from any of the models that he has available and that are not in play at the time. In the unlikely event that there are not enough Tyranid models because they are all on the map, he can't take any extra.
[Illustration: Full-page artwork of Space Marines fighting Tyranid creatures inside the hive ship.]
Exploration
The Space Marines move through the hive ship trying to find a way to their objectives, following promising passages or pushing through small, slimy crevices that suddenly open out onto vast ribbed chambers. This exploration is a tense experience, fraught with terror and spine-chilling shocks as the full horror of the mucus-dripping, intestinal hive ship unfolds before them.
What the Space Marines find is represented by the exploration sequence. A Space Marine model triggers the exploration sequence when it moves onto an unexplored board for the first time. It is easy to tell which boards have not been explored yet because they will have an exploration card on them as a handy reminder.
The Exploration Sequence
The exploration sequence must be carried out when a Space Marine model moves onto an unexplored board section for the first time. The Space Marine player finishes moving and/or attacking with the model that moved onto the board, then pause before he continues his turn while the exploration sequence shown below is carried out. Once the exploration sequence has been completed the Space Marine player may continue to move and/or fire with any models he has left.
[Figure: The end board is picked up and placed at the front. A dice is rolled to see where it is placed. The dice roll was a '6' so it is placed to the right.]
Exploration Sequence
- Remove the board that has the Space Marine entry area next to it. If there are any models on the board they are lost as Sphincters close cutting them off. Place the Space Marine entry area against the next board along, so that you will know which board to remove next.
- The board you removed in step 1 now 'rolls' to the front to become the new board section. Roll a D6 to see where it goes: on a roll of 1-2 it goes to the left of the board being explored, on a roll of 3-4 it goes straight ahead, and on a roll of 5-6 it goes to the right.
- Take an exploration card from the deck and, without looking at it, put it face down on the new board section.
- The Space Marine player now checks to see if the new board is the one shown on his location tile. If it is, then the Tyranid player must place the appropriate objective template on the board, along with 1D6 Tyranid models. The location tile is then discarded and the Space Marine player may take the next one in the stack.
- Finally, flip over the exploration card on the board with the Space Marine who triggered the exploration sequence and resolve its effects.
[Figure: The Marine Entry Area is moved round to show the next board section that will be removed.]
Objectives
At the start of the game the Space Marine player shuffles the location tiles and takes the top one from the deck. The location tile tells you where the next objective is located. The Space Marine player reveals the tile when the corresponding board section is placed during an exploration sequence, forcing the Tyranid player to set up the appropriate objective template.
Each objective template has a number which corresponds to the number shown on the board section. For example, the Dermal Sphincter is always found on board 1, the Sensory Cluster on board 2 and so on. If you look at the Objective Templates on page 21 you will see where each objective is found.
[Figure: The Sensory Cluster blocks the line of sight, between the Scout and Tyranid.]
The Tyranid player may place the template anywhere on the board section, as long as none of the template is placed across a wall. An objective template blocks movement and firing until it is destroyed, so it is a good idea to think carefully about where you put them in case you block your own movement and shooting!
Defending Models
All objectives will be protected by one or more Tyranid models. To determine how many Tyranid defenders there are the Tyranid player rolls a dice and selects that many models from those available. The models may be placed anywhere on the new board section.
Special Rules
Each objective has a special rule that applies to it. For example, if you capture the Sensory Cluster, you are allowed to look at exploration cards when they are laid down. The rules that apply to each objective are fully explained on the quick reference sheet.
Destroying the Objective
You can shoot at objective templates using the same rules as for shooting at models. All objectives have an armour rating of 6.
You can attack objective markers in close combat. Because they're inanimate and can't defend themselves, these objects don't have close combat dice, so slightly different rules apply. Roll your usual number of hand-to-hand attack dice. Any score that equals or beats the object's armour rating destroys the object. If none of the dice hit, you've failed to destroy the object. As the object can't return the attack, there's no chance your model will be damaged.
Exploration Cards
After placing any objectives you must resolve the effects of the exploration card which is on the board section with the Space Marine model that triggered the exploration sequence. To do this you simply flip the card over and follow any instructions printed on it.
Artifact Counters
Some encounters allow the Space Marines to find ancient artifacts whose effects last for the remainder of the game. The combi-weapon card, for example, increases one model's fire value by 2 points. Any cards that have effects like this will also have a small number printed at the bottom of the card (the combi-weapon has the number '4'). When you find an artifact take the artifact counter with the same number and place it under the base of the model that triggered the exploration sequence to show he is carrying the artifact. Keep the encounter card in front of you to remind you what the artifact does.
Artifacts may be transferred from model to model. The models must be standing next to each other and both models must give up their attack for the turn in order to transfer the artifact. Simply move the counter under the new model to show that the artifact has been handed over.
If a model with an artifact is killed, the artifact counter is left in the square when the model is removed. Space Marine models may pick up the artifact instead of making an attack if they are in the same square as the counter. Tyranid models may not pick up or use artifact counters.
Winning the Game
When an objective is destroyed the template is removed from the board and given to the Space Marine player. The Space Marine player wins the game when he has destroyed 4 objectives. The Tyranid player wins if there are no Space Marine models anywhere on the board at the end of a turn.
[Illustration: Full-page artwork of Tyranid creatures attacking Space Marines.]
Weapons
The warriors of the 41st millennium are equipped with a dazzling array of weaponry, ranging from basic combat knives to highly-advanced laser and plasma weapons. This section describes the weapons carried by the Space Marines and Tyranids provided with the game, and any special rules that apply to them.
Bolters
The boltgun or bolter is a short, compact weapon that fires a hail of small missiles called bolts. Inside the bolt is an explosive charge which detonates once the target has been hit, blasting the enemy apart.
The bolter comes in a variety of different forms. The Scouts carry a bolt pistol, which is small and easy to use, but lacks the range of the larger boltgun. One member of each Scout squad carries a heavy bolter. Although this large, bulky weapon slows the Scout down, this doesn't matter too much as his job is to provide long range supporting fire for the rest of the squad. Terminators use a storm bolter, which has a higher rate of fire than a normal bolter, but is much heavier due to the extra ammunition that must be carried.
All bolters, whether they are bolt pistols, storm bolters or heavy bolters, may spread their shooting dice around amongst any targets that can be seen. For example, if a model with a bolt pistol could see two Tyranids you could fire both dice at one target or split the dice up to attack both targets.
Close Combat Weapons
All Space Marines carry a combat knife to use as a last resort in hand-to-hand combat. These knives have mono-molecular edges which can cut through many types of metal and sever flesh and bone.
The chainsword has a powered chainsaw edge studded with mono-molecular teeth, and is carried by Scout Sergeants. It is capable of slicing through most solid material, including armour and flesh. Any model armed with a chainsword adds +1 to its dice roll in hand-to-hand combat.
Power weapons are surrounded by an energy field which disrupts any solid matter it touches. The power glove is a heavy gauntlet which can be used to punch through walls and armour, and to tear apart solid objects. Any model armed with a power glove may add +2 to its dice roll in hand-to-hand combat.
Librarian's Force Axe
Terminator Space Marine Librarians carry a force axe, a carbon steel blade which incorporates a psi-matrix. A psi-matrix is a serpentine or interlaced pattern which concentrates psychic energy. Using the force axe a Terminator Librarian can magnify the power of his blows, shattering armour and pounding flesh with supernatural strength. However, psionic attacks are not predictable or reliable, so the strength of the attack is highly variable. Every time the Librarian makes a hand-to-hand attack, roll a dice and subtract 1 from the score to produce a result of between 0 to 5. This bonus is added to the Librarian's dice roll in the hand-to-hand attack.
Hellfire Shells
The heavy bolters of Space Marine Scouts are specially adapted to shoot hellfire shells as well as normal bolter shells.
Hellfire shells are well-suited to the Scouts' role as terror troops. They are made from a single hollow crystal filled with a mixture of caustic acids and deadly neuro-toxins. When a hellfire shell hits, it shatters with explosive force, throwing out slivers of crystal that cut through flesh, while its contents simultaneously burn and poison its victims.
A Space Marine Scout armed with a heavy bolter can choose to shoot either bolter shells or a hellfire shell - you must tell your opponent which sort of ammo is being fired before rolling to hit. Bolter fire is resolved using the shooting rules described above.
Hellfire shells are vicious weapons and automatically kill the target they are fired at, while any model (friend or foe) standing next to the target is killed on a roll of 4 or more. If the Space Marine player wants he may target the hellfire shell at an empty square in order to try and 'splatter' a target that is lurking round a corner.
Fortunately for the Tyranid player, the Space Marines only carry a limited number of these highly dangerous weapons. Every time that the Space Marine player makes an attack with a hellfire shell he must discard one of his hellfire shell counters. Once all three counters are used up the Space Marine player may no longer make any hellfire shell attacks.
Heavy Flamer
The heavy flamer is an area effect weapon and engulfs its target area in a fiery inferno reaching from floor to ceiling. The target of the flamer is attacked with two dice, and anything standing next to the target (friend or foe) is attacked with two dice as well.
Melta-Bombs
Melta-bombs are a special type of grenade with a magnetic-adhesive surface that allows them to be fixed to their target. The shaped charge of the melta-bomb explodes and channels all its energy against the target. They are designed as demolition charges and for blowing holes through bulkheads, but they can also be used against living targets.
Melta-bombs can be used by any Space Marine model instead of making a normal attack. The bomb is not thrown at the target but placed on it from an adjacent square. Anything attacked by a melta-bomb is automatically destroyed. Because of the shaped charge, a melta-bomb does not have an area effect and only affects the target square.
Like hellfire shells, the Space Marines only carry a limited number of melta-bombs. Every time the Space Marine player makes a melta-bomb attack he must hand in one of his melta bomb counters. Once both counters are used up the Space Marine player may no longer make any melta bomb attacks.
Plasma Gun
The plasma gun fires energy shells of bright glowing plasma. When a plasma shell hits it releases tremendous heat and energy, destroying the target in a great explosion. The plasma gun only gets 1 dice when it makes an attack, but +2 is added to the dice roll to represent the searing energy of the attack. Though the plasma gun is highly effective, it requires a massive amount of energy to power it, and the weapon takes some time to recharge. If a plasma gun is fired it cannot be used in the following turn, and is only ready to fire again in the turn after next.
Tyranid Bio-Weapons
Like all their other bio-technological devices, Tyranid weapons are created by advanced genetic manipulation. Each weapon is made of a creature or group of parasitical creatures that have been bred specifically to act as weapons. There are many horrific Tyranid bio-weapons, but the bonesword and the deathspitter are amongst the most-commonly used by Tyranid Warriors.
Bonesword
The blade of a bonesword is a massively-enlarged horn, sharply serrated along both edges. The blades grow slowly but continually and are even able to repair themselves over time. The hilt is the hard, chitinous exo-skeleton of the bio-construct. The creature's small brain is lodged within the hilt. It is incapable of independent thought but able to generate a powerful surge of psychic energy when stimulated by the wielder. The energy flows along the nerve tendrils embedded within the blade, causing a field effect rather like a Librarian's force axe.
A Tyranid Warrior can wield its pair of boneswords in a frenzied pattern that acts like a shield, deflecting enemy shots as they hit the energy fields surrounding the blades. This is why a Tyranid armed with these weapons has a higher armour value than a Tyranid armed with the deathspitter. In addition, the boneswords add +1 to the Tyranid's dice roll in hand to hand combat.
Deathspitter
This horrid bio-weapon is in fact a living organism composed of many inter-active parts, all bred to perform specific tasks. The living creatures which form the ammunition are grown and nurtured in a brood chamber deep inside the innards of the deathspitter. When the gun is fired, a spider-jawed creature drops a writhing piece of ammunition into the firing chamber. The caustic skin of the ammunition creature reacts violently with the walls of the firing chamber, causing it to be spat out of the gun with great force. The strength of the impact alone may be enough to slay an unarmoured target, but those who survive the initial hit can be poisoned by the creature's powerful metabolic acids.
The deathspitter has two attack dice: one to represent the force of the hit, and the second to represent the poison and acid. When the deathspitter's bio-projectile strikes a target, it bursts and sprays the area with caustic bile and mucus. To represent this, any models standing next to the target (friend or foe) are attacked with one dice each. The Tyranid player may target the deathspitter on an empty square in order to 'splatter' a target that is lurking round a corner.
Tyranid Acid-Blobs
Acid-blobs are creatures created by the Tyranids to keep the interior of a hive ship clean and free of infection. The acid-blob secretes a unique and highly corrosive molecular acid. Tyranid creatures are immune to the effects of this acid, but anything else is quickly dissolved into a proto-plasmic gloop which is then absorbed by the acid-blob. Once the acid-blob has absorbed enough nutrition it will suddenly grow and split into two identical acid-blobs!
Acid-blobs can only be encountered as the result of an exploration card. The Tyranid player may not use them as reinforcements, or when he is placing models to protect an objective. Use the acid-blob counters provided in the game to represent these dangerous creatures.
The characteristics for acid-blobs are included in the Force List. An acid-blob can only attack in hand-to-hand combat. However, when it manages to do so, it always wins, killing its opponent without any dice having to be rolled. Any model killed in this way is removed from the board and replaced with a new acid-blob counter! The new acid-blob may not move or attack on the turn it is placed on the board.
Expanding the Game
Tyranid Attack is much more than just the game contained in this box - it's an open-ended system that's just a part of Games Workshop's world of hobby gaming.
If you want to know more about what we've got planned for the future, or learn something about our other games, take a look at White Dwarf or pop in to your local Games Workshop store - the staff there will be more than happy to talk to you about our games and Citadel Miniatures.
If you have any good ideas for expanding Tyranid Attack - for example new game rules, additions to the encounter tables, rules for miniatures we've not covered here and so on - feel free to add them to your games. Just make sure you get your opponent's agreement first.
Objective Templates
Location Tile 1 - Dermal Sphincter. The Dermal Sphincter is a large muscled valve used to evacuate the waste from the hive ship into space. If the Space Marines capture the sphincter they may use it to bring on vital supplies and reinforcements from their space ship. If the Space Marine player destroys the Dermal Sphincter he may be able to receive reinforcements if the Imperial Mothership is in position to deliver them.
Special Rules: If the Space Marine player destroys the Sphincter, roll a D6, and on a roll of 4 or more he may replace 1D6 of the Scout models he has lost so far in the game. The replacements must be placed on squares that were occupied by the sphincter, and are not allowed to move or shoot on the turn they enter the board.
Location Tile 2 - Sensory Cluster. The Sensory Cluster co-ordinates many of the hive ship's functions, monitoring the ship's organs and stimulating them into action when needed. If the Space Marines destroy this objective, they can tap into the energy flows around the ship and gain some idea of Tyranid movements and what awaits them as they explore the ship.
Special Rules: If the Space Marine player manages to destroy the Sensory Cluster he may be allowed to look at exploration cards. The Space Marine player rolls a D6 as each new exploration card is taken. If he scores 4 or more he may examine the card before it is placed on the map.
Location Tile 3 - Respiratory Vent. The Respiratory Vent cleanses the hive ship's atmosphere of impurities by drawing the air through itself and extracting many of the poisonous chemicals. It stores these in sacs that are milked by small beetle like creatures which in turn move around the ship and are consumed by the bio-mechanisms that require the chemicals to function.
Special Rules: This board section is filled with a cloud of gas that restricts vision to a foot or two at best. Any model on the same board as the Respiratory Vent can only be attacked by models standing in an adjacent square. Once the vent is destroyed visibility on this board returns to normal.
Location Tile 4 - Teleporter Nexus. The Teleporter Nexus is the controlling hub of the hive ship's teleporter system. Like the smaller cysts spread through the ship, its orifices are extensions in realspace of the teleporter worm, a Tyranid bio-construct that has most of its body within the warp. The Nexus is a very sensitive organ, and damaging it causes the teleporter worm to close off all its cysts as the shock sets in. The worm pulls back its tentacles into the safety of the warp, leaving the cysts as decaying cancerous growths in the floor of the hive ship.
Special Rules: If the Nexus is destroyed the Tyranid player may no longer use Teleporter cysts to enter reinforcements.
Location Tile 5 - Hive Mind Synapse. The Hive Mind Synapse is a vital organ that connects the consciousness of the hive ship with all the other Tyranid hive minds. Using the Synapse the hive ship is able to think as one with the many millions of ships of the hive fleet. The powerful emanations of the Hive Mind Synapse also allow the hive mind to exchange information and instructions with all the Tyranids and bio-constructs on the ship. The ability of the Tyranids to react to new threats is greatly diminished if the Synapse is damaged or destroyed.
Special Rules: If the Hive Mind Synapse is destroyed the Tyranid only gets reinforcements on a roll of 6.
Location Tile 6 - Energy Cortex. The Energy Cortex is a multi-chambered pump that circulates vital fluids around the hive ship. The Energy Cortex produces a deep throbbing sound as it pumps the viscous fluids around its muscular tubes. The sound is so powerful and penetrating that it can cause disorientation, nausea and blackouts in those near to it.
Special Rules: If a Space Marine is within 6 squares of the Energy Cortex at the start of the Marine turn, roll a D6. On a score of 1 the Space Marine passes out - place the model on its side to show this. The Space Marine remains down until the cortex is destroyed. While prone he does not blocks the line of sight. He will be killed if attacked in hand to hand combat by a Tyranid model.
Tyranid Attack Force List
Imperial Models
| Name | Move | Armour | Weapons | Range | Fire | Hand to Hand | Notes |
|---|---|---|---|---|---|---|---|
| Scout Sergeant | 8 | 4 | Bolt Pistol & Chainsword | 12 | 2D | 2D (+1) | The Chainsword adds +1 to the Sergeant's dice roll in hand-to-hand combat. The Scout Sergeant has 2 life points. |
| Scout | 8 | 4 | Bolt Pistol & Knife | 12 | 2D | 2D | None |
| Heavy Weapon Scout | 6 | 4 | Heavy Bolter & Knife | 48 | 4D |
Tyranid Models
| Name | Move | Armour | Weapons | Range | Fire | Hand to Hand | Notes |
|---|---|---|---|---|---|---|---|
| Acid-Blob (counter) | 2 | 6 | Acid Attack | - | - | Special | The acid-blob always wins if it attacks in hand-to-hand combat, converting the victim into a new acid-blob. Remove the opponent and replace them with an acid-blob counter. |
| Genestealer | 8 | 5 | Claws and Teeth | - | - | 4D | None |
| Genestealer Hybrid | 6 | 2 | Gun & Claws | 12 |
Additional Force List
The models listed on this page are not included with Tyranid Attack. However, if you have any of the models in your collection the following special rules will allow you to include them in your games.
If your collection of Citadel miniatures includes models of Space Marines in Power Armour you are allowed to include them in the boarding party instead of or as well as Scouts. When using this system the Space Marine player has 30 points with which to buy models for his initial boarding party. The models you are allowed to choose from and how many points each one costs is shown in the list below. If you have any Tyranid mind slaves or special bio-constructs in your model collection you may add them to the Tyranid models provided with the game. When the Tyranid player is allowed to take models as reinforcements or to protect an objective he may pick them from any of the models that are available. There is only one restriction on using mind slaves and special bio-constructs: each may only be used once per game - they cannot be recycled like the standard Tyranid models. This represents the fact that each Tyranid ship only has a few of these special creatures to protect it compared to the teeming hordes of Tyranid warriors and Genestealers that are on board.
| Model | Cost | Model | Cost | Model | Cost |
|---|---|---|---|---|---|
| Scout | 2 | Space Marine | 3 | Terminator | 5 |
| Scout with Heavy Bolter | 4 | Space Marine with Heavy Weapon | 5 | Terminator Librarian | 10 |
| Scout Sergeant | 5 | Space Marine Commander | 10 |
Space Marines in Powered Armour
| Name | Move | Armour | Weapons | Range | Fire | Hand to Hand | Notes |
|---|---|---|---|---|---|---|---|
| Space Marine Commander | 6 | 5 | Power Axe & Bolt Pistol | 12 | 2D | 2D (+2) | The Power Axe adds +2 to the Commander's dice roll in hand-to-hand combat. The Commander has 6 life points. |
| Space Marine | 6 | 5 | Boltgun | 24 | 2D | 2D | None |
| Heavy Weapon Marine | 4 | 5 | Missile Launcher | 72 | 2D |
Tyranid Mind Slaves
| Name | Move | Armour | Weapons | Range | Fire | Hand to Hand | Notes |
|---|---|---|---|---|---|---|---|
| Android | 4 | 5 | Doom Blaster | 24 | 1D (+1) | 1D (+1) | Add +1 to the Android's dice roll when firing and in hand-to-hand combat. |
| Chaos Marine | 6 | 5 | Boltgun and Knife | 24 | 2D | 2D | None |
| Chaos Commander | 6 | 5 | Storm Bolter | 24 | 3D |
Chaos Dreadnought
The Dreadnought is a fearsome war machine, developed by the followers of Chaos. It is an armoured fighting suit controlled by a pilot encased deep inside the heavily protected chest section. The Dreadnought's operator can control all of the Dreadnought's functions, including moving its arms and legs and firing its powerful array of weapons.
The Chaos Dreadnought is an adversary to be feared and respected. It counts as three models against the number of models the Tyranid may take, rather than just one. For example, if the Tyranid player was allowed to place 4 models on the board he could take the Dreadnought and 1 other model. Note that this means that the Tyranid player may not take the Dreadnought when he is only allowed to place 1 or 2 models on the board.
Although the Dreadnought is very large, you place it on the board so that it is centred on a single square. This square is the one used for movement, line of sight to and from the model and so forth.
The Dreadnought starts the game with bolters mounted on its body and two heavy weapons. Before placing it on the board the Tyranid player must decide which heavy weapons he will use and clip these onto the Dreadnought model. When a Dreadnought fires it may fire all three of its weapons. The weapons are fired one at a time. It may fire more than one weapon at the same target or may choose to fire each weapon at a different target.
The Dreadnought has three life points. When it loses its first life point the Tyranid player must remove one of its heavy weapons. The second heavy weapon is removed when it loses another life point. It continues to roll its full number of dice for hand-to-hand combat, even when damaged. It is removed from the board when it loses its third life point.
Reference Sheet
Summary of Play
A game of Tyranid Attack is divided into turns. In each turn the Space Marine player moves and attacks with his models, then the Tyranid player moves and attacks with his models. The Space Marine player always moves and attacks first.
Moving and Attacking. Players can choose whether to move all, some or none of their models each turn. Each model can move then attack, or attack then move. However, a model may not move twice or attack twice unless a special card is played that allows it to do so.
Winning the Game. The Space Marine player must destroy four objectives in order to win the game.
The Tyranid player wins if he kills all the Space Marine models before they capture four objectives.
Movement
The number of squares a model may move is given under its move characteristic. A model may move before or after it has attacked.
Models may move into any empty adjacent square - sideways, diagonally, backwards or forwards.
A model may move through a square that contains a friendly model, but it may not end its turn there. A model may not move through or into a square already occupied by an enemy model, nor into an impassable square - one that contains a wall or an objective marker.
Space Marine Order Cards
The Space Marine player may use one order card per turn. The card may be played at any time during the turn and is then discarded and may not be used again. As long as the Marines have a Sergeant on the board then the card applies to all of the Marine models on the board. If both Sergeants are dead the card may only be used by one Scout model, though other types of Marine (Terminators and Librarians, or Marines in Power Armour) can use the order card as normal.
Tyranid Reinforcements
The Tyranid player may roll for reinforcements at the start of each of his turns. You must score 5 or more to get a reinforcement. Add 2 to the roll if there are no Tyranid models anywhere on the map at the start of the turn. Subtract 1 from the roll if the Hive Mind Synapse has been destroyed.
Attacks
A model may make either a hand to hand attack, or a shooting attack in its turn, but not both.
Shooting Attacks. To make a shooting attack, a model must have line of sight to the target and the target must be within range of the weapon being used. To shoot, roll the number of dice shown under the model's fire value characteristic. If the score on any of the dice is equal to or higher than the target's armour rating, the target model loses a life point.
Hand-to-Hand Attacks. Hand-to-hand attacks can only be made against a target in an adjacent square. When a hand-to-hand attack is made, the attacker and the defender roll the number of dice shown under their model's hand to hand characteristic. Each player then picks the single dice with the highest score out of those he rolled.
The player who has the single highest dice roll wins the combat and the target model loses a life point. In the case of a draw, both models are hit and both lose a life point!
Exploration Sequence
The exploration sequence is carried out when a Space Marine model moves onto a board section which has an exploration card on it.
- Remove the board that has the Space Marine entry area attached to it. If there are any models on the board they are lost. Clip the Space Marine entry area to the next board along, so that you will know which board to remove next.
- The board you removed in step 1 now 'rolls' to the front to become the newest board section. Roll a D6 to see where it goes: on a roll of 1-2 it goes to the left of the board being explored, on a roll of 3-4 it goes straight ahead, and on a roll of 5-6 it goes to the right.
- Take an exploration card from the deck and, without looking at it, put it face-down on the new board section.
- The Space Marine player now checks to see if the new board is the one shown on his location tile. If it is, then the Tyranid player must place the appropriate objective template anywhere on the board, along with 1D6 Tyranids models. The location tile is then discarded and the Space Marine player may take the next one in the stack.
- Finally, flip over the exploration card on the board with the Space Marine who triggered the exploration sequence and resolve its effects.
[Figure: Diagram of the exploration sequence showing the entry area moved to the next board.]