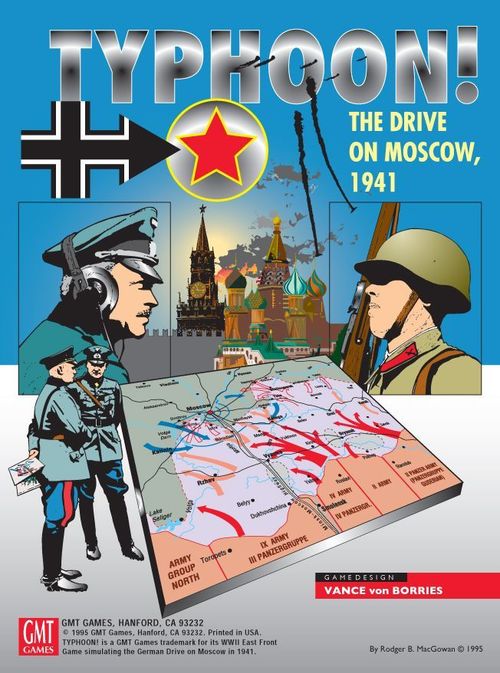
Typhoon! The Drive on Moscow, 1941
Typhoon! The Drive on Moscow, 1941 Rulebook
Table of Contents
Table of Contents
- 1.0 Introduction
- 2.0 Game Equipment
- 3.0 Preparing for Play
- 4.0 Sequence of Play
- 5.0 Weather
- 6.0 Supply
- 7.0 How to Move Ground Units
- 8.0 Combat
- 9.0 Armor in Combat
- 10.0 Artillery Fire Support
- 11.0 Airpower
- 12.0 Fortifications / Engineers
- 13.0 Special Units
- 14.0 Order of Appearance
- 15.0 Replacements
- 16.0 Soviet Mandated Attacks
- 17.0 Victory Conditions
- 18.0 Scenarios
1.0 Introduction
Typhoon! is a two-player game, but when playing those scenarios that have a large number of pieces, the front usually divides such that team play works well. One player (or team) controls the Axis forces, and the opposing player (or team) controls the Soviet forces. The playing pieces represent the actual units which participated in the campaign, and the maps represent the terrain over which those units fought. Players maneuver their units across the map and conduct combat as described in the rules of play. To win, the Axis must capture and hold either the Soviet capitol, Moscow, or Victory Point objectives that represent control of the game map and decide the campaign. These objectives, battle casualties, and certain actions all result in a final Victory Point total which is used to determine the winner.
2.0 Game Equipment
The game includes:
- Three 22x34" maps
- 1080 die-cut counters
- One Rules Booklet and One Play Book
- Axis and Soviet Unit Setup Cards
- Player Aid Cards
- One ten sided die
2.1 The Game Map
There are three maps: Map M (has Moscow), Map N (has Smolensk), and Map P (has Bryansk). Most of the game's scenarios use only one map. The Campaign Game scenario uses all three maps, arranged as shown below:
      N        M

            P
When using all maps, notice that the hexrow or column on the common edge will overlap onto the adjoining map.
A grid of hexagons has been superimposed on the terrain features in order to regularize movement and the positioning of playing pieces. These hexagons are hereafter called "hexes." Each hex has a four-digit identification number, used for game reference purposes only. Throughout the rules, hexes on Map P are designated with the prefix "P," hexes on Map N with an "N," and hexes on Map M with an "M." Each hex on the map represents about 5.0 miles (8.0 km) of real terrain from side to side. To make the maps lie flat, back-fold them against the creases. Small pieces of drafting tape may be used to hold them taut. This type of tape can be removed later without damaging the map. Alternatively, you may wish to cover your game maps with plexiglas or acetate, or laminate them to provide additional protection.
2.2 Player Aid Cards
Typhoon! includes Set-up Cards and Charts and Tables to help players set up the game, keep track of reinforcements, and resolve movement and combat functions. Place these to the side of the map(s) for easy reference.
2.3 The Playing Pieces
Carefully remove the cardboard playing pieces from the counter sheet and sort them by color and type. They represent the military units that took part in the historical campaign. The numbers and symbols on the pieces represent the strength, movement capability, and type of unit represented by each piece. These playing pieces will hereafter be referred to as "units".
2.3.1 How to Read the Units: Refer to the Player Aid Card which has pictures of the playing pieces, including identification of unit values, unit sizes, and unit type symbols.
2.3.2 Unit designations are the historical identity numbers of the units. For an explanation of abbreviations used on the unit counters, see the Historical and Design Notes.
2.4 Explanation of Unit Values
- Air Combat Rating is the strength of an air unit in air combat.
- Attack Strength is the strength of a unit used when attacking other units (see 8.0).
- Close Air Support (CAS) Rating is the potential combat DRM of an air unit which flies a CAS mission (see 11.5).
- Command Value is the maximum number of other ground units a headquarters unit can activate within its command range, and the number of retreat options that can be placed within command range (see 13.1.1).
- Defense Strength is the strength of a unit used when defending against enemy units (see 8.0, 10.2).
- Movement Allowance is the maximum number of clear terrain hexes through which a unit can be moved in a single Movement Phase during Dry weather. Moving units from hex to adjacent hex requires the expenditure of Movement Points from the unit's Movement Allowance. Consult the Terrain Effects Chart (TEC) for the movement point cost of different types of terrain.
- Range indicates the maximum distance in hexes that an artillery unit may fire, counted from the firing hex (excluded) to the target hex (included).
- Set-up Code (for Scenario #5: the Campaign Game): Each counter has a Set-up Code noting that unit's deployment hex or reinforcement arrival information for Scenario #5 only. Players should ignore this code when playing any of the other scenarios, as each unit's set-up hex for the other scenarios is listed on the Set-up Cards. See the "How to Read the Units" section of the Player Aid Cards and 14.1 for a description of each Set-up Code.
- Support Strength is the strength of an artillery unit when providing Fire Support in combat (see 10.1).
Note: The following capabilities are highlighted on the unit counters to help players easily identify certain types of units.
- Infiltration Movement Capable: All motorized units with a Movement Allowance of seven (7) or more are capable of Infiltration Movement (moving directly from one enemy ZOC to another — see 7.2.3). All ski units are capable of Infiltration Movement during Snow or Arctic weather turns. Infiltration-capable units' counters include a yellow-filled Movement Allowance.
- Motorized Unit: All motorized unit counters have a colored box around the unit's Movement Allowance.
- Soviet Guards: All Soviet Guards units have their unit type symbol colored red.
- Soviet NKVD: All Soviet NKVD units have their unit type symbol colored green.
2.5 Terminology
2.5.1 A player's own units, supply sources, and turn phases are termed "friendly", while those of his opponent are described as "enemy." At Start, all hexes generally to the west of Axis units are friendly to the Axis player, all hexes generally to the east of Soviet units are friendly to the Soviet player.
2.5.2 A hex is "controlled" by the last player to move a combat unit through that hex or to have an uncontested Zone of Control (see 3.3) projected into it.
2.6 The Die
2.6.1 The game uses a ten-sided die. The number "0" is read as ten (10), not zero (0) as in some other games.
2.6.2 To perform many game functions, you will roll one die to determine a result. Often, you will modify the actual die roll result plus (+) or minus (-) as explained in the rules below; these are called Die Roll Modifications ("DRMs").
3.0 Preparing for Play
3.1 Setting up the Game
3.1.1 Set-up instructions for each of the game's six scenarios are detailed in the Play Book. For most scenarios, there is also a Set-up Card for each side which lists the set-up hexes for the units that you will use to play that scenario. Refer to both the scenario instructions and the Set-up Card for the scenario you are going to play (We strongly encourage you to try the Learning Scenario before playing the other scenarios). Place your units in the hexes indicated on the Set-up Card, then check the scenario instructions for special rules and conditions in effect for that scenario.
Note: When playing Scenario #5 (the Campaign Game), use the set-up codes listed on each unit counter instead of a Set-up Card.
3.1.2 Each Set-up Card lists certain units which are not initially placed on the map. These are reinforcements, and are stored in the Reinforcements or Pools sections of the Set-up Card. They will enter play on a later game-turn (see 14.1). Units begin the game at the strength level (see 8.5) shown on the Card; those starting reduced are shown at that level. Once you have placed all units, begin play according to the Sequence of Play (4.0).
3.2 Stacking
Stacking refers to the placing of more than one unit in a hex. The position of a unit within a stack has no effect on play.
3.2.1 Each unit has a stacking point value marked on it. A maximum of ten (10) stacking points can occupy a hex at the end of any phase of the game-turn. During all other times units can freely enter and pass through stacks of friendly units.
Exception: Retreat; see 8.6.4.
3.2.2 If a stack of units is found to be in excess of the stacking limit at the end of any phase, the excess is eliminated by the owning player.
3.2.3 Certain units with zero stacking value and play aid markers stack freely without limit.
3.3 Zones of Control
The hex a unit occupies and the six hexagons immediately surrounding it constitute the unit's Zone of Control (ZOC). Hexes into which a unit exerts a ZOC are called controlled hexes.
3.3.1 In Typhoon!, the counters of units that do not exert a ZOC are marked with a colored "No ZOC" band across the top for easy identification. If at least one unit in a hex exerts a ZOC (that is, it lacks the "No ZOC" band), then all combat units in that hex exert a ZOC.
Note: Some units gain a "No ZOC" band when they are Reduced.
3.3.2 A combat unit always controls the hex it occupies.
3.3.3 A unit's ZOC can be modified by weather (see Summary of Additional Weather Effects).
3.3.4 A unit's ZOC extends into all types of terrain hexes and across all types of hexsides except those prohibited to its movement. ZOCs never extend into a major city hex.
Example: No units exert ZOCs across a lake hexside during Dry weather.
3.3.5 A ZOC is not affected by other units, enemy or friendly, except when tracing a Supply Route (see 6.1) or during retreat.
3.3.6 If both enemy and friendly units project a ZOC into a hex, both co-exist and the hex is mutually controlled by both players.
3.3.7 Units that have been successfully overrun (7.8) temporarily lose their ZOC.
4.0 Sequence of Play
The game is played in successive game-turns, composed of Segments, as noted below. See the Expanded Sequence of Play on the back of the Play Book for a detailed listing of each Phase.
A. Strategic Segment
- Weather Determination Phase
- Supply Determination Phase
- Soviet Replacements Phase (Scenarios 4 and 5 only)
- Air Readiness Phase
B. Axis Player Segment
- Movement Phase
- Axis Interdiction Phase
- Soviet Reaction Phase
- Combat Phase
- Motorized Movement Phase
- Engineering Phase
C. Soviet Player Segment
- Motorized Movement Phase
- Axis Reaction Phase
- Combat Phase
- Movement Phase
- Engineering Phase
D. Soviet Surrender Phase
E. Game-Turn Record Interphase
5.0 Weather
Weather conditions governed much of the campaign in the Soviet Union during the war. Both sides were affected. Weather conditions will affect supply, movement, air unit readiness, and various other game functions.
5.1 Weather Determination
5.1.1 Each game-turn's box on the Turn Record Track contains a general "Climate Condition" for that game-turn. This Climate Condition will provide the reference column on the Weather Table for the Weather die roll described in 5.1.2.
Note: The die roll references the column for the listed Climate Condition, not the previous turn's weather condition.
5.1.2 The Axis player rolls a die and consults the Weather Table during the strategic segment of every game-turn.
Exception: Some scenarios specify weather conditions for the first and second turns.
He cross-references his die roll result on the column for the Climate Condition for the current game-turn that is listed on the Turn Record Track. The resultant weather condition applies immediately to all maps for that entire game-turn. On game-turns whose turn box (on the Turn Record Track) contains a "+1" notation, add a +1 DRM to the Weather die roll.
5.1.3 There are five possible weather conditions: Dry, Mud, Frost, Snow, and Arctic. Mud and Snow weather have special conditions attached, as noted in 5.1.4 and 5.1.5.
5.1.4 Lingering Mud: On any Dry weather turn which immediately follows a Mud turn, pay Mud costs for movement and (as noted on the Terrain Chart) apply all Mud effects in all Woods hexes.
5.1.5 Lingering Snow: If Frost weather occurs in a turn immediately following a Snow turn, ignore the Frost result. The weather remains Snow. It takes two consecutive turns of Frost results to change Snow weather to Frost.
Example: On GT 28, the Climate Condition is Frost. The Weather die roll is "8", which gives a weather result of "S" (Snow) for the current turn.
On GT 29, the Climate Condition is still Frost (as listed on the Turn Record Track), and there is a "+1" DRM, as noted on the Turn Record Track. The die roll is "8", modified to "9", which gives a result of "ST", which means the weather condition for the turn is Snow with Storms.
On GT 30, the Climate Condition is still Frost, with a +1 DRM, and the die roll is "6", modified to "7." This results in "Frost." Because, however, it takes two consecutive "Frost" results to change Snow weather to Frost weather, the weather condition remains Snow for this turn. If the weather die roll on GT 31 results in Frost again, then the weather will change to Frost.
5.1.6 Certain results on the Weather Table indicate a weather condition and Storm. Storms last for the entire turn and cause additional effects on certain results tables that are explained there. Storm is not a Climate condition.
6.0 Supply
There are two types of supply: general supply and attack supply. A unit's general supply condition affects its actions throughout the game-turn. Attack supply only affects attacking units.
During every Supply Determination Phase, each player determines, by tracing Supply Routes, which of his combat units are in general supply and which units are out of supply and places markers on out of supply units as noted in 6.3.3.
6.1 Supply Routes
To be "in supply," a unit must be able to trace a Supply Route through a path of contiguous hexes that is free from enemy combat units and enemy ZOC from the unit to a supply source. This route can be composed of:
a. a Line of Communications (LOC) and
b. a road net and/or
c. a rail net
6.1.1 A unit can trace a LOC of not more than seven (7) hexes in length (not counting the hex the unit occupies), which is free from enemy combat units and enemy ZOC, to a friendly supply source (see 6.2), or to a road or rail net leading to a friendly supply source.
Exception: The maximum length of the LOC is five (5) hexes if it is traced through any Marsh or Swamp hex (along a road), or during certain weather conditions (see 6.1.3).
6.1.2 You cannot trace an LOC:
a. across (currently impassable) lake and major river hexsides (except at bridges)
b. through a Swamp hex (unless along roads or during Frost, Snow, or Arctic weather)
c. through non-destroyed enemy fortifications (see 12.0).
6.1.3 Weather and LOCs: During Mud, Snow, or Arctic weather, the LOC length is reduced to five (5) hexes. It is also reduced to five (5) hexes for a particular unit if it must be traced over a hex in woods with Lingering Mud conditions (5.1.4). A LOC can be traced over Swamp only during Frost, Snow, or Arctic weather conditions (since it is frozen).
6.1.4 It is not sufficient for a unit (that must trace its Supply Route to a map edge) to trace the Supply Route off the edge of the map; it must do so by means of a road or railroad net which leads off the map edge.
6.1.5 An enemy occupied hex blocks the Supply Route through that hex. An enemy ZOC also blocks the Supply Route, but the presence of a friendly unit or ZOC in an enemy controlled hex negates enemy ZOC in that hex for the purpose of tracing a Supply Route (and for the purpose of retreat; see 8.6.2a).
6.1.6 Road Nets: A friendly road net is any continuous series of connected main road hexes, no more than 21 hexes in length, which lead either to a friendly supply source or to a railroad hex which forms part of a friendly railroad net and which is free from enemy combat units and enemy ZOCs.
Exception: During Mud, Snow, or Arctic weather, the maximum length of a road net is fifteen (15) hexes.
6.1.7 Railroad Nets: A friendly railroad net is any continuous series of connected railroad hexes of unlimited length which leads to a friendly supply source. All these railroad hexes must be free from enemy units and enemy ZOC and must be currently available for friendly railroad movement (see 7.6).
6.2 Supply Sources
6.2.1 Soviet supply sources are any major city hex, any friendly railroad or main road hex at the east edge of maps M and P, and that portion of the south edge of map P from P4434 to the east map edge.
6.2.2 Axis supply sources are any railroad or main road hex at the west edge of maps N and P and the railroad at hexes P2333 and P2434.
In Scenario #5 only, hex N1016 is also an Axis supply source. In Scenarios #4 and #5 only, hex P4034 (Lgov) becomes an Axis supply source on GT #10.
6.2.3 During the Supply Determination Phase, a Supply Point (see 6.5) can be used as a temporary, one game-turn supply source for units in up to five hexes that are able to trace a LOC (7 hexes or 5 hexes, depending on weather) to it. That supply point is immediately expended.
6.3 General Supply Effects
Units are always in one of three general supply states:
a. In general supply
b. Out of supply using Emergency Supply
c. Out of general supply.
6.3.1 Determine the supply state for all of both sides' units during the Supply Determination Phase of each game-turn. A unit's supply state remains the same for the entire game-turn. Thus, a unit that is out of general supply at the beginning of a game-turn is out of general supply for the duration of that game-turn, even if it moves back into general supply during its Movement Phase.
6.3.2 A unit is in general supply if, during the Supply Determination Phase, it can trace a supply route. If a unit cannot trace a Supply Route, it is either:
a. out of general supply using Emergency Supply, if it was in supply during the previous game-turn; or
b. out of general supply, if it was out of supply (whether using Emergency Supply or not) during the previous game-turn.
6.3.3 To indicate a unit's supply status:
a. Place Emergency Supply markers on all units which are newly out of general supply.
b. Place Out of Supply markers on all units which already carry an Emergency Supply marker and which are still judged to be out of general supply.
c. Retain Out of Supply markers on those already bearing such markers which are still out of supply.
d. Remove the Emergency Supply or Out of Supply markers from units that can trace a Supply Route during the Supply Determination Phase.
6.3.4 A unit bearing an Emergency Supply Marker suffers no adverse effects. It is treated as if it were in general supply.
Design Note: Such units are consuming emergency stocks to maintain combat effectiveness.
6.3.5 Each unit carrying an Out of Supply Marker is affected as follows:
a. Its movement allowance is reduced by two (-2) MPs for each Movement Phase.
Exception: Cavalry units are not affected.
Design Note: Belov's Cavalry Corps engaged in extensive offensive operations behind German lines, at times traveling thirty to forty miles per day.
b. In ground combat, the attacker subtracts one (-1) from his die roll result when the defending force includes any number of units with an Out of Supply marker.
c. It loses its Reaction Movement Phase (see 7.5.2) and cannot qualify for rule 7.3.3 movement during its Motorized Movement Phase (i.e. it must have sufficient movement points or it cannot be moved).
6.3.6 Strongpoint Deterioration: Non-occupied friendly strongpoints which are not adjacent to a friendly unit and are judged to be out of general supply have Emergency Supply markers placed on them. During the next Supply Determination Phase, any such strongpoint still judged to be out of supply is removed from the map.
6.4 Soviet Surrender
It is well-known that many surrounded, unsupplied Soviet troops surrendered during the campaign, sometimes in mass. Some units, though, notably Guards and NKVD units, as well as those in cities, would most often fight to the death rather than surrender. Typhoon! includes a mechanism which forces certain Out of Supply Soviet units to check each turn for surrender.
6.4.1 During the Soviet Surrender Phase of each game-turn, the Soviet player makes a Surrender Check for each hex which contains any Soviet units which:
a. are out of general supply and
b. are in an enemy ZOC and
c. cannot trace a LOC of any length to a Soviet Supply Source.
Make one Surrender Check for each such hex, not for each unit in each hex.
6.4.2 Hexes containing at least one Guards or NKVD unit (whether in or out of supply), and all city and major city hexes are immune from Surrender Checks.
6.4.3 To make a Surrender check, identify the qualifying hex, then roll one die and refer to the Surrender Table. If the result is "Surrender," all Out of Supply units in the hex immediately surrender. Place them in the Eliminated Box. Units in the hex that are not out of general supply are unaffected and remain in place. If the result is "No Effect," there is no surrender in that hex.
6.4.4 The only DRM to a Surrender Check is a "+1" if the hex is within the command range of a Soviet HQ (regardless of the HQ's supply status). No hex can receive more than a "+1" DRM, no matter how many HQs are within range. A single HQ does, however, give the DRM to all hexes within its command range.
6.4.5 Axis units may not advance (during this phase) into hexes vacated by surrendered Soviet units.
6.5 Attack Supply
In Typhoon!, players must provide Attack Supply to each ground combat attack in order for their units to attack at full effectiveness. Failure to provide Attack Supply causes penalties to the attackers which are in addition to other supply and combat effects.
6.5.1 During the Supply Determination Phase of each game-turn, both players consult the scenario instructions and/or the Axis Attack Supply Chart to determine the number of Supply Points they receive for that turn. Each Supply Point arrives, in the form of Supply Counters, during the Supply Determination Phase. They are placed on the map immediately, as per 14.1, but may not move until their friendly Movement Phase. If insufficient Supply Counters are available, then excess Supply Points are lost; Supply Points cannot be accumulated off-map. Players cannot have more Supply Counters in play at any one time than those provided in the counter-mix. A two Supply-Point Supply Dump can only enter the map on a rail hex and move via rail movement. A one-point MSU may utilize either rail or normal movement (see 6.5.4), or enter by Air Transport (see 11.6).
Note: The Soviet player receives one Supply Point per turn for Moscow. This means he receives one point at the beginning of every strategic segment that he has a friendly combat unit on at least one Moscow hex. Place a supply counter (or flip an existing MSU to its Supply Dump side) on any friendly Moscow hex.
6.5.2 Each Supply Counter has a front and a back side which correspond to the number of Supply Points that the counter represents. The front side of a Supply Counter is a Mobile Supply Unit (MSU), representing one Supply Point. MSUs can move during the friendly Movement Phase. The reverse side of the Supply Counter is a Supply Dump, representing two Supply Points; it cannot move (except by railroad movement). A Supply Counter may never represent more than two Supply Points. A player may, at any time during his Movement Phase:
a. flip a Supply Dump over to its one supply point (MSU) side, forfeit one of the counter's Supply Points, and then move it.
b. combine two (one point) MSUs in the same hex to create a (two point) Supply Dump. In this case, flip one over to its Dump side and remove the other from play. Players will find this procedure helpful in order to accumulate extra supplies in one place and free a Supply Counter to be able to bring forward fresh supplies.
6.5.3 A Supply Counter has no combat strength (and is not a combat "step") and is immediately removed if it is alone in a hex when an enemy unit declares combat against it or enters its hex. It cannot enter an enemy ZOC unless a friendly unit occupies that hex. Supply units cannot be captured. MSUs suffer all retreat combat results; Supply Dumps cannot retreat. When it is removed from play, by expenditure for combat or by enemy action, the counter is again available for play next game-turn (it represents the physical food, fuel, and ammo; not men and equipment). A Supply counter cannot be judged out of supply, regardless of its location.
6.5.4 MSUs: There are two types of MSUs in the countermix. Those MSUs with eight (8) movement points (representing truck-borne supplies) move with the same movement point penalties as a motorized unit (but do not have the extra Movement Phases); those with four (4) movement points (wagon-borne supplies) are the same as non-motorized units. Either type of MSU may utilize strategic movement.
6.5.5 Each attack requires one Supply Point to be Attack Supplied. As the phasing player declares each combat, he declares whether that attack has Attack Supply and designates the Supply Point to be expended. All units in that attack must be able to trace a seven (or five, depending on the weather) hex LOC to a Supply Counter. If not, the attack is not Attack Supplied and no Supply Point is expended. Conceivably, more than one Supply Point could be expended to be sure all combat units in the same attack are attack supplied. Units marked as Out of Supply could, if they can trace a LOC to a Supply Counter at the moment of combat and a Supply Point is expended, still be Attack Supplied, suffering no out of supply penalties for that attack only. The Out of Supply marker remains on the unit(s).
6.5.6 If you use only one Supply Point from a Supply Dump, flip the Supply Counter to its MSU side. If you use both Supply Points from a Supply Dump, or one point from an MSU, remove the Supply Counter from the map. You may reuse it in subsequent turns as Supply Points become available.
6.5.7 If no Attack Supply is provided to a ground combat, the following effects apply:
a. The attacker adds two (+2) to the die roll result.
b. The attacker may not allocate supporting artillery units to that combat.
c. The attack by that force suffers an additional one step loss (see also 8.4.4) if an asterisk is included in the final combat result (see Combat Results Table).
6.5.8 The choice of which combats are deemed Attack Supplied is entirely optional, but a player can provide Attack Supply to no more combats than he has Supply Points.
7.0 How to Move Ground Units
During his Movement Phase, a player can move any number of his units. He moves them through contiguous hexes in any direction or combination of directions. Movement can be affected by supply, terrain effects, weather, and enemy ZOCs. It can be increased by certain special movement procedures.
Procedure:
Move units or stacks one at a time, tracing a path of contiguous hexes through the hex grid. Each unit spends a certain number of movement points from its movement allowance to enter each hex or cross certain hexsides (see Terrain Effects Chart).
7.1 Movement Restrictions
Players move units during the friendly Movement, Reaction, and Motorized Movement Phases. During the Combat Phase, units of either side may advance or retreat after each combat is resolved; this is not considered "movement" for the purposes of these rules, and uses no movement points (MPs).
7.1.1 Move units from hex to adjacent hex. A unit cannot jump over a hex.
7.1.2 There is no limit to the number of friendly units which can pass through a single hex in one game-turn.
7.1.3 At the discretion of the owning player, units can be moved together as a stack (see 3.2). The movement allowance of stacked units is that of the slowest unit in that stack, but faster units can be moved off at any time with the remainder of their movement allowance.
7.1.4 A unit can move only once in a Phase. It can never spend more MPs than its total movement allowance in any one Phase (Exception: see 7.3.3). Units are never forced to move. Unused MPs cannot be accumulated for later use, or transferred to other units.
7.1.5 A friendly unit can never enter a hex containing an enemy ground combat unit. It can move through friendly occupied or controlled hexes (those not in an enemy ZOC) at no extra MP cost.
7.1.6 You may not move a unit off the edge of the map sheet.
Exceptions: see 17.4.2 and 17.4.3, and road movement between hexes N2453 and P1002 — the Smolensk-Roslavl Highway; see 7.3.5 note.
Units forced to retreat off the map are eliminated. Place them in the Cadre Box.
7.2 Effects of Zone of Control
7.2.1 All units cease movement immediately upon entering an enemy ZOC and cannot move further that phase (Exception: Overruns, see 7.8). Units spend one (1) additional movement point to enter an enemy ZOC. There are no MP penalties to leave an enemy ZOC.
7.2.2 Any unit in an enemy ZOC at the beginning of its Movement Phase or Motorized Movement Phase can leave that hex; it can enter another enemy controlled hex during the same phase but only if it first is moved into a hex that is not enemy controlled.
Exception: see 7.2.3.
7.2.3 Infiltration Movement: There are three situations in which a unit can move directly from one enemy ZOC to an adjacent hex in an enemy ZOC:
a. Any motorized unit which has a printed movement allowance of at least seven (7) movement points may do so, and
b. any ski infantry unit may do so during Snow or Arctic game-turns.
Design Note: Ski units were intended to bypass enemy strongpoints and strike the enemy from the rear. Soviet infiltration was most effective during winter because the Axis defense relied on strongpoints.
c. All units, except artillery, may do so if they move into or out of a city or major city hex.
In each case, such a move costs the unit's entire movement allowance (thus, an infiltrating unit cannot perform Overrun) and can be conducted only during the friendly Movement Phase during which the unit would normally have its full movement allowance; thus, it can be made only when the unit begins the phase in the enemy-controlled hex. This movement is not allowed into non-destroyed enemy fortification hexes (see 12.0) or across fortification hexsides, or across major river hexsides.
7.2.4 Friendly ZOCs do not affect the movement of your units.
7.3 Effects of Terrain
7.3.1 Each hex contains one or more terrain types. The Terrain Effects Chart (TEC) identifies the terrain and lists the movement point costs a unit spends to enter various terrain types during different weather conditions (see 5.1). Where a single hex contains more than one type of terrain (for example: clear and hill), units moving through the hex pay the highest movement cost, except when moving on roads under certain weather conditions (See TEC, 7.3.5).
Example: In Dry weather a unit would pay 2 MPs to move through a hex containing both clear and hill terrain.
7.3.2 A unit cannot enter a hex if it does not have sufficient MPs remaining to do so.
Exception: see 7.3.3.
7.3.3 A unit can always move a minimum of one hex during the friendly Movement Phase, even if it lacks the movement points to do so, provided it has spent no movement points during the current phase and the move is merely into an adjacent hex (and is not Overrun). However, the ZOC restrictions of 7.2 do apply, although infiltration movement is still allowed. Only motorized units can be moved this minimum one hex during the friendly Motorized Movement Phase and during the Reaction Movement Phase (if not carrying an Out of Supply marker).
7.3.4 Artillery units and MSUs with a movement allowance of eight (8) pay movement point costs identical to motorized units (because they have that kind of equipment). They are not, however, eligible for motorized or reaction movement (see 7.5).
7.3.5 A unit which moves from one road hex directly into another adjacent road hex through a hexside crossed by the road symbol, spends movement points according to that road's rate regardless of the other terrain in the hex.
Note: The main road that leads off the map at N2453 is the same road that enters at P1002. Players may want to draw in hex N2553 to create the missing road (the terrain type is Clear, with a main road). This is entirely optional.
7.3.6 Roads and Woods: The MP cost for woods is added to the terrain cost of the other terrain in the hex, Thus, for a clear hex which includes woods, the total cost is two MPs (1+1=2) for non-motorized, or three MPs for motorized and artillery; for hills and woods the total cost is three MPs for non-motorized, or four MPs for motorized and artillery. However, a unit moving along a main road through a woods hex ignores all other terrain and pays only the main road movement point cost. When it moves along a minor road instead, it again ignores all other terrain but pays the movement point cost for a minor road in terrain other than clear terrain (meaning: one (1) MP in Dry, Frost, or Snow; or the Other Terrain cost during Mud).
7.3.7 Railroad and Woods: A unit moving along a railroad in a woods hex spends 1 MP less for woods, regardless of weather.
Example: During Clear weather, a non-motorized unit spends no additional MP for woods, and a motorized unit spends only 1 MP, not 2 MP.
7.3.8 A number of terrain features (such as rivers) are found only on the hexside. A unit spends movement points to cross such hexside features, in addition to the cost of entering the terrain in the hex itself. Units crossing river hexsides on a road (bridges exist wherever a road crosses a river hexside) move at that road's rate and do not spend the additional hexside cost for the river. Railroad bridges can be used for ground movement across a river hexside in addition to normal railroad movement (see 7.6).
7.3.9 In order for a unit to cross a major river hexside which has no bridge, it must start its Movement Phase (not the Motorized or Reaction Phases) adjacent to that hexside. It then spends all its movement points to cross the hexside (just as in rule 7.3.3 above) and is placed in the (unoccupied) hex opposite. All units can cross normally, at road movement rate, over a major river hexside crossed by a bridge; these bridges are specially marked on the map, not implied. Units may also cross major rivers by utilizing bridge units (see 13.2). During Snow and Arctic weather, units spend only one (1) MP to cross major river hexsides (without bridges), and need not start adjacent. Regardless of weather, artillery unit types cannot cross major river hexsides without a bridge.
Design Note: All artillery units in this game represent weapons of great physical weight, each of which usually requires an elaborate, and heavy, towing device. All this presents great difficulties in moving across open country, let alone up and down ice covered river banks. By contrast, tanks might weigh more but they have treads and are far more maneuverable.
7.4 Effects of Weather
7.4.1 Use the column on the TEC which corresponds to the current turn's weather condition.
Example: If the weather condition for the current game-turn is determined to be Mud, use the Mud column on the TEC to find the correct cost to enter or cross the various terrain types.
7.4.2 Minor Road and Woods: During Mud weather, ignore woods when moving along minor roads (i.e. 2 MPs for a clear hex with woods).
Design Note: Playtesting showed this exception to be necessary for proper game balance and tactical feel; units would in fact move along the path created by the road, even when these were mud holes.
7.5 Motorized and Reaction Movement Phases
While nearly all units have at least some vehicles, those game units marked as motorized (those with colored boxes around their movement allowance) have both the necessary equipment and tactical doctrine for these special Movement Phases.
7.5.1 During the Motorized Movement Phase the phasing player can move all, some, or none of his eligible units (which would include cavalry and, for the Soviet player, non-motorized units activated by HQs; see 13.1.2a). Check the Movement Allowance Chart for which types are eligible and whether they are moved at full or half their printed movement allowance. Units carrying an Out of Supply Marker or in enemy ZOC can still be moved during this phase.
7.5.2 During the Reaction Movement Phase the reacting player can move all, some, or none of his motorized units which are within three hexes of a declared combat hex up to half their movement allowance. A motorized unit is eligible for reaction movement if it:
a. is in general supply or emergency supply, and
b. is not in an enemy ZOC, and
c. is allowed reaction movement by the Movement Allowance Chart, and
d. is within command range (see 13.1) of a Soviet headquarters unit (Soviet units only), and
e. does not bear an "Overrun" marker.
Note: This Phase gives the non-phasing player the opportunity for local reaction to combat. Thus, if the phasing player has declared no combats at the end of his Movement Phase (Motorized Movement Phase for the Soviet player), no reaction movement is possible.
7.5.3 A unit moved in either phase obeys all rules of movement, ZOC, and supply. During the Reaction Phase a unit cannot move adjacent to an enemy unit or into an enemy ZOC unless it has sufficient movement points and a friendly unit already occupies that hex (note rule 7.3.3). If it enters an enemy ZOC, it does not pay the MP cost to enter enemy ZOC but it stops immediately for the remainder of that phase. Reaction movement need not be into the combat that triggered it, or even toward any combat.
7.6 Railroad Movement
7.6.1 Any combat unit in general or emergency supply that has a movement allowance greater than zero can move by railroad. To do so, the unit must begin on a railroad hex at least three hexes (i.e. at least two hexes intervening) from an enemy ground unit and not be in an air zone of interdiction (see 11.4.3). The railroad used must form part of a supply railroad net per rule 6.1.7.
7.6.2 Units conduct railroad movement only during the friendly Movement Phase. They can move up to 60 hexes along connected railroad hexes which are currently available for friendly railroad movement, changing railroads only at railroad junctions. A unit moving by railroad cannot otherwise move during that Movement Phase. A unit moving by railroad can never be moved within three hexes of any enemy unit (i.e. two intervening hexes) that does not carry an Out of Supply marker, and can never enter an enemy ZOC.
Exception: Soviet Armored Trains; see 13.3.1.
A unit can use railroad movement as many times as desired during a game but only once per game-turn.
7.6.3 Rail Capacity: Both sides can use railroad movement to move only a limited number of stacking points each game-turn. This is their Rail Capacity, and is listed in the scenario instructions for each scenario (see Play Book).
7.6.4 A unit with zero stacking value (such as a headquarters) occupies one stacking point of railroad capacity for railroad movement. A MSU (one Supply Point) occupies one Rail Capacity point; a Supply Dump (two Supply Points) occupies two Rail Capacity points.
7.6.5 Reinforcements for both sides may enter play using railroad movement. They count against Rail Capacity during the game-turn of entry.
7.7 Strategic Movement
7.7.1 Any eligible unit of either side can use strategic movement. To be eligible, the unit must:
a. be in general or emergency supply, and
b. be at least three hexes from an enemy combat unit (i.e. at least two hexes intervening), and
c. not be in an air zone of interdiction, and
d. begin its Movement Phase on a road (main or minor).
7.7.2 Eligible units can conduct strategic movement during their Movement Phase only. Increase their movement allowance for this phase by half. Any fractions are lost.
Example: A unit with a movement allowance of 7 would be increased to 10.
7.7.3 A unit conducting strategic movement moves solely along motorways (for motorized and artillery units), main or minor roads (not railroads) and cannot move within three hexes of an enemy combat unit. A unit can conduct strategic movement as many times as it is eligible during a game but only once per game-turn. Weather does not affect the eligibility of roads for strategic movement.
Note: During Mud turns, other terrain costs apply in minor road hexes, but units may still perform strategic movement through those hexes.
7.8 Overrun
An overrun is an attempt to move into an enemy occupied hex. Although it bears some resemblance to combat (see 8.0), overrun is a function of movement. It is not combat.
During the friendly Movement or Motorized Movement Phase, any motorized combat unit or stack of motorized units (which can achieve at least 7-1 odds; see 7.8.2a) can attempt to overrun an enemy unit or stack. A successful overrun results in either retreat or a step loss for the enemy units. A successful overrunning unit occupies the former enemy-held hex, and can move further, to the extent of its movement allowance.
7.8.1 Only motorized units are eligible to conduct overruns and only one unit, or stack of units (up to ten stacking points), can conduct a single overrun. Units in an overrunning stack must begin their movement stacked together and remain stacked at the instant the overrun is declared.
7.8.2 Restrictions:
a. Odds Ratio: In order to perform an overrun, the overrunning unit or stack must be able to achieve an odds ratio (the sum of its attack strength(s) versus the sum of the defending stack's defense strength) of at least 7-1.
b. Terrain: An overrun cannot be conducted against enemy units behind major river hexsides, or in a city, major city, marsh, swamp, or any type of fortification hex. Overrun is not allowed across a bridged lake hexside — unless frozen — even though an attack is allowed across such a hexside.
c. Weather: No overruns are allowed during Mud or Snow/Storm weather conditions.
d. Multiple Enemy ZOCs: A unit may not conduct an overrun from a hex that is in the ZOC of enemy units in more than one hex. See the diagram below:
The Axis unit in 1117 can move into hex 1116 and declare an overrun into 1216. It cannot move into 1217 and declare an overrun, because 1217 is in the ZOC of enemy units from more than one hex.
e. Supply: No unit conducting an overrun can be carrying an Out of Supply Marker. Attack Supply is not used during overrun.
f. Artillery Units: Artillery units cannot conduct overruns or be part of an overrunning stack (Although Axis anti-aircraft battalions are allowed to do so). Non-adjacent artillery cannot provide offensive or defensive fire support (neither side may conduct Close Air Support missions). If only artillery-type units are defending in an overrun hex, they use their defense strength(s) only. See, also, 10.2.2.
7.8.3 Procedure:
a. Move the phasing unit or stack adjacent to the hex to be overrun, paying normal terrain and ZOC costs to do so, and declare the overrun. Or, if the overrunning unit/stack begins its Movement Phase adjacent to the hex to be overrun (but remember 7.8.2d), simply declare the overrun.
b. Each phasing unit expends one movement point as the overrun MP cost plus the terrain cost for the hex occupied by the unit(s) to be overrun (pay road costs when the two hexes are connected by a road). There is no additional cost to enter a ZOC in the overrun hex.
Example: if the overrun hex is hill terrain, the total MP cost is 1 MP to overrun plus 2 MP for the hill for a total of 3 MP, plus the cost to cross the hexside (if any).
c. Leave the units eligible for overrun in the hex adjacent to the hex being overrun. Units not eligible to conduct overrun can remain adjacent but cannot participate in the overrun.
d. Now total the attack strengths of the units conducting the overrun to determine if any odds DRMs apply to the overrun.
e. Now roll one die and refer to the Overrun Table. Apply only the Table's listed DRMs.
f. If the overrun is successful, the defending units are either retreated by the phasing player two hexes (or eliminated, if they cannot retreat), or they lose one step and are retreated, as above. Units which are retreated as a result of an overrun cannot be retreated through an enemy ZOC, unless that hex contains a friendly unit. Units forced to retreat through an enemy ZOC are eliminated. Place them in the Eliminated Box.
Design Note: The Germans did not consider a breakthrough successful until they overwhelmed the enemy's artillery positions. Unsupported artillery and very weak artillery were the intended victims, but most units that found themselves in the way of such a mechanized onslaught were merely pushed aside, not necessarily destroyed.
A Supply Dump in the defending hex cannot be retreated or converted during an overrun and remains in play only if the overrun fails. A MSU suffers the fate of the combat units with which it is stacked.
g. Place the phasing (attacking) units in the vacated hex. If that hex is in the ZOC of an enemy unit, the overrunning stack's movement is finished for the phase unless it can perform another overrun (and note especially 7.8.2d) against the unit(s) in the hex projecting that ZOC. If the hex is not in an enemy ZOC, the overrunning unit/stack can continue moving, to the limit of its remaining movement allowance and can conduct additional overruns if sufficient movement points are available.
h. If the overrun fails, the phasing (attacking) units remain in their currently occupied adjacent hexes; they cannot move for the remainder of the phase. They can, however, conduct regular combat during the ensuing Combat Phase.
7.8.4 Mark non-phasing units which are retreated as a result of overrun with an "Overrun" marker. A unit bearing an "Overrun" marker:
a. loses its ZOC, and
b. cannot conduct fire support (if it is an artillery unit; see 10.1), and
c. is not eligible for reaction movement (see 7.5.3). Additionally,
d. Overruns against a unit which already bears an "Overrun" marker receive a -1 DRM.
7.8.5 A single overrun cannot be directed against units in more than one hex.
7.8.6 A single defending (non-phasing) force can be the object of more than one overrun attempt (even if the first overrun was not successful, other phasing units could also attempt to overrun the stack). After being retreated in an overrun, that same defending force could, conceivably, be the object of a second (or third) overrun attempt by the same successful group of phasing units in their new hex.
8.0 Combat
Combat occurs between adjacent opposing units at the phasing player's discretion. The phasing player is termed the Attacker; the other player is the Defender, regardless of the overall strategic situation. Attacks are resolved individually according to the procedure in 8.4.
Procedure:
a. The attacking player totals the attack strength and artillery support strengths of all units involved in this specific attack.
b. The defender totals the defense strength of all units which are the object of a specific attack and includes any artillery support strength committed to that combat during his Reaction Phase. Divide the total attacking strength by the total defending strength to arrive at a combat odds ratio, which is rounded off, always in favor of the defender (example: 29 to 10 is 2-1 odds), to the nearest ratio listed on the Combat Results Table.
Exception: units are not forced to attack enemy units across major rivers. See 8.3.6b.
If a non-phasing combat unit has only non-attacking enemy units in its ZOC, then it need not be attacked. A phasing combat unit can remain in an enemy ZOC without attacking, even if that enemy occupied hex is attacked by another unit.
8.1 Which Units Attack
8.1.1 Units can attack only during a friendly Combat Phase. The phasing player declares all attacks during his Movement Phase (Motorized Movement Phase for the Soviet player), and designates each with a "Declared Attack" marker. Although attacking is voluntary, once an attack is declared, it must be made.
8.1.2 An attacking unit is eligible to attack all adjacent enemy occupied hexes, except those into which it could not normally move (see TEC). When any phasing unit attacks, all non-phasing (enemy) combat units which project a ZOC into the attacking unit's hex must be attacked by either the attacking unit in question, or by another eligible attacking unit.
8.1.3 A unit can attack only if it is in a hex adjacent to the defending units.
Exception: artillery units; see 10.0.
8.1.4 An enemy occupied hex can be attacked by as many units as can be brought to bear in the six adjacent hexes, with possible additional artillery fire support (see 10.1).
8.1.5 No unit can attack or be attacked more than once per Combat Phase.
Note: Overruns (see 7.8) are not attacks.
8.2 Multi-unit and Multi-hex Combat
8.2.1 Units in two or more hexes can combine their combat strengths to attack a single hex, if all the attacking units are adjacent to the enemy occupied hex.
8.2.2 An Attack can involve any number of attacking or defending units and can be directed against more than one defending hex. For the attack to be resolved as a single combat, however, all the attacking units must be adjacent to all the defending units.
8.2.3 All units defending a given hex must be attacked as a single, combined defense strength. The defender cannot withhold a unit in a hex under attack.
8.2.4 A given unit's combat strength cannot be divided among different combats or loaned to other units.
8.3 Effects of Terrain
8.3.1 Only defending units benefit from the terrain in the hex they occupy and from that hex's hexsides. Terrain in hexes occupied by attacking units has no effect on combat.
Exception: see 8.3.6a.
8.3.2 Certain terrain effects or supply conditions will halve a unit's/stack's combat strengths. When making this computation, add together the strengths of all the affected units, halve the total and retain fractions. Halving is cumulative but a group of units involved in a single combat cannot be reduced to less than one strength point. Other terrain types and combat conditions will cause a combat DRM of one or more points, and again, these effects are cumulative. See 8.4.3.
8.3.3 A defending unit benefits from the terrain it occupies as well as the terrain in all hexsides through which it is attacked. However, hexside benefits apply only if all attacking units are attacking through that type of hexside and all defending units are behind that hexside type or a combination of two types (such as river and fortified line) that have the same effect. Whenever the defender's hex is affected by more than one type of terrain, the effect is cumulative (such as hill behind a river).
8.3.4 When two or more defending hexes are being attacked in a single combat, if the units in any one hex are in or behind terrain which causes a DRM, then the DRM is applied.
8.3.5 A unit cannot attack across a hexside that it is prohibited from moving across, unless an enemy ZOC currently extends across that hexside. For example, motorized units cannot attack into swamp unless enemy ZOC extends from that hex (here, normal combat occurs but victorious attacking motorized units could not advance after combat; see 8.9) or unless advancing along a road.
8.3.6 Special Terrain Combat Effects
a. Swamp: Swamp gives no beneficial DRM to a unit defending in it but the combat strength of units attacking from a swamp hex is halved. Artillery units are not halved when firing from swamp.
Design Note: The key to any defense is concealment and the need to keep the attacker at a distance, therefore the main line of resistance in a swampy region is either deep inside the swamp or behind it. In either case, the attacker must cross a difficult region before closing with the defense.
b. Major Rivers: Units attacking across a major river hexside have their attack strength halved, regardless of whether other friendly units in the same combat are on the far bank and are not attacking across a major river hexside. (see also 8.2.1). Units are not obligated to attack adjacent units across a major river hexside during Clear, Mud, or Frost weather.
c. Cities and Major Cities: When units (of either side) attack into a city hex, there is a +1 DRM to the combat die roll.
When an attack is made into a major city hex, the DRM is +1 for Soviet attacks and +2 for Axis attacks.
See 9.1.2 and 9.1.3 for terrain combat restrictions and effects on armor units.
8.4 Combat Resolution
8.4.1 Procedure:
a. The attacking player totals the attack strength and artillery support strengths of all units involved in this specific attack.
b. The defender totals the defense strength of all units which are the object of a specific attack and includes any artillery support strength committed to that combat during his Reaction Phase. Divide the total attacking strength by the total defending strength to arrive at a combat odds ratio, which is rounded off, always in favor of the defender (example: 29 to 10 is 2-1 odds), to the nearest ratio listed on the Combat Results Table.
c. Now roll one die and apply DRMs for terrain, fortifications, engineers, No Retreat option, Close Air Support, Combined Arms Bonus, Panzer Division Integrity, and supply status on attack and defense. Adjustments are cumulative. Cross-index the final numerical result with the odds column on the Combat Results Table. Immediately apply the combat result to the involved units before going on to any other combat. Separate combats are resolved in any order that the attacker desires.
8.4.2 Combat results are as follows:
| Result | Effect |
|---|---|
| #(1-4) | The affected force loses one to four steps, as indicated (see 8.5). Possible additional loss; see 8.4.5, 9.3. |
| R | All of the remaining affected units are retreated. |
| e | All affected units are eliminated. |
| — | Nothing happens; there is no step loss and no retreat after combat. |
8.4.3 You cannot declare an attack in which initial combat odds (before defender reaction, combat support, etc.) are worse than 1-4; in any combats with final odds worse than 1-4, the attacking units are automatically eliminated ("e" result) while the defending force suffers nothing. Combat odds greater than 10-1 are resolved as 10-1. The attacker cannot voluntarily reduce combat odds; for example, he cannot declare 3-1 odds when he has 4-1 odds.
8.4.4 Apply all applicable DRMs to the combat die roll result. These are summarized on the Combat Effects Chart and include effects of terrain, supply, air power, special units, and special conditions. Net out all the DRMs; each +1 DRM offsets a -1 DRM. The DRM total remaining after offsetting is the Cumulative DRM.
Note: Cumulative DRMs can never be greater than +3 or less than -3.
8.4.5 Certain results for the attacker have been marked with an asterisk. Such results indicate that the attacking force must lose one extra combat strength level if:
a. it attacks without Attack Supply (regardless of general supply status), or
b. it attacks a non-destroyed enemy fortification, or
c. if it is making a Mandated Attack (Soviet only; see 16.0)
These effects are cumulative, so conceivably the attacker could lose a total of two (Axis) or three (Soviet) extra steps.
8.5 Combat Results and Unit Steps
8.5.1 When a loss of combat strength is required, the owner removes the indicated number of combat strength levels (called "steps") from the total force, not from each unit in that force.
8.5.2 A combat unit possesses up to four steps. For both sides, all units with a printed defense strength (on their full-strength side) of eight (8) or more have four (4) steps. All units with a printed defense strength of five (5) or more have three steps. All other units with values on both sides of their unit counter have two steps. Those with values on only one side of their counter have one step.
The step loss process: a 4-step unit takes a Step Loss marker on its Full Strength side after the first loss (lowering attack/defense by two each), a second loss flips it to its Reduced Strength side, a third loss adds a Step Loss marker to the reduced side (lowering attack/defense by two each again), and a fourth step loss removes the unit from play. A 3-step, 2-step, or 1-step unit follows the same process for its own number of steps, with the final loss removing it from play (Eliminated).
8.5.3 Extracting Losses: When called for on the Combat Results Table, a unit takes losses in the form of steps. When a four step unit takes its first loss, place a Step Loss marker directly on top of its Full Strength side. A Step Loss marker lowers the unit's attack and defense strengths by two (-2) each for all purposes. If that unit loses another step, remove the marker and flip the unit to its reverse (Reduced Strength) side. A third step loss (for four step units) is indicated by placing a Step Loss marker on top of the reduced unit, which decreases its Reduced Strength attack and defense strengths by two points each. A fourth step loss removes the unit from play.
A unit obliged to lose more strength levels than it has available is removed from play. The step-loss process is slightly different depending on how many steps a unit represents (see 8.5.2).
8.5.4 When a unit is removed from play due to combat losses, it is placed immediately in either the Cadre Box or Eliminated Box, depending on how it was eliminated. Units eliminated by an "e" result, or removed because they cannot retreat due to being completely surrounded by enemy units or impassable terrain, are placed in the Eliminated Box. One-step units which suffer a step loss during Overrun go to the Eliminated Box. All other units reduced beyond their last step are placed in the Cadre Box.
8.6 Retreats
When a combat result includes the Retreat ("R") result, the owning player immediately moves the affected units individually two hexes in any direction away from their combat position. If the unit is unable to retreat within the restrictions below, it is eliminated. Place it in the Eliminated Box.
Exception: Units bearing a No Retreat marker are not required to retreat when they receive an "R" result. See 8.8.
8.6.1 You cannot retreat a unit through two consecutive enemy ZOCs, onto prohibited terrain, across a prohibited hexside, or onto or through enemy combat units.
8.6.2 You cannot retreat a unit into or through an enemy ZOC unless either:
a. that hex contains a friendly combat unit, or
b. it does so under the procedure in 8.6.3 below.
8.6.3 Retreat Through Enemy ZOC
Note: Units utilizing Additional Retreat (8.7) cannot retreat through enemy ZOCs.
a. A unit (or stack) is allowed to retreat through one hex in an enemy ZOC (incurring at least a one step loss, as noted below) while retreating, but must resolve a retreat die roll after the retreat to determine the fate of the retreating units.
-
If an Axis unit is retreating, a die roll of five (5) or less means the unit (or stack) retreats successfully, and loses one step (from the stack, not per unit) at the end of the retreat. A roll of six (6) or more means that the retreat fails. All retreating units are eliminated and placed in the Cadre Box.
-
If a Soviet unit is retreating, a die roll of three (3) or less means the unit (or stack) loses one step (from the stack, not per unit) at the end of the retreat. A roll of four (4) or more means that all retreating units are eliminated and placed in the Cadre Box.
-
Both players may subtract two (-2) from the above die roll if either of the hexes through which the unit(s) retreated was a Woods hex.
b. The retreating unit or stack cannot retreat more than two hexes from its original combat position, unless it would be overstacked in the second hex it enters (see 8.6.4).
8.6.4 A unit can retreat through a hex containing friendly units, even if that means (temporarily) exceeding stacking limits. A unit cannot end its retreat in violation of stacking limits. If it has no alternative but to be overstacked in the second hex of retreat, move it one extra hex away from its original combat position. If still overstacked in the third hex, it is eliminated ("e") and placed in the Eliminated Box.
8.6.5 Bridge units and Supply Dumps cannot retreat and are removed if required to do so. MSUs retreat like all other units. Strongpoints always remain where placed, and are destroyed by non-combat methods (see 12.1.9 and 6.3.6).
8.7 Additional Retreat Option
Design Note: During this campaign, both sides exercised at least some control over retreats. The difference was that, during 1941, Soviet units were fully dependent on nearby HQs for retreat orders. Sections 8.7 and 8.8 offer players two additional retreat options.
8.7.1 Either side can declare the Additional Retreat option for his units in any ground combat (see HQ restriction on Soviets; 13.1.2c). The defender declares it during his Reaction Phase (before the combat is resolved) by placing an Additional Retreat Marker on top of the defending unit (or stack of units). The attacker places his Additional Retreat Marker just before he resolves the combat (after the enemy Reaction Phase).
8.7.2 If the combat result indicates an "R", for units bearing an Additional Retreat marker, the opposing player retreats the affected units three hexes in any direction he desires. The affected units benefit by taking one step less of combat losses, except those required by an asterisk result. Units using this option cannot be retreated through enemy ZOCs. If they must, they are eliminated. Units must be retreated a full three hexes away from the original combat position (or four hexes, if overstacked as per 8.6.4 above) or be eliminated ("e").
8.8 No Retreat Option
Due to the fanatical defensive combat by both sides during the campaign, both players always have the option not to retreat their units, regardless of whether attacking or defending. There is, however, a cost for not retreating.
8.8.1 Either side can declare a No Retreat option for any ground combat (see restriction on Soviets; 13.1.2c). The defender declares it during his Reaction Phase (before the combat is resolved), and places a No Retreat Marker on top of the defending unit (or stack of units). The attacker declares No Retreat (and places the No Retreat marker) for his attacking units before he resolves the combat (after the enemy Reaction Phase). When a player places a No Retreat marker for a particular combat, it applies to all of his units in that combat. Units in a hex containing a No Retreat marker cannot retreat, regardless of the combat result. See 8.8.3.
8.8.2 The Attacker must add one (+1) to his die roll result for any combat which involves defenders with a No Retreat Marker. There is no DRM involved for attackers declaring No Retreat.
8.8.3 If combat results call for a retreat, units with a No Retreat marker are not retreated; instead, that group of units must lose two additional steps and remain in place. The loss can be from any unit (or combination of units) in that force. The affected group of units will lose only one additional step (not two) if it is either:
a. in a city, major city, hills, or woods hex, or in a non-destroyed fortification, or in a town during Mud, Snow, or Arctic weather; or
b. if all of the affected units are Axis units.
8.9 Advance After Combat
When the original defending hex is vacated as a result of combat, attacking units can advance into the vacant hex. Advances are useful in cutting off the retreat of enemy units whose combat has not yet been resolved.
8.9.1 A player must exercise the option to advance immediately, before resolving any other combats. A player is not forced to advance a unit. After advancing, units cannot attack again in that phase, even if their advance places them adjacent to enemy units against which combat is yet to be resolved or which are not involved in combat.
8.9.2 Only victorious attacking units which participated in that combat can advance. Artillery units cannot advance.
8.9.3 The advance must be into the hex that was attacked. Advancing units ignore enemy ZOC to enter the hex.
8.9.4 Units cannot violate stacking limits at the end of an advance after combat.
8.9.5 In the case of multiple hex combat, victorious units can be advanced from any hex from which the attack was made and into any hex vacated by the defender as a result of combat, subject to stacking limits.
9.0 Armor in Combat
Many infantry formations suffered "tank fright," called "Tankoboyan" by the Russians, and "Panzerschreck" by the Germans.
9.1 Combined Arms Bonus
9.1.1 When any attacking force includes at least one armor unit and at least one motorized infantry, motorized engineer, engineer, or motorcycle unit, and there is no defending armor unit, AT unit, or AA unit, the attacker subtracts one (-1) from the die roll result for that combat.
9.1.2 Restrictions: The Combined Arms Bonus does not apply against defending units in hills, woods, or non-destroyed fortifications.
9.1.3 Armor units are halved in strength and no Combined Arms Bonus applies when attacking city or major city hexes, or across major river hexsides. This is not in addition to rule 8.3.6a or b; units are halved only once. Rule 8.3.6c does apply in addition to this section.
9.1.4 The Combined Arms bonus does not apply during Mud, Snow, or Arctic weather.
9.2 Panzer Division Integrity Bonus
9.2.1 When enough component units of a German Panzer Division or German Motorized Division are attacking the same defender, the Axis player subtracts one (-1) from the die roll result for that combat for each qualifying Panzer and Motorized division. This bonus applies even if the component units are attacking from different hexes or if any of them has been reduced in strength.
9.2.2 A Motorized Division cannot qualify for this bonus unless a Panzer Division also qualifies in the same combat.
9.2.3 The following conditions allow a Division to qualify for this bonus:
a. None of the necessary component units can be Out of Supply.
b. A Panzer Division must have three component parts present: its Panzer regiment plus one of its motorized infantry regiments plus either the second motorized infantry regiment or the recon unit.
c. The Motorized Division must have all three of its units present (two motorized infantry regiments and the recon unit).
Exception: The SS Reich Division needs only three of its four component units present to qualify.
9.3 Armor Attrition
9.3.1 If an asterisk result is included in the combat result, and
a. if both the attacker and the defender have armored units in the same combat, the armored unit on both sides takes the first step loss by that side (that loss being the one not required by lack of supply).
Note: If no step loss was indicated by the combat result, there is no armor attrition.
b. if the attacker has an armored unit and the defender has an anti-tank (or anti-aircraft) unit, then the attacker's first step loss must be an armored step.
9.3.2 Note that in certain circumstances an attacking engineer unit (see 12.3) will take a step loss before the armor unit.
10.0 Artillery Fire Support
Artillery units can participate in combat either from adjacent or non-adjacent hexes. The artillery unit's support strength is used to supplement the strengths of other friendly units in combat. Attacking and defending artillery units need not be adjacent to, but must be within range of, the defending unit in a given combat. An artillery unit can use both its support and defense strengths in a single game-turn (not phase), but never together in a single combat. See 10.2.1, 10.2.2.
10.1 Fire Support
Fire Support is conducted by supplied artillery units in conjunction with any friendly non-artillery units which are engaged in combat. Artillery units must be in general supply to provide defensive fire support, and in Attack Supply (that is, they must be able to trace the five or seven hex LOC (see 6.4.5) to the MSU or Supply Dump that is providing Attack Supply for the attack) to provide offensive fire support.
10.1.1 Artillery units can (but are not forced to) attack non-adjacent enemy units if they are within range. An artillery unit cannot attack an enemy unit which is not already being attacked by an adjacent non-artillery unit.
10.1.2 A non-phasing artillery unit can (but is not forced to) use its support strength to supplement the defense strength of one friendly defending force within its range. Add the artillery unit's support strength to the total defense strength of the defending force before computing combat odds.
10.1.3 All artillery units have a range printed on the counter (usually 2 hexes). Count range from the artillery unit to the defending unit (enemy or friendly) by including the defending unit's hex but not the artillery unit's hex.
10.1.4 Up to four artillery units can combine their strength to support any one combat, provided all are within range of the defending hex. However, Soviet artillery units cannot combine (i.e. no more than one can participate in a single combat) unless:
a. all participating artillery units are stacked with a headquarters (not necessarily the same one), or are in the defending hex (or a combination of both locations) and
b. all are within range of the defending hex.
Note: The number of Soviet artillery units that may support a combat can be reduced by Axis Air Interdiction. See 11.4.3c.
10.1.5 During his Reaction Phase the defender declares which artillery units will support each combat. The attacker declares his artillery fire support during his Combat Phase, one combat at a time.
10.1.6 Non-adjacent artillery units of either side supporting at range suffer no combat results; they are not reduced, eliminated, retreated, or advanced after combat.
10.1.7 Artillery support cannot nullify the effects of terrain on combat for other units, but support strength is not halved when firing across major river hexsides or when firing from swamp. Artillery can fire into and/or over swamp hexes.
10.1.8 Artillery support strength points cannot exceed the total attack or defense strength of the friendly force being supported in a given combat.
Example: If a unit with two (2) defense strength points is defending alone in a hex and a three (3) support point artillery unit is within range, no more than two (2) support points are allowed from that artillery unit (the final point is ignored; it cannot be used anywhere else).
10.2 Artillery in Combat
10.2.1 If defending alone in a hex, or if defending in a hex containing only artillery-type units, an artillery unit uses its defense strength, not its support strength, for that combat. Other artillery not in the hex but within range may provide defensive support.
10.2.2 If defending in a hex with one or more non-artillery units, an artillery unit uses its support strength for that combat. When providing support fire in its own hex, it will suffer combat effects of reduction, elimination, or retreat in the same manner as other units in the stack.
10.2.3 An artillery unit cannot support a friendly defending unit not stacked in the same hex if the artillery unit is in an enemy ZOC or if at any time an enemy combat unit with a ZOC moves adjacent to it before the supported combat is resolved.
10.2.4 An artillery unit that is Out of Supply cannot use its support strength in defense. It cannot use its support strength to support an attack unless that attack is attack supplied.
11.0 Airpower
Both sides employed substantial air forces during this campaign. Air units in the game represent virtually all the tactical combat aircraft engaged by both sides. Each air unit generally represents one fighter or bomber group. During a game-turn an air unit can fly one Close Air Support (CAS) mission. Alternately, an Axis unit may fly one Interdiction mission and the Soviet player may fly fighters (only) to oppose the Interdiction mission. Air combat occurs when opposing air units are committed to CAS missions for the same ground combat, or when Soviet air units oppose an Axis Interdiction mission.
11.1 Air Units
11.1.1 There are two types of air units in the game: Fighters (marked "F" on the counters) and Bombers (marked "B"). Air units do not have "steps" like ground units and so cannot be taken as losses in ground combat, although they are subject to losses from air combat (see 11.2).
Design Note: All air units have their aircraft type marked on the counter. This is for historical reference only. The Soviets usually employed more than one aircraft type in their air formations, so the type listed is the prevailing type in that unit.
Both sides have two "Dummy" air units to aid in deceiving the opponent concerning the content of an air mission (see 11.1.6).
11.1.2 Air units for both sides are kept in the appropriate box of the Air Operations Card whenever they are not in use. The capacity of each box is unlimited. At the start of the game, air units are placed in the box indicated on the players' respective Set-up Cards. Most begin in the Ready box. When a unit flies a mission, take it from the Ready box and place it on the map in the Mission Hex. As units complete their mission for the game-turn, they are returned to the Flown box. If they were affected by air combat results or AA Fire results, they might be returned to the Damaged or Destroyed boxes instead (see 11.2 and 11.3).
11.1.3 Readiness: During the Air Readiness Phase of the Strategic Segment of each game-turn, roll one die for each air unit. If the die roll lies within the range (adjust for weather DRMs; these are cumulative) listed in the box the air unit occupies, it is moved up the track by one box. Units that do not pass the die roll remain in the box they occupy. Don't make readiness die rolls for Dummy air units. They are automatically placed in the Ready box at the end of the Air Readiness Phase. Units starting in the Ready box automatically remain in that box.
Exception: see 11.1.4.
11.1.4 Storm: On all Storm weather game-turns, all air units of both sides which start the Air Readiness Phase in the Ready box are immediately placed in the Flown box. Each of these units must then pass the usual die roll to be returned to the Ready box (see the Air Operations Card).
11.1.5 A player may perform missions with as many air units (that are in the Ready box) as he desires during each game-turn. An air unit is not available to fly a mission unless it is in the Ready box.
11.1.6 Air Missions: Each air unit in the Ready box may perform one air mission per game-turn (Each player may allocate each Dummy unit to one mission per turn.). Axis aircraft may perform either an Interdiction (see 11.4) or a CAS (see 11.5) mission. Soviet air units may perform CAS missions, but not Interdiction missions. Soviet Fighters may fly to oppose German Interdiction missions. Each side may allocate a maximum of three air units (including either or both of their Dummy air units) to a single mission.
11.1.7 When allocating an air mission, the owning player simply places his air unit(s) in the target hex desired (he does not move them hex by hex across the map); this is called the Mission Hex. There is no range limitation.
Exception: Moscow Air Defense Corps units cannot fly missions to Mission hexes more than ten (10) hexes from a Moscow hex, unless released. See 13.7.
Axis air units performing an Interdiction mission can be placed anywhere on any map. Soviet fighters opposing an Interdiction mission are placed in the Mission hex occupied by the Axis unit(s) on that mission. The Mission hex for a CAS mission must be a hex containing a Declared combat marker. Air units are placed upside down on their Mission hex. Their identity and strength is unknown to the enemy player until air combat (see 11.2) is resolved.
11.1.8 The Axis player allocates Interdiction missions (and the Soviet sends opposing fighters) during the Axis Interdiction Phase of each game-turn. Both sides are eligible to perform CAS missions with Ready air units during the Combat Phase of either player-segment. When performing either type of mission, follow the mission sequences listed in 11.4.1 and 11.5.4.
11.2 Air Combat
When both players fly air units to perform a mission in the same hex, air combat occurs between those units.
11.2.1 Whenever the air mission sequence directs the players to perform the air combat procedure, complete the steps below in order.
11.2.2 "Firing" in Air Combat: The rules often refer to units which fire in air combat. A firing unit is one for which the player rolls on the Air Combat Table. Note that:
a. Only fighter ("F") units can fire in air combat. Bomber units may be the targets of fire, but they never fire back.
b. To fire, subtract the target unit's Air Combat Rating (ACR) from that of the firing unit. Then roll one die and refer to the column on the Air Combat Table which is equal to this difference.
Example: An Me-109 (ACR of 4) firing at a MiG 3 (ACR of 2) fires on the "+2" column of the Air Combat Table. The MiG 3 returns fire on the "-2" column.
c. Units that fire in air combat cannot perform Close Air Support or Interdiction. Instead, they return to the Flown box at the conclusion of the Air Combat Procedure. Note that, because bomber-type units cannot fire during air combat, they are always eligible to perform Close Air Support or Interdiction if they survive air combat. For fighter units with a CAS Rating (and all Axis fighter units on Interdiction missions; see 11.4.1a), the players have the option of firing in air combat, and giving up the mission (in essence, jettisoning their bomb load), or choosing not to fire (or return fire) in air combat and continuing the mission (if they survive).
11.2.3 Air Combat Procedure:
a. Players first determine which side has Air Initiative for this combat. Roll one die and refer to the Air Initiative Table. The result will indicate which player gets to choose the engagements for this combat, or it may indicate that all bombers reach the target safely and there is no air combat for this mission. It might also indicate that the player with the initiative may get to fire a second time with any fighters that are unengaged after the air combat.
If the result indicates that the bombers get through to the target and there is no air combat, players return all fighters to the Flown box. Only bombers may continue the mission. In this case, the Air Combat Procedure is concluded. Return to the Air Mission Sequence (11.4.1 or 11.5.4).
b. Both players flip their air units and reveal them to their opponent.
c. The player who has initiative now selects which friendly air units fight which enemy air units. All enemy fighters must be engaged by friendly fighters before any bombers can be attacked. If one player has more air units than the other, excess units may "gang up" on an enemy air unit. Fighters attacked by more than one enemy unit can only fire at one of the attackers.
d. Each player declares which of his eligible air units will fire (remember 11.2.2a and c), and rolls one die for each firing unit, referring to the Air Combat Table for results. All fire is considered to be simultaneous, so all units fire before any results are applied.
e. Both players allocate losses, and return any affected units to the appropriate box on their Air Operations Card. See the Air Combat Table.
f. Local Tactical Advantage: If the Air Initiative result allows one player Local Tactical Advantage, and if that player now has any unengaged Fighters, he selects a new target for each of his unengaged fighters, and fires again, allocating losses, if any, to the affected unit(s). The targets of such fire cannot return fire.
g. Both players indicate which remaining air units will continue the mission, and return those which will not continue (including all units which fired in air combat) to the Flown box. Return to the Air Mission Sequence (11.4.1 or 11.5.4).
Note to Solitaire Players: There are two good ways to play this air system solitaire.
-
The "I'm in control" method. Don't use the Dummy air units. Keep all units face up at all times. Make the best moves you can for each side.
-
The "I want to be surprised" method. Keep the Dummy air units. After performing the Readiness die roll each turn, separate each side's Ready air units into two groups; all fighters ("F") in one group, all bombers ("B") in the other. Place one Dummy unit with each group (if you have only fighters or only bombers in the Ready box, you'll only have one group. Place both Dummy units there). Then flip all air units (of both sides) to their back (unknown) sides. When you allocate air missions, allocate blindly, so you'll know only the number of air units of each type that you will allocate to each mission, not their identities or values. Reveal them normally during combat, and you'll be surprised! Once air units are revealed, make the best moves you can for each side.
11.3 AA Fire
11.3.1 After the completion of the Air Combat Procedure, surviving air units which will perform CAS or Interdiction missions undergo AA Fire, if there are enemy units present which are eligible for AA Fire. For purposes of eligibility, AA Fire is considered to be coming from the Mission Hex and all six surrounding hexes. If any unit in those hexes is eligible, AA Fire takes place. Otherwise, there is no AA Fire against the air units of that mission. AA Fire against air units is resolved on the AA Fire Table.
11.3.2 Eligibility: All units are eligible for AA Fire except:
a. Soviet non-HQ, non-AA units of less than division size.
b. Axis units which have a "No ZOC" band.
11.3.3 To resolve AA Fire, each player fires once against each enemy air unit remaining in the mission (regardless of the number of ground units in that hex). Apply the DRMs listed below the AA Fire Table. Results are either No Effect, Aborted, Damaged, or Destroyed.
11.3.4 Air units which survive AA Fire successfully perform their mission (see 11.4.1e and 11.5.4d).
11.4 Air Interdiction Missions
Because of his overall air superiority, only the Axis player is allowed to conduct Interdiction.
11.4.1 Interdiction Mission Sequence:
a. During his Air Interdiction Phase, the Axis player can assign any of his Ready air units to Interdiction missions, including those with a zero CAS Rating (assume their CAS Rating is one (1) for an Interdiction mission). He can place up to three interdicting air units in any hex he wishes to interdict (it does not have to be occupied by an enemy unit).
b. The Soviet player can then allocate fighters (only) to oppose the mission.
c. If the Soviet player allocates fighters, the players perform the Air Combat Procedure (see 11.2.3).
d. Interdicting Axis air units which survive and did not fire in air combat then undergo AA fire in the target hex.
e. Surviving Axis air units cause an Interdiction Marker to be placed in the interdicted hex.
f. Return all surviving Axis units to the Flown box.
11.4.2 Interdiction affects the interdicted hex and the six adjacent hexes; this is called the Zone of Interdiction. Zones of Interdiction may overlap. However, the maximum Interdiction level in any hex is two (2).
11.4.3 A Zone of Interdiction causes the following effects:
a. Units moved by railroad movement (including armored trains; see 13.3.1) through interdicted hexes spend 12 railroad movement points for each interdicted hex instead of the normal one railroad movement point for the hex. Multiple or overlapping zones do not cause any additional effect on railroads.
b. Units cannot conduct strategic movement through an interdicted hex.
c. All Soviet HQ units within the Zone of Interdiction have their command value reduced by an amount equal the sum of all zones which affect their hex (maximum of two (2)).
11.4.4 Normal movement and supply routes are not affected by interdiction.
11.4.5 Remove all Interdiction markers during each turn's Game-Turn Record Interphase.
11.5 Close Air Support Missions
Air units can aid friendly ground units in both attack and defense.
11.5.1 An air unit can be used to support an attack on any hex that friendly combat units are attacking or to support friendly combat units in defending that hex.
11.5.2 Air units cannot attack ground units by themselves or defend empty hexes by themselves.
11.5.3 If, after concluding the CAS Mission Sequence, the attacker has air units remaining, he subtracts the combined CAS ratings of his air units from the die roll result for that combat. If the defender has air units remaining, he adds the combined CAS ratings of those air units to the die roll result. The effects are cumulative (often, one player's CAS Rating offsets that of his opponent).
11.5.4 CAS Mission Sequence
a. During the Combat Phase of each player-segment, both players can assign any of their Ready air units to CAS missions in hexes where combat has been declared. Each CAS mission can be composed of up to three air units (any mix of Fighters, Bombers, or Dummies). Place CAS mission (with air units inverted) in the desired Mission hexes.
b. Perform the Air Combat Procedure (see 11.2.3) for each Mission hex that contains both side's air units.
c. Air units which survive and did not fire in air combat then undergo AA fire (see 11.3).
d. Surviving air units cause a favorable DRM (equal to their Total CAS Rating(s)) to the ground combat die roll.
e. Return all surviving units of both sides to the Flown box.
11.6 Air Transport
During the battle for Moscow, both sides made limited but significant use of air transport to move both troops and supplies.
11.6.1 Both players can move MSUs by air transport. Additionally, the Axis player can move his "Koch" combat unit by air transport and the Soviet can move any HQ and any of his three "Abn" units by air transport.
11.6.2 Units to be moved by air transport must start on a friendly town, city, or major city hex, or can start from off the map. They can be moved any distance, without regard to terrain, to another friendly town, city, or major city hex. Transport units during the friendly Movement Phase. Transported units may not move further on the turn they are transported.
11.6.3 Each player may perform a limited number of air transport missions during the game, as indicated by the scenario instructions.
11.6.4 Air transport cannot be opposed by enemy fighters, and is not subject to AA Fire. A unit cannot be transported to a hex in an enemy Zone of Interdiction. No air transport is allowed into or out of a town hex during Mud weather unless an engineer is present in that town hex. Axis air transport is not subject to air unit availability.
12.0 Fortifications / Engineers
There are two types of fortifications: strongpoints and fortified lines. Strongpoints are available to both players, but fortified lines benefit only the Soviet player.
Note: Both players are restricted in the number of strongpoints they may build. See 12.1.2, 12.1.3.
12.1 Strongpoints
Strongpoints represent field fortifications prepared for defense from all directions. Strongpoints must be built; they are not printed on the map.
12.1.1 Both players can build strongpoints. Construction can start on any hex in general supply. The construction hex cannot already contain another strongpoint. A strongpoint under construction has no effect on play.
12.1.2 Due to limited construction materials, the Soviet player cannot begin the construction of more strongpoints per game-turn than that allowed by the results of his Soviet Replacements Table die roll (see 14.3). Strongpoint replacements cannot be accumulated from turn to turn.
12.1.3 Axis strongpoints cannot be built unless an engineer unit (see 12.3.3) is present in the hex. In Scenario #5, construction also depends on which Victory Plan is in effect (Hitler and Hoepner Plans only; see 17.3).
12.1.4 Because the ground is so deeply frozen, no strongpoint can be emplaced once the first Arctic weather occurs, unless it is placed by Engineer units. See 12.3.2 and 12.3.3.
12.1.5 Over the course of a full game, the number of strongpoints allowed on the map for both sides is unlimited; the counter-mix does not constitute a design limit.
12.1.6 Construction Procedure: During the friendly Engineering Phase, place the strongpoint with its "Under Construction" side showing. During the next friendly Engineering Phase, flip strongpoints that are under construction over to their completed side if the construction hex is still in general supply. The construction process is now complete. Soviet construction can be speeded by engineers (see 12.3.2).
12.1.7 Movement Effects: There is a +1 MP penalty for entering a hex containing a completed enemy strongpoint; there is no additional cost to enter a hex with a strongpoint that is under construction.
12.1.8 Combat Effects: Units defending in a hex containing a strongpoint cause a +1 DRM to the combat die roll. Additionally, the attacker is not allowed to use the Combined Arms Bonus against units in a strongpoint.
12.1.9 Destruction: A completed strongpoint is destroyed when an enemy unit of division size, or any engineer unit, remains in the hex during its Engineering Phase. If it is still under construction, an enemy unit need only move into or through the hex to destroy it. See, also, 6.3.6.
Note: A Panzer or Motorized Division qualifying for the Integrity bonus (per 9.2) also qualifies as a "Division," above.
12.2 Fortified Lines
Fortified lines represent a linear system of permanent concrete pillboxes and bunkers that was expected to defeat the advance of any invader. All fortified lines have been printed on the map and benefit only Soviet units.
12.2.1 Fortified lines are a hexside feature. Notice that the graphics symbol on the map shows the line actually in a hex and pointing to certain adjacent hexes. If all Axis units are attacking from hexes to which the fortified line points then the Axis player adds one (+1) to his die roll result for that combat, cumulative with other effects. If even one Axis unit is attacking through a hexside not covered by the fortified line, the DRM does not apply.
12.2.2 The Axis player may not use the Combined Arms Bonus if all Axis armor units in that combat are attacking across non-destroyed fortified line hexsides.
12.2.3 A fortified line hex can be destroyed in any one of three ways:
a. When an Axis engineer unit is in that hex during its Engineering Phase, or
b. if an engineer attacked that hex this player segment and a friendly unit was advanced into that hex (even if the engineer was eliminated as a result of that combat); or
c. by declaration. Each game-turn during his Engineering Phase, the Axis player can declare the destruction of the fortification in all hexes which his division-sized (or three component units of a Panzer or Motorized division) ground combat units currently occupy (this represents other engineers, usually divisional engineers, not shown as separate game units).
12.2.4 If a Soviet unit re-enters a non-destroyed strongpoint or fortified line hex, it immediately regains the defense benefits. Fortified lines cannot be built or rebuilt.
12.2.5 The Soviet player can build a strongpoint on top of a fortified line hex but gains only the MP cost for the Axis to enter the hex and the all-around defense feature of a strongpoint; there is no additional DRM.
12.3 Engineers
12.3.1 Engineer Units in Combat: A player has the option to subtract one (-1) from the die roll result when his combat engineer (motorized or non-motorized) attacks (or is included with other units which attack) a city, major city, or non-destroyed enemy fortification (when the fortification +1 DRM applies). This DRM is cumulative with other effects. If this option is chosen, the engineer unit must take the first step of attacker's combat loss on any combat result that includes the asterisk. Engineer units cannot combine to provide additional DRMs.
12.3.2 A Soviet engineer unit can place a completed strongpoint during the same game-turn the strongpoint is received (as dictated by the Soviet Replacements Table). Place a completed strongpoint on any engineer in general supply or emergency supply during the Engineering Phase. That engineer cannot have engaged in combat during that player segment or conducted strategic or railroad movement, or have converted railroad hexes (see 12.4).
12.3.3 An Axis engineer unit is required to emplace an Axis strongpoint. That engineer cannot have engaged in combat, or strategic or railroad movement during this game-turn. To construct the strongpoint, place it with its under construction side up on the same hex as the engineer. Turn the strongpoint over to its completed side during the next friendly Engineering Phase if an engineer is in that hex (same restrictions).
12.4 Railroad Conversion
The Soviet Union had a railroad track width different from that of the other European nations, so it was impossible for either the Axis or the Soviets to use enemy railroad until the track could be converted to the appropriate gauge.
12.4.1 At any time during a game, a particular railroad hex will be either friendly or enemy. Only friendly railroad hexes can be used for friendly railroad movement and/or friendly supply purposes. All rail hexes begin the game friendly to the Soviet player, unless otherwise indicated in the scenario set-up instructions.
12.4.2 Both players can convert railroad hexes during their respective Engineering Phases. All hexes converted in a single phase can be added only to a functioning railroad net (see 6.1.7). A player cannot purposely leave gaps, although gaps may appear later due to enemy action (see 12.5).
12.4.3 To convert a rail hex, the Axis player is not required to have a unit occupying that hex. Instead, he has conversion points (as indicated in the scenario instructions) available every game-turn which he may expend to convert any rail hex that is:
a. in supply (that is, the Axis player can trace a Supply Route (see 6.1) from the hex to a Supply Source), and
b. not in an enemy ZOC (unless a friendly unit occupies the hex), and
c. adjacent to a friendly Railhead marker.
or
d. is a previously converted hex which now contains a Soviet Rail Cut marker.
A swamp hex or marsh hex costs two (2) conversion points; all other hexes cost (1) conversion point. During Mud, Snow, and Arctic weather all hexes cost two (2) conversion points. As the Axis player expends the conversion points, he converts the affected hexes immediately by moving his Railhead marker or removing Rail Cut markers (see 12.4.5).
Exception: Conversion of a rail hex containing an enemy fortified line or strongpoint cannot occur until the first friendly Engineering Phase after the fortified line or strongpoint has been destroyed (see 12.1.2 and 12.2.3).
12.4.4 The Axis player can spend no more than four conversion points during a single game-turn to move any single railhead marker. Unused conversion points are lost; they may not be accumulated from turn to turn.
12.4.5 The Axis player uses Railhead markers to indicate the extent of his rail conversion, as follows:
a. Each scenario indicates the starting location(s) for Axis Railheads and designates where to place Rail Cut markers delimiting Axis control.
b. As the Axis player spends conversion points, he moves the Railhead marker into the converted hex. Note 12.4.4.
c. Whenever a Railhead marker is moved into a rail junction hex (one where multiple rail lines converge), the Axis player immediately places a number of Railhead markers equal to the number of rail lines which converge (not counting the one the Railhead is on). He can then use the new Railhead markers to indicate conversion of hexes on the converging line, but not until the following game-turn. You cannot move a Railhead marker on the turn it is placed.
12.4.6 A Rail Cut marker in a hex indicates that just that single hex is not converted and not available for use by the Axis player. Some Rail Cut markers include an arrow which indicates that the occupied hex and all hexes in the direction of the arrow are not converted for use by the Axis player. All hexes in the direction of the arrow are assumed to be available for use by the Soviet player.
Note: The Axis player should beware that in an instance where he last moved a unit through a railroad hex (but did not convert it), the Soviet player can still use it and, conceivably, could move units by railroad deep behind the Axis front line.
12.4.7 The Soviet player receives no conversion points, and can convert an Axis rail hex during his Engineering Phase only if a Soviet engineer unit currently occupies the hex. The engineer cannot have engaged in combat or strategic or railroad movement during that player segment. If the above conditions are met, the Soviet player may immediately convert the hex. Push back the Railhead marker and place a Rail Cut marker in the newly-converted Soviet hex to indicate its conversion.
12.5 Cutting Rail Lines
12.5.1 During his Engineering Phase, the Soviet player may place a Rail Cut marker on any Axis-converted rail hex which is currently occupied by any Soviet combat unit.
12.5.2 Axis units may never cut rail hexes.
Design Note: We do not allow the Axis player to cut rail lines because generally, the Axis did not destroy Soviet railroads during the time period of this game. They expected instead to capture and to put them to their own use. The Soviets, on the other hand, destroyed railroads converted to Axis use at every opportunity.
13.0 Special Units
A number of specialized units were used by most armies to perform specific tasks in movement, combat, and other procedures. Each special unit below is a one-step unit. Each controls the hex it occupies but (usually) has no ZOC and no stacking value.
Exception: Bridges are not combat units; see 13.2.
13.1 Soviet Headquarters Units
Soviet Headquarters (HQ) units serve several important command functions in the game.
13.1.1 Every Soviet HQ has a command range of four hexes. The range is traced without regard to terrain or enemy units and their ZOC. When counting the four hex range, do not count the hex occupied by the HQ unit.
13.1.2 Command value, as printed on the HQ counter, has three functions. It indicates:
a. the number of non-motorized units which the HQ can activate for movement at the beginning of any one Motorized Movement Phase. Note that the HQ cannot activate itself. Units so moved are moved at their full movement allowance, but they cannot be moved during the subsequent regular Movement or Reaction phases. Place an "Activation" marker on each unit so moved. In order to be activated this way, units must be within command range of the activating HQ.
Exception: Soviet Guards are activated in addition to those allowed by the HQ's command value; see 13.5.1.
b. the number of motorized units (again, within command range) eligible to be moved by each HQ during the Soviet Reaction Phase.
c. the number of additional "Retreat" or "No Retreat" markers (there are no "blanks" for these to indicate "no orders") that can be placed during a single game segment on eligible combats within range.
Example: If there are two combats but the only HQ within range has a command value of one (1), a retreat option can be placed on only one of those combats.
13.1.3 Command value cannot be accumulated from turn to turn nor lent to other HQs. Air units can interdict HQ command value (see 11.4.3c).
13.2 Bridge Units
Historically, many bridge construction engineers were available to both sides and frequent use was made of pontoon bridges, even across major rivers.
13.2.1 A bridge unit creates a bridge across an adjacent river or major river hexside. Orient the arrow on the counter to point directly at the bridged hexside. A bridge negates the cost to cross that hexside.
13.2.2 The owning player can place this unit as desired on any hex which is adjacent to a river and in general supply. Just pick it up from anywhere, even from out of play (but not from out of supply), and place as desired. The Soviet player can place a bridge unit only within command range of a friendly HQ. Place it anytime during the friendly Movement Phase (only). It remains in place until the beginning of the next friendly Movement Phase, at which time it can either be repositioned or remain where it is.
13.2.3 No more than two friendly bridge units per map can be in use at any one time.
13.2.4 A bridge unit is a non-combat unit and has no defense strength. It cannot be moved except as above and is removed instead of retreating when other units in its hex are forced to retreat. A removed bridge may be placed on any eligible hex on map during any future friendly Movement Phase. A bridge is removed if an enemy unit moves onto it.
13.3 Armored Trains
Famous during the Russian Civil War, armored trains also saw use by both sides during WWII. The game units represent groups of trains, numbered for their controlling NKVD or Army railroad security regiments.
13.3.1 An armored train unit can move only on railroad hexes, up to 48 hexes per turn, subject to enemy air interdiction effects. It does not count against Rail Capacity. It can be moved during either the friendly Motorized Movement Phase or the friendly Movement Phase, but not both in the same game-turn. It cannot be moved during reaction movement. It can be moved into but not through an enemy ZOC. It pays no MPs to enter an enemy ZOC. It can be moved on friendly railroad hexes last moved over by an enemy unit but not those converted for use by the opposing side. It can block enemy supply through the hex it occupies.
13.3.2 An armored train unit does not require supply or Attack Supply. It cannot carry or transport units. It can attack only into adjacent railroad hexes that it could move directly into; it defends, of course, against attacks from any direction. It is a one-step unit. It is not an armored unit.
13.3.3 An armored train which retreats during combat must retreat along its line of railroad hexes or be eliminated ("e").
13.4 Siege Artillery
13.4.1 A siege artillery unit cannot use its support strength to supplement friendly defense strength. It is used for attack only and it does not count towards the four artillery unit per combat limit.
13.4.2 A siege artillery unit doubles its support strength when used to attack city, major city, or non-destroyed enemy fortifications (see also 17.4.4).
13.4.3 Siege artillery units cannot spend less than one movement point per hex for any type of road (i.e. they usually spend 1 MP per road hex).
13.4.4 The two Soviet "Naval" artillery units included a variety of long range guns (100 mm, 130 mm, and 152 mm), well supplied with ammo, but virtually immobile. During any one Combat Phase, the Soviet player has the option to double either or both units' support strength. If he does this, he removes each unit that was doubled and places it in the Eliminated box.
Note: Historically, as the Germans approached, these guns fired off some 5,000 rounds and were then abandoned. The crews later made up much of the personnel in the Moscow Naval Rifle Brigade.
13.5 Soviet Guards and NKVD
Note: The unit type boxes of Guards (red) and NKVD (green) are colored for easy identification.
13.5.1 Soviet Guards: During the Soviet Motorized Movement Phase, the Soviet player can activate one Guards unit per in-range HQ. This activation is in addition to activation allowed by an HQ's command value, and is allowed even if Interdiction has reduced the command value to zero (see 11.4.3).
13.5.2 Soviet NKVD Units — These internal security troops were not under army control, but in the emergency conditions of 1941 many were committed to front line duty. Whenever it defends in a major city, city, or town hex, it makes the No Retreat Option mandatory and takes the last step of loss.
13.5.3 No Surrender die roll is made for any hex in which there is at least one Guards or NKVD unit (see 6.4).
13.6 Soviet Garrisons
13.6.1 Garrison units are designated as such on the Soviet Set-up Cards. A garrison unit cannot move from its garrison hex until released. If one unit in a garrison hex is released, all garrison units in that hex are released. Once a garrison hex is released, there is no need to reposition any unit at that location, but that location no longer requires a garrison.
13.6.2 Release each garrison immediately when:
a. it is attacked, or
b. it is judged to be out of general supply, or
c. an enemy unit moves adjacent, or
d. it is released by an "R" result on the Soviet Replacements Table (see 14.3), or
e. it is released by a release date listed in the scenario instructions.
13.6.4 Moscow Garrison: Soviet units of this garrison (shown on the Set-up Card) can be moved as desired in any game-turn, but only on or adjacent to any Moscow hex. They are released according to 13.6.2.
Exception: The "NKVD" units cannot be released by an "R" result on the Soviet Replacements Table.
13.7 Moscow Air Defense Corps
13.7.1 Soviet air units which include the "Moscow" designation on their counter are part of the Moscow Air Defense Corps. These units function in the same manner as other Soviet air units (readiness, missions, etc.) except that they have special range limitations, as noted in 13.7.2.
13.7.2 "Moscow" air units can conduct missions only within ten (10) hexes of any Moscow hex. However, on game-turns when a "V" result occurs on the Soviet Replacements Table, all "Moscow" units are released for (only) that game-turn to conduct missions anywhere on the map.
13.7.3 "Moscow" air units remain in play even if all Moscow hexes are occupied by Axis units.
14.0 Order of Appearance
During the course of play both sides receive Reinforcements. Conversely, in a procedure termed "Withdrawal," they may have to remove certain units. Both are shown on the players' respective Set-up Cards.
14.1 Reinforcements
Both players should refer to their Set-up Cards for game-turn of entry and other information relating to bringing reinforcements into play.
14.1.1 The game-turn designated for a group of reinforcements is the earliest game-turn it can be brought into play. Reinforcements arrive and enter play during the friendly Movement Phase, or, for motorized units, during the friendly Motorized Movement Phase. Any unit can be delayed if enemy units occupy all its possible entry hexes or can be delayed at the owning player's option.
14.1.2 Each reinforcement has an arrival location which is shown on either the Set-up Card or as a printed "Code" on the unit counter, depending on the scenario being played.
14.1.3 Axis Arrival Location Codes: When a specific hex is listed on the Set-up Card as arrival location, the unit enters through the map edge on or adjacent to that hex. The codes marked on the unit counters are interpreted as follows:
a. Code "w" means any hex on the west edge of maps N or P. When a specific map is listed, use only that map.
b. Code "s" means hex P1733 or hex P2333 on the south edge of Map P as indicated on the Set-up Card.
c. Code "c" means place the unit at any friendly city or major city (it need not be in supply).
d. All Axis supply units enter with code "w", west edge. Axis supply units (only) can also enter through Lgov (P4034) after it becomes an Axis supply source (see 6.2.2).
14.1.4 Soviet Arrival Location Codes: If a specific hex is listed on the Set-up Card as arrival location, the unit enters on or adjacent only to that location. The codes marked on the unit counters are interpreted as follows:
a. Code "e" means any hex on the east edge of maps M or P.
b. Code "s" means any hex on the south edge of map P from hex P4434 to the east, inclusive.
c. Code "c" means the unit is placed on any friendly and supplied major city hex. Note that often this code is paired with Code "e", meaning the Soviet player has a choice of either "e" or "c" for each unit so coded.
d. Code "M" when applied to reinforcements means the unit is placed on any friendly Moscow hex.
e. Code "MG" means that reinforcement is placed on any friendly Moscow hex and becomes part of the Moscow Garrison (see 13.6.4).
f. All Soviet supply units enter with Code "ec" (except the Moscow supply unit which starts on any friendly Moscow hex; see also 6.5.1 note).
g. Code "eM" is a combination of codes "e" and "M," above.
14.1.5 Soviet Special Reinforcement Pools: There are nine armies shown as available (game-turns 29-32). Unless otherwise marked, units in these groups enter only through the east edge of maps M or P.
14.1.6 Axis Special Reinforcement Pool: This pool is similar to the Soviet Pool, but the Axis player can draw groups from it at any time, once a group becomes available. VP costs and entry hexes are listed below each group.
14.1.7 When a unit enters through a map edge, it pays the terrain movement cost for the first hex on the map edge. Units can enter using the road rate or use railroad or strategic movement.
14.1.8 Reinforcements are in general supply during the game-turn of entry.
14.1.9 HQs cannot begin to exercise their headquarters functions until they have entered the map. Similarly, units off-map cannot be affected by HQs already on the map. For example, on-map HQs cannot be used to enable non-motorized units to enter during the Motorized Movement Phase.
14.2 Withdrawals
Occasionally, the Set-up Card will indicate a unit (or group of units) that must be withdrawn. This means that the specific unit(s) shown must be picked up and permanently removed from play.
14.2.1 During the friendly Movement Phase, pick up the units, regardless of location, even if reduced, and remove them from play. Air units can be at any state of readiness, or even eliminated. (Even if the planes are lost, the air and ground crews are available to redeploy)
14.2.2 If a unit has been eliminated or reduced in combat, then it must be restored to have at least one step (and not be in the Cadre or Eliminated Boxes). Reduce the current replacements available (see 15.1) by the number of steps restored. If not enough are available, then future replacements are used to make up the deficit, or reduce other units of the same unit type if future replacements are not sufficient.
14.2.3 If the player chooses, he can cancel the withdrawal and keep the unit, but he loses a VP (see 17.2) for each unit not withdrawn.
14.3 Soviet Replacements Table
The Soviet Replacements Table affects only the Soviet player. Use it during the Strategic Segment of each turn of Scenarios 4 and 5 only. This table determines the number of strongpoints and infantry type replacement points the Soviet player receives for that turn. With each result are also special events, as described below.
14.3.1 Replacements (=A): The Soviet player can either:
a. receive one type "A" replacement step, or
b. draw one group from the Armor Pool.
14.3.2 Moscow Panic / Mandated Attack (=M): During game-turns #1 through #5 this result is ignored (no effect). During GTs #6-#19, this result means a Moscow Panic has occurred (see Scenario instructions). From GT #20 until the end of the game this result means Mandated Attack (see 16.0); note the penalty if the Soviet player fails to make the Mandated Attack, and that this will also cause a DRM on the Soviet Replacements Table.
14.3.3 Soviet Special Reinforcements Pool (=R): The Soviet player can either:
a. draw one available group from the Special Reinforcements Pool, or
b. release all units from any one garrison location.
14.3.4 Supply (=S): Remove the Emergency Supply or Out of Supply marker from any one unit (or stack) as desired; it is now in full general supply.
14.3.5 Airforces (=V): The Soviet player can either:
a. receive one type "V" replacement, or
b. release for use, this game-turn, all available "Moscow" air units (see 13.7).
14.3.6 NKVD (=N): The Soviet player receives one replacement step to use specifically on NKVD units of any type. If all NKVD units are currently at full strength, then use the step on Guards units (but not rocket units). If these, too, are at full strength, then the step is lost; it cannot be accumulated.
14.4 Soviet Reinforcement Pools
Many of the Soviet player's reinforcements are available through special large groupings of units termed "pools". There are two reinforcement pools: the Armor Pool and the Special Reinforcements Pool. The Axis player will score VPs (see 17.2) for certain groups that the Soviet player brings into play.
14.4.1 Units in either reinforcement pool are reinforcements and enter play like regular reinforcements, but are not available until the game-turn shown for each group of units. Additionally, the Soviet player cannot receive any group before he obtains an "R" result for Special Reinforcements Pool or "A" result for Armor Pool on the Soviet Replacements Table. Each "R" or "A" result allows the release of just one group of units which is currently available. If, for instance, two groups are currently available, two "R" results (obviously, one each on separate game-turns) will be required to bring both into play, one with the first "R" and the second with the second "R".
14.4.2 Soviet Replacements Table results of "R" allow the Soviet player to draw only from the Special Reinforcements Pool; "A" results allow only the Armor Pool. The option to draw must be taken on the game-turn the result is obtained; it cannot be saved. If no group is currently available, the option expires. If only part of a single group within a Pool is currently available and is chosen, the remaining units in that group are received as regular reinforcements; an additional "R" result is not needed, and no additional VP cost is incurred.
14.4.3 Soviet units shown as regular reinforcements and not part of either pool are received with no additional restrictions or VP cost.
14.4.4 Air units received as reinforcements are placed immediately in the Ready box. They do not undergo the readiness procedure on the turn they arrive.
15.0 Replacements
(Scenarios #4 and #5 only)
As units fight, their strengths may be reduced by combat results. Combining them with replacements enables them to recover lost steps. Each replacement point represents the men and equipment necessary for a combat unit to recover one step.
Exception: Certain units require two replacement points per step. See 15.1.3.
15.1 Receiving Replacements
15.1.1 Each time the Soviet player rolls on the Soviet Replacements Table, he receives the number of replacement points indicated. These points are received (but not expended) immediately. The Soviet player keeps track of the number of replacement points he currently has available by placing his Replacement Point marker on the appropriate box on the Loss / Replacements Track. Unused replacement points can be saved for use during a future game-turn.
15.1.2 The Axis player receives infantry replacement points (only) as reinforcements, as shown on his Set-up Card. He records the current number available on the Loss / Replacements Track with his Replacement Point marker.
15.1.3 Only the following unit types can recover strength by means of "infantry" type replacements: cavalry, headquarters, infantry, motorized infantry, motorcycle infantry, ski infantry, security, engineer, and motorized engineer. Each HQ, motorized infantry, motorcycle infantry, engineer, or motorized engineer step requires two infantry type replacement points to be moved from the Cadre Box (not Eliminated Box).
15.1.4 The following unit types recover steps by means of type "A" replacement points: all armored, artillery, or anti-tank types. The Soviet player receives these only by special event results on the Soviet Replacements Table and cannot accumulate unused points for use on a future game-turn.
15.1.5 If used as replacements, Soviet type "V" replacement points are used to rebuild only air units. One point rebuilds one air unit from the Destroyed Box. These are received only by special events on the Soviet Replacements Table. Place rebuilt air units in the Ready Box during the Air Readiness Phase of the game-turn received. Type "V" replacement points cannot be accumulated.
15.2 Replacement Procedure
Each player may expend replacement points during his friendly Engineering Phase, subject to the number of points he has available (as reflected on the Loss/Replacements Track). The current strength and status of a unit affects how it receives replacements.
15.2.1 An on-map unit which is not at full strength (see 8.5.2) can receive a replacement point to regain a step, according to the following restrictions:
a. The combat unit must be in general supply, cannot have moved or attacked this player segment, and cannot be in enemy ZOC.
b. During the friendly Movement Phase, designate those units to receive replacements with a spare marker. Such units cannot move or attack during that player segment. During the friendly Engineering Phase, add one step to the unit, and reduce replacement points available by one for each unit so increased. A unit can regain only one step per game-turn, regardless of the source of the replacement point.
15.2.2 A unit in the Cadre Box can receive replacement points to recover to its lowest combat strength level. Spend one replacement step (or two; see 15.1.3 above) to restore it to its one-step level and place it either:
a. (for either side) in the Active Box. It can then enter play next game-turn as a reinforcement, or
b. (if Soviet) on any friendly city or major city hex in general supply (only one unit per such hex per turn). It cannot move during the player segment of placement.
Such a unit can recover further steps (per 15.2.1 above) on subsequent game-turns.
15.2.3 A unit in the Eliminated Box can also receive replacements. Spend one replacement point to move it from the Eliminated Box to the Cadre Box. It can recover to its one-step level, per 15.2.2 above, on a subsequent turn.
15.3 Regiment Substitute Counters
The Axis infantry division counter represents a considerable concentration of force that the Axis player may need to spread out to cover more hexes. Historically, this was done frequently to cover the ever-widening front. Only the Axis player can use regiment substitute counters.
15.3.1 An Axis infantry division can detach one, two, or three (depending on its current strength) of its component regiments at the start of a friendly Movement Phase. It costs one step from the parent division to place a regiment counter. There is no movement point cost to place regiment counters. Place the regiments with the remaining division counter; they have the same supply status as the parent division.
15.3.2 Only those divisions with more than one remaining step are allowed to detach substitute regiments. Each regiment is effectively one step, so a division currently with four steps can detach up to three substitute regiments and still have the division counter with its final step remaining in the hex. No division counter can be removed by this process; thus for example, if a division has only two steps remaining, it can detach only one regiment. Regardless of its strength, for each regiment detached, reduce the division by one step.
15.3.3 Divisions can recover steps by recombining with substitute regiments. To recombine, the division and regiment must occupy the same hex at the end of the friendly Movement Phase. Recombining does not cost any movement points and the units involved can have been moved to the limit of their movement allowance. The division need not be the division which originally released that exact regiment. The original division counter might even have been eliminated. The division will now have Emergency Supply or Out of Supply status if it or any of the recombining regiments themselves carried that marker at the beginning of the phase. A division could always, alternatively, recover strength through normal replacement procedure. Two regiment counters cannot combine to recreate a previously eliminated division counter.
15.3.4 Regiment substitute counters are generic; players need not detach or recombine exact units, but notice that the counter-mix limits the total number of substitute counters that can be used at any one time. The unit identification marked on each counter is only for convenience.
16.0 Soviet Mandated Attacks
(Scenario #5 only)
From time to time Comrade Stalin ordered special attacks, usually to recapture objectives. These are known as Mandated Attacks. They are required with each "M" result on the Soviet Replacements Table starting GT #20.
16.1 Restrictions
16.1.1 Each Mandated Attack must be made at 3:2 or better initial combat odds (prior to the Axis Reaction Movement Phase). The attack must be specifically identified before resolution as a Mandated Attack.
16.1.2 If the Soviet player receives an asterisk result during a Soviet Mandated Attack, the attacking force suffers an additional step loss.
16.1.3 A Mandated Attack can be made during any game-turn and need not be made the same game-turn that it first becomes required. Each separate "M" result on the Soviet Replacements Table requires one attack. Attack requirements can accumulate and more than one such attack can be made in a single game-turn. A Mandated Attack cannot be made prior to being ordered.
16.2 Replacements Table DRMs
16.2.1 The number of Mandated Attacks yet to be resolved becomes a DRM number on the Soviet Replacements Table (for example, two Attacks not yet resolved becomes a -2 DRM).
16.2.2 Each attack still not resolved by the End of Game-turn Segment of the game-turn in which the Axis player both captures and has a ground combat unit on a victory point location (city, major city, or red star) becomes converted to two (2) Victory Points (see 17.2) for the Axis player and ceases to be a Mandated Attack.
17.0 Victory Conditions
17.1 How to Win
Players win the game by scoring Victory Points (VPs). VPs are used to measure the level of victory achieved by the players; obviously, what might be measured as a victory nevertheless might not be sufficient to win the war or even next year's campaign. The Axis player wins the game by scoring at least the minimum number of VPs required for the levels of victory described in the scenario being played. The Soviet player wins by keeping the Axis player from achieving his minimum level of victory.
Example: In Scenario #5 the Axis player wins a Marginal Victory if he scores at least 30 VPs. If he scores only 29 VPs, the Soviet player wins a Marginal Victory.
17.2 Victory Points (VPs)
VPs are awarded for controlling certain locations on the map, by causing enemy HQ, armor and artillery step losses, and for certain actions players take. The actual number of VPs awarded or lost is determined by examining the Victory Point Schedule. Only the Axis player receives VPs. Those "earned" by the Soviet player are subtracted from the Axis total.
17.2.1 VPs for locations are awarded if that location is occupied by an Axis ground unit at the end of the scenario. It is not necessary to occupy or garrison these locations during the course of the game. Locations are worth a number of VPs according to the scenario being played or the Plan (see 17.3) in effect.
17.2.2 Count steps lost by reduced units on the map and those in the Cadre or Units Eliminated boxes, as shown below:
- +2 per Soviet HQ ever eliminated (or Cadre), even if restored
- +1 per 8 (or fraction thereof) Soviet armor or artillery steps lost or in the Cadre or Eliminated Box at the end of the game.
- -1 per 5 (or fraction thereof) Axis armor or artillery steps lost or in the Cadre or Eliminated Box at the end of the game (per 10 Axis steps for the Hoepner Plan).
- -1 for each German Panzer or Motorized Division that has all its component units in either the Cadre or Eliminated Box at end of game.
Do not count those units (or steps) withdrawn from play, or air units.
17.2.3 During the course of the game both players have various play options, many of which carry a VP cost. Each type is outlined in the scenario instructions.
17.2.4 It is possible for the Axis player to have a "negative" VP total.
17.3 Axis Victory Plans
(Scenario #5 only)
Often during the campaign, orders from Berlin would change the set of objectives for the Axis field armies. Field commanders might voice objections, yet would be left with uncertainty as to which set of objectives to fulfill or which Plan to follow. Unfortunately for Germany, Hitler's Plan usually prevailed.
17.3.1 At all times during the course of the game one of four Victory Plans will be in effect. The Victory Plan currently in effect determines the column to use on the Victory Point Schedule, and thus the actual number of VPs scored. Ignore the other columns. The Axis player starts play with the Compromise Plan. During the course of play, that Plan might be switched to another through his random draw of one of the four Victory Plan markers. Each time he draws a Victory Plan marker, he reads it and places it within view but not so the Soviet player can read it (or the other markers). On GT #35 the final Victory Plan marker in effect must be revealed to the Soviet player. It is assumed that by now Red spies (the "Red Orchestra") would have discovered the plan.
17.3.2 If the Axis player is not satisfied with his Plan, he can draw a Victory Plan marker again on any future game-turn during which the Soviet player obtains an "M" result on the Soviet Replacements Table.
Procedure
a. The Axis player reveals the first Victory Plan marker and then returns it to the pile.
b. He then draws at random a marker from the five in the pile (and might draw the first Plan again!). Use an opaque cup.
The new Plan likewise cannot be examined by the Soviet player until GT #35, or until returned to the cup for a re-draw.
17.3.3 On GT #20 the Axis player must draw, regardless of Soviet Replacement Table result.
17.3.4 Compromise Plan: On 6 September 1941 Hitler issued Directive #35 which called for the "annihilation" of the Soviet "Central front" and for "the advance on Moscow." The directive, code-named "Operation Typhoon," was actually a compromise of divergent ideas. The game begins with this Plan. There are no special conditions to consider when using this Plan's column on the Victory Point Schedule.
Restriction: When using this plan, the Axis player cannot build strongpoints.
17.3.5 Hitler Plan — With the great success of the offensive in the opening days, German High Command pressed for ever more divergent objectives. None was more insistent than Hitler, who envisioned a complete military solution in the East. He renewed demands for impossible objectives far to the east of Moscow, generally the line Vologda-Gorki-Stalingrad-Maikop (all far off the map). Moscow would be bypassed, surrounded, and turned into a lake. In the end, Hitler's plan was the official plan but it had become militarily impossible. Hitler relented and on 8 December (in Directive #39) called off the offensive, took overall command of the armed forces, and soon imposed No Retreat orders (the "Standbefehl" of 16 December), ordering his eastern armies to dig in where they stood. Was this what might be expected of a "Bohemian Corporal" or was it brilliance? Military historians have debated the decision ever since.
No Retreat Orders: This restriction automatically applies to all defensive combats where initial combat odds (before reaction) are 5-1 or less. Use the No Retreat Marker. The Soviet player must now announce initial combat odds for all combats before Axis reaction phase. Also, a unit cannot be moved out of a friendly strongpoint hex during the friendly Movement, Motorized Movement, or Reaction phases, unless by so remaining it would violate stacking limits. It can, however, be moved out if it ends that phase on any other friendly strongpoint.
Note: There are two Hitler Plan Markers. Both indicate the same Plan. The intent is to make it more likely that Hitler's Plan will prevail; he is, after all, "der Fuhrer."
17.3.6 Von Bock Plan: Army Group Centre commander Fieldmarshal F. von Bock, had seen himself as the conqueror of Moscow since before the invasion of the Soviet Union. To him Moscow symbolized victory and the end of the war. He rejected Hitler's (and the High Command's) proposals on 7 October, yet made some progress towards those objectives, but with the capture of Kalinin he canceled plans for all further diversions in order to concentrate on Moscow. He supported the renewal of the offensive in November and went on sick leave on 18 December when it became obvious that the campaign had been irretrievably lost. He returned in mid-January to command Army Group South but in July was again placed on sick leave because of disagreements in strategy with Hitler. He was not re-employed and died in an air raid on 4 May 1945. Below are the restrictions under this Plan:
a. The Axis player cannot build strongpoints.
b. The German player receives one extra attack Supply Point for each game-turn of Dry or Frost weather while this Plan is in effect.
17.3.7 Hoepner Plan: The only major German commander to object to continuing the offensive during November was Col.Gen E. Hoepner. His plan centered on the need to preserve the army's strength. Had they listened to him then, the German army would have gone into winter quarters outside of Moscow and renewed the offensive in the spring. By his Plan the campaign had already been won. Essentially, this commander did not laugh at stories that the Soviets were raising an army of 10 million men in the Urals. Interestingly, certain Germans appear to have embraced his plan only after the war. Hoepner was dismissed by Hitler during December, never took the field again, and was executed for his implication in the July 1944 Bomb Plot Conspiracy against Hitler. Below are the restrictions under this Plan:
a. The German player receives one extra attack supply point for each turn of Dry or Frost weather while this Plan is in effect.
b. If this Plan is in effect on GT #36, the German player must this game-turn withdraw any three Panzer and two Motorized Divisions, all components of each division. Each division must be capable of Integrity Bonus (see 9.2). If an insufficient number of capable divisions are in play, then the Axis player must spend sufficient replacement points to make them capable (even pulling steps out of units still in play to find a sufficient number of steps).
18.0 Scenarios
Typhoon! has six scenarios, including a small and quick-playing Learning Scenario to help you learn the basics of the game without a big investment of time and space. Details for each scenario are found in the Play Book and on each player's Set-up Cards.