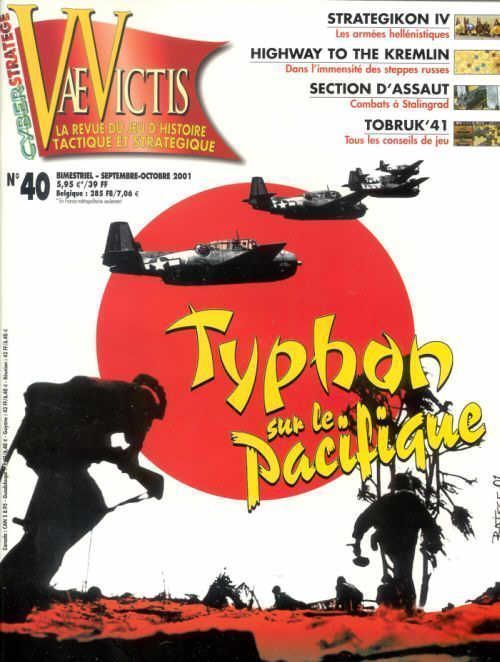
Typhon sur le Pacifique
Typhon sur le Pacifique Rulebook
Table of Contents
Table of Contents
- 0. Generalities
- 1. Sequence of Play
- 2. Strategic Warfare
- 3. Reinforcements and Replacements
- 4. Non-Active Allied Side
- 5. Japanese Economy
- 6. Strategic Redeployment
- 7. Non-Active Japanese Side
- 8. Stacking and Task Forces
- 9. Operations
- 10. Combat
- 11. Air Fleets and Carriers
- 12. Reaction
- 13. Zone Control
- 14. Bases and Fortresses
- 15. Supply and LOC
- 16. Weather
- 17. Nationality Specifics
- 18. Japanese Detachments
- 19. Victory Conditions
- Campaign Game
- Errata
- Tables
0. Generalities
Scale
Each land unit represents an army for the Japanese and a corps for the Allies, of between 5,000 and 30,000 men. Each air unit represents a fleet for the two sides (Air Force or Kokugan) of between 100 and 600 aircraft, with one strength point representing 50 aircraft. Each naval unit represents a naval fleet or a carrier fleet containing between 30 and 300 ships. Each turn represents three months.
Map
The map is divided into geographic zones.
Japan: The Japanese Archipelago is represented by the three zones of Honshu, Kyushu, and Hokkaido that act as production and supply sources.
Sea route between the USA and Australia: This is shown on the map and passes through Australia, New Caledonia, New Hebrides, Fiji, Samoa, Palmyra, and Hawaii.
Sea connection between Alaska and Pearl Harbor: These two zones are directly accessible for the Allies as if they were adjacent.
Glossary
CV or CVL: Aircraft carriers; BB or CA: Surface ships; LP: Logistical Point; AP: Action Point (see 7); LOC: Line of Communication (see 15); SNLF: Japanese Naval Detachment (Special Naval Landing Force); NAF or AAF: Japanese Naval or Land Based Air; Fleets or Task Forces (TF): these names are used interchangeably; Contested Zone: see Section 13.
Random rolls are determined by chance. Assign a different value to each unit or zone for die roll purposes. The number corresponds to the unit or zone selected. For example, if choosing between three fleets, the first corresponds to a die roll of 1 or 2, the second to a 3 or 4, and the third to a five or six. If the roll were four, the second fleet would be chosen.
1. Sequence of Play
- Strategic war for both sides
- Arrival of reinforcements for both sides
- Allied strategic actions If this side is non-active, it follows the procedures in Section 4. Otherwise, the player may perform reconstruction, reorganization, and strategic redeployment.
- Japanese production
- Japanese strategic actions If this side is active, the player may spend LPs, reorganize navies, and redeploy units. Otherwise, the player follows the procedures in Section 7.
- Active side operations
- Air attacks
- Naval and combined operations
- Movement of activated fleets
- Non-active side naval reaction
- Naval air battles
- Naval battles
- Landings
- Returns to base
- Land attacks
- Non-active side operations
- Zone control verification
- Victory point calculation, switchover and capitulation checks
2. Strategic Warfare
During the Strategic Warfare Phase, the player rolls a die for the Allies (except on Turn 1), applying any necessary modifiers, and locates the result on the Strategic Warfare Table. When the Japanese side is active, the player may roll on the table by paying 2 LPs (see 5). After the switchover, the table is no longer used for Allied strategic action as it is taken into account through Japanese plans.
3. Reinforcements and Replacements
Reinforcements
Each side receives naval, land, and air units as reinforcements. These reinforcements are strictly historical and arrive as indicated on the Turn Record Track. If a specified reinforcement zone is no longer friendly controlled, the closest friendly zone in the LOC is used instead. Most of the naval, land, and air reinforcements arrive on their reduced side; they must be rebuilt to their full strength side using replacements.
Replacements
Replacement consists of rebuilding naval, air, and land units by either flipping reduced units back to their full strength side or returning units to the game at reduced strength. It is possible to rebuild units located in contested zones.
The Japanese replace reduced land armies and air fleets paying LPs as specified in Section 5, but destroyed armies are replaced back into the pool. Completely destroyed air fleets may not be rebuilt. Fleets are replaced according to type, naval air or surface, based on the specific points available.
The Allies receive a certain number of US and UK naval replacement points, US and UK land points, and a common allotment of naval points based on the amounts given on the Turn Record Track. They may be used for replacement of reduced or destroyed naval, land, and air units during the Strategic Action Phase. If the Allies are the non-active side, they follow the rules given in Section 4.
Note: The two Marine corps (3rd and 5th Marines) and Task Forces 53 and 58 cost two points per step to replace and one-step units may not be replaced.
Any air or land replacement points not used in the turn they are received are lost; they are sent to Europe. Surface and naval air points may be accumulated. A naval replacement may be used during either the Strategic Action Phase or during the activation of a fleet for either offensive action or in reaction. This reaction is automatic if the points are available during the non-active side reaction.
Reorganization
The two sides may wait for disrupted fleets to return to the game. If they take two or more turns, they may be replaced by spending one replacement point according to fleet type. The reorganized fleet remains reduced, but is immediately placed in either Honshu or Pearl Harbor, depending on side.
Regrouping
The two sides may regroup reduced fleets of the same type. The weaker fleet is removed and the stronger fleet is returned to its full-strength side.
Japanese army pool
This pool is composed of all armies and detachments that are not in the game; either not yet in the game or already destroyed. These armies are available for purchase (see 5) or for deployment when called for by a specific plan. Armies purchased or selected from the pool are chosen randomly (which may result in a detachment being selected instead of an army).
4. Non-Active Allied Side
During each game turn until the switchover, the player acts for the non-active Allied side strictly according to the following rules.
During the Strategic Actions Phase
Land
Utilization of land replacement points. First, a reduced unit is rebuilt. If there are none, a destroyed unit is rebuilt to reduced strength. The priority is to contested zones followed by the zones closest to the enemy, within LOC, and chosen randomly if there are several that qualify. Units reconstructed entirely are placed in a friendly base in garrison.
- U.S.: Leave garrisons in the principal zones of the sea route: two reduced corps or one full-strength corps in Pearl Harbor (always) and New South Wales if at least one Australian zone contains enemy troops or is adjacent to an enemy zone, plus Samoa, Fiji, New Hebrides, New Caledonia at random one corps per zone maximum. The Australian and New Zealand corps are considered U.S. but the Australian corps remains in place until enemy units are adjacent.
- British: They must defend India at all costs and must place a corps in all zones adjacent to a Japanese army in Burma or an India zone.
- Chinese: Make the necessary moves to keep three armies in every contested zone and recover all Chinese armies (see 17). When the Allies are inactive, Chinese armies are rebuilt in friendly areas and may move into contested areas later on. One Chinese army is automatically chosen at random to move to Burma from a friendly adjacent zone the first time the Japanese enter Burma.
Naval
TF 64 is based in New Caledonia with one of the two carrier groups (random pick); the other carrier group is based in Pearl Harbor. If New Caledonia is contested or enemy controlled, the new base is New Hebrides followed by Fiji and Samoa in that order. If Pearl Harbor is contested or enemy controlled, that TF must defend the USA and leaves the game along with any accumulated surface and naval air replacement points.
The British Eastern Fleet is based in India. If the India zone is captured, the fleet retreats to Africa and is lost for the game.
The ABDA fleet is based in Java and may not move except for reaction. If Java is captured it is removed from the game.
Utilization of surface and naval air replacement points. In order, the US repairs disorganized fleets first, followed by destroyed or damaged fleets.
Air
Utilization of air replacement points. Priority is given to rebuilding destroyed units. Air fleets are placed on their historical HQ if possible: 5th AF and RAAF in New South Wales, 7th AF in Pearl Harbor, RAF FE and 10th AF in India, 11th AF in Alaska, 13th AF in New Caledonia, and 14th AF in Southern China. Otherwise, they are randomly placed in a friendly or contested zone. If there are no destroyed air fleets, a reduced unit is rebuilt to full strength. Priority is to a unit in a contested zone, chosen randomly if necessary, in the LOC.
Combine air fleets in a combat zone if necessary by moving to an adjacent zone, friendly or contested, that is closest to an enemy or contested zone. If more than one exist, choose randomly.
Actions during the Operations Phase of the non-active side
Beginning with Turn 2, the player rolls the die for a possible counterattack during the Operations Phase. A counterattack is launched if a number equal to or less than the current turn is rolled on one die. The following modifiers may be applied: -1 if Alaska, a zone in Australia, or an adjacent zone becomes enemy or contested, or if a zone adjacent to the sea route becomes Japanese; -2 if a zone on the sea route is Japanese.
Example: On Turn 4, the Solomons are Japanese. On a 5 or less, the Allies counterattack; 4 for the turn, -1 for a Japanese zone adjacent to the sea route.
If a counterattack occurs, the Allies mount a combined operation and/or several land operations to invade one or more enemy zones adjacent to friendly zones or relaunch attacks in contested zones with reinforcements. The number of zones attacked depends on land units available not otherwise used for garrisons.
The Allies must maintain all units in contested zones and at least one unit in zones adjacent to enemy zones, as well as a full-strength corps in Hawaii. The rest are available for use and are chosen at random. If none are available, there is no counterattack.
Combined operations take place, if possible, with a full-strength unit. If necessary, the Allies may transfer garrisons, except Pearl Harbor. For targets, the player randomly selects zones closest to the sea route between Australia and the USA, and the zones closest to Australia or possibly Alaska or the Aleutians if there are enemy and the weather permits.
If it is a land offensive, it is preceded by one or more air attacks if at least one air unit is in range and a target is present. The Allies occupy the zone with the maximum allowed by stacking. The units engaged attack together against the weakest enemy unit if several are present.
If it is a combined operation, it is also, if possible, preceded by an air attack and involves a transport TF and an escorting carrier TF. The closest TF is chosen. The escort TF is placed in a friendly adjacent zone and the transport TF is placed in the zone being invaded. The counterattack may involve a Japanese reaction (see 12). The land units disembark and attack the weakest enemy unit if several are present. At the end of combat, if the zone is contested or friendly, the 13th AF is based in the newly occupied zone. Finally, the task forces used in the counterattack are placed in the closest friendly base to the invaded zone. Chose randomly if several are equally close.
The Switchover
On the turn following the switchover, the Allies may not launch an offensive. That is, they may not enter a zone solely occupied by enemy units or reinforce a contested zone. They may, however, launch air attacks and attack with units already in contested zones. This pause represents the series of inter-Allied strategic conferences convened to arrive at a joint strategy. The Allied victory conditions are determined (see 19). After the switchover, the Allies, as the active side, no longer use the rules for garrisons and counterattacks. Also, the Strategic War Table is no longer used.
5. Japanese Economy
5.1 Logistical points
For most actions in the game, the Japanese side must spend Logistical Points (LPs) that are generated from resource points. Each resource zone occupied by the Japanese within the LOC provides one resource point, even if the zone is contested.
There are 8 resource zones: Manchuria, Northern China, Southern China, Malaysia, Sumatra, Borneo, Java, and Celebes. To be converted to LPs, they must be connected by sea to Japan along a valid LOC.
The current merchant marine level dictates the number of resource points that may be transported to Japan. Any resource points available above this level are ignored.
Example: In Spring 1943, the merchant marine level is 7 and 8 resource points are available. Only 7 may be converted into LPs in Japan. The remainder is lost.
The initial level is 6 and may be increased by reinforcements and conquests and reduced from Allied strategic attrition. There is a bonus of +2 for capturing an Allied fleet, +1 for capturing Malaysia, and +1 for capturing Java. The number of LPS available per turn is equal to the number of transported resource points.
Utilizing logistical points
LPs may be spent during a turn or saved for future use. When the Japanese are the active side, LPs may be spent as the player sees fit. When the Japanese are the non-active side, the particular plan in effect determines how LPs are spent.
Each action costs 1 LP unless noted otherwise:
Rolling on the Strategic Warfare Table: The Japanese may use the Strategic Warfare Table at the beginning of the turn by spending 2 accumulated LPs.
Creating an army in Japan: One army chosen at random from the available army pool. Valid only when the Japanese are the active side.
Replace a land unit step in the LOC: See Section 3.
Strategically redeploy one army in the LOC: See Section 6.
Attack with an army: Each army must spend 1 LP for each combat, even landings.
Launch an air attack: Each air attack costs 1 LP.
Move an air fleet in the LOC: See Section 6.
Replace an air fleet step in the LOC: See Section 3.
Activate and move a naval fleet: Depends on the fleet moved. The 1st Fleet and 1st Carrier Fleet cost 2 LP each. All others cost 1 LP. This cost includes the movement of land units by sea.
Build a fortress in the LOC: See Section 14.
Free actions
- Move an army by land.
- Move an SNLF detachment by land or sea using a fleet.
- Transform a detachment into a fortress. The detachment is removed form the game.
- Naval reaction.
6. Strategic Redeployment
Strategic redeployment allows the two sides to bring in troops, material and aircraft from different parts of the combat zone without launching operations or risking reactions and interceptions. This is done during the Strategic Actions phases of the two sides.
Land units
Troops may change zones if they begin and end in friendly zones in the LOC. For the Japanese, each redeployment that passes through a sea zone without taking a land route or inter-island passage costs 1 LP, regardless of the size of the unit, and must be within Strategic Transport range (see 15).
Air units
Air units of the two sides may redeploy and arrive in a contested zone. For the Japanese, each redeployment costs 1 LP.
Naval units
All fleets and task forces may redeploy freely between two friendly bases if they only traverse friendly zones in the LOC.
7. Non-Active Japanese Side
When the switchover takes place and the player takes the role of the Allied side, the actions of the non-active Japanese side are performed in accordance with the following rules and plans. The turn following the switchover has no operations in order to allow the Japanese side to form its defense in accordance with Plan Z.
Actions during the Japanese Strategic Actions Phase
The Strategic Warfare Table is no longer used, nor are the rules for the Japanese economy. A basic set of actions to be carried out is used instead. The Japanese LOC is the same as the number of APs awarded per turn for the plan currently in effect.
Action 1: Stack a zone to the maximum for defense. First the Japanese fills the friendly areas on the external perimeter that are empty and in the LOC. He puts the maximum stacking for the area, from the pool, and redeploys one Air Army and one fortress if the area is a base. Atolls are a specific case where a fortress is placed instead of a detachment, but a detachment is added for the bases (Carolines and Palau). Each area costs one AP to fill (not related to the size of the area). Next, he can reinforce the areas not fully stacked on the external perimeter. He puts the maximum land stacking, plus one Air Army for the base if one is available somewhere else than on the external perimeter, but no more fortresses. Again, each area costs one AP.
Action 2: Rebuild two steps: Rebuild two steps of air or land units. This is explained in Section 3. Naval replacement points are used to rebuild the 1st Surface Fleet and 1st Carrier Fleet.
Action 3: Attack a zone in Asia: See Section 7.2 for actions during the non-active side Operations Phase.
Plan Z
This plan is in effect after the switchover until the enemy controls a zone within three zones (two intervening) of the Japan region. The player organizes a perimeter defense of Japan by stacking to the maximum (see Action 1) each zone on the outer perimeter. The outer perimeter is defined as all of the friendly or contested zones that are adjacent to an enemy controlled zone. Any surviving carrier fleets are placed in Honshu and the remainder of the Japanese fleets is placed in the Caroline Islands. The Japanese side possesses 4 action points each turn. The three homeland garrison armies are placed in Japan.
Land and air:
- Each turn the Japanese side spends, in order, action points necessary to build up to maximum stacking in each zone of the outer perimeter (Actions 1 and 2).
- Next, with remaining points, a zone adjacent to the outer perimeter is built up according to Action 1. Priority is to bases; otherwise choose randomly.
- Next, with remaining points, launch an attack in any contested zones according to Action 3 at the cost of 1 action point per contested zone. Lastly, any remaining action points are saved for future use.
Plan A
Plan A is in effect until the Allies control a zone within two zones (one intervening) of the Japan region. All surviving fleets are randomly based together in the Marianas, Northern Philippines, or Formosa. Land and air actions follow Plan Z. The Japanese side possesses 3 action points each turn.
Plan SHO
Plan SHO is in effect until the Allies control a zone adjacent to the Japan region. Surviving fleets are placed in Okinawa. Land and air actions follow Plan Z. Also air fleets act as Kamikazes (see Section 12). The Japanese side possesses 2 action points each turn.
Plan TEN
Plan TEN is in effect until the end of the game. Surviving fleets are placed in Kyushu. Land and air actions follow Plan SHO with the addition of automatic Kamikaze reactions against Allied landings (see Section 12). The Japanese side possesses 1 action point each turn. An immediate naval reaction is automatically launched against any landings in the same or adjacent zone. A fleet is randomly activated, moved to the landing zone, and combat continues until one side is completely eliminated. This is the only case in which naval combat lasts more than one round.
Actions during the Operations phase of the non-active side
If Action 3 is performed (see 7.1), the Japanese launch an offensive in continental Asia. The Japanese must attack in a contested zone with all available units, supported by any air units in range at a cost of 1 AP (total). They may switch garrisons in order to attack with the strongest armies. Each army attacks an enemy unit beginning with the weakest.
If there are no contested zones, the Japanese invade a zone containing Allied air. If there are none or several, roll a die using all adjacent Asian zones to determine the zone to be invaded. If the attacked zone becomes friendly controlled, a breakthrough occurs (see land combat in Section 10) against the closest enemy zone. If there are several, determine randomly. When determining an invading force under Action 3, maximum-stacked garrisons in the exterior perimeter must be maintained and one army must occupy each of the other Asian zones. The remainder invades the previously determined zone.
At least one Army air fleet must support the offensive if a new zone is attacked. If none are in range, one located in Asia, if possible, is moved. If any LPs or APs remain after all attacks, they are saved for later use.
8. Stacking and Task Forces
Stacking is the ability to place more than one unit in the same zone; it varies according to type of zone, unit, and side (see the Stacking Table). Stacking limitations must be obeyed at the end of each movement, but may be ignored during movement or when swapping units between two zones in the same phase.
Land stacking
A corps or army always counts as one unit, whether at full strength or reduced. A Japanese SNLF detachment or a fortification does not count for stacking, but only one of each type is allowed in a zone.
9. Operations
The Operations Phase represents three month’s worth of military operations and uses a flexible structure for the actions of air, naval, and land units activating in the order the player wishes. The only limit is that each unit may perform only one operation during the phase. It is not permitted to launch two operations simultaneously (i.e., a combined operation with troop landings along with a land offensive at the same time); they must be launched consecutively.
Air offensives
Air units may not move during the Operations Phase. They may attack, but without physically moving the piece. Each air fleet may launch one air offensive per turn. Several units stationed in the same zone may act together, but units located in adjacent zones must act separately. The attacking air units select a target in their own zone or an adjacent one and attack.
The target may be a fleet or an air unit, but not a land unit. If there are enemy air units located in the target zone, they may react in order to reduce the attacker’s strength. Carrier-based air units represent a special type of air offensive launched during a naval operation (see Section 11).
Land offensives
One or more land units may launch a land offensive by being placed in an enemy or contested zone that is connected by an unlimited chain of land zones to the zone they start in. It is permitted to leave a contested zone (at the start of its movement) to enter a friendly zone or another contested zone, but not to an enemy zone.
A land unit may move between two island zones if a crossing arrow exists and if the zone exited is friendly and the zone entered is friendly or contested. If a land unit enters (or ends combat in) a zone occupied solely by enemy air or fleet units, they are immediately displaced to an adjacent friendly zone after any potential naval combat if active fleets are present. If there are no adjacent friendly zones, they may move to an adjacent contested zone. If there are none, the units are destroyed.
Naval and combined offensives
Selected fleets may be rebuilt or repaired before movement (see Section 3).
One or more fleets may launch a naval or combined operation. The player selects the fleet(s) and moves it through solely friendly zones. The fleet may possibly embark land units up to the maximum allowed on the counter: 1 or 2 armies or corps; D for SNLF detachment.
In the final destination zone, a US fleet may be subject to Kamikaze air interception (see 12.3). At the end of the fleet’s movement, it may be placed in a contested or enemy zone connected by sea to an adjacent friendly zone.
If enemy fleets react, naval combat occurs (see Section 10). At the end of all combats, the player counts up the naval step losses for each side, one point per step plus one half point per Disorganized marker. If the offensive side has suffered fewer losses than the inactive side for all battles for all activated fleets for this operation, air reaction included, it may proceed with the landings and then return to base. If the offensive player suffers more losses, the mission is aborted and the fleet returns to the nearest base and is deactivated along with any transported land units. They may not be used for the remainder of the turn. In case of even losses, the Japanese abort and the Allies continue with the mission (this simulates the greater tenacity of the Allies during the course of the war).
Once the operation has ended, the fleets return to a friendly base in the LOC. A fleet may only participate in one operation and one reaction per turn. It is possible to launch a naval operation in support of land units located in an archipelago or atoll zone.
It is also possible to launch a naval operation using several fleets activated at the same time. For example, one fleet may land troops in a zone while another provides cover with carrier air. In order to do this, simply move all of the fleets, one after the other without entering a contested or enemy zone and then move the fleets in the order desired into the contested or enemy zone.
At the end of movement, all of the fleets must be in the same or adjacent zone and only one enemy zone is invaded per operation. It is possible to launch a naval operation in order to transport troops from one friendly zone to another, but the Strategic Redeployment rule was designed for this action as for simple redeployment of fleets between friendly bases (see Section 6). Activation of a Japanese fleet at the beginning of an operation costs 1 or 2 LPs (see Section 5).
Special case: In order to invade a Japan zone, the Allies must have a friendly zone adjacent that contains a base (Okinawa or Korea).
10. Combat
During the course of an operation, different types of combat may take place, either from reaction or as the goal of the operation. Each is resolved between particular types of units and at a particular time. All combats consist of a simultaneous attack and counterattack, except in case of surprise. The inactive side is on defense and always attacks the weakest attacking unit.
There is a modifier based on the period of the war and the specific game turn (see the Combat Results Table). It accounts for changes in doctrine, technological advances, and differences in training affecting the two sides during the course of the war. The modifier is always used for the attacking side and never for the defending side. The same principle is applied for immediate counterattacks where the only the modifier of the counterattacking unit is used.
A surprise modifier applies in the Japanese side’s favor for combat on the first turn of the game and for the defender if surprise is attained on the Naval Reaction Table. This bonus consists of doubling the step losses suffered by the defender and non-simultaneous application of losses. That is, the surprised player may only attack with survivors.
Land vs. land
Combat between land units takes place in contested zones and is conducted voluntarily by the active side. The zone must be in the LOC. The non-active side may launch attacks when certain actions occur in the Operations Phase (see Sections 4 and 7). The attacker decides the manner in which combats are organized and is not obliged to attack all defenders or engage all his units present in the zone.
A defender unit may be attacked several times by different units but an attacker unit may attack only once per turn. Each combat is resolved on the Combat Table by subtracting the defense values of the defending units from the total attack value of attacking units. This total is then modified by the number for the period based on the attacking side.
Any other modifiers due to terrain, air support, naval support, amphibious assault, and efficiency rating are applied to the die roll. Each number on the table causes a step loss unless the combat takes place in difficult terrain, in which case the first step loss is ignored (surprise is applied first; only one step loss will be ignored). This effect for difficult terrain does not apply to counterattacks.
If one side suffers losses and the other does not, it must retreat. All of the losing side’s forces are retreated into an adjacent friendly zone accessible by land without crossing an inter-archipelago crossing arrow. If this is not possible, Allied units are removed from the game while Japanese units take a step loss and cause a step loss to the attacking army. For landings, the units are reloaded and are deactivated in the closest naval base.
If a zone no longer contains any enemy land units at the end of combat, the attacker may perform a breakthrough and immediately advance into an adjacent enemy or contested zone accessible by land, but may not attack again. If one side occupies a zone containing only enemy naval or air units at the end of combat, those units must retreat as explained in the section on land movement and a breakthrough may be performed. Attacking Japanese armies must spend 1 LP each. Destroyed Japanese armies are placed off map in the Japanese army pool.
Air vs. land
This type of combat is not simulated directly, but is included abstractly in land combat by adding for each side +1 to the die for each air fleet present in the zone and the bonus for non-disorganized carrier air. The bonus for each side is combined and applied appropriately for attack and counterattack with a maximum total die roll modifier of +2/-2.
Naval vs. naval
Whenever a naval reaction is performed, combat automatically takes place in each zone between all active fleets. Each fleet attacks an enemy fleet.
There are two types of fleets: carrier or surface, and involve two types of combat. Carrier fleets may attack carrier or surface fleets, whereas surface fleets may only attack surface fleets. If the enemy only possesses a carrier fleet, a surface fleet will be attacked without attacking back. Carrier fleets may attack any fleet while surface fleets may only attack other surface fleets. Another surface fleet may only attack a surface fleet once. In all cases, the player chooses the attacks of the active side. For the inactive side, the priority target is the strongest carrier or surface fleet.
Carrier combat
Each fleet subtracts from its air attack strength the air defense strength of the enemy fleet with the result indicating the column on the Combat Table that it uses, modified by period. The player rolls a die and applies the result: no effect, enemy disorganized, or enemy suffers one or more step losses.
If the result is Disorganized, a Disorganized marker is placed on the fleet that was attacked. The defender counterattacks immediately with its initial attack strength if there was no surprise. If surprised, it counterattacks with its remaining attack strength.
Naval combat
Naval combat is resolved exactly like carrier combat except the two sides use their naval combat strength for both attack and defense. There is no surprise, but a bonus of +1 is added to the die for combat in an island zone.
Air fleet action
All air fleets within range, i.e. in an adjacent zone if their adjacent bombardment strength is greater than zero or in the same zone for all air fleets, may add their bombardment bonus to a surface or carrier combat.
Once the naval battle is over, if it was a defender reaction, the reacting fleets return to they base they left. If it was a battle initiated by the active side, the next step depends on the naval losses suffered (see the paragraph on naval and combined operations). The side that suffers the most losses disorganizes any of its fleets that are not already. If a fleet is completely destroyed during the course of combat, any land units it was transporting are destroyed.
Disorganization
At the end of an operation, all fleets with a Disorganized marker are immediately placed on the Turn Record Track two turns ahead. These fleets are considered to be going through refit and reorganization. It is possible to speed up the refit by expending replacement points as explained in the replacement paragraph of Section 3. A disorganized fleet loses its ability to bombard land targets. A second disorganization has no effect.
Air vs. naval
Land-based air fleets may attack fleets during an air offensive in an adjacent zone if their adjacent bombardment strength is greater than zero. Otherwise, they may only attack within their own zone. A carrier fleet may attack a fleet in a base during its activation. Air fleets choose their targets, a maximum of one fleet per air unit. Air units may combine against a single fleet. Add the attack strengths and subtract the air defense strength of the fleet. The period modifier modifies this value. The player rolls on the Combat Table with the following modifier: -2 if the fleet is in a base. Air fleets may react during air battles (see Section 12).
Air vs. air
Air units may attack other air units through air offensives. The attacking side chooses the attack and places its air units opposite enemy units without being required to attack all of the defenders. The defender strength is subtracted from the attacker strength, the period modifier is applied, and the die is rolled. Each number causes a step loss. The defender counterattacks the weakest attacker with the attacked unit without the support of any other air units present if they are not being attacked.
Naval vs. land
Each fleet possesses a bombardment value that may be used during a landing or a bombardment in support of a land attack in an archipelago or atoll zone. One fleet maximum per zone, non-disorganized, may apply its bonus.
11. Air Fleets and Carriers
Naval air fleets function through the ships they are aboard; they are not separate air units. A naval air fleet may attack an enemy fleet in its base, or an air fleet in its zone or in an adjacent zone during movement, or in its final destination zone. It may act in the case of enemy reaction to its movement. Finally, if it is not disorganized, it provides a bombardment bonus during landings. A naval air fleet that launches an air strike against an air fleet suffers all effects of aerial counter-attack.
12. Reaction
During the game, certain units may react to the actions of other units, whether active or non-active side units. The movement of the attacker’s units spontaneously activates defender reactions.
For all reactions, when counting distance in zones, use the most direct path, whether open sea, contested, or enemy zones.
Air reaction against naval
At this scale of simulation, only interception in support of naval combat is effective. An air fleet with an attack strength of 4 or more may react in its own zone or an adjacent zone. If the attack strength is 3 or less, it may only react within its own zone.
An air fleet reacts with its bombardment bonus, based on distance, for resolution of all offensive naval and naval air combat whether its is on the offensive or defensive side. An air unit may react an indefinite number of times per turn, but only once per friendly or enemy action.
If several air units, even from different zones, intercept the same fleet, they intercept together and add their strengths. An air reaction may be negated by an enemy air reaction (see following paragraph).
Air reaction against air
An air fleet may intercept any enemy air units that enter its zone, whether they attack or not. An air unit may react an indefinite number of times per turn, but only once per friendly or enemy operation.
During reaction against naval units, each air fleet negates the attack of one reacting enemy air fleet, strongest first.
Against an air attack, the defense strength of all intercepting units is subtracted from the attack strength of the units making the attack. Interceptors never inflict any losses, but if they are the target of an air attack, they may counter-attack and inflict losses.
Kamikaze reaction
The famous Japanese suicide missions are launched when Plan SHO is effect (see 7). During Plan SHO, air fleets that react to naval units automatically lose one step and attack on the Kamikaze column of the Combat Table. During Plan TEN, Japanese air fleets react as in Plan SHO. Additionally, for each landing, each landing fleet is first attacked by kamikazes (not represented by a counter) on the Kamikaze column.
Naval reaction
Whenever all activated fleets have ended their movement and at least one of them is located in an enemy or contested zone containing a base, or adjacent to an enemy base, even if empty, in the LOC of the defender, a naval reaction may be performed. One die is rolled on the Reaction Table and all applicable modifiers are applied. The shortest possible distance is used for reaction distance.
Counter-attacks launched by the non-active Allied side (see 4) may trigger Japanese naval reaction. The Allied defense is divided between the American sector and the British sector. Each follows its own reaction rules and reacts with its own navy.
The British Navy may react to all attacks located in zones containing British bases or adjacent: Ceylon, India, and Malaysia as long as the zone is still friendly. Roll on the table, but only react with the Eastern Fleet.
The US Navy may react to all attacks outside the British sector, with the other task forces. All reacting fleets are placed in the attacked zone conduct an attack as explained in Section 9. At the end of the reaction, the fleets return to the base they left, if possible. Otherwise, the closest friendly base.
13. Zone Control
Apart from completely sea zones, which may not be controlled by either player, the other zones on the map are either friendly, enemy, or contested.
Whenever the land forces of only one side occupy a zone, it is considered to be controlled by that side. If no other units are present, a control marker with that side’s flag is placed in the zone.
A contested zone (one occupied by land units of both sides) is considered to be controlled by both sides. Whenever a land unit enters or lands in an enemy zone containing only a control marker, it must stop in that zone and its movement is finished. If a zone changes sides during an operation, it does not become friendly until the end of the turn, even if there is no enemy reaction to take back or contest the zone. If, during the course of combat, both sides are completely eliminated, control reverts to the previously controlling player.
14. Bases and Fortresses
Naval bases
Between two operations or reactions, fleets must always be based in a friendly naval base. Naval bases are marked on the map and no new bases may be created. They are only usable by the side that controls them. A fleet in a friendly zone that becomes contested is not required to leave as long as a friendly land unit is present. However, if the fleet goes on a mission, it may not rebase in the contested zone.
Fortresses
The Japanese may construct fortresses. They participate in combat, but are immobile and do not count for stacking. Fortresses may be constructed directly by spending an LP, or by transforming a naval detachment at no cost. The Japanese side may choose if currently the active side, or as a result of a plan when it is the non-active side (see 7).
15. Supply and LOC
In order to spend LPs, attack, or redeploy troops, a zone must be supplied. That is, it must be able to trace a Line of Communications.
For the Allies, an LOC must be traced to the east map edge (also Pakistan for the British). For the Japanese, the LOC must be traced to Japan.
An LOC may be of any length for the Allies, but it may only be traced through friendly adjacent zones; not contested or open sea.
For the Japanese, the zones must be within strategic transport range. This range extends a number of zones equal to the current merchant marine level. It is valid for zones accessible directly by sea that are friendly and not in open sea. For units in Asia, the supply range may be traced to a friendly base in the LOC that connects the zone to supply by following only friendly land zones or friendly inter-island connections. Thus it is possible to trace from Asia to Japan through Korea.
16. Weather
The map is divided into three weather zones:
- Southeast Asia with monsoons in summer and autumn of each year. These zones are indicated on the map.
- The Great North with storms, fog, and intense cold in autumn and winter of each year. These zones are indicated on the map.
- Continental Asia and Tropics zones with typhoons and storms. These are all the zones that have not been labeled as either of the two types above. During the monsoons in Southeast Asia and the storms, fog and cold in the Great North, all combat and movement entering or leaving one of these zones is prohibited. Rebuilding is allowed.
17. Nationality Specifics
China
If Burma is not a friendly zone, Chinese units may not attack or leave China and only receives one destroyed army back per turn. Otherwise, it automatically receives two reconstructed armies. China consists of the four Mainland China zones outside of Formosa.
Japan and China
During the entire game, the Japanese must maintain a garrison of two armies in each friendly Chinese zone. If not, the zone becomes contested and one Chinese army in an adjacent zone is immediately moved in.
ANZAC
If the Japanese land in Australia, the two Australian militia corps are immediately placed in New South Wales. The two militia corps automatically receive one replacement step between them each turn, but they may not leave Australia.
The AUS and NZ corps are considered to be American for non-active side actions, but either US or UK replacement points may reconstruct them.
India
India is composed of the four zones of Bengal, India, Pakistan, and Ceylon. If a Japanese ground unit enters one of these zones, The RAF FE air fleet and the 33rd Corps (reduced) are immediately placed in the India zone. Otherwise, they arrive on Turn 9. If more than one Japanese ground unit occupies an India zone, the Allies receive a UK ground replacement point as well.
USSR and Manchuria
During the war, both Japan and the USSR kept large garrisons to protect against surprise attacks along their common border. To simplify these political and strategic actions, the garrisons of the two sides are represented by inaccessible zones for the entire game.
18. Japanese Detachments
During the course of the first phase of the invasion, the Japanese Army used paratroops and naval detachments to capture natural resources and weakly defended islands. These actions do not cost LPs.
Naval detachments
On the first turn only, each Japanese SNLF naval detachment may occupy an adjacent enemy zone that contains only a control marker. This movement does not require a fleet and does not trigger reaction, but does count as an action for the naval detachment. This amphibious movement is carried out during the Operations Phase.
Paratroops
Once during the course of the first two turns of the game, the Japanese may take control of a zone occupied solely by an enemy control marker that is adjacent to a friendly zone. This airborne operation is carried out during the Operations Phase.
19. Victory Conditions
The player begins with the Japanese side and attempts to fulfill the victory conditions chosen either by choice or randomly at the start of the game.
When the Japanese victory conditions are met at the end of a turn, the game ends and the Japanese win. The player changes sides at the beginning of the turn when the American counter-attack takes place.
Immediately calculate the victory points: one for each Japanese friendly zone at the moment of the switchover, plus the number of victory points for captured objectives. During the Allied Strategic Action Phase of the turn following the switchover, the Allies choose their victory conditions or determine them randomly.
The player continues as the US side until the end of Turn 15 or Japanese capitulation. From the moment when the SHO Plan is declared, at the end of each turn the player rolls one die to determine if the Japanese capitulate.
On a 6 or more, capitulation occurs and victory is determined (feel free to change this to 7 or more if capitulation occurs too quickly). The die is modified as follows:
+1 for each captured zone adjacent to Japan.
+2 for each captured Japan zone.
+1 if Plan TEN is in play.
+1 on Turn 15 representing the dropping of the atomic bomb.
When the game ends, the player calculates the level of Allied victory. First, deduct the Japanese victory points on the switchover turn, one point for each friendly Japanese zone. Next, calculate the Allied points by multiplying friendly zones as a bonus for victory (as a result of the inter-allied conferences) by the capitulation multiplier. This multiplier is calculated by subtracting the capitulation turn from 16 (zero if capitulation does not occur). Example: 16 minus 13 giving 3 if capitulation occurs on Turn 13. Finally, combine the Japanese and Allied victory points to determine the level of victory.
- If the total is less than 25 (defeat): You will probably win anyway, but the victory will have an incredible butcher’s bill from the large number of atomic bombs you will need to drop. It will not be good for your career…
- A total between 25 and 30 (minor victory): The victory will be long in coming and costs the lives of many Allied soldiers. In spite of the prestige of victory, you risk not becoming a popular hero and your nickname becomes “The Butcher of the Pacific”…
- A total greater than 30 (major victory): Victory will not be easy, but since you are a great strategist, the enemy will finally succumb. You will become a national hero and you may even become the future president: Congratulations! Note: It is possible for the player to remain the Japanese side for the entire game in hopes of winning, but if at the end of 15 turns victory has not been achieved, it is a major defeat. Your only option is to commit Hara-kiri!
Campaign Game
Japan
Initial production: 3, located in Manchuria, North China, and South China (contested zone).
Accumulated LP stocks: 6
Merchant marine level: 6
Initially controlled zones: 16
Naval replacement points (NP): 1
Allies
Naval replacement points (NP): 1
Initially controlled zones: all those not controlled by the Japanese.
Note: Placement zones are indicated on the map and on the pieces. Pieces with only a number arrive as reinforcements on the turn indicated. Errata: the Japanese fleet in Indochina may begin in Formosa if so desired.
Length
The game lasts up to fifteen turns but may end sooner by a Japanese victory or capitulation.
- Siam is considered Japanese and is treated as a friendly zone.
- Manchuria (or Manchukuo) is inaccessible for the entire game, is controlled by the Japanese, and always provides one resource point for the Japanese.
- The USSR and Mongolia (Siberia, Mongolia, Sakhalin, and Kamchatka) are inaccessible zones. Neither side may capture or pass through.
- The Japanese may capture two merchant marine points: one in Malaysia and one in Java.
- On the first turn of the game, the Allies do not gain the effects of strategic war and the Japanese receive the benefit of the surprise rules.
Errata
- Japanese 2AAF sets up in Southern China.
- Japanese 4AAF enters on Turn 8.
- US 11AF enters at half strength on Turn 2.
- Australian 1M and 2M militia enter only when Australia is invaded.
- US 14 Corps enters on Turn 3.
- UK 33 Corps enters on Turn 9.
- US 3 Marines enter on Turn 9.
Tables
Japanese Victory Conditions, Capitulation, and Switchover Table
| Die | Japanese Objectives | Victory Conditions | Victory Points |
|---|---|---|---|
| 1 | Australia for all | Seize all of Australia and maintain an army in LOC in each of the five zones | 2 VP for each controlled zone in Australia |
| 2-4 | China for the Army; Cut the US-Australia LOC for the Navy | Uncontested control of three of the four China zones and one of the following: New Caledonia, Fiji, New Hebrides, Samoa with a LOC | 3 VPs for each controlled zone in the sea route and in China |
| 5-6 | India for the Army; Micronesia and Pearl Harbor for the Navy | Uncontested control of the four India zones and Pearl Harbor, Gilberts, Marshalls, Nauru, Carolines, Midway and Wake in LOC. | 4 VPs for Pearl Harbor, 2 VPs for each of the four India zones |
Allied Victory Conditions, Capitulation, and Switchover Table
| Die | Inter-Allied Conference Results | Zones for Victory Bonus |
|---|---|---|
| 1 | Churchill imposes his views: The Far East must be liberated | Burma, Malaysia, Indochina, Sumatra, Java, Borneo, Celebes |
| 2-4 | MacArthur declares: "I Shall Return" | Solomons, Bismarck Archipelago, New Guinea, Halmahera, Southern Philippines, Northern Philippines |
| 5-6 | Nimitz prevails: the Japanese defenses must be pierced in the Central Pacific | Nauru, Gilberts, Marshalls, Carolines, Palau, Marianas, Formosa |
Stacking Table
| Atolls | Islands | Coastal | Continental | Open Sea | |
|---|---|---|---|---|---|
| Allied land | 1 corps | 2 corps | 3 corps | 5 corps | None |
| Allied air | 1 air fleet | 1 air fleet | 2 air fleets | 2 air fleets | None |
| Japanese land | 1 SNLF | 1 army + 1 SNLF | 2 armies + 1 SNLF | 3 armies | None |
| Japanese air | 1 air fleet | 1 air fleet | 1 air fleet | 2 air fleets | None |
Transcription note: in the converted source the Japanese land row had empty cells between entries; the entries are assigned to the five columns in printed order. The source's Section 8 text itself also ends after the "Land stacking" paragraph (no air, naval, or task force stacking text survives in this copy).
Strategic Warfare Table
Japanese losses (roll for the Japanese side):
| Die | Result |
|---|---|
| 1-4 | Nothing |
| 5+ | 1 Merchant Marine point |
Allied losses:
| Die | Result |
|---|---|
| 1-3 | Nothing |
| 4-6 | 1 Air Replacement Point |
| 7+ | 1 Land Replacement Point |
Die roll modifiers:
- +/- Period modifier
- Japan (Allied losses): Distance in zones between Allied sea route and the nearest friendly base
- Allied (Japanese losses): Distance in zones between a Japan zone and the nearest friendly base
- +2 if one or less
- +1 if two zones
- 0 if three or four zones
- -1 if five or more zones
Transcription note: the converted source flattened this table; the assignment of the die rows to the Japanese-loss and Allied-loss columns follows the printed order and could not be verified against the original layout. The "Japan (Allied losses)" and "Allied (Japanese losses)" modifier lines are transcribed as printed.
Reaction Table
- Nothing: No reaction; operation continues unhindered.
- Immediate reaction: The defensive side reacts with fleets located within two zones. If there are no fleets in range, there is no reaction. The defender activates, at most and randomly, one fleet per enemy fleet of the same type, surface or carrier. If the enemy only consists of carrier fleets and there are no carrier reaction fleets within range, there is no reaction. Carrier fleets, however, will react to surface fleets.
- 7+ Surprise reaction: Reconnaissance, espionage, and military intelligence have uncovered the enemy's plans. The inactive side reacts vigorously to the enemy movement with carrier forces or its best surface fleets. Fleets equal to the active side are activated, solely carrier fleets if possible, with no limit on distance. Additionally, the inactive side receives a bonus for carrier combat and combat is not performed simultaneously.
Transcription note: the die-roll ranges for "Nothing" and "Immediate reaction" were lost in the converted source and could not be verified; only the "7+" threshold for Surprise reaction survives.
Allied modifiers:
- Turn 1 surprise: -2
- Enemy fleet in or adjacent to Pearl Harbor zone: +3
- Enemy fleet in or adjacent to an India zone or the Australia-US sea route: +1
- Enemy fleet in an Australia zone: +1
- More than two enemy fleets activated: +1
- Enemy fleet in a zone containing an Allied air fleet: +1
Japanese modifiers:
- Japan zone: Immediate automatic reaction
- Adjacent to a Japan zone: +1
- Two zones away from a Japan zone: +4 (the historical principal Japanese defensive line)
- Three zones away from a Japan zone: +1
- Zone attacked contains a base but is more than three zones from Japan: +1
- More than two enemy fleets activated: +1
- Plan Z in effect: -2
- Enemy fleet in a zone containing a Japanese air fleet: +1
Combat Results Table modifiers
Note: the Combat Results Table itself (the grid of columns and die results) is not present in this source copy; only the modifiers below survive.
Modifiers for the attacker (column shifts), by period:
- Japanese on turns 1 and 2: +2 (1941, start of 1942)
- Japanese on turns 3 to 5: +1 (1942, start of 1943)
- Japanese on turns 6 to 9: 0 (1943, start of 1944)
- Japanese on turns 10 to 13: -1 (1944, start of 1945)
- Japanese on turns 14 and 15: -2 (1945)
- Allies on turn 1: -1 (1941)
- Allies on turn 2 to 5: 0 (1942, start of 1943)
- Allies on turns 6 to 9: +1 (1943, start of 1944)
- Allies on turns 10 to 13: +2 (1944, start of 1945)
- Allies on turns 14 and 15: +3 (1945)
Surprise: Defender losses are doubled (0 becomes D, D becomes 1, 1 becomes 2, 2 becomes 4) and are suffered before any counterattacks.
Die roll modifiers:
Land combat
- Difficult terrain: First defender loss is ignored (1 or D becomes 0, 2 becomes 1, 4 becomes 3).
- Air support: Air fleet or non-disorganized carrier bombardment bonus up to a maximum of +2.
- Naval support: Fleet bonus. Maximum of one non-disorganized fleet per zone.
- Amphibious landing: -2 for attack and +2 for counterattack.
- Efficiency differential: +/- difference of the best unit for each side.
Combat against naval units
- Combat in an island zone: +1
- Air attacks against fleets in port: -2
Combat against air units
- The air defense strength of the defender is subtracted from the attacker strength.
- All air units in the zone are subtracted from the attack strength.