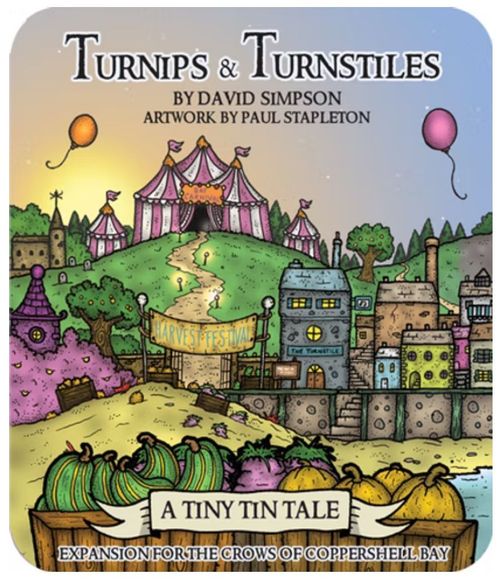
Turnips & Turnstiles
Official rulebook: Bedsit Games · PDF
Turnips & Turnstiles Rulebook
Table of Contents
Table of Contents
Components
Weather Components
- 14 Weather cards. At the start of each day, you draw a Weather card which gives you a special one-off action to take that day. But beware: you also place Weather Warning tokens which may well impede you.
- 5 Weather Warning tokens. When you place a Weather card, you also place then reveal 2 Weather Warning tokens at different Locations. The unlock cost on the token must be paid before you can visit that Location.
- The Weathervane / The Graveyard. The Weathervane is a new Location that describes the Weather module rules and allows you to forecast the weather. At night, flip this card to reveal the Graveyard.
Tourist Components
- 14 Tourist & Gift cards. You may visit the Noticeboard to be a tour guide for a Tourist, gaining a deposit item immediately. As you complete their tasks, you'll gain a choice of rewards which are shown on the Tourist's card. Complete all 3 tasks and you can gain a Gift: flip and rotate the Tourist card to reveal it. The Gift side of the card describes its effect. Gifts are generally kept for the rest of the game.
- The Noticeboard / The Turnstile Inn. You can gain a Tourist at this new Location. At night, flip this card to reveal the Turnstile Inn.
- 3 Task cubes. When you complete a Tourist's task, move a task cube onto a reward of your choice to gain it.
- Divining Rod. After rolling any die, you may discard the Divining Rod to flip that die to show a value of your choice.
Growing Contest Components
- The Allotment & The Growth Track. These cards form the Growing Contest. Each day, you will be able to place a bet on which vegetable will grow the largest.
- 3 Vegetable tokens. These tokens represent the 3 participants in the Growing Contest: the pumpkin, the marrow and the turnip. These tokens are flipped if you're playing the Great Rootwing Race instead.
- The vegetable die. The vegetable die is rolled to see which vegetable or rootwing is moved along its track.
- Story's End card. When you use the Growing Contest or Great Rootwing Race module, use this Story's End card instead of the usual one.
- 3 Betting cards. When you place bets on the Growing Contest, these cards are used. They are also used in the Great Rootwing Race.
- The Great Rootwing Race. To use the Great Rootwing Race module, flip the Allotment, the Growth Track and the 3 vegetable tokens.
Folklore Components
- 2 Day & Night cards. You can choose to play an easier or a more difficult game by selecting either the Bodach's or the Giftbearer's Day & Night card.
Extra Components
- 2 Quest cards. 2 new Quests (1 shallow, 1 deep) are available when you ATTEMPT A QUEST at the Miners' Guild.
- 4 Special cards. Both Quests have a pair of Special cards. When you are told to draw a Special card, randomly choose 1 card matching the letter shown.
- 2 Carnival Game cards. 4 new carnival games are available when you VISIT THE STALLS at Bay Carnival.
- 2 Character cards. 4 new characters are available for you to play, each with their own unique abilities. Note: Characters with unlocked Tuck abilities may Tuck 2 cards if they select merchant when they level up.
- Achievements, Score & Module Timings cards. There are lots of new achievements to complete in Turnips & Turnstiles, and a new scoring system. Also, the new modules and their phase timings have a summary card.
The Achievements card lists these achievements (each with a tick box):
- Win with the Crows' Nest Location flipped
- Win using Giftbearer's Daytime
- Win using Bodach's Daytime
- Win with 8 or more Gems at the Tower o' Strength
- Win with 9 or more Gems during Bust A Balloon
- [icon] playing The Bone Sack
- [icon] playing Welly Wallop (the icons are not legible in the proof; they are shown on the card)
- Complete 3 tasks for 3 Tourists in 1 game
- Win the Great Rootwing Race
- Win with 6 Gems using the Piggy Coffer
- Use Bone Ticker to shuffle 24 or more cards
- Win with Ben Negglington
- Win with Breath Nompus
- Win with Cleffnis Berrium
- Win with Wedge Vitus
Character card (Ben Negglington, one of the 4 new characters shown in the proof): DREAMER: When you GET SOME SLEEP, peek at the top 4 cards in the Story deck. Return them to the top of the deck in any order. BOTANIST: Whenever you ATTEMPT A QUEST, immediately Forage 2.
Note: the Score & Module Timings summary cards are separate components and are not reproduced in this proof PDF, so the new scoring system is not transcribed here.
- Nighttime token. Use this as a reminder that hazards have +1 Strength at night.
- Extra die. This is used when you resolve fights, or any other situation where you're required to roll a die twice.
These cards are all added to their respective decks. They can all be played with or without the other elements in this expansion.
Introduction to Turnips & Turnstiles
Turnips & Turnstiles adds 5 modules to The Crows of Coppershell Bay. These modules can be played separately or together, in any combination. The modules are: Folklore, Weather, Tourists, Growing Contest and Great Rootwing Race.
The Weather and Tourist modules interact with both the Growing Contest and the Great Rootwing Race. When this occurs, the rules are shown inside green boxes.
Also, some new concepts and keywords have been introduced:
- Start of daytime triggers. Events and abilities are resolved when the hourglass lands on the start-of-daytime space on the daytime track.
- End of daytime triggers. Events and abilities are resolved when the hourglass lands on the end-of-daytime space or the red crow space on the daytime track.
- End of nighttime triggers. Events and abilities are resolved when the hourglass lands on the end-of-nighttime space on the nighttime track.
New Keywords
- WASTE X: Move X cards from the top of the Story deck to the Story discard pile. This may trigger the Story's End card.
- PEEK X: Look at the top X cards of the Story deck (often to reorder them). This does not trigger the Story's End card. If fewer than X cards remain in the Story deck, resolve peeking with as many cards as possible.
- TUCK X: Place the top X cards of the Story deck beneath your character card. This may trigger the Story's End card.
NOTE: Characters with unlocked Tuck abilities may Tuck 2 cards if they select merchant when they level up.
Layout
The layout diagram shows where each module's cards sit around the board. The Weather module (Weathervane, Graveyard, Weather deck) is placed to the left, the Folklore module (Bodach's and Giftbearer's Daytime cards) in the centre, the Tourist module (Noticeboard, Turnstile Inn, Tourist deck and task cubes) to the right, and the Growing Contest / Great Rootwing Race modules (Allotment, Growth Track and vegetable tokens) along the far right. Base game Locations are marked with the question-mark, pickaxe and hand icons.
Folklore Module
When the crowds gather and the taverns fill, stories of local folklore colour the air. Are the mischievous bodachs really just a story, and why do Brighthelm's children wake up to find mysterious wrapped gifts?
This module adds 2 day & night cards. The Giftbearer's card makes the game easier. The Bodach's card makes it harder.
Setup
Setup the game as usual, replacing the usual day & night card with either the Giftbearer or Bodach one.
Using the Folklore Module
Some spaces on the daytime tracks contain a bonus (Ⓘ or a green lightning bolt) or a penalty (PAY GEMS or a red minus lightning bolt). When the hourglass is moved onto a space containing a bonus or penalty, resolve it immediately. Actions you can take at night also change slightly.
Bodach's Daytime
- If you are in town, move your meeple (the star icon) to any Location. Choose 1 action at that Location and follow the rules accordingly.
- If you are on a Quest, move your meeple along a tunnel until you reach a chamber. Follow its rules accordingly.
- When the hourglass is shown, move the timer 1 square along the track. Immediately gain any bonuses shown in that square.
- At the end of day 1 and day 2, flip this card. If you reach the red crow icon whilst on a Quest or with fewer than 60 Gems in your Purse, you lose.
The track on the Bodach's Daytime card:
- Day 1: start, then hourglass, PAY 1 GEM (with hourglass), hourglass, hourglass, end-of-daytime.
- Day 2: start, lightning bolt +1 (with hourglass), hourglass, hourglass, hourglass, hourglass, end-of-daytime.
- Day 3: start, lightning bolt +1 (with hourglass), hourglass, PAY 1 GEM (with hourglass), hourglass, hourglass, hourglass, red crow icon.
Giftbearer's Daytime
The Giftbearer's Daytime card has the same opening rules as the Bodach's card (move your meeple to any Location in town, or along a tunnel on a Quest; move the timer and gain the bonuses shown when the hourglass is shown; and the end-of-day-1-and-day-2 flip). Its track is partly covered by the Bodach's card in the proof artwork, so only the first squares are legible: Day 1: start, hourglass, Ⓘ (Gems), and the remaining squares are not transcribed here. Day 2: start, Ⓘ with hourglass. Day 3: start. The squares on the physical card should be followed.
Story's End Card (Growing Contest and Great Rootwing Race)
When you use the Growing Contest or Great Rootwing Race module, use the Story's End card included with this module instead of the usual one. Its steps, in order:
- TIME PASSES. Hourglass icon, with a LAST +1 icon (the vegetable or Rootwing in last place moves up 1 space).
- TAX: For every 10 Gems in your purse, pay 1 Gem.
- ROT. Discard 2 hazard cards of your choice from your supply.
- ONWARDS! Flip this card. Shuffle all cards in the Story discard pile, then place them face down on this card.
Weather Module
The weather is very unpredictable this weekend. Something's not right...
This module adds 1 Location card (the Weathervane and the Graveyard), 14 Weather cards and 5 Weather Warning tokens.
Each Weather card comprises 2 parts: a setup instruction that immediately places 2 random Weather Warning tokens on 2 different Locations, and a single-use action. The Location card is double sided, with the Weathervane being accessible during daytime, and the Graveyard during nighttime.
Setup
- Setup the game as shown on page 11, placing the Weathervane Location beneath the Crows' Nest Location.
- Shuffle the Weather deck and place it to the left of the Weathervane, face down.
- Shuffle and place all 5 Weather Warning tokens face down nearby so that their unlock requirements are hidden. These tokens form the cloud.
Using the Weather Module
At the start of each daytime, draw the top card from the Weather deck, then place it to the right of the Weathervane Location, face up. This is now the active Weather card.
Each Weather card thematically links to a Location (as shown by the die number in the top left hand corner), but is otherwise separate: its one-use action is not blocked by Weather Warning tokens.
Growing Contest / Great Rootwing Race: If you are also using the Growing Contest or the Great Rootwing Race module, you now immediately move the token shown in the top right-hand side of the active Weather card the number of spaces shown along the track. NOTE: This happens before ALL rolls of the vegetable die.
Anatomy of a Weather Card
- The Location card this Weather card is thematically linked to.
- The Weather today.
- Move the token shown this many spaces along the track (Growing Contest / Great Rootwing Race only).
- A picture and flavour text describing the Weather.
- When this Weather card is drawn, place Weather Warning tokens on the 2 Location cards shown.
- The one-use action. You can visit the Weather card to resolve this action. Once you have done so, the Weather card is discarded to the tin.
Weather Warning Tokens
Take 2 tokens at random from the cloud. Place them face down on the Location cards shown by the die icons (so if the Weather card shows a one-pip die, place the token on Coppersands).
Whenever you see the ? icon, instead roll the die and place a Weather Warning token face down on the matching Location number.
NOTE: A Location can only ever have 1 Weather Warning token on it. If the result of a die roll instructs you to place a Weather Warning token on a Location card that already has one on it, place it face down on the Miners' Guild Location instead.
Once both Weather Warning tokens have been placed, flip them so their unlock requirements are showing.
When a Location has a Weather Warning token on it, no actions at that Location can be used (even actions that do not cost the hourglass) until the Weather Warning token has been unlocked.
To unlock a Weather Warning token, pay the cost shown on the token (either lose 1 Life, lose 1 Pep, spend time (the hourglass), pay 2 Gems or, if you're lucky, Loot 2) then return it face down to the cloud. When a Weather Warning token is unlocked in this way you MUST immediately resolve an action at that Location.
One-Use Actions
The active Weather card has a one-use action which may be used any time you are normally able to visit a Location in town. You cannot use this one-use action during a Quest.
When a Weather card's one-use ability is used, pay the costs as directed and follow the instructions shown. The Weather card is then discarded to the tin. Weather tokens remain in play even after the active Weather card has been discarded.
End of Daytime
At the end of daytime, the active Weather card is discarded (if still in play). All Weather Warning tokens that remain on Locations are returned to the cloud face down, and all 5 are randomised (e.g. jumble them around face down with your eyes closed). The Weathervane Location is then flipped to show the Graveyard side.
The Graveyard
Unlike the majority of Locations in Coppershell Bay, the Graveyard is available to visit during nighttime (as denoted by the moon icon). To visit it you must be in town (not on a Quest) and may use its Location action like any other Location action, resolving the text as described on the card.
At the end of nighttime, flip the Graveyard Location to its Weathervane side. The next day now starts in the usual way.
The Buried Treasures of the Bay: It's customary in Coppershell Bay to bury the dead with a few trinkets. Now with the strange weather, the mud has shifted, the stones have turned, and some of these treasures have made it to the surface. It's risky and frowned on, but maybe you could borrow one?
Weather Module Example
- At the start of daytime, the Beautiful Day card is drawn from the Weather deck. It is placed face up to the right of the Weathervane Location.
- 2 Weather Warning tokens are placed face down: 1 on Bay Carnival (the die icon shown on the Weather card), then 1 on a Location matching a die roll (the ? icon). 2 is rolled, so a token is placed on the Scrapyard.
- Both Weather Warning tokens are flipped to show their unlock requirement.
Tourist Module
The streets are awash with all sorts of chancers looking to discover the delights of Coppershell Bay. Reluctantly, that's where you come in.
This module adds 1 Location card (the Noticeboard and the Turnstile Inn), 14 Tourist / Gift cards and 3 task cubes.
Each tourist has 3 activities (known as "tasks") that they hope to do whilst visiting Coppershell Bay. For each task they complete, they will give their tour guide (i.e. you) a small bonus. If you complete all three tasks you may choose to accept a gift from them to keep for the remainder of the game.
Anatomy of a Tourist Card
- This Tourist's profession.
- Their Deposit. You gain this item when you choose to guide this Tourist.
- The 3 tasks you need to complete for this Tourist by the end of the day (hourglass and crow icons, i.e. the end of daytime triggers).
- Each time you complete a task, place a task cube on a reward of your choice to gain that reward. When you place the 3rd cube, you may gain the Gift on the card's reverse side.
Setup
- Setup the game as shown on page 11, placing the Noticeboard Location beneath the Bay Carnival Location.
- Shuffle the Tourist / Gift deck, then place it so the Tourist side is showing, to the left of the Noticeboard Location.
- Through the course of play, you will draw the top 2 cards from the Tourist deck and place them to the right-hand side of the Noticeboard Location, forming the Tourist Row.
Using the Tourist Module
At the start of each daytime, the Noticeboard directs you to draw the top 2 cards from the Tourist deck. Place them so the Tourist side is showing, to the right of the Noticeboard Location. This forms the Tourist row.
Guiding Tourists
You may choose to guide a Tourist in the Tourist row when you visit the Noticeboard Location and resolve the TOUR GUIDE action, paying its costs in the usual way.
When you have chosen a Tourist to guide, place their card by your character card. Place the 3 task cubes onto the 3 green tick boxes on the Tourist card, and immediately gain the Tourist's deposit which will be a brew or a tool.
NOTE: You may only guide 1 Tourist at a time. If you choose a new Tourist to guide, the first Tourist is returned to the tin.
Completing Tasks
Each Tourist has 3 activities they want to do within a day, known as tasks. Each task is described on their card. Tasks may be carried out in any order, and if all 3 are completed you may receive a Gift from the Tourist.
Tasks with task cubes covering their green ticks indicate tasks that are yet to be completed.
When a given task is completed (e.g. catch 3 or more fish when you GO FISHING at Coppersands), remove the task cube from that task. This reveals the green tick to show it is complete. Place the task cube on 1 reward of your choice along the bottom of the Tourist card. You immediately gain that reward. Each reward may only be selected once.
The rewards along the bottom of a Tourist card are: Dig 1, Loot 1, Acquire 1, a vegetable (+1) and the Gift reward (two task cubes with an arrow).
Growing Contest / Great Rootwing Race: Each Tourist has a reward showing a vegetable symbol. If playing with the Growing Contest or the Great Rootwing Race module, you may choose this reward for completing a task by placing a task cube on it. When you do so, immediately move the token shown along the track. This can be used to help better your odds of winning the Growing Contest or the Great Rootwing Race.
One of the rewards shows the Gift symbol (two task cubes with an arrow). This reward may only be chosen once both of the other task cubes have been placed on rewards (i.e. you have completed all 3 tasks required by the Tourist). When this reward is chosen, remove all 3 task cubes from the Tourist card and flip it over to its Gift side. You now own this Gift.
NOTE: You can inspect the Gift side of the Tourist card before making your choice.
Gifts
Gifts are items that can be gained from Tourists by completing all 3 of their tasks and choosing the Gift reward as their final reward.
Gifts are placed next to your character. The card describes the Gift's effect. Some Gifts are discarded after use, others have a continuous effect. The Gift card will always describe which of these it is.
Note that Gifts are NOT Tourists so are unaffected by anything that affects Tourist cards.
Example Gift, Fish Breadwedge: "It's fresh but you'll be wanting to eat it soon, if only to stop it looking at you." Discard at any time to gain 1 Life and 1 Pep. This card MUST be discarded at the end of day 3.
End of Daytime
At the end of the daytime, all Tourist cards remaining in the Tourist row and by your character card are discarded to the tin. Gift cards generally stay in your possession, although some (such as the Fish Breadwedge) are discarded after use as directed. The Noticeboard Location is then flipped to reveal the Turnstile Inn Location.
The Turnstile Inn
Unlike the majority of Locations in Coppershell Bay, the Turnstile Inn is available to visit during nighttime (as denoted by the moon icon). To visit it you must be in town (not on a Quest), and you can use its Location actions like any other Location's actions, resolving the text as described on the Location card.
At the end of nighttime, flip this Location back to the Noticeboard side. The next day now starts in the usual way.
The History of the Turnstile Inn: Built to give the fishers and trollers somewhere to drink, the Turnstile Inn also became a place to share their shanties. As time passed, it became even better known for its music than its ale. As a result, the Turnstile Inn is a popular stop for musicians on their way to the Symphony of Songbirds festival, and getting to play here is considered a real badge of honour.
Tourist Module Example
- At the start of the day, 2 Tourist cards are drawn and placed in the Tourist row, Tourist side showing.
- You visit the Noticeboard Location and choose the TOUR GUIDE action. You choose to guide the Adventurer, placing all 3 task cubes on the green ticks on her card.
- After placing the task cubes, immediately gain her deposit bonus (in this case, a battle beer).
You can now spend today attempting to complete any or all of the Adventurer's 3 tasks.
Growing Contest Module
It's the biggest date in the Coppershell calendar. Come and place your bets on the surprisingly thrilling vegetable growing contest. Cash prizes!
This module adds a new Location (the Allotment), the Growth Track, 3 Betting cards (1 each for days 1, 2 and 3), a new Story's End card, the vegetable die and 3 vegetable tokens.
This module introduces Coppershell Bay's Growing Contest, in which residents and visitors alike bet on which vegetable will grow to be the biggest. It can be very profitable if you're able to guess the winning vegetable before the end of day 3.
Setup
- Setup the game as normal, replacing the usual Story's End card with the one included for this module (placed so the green bordered side is facing upwards).
- Place the Allotment Location and Growth Track cards as shown on page 11. Take the vegetable die and the 3 Betting cards and place them near your rucksack, any side up.
- Stack the three vegetable tokens on the 0 space of the Growth Track, arranged in the order shown (pumpkin on top, then marrow, then turnip at the bottom).
The Growth Track
Throughout the game, the vegetables will grow as the vegetable die is rolled. This is represented by the vegetable tokens moving up the Growth Track.
The vegetable that occupies the highest number on the Growth Track at the end of day 3 (or the first vegetable to move onto the 13+ space at any time) will win the Growing Contest.
In the event of a tie (i.e. if more than one token is on the same space of the Growth Track in a stack), the token on top of the stack is considered to be in the lead.
NOTE: both the Weather module AND the Tourist module interact with the Growing Contest, allowing you to nudge vegetables' growth in your favour. How these modules interact with the Growing Contest is described on pages 36-37.
Rolling the Vegetable Die
At the start of each daytime, the Allotment Location card directs you to roll the vegetable die TWICE. The 6 different faces of the die are as follows:
- Pumpkin +1
- Pumpkin +1
- Marrow +1
- Marrow +2
- Turnip +2
- Turnip +2
When the vegetable die is rolled, move the indicated vegetable token that many spaces up the Growth Track as shown.
- If the indicated vegetable token is occupying a space of the Growth Track on its own, it will move up the track alone.
- If the indicated vegetable token is at the top of a stack, it will move up the track alone.
- If the indicated vegetable token is in the middle or the bottom of a stack, ALL vegetable tokens stacked ABOVE the rolled vegetable will move up the track with it.
If a moving vegetable token (or stack of tokens) ends its movement on another token (or stack of tokens), place it on top to form a new stack.
Example of Vegetable Growth
At the start of the game the vegetables are in their starting stack order. The first roll of the vegetable die is turnip +2 so moves 2 spaces up the Growth Track, carrying both the pumpkin and the marrow above it as it moves (meaning that the whole stack would now be in the same order on space 2 of the Growth Track).
The second roll of the vegetable die is marrow +1, so the marrow moves off of the turnip, leaving it behind, and moves 1 space up the Growth Track onto space 3. As the pumpkin is still stacked above the marrow, it would be carried by the marrow and so would also move, with both tokens retaining their stack order.
End of Day 3
At the end of day 3, the vegetable die is rolled 1 final time (unless the Growing Contest has already ended by a vegetable moving to the 13+ space, in which case this roll is skipped). The winner of the Growing Contest is decided when the contest ends, and bets resolved as described on page 40.
Throughout the course of the Growing Contest, stacks of vegetables will form and break apart, making bets uncertain.
Using the Tourist & Weather Modules
Both the Weather and Tourist modules can influence the growth of vegetables when you use them alongside the Growing Contest module. The following pages describe how they work, and the icons they use are explained below.
- +1 (marrow icon): Move marrow 1 space up the Growth Track.
- +1-3 (pumpkin icon): Move pumpkin 1-3 spaces up the Growth Track.
- +1 (turnip icon): Move turnip 1 space up the Growth Track.
- LAST +1-3: Move the vegetable in last place 1-3 spaces up the Growth Track.
Weather Module and Vegetable Growth
At the start of each daytime, the Weathervane Location card directs you to draw the top card in the Weather deck. The vegetable depicted in the top right of this card will IMMEDIATELY move the amount of spaces shown up the Growth Track, obeying the movement and stacking rules described on page 33. In the example on the card, the marrow will move 1 space up.
If the LAST icon is shown, then the vegetable occupying the lowest numbered space on the Growth Track moves up the amount of spaces shown.
If a stack of vegetables occupies the lowest number on the Growth Track, the token at the BOTTOM of the stack is considered to be in last place and thus would move, carrying the vegetables above it.
NOTE: Movement caused by Weather cards happens BEFORE any dice are rolled by the Allotment Location on any given day.
Tourist Module and Vegetable Growth
When tasks are completed on Tourist cards, you may choose to select vegetable movement as a reward. When you do this, place the task cube on the vegetable icon on the reward track. The vegetable shown will IMMEDIATELY move the amount of spaces shown up the Growth Track.
In the example on the Antiquarian card, choosing vegetable movement as a reward will move the marrow 1 space up the reward track (+1).
If the LAST +1 icon is chosen, then the vegetable occupying the lowest numbered space on the Growth Track moves up the amount of spaces shown, carrying those above it if it's inside a stack.
As with all rewards shown on a Tourist card, you can only choose vegetable movement once.
Betting
Players can place bets on which vegetable they believe will win the Growing Contest. A single bet may be placed each day, and once placed it cannot be changed. You may place a bet on any, all or none of the 3 days. You will only gain winnings for the days you placed bets.
You may bet on different vegetables each day as you try to follow the ebb and flow of the contest, or you may decide to bet on the same vegetable hoping for a massive payout. The choice is yours.
You place your bets by visiting the Allotment Location and choosing the PLACE YOUR BETS action (you cannot do this whilst on a Quest). To do so, once a day, Waste 6 and pay 1 Gem, then select that day's Betting card. The winnings you can gain are shown on the Betting card.
Place the Betting card on the Allotment Location, on the current day's slot with the card oriented so the vegetable you chose is face up and the right way round. Betting cards are double sided, and there is 1 for each of the 3 days. NOTE: You cannot choose Rootwings. Once a Betting card has been placed, that bet is fixed.
The printed winnings are:
- Day 1: Pumpkin — 5 Gems OR 1 Life. Marrow — 1 Life OR 5 Gems.
- Day 2: the winnings are printed on the Day 2 Betting card (the values are not legible in the proof artwork, so they are not transcribed here).
- Day 3: Pumpkin — 3 Gems OR 1 Pep. Marrow — 1 Pep OR 3 Gems.
Winner of the Growing Contest
The winner of the Growing Contest is the vegetable occupying the highest number of the Growth Track when the contest ends. In the event of a tie, the vegetable at the TOP of the leading stack is the winner.
If a vegetable (or vegetables) lands on the 13+ space of the Growth Track at any time, the winner is decided immediately. No further rolls or movement of vegetables will take place.
Otherwise at the end of day 3 a final roll of the vegetable die is made, then the winner is determined.
Winning Bets
Only bets on the winning vegetable of the Growing Contest will payout. When the winner of the contest is determined, you gain winnings for each Betting card you placed that matches the winner.
Each day's Betting card pays out different amounts. Day 1 bets (when the contest is the most uncertain) pay out more than day 2 bets, which in turn pay out more than day 3 bets (when the contest is almost complete). Gain the winnings shown on the winning Betting cards only. All winnings have 2 options: Gems or the bonus or item shown. For each winning bet, choose 1 of these options and gain it immediately.
In the event that the contest ends early and you are on a Quest, you may still receive the winnings. If the contest ends at the end of day 3, bets are paid out BEFORE you PAY THE CROWS at the Crows' Nest Location.
Great Rootwing Race Module
When the harvest is good, these strange winged creatures are found in abundance. The chaotic and excitable races they like to engage in have become a money spinner in themselves. Your boss, Helmnica Navveth, has his eye on a particular Rootwing to win the race. It's up to you to make this so, as he happens to be very good friends with the Crows.
This module introduces the Great Rootwing Race. It uses the Aviary Location (the flipped side of the Allotment) along with the Skyline (the flipped side of the Growth Track), 3 Betting cards (1 for each Rootwing), the vegetable die and 3 vegetable tokens flipped to their Rootwing sides.
Setup
- Read the rules of the Growing Contest, then setup the game as described by the Growing Contest module, with these exceptions:
- Flip the Allotment and Growth Track to show the Aviary and Skyline. Flip the vegetable tokens to their Rootwing sides.
- Stack the three vegetable tokens on the 0 space of the Skyline, arranged as shown.
- Deal yourself a single random Betting card. Return the other 2 Betting cards to the tin. Place the Betting card onto the slot at the bottom of the Aviary, Rootwing side up. This is now YOUR Rootwing.
- Setup both the Tourist and the Weather modules. You will be using both for the Great Rootwing Race.
Using the Great Rootwing Race Module
The Skyline
The Skyline tracks the movement of the Rootwings. Lines between certain spaces show Gem values. These Gems are gained when your Rootwing passes them in a forwards direction only. The same Gems can be gained more than once.
Rootwing movement rules are the same as those described for the vegetables in the Growing Contest rules. The vegetable die faces move the Rootwing described below:
- Pumpkin: move the puffkin.
- Marrow: move the marrowl.
- Turnip: move the spurnip.
The Aviary
At the start of each daytime, the Aviary Location directs you to roll the vegetable die TWICE.
The Aviary keeps track of YOUR Rootwing and provides 4 ways to STEER A ROOTWING (3 options that move specific Rootwings backwards 1 space by paying fish, foragables or materials from your supply, and a once-per-day action that allows you to move the current leader forwards):
- Pay 2 fish to move the spurnip back 1 space.
- Pay 2 foragables to move the marrowl back 1 space.
- Pay 2 materials to move the puffkin back 1 space.
- Once a day, Waste 8 to move the FIRST +1 Rootwing (the current leader) forwards 1 space.
If a moving Rootwing token (or stack) moves backwards onto 1 or more other Rootwings, place it on top of the stationary stack.
FIRST +1: The Rootwing currently occupying the highest number on the Skyline moves one place forwards. In the case of a tie, the Rootwing highest up the stack is considered in the lead and will move, leaving the rest of the stack where it is.
At the end of day 3, the vegetable die is rolled 2 more times (unless the Great Rootwing Race has already ended by a Rootwing moving to the 13+ space, in which case these rolls are skipped), and the winner is determined.
Remember to make use of the vegetable movement abilities in both the Tourist and Weather modules, you'll need all the help you can get.
Remember: the puffkin = pumpkin, the marrowl = marrow and the spurnip = turnip.
Winner of the Great Rootwing Race
If the Great Rootwing Race ends early by 1 or more Rootwings landing on the 13+ space of the Skyline, the winner is decided and no further rolls or movement take place. However, the benefit of winning does not happen until the end of day 3.
Otherwise, at the end of day 3, the vegetable die is rolled twice, then the winner is determined.
The winner of the Great Rootwing Race is the Rootwing occupying the highest number of the Skyline. In the case of a tie, the Rootwing at the TOP of the leading stack is the winner.
As soon as the winner of the Great Rootwing Race is determined, check your Betting card. If your Rootwing is the winning Rootwing, leave your Betting card in its slot on the Aviary. If your Rootwing is NOT the winner of the Great Rootwing Race, then immediately remove your Betting card from the Aviary (printed as "Avery" in the source; this is the Aviary) and return it to the tin.
The Crows' Nest
At the end of day 3, after all rolls have taken place, proceed to the Crows' Nest Location as usual (unless you're still on a Quest, in which case you automatically lose).
If your Betting card is still in place on the Aviary (i.e. you won the Great Rootwing Race), you will roll 1 less die when you PAY THE CROWS, as denoted by the -1 icon on the Betting card. Otherwise, you roll 1 EXTRA die when you PAY THE CROWS, as denoted by the +1 icon on the Aviary Location.
Keep track of the number of rolls remaining by using the second die included. Resolve all rolls as normal.
A Note on Timings
When using more than 1 module, there will be instances when you're required to resolve start-of-daytime, end-of-daytime, end-of-nighttime or end-of-day-3 triggers. When this occurs, resolve them as shown on the module timings card, starting on side A from left to right, then side B (i.e. Weather, then Tourists, then the Growing Contest / Rootwing Race).
Example of Rootwing Racing
The marrowl is the selected Rootwing. Place this card in the slot on the Aviary Location.
- The active Weather card (Aurora) shows LAST +2. The whole stack of Rootwings moves onto space 2.
- The first roll of the vegetable die shows marrow +1. The marrowl and the puffkin move onto space 3.
- The second roll of the vegetable die shows turnip +2. The spurnip moves on its own to space 4.
- Spend 2 materials to STEER A ROOTWING and move the puffkin back 1 space, to space 2.
- Choose vegetable movement as a Tourist reward, moving the marrowl 1 space on to space 4 on top of the spurnip, collecting the Gem value shown.
- Waste 8 to move FIRST +1 using STEER A ROOTWING. The marrowl is in the lead so moves off the spurnip and on to space 5.
- Waste 3 to FORECAST WEATHER. You reveal a puffkin +2 and marrowl +1. You place the puffkin +2 on the bottom and the marrowl +1 on top.