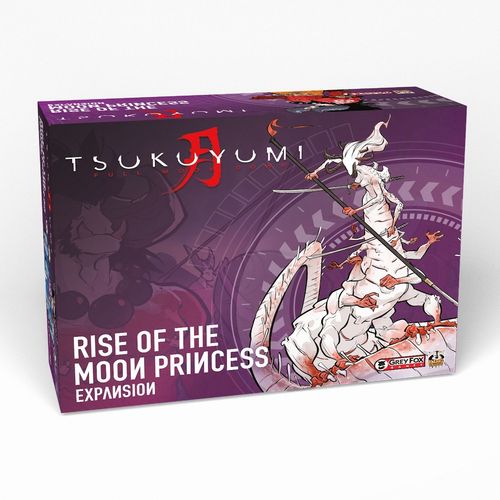
Tsukuyumi: Full Moon Down – Rise of the Moon Princess Expansion
Tsukuyumi: Full Moon Down – Rise of the Moon Princess Expansion Rulebook
Table of Contents
Table of Contents
Compatibility
This expansion requires the basic game Tsukuyumi - Full Moon Down. The expansion Rise of the Moon Princess can be played with all previously released factions (as of September 2019). It cannot be combined with the following modules: Mascots, Oni missions, Oni power cards, alternative goals, starting advantages.
Note on Legendary Oni: This expansion is played with all Legendary Oni that have been released so far. If you do not own the respective miniatures, you can use the standees provided with this expansion.
Ways to Play
NOTICE! Please note that these rules assume that you already know the rules of the basic game (Tsukuyumi - Full Moon Down).
The Rise of the Moon Princess expansion can be used in three different ways:
- Cooperative: You can use it to play Tsukuyumi as a cooperative game in which all players must work together against the Oni. The Oni are controlled by an "artificial intelligence" that will make it difficult for the players to gain an advantage.
- Solo Mode: This variant allows for the game to be played by the solo player.
- Moon Princess in a regular game: You can also experience the Moon Princess in a regular game, as she can also be a Legendary Oni and will really spice up your game.
Game Material
- 20 Oni Standees: 1 Moon Princess, 7 Legendary Oni, 4 Small Oni, 4 Medium Oni, 4 Large Oni
- 1 Moon Princess Miniature
- 66 Standard Cards: 9 Modification Cards, 30 Action Cards, 1 Moon Princess Card (for use in standard rule games), 15 Oni Counters, 1 Moon Princess Combat Card
- 27 Tarot Cards: 4 Momentum Cards, 7 Moon Princess Cards, 7 Oni Turn Cards, 9 Legendary Oni Cards
- 2 Home Markers (Jade Sentinels, Lords of the Lost Sea)
- 28 Priority Markers
- 2 Momentum Markers
- 4 Overview Sheets (double-sided)
Image shown with standees. The Rise of the Moon Princess expansion is playable with both the original standee version and the new miniatures.
Set Up
1. Choose a Faction: Each player chooses a faction and takes all the respective game material. Leave out mission cards, faction events, mascots, and alternative goals. Each player will instead take their respective faction's modification card from this expansion. Players are bound by these rule modifications!
2. Prepare Oni: In cooperative mode, gather the following number of Oni:
- 7 Large Oni
- 12 Medium Oni
- 15 Small Oni
- 7 Legendary Oni
You will never use more than the 34 Oni and 7 Legendary Oni listed here. Put the remainder back in the box as they will not be used in the game.
3. Setting up the Board: Place the Moon in the center of the table and place 1 Small Oni and 1 Medium Oni on each moon area. The Moon Princess will then be placed at any point on the purple border of the Moon.
7 area tiles are placed per player, always in a circle around the moon. (You can adjust the difficulty by changing the number of area tiles. For more info on that, see p.6.) Per player, 1 fertile ground is mixed into the otherwise random selection of areas. If playing the solo mode, use only 12 area tiles set up in the same way as listed above.
Note: If you want to play with the After the Moonfall expansion, do NOT use riverlands and toxic areas.
4. Homezones and Starting Units: Each player places his homezone according to the rules and then marks 1 single area as their starting area. Each player may place the starting units of their faction in that area, adjacent to that area, or adjacent to their homezone. Consider BLOCKADES.
Exception:
- Lords of the Lost Sea: Mark 2 areas as your starting areas and mark one of them with the special home marker of this expansion.
- Sentinels: Mark one of your portals with your special home marker.
Home markers count as homezones when it comes to movement of the Oni and Moon Princess, as well as for the rating at the end of the game.
5. Action Cards: Each player is dealt 5 action cards and selects one of them. The rest are passed on to the player on the left, as usual.
6. Momentum Track: Take the appropriate Momentum Track depending on the number of players. Place the marker on the number 1.
7. Priority Markers: Place 1 priority marker in each of the following areas: each area adjacent to a homezone/home marker, in each fertile area, in each radioactive area and in the center of the moon.
8. Preparing the Cards: Form the following decks and shuffle:
- Moon Princess Cards
- Oni Turn Cards
- Counter Cards
- Last Round Counter Cards
- Legendary Oni Cards
Separate the counter cards of the last round from the remaining counter cards and then shuffles both stacks. The counters of the last round are used in the last round and replace the normal counters for that round.
Tips for Setting Up Your First Game
The Oni prefer to attack areas adjacent to homezones, as these are worth more victory points for them in the end. So the more adjacent areas you have, the more valuable areas there are. Therefore, try to use as few adjacent areas as possible when you place your homezones.
Do not place your homezone too far away from the moon, as this puts you at an unnecessary disadvantage. The moon belongs to the Oni at the beginning of the game and must first be conquered the players.
2 Player and Solo Mode
If you play with only 2 players or alone, draw only 3 action cards and select 1 of them, then discard the rest. At the end of each round, draw 3 new cards, select 1 and discard the rest. There is no drawing, so the cards are not passed on.
Introduction to a Cooperative Game
In the cooperative game, the players will have to follow new tasks that are new to the Rise of the Moon Princess expansion. You will need to move the Oni and attack with them, following the directions of the appropriate AI deck.
In this game mode, chance has been added to Tsukyumi experience. Since Tsukuyumi doesn't normally have that many random elements to it, we hope to present you with an exciting and challenging gaming experience that differs from what you're used to. While many elements of the base game have been preserved, some of have been simplified to streamline the experience for the cooperative game.
Note: By simplifying some concepts, the cooperative game mode is well suited to introduce new players to the game. Experienced players can help the newcomers better than while playing against each other.
Cooperative Game
Goal of the Game
A cooperative game against the Moon Princess on normal difficulty level lasts for exactly 3 rounds.
At the end of the third round - i.e. after the last player has finished their last turn of that round, the party with the most victory points wins: either the Oni or the players. The victory points of all players are added up and compared with those of the Oni.
Longer/Easier Variant: You can also play 4 rounds, but please note: A longer game shifts the balance in the favor of the players.
Counting Victory Points
THE GOLDEN RULE: Only the victory point conditions of the Rise of the Moon Princess expansion apply. (See p. 11, backside and overview sheet.)
Areas: For the players, each conquered area is worth exactly 1 victory point, no matter if it is a fertile ground or a devastated area. The Oni, however, receive the normal victory points of the areas, i.e. 2 victory points for fertile grounds or 0 victory points for toxic/devastated areas.
Note that all Tsukuyumi areas automatically belong to the Oni unless they have been conquered and marked with a player's territory marker. This means that the moon is automatically considered as conquered by the Oni. The players' markers overwrite the Oni's control of the area.
Goals/Missions: NO goals or missions are used.
Round Goals: Each Oni round card offers one round goal. If the goal is met, players receive the indicated victory points at the end of the game. (Place the respective number of territory markers on the victory board to help track this.)
Other Victory Point Conditions: Victory points cannot be gained from other sources, such as destroying Fireborn, the Ritual Combat of the Sentinels, or through A Place of Peace of the Lords of the Lost Sea. If you would gain victory points that are not on the victory point bar of this expansion, ignore them.
Legendary Oni/Moon Princess: If any legendary Oni or the Moon Princess are on the board at the end of the last round, they each grant the Oni 1 victory point.
Oni Victory Points: If the Oni have earned victory points elsewhere, they will be counted additionally.
New and Modified Rules
This section goes through all the new rules that have changed from the standard game. Rules not specifically listed here remain as they are written in the base game rule book.
Difficulty
In Rise of the Moon Princess, you can change the difficulty level by placing more or fewer area tiles when setting up the game. The more area tiles you place, the easier the game will be, while the difficulty will increase if you start with fewer areas.
Example: A game with 3 players usually has 21 area tiles. You can lower the difficulty by setting up a game with e.g. 22 or 23 area tiles. If you play with 20 or even 19 area tiles instead, the game becomes noticeably more difficult.
Modifications
Each faction in the Rise of the Moon Princess expansion will receive some special modifications to make this faction fit for cooperative gameplay. Players must follow these rules. These modifications will override all relevant faction rules.
Order of a Round and Player Actions
One round in Rise of the Moon Princess is structured as follows:
- Turn Card
- Oni Actions and Player Actions
- End of round and Scoring of that round's goal
White and Black Phase
The most important change is the game order.
If you look at the action cards for this expansion, you will notice that at the beginning of each white phase, you will need to perform a Moon Princess action. The colored phases have been removed and have been replaced with one single black phase - a mixture of blue, green and red. So each action card now has only two phases: White and Black.
Most important change: The Oni are no longer controlled by the players in the green phase, but act independently before each player.
Oni Actions
The Oni act at three times during a round: At the beginning of the round, before each player in the white phase and before each player in the black phase.
- At the beginning of the round, an Oni round card is dealt face-up that shows the round goal, the Oni effect, and the production of new Oni.
- At the beginning of each player's white phase, the Moon Princess acts once.
- At the beginning of each player's black phase, the Oni execute two attacks. The active player may then take their actions - they are not interrupted by the actions of other players. Oni attacks MUST be executed, before the player can use any actions.
Oni Turn Card: Each Oni Turn Card consists of three sections:
- Turn effect
- Production of Oni/Moon Princess Action
- Turn goal
Example card printed on the rules page: "Out of Control. Effect: Each player has to remove one of their territory markers. Place 1 random LEGENDARY ONI according to its placement rules. Draw a Moon Princess Card and execute it. If necessary, place the Moon Princess beforehand. Round Goal: The players have destroyed 1 Legendary Oni this round (not Moon Princess)." Actions are executed in the order indicated on the card with no exceptions.
Turn Effect: This effect applies as long as this card remains face-up for the entire round. The effects are very different, but they override all other rules and have the highest priority, even if they contradict other rules.
Production: New Oni are placed. Follow the instructions on the card to bring the required Oni into play.
Moon Princess Action: Some cards ask you to draw and play a Moon Princess Card again. Remember: If the Moon Princess is not in play when instructed to draw a Moon Princess card, place her figure on the board instead, following initial placement rules.
Turn Goal: The turn goal is designed exclusively to ensure that the Players may fulfill it. If they have fulfilled the goal at the end of a round, they receive the specified victory points, which they can add to the final score. We recommend to place the appropriate amount of victory point markers on the victory board to track that you've received them.
Victory Points
Players:
- Each conquered area
- Conquered center of the moon
- Less than 15 Oni in play
- Any achieved turn goals
Moon Princess (Oni):
- Oni control 3+ (number of players) areas
- Each Legendary Oni/Moon Princess in play
- Each conquered area is worth its respective victory points
- Each area adjacent to a player's homezone
- Momentum track
Note that all three areas the Moon Princess is standing in count for the Oni. She overwrites all of the players' territory markers.
White Phase
Once the Oni Turn Card has been revealed and executed, it is the players' turn, starting with the white phase. The players act in initiative order and may perform 2 different actions in this phase.
Note: The Moon Princess always acts BEFORE the actions of the player.
White Phase:
- First player in order of initiative
- 1.1 Moon Princess
- 1.2 Player actions
- Second player in order of initiative
- 2.1 Moon Princess
- 2.2 Player actions
- ...
Player actions in the white phase: Choose 2 different actions:
- Draw and play up to 1 event card, OR
- move the Moon Princess 1 area, OR
- lower the momentum by 1, OR
- remove 1 priority marker.
- Produce units/upgrades to a value of 1.
- Move each of your units up to 1 area.
- Execute up to 1 combat action.
Moon Princess Action: Before a player uses their white phase, that player draws a Moon Princess card and follows all instructions on the card. (See Moon Princess, p.14.) When the deck is empty, the discarded cards are shuffled to form a new deck.
Moon Princess is not on the board: If the Moon Princess is not on the board when a Moon Princess action must be executed, you do not draw a card. Place the Moon Princess instead.
You can read all the special rules, rules for movement and placement of the Moon Princess under MOON PRINCESS (p.14).
Black Phase
Oni Attacks:
- First player in order of initiative
- 1.1 2 Oni Attacks
- 1.2 Actions of the player
- Second player in order of initiative
- 2.1 2 Oni Attacks
- 2.2 Actions of the player
- ...
Black phase action card, as illustrated on the rules page: Use your faction effect. Draw and play up to 2 event cards, OR move the Moon Princess, OR lower the momentum, OR remove a priority marker. Move each of your units up to 1 area. Execute up to 2 combat actions.
Special rule: All players may ignore the property massive this round.
The actions of the players: The following special rules apply to the black phase of the new action cards of the Rise of the Moon Princess expansion:
- 2 Oni attacks take place BEFORE the player's first action. Execute these attacks according to the attack priority (p.18).
- Players may execute any number of actions of this phase in any order.
You can use other actions of the black phase between movement and combat. As usual, attacks and movements must not be interrupted. Movement may not take place after attacks.
- Each player only has one turn per round. The black phase may not interrupted and later resumed, not even voluntarily.
- If a player finishes their turn, they can no longer act in this round.
The black phase is considered as all three colored phases (blue, green and red) when it comes to actions, properties, abilities etc. or rules that apply to a specific phase, such as free combat actions in the red phase or additional production points in the green phase.
- Changed Action: You can use the draw/play event card action to take different actions, other than playing an event card. Discard one event card (a face-up one or a face-down one from the stack) and:
- Move the Moon Princess two steps in any direction
- Decrease your momentum by 1
- Remove a priority marker
When you are allowed to draw and use several event cards, you may freely divide the action points between the four options: draw/play event card, lower momentum, move Moon Princess or Remove Priority Marker.
To perform these new actions, you must discard an event card (without using the effect listed on the card.) You can draw cards from the face-up display or by drawing from the deck, as normal.
End of Round
At the end of the round, after all players have finished their black phase, you will check to see whether or not you've met the conditions of the turn goal. If you have met the conditions, then gain the specified victory points immediately.
Stop! Don't draw a new Oni Turn Card - this will only take place at the beginning of the next round.
Now choose a new action card and pass the rest to your left neighbor. Pay attention: The selection of the action cards is secret - each player chooses for themselves and is only allowed to talk about it with the others after the selection of the cards.
Note Solo Mode/2 Player: In a 2 Player or solo game, you discard all action cards and then draw 3 entirely new action cards, pick one of these 3 cards and discard the old/remaining cards. There will be no drafting.
Special Oni
Moon Princess
Area Control: The Moon Princess always stands in 3 areas at the same time: either 2 moon areas and an area outside the moon or vice versa. She always stands at the intersection of 3 areas and is standing in each of the areas adjacent to that intersection.
She automatically controls all 3 areas, even if enemy markers are in them. She overwrites the players' markers for the scoring - but the markers remain in place. Players regain control of these areas when Moon Princess moves on or is destroyed.
This effect also applies across BLOCKADES or when enemy units in the area have more conquest points. Important: This is NOT a Conquest attack, but a rule that applies automatically.
Example: The Moon Princess is simultaneously located in all 3 areas adjacent to the point on which she is standing (1 moon area, 2 ocean floors). The Moon Princess automatically controls all 3 areas in which she stands. Although two of the areas are marked with players' territory markers, they are now controlled by the Moon Princess. The markers remain in place, but lose their status for the time being and are overwritten by the Moon Princess as long as she is in that location.
Moon Princess Movement: The Moon Princess moves exclusively on the purple border of the moon. When activated, she will ALWAYS move at least 1 step. She never remains in place.
If the Moon Princess has already fulfilled the requirements for her final position of a Moon Princess card when the card is revealed, she will still move 1 step in the specified direction. For the Moon Princess, 1 step = 1 intersection.
The Moon Princess is never hindered or impaired by enemy units or BLOCKADES.
Placing the Moon Princess (again): If the Moon Princess is destroyed, she will be replaced at the intersection closest to the homezone of the player on the last place of the initiative. If there is a tie between 2 or more areas, you must choose the place less favorable to the players.
The Moon Princess ignores all effects that might influence her placement, for example the Cybersamurai's Rocket Attack.
Attacking the Moon Princess: When the Moon Princess is attacked, she responds to EVERY combat action in any of the 3 areas with her standard counter: After the attack, the attacker must replace 50% of their units (rounded up) but at least one unit with the largest available Oni.
Note that the Moon Princess is always involved in all battles in all 3 areas and that her conquest points are counted, too!
Legendary Oni
Each Legendary Oni is represented by their own card. Rise of the Moon Princess can be played with all Legendary Oni that are represented by cards in this expansion. If you do not own one or more of these Legendary Oni, remove the respective cards before the beginning of the game. Always keep this stack of cards face down.
In Rise of the Moon Princess, any number of Legendary Oni can be in play at the same time. This overrides the basic rules from Tsukuyumi - Full Moon Down.
Legendary Oni count as Oni in all respects but NEVER as available Oni when it comes to placing new Oni! So when a card asks you to place the strongest available Oni, this never refers to a Legendary Oni.
Placing Legendary Oni: When a Legendary Oni comes into play, for example, when a card prompts you to do so, draw a card from the face-down Legendary Oni stack and reveal it. Each card tells you where the Legendary Oni comes into play and what special rules apply. Always follow these rules and instructions completely.
Legendary Oni ignore all effects that might influence their placement, for example the Cybersamurai's Rocket Attack.
Attacking Legendary Oni: Legendary Oni can be destroyed and removed from the board the same as any other Oni. Don't forget to add the additional Momentum. (p. 23)
Ronin: The Ronin can also become the active Oni itself and can then move up to 3 areas. This has no effect on the Moon Princess.
Dark Observer: When the Dark Observer is in play, it and all Oni in its area always attack. You don't have to check which is the smallest (group of ) Oni to attack an area.
Three Shadows: At the beginning of the round, when the Oni Turn Card is revealed, two of the smallest Oni are placed in each area with one of the Three Shadows.
Merchant: If a player has 3 production points on their action card, they may only use 2 production points as long as the Merchant is in play. Its ability has no effect on the white phase.
Abyssal: The Abyssal triggers a third Oni attack per player. Sometimes the Abyssal may be locked in, or unable to conquer itself at the time of the attack - in which case its (third) attack will be transferred to other Oni and the players must check which (group of ) Oni attacks instead.
Gambler: There is no dice included in the game, please use a dice you have at home. Roll a 6 sided die when the Gambler is put into play and follow the effect as listed below for the value of the die.
- It can be any of their units, from any area of the players' choice.
- No matter which kind of attacks the players execute against Oni, they build up an additional momentum.
- As long as Gambler is in play, players may not fulfill any turn goals.
- If the action card indicates 3 attacks, the player may only execute 2. If this causes the number of attacks to drop to 0, the player may still execute 1 attack. This effect does not affect the white phase.
- Massive means that all units may move a maximum of 1 area per phase and movement action, even if they would benefit from bonus moves or increased movement through action cards. Flying units lose their flying ability and are bound by the normal movement rules.
- If the counter applies to all players, all players are affected, not only the player who is positioned last in initiative order.
Skybound: The Skybound has high values, which predestines it to carry out attacks preferentially. If, for example, Dark Observer is in the game, the Skybound is not activated.
If Moon Princess moves, whether in the white phase or otherwise, Skybound will also move in a circle around the moon.
Note that the territory marker is removed when it enters an area, not when combat is initiated. So when the Moon Princess moves, Skybound removes up to 2 territory markers through free movement.
Defiler: Players may attack and destroy Oni, but may not conquer Oni territory.
Oni Attacks
The Oni want to conquer as many areas as possible and will also occasionally destroy players' units.
Oni Attack — Annihilation and Conquest
In Rise of the Moon Princess, Oni always inflict damage in addition to the conquest action. This counts as a single attack with both conquest and annihilation. The player chooses their counterattacks only after both parts of the Oni attack have been completed.
It is important that the Oni only conquer/attack areas if they have enough conquest points BEFORE annihilation - not after they have done damage.
Example: 3 Nomads are attacked by an Oni. The Nomads have 30 conquest points, just like the Large Oni. As you know, a tie is enough, so the Oni marks the area with a territory marker and the Nomads have to take an additional 30 damage points. The Nomads player decides to go for Protection to save at least one unit.
Note: If there are no Oni territory markers left at any time, use unused territory markers from a faction not involved in the game. Oni territory markers are considered unlimited.
Oni Attack Priority – Basic Rule
The following conditions must be met when determining which area the Oni attack:
- The Oni must be able to conquer the area. The Oni only attack areas that they are capable of conquering, no exceptions!
- If there are players' units in an area, the Oni must have at least the same amount of conquest points in order to conquer the area.
- The Oni do not attack unconquered Tsukuyumi areas or areas with Oni markers. Tsukuyumi areas are only attacked if a player's territory marker is in them.
- The Oni must have at least enough conquest points to conquer a mountain range or otherwise protected area. (For example Strongholds of the Boarlords).
- The areas must be within a range of 2. Oni can move up to 2 areas to conquer areas. So they can potentially conquer areas within range 0, 1 and 2.
- As few Oni as possible must be moved. If there is an area where 0 Oni must move to conquer it (because they are already in it), that area will be attacked and conquered. If there is none that can be reached without movement, check if there is an area where only 1 Oni needs to be moved, then 2 Oni, and so on.
Example: The Oni prefer 1 Large Oni to 2 Small Oni. Where 2 Medium Oni are moved, rather than moving 3 Large Oni and so on.
The Oni attack only:
- Areas without Oni territory markers
- Moon areas only, when there are players' territory markers
- Areas where the Oni have at least as many conquest points as the units of the strongest player. (the units of different factions are not added together).
The Oni want to conquer 2 AREAS and: Move as few Oni as possible (1, 2, 3 etc.) ...
- ...as little as possible (0, 1, 2)
(If there is a tie between several Oni, use the smallest possible Oni.)
Tie between areas: The following rule ONLY applies if there are still more than 2 areas to choose from according to the two criteria above:
- Areas with priority marker are preferred.
- Otherwise the players decide which of the available areas will be attacked.
Note: the decision is ONLY made between areas that meet all the above criteria and still tie.
ALWAYS applies when the Oni conquer areas:
- Areas WITHOUT players' units: Place an Oni territory marker and the smallest available Oni in this area.
- Areas WITH players' units: Place an Oni territory marker. The defenders' units take damage and they get to choose a counterattack (see p.24).
Movement Rules for Oni
"Which area can the Oni conquer in which they have to move as little Oni as possible?"
Important: The Oni do not have to come from the same area, but can come from different areas within range.
Example 1: The Oni can conquer the area 5 because they have more conquest points than the players and don't have to move a single Oni. – 0 Oni moves.
Example 2: A single Oni moves 1 area to strengthen a group of 3 Oni who can then conquer the area. – 1 Oni moves.
Example 3: A single Oni moves 2 areas into an empty area and conquers it. In any other case at least 2 Oni would have to move to conquer an area – 1 Oni moves.
Example 4: Neither 0, 1 nor 2 Oni can conquer an area. Instead, only 4 Oni can conquer an area – because a squad of Boarlords have an area safely under their control. – 4 Oni move.
Multiple Areas to Choose From at the Same Time
There will be situations where there are several areas to be considered for an Oni attack. Please note that the resolution of such a tie between two or more areas will only be decided between those areas that compete with each other, i.e. between those that are eligible anyway. All others are already sorted out, for example because they cannot be reached, conquered or entered by Oni, or because more Oni would have to move there.
This means that it has already been checked that all areas available for selection can be successfully conquered by the Oni.
In this case, the tie will be resolved according to the following checklist. Go through the list from top to bottom. If after each point you have not decided which area will be attacked, go to the next point and so on.
- Only 2 areas available? Since the Oni always execute 2 attacks, if there is a tie between two areas, then both areas are attacked. There's no need to break the tie.
- Does one of the areas have a priority marker? If so, then the area with the priority marker has the higher priority. If several areas have priority markers, then the players decide which two of those areas will be attacked.
- Do none of the available areas have a priority marker? Then the players may decide which of the available areas the Oni will attack.
Note that the Oni will receive new units when they conquer empty areas. However, they will not receive new Oni if they attack areas with players' units.
Example: In one area there are 4 Large Oni together with a Fireborn and in two other areas there are 1 Small Oni each without enemy units. In all three cases, 0 Oni would have to move - so they are tied. None has a priority marker. The players now decide for themselves whether the Oni destroy the Fireborn and then conquer the area or whether they grant them new units and let them conquer the empty areas.
- There are several available Oni that could move? Please note: the decision which Oni moves can cause the most confusion. As a player, one may pay more attention to Oni units than to areas. Therefore, the following rule applies: Only when it has been determined which area is to be attacked and there is a tie, the rule about the smallest possible Oni comes into effect. For the Oni, it doesn't matter whether they attack with a Small Oni or a Large Oni, as long as they can conquer the selected area – much like for the players themselves: the smallest possible stake, for the biggest possible gain.
Example: An area with players' units and 20 conquest points can be conquered by a Medium or a Large Oni. Small Oni would be the smallest available Oni, but they cannot be used, because more than one Oni would have to be moved. The choice between a Medium and Large Oni, on the other hand, clearly goes to the Medium Oni because it is the smallest of both.
Players' Choice
Since the players are often allowed to decide for themselves which area is attacked, there are two possible outcomes of conquest:
Attacking an empty area: The smallest available NEW Oni is placed and the area is conquered. If the Oni attack areas without the players' units in them, you will place the smallest available Oni in them immediately after placing the Oni territory marker.
Attacking areas with players' units: Oni cause damage to players' units and conquer the area. If the Oni attack areas with players' units in them, the Oni first deal damage to the units and then place their territory marker, but NO new Oni. The defender(s) may choose counterattacks. If there are multiple defenders, only one player may choose a counterattack (of the players' choice). However, the player with the lowest initiative always suffers damage first. From then on, the damage is dealt to the next player in ascending initiative order.
Combat Against the Oni
Combat in the cooperative game of Rise of the Moon Princess is completely different from what you are used to from Tsukuyumi. Normally you have an opponent who chooses and uses a counterattack that is completely unfavorable to the attacker. This is not possible in the cooperative game because your fellow players want you to win.
Random counterattacks are also ruled out because you then lack the predictability of your attacks, which is a core concept of combat in Tsukuyumi.
That's why we've implemented the Momentum Track, which takes the Oni's counterattacks to a higher level, weakening you for all further rounds or making the game more difficult for you - but not as a counterattack to a single attack.
Momentum and Momentum Track
You record every attack and every destroyed Oni on the momentum track. The momentum track scales with each player so that a player in Solo Mode has the same experience as a higher player count.
Each time an Oni is destroyed or attacked, the marker on the momentum track is moved forward. The following rules apply:
- If you use a combat card in an area with Oni, you move the momentum forward by one space. The type of combat card does not affect this, simply playing a combat card moves the momentum track.
- If Oni are destroyed in an attack (no matter how many Oni), you move the momentum +1 (additionally) on the momentum track. This does NOT happen if you are using passive abilities, counterattacks or attacks that do not require a combat card. So Tetsuo orbital laser, mines, counterattacks to an Oni attack, the Fireborn's Flaming Skin, etc. do NOT produce momentum.
- If you attack in an area with the Moon Princess or a Legendary Oni, you always build +1 Momentum, whether there are several Legendary Oni or just one.
Example: If you have played the combat card Annihilation and destroy at least 1 Oni, you move the momentum by 2 spaces — 1 for playing a combat card against the Oni and +1 because at least 1 Oni was destroyed. For example, if you played the combat card Conquest or Devastation in an area with Oni, the Momentum track will only move forward by 1, because no Oni are destroyed. If there is a Legendary Oni in the target area, you will build up 2 momentum. If you destroy another Oni you even build up 3 momentum.
When Is No Momentum Built Up?
- Momentum is NOT built when players conquer an area without Oni units, or when they conquer an Oni area without a fight.
- Ranged attacks such as the Target Finder missile or the Snipe combat card (Kampfgruppe 03) do not build momentum.
- When Oni are destroyed by mines, Tetsuo laser, Flaming Skin, or similar attacks that do not require playing a combat card, no momentum is built.
- When Oni may be moved or removed.
- When BLOCKADES or events are used in areas with Oni, not even if they destroy Oni.
- When the Lords of the Lost Sea perform Cleansing.
- When the Children of the Lion replace or rotate areas.
- When the Sentinels destroy Oni.
Counters and Legendary Oni
The momentum track has two special types of event spaces: Purple counter spaces and Legendary Oni spaces. When the momentum reaches one of these spaces, you immediately draw a corresponding card. However, do not reveal it until that player has completed their current phase. A player's attacks are not interrupted. This may result in two or more cards being revealed at once after a player has finished their current phase.
Note: In the last round, the special Counters of the Last Round are used.
Counter: If the momentum marker reaches a counter square, the player immediately draws one of the face-down counter cards and reveals it at the end of their phase (end of white or black phase). Execute the effect immediately, or if the effect is permanent, place the cards face-up in front of you.
Permanent effects remain face-up and in effect until, for example, the momentum track is lowered and a player is allowed to discard a counter card. Otherwise, the effect is permanent. If the momentum track passes a purple counter square while being lowered, the players may discard a permanent counter card of their choice. Legendary Oni cannot be removed that way.
In the last round, only counters of the last round are drawn.
Note: The event card action allows a player to spend event cards to lower the momentum. If the momentum falls below a counter space, a player may choose to discard any counter card. If the momentum reaches that space again, the player who has moved the momentum track up again must draw another counter card.
Legendary Oni: If the momentum reaches a Legendary Oni space, the player immediately draws one of the face-down Legendary Oni cards and reveals it at the end of their phase. Place the respective Legendary Oni at the end of the player's phase according to the Oni's placement rules.
Note: The event card action allows a player to spend event cards to lower the momentum. If the momentum drops below a Legendary Oni space, the Oni will still remain in the game. If the momentum reaches that space again, a new Legendary Oni is placed.
Fighting the Moon Princess
When a player attacks the Moon Princess, half of the attacker's units (rounded up) become Oni. Replace the affected unit(s) with the strongest available Oni.
Damage Distribution to Oni
Distributes damage against Oni so that as few Oni as possible are destroyed. Whenever larger Oni can protect smaller units, they do so.
Priority Marker
If there is a tie between areas, this area is attacked preferentially by the Oni.
One Round
- Choose Action Card: Each player selects a single card and then passes all remaining cards to the player on their left.
- Reveal Turn Card: Execute the actions shown on the card. All effects on the turn card take effect. These effects apply for the entire round.
- Execute:
- 1 White Phase: First execute the Moon Princess action, then the player chooses their two actions and executes them.
- 2 Black Phase: First, execute the Oni attacks, then the player executes their actions. Each phase is completed before a new phase begins. The order in which the actions of each phase are used is arbitrary. Exception: Movement BEFORE attack. Actions do not have to be used (completely). Exception: Oni Attacks must be played.
- Scoring the Turn Goal: If, at the end of a round, the players have fulfilled the turn goal specified on the turn card, they receive the specified victory points.
FAQ
Question: How many victory points is a devastated area adjacent to a homezone worth? Answer: 2 victory points. The Devastation lowers the value of the area to 0, but being adjacent to a homezone, the area gains +2 in value.
Question: If the Moon Princess is moved as part of a counterattack, when does this happen and in what order are counters executed? Answer: When the Moon Princess attacks, she attacks in all 3 areas in which she stands at the same time. Only afterwards may counterattacks be selected or executed. The counter of several players are executed in initiative order.
Question: If a counter space is passed a second time (by previously lowering the momentum) in a game, is another counter card drawn for the same space? Answer: Yes, for every counter space that is passed when building momentum, a counter card must be drawn, even if the players have already drawn a counter card on that same space before.
Overview
Players
- Each conquered area
- Conquered center of the moon
- Less than 15 Oni in play
- Any achieved turn goals
Note that all three areas the Moon Princess is standing in count for the Oni. She overwrites all of the players' territory markers.
Moon Princess
- Oni control 3+ (number of players) areas
- Each Legendary Oni/Moon Princess in play
- Each conquered area is worth its respective victory points
- Each area adjacent to a player's homezone
- Momentum track
Type of Area
- Ocean Floor: No special characteristics.
- Fertile Ground: Is worth 1 victory point for the players and 2 victory points for the Oni.
- Mountain Range: Attackers need at least x conquest points to be able to conquer the area. Defenders get x as a bonus on conquest points.
- Devastated Land (Expansion: Fireborn): Is worth 1 victory point for the players and 0 victory points for the Oni.
- Area Adjacent to a Player's Homezone: This area is worth +2 victory points for the Oni.
Momentum
+1 momentum is built when:
- a player plays a combat card in an area with Oni.
- a player destroys units of the Oni (no matter how many) as a part of an attack.
- a player plays a combat card in an area with at least one Legendary Oni or the Moon Princess (no matter how many).
No momentum is built when:
- a player plays a combat card in an area without Oni.
- a player uses a ranged attack.
- Oni are destroyed without playing a combat card.
- the Sentinels destroy Oni.