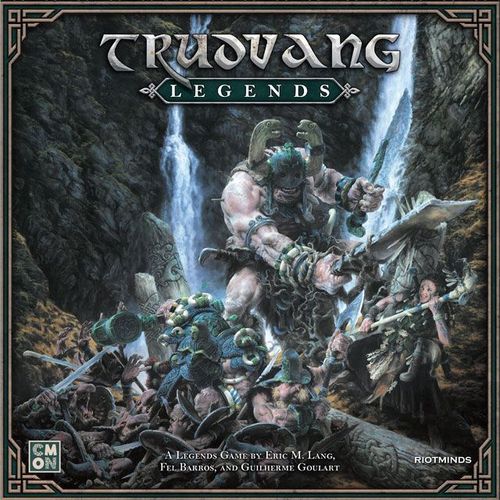
Trudvang Legends
Trudvang Legends Rulebook
Table of Contents
Table of Contents
Introduction
Trudvang Legends is a cooperative game of epic adventures in which 1 to 4 players take on the role of daring Heroes who band together to fight back the encroaching forces of darkness while the game itself controls Enemies, Events, and obstacles.
Sleeves on the Map and Adventure boards keep track of the story, the connections players make, the different paths that are chosen, and render the current state of the world. Each Adventure is part of the campaign that unfolds and presents challenges, mysteries, tests, decisions, and Points of Interest that Heroes must overcome and investigate. Every choice has an impact and leaves a mark upon the land and its inhabitants, shaping the future. The destiny of Trudvang is in your hands.
Components
NOTE: Some of the examples of components shown in this Rulebook (Personalities, Companions, Titles, Adventure cards, Entries, and Points of Interest) are merely mockups of real components, created to preserve the element of surprise during the game.
- 1 Map Board
- 1 Adventure Board
- 1 Points of Interest Board
- 10 Double-Sided Adventure Sheets
- 2 Double-Sided Adventure Map Sheets
- 4 Hero Dashboards
- 1 Book of Sagas
- 6 Hero Cards
- 6 Starting Item Cards
- 160 Feat Cards (12 for each Hero, 14 for each Class, and 4 Wyrd)
- 14 Event Cards
- 171 Story Cards
- 12 Enemy Attack Cards
- 9 Starting Cards
- 6 Hero Figures: Kattly, Felerion, Briya, Lydana, Volgr, Maelling
- 2 Ships
- 27 Enemy Figures: 4 Bull Trolls, 8 Forest Trolls, 4 Garms, 8 Draugrs, Erkki, Blodughadda, Two Cleavers
- 4 Counter Bases
- 4 Rune Bags
- 108 Runes (32 Dark, 12 Wild, 16 Air, 16 Earth, 16 Fire, and 16 Water)
- 24 Negative/Positive Status Tokens (6 Chronicle Point, 6 Defense, 6 Attack, and 6 Health)
- 32 Damage Tokens (14 1-Damage, 12 5-Damage, and 6 10-Damage)
- 12 Points of Interest Tokens
- 1 Leader Token
- 1 Phase Marker
- 4 Health Markers
- 4 Chronicle Points Markers
Basic Concepts
NOTE: Some of the examples of components shown in this Rulebook (Personalities, Companions, Titles, Adventure cards, Entries, and Points of Interest) are merely mockups of real components, created to preserve the element of surprise during the game.
Map Board
The Map board represents the lands of Trudvang, where the campaign takes place. The Map contains the following elements:
Regions: Areas separated by borders, which may or may not contain sleeves.
Sleeves: Pockets that hold Location cards that are sleeved in a region.
Borders: Separate and limit regions. Regions are adjacent to each other when they share a common border.
Sea borders: Special blue borders that can only be crossed with Ships.
Adventure Board
The Adventure board keeps track of the Heroes' journey and world's state and behavior. It is divided into 2 different areas:
Stories area: Contains 12 sleeves to store Starting Rules cards, which are player aids with defeat and level up rules, World cards that determine the world behavior and important occurrences throughout the journey, Personalities met by the Heroes, and occasionally Locations cards.
Phases area: Contains 6 sleeves to store Phase cards. The order of the cards determines the order in which the Phases of the game take place.
Points of Interest Board
The Points of Interest board keeps track of the Points of Interest, which are places that Heroes must visit, happenings that need to be investigated, or Enemies that must be fought to progress the story. It holds the sheet of the Adventure in play in the pocket present on the back of the board. It has a set of 12 windows that must remain closed (with window covers placed inside each window) and may only be revealed when instructed to by the game. When first playing the game, remove the cardboard pieces that cover the Adventure sheet's letters by pushing them while holding the board facedown, letting them fall through the pocket opening. They aren't used in the game.
Hero Dashboard
Health and Chronicles track: Indicates the Hero's health (Health icon) and amount of Chronicle Points (Chronicle Point icon).
Items slot: Holds the Hero's Item cards.
Status track: Formed by 2 permanent statuses, 1 positive (blue) and 1 negative (red), and 3 status slots for temporary Status tokens.
Miss track: Indicates the total amount of times a Hero failed to allocate runes on their Feats, which may trigger status effects on the Hero, depending on the quantity of runes.
Hero card slot: Holds the Hero card.
Titles slots: Hold Titles that the Hero acquires throughout the campaign.
Feats deck slot: Holds the Feat cards of the Hero's current Level.
Feats upgrades slot: Holds the Feat cards of the Hero's next Level.
Feats discard slot: Holds discarded Feat cards.
Draw power: The standard amount of Feat cards a Hero draws during combat and how many runes are drawn during combats and tests.
Hero Card
Health: Indicates the Hero's initial and maximum health (Health icon).
Starting runes: Amount and types of runes that comprise the Hero's initial Rune bag.
Class: Indicates the role of the Hero.
Exhaust effect: Indicates an optional effect granted when players decide to exhaust their Hero cards. If forced to exhaust by any game effect, the Hero doesn't gain its benefit.
Miss effect: Indicates the effect triggered when the Hero is exhausted and reaches the end of the Miss track.
The Classes
Each Hero in the game belongs to a Class, indicating a professional focus that the character has chosen in life and experiences they have gained prior to the start of the adventure. Each Class has its own Starting Item and a set of Feat cards. In addition, the Hero's Class may provide them with unique insights that aid in decision-making throughout the campaign as well as influence the tests' difficulty (see pg. 21) and damage intake. Some tests are exclusive to certain Classes, others have difficulties adjusted, and occasionally being from a certain Class may even grant automatic successes. There can only be 1 Hero of each Class per game.
The Classes featured in the core game are:
Bard: Entertaining, knowledgeable, and versatile, capable in combat and with magic. Bards are prone to have unique insights regarding places and people that may be found during the campaign and usually exceed in CHARISMA tests.
Vitner Weaver: Masters the energies of magic and weavers of the mysterious energy called vitner, also sometimes called spellcasters, sorcerers, or conjurers. Vitner Weavers have insights regarding secret enchantments and usually face INTELLIGENCE tests exclusive to them to perform spells.
Dimwalker: Live in the name of their god(s). They pray and connect with a divine power to receive special abilities and skills. Dimwalkers frequently reduce the amount of damage intake of their own or the party as well as sense the intentions of the NPCs that cross their path.
Warrior: Strong and powerful, fierce and supernatural berserkers that are respected and feared. Warriors exceed in STRENGTH tests and at times can challenge NPC Enemies to duels, protecting the other Heroes.
Ranger: Wanderers of the wild, pathfinders, skilled hunters, and scouts who learned how to predict weather and track the most fearsome beasts. Rangers are prone to have insights regarding different creatures that cross their path as well as succeed in tests of any type relating to taming such creatures and to finding tracks and clues.
Rogue: Outcasts and con artists, they live by stealth, murder, or dealing with secrets, and always live in the shadows. Rogues are likely to succeed at AGILITY tests, especially those relating to deceit or theft.
Setup
Basic Setup
-
Place the Map board faceup in the center of the game area.
-
Place the Adventure board faceup next to the Map board.
-
Choose an unlocked Adventure or Side Quest to play. Take the corresponding Adventure sheet and slide it, faceup, in the Points of Interest board pocket. Make sure that all windows are closed and avoid reading the sheet to prevent spoilers.
-
Place the Points of Interest board faceup next to the Map board.
-
Take the Story cards along with their paper tray and place it next to the Points of Interest board. Do not shuffle the cards!
-
Take the Enemy figures and place them within reach of all players.
-
Each player chooses 1 Hero and takes:
- The corresponding figure and Hero card.
- 1 Rune bag and 1 counter base of the matching color, attaching it to their Hero figure.
- The starting runes listed on their Hero card, placing them inside the bag.
- 1 Hero dashboard, placing it in front of them.
Then each player takes and places on their dashboard:
- The corresponding Hero card faceup in the Hero card slot.
- 1 Health marker in the Health and Chronicles track slot corresponding to their Hero's Health.
- 1 Chronicle Points marker in the 0 slot of the Health and Chronicles track.
- The Starting Item of their Hero Class faceup in the Items slot.
IMPORTANT! When playing the game for the 1st time, the only Adventure that can be played is Adventure C1, Child of the Light (Book of Sagas, pg. 03)
1st Adventure
When playing the 1st Adventure, perform the following steps:
A. Each player takes and places on their dashboard:
- The Level I Feat cards from their Hero and Class, shuffled and facedown on the Feats deck slot.
- The Level II Feat cards from their Hero and Class shuffled and facedown on the Feats upgrades slot.
- Their 2 Ultimate Feats, facedown, on the bottom of the Level II Feats deck on the upgrades slot.
B. Sleeve the Starting Phase cards on the phases area of the Adventure board according to the number listed on their backs:
- Travel in the 2nd sleeve.
- Engage in the 3rd sleeve.
- Explore in the 4th sleeve.
C. Sleeve the Defeat and Level Up Starting Rules cards faceup on the first 2 sleeves of the stories area of the Adventure board.
D. Sleeve the 4 Starting Location cards faceup in their listed regions:
- City of Storhavn in Wildland.
- City of Manjord in Manjord.
- City of Ildebaad in Dranvelt.
- City of Vodd in Sylvan.
Ongoing Game
During the 1st Adventure, cards are sleeved on the boards and Heroes make some progress, acquiring cards and possibly upgrading their Feats. From the 2nd Adventure onwards, perform the following steps:
Each player takes:
- Their Companion cards and places them faceup above their Hero dashboard.
- Their Title cards, choosing up to 4 to use during the Adventure, and places them faceup on the Titles slot of their dashboard. The remaining cards are placed next to their dashboard in a faceup deck.
- The runes of the 4 active Titles (if any) and places them in their bag.
- Their Item cards and places them, along with the Starting Item, on the Items slot of their Hero dashboard in a faceup deck. This deck is not shuffled. Instead, players select the order in which they organize their Item deck.
- Their XP tokens and places them next to their dashboard.
- The Feat cards of the Hero's current Level, shuffles them forming a deck, and places it facedown on the Feats deck slot.
- The Feat cards of the Hero's next Level, shuffles them forming a deck, and places it facedown on the Feats upgrades slot. Place the Ultimate Feats, if needed (if you haven't already upgraded all Level I cards) on the bottom of the deck.
Then, resolve any level-up effects.
NOTE: Although not advised, players may swap Heroes during a campaign by rebooting the Hero in play entirely. Their Story cards acquired during the campaign should be taken by the remaining Heroes, and a new Hero should start from scratch. Spreading out game sessions across Heroes may not be the most effective way forward, as it'll lead to Heroes that see little play and slower progress (not to mention a very fractured story experience).
Game Overview
At the start of the game, players read the chosen Adventure's Introduction Entry in the Book of Sagas and proceed to follow its instructions and branching paths (if any). Then, the rest of the game is played through a series of rounds. Each round is divided into multiple Phases, defined by Phase cards in the phases area of the Adventure board (see pg. 06), traveling through regions, engaging in combat, and interacting with Locations and Personalities on the board, with the objective of reaching a Point of Interest to progress with the Adventure story.
When a Hero or a party interacts with a Point of Interest, they are taken back to the Book of Sagas, where the game story develops, branches according to the players' decisions and performance in tests, and determines future objectives for the Heroes. Players continue to read through the Book of Sagas until a new Point of Interest is revealed, at which point they stop reading the Book, placing it aside, and return to the Phases of the game, moving to the next Phase. The game continues to progress in this manner until players reach the End Entry of the Book (see below).
Side Quest Adventures are optional and can be played at any time and in any order between main Adventures. In addition, unless stated otherwise, when playing a Side Quest, Heroes don't gain Chronicle Points for defeating Enemies. Most of the Side Quests are temporary and are removed from the game by instructions in the Book of Sagas once the campaign reaches a point in which too much time elapsed and the Side Quests plots no longer make sense with the current events.
Side Quests may not be essential, but they have a great impact on the game. Not only do they provide useful insights, knowledge, Items, Companions, and Personalities that can be very helpful, they also influence branching paths of the main Adventures and may change the course of the campaign.
Whenever the game refers to Adventures it refers to both main Adventures and Side Quest Adventures. Each Adventure can only be played once in the same campaign.
Book Entries
Each of the Book's Adventures and Side Quests are formed by Entries, which are pieces of the story that come in 3 different types:
Introduction: Provides a context for the time in which the Adventure takes place, what troubles the lands or the Heroes, and what is expected of them. It also provides specific setup instructions to start the game, listing in which region the Heroes start, which Enemies are roaming the lands, and which Enemy cards to use. In addition, the Introduction usually reveals a Point of Interest (see pg. 23), which is the next objective that the Heroes need to reach to progress the story.
Numbered: The mid-pieces of the Adventure, which are shuffled to prevent spoilers as well as to account for the branching paths. Each Entry is numbered and must only be read once the Book or a Point of Interest (see pg. 23) instructs players to do so. Entries present the Heroes with decisions, instructions, tests, as well as reveal Points of Interest to investigate.
End: The end of an Adventure. Just like the other types of Entries, the End may provide Heroes with instructions to perform. It is possible for an Adventure to have more than 1 possible End, which is defined by the choices and results obtained by the players throughout the Adventure.
Basic Rules
IMPORTANT! Being a storytelling game, the story may introduce new rules, leading to situations that are not covered in the Rulebook. In such cases, the rules presented on cards and in the Book of Sagas take precedence over the Rulebook.
The Book of Sagas
The Book of Sagas is the most important component of Trudvang Legends. Filled with multiple choices, tests, puzzles, and branching paths, the Book guides each of the Adventures in the game, forming an interwoven campaign and a world that is shaped by the players' decisions and performance.
The Book of Sagas is divided into Adventures and Side Quests.
Adventures and Side Quests
Adventures and Side Quests can only be played when their cards (see pg. 13) are unlocked.
Adventures are mandatory, and once unlocked must be played to progress the campaign. They are also never discarded. When playing an Adventure, Heroes gain Chronicle Points for defeating Enemies.
Acting as a Party
Heroes in the same region are considered a party. Whenever any game effect happens to the party, it affects all Heroes in the region where the effect is taking place. If there's only 1 Hero in the region, then only that Hero is affected. In the same manner, whenever the game checks for the presence of Classes, Items, Companions, tokens, or any other game element in a party, only the Heroes in the pertinent region check for the presence of the determined element.
When a party gains a Story card or token, the players whose Heroes are in the party choose among them who will receive the Story card or token.
Timed Effects
Timed Effects are any effects that are automatically activated or used during specific times of the game and are usually present in World, Location, and Personality cards (see pgs. 13 and 14).
A start-of-game icon denotes any game effect that must be activated at the start of the game. They also activate immediately when the card is revealed and sleeved.
An end-of-game icon denotes any game effect that must be activated at the end of the game, after players read the End Entry.
Throughout the campaign, more timed effects may be revealed and are explained by the Book of Sagas upon its reveal.
Health
Health may refer either to the Heroes' health or the Enemies' health.
A Hero's health is tracked through the Health and Chronicles track on the Hero's dashboard.
Whenever a Hero gains Health, move their Health marker 1 space to the right for each Health gained. The maximum amount of health varies according to each Hero and is determined by their Hero card. Heroes cannot go over the amount of health listed on their Hero cards, even if they acquire more Health.
Whenever a Hero loses Health, move their Health marker 1 space to the left for each Health lost. The minimum amount of health is 0. Heroes cannot go under 0, even if they lose more Health.
Whenever a Hero's Health marker reaches the 0 space of their dashboard, the player must follow the defeat rules (see pg. 33).
Enemies' health is tracked through Damage tokens. The maximum health of an Enemy is determined by their stats (see pg. 16). Whenever an Enemy loses Health, place 1 Damage token next to their Enemy figure or token for each Health lost. When an Enemy has an amount of Damage equal or higher than their health, the Enemy is defeated. Remove their Enemy figure or token from the Map and return the Damage tokens to their respective pool.
If an Enemy gains Health, remove an amount of Damage tokens corresponding to the Health gained. An Enemy's health can't ever go beyond the amount listed in their stats. If an Enemy receives more Health than the amount of Damage they have, simply remove all the Damage from the Enemy, restoring it to full health.
Chronicle Points
Chronicle Points are used as currency in the game and can be exchanged to grant several benefits to the Heroes, usually relating to Items and Feats activation as well as to interact with Locations. Chronicle Points are gained by the Heroes when they succeed in their actions and perform particularly Heroic acts. Chronicle Points are tracked through the Health and Chronicles track on the Hero's dashboard.
Whenever a Hero gains Chronicle Points, move their Chronicle marker 1 space to the right for each Chronicle Point gained. The maximum amount of Chronicle Points is 12. Heroes cannot go over 12 even if they gain more Chronicle Points.
Whenever a Hero loses Chronicle Points, move their Chronicle marker 1 space to the left for each Chronicle Point lost. The minimum amount of Chronicle Points is 0. Heroes cannot go under 0, even if they lose more Chronicle Points.
Whenever a component shows "X Chronicle Points:", with X being a number, move the Chronicle marker the listed number of spaces to the left in order to activate the effect listed after the colon. Activating effects is not mandatory. Players choose whether to activate the effect, provided that they have enough Chronicle Points to use. Only the Hero interacting with the effect may use their Chronicle Points to activate it. Other Heroes cannot lend Chronicle Points to activate other Heroes' Items or Feats (even if in a party). If a Location requires that Chronicle Points is used when interacted with (see pg. 14), each Hero in the region may individually decide to use their Chronicle Points to receive the benefit.
Story Cards
Story cards are a main group of diverse numbered cards that are acquired by the players or revealed throughout the campaign. These cards must be kept secret and may never be revealed unless specifically instructed to by the game.
Story cards can be any type of card, but are mainly composed by Locations, Items, Adventures, Side Quests, Personalities, Companions, Titles, Enemies, and World cards. Each type of card has its own purpose, behavior, and rules to follow when revealed or acquired.
Unless a choice is given, players must reveal or take a Story card when instructed to. Story cards can't be refused or discarded. Likewise, whenever there's an instruction to remove a Story card from the game, players must remove it. This is not optional. When a Story card is removed from the game, it must be returned to the Story cards tray in numbered order.
Story cards remain in the game for an undetermined amount of time. They may remain in the game for the rest of the campaign, or until they're replaced by updated versions of the card when affected by the story, or be removed entirely at some point. Any changes related to Story cards are associated with the Adventures and are so instructed by the Book of Sagas.
Adventure and Side Quest Cards
Adventure and Side Quest cards represent the different Adventures and Side Quests that compose the campaign.
At the start of the game, only the 1st Adventure is available to play, Child of the Light (Book of Sagas, pg. 03), which is not represented by a card. The remainder of the Adventures and Side Quests are all represented by Adventure and Side Quest cards that are unlocked by simply playing the game. The more the campaign is played and explored, the more Adventures/Side Quests are unlocked. Adventures and Side Quests may only be played once unlocked.
Whenever an Adventure or Side Quest is unlocked, players take the respective card from the tray and keep it separated until the end of their campaign or until they are removed from the game (in the case of Side Quests).
Once the 1st Adventure is played, 1 or more Adventure/Side Quest cards are unlocked. From there onward, before playing an Adventure, choose 1 among the unlocked cards and start play by reading the indicated Introduction Entry at the bottom of the card.
Companions
Companions are Non-Playable Characters (NPCs) the Heroes meet during the campaign. More than casual acquaintances, Companions join the Heroes, becoming trusted sidekicks, and reliable assets.
Whenever a Hero or party gains a Companion, 1 of the players whose Hero is in the party takes the Companion card and places it, faceup, above their Hero dashboard. Once a player takes the card, it may not be traded or exchanged among players for the rest of the campaign.
Each Companion has an effect listed on their cards that, unless stated otherwise, may be activated only once per Adventure by the player holding the Companion during a combat resolution (see pg. 27).
Once a Companion is activated, rotate their card 90° to represent the activation. Although Companions may be activated only once per Adventure, some game effects allow them to be restored back to their active position, becoming available to use again.
Personalities
Personalities are important NPCs the Heroes meet that, unlike Companions, don't join the Heroes in their journey, but their acquaintance impacts the world and may aid or hinder the Heroes, depending on the nature of their relationship.
Whenever players are instructed to sleeve a Personality card, sleeve it, faceup, in the stories area of the Adventure board. Then, take the respective Personality token (carrying the same image) and place it in the region listed on the Personality card, with the color side faceup.
At the start of each Adventure or Side Quest, if a Personality is sleeved, place the personality token in the indicated region when the effects are resolved.
Each Personality has a combat related effect and effect type listed on their cards that may be activated by the Heroes whenever a combat takes place in their region. Some Personalities have mandatory effects (usually the ones that hinder the Heroes) and must be activated whenever a Hero or party is in their region, while others may be activated by players' choice. The Personalities' effects take place during the combat according to their effect type (Skill, Block, or Attack) (see pg. 19). If any game effect interacts with Skills, Blocks, or Attacks, the Personalities' effect is also affected.
Once a Personality has been activated, flip its token to the uncolored side to indicate that they've been activated during the combat. Once the combat is over, flip the token back to its color side.
World
World cards determine the world behavior and special circumstances that mark the Heroes. They may keep track of Enemies following the Heroes, the current strength of allies, or even menaces hovering over the Heroes, waiting to happen.
World cards may only have text on them to remind the players of specific occurrences that mark the Heroes during the campaign or timed effects that must be activated.
Whenever players are instructed to sleeve a World card, sleeve it faceup in the stories area of the Adventure board.
Locations
Locations are important places discovered by the Heroes that are sleeved in the regions of the Map board. Similar to Personality cards, Locations may aid or hinder the Heroes, depending on their nature and state.
The game starts with 4 Locations, the main Cities of Trudvang, already sleeved on the map (Storhavn, Manjord, Ildebaad, and Vodd). Whenever players are instructed to sleeve a Location card, sleeve it faceup in the Map board in the region listed on the card. If the region already has a Location card, replace it with the new Location card unless stated otherwise and return the replaced card to the tray in numbered order.
Each Location has an effect. Most Locations may be activated by each Hero in its region during the Explore Phase (see pg. 31). Other Locations are associated with timed effects (see pg. 12), and are automatically and exclusively activated at the time the effect takes place. Locations with mandatory effects (with the 'mandatory' keyword) must be activated a single time whenever a Hero or party is in that region during the Explore Phase.
Most Locations require that Chronicle Points are used to activate it, or some other type of exchange. All Heroes in the party may benefit from the effect as long as they're individually able to fulfill its requirements (if any).
At times, the Book or a Story card may interact with Cities. Cities are any Location cards starting with the 'City' keyword.
Items
Items are weapons and objects that can be found throughout the campaign. Items can be used in combat (see pg. 25) and can provide several different effects, such as increasing Attack, providing Chronicle Points, and healing Heroes. Each Hero starts with a Starting Class Item, which are unique Items for each Class. As the game progresses, Heroes receive more Items, all related to the story in the campaign.
All of a Hero's Items form a deck, which is placed faceup on their Hero dashboard, in the Items slot. Whenever a Hero or a party gains an Item, 1 of the players whose Hero is in the party takes the Item card and chooses to place it faceup at the top or bottom of their Items deck. Once a player takes the card, it may not be traded or exchanged among players for the rest of the campaign.
At the start of each Adventure, the players choose the order of each of their Items on the deck. The top Item of the deck is the active Item and can be used during a combat. Most Items require Chronicle Points to be used. Once the active Item is used, the card is placed faceup on the bottom of the Items deck, making the new topmost Item active. Multiple Items can be used during a combat. However, each Item can only be used once.
Titles
Titles are awarded to Heroes whenever they accomplish remarkable deeds or whenever they're marked by life-changing events. Titles may have different effects that provide benefits to the Heroes whenever they are in play and/or provide additional runes to the awarded Hero.
Whenever the Book of Sagas awards a Title to a Hero or a party, 1 of the players whose Hero is in the party takes the Title card and places it, faceup, in one of the Title slots of their Hero dashboard. Then, the player takes the additional rune (if any) and places it in their bag. Once taken, Title cards cannot be exchanged among players. Each Hero can have a maximum of 4 active Titles on their dashboard. Players select which of their Titles to use at the start of each Adventure. If a Title contains the keyword 'mandatory', the Title must be among the ones selected. Any inactive Title must remain in a deck to the side of their dashboard. Heroes don't benefit from additional runes or effects from the inactive Titles. However, any game effects relating to the presence of specific Title cards are still triggered by the inactive cards.
IMPORTANT! Throughout the campaign, the Book of Sagas may check for the presence of Story cards to take the Heroes through different branching paths. Any Story card acquired by the Heroes is eligible, including inactive cards (in the case of Companions, Titles, and Items, for example). Unless stated otherwise, checking the presence of a card does not count as activating it.
Quest Tokens
Quest tokens are numbered from 1 to 6 and are used to represent important points in the Adventure, such as specific information the Heroes learn, a moment they've witnessed, objects they carry, people they meet, etc.
The presence of Quest tokens is checked during the Adventures and takes the Heroes through different branching paths. When a party gains a Quest token, players take the respective Quest token and keep it until instructed to discard it. Unless specifically assigned to a Hero, Quest tokens belong to all players. If there are any remaining Quest tokens when the end of the Adventure is reached, they're discarded. Quest tokens are not carried from one Adventure to the other.
Generic Tokens
Generic tokens are multi-purpose tokens used throughout the game, usually on World cards (see pg. 14) to keep track of different gameplay elements, such as an army growing stronger or a danger that is constantly increasing.
Whenever a Generic token is required, their purpose is clarified by the Book of Sagas or card relating to it.
Enemies
During the course of a campaign, Heroes meet and fight several types of Enemies which can be represented by figures or Enemy tokens.
Enemy Stats and Abilities
Regardless of their type, Enemies always have health, attack strength, and defense stats, and up to 2 abilities. The Enemy stats and abilities are determined by their Enemy cards or by Points of Interest, depending on their type.
Enemy Stats:
- Health: Maximum health of each Enemy figure or token. Unless stated otherwise, Enemies always start with full health (without any Damage).
- Attack: Attack strength of each Enemy figure or token. Each non-Boss Enemy unit attacks once per combat.
- Defense: Defense of each Enemy figure or token.
Enemy abilities: Determined by ability symbols, Enemy abilities vary among the roster of Enemies and are activated by Enemy Attack cards (see pg. 17). Unless stated otherwise, the ability always targets the Hero defending the Enemy Attack (see pg. 27).
In addition to the usual Enemy stats and abilities, Regular Enemies may also carry a symbol at the top left of their card, indicating that these Enemies may interact with Event cards (see pg. 21) moving from their original region. Enemies may be placed by the game in sea regions, but may never cross a sea border when moving.
Enemy Types
Regular Enemies
Regular Enemies are constant Enemies that roam the lands, always present throughout the game, and may or may not be related to the current events of an Adventure. They're represented by figures.
Regular Enemy's stats are always determined by their current Enemy card, which players reveal when instructed to do so by the Book of Sagas.
Elite Enemies
Elite Enemies, like regular Enemies, are also represented by figures as they also constantly appear in the Adventures. However, these are particularly powerful and unique versions of the Enemy (for example, the chief of Draugrs) and are always related to the current events of the campaign, therefore have different stats and abilities from their regular Enemy version.
Elite Enemy's stats are determined by a Point of Interest associated with the Enemy which players reveal when instructed to do so by the Book of Sagas.
To differentiate an Elite Enemy from a regular one, take an Elite Enemy token and place it under each Enemy being placed on the board. This means that if an Elite Draugr is placed on the board, instead of checking the current Draugr Enemy card in play to determine its stats, players check the Point of Interest related to it instead (see pg. 23).
NPC Enemies
NPC Enemies are represented by Enemy tokens as they are specific one-time Enemies that Heroes encounter during their Adventures.
NPC Enemy's stats and abilities are determined by a Point of Interest associated with the Enemy which players reveal when instructed to do so by the Book of Sagas (see pg. 22).
Boss Enemies
Bosses are special Enemies that appear through the campaign and always carry the 'Boss' keyword. Important Bosses that appear constantly are represented by figures, like regular Enemies, while one-time Bosses are represented by Enemy tokens, like NPC Enemies.
Unlike other Enemies, however, the Bosses' health and number of Attacks escalate according to the number of Heroes in the game:
- Bosses' health is multiplied by the number of Heroes. This means that, if the Boss' health is 10, and there are 3 Heroes in the game, their maximum health is 30.
- Bosses Attack a number of times equal to the number of Heroes in the game, revealing 1 Enemy Attack card for each Attack. This means that if there are 3 Heroes in the game, the Boss attacks 3 times (reveals 3 cards).
Enemy Groups
Whenever several Enemies of the same type are placed on the Map board (figure or token) at the same time, they are considered an Enemy group.
Running Out of Enemy Figures
Although rare, it is possible that players run out of figures of the indicated type when required to place an Enemy on the board. In this case, place the remaining Enemy figures (if any are available) in the determined region. Then, locate groups of the same type of Enemy required with 2 or more figures already on the Map. Replace 1 Enemy with 1 Threat token (with the '!' side faceup) and move the figure to the group with missing figures. Continue to do this until all the required Enemies are placed in the determined region, always leaving at least 1 Enemy figure in each existing group. If all groups on the Map only have 1 Enemy figure and an additional figure is still required, then the figure is simply not placed.
Enemy Attack Cards
The Enemy stats represent their usual Attack strength, but this doesn't mean that they necessarily always attack at full strength or that they can't have exceptionally powerful blows. It can vary for each Attack.
For each Attack, an Enemy Attack card is drawn and may include modifiers to their Attack stats that vary from -2 to +2 as well as ability triggers that activate the Enemies' abilities (if any). The abilities are always accompanied by negative or neutral modifiers, never a positive one. If an Enemy doesn't have the ability depicted on the ability trigger, then just the modifier is applied.
In addition to the basic modifiers, there are 2 special ones that force the Enemy Attack deck to be reshuffled. One is a +3 modifier and the other is a Miss, which means that the Attack completely misses the Heroes. When 1 of these cards is revealed, first apply their effects, then take the discarded Enemy Attack cards, including the one just drawn, add them to the deck, reshuffling it.
The Enemy Attack deck contains 12 cards in total, which allows for observant players to anticipate the card that may be revealed:
| Modifier | Ability | Quantity |
|---|---|---|
| -2 | — | 1 |
| -1 | — | 1 |
| -1 | Ability | 1 |
| +0 | — | 2 |
| +0 | Ability | 2 |
| +1 | Ability | 2 |
| +2 | Ability | 1 |
| +3 and reshuffle | — | 1 |
| Miss and reshuffle | — |
Threat Tokens
Threat tokens are double-sided tokens, featuring a '!' in one side and a '!!' on the other and are used to increase the Enemy forces. When attached to an Enemy or group of Enemies, each '!' increases the Enemy forces by 1.
In 1- and 2-player games: Only place Threat tokens when instructed to by the game. Always place the token with the '!' faceup.
In a 3-player game: Place Threat tokens when instructed to by the game and any time a non-Boss Enemy or group of Enemies is placed on the Map. Always place the token with the '!' faceup.
In a 4-player game: Place Threat tokens when instructed to by the game and any time a non-Boss Enemy or group of Enemies is placed on the Map. Always place the token with the '!!' faceup.
When instructed to add a Threat token to a region with Enemies, the token is immediately attached to the Enemy or group of Enemies. If they move during the game, the Threat token moves along with them. If more than 1 group of Enemies is in the region, players choose which group the Threat token is attached to.
When instructed to add a Threat token to a region without Enemies, then the token stays in the region until an Enemy or Enemy group enters the region, at which point the Threat token is attached to the Enemies. If more than 1 group of Enemies enter the region at the same time, players choose which group the Threat token is attached to.
For 3- and 4-player games, whenever a non-Boss Enemy or Enemy group is placed on the Map along with a Threat token, the token is immediately attached to the Enemy/group it was placed with.
If 1 or more Threat tokens must be placed in a region and there are no more tokens available, take the furthest token from the region not attached to an Enemy/group. If all Threat tokens are attached, simply don't add any.
During combat, each '!' is considered an extra Enemy unit of the same type of the Enemy they're attached to and behave exactly like one, participating in combat (see pg. 25) as usual (attacking the Heroes, drawing Enemy Attack cards, activating abilities, etc). Threat tokens must always be defeated and removed before Enemy figures or tokens. In the case of 4-player games, once 1 of the '!' of the '!!' side is defeated, flip the token to the '!' side, indicating that there's only 1 left to defeat.
Runes
Throughout the campaign, Heroes prove their mettle in combats and tests by drawing Rune tokens from their personal Rune bag, trying to match them with a test difficulty (see pg. 21) or rune slots on Feat cards (see pg. 19).
All Heroes have their starting runes listed on their Hero card. These are the initial runes that compose their Rune bag. As the game progresses, runes are added to and removed from the Rune bags, improving or harming the Heroes' chances of success in tests as well as the use of specific Feats. Runes come in 6 different types: Water, Fire, Earth, Wind, Dark, and Wild.
Whenever the game instructs players to remove a rune from their bag, they must remove it. This is not optional. Gaining runes, however, is optional, unless it's a Dark rune, in which case the player must take it. If, at any point in the game, a rune must be taken but there are no more Rune tokens left of the determined type, then the token is not taken.
NOTE: Whenever a player gains additional runes, take a Rune token of the determined type, and add it to their Rune bag. If the determined type shows a dual rune (2 different runes in the same icon) the player chooses which type of Rune token to take among the 2 depicted.
Feats
Feat cards represent the Heroes' abilities and are only used during combat (see pg. 25). Each Hero has their own Feats, which are a combination of the Hero's unique Feats, marked with the Hero's name at the bottom, and Class specific Feats. As the game progresses, Heroes collect XP which is used to upgrade their Feats (see pg. 32). There are 4 different Levels of Feats:
Level I Feats: Starting Feats and the most basic versions of the abilities. Each Hero has 8 Level I Feats: 4 Hero-specific and 4 Class-specific.
Level II Feats: Upgraded versions of the Level I Feats.
Ultimate Feats: 2 Class-specific bonus Feats that can be acquired once all Level I Feats have been upgraded to Level II.
Legendary Feats: Upgraded versions of the Level II Feats. Legendary Feats are the final and most evolved version of the Heroes' Feats.
Feat cards are used by allocating runes into their rune slots. Once all rune slots on a Feat card are filled, the Feat is active and its effect may be used. If any rune slots are still empty, the Feat cannot be used unless it is considered active by a game effect. Once a rune is allocated to a slot it cannot be removed until the end of the combat, unless stated otherwise.
In addition to allocating runes, some Feats' effects require tokens to be discarded or gained or to be lost in order to be used. Some Feats may also have more than 1 effect. If the effects are separated by an 'OR', the player must choose which one to use. Otherwise, they all can be used, provided that the player fulfills the effect's requirements (if any). Unless stated otherwise, only the Hero activating the Feat benefits from its effects.
There are 3 different types of Feat cards:
Skills: Auxiliary abilities that can be used anytime during combat resolution (see pg. 27), unless stated otherwise.
Attacks: Attack abilities that can only be used during the combat resolution after the Enemy Attack, with the exception of Fast Attacks (see pg. 27). An Attack can target only 1 Enemy and, unless stated otherwise, damage dealt beyond the target's health cannot be distributed to other Enemies in combat.
Blocks: Defense abilities that can be used during combat resolution in response to the Enemy Attack to prevent health loss.
Some Feats also carry a solo-game icon on their bottom right to indicate the Feats that are used during a solo game (see pg. 33).
Rune Slots
To allocate a rune into a rune slot, place a Rune token of the matching type on the rune slot. Rune slots may be single slots, accepting only the type of rune listed, or dual, accepting either of the 2 types of runes listed.
Wild runes can be allocated to any slot of any color. Dark runes, however, cannot be allocated to any slot, unless the Hero benefits from a card effect that states otherwise.
Whenever a Hero cannot allocate a rune to their Feats, either by not having a matching slot or by drawing a Dark rune, the rune must be placed in the 1st available slot, from left to right, of their Miss track (see pg. 20).
IMPORTANT! A player may decide to exhaust their Hero card during a combat or test to return the current runes drawn to their Rune bag. If they do, flip the Hero card to the exhausted side (back side) and return the last runes drawn to the bag. Heroes may only benefit from the exhaust effect when deciding to exhaust their Hero card. If any effect forces the player to exhaust their Hero card, the card is flipped to the exhausted side as usual, however the exhaust effect is not triggered. Once exhausted, a Hero card may only be returned to the unexhausted side by game effects with the 'refresh' keyword.
Status
Status are modifiers that may affect the Heroes during combat (see pg. 25) positively or negatively. Not succeeding in tests, Enemies' abilities, and overall bad decisions commonly grant the Heroes with negative statuses (red), while Feat cards, Items, and passing tests usually benefit the Heroes with positive statuses (blue).
Status effects are triggered by the Heroes' Miss track and may affect 4 different aspects/resources of the Heroes positively or negatively: Health, Chronicle Points, defense, and attack strength.
The Hero dashboard comes with 2 pre-existing statuses, 1 positive and 1 negative, that are permanent and cannot be replaced or removed during the game: Gain 1 Health / Lose 2 Health.
In addition, the dashboard contains 3 status slots which house Status tokens that the Heroes may acquire during Adventures. Status tokens are double-sided, with 1 side indicating the positive and the other the negative effect, related to the same aspect/resource: Gain 1 Chronicle Point / Lose 1 Chronicle Point, Gain 1 Health / Lose 1 Health, Deal +1 Damage / Deal -1 Damage, Gain +1 Defense / Lose 1 Defense.
When a Hero receives a Status token, it is placed into the leftmost slot on the Status track, pushing any token placed in that and following slots 1 space to the right. Status tokens that are pushed out of the track are discarded. If more than 1 status token is acquired at the same time, unless an order is specified, the player chooses which one to place first in the track.
The effects of the Heroes' statuses may be triggered at the beginning of a combat resolution step (see pg. 27) by the Hero's Miss track.
Enemies may also receive Status tokens related to Attack or Defense through specific game effects. A Status token placed on an Enemy card or Point of Interest affects the Enemies' stats for as long as they are in play.
EXAMPLE: During the game, Maelling receives 1 negative Status token. Maelling places it in the leftmost slot of the Status track, pushing the other tokens 1 space to the right. Later, when Maelling receives a new Status token, he proceeds to place it in the leftmost slot of the Status track, pushing all Status tokens to the right, and the rightmost one out of the track, discarding it.
Miss Track
During combat, whenever a Hero cannot allocate a rune to their Feats, either by not having a matching slot or by drawing a Dark rune, the rune must be placed in the leftmost available slot of their Miss track. Once combat reaches the resolution step (see pg. 27), the Heroes' Miss track effects are activated according to the number of runes allocated to its slots:
If there are 3 or less runes allocated (blue area): Activate all positive statuses of the Hero, including the permanent one, and resolve their effects.
If there are 4 runes allocated (neutral area): Nothing happens.
If there are 5 runes allocated (red area): Activate all negative statuses of the Hero, including the permanent one, and resolve their effects. If the Hero card is exhausted, trigger the Miss effect of the Hero card as well.
Events
Event cards represent different encounters and situations that the Heroes face during their travels and are drawn and resolved during the Engage Phase (see pg. 24). Each Event card has a description of the Event and its effects and may or may not contain a test (see below). In the case of a test, each possible outcome (success or failure) has its own effect, listed at the bottom of each card. Events may also move Enemies with a special symbol on their Enemy card.
Tests
During a game Heroes are submitted to tests that appear throughout the Book of Sagas and Event cards. There are 4 different types of tests, each associated with a rune color:
CHARISMA: Water rune. AGILITY: Wind rune. INTELLIGENCE: Earth rune. STRENGTH: Fire rune.
Each test has a difficulty, which is how many successes the Heroes performing the test must obtain in order to succeed in it, and outcome conditions, which determines the outcome(s) of the test in case of success or failure.
Each player performing a test must draw 7 runes from their bag. Each rune matching the required type counts as 1 success. To succeed, a player must draw a number of runes of the determined type equal to or higher than the test difficulty.
While Water, Fire, Earth, and Wind may or may not count as successes depending on the type of test being performed, unless stated otherwise, Dark runes never count as successes. Conversely, Wild runes always count as successes.
Once all players participating in the test have drawn all of their runes, they check which outcome condition was met and proceed as instructed by the Event card or Book, depending on the test origin.
Outcome conditions come in pairs:
If at least 1 Hero succeeds OR If all Heroes fail: Only 1 outcome is possible for the party.
If all Heroes succeed OR If at least 1 Hero fails: Only 1 outcome is possible for the party.
If they succeed OR If they fail: Follow tests which only 1 Hero may participate. Only 1 outcome is possible for the party and depends entirely on the Hero who performed the test.
Each Hero that succeeds AND Each Hero that fails: Each Hero has individual outcomes that depend entirely on their individual success or failure.
Adventure Tests
Adventure tests appear in the Book of Sagas and may be mandatory or optional and may require a single, any, or all Heroes in the party to participate.
To determine the requirements of a test, check its structure:
Each Hero in the party may: This is an optional test that, if chosen to be performed, requires all Heroes in the region to participate.
Any Hero in the party may: This is an optional test that, if chosen to be performed, requires at least 1 Hero in the region to participate.
A single Hero in the party may: This is an optional test that, if chosen to be performed, requires only 1 Hero in the region to participate.
Each Hero in the party must: This is a mandatory test that requires all Heroes in the region to participate.
A single Hero in the party must: This is a mandatory test that requires only 1 Hero in the region to participate.
Adventure tests may also check for specific conditions, such as if a Companion (see pg. 13) is in the party, or if the party has a specific Item (see pg. 14), or to a Hero fulfilling certain conditions, such as being of a certain Class or carrying a specific Quest token (see pg. 15). In this case, the tests will always start with a condition (see pg. 22).
Adventure test outcomes are listed right after the test and may take the Heroes to branching paths or have simple effects, such as gaining or losing Health or Chronicle Points.
Events Tests
Events tests are always mandatory to all Heroes in the party (Heroes in the same region). Events test outcomes are listed at the bottom of the Event card and have simple effects, such as gaining or losing Health, Chronicle Points, and Status tokens.
Playing the Game
The game is divided between reading the Book of Sagas, at the start of the Adventure and when interacting with Points of Interest, and resolving the different Phases of the game.
- Start an Adventure by reading its Introduction Entry in the Book of Sagas and following its branching paths until a Point of Interest is revealed and there are no further instructions.
- Set the Book aside and proceed to the game Phases.
- Continue to follow the game Phases until a Hero or party interacts with a Point of Interest.
- Read the Entry indicated by the Point of Interest and follow its branching paths until a new Point of Interest is revealed and/or until there are no further instructions and there is a Point of Interest already revealed in game.
- Set the Book aside and proceed with the game Phases.
Play continues in this manner until the Adventure's End Entry is reached, at which point the current Adventure ends (see pg. 11).
Reading the Book of Sagas
At the beginning of a game, players choose 1 unlocked Adventure or Side Quest (see pg. 11) to play and start by reading the Introduction of the Adventure. If it's the 1st time playing the game, start with Adventure C1 (Book of Sagas, pg. 03).
The Book should be read out-loud by the leader to the other players.
Introductions list additional setup for the Adventure, such as in which regions the Heroes start and placement of Enemies on the board. In addition, each Introduction reveals a Point of Interest and/or contains a choice (see pg. 23), a condition to check (see below), or a test (see pg. 21) that leads to a numbered Entry.
If a Point of Interest is revealed and there are no further instructions, players must stop reading the Book and proceed to the game Phases (see pg. 24).
If a condition, test, or choice is presented, players check the conditions, perform the test, or make their choice and proceed to read the listed numbered Entry. The new Entry may present new choices, tests, conditions or reveal a Point of Interest. Players continue to read the flow of Entries and follow instructions until a Point of Interest is revealed, or when a Point of Interest was already revealed in previous Entries and the Book no longer provides instructions to the players. Any instruction provided to the players must be followed as soon as presented, if possible.
Once play proceeds to the game Phases, players only return to the Book of Sagas and progress the Adventure when interacting with a Point of Interest during the Explore Phase (see pg. 31) or if a Story card instructs players to return to the Book.
Conditions
Conditions check the presence of specific components or Classes, if a specific decision was made, or if a result was achieved. Conditions always start with an 'If' and contain a condition that must be met. Conditions may introduce new Entries, instructions, tests, or test results. If the condition is met, follow its instruction immediately. If not, its instructions must be ignored.
Choices
Choices present the players with branching paths to take, usually leading to a numbered Entry. They always start with a 'CHOOSE'. Once the players decide which path to take among the ones presented, they must read and perform the instructions related to their choice.
Points of Interest
Points of Interest are tokens that represent places that Heroes must visit, happenings that need to be investigated, or Enemies that must be fought to progress the story. Each Adventure may contain up to 12 Points of Interest, from A to L, and can be either regular or Enemy-related Points of Interest.
Regular Points of Interest are green and represent places to visit or investigate. They can be placed anywhere on the Map board. Whenever the Book of Sagas instructs the Heroes to reveal a regular Point of Interest, reveal the respective window in the Points of Interest board by removing its window cover and read its description out loud. Then, take the respective Point of Interest token and place it in the indicated region. During the Explore Phase (see pg. 31), a Hero or party may interact with the Point of Interest and read the Entry indicated by its instruction. Regular Points of Interest tokens are only discarded when instructed to do so by the Book of Sagas.
Enemy-related Points of Interest are red and represent Enemies that must be defeated to progress the story. They are always placed in the same region as the Hero or party currently reading the Book of Sagas. Whenever the Book of Sagas instructs the Heroes to reveal an Enemy-related Point of Interest, it also instructs which type and number of Enemies must be placed in the region. Reveal the respective window in the Points of Interest board by removing its window cover and read it out loud. Then, take the respective Point of Interest token and indicated Enemies and place them next to each other in the indicated region. Enemy-related Points of Interest tokens are immediately discarded when Heroes interact with it.
Regular Enemies related to a Point of Interest always follow the stats of their current Enemy card in play. Elite and NPC Enemies are always related to a Point of Interest and have their own particular stats.
IMPORTANT! A Hero or party may only interact with a Point of Interest and read the indicated Entry on its instruction in regions free of Enemies. This means that Point of Interest-related Enemies must be defeated (see pg. 25) before interacting with the Point of Interest.
Game Phases
Trudvang Legends is played over a series of rounds. Each round is divided into multiple Phases, defined by cards in the phases area of the Adventure board, which are resolved in order, from top to bottom. Empty sleeves in the Phases area (if any) are skipped.
The current Phase of the game is marked with the Phase marker. Once all Heroes have resolved the current Phase, the marker moves to the next sleeved Phase. Players are free to choose the order in which each Hero or party performs each Phase and are encouraged to discuss the possibilities and decide as a group how to proceed. If there's ever a conflict among the players, the player with the Leader token decides for the group.
The game starts with 3 Phases that must be resolved in order: Travel, Engage, and Explore.
As the game progresses, new Phases may be revealed as well as replace an existing Phase. A Phase must be fully completed before play moves to the next one.
EXAMPLE: During a Travel Phase, Volgr travels from Fylges to Manjord. Lydana decides to embark the Ship in Sylvan and travel to the Grim Sea. Since there is 1 Draugr and 1 Threat token with the '!!' side up in Sylvan, she loses 3 Health for leaving the region. Briya, also in Sylvan, travels to Fylges and loses 3 Health as well. Maelling cannot travel, as he is in a region with a Point of Interest-related Enemy. The Travel Phase has been fully resolved and play moves to the next Phase, Engage.
Travel Phase
Each Hero may travel to an adjacent region. If there are Enemies not related to a Point of Interest in their current region, each Hero loses 1 Health per Enemy before leaving the region. In order to travel across a sea border (blue border), Heroes must be on board a Ship. Heroes in regions with Enemies related to Points of Interest cannot travel.
Ships
Ships are found or awarded to the Heroes during specific Adventures, Side Quests, or through Story cards effects, and are represented by a Ship figure. To embark on a Ship, Heroes must be in the same region as the Ship figure and automatically embark on it when traveling across sea borders. All Heroes aboard the Ship are considered a party and travel together as the Ship moves. Heroes automatically disembark a Ship when in regions with dry land. Unless stated otherwise, Ships are lost at the end of the Adventure/Side Quest.
Engage Phase
Heroes must engage in combat with Enemies in their region. Whenever engaging in combat, Heroes must fight all Enemies present in their region, regardless if they are of the same type or not. If a region is free from Enemies, players must draw and resolve 1 Event card for each dry land region occupied by Heroes. Event cards are not drawn or resolved when the Heroes are on board a Ship. Heroes can only resolve the Events of their current region.
EXAMPLE: Since Maelling is in a region with an Enemy during the Engage Phase, he must fight it. Volgr and Briya are in regions free from Enemies, so each must draw and resolve 1 Event card. Lydana is also in a region free from Enemies. However, since she is on board a Ship, she won't be drawing or resolving Events. The Heroes discuss among themselves and decide that Maelling should resolve his combat first.
Combat
Combats take place during the Engage Phase whenever a Hero is in a region occupied by Enemies. A combat is divided into 2 steps, which are resolved in order:
- Planning
- Resolution
1. Planning
During the planning step, players draw Feat cards and allocate runes to their rune slots. All players involved in the combat must simultaneously:
- Choose to activate Items and Companions with instant effects (marked with the 'Instant' keyword), if any.
- Draw 4 cards from their Feat deck and place them below their Hero dashboard. If there are not enough Feats to draw in the Feats deck, shuffle the Feats discard pile, to create a new deck.
- Draw 3 runes from their Rune bag and allocate them to their Feats' rune slots. Each rune drawn must be allocated to a matching rune slot on 1 of the revealed Feats. If the player doesn't have any available matching slot, or if they draw a Dark rune, the Rune token must be placed in the 1st available slot of their Miss track (see pg. 20) of the Hero dashboard, from left to right. Once drawn, runes can only be returned to the bag if the player decides to exhaust their Hero card.
- Once all 3 runes have been allocated, either to a Feat or a Miss track slot, players may choose to continue, drawing 3 more runes, or to stop. Any Feat with the 'Instant' keyword is used immediately as soon as all its rune slots have runes allocated to them.
Players continue to draw 3 runes at a time and to allocate them to their Feats and Miss track until they individually decide to stop OR until all 5 slots of their Miss track are filled with runes. Once all players involved in combat have stopped OR have their Miss track slots completely filled with runes, combat moves to its resolution.
NOTE: If there are no slots left in the Miss track and runes drawn that can't be allocated to Feats, place the leftover runes back in the Rune bag and stop drawing runes.
EXAMPLE: Maelling is fighting the Threat token and Enemy related to Point of Interest D, a City Guard. He draws 4 Feats from his Feats deck: Tracking I, Dodge I, Focus I, and Quick Shot I. Then, he proceeds to draw 3 runes from the bag. At this moment, Maelling's bag composition is his starting runes, as listed on his Hero card, and 1 additional rune, acquired through his Title.
He draws 1 Water, 1 Fire, and 1 Dark rune. The Dark rune cannot be allocated to any of his Feat cards, so it's placed on the 1st slot of his Miss track. Since he has runes of both colors, he decides to allocate the Water and Fire runes to his Focus card.
He decides to proceed with the planning step and draws 3 more runes: 1 Earth, 1 Wind, and another Dark. The Dark is allocated to the 2nd slot of the Miss track. The Wind can only be allocated to the Dodge I Feat. The Earth can be allocated to his Tracking I Feat or to his Quick Shot I. Since the Quick Shot is the only Attack Maelling has and he has better chances of drawing Earth runes than Wind or another Earth, he decides to allocate the Earth to it.
Maelling decides to continue and draws 1 Water, 1 Fire, and 1 Dark. He allocates the Water to his Quick Shot I, which is now active. The Fire goes to the 3rd slot of Miss track and the Dark to the 4th since there are no available matching rune slots on the Feat cards. If Maelling decides to stop drawing runes now, he won't benefit from the effects of his positive statuses but also won't trigger his negative statuses either. Maelling decides to continue, regardless, looking to activate his Dodge I Feat to prevent Health loss, as the Enemy's Attack stat is 3.
Maelling draws 2 Wind and 1 Dark. He allocates the Wind to the Tracking I card and 1 Wind to the Dodge I card. The 2nd Dark cannot be allocated to any of the Feats and must be placed on the 5th slot of the Miss track. Since Maelling is the only Hero in combat, the planning step immediately stops and play proceeds to the next step, resolution.
2. Resolution
During the resolution step, all elements that affect combat are accounted for and resolved, including the effects of Personalities, Companions, and Titles related to combat.
- All Heroes involved in the combat resolve the effects triggered by their Miss track according to the number of runes allocated to the slots.
- All Heroes involved in the combat may resolve the effects of their Skill and fast Attack Feats (marked with the 'fast' keyword), if any, in the order they choose. Slightly slide used Feat cards down to indicate that they have been used. For each Attack activated, add up the Hero's total Attack and subtract by the target Enemy's total Defense. The Enemy receives 1 Damage for each point left over.
- Resolve the attack of all Enemies in the region by revealing Enemy Attack cards. If there is more than 1 Enemy in the region, players choose the order in which each Enemy attacks, unless stated otherwise. Bosses attack according to the number of Heroes in the game and their attacks are resolved in sequence (one after the other). For each Enemy attack:
- Choose 1 of the Heroes to defend the Enemy attack.
- Reveal the topmost card of the Enemy Attack deck. The total Attack of the Enemy is defined by their Enemy stats plus the value of the Enemy Attack card modifier. If the Enemy Attack card activates 1 of the Enemy's abilities, resolve that as well.
- The Hero defending the attack may use active Skills. They may also use Block Feats to prevent Health loss. Add up the Enemy's total Attack and subtract by the Hero's total Defense. The Hero loses 1 Health for each Enemy Attack point left over (if any). If the Hero's Health is depleted, the Hero is defeated (see pg. 33). They no longer participate in the combat and current round and must resolve the effects of the Defeat card in the stories area of the Adventure board.
- Discard the Enemy Attack card, forming a pile.
- All Heroes involved in the combat may resolve the effects of their unused Attack and Skill Feats, slightly sliding the cards down to indicate their use. For each Attack activated, add up the Hero's total Attack and subtract by the target Enemy's total Defense. The Enemy receives 1 Damage for each point left over.
- All Heroes involved in the combat may use their active Items.
Once the combat is over, players return their runes to their bag. The revealed Feat cards are discarded in the Feats discard slot, forming a pile.
If at any time during the combat, an Enemy's amount of Damage is equal or higher than their Health, the Enemy is defeated. Remove the Enemy figure or token from the board. The Enemy no longer participates in the combat. The combat is immediately over if there are no more Enemies in the region.
Enemies that are not defeated remain in the region and can only be fought during the next Engage Phase. Once a region is freed of Enemies, each Hero involved in the combat gains 1 Chronicle Point.
EXAMPLE: Maelling starts the resolution step by resolving the effects triggered by his Miss track. Since the Miss track is filled with runes, he must trigger all negative statuses in his Status track. During the rest of the combat, he has -1 Attack and -1 Defense. He doesn't lose Health from his permanent status thanks to his Title effect. Since his Hero card is exhausted, he also triggers the Miss effect of the card, discarding his Chronicle Point token.
Maelling then proceeds to use his fast Attacks and Skills. First, Maelling uses his Quick Shot I to deal 2 Damage to the Enemy, as 1 was lost due to the negative status. He defeats the Threat token and flips it to the '!' side since the Enemy has 0 remaining.
Then, he activates his Focus I and gains 1 Chronicle Point and 1 positive status. He places the tokens on his Miss track, choosing the order, and pushing the negative status in the rightmost space out of the track, discarding it. He chooses to place the positive status first and then the negative, so the negative status is pushed out of the track first.
Maelling then reveals the Enemy Attack card for the Threat token. It's a +0 that triggers the ability of the Enemy. The ability gives Maelling 1 negative status, so Maelling decides to activate his Ox Companion card, preventing the ability from being triggered.
Since Maelling didn't gain any Chronicle Points during the combat and doesn't have 3 Chronicle Points to use, his Wulterfish Companion won't be of any use during this combat.
The Enemy is attacking with 3 Attack. Maelling blocks 1 with his Dodge I card, since he lost 1 Defense due to the negative status, and loses 2 Health.
The Enemy Attack card for the City Guard is then revealed. It's a Miss. Maelling doesn't take any Damage. He takes the Enemy Attack discard pile and the revealed card and places it back in the Enemy Attack deck, shuffling it.
Maelling doesn't have Skills or Attacks left to activate of his own, but there is a Personality in his region with an Attack effect. He activates the Personality effect, flipping their token to the uncolored side, and deals 2 Damage to the City Guard, defeating it.
Maelling then proceeds to use his active Item, losing 2 Chronicle Points to defeat the remaining Enemy. Maelling doesn't have any other Items to use. If he did, then the active Item would be moved to the bottom of the Items deck and a new Item would be then active and available to use.
Now, combat is over. Maelling defeated all Enemies in the region during the combat and gains 1 Chronicle Point.
Resolving Events
Draw and resolve 1 Event card for each region free of Enemies occupied by Heroes not on board a Ship. If the Event contains an effect relating to the Heroes, all Heroes in the region must resolve its effects. If the Event contains a game effect (such as moving Enemies with a special symbol) resolve the Event a single time for the entire party.
EXAMPLE: Now, it's Volgr's time to draw and resolve an Event card. He reveals an Event with a Strength 3 test. Volgr proceeds to draw 7 runes from his bag. He draws 3 Fire, 2 Water, and 2 Wind. He passes the test and gains 1 Chronicle Point. Then, he returns the runes to his bag.
EXAMPLE: Now that Maelling's combat is resolved, players choose to resolve Briya's Engage Phase. She draws 1 Event card and proceeds to resolve it. The card activates all Enemies with a special symbol on the board, so the Draugr and its Threat token travel 1 region towards the closest Hero. Since Briya, Maelling, and Lydana are tied, and Enemies can't cross sea borders, the players choose to move the Enemies to Fylges, since Maelling just resolved a combat and is getting ready to interact with the Point of Interest token, which would be prevented by another Enemy entering the region.
Explore Phase
During the Explore Phase, Heroes may interact with sleeved Locations on the board and/or with Points of Interest in their region, provided that the region is free of Enemies. If any Enemy is in the region, this phase is skipped there.
Interacting with Locations
When interacting with a Location, check the Location effect on the card and fulfill its requirements (if any) to activate it. All Heroes in the party may benefit from the Location effect, as long as they're individually able to fulfill its requirement (if any).
IMPORTANT! Although Heroes may decide if they want to interact with Locations during the Explore Phase, not all Locations provide that option. Locations with mandatory effects (usually the ones that hinder the Heroes) must be activated, this is not optional. Locations with timed effects cannot be activated during the Explore Phase.
EXAMPLE: Volgr is in a region with the City of Manjord Location and decides to interact with it. He loses 2 Chronicle Points to gain 1 rune and proceeds to take the token from the pool and add it to his Rune bag. Volgr could also have refreshed his Hero card if it was exhausted.
Interacting with Points of Interest
When interacting with a Point of Interest, check the Points of Interest board window instruction corresponding to the token on the Map board and proceed to read the listed Entry in the Book of Sagas.
Regular Points of Interest tokens are only discarded when instructed to do so by the Book. Points of Interest tokens related to Enemies are immediately discarded once interacted with, unless stated otherwise.
EXAMPLE: Since all Enemies were defeated in Arji, Maelling is able to interact with Point of Interest D, discarding its token. Maelling returns to the Book of Sagas and reads the Entry indicated by the Point of Interest instruction. Now, he must follow the instructions and branching paths of the Book until a new Point of Interest is revealed and/or there are no further instructions.
Adventure Maps
Adventure Maps are special Maps used in some Adventures to represent the place being explored by the Heroes. Adventure Maps are divided in spaces, each associated with an Entry from the Book.
Whenever the Book of Sagas instructs the players to take and use an Adventure Map for the Adventure, take the respective map and place it faceup within reach of all players.
The Book determines a starting space for the Heroes to begin their exploration. When playing with Adventure Maps, the party cannot be separated. Place all Hero figures in the region of the Hero or party who revealed the Map, without losing Health if in a region with an Enemy, if they are not present already. Place the party token in the determined starting space on the Adventure Map and use it to track the party's position during the Adventure.
- During the Travel Phase, Heroes move through the Adventure Map, moving the party token to spaces connected by doors or roads to their current space.
- Events are not drawn during Engage Phase. This means that, whenever the party is in a space without Enemies, the Engage Phase is skipped, moving immediately to the Explore Phase, in which players read the Entry corresponding to the one in the space. Other game Phases take place as usual.
- Throughout the Adventure, cleared tokens are placed on the spaces of the Adventure Map to indicate that a space has been cleared and that Heroes can move freely through it without reading its respective Entry.
- Blocked tokens are placed on the spaces of the Adventure Map to indicate that Heroes can no longer move through a space.
- Unless stated otherwise, any Point of Interest that appears when playing with an Adventure Map is placed directly on the determined space of the Adventure Map.
Level Up
Heroes Level up by upgrading their Feats to superior versions. When a Hero has 3 XP, the player must:
- Discard 3 XP and draw the top 3 cards from the Feat upgrade deck.
- Choose 1 Feat to Upgrade and discard the lower version of the card from the Feat deck, returning it to the box, and replace it with the chosen upgrade. Then, shuffle their Feat deck.
- From the remaining 2 cards, choose 1 and return it to the top of the upgrade deck and place the other 1 on the bottom, before the 2 Ultimate Feats, if present.
When a Hero has upgraded all Level I Feats, they may also choose 1 Ultimate Feat card from the 2 available and add it to their deck. The unchosen Ultimate Feat is removed from the game.
EXAMPLE: In later rounds, Maelling collected 2 more XP. He is now able to upgrade 1 of his Feats. Maelling draws the top 3 cards from his Feat upgrade deck: Dodge II, Crippling Shot II, and Mighty Shot II. He decides to upgrade his Mighty Shot I, returning it to the box. He then adds Mighty Shot II to his Feat deck and shuffles it. Finally, he decides to return Dodge II to the top of the upgrade deck and the Crippling Shot II to the bottom.
Defeat
A Hero is defeated whenever their Health is completely depleted. A defeated Hero no longer participates in the current round. At the start of the next round, the defeated Hero returns to the game, resetting their Health to 6 (regardless of their maximum health). If they don't already have a Wyrd Feat card in their Feat deck, they must randomly add 1 to the Feat deck and shuffle it. Finally, if there isn't a Darkness card (World card) sleeved in the stories area of the Adventure board, sleeve card CS156 on it.
Wyrd Cards
Wyrd cards are Feats added to a Hero deck whenever they are defeated. Each Wyrd card has 3 rune slots to be filled and grants XP when used. The card is removed from the game and returned to the tray when the Hero defeats their 1st Enemy in a combat where the card is activated.
Adventure's End
To save the game progress once an Adventure ends:
- Remove all exceeding runes from the bag, leaving only the Heroes' starting runes, and return them to the game box. Then, take the Hero's XP tokens (if any), place them in the bag, and return it to the box.
- Return all remaining tokens and figures to the box.
- Return the Enemy cards to the Story cards tray, in order, and store it in the game box.
- Gather all Hero's cards together in order: Hero card, Feat deck, Items, Titles, Companions, and upgrade Feat deck and store them together in the game tray. Any Feat not in play (nor from the Feat deck or Feat upgrade deck) should be kept separated from the Heroes' cards by Adventure and Side Quest unlocked cards.
- Remove the Adventure sheet from the Points of Interest board. Return Adventure Maps (if any), Points of Interest board, and the Adventure sheet to the box.
- Unless stated otherwise by the Adventure or Timed Effects, keep all other cards in the Map and Adventure board in their sleeves. Fold the boards as they are and return them to the game box.
When the next Adventure is played, follow the Basic setup steps (pg. 09) (without the need to prepare the Rune bag) and Ongoing game setup steps (pg. 10).
Campaign's End
Once the campaign is over, follow the usual Adventure's end steps with the following modifications:
- Return all Story cards in the game (sleeved in the Adventure and Map boards and with the Heroes) back to the Story cards tray, in order.
- Reset the Heroes' cards to the original order (Hero card, Hero Feats, Starting Class Item, and Class Feats) following the Level order (I, II, Ultimate, and Legendary).
- Empty the Heroes' Rune bags and return the Runes and Rune tokens to the game box.
Solo Game
During setup, choose 1 of the unselected Heroes to act as a hired hand.
- Take their figure, Hero card, and 4 Level I Feat cards (2 Hero-related and 2 Class-related) marked with the solo-game icon.
- Place the figure on the Map board in the Heroes' starting region for the Adventure.
- Place the hired hand's Hero card next to the Hero dashboard.
- Upgrade 1 of the hired hand's Feats for each Adventure played so far (Side Quests don't count), starting with all Level I cards and place them below their Hero card. XP is not used when upgrading the hired hand's Feats. Once all Level I cards are upgraded, upgrade to Legendary, as usual. Hired hands don't use their Ultimate Feats.
- Allocate 1 rune from the Rune token pool to each single slot of the hired hand's Feat cards. Once all single slots are filled with runes, do the same for dual slots using different rune types from the ones already placed on the same card, if possible. Otherwise, choose any of the colors required.
- Add the hired hand's Starting Item to the solo Hero Item deck. From the 2nd Adventure onward, take half of the Items and Titles, rounding up, and place them in their respective slots on the Hero dashboard. The remainder of the Items and Titles are set to the side of the dashboard, in a faceup deck in case the Adventure checks their presence.
EXAMPLE: Felerion is playing a solo game and has already played 3 Adventures. He chooses Lydana as his hired hand and upgrades 3 of her Feat cards, Soul Shatter I, Lindwurm's Blood I, and Troll's Strength I.
He then takes Rune tokens and allocates them to the single slots on Lydana's feats: 1 rune in Soul Shatter, 1 rune and 1 rune to Lindwurm's Blood, and 1 rune in Troll's Strength. Then, he proceeds to allocate runes to the dual slots. He allocates 1 rune and 1 rune to Silence's slots, 1 rune in Soul Shatter II, as there was already a rune on the single slot, and 1 rune to the Troll's Strength, as there was already a rune in the single slot.
The hired hand acts as a support to the Hero, assisting with tests and combats, and has a few particular rules:
- A hired hand figure stays with the Hero at all times. They cannot be separated. When the Hero travels, move both figures together.
- During combat resolution, in addition to their Hero's Feats, the player may also use 1 of the hired hand's Feats, as if it was one of the Hero's Feat cards. However, a hired hand Feat can only be used if it has an equal or higher number of runes allocated in its slots than the other hired hand's Feats. Slide it down as usual to indicate that it was used during the combat and move 1 of the runes allocated from the Feat to the hired hand's Hero card. At the end of the combat, instead of removing the runes from the cards and discarding the Feats, simply slide the used cards up to their active position. Once all runes are removed from a card, the Feat can be used 1 last time. Then, it's flipped facedown to indicate that it can no longer be used.
EXAMPLE: During combat, at the start of the resolution step, Lydana has 2 runes allocated to the Silence I and Troll's Strength II Feats, and therefore are the only Feats that can be used by Felerion at the moment, since Soul Shatter II and Lindwurm's Blood II have 1 rune allocated to each. Felerion proceeds to activate the Silence I Feat. Now, he may only use the Troll's Strength II Feat. As soon as it's used, all Feats will become available again, as they will all have 1 rune allocated to each.
- When the Hero performs a test, runes on the hired hand's Feats or Hero card matching the test type may be discarded to the Rune token pool to add successes to the test.
- When the Hero loses Health, the player may instead discard 1 rune to the Rune token pool from the hired hand's Feats or Hero card for each Health that would be lost.
- The hired hand grants an extra exhaust effect to the Hero. When the Hero refreshes, refresh the hired hand as well.
- When the Book of Sagas checks for the presence of specific Classes in play, consider the hired hand's Class as well, performing any test, acquiring any bonus or hindrance of the hired hand's Class as if it was the Hero's own Class.
- The hired hand counts as a Hero when determining Boss' stats. For any other game effect relating to the number of Heroes in play, the hired hand is not considered.
- The hired hand cannot gain any card, status, Health, Chronicle Points, runes, or tokens.
Glossary
Block X - Blocks X amount of the Enemy's Attack. Subtract the Hero's total Defense from the Enemy's total number of Attack. The Hero loses 1 Health for each Enemy Attack left over (if any). If the amount blocked is higher than the Attack, the exceeding Block is lost.
X Chronicle Points: - Lose X Chronicle Points to activate an effect. If the Hero has less than required, the effect cannot be activated.
Cancel - Ignore the listed effect.
Deal X Damage - Deal X amount of Damage. Subtract the Enemy's total Defense from the Hero's total Attack. The Enemy receives 1 Damage for each point left over.
Deal +X Damage - Adds X to an active Attack. An Attack that deals multiple times is affected each time.
Deal -X Damage - Reduces an active Attack by X. An Attack that deals multiple times is affected each time.
Deal X Damage twice - Deal X Damage 2 separate times. It can target the same or a different Enemy each time.
Deal X Damage three times - Deal X Damage 3 separate times. It can target the same or a different Enemy each time.
Deal double Damage - Deals 2X Damage.
Deal triple Damage - Deals 3X Damage.
Defeat X Enemy - Remove X Enemy figures or Enemy tokens from the Map that fit the listed requirement (if any).
Discard - Discard the listed token or card. If the Hero doesn't have the token or card, nothing happens.
Exhaust - Flip the Hero card to its exhausted side (back side). If the Hero is already exhausted, nothing happens. If an effect requires that the Hero exhausts their card and they're already exhausted, the effect can't be activated.
Fast - Activates during the start of the resolution step of combat.
Foretell X - Reveal X number of cards from the listed deck. Then, choose to place each of the revealed cards either on top or bottom of the respective deck.
Gain X - Gain X number of the listed element, respecting Health, Chronicle Points, and token limitations. Exceeding amounts are ignored.
Instant - Feat cards that must be used as soon as all their rune slots have runes allocated or Items and Companions that are activated during the planning step, as long as their requirements (if any) are met.
Lose X - Lose X amount of the listed element, respecting Health, Chronicle Points, and token limitations. Exceeding amounts are ignored. The effect may not be prevented by the use of Blocks.
Miss - The Attack from an Enemy or Hero has no effect.
Mandatory - The effect must be activated, if possible. On Title cards, it indicates Titles that must be selected by the players.
Refresh - Flip the Hero card to its unexhausted side (front). If the Hero is already unexhausted, nothing happens.
Take X - The Enemy deals X Damage to the defending Hero as if it was a separate attack. Unless stated otherwise, it can be defended with Blocks as usual.
Take +X - Adds X to an Enemy Attack.
Take X twice - Take X Damage 2 separate times.
Take X three times - Take X Damage 3 separate times.
Take double Damage - Take 2X Damage.
Take triple Damage - Take 3X Damage.
Elite Enemy icon - Elite Enemy. Their stats are defined by a Point of Interest.
Enemy token icon - Enemy token. Their stats are defined by a Point of Interest.
Miss track icon - Trigger the effects of the Hero's negative statuses and Miss effect of the Hero card if exhausted.
Positive status icon - Any positive status token.
Negative status icon - Any negative status token.
Any status icon - Any status token, positive or negative.
Summary
Playing the Game
- Start an Adventure by reading its Introduction Entry and follow its branching paths until a Point of Interest is revealed or there are no further instructions.
- Set the Book aside and proceed to the game Phases.
- Continue to follow the game Phases until a Hero or party interacts with a Point of Interest.
- Read the Entry indicated by the Point of Interest and follow its branching paths until a new Point of Interest is revealed and/or there are no further instructions.
- Set the Book aside and proceed with the game Phases.
Game Phases
- Resolve the game Phases in the order they appear in the phases area of the Adventure board.
- Players are free to choose the order in which each Hero or party performs each Phase. Once all Heroes have resolved the current Phase, play moves to the next one.
The game starts with 3 Phases: Travel, Engage, and Explore.
Combat
Planning Step
Heroes involved in combat:
- Choose to activate Items and Companions with Instant effects (if any).
- Draw 4 cards from their Feat deck.
- Draw 3 runes from the Rune bag and allocate them to the Feats' rune slots. If not possible, place the rune in the 1st available slot of the Miss track.
- If the Miss track slots are not completely filled, choose to continue, drawing 3 more runes, or to stop. Use instant Feats.
- Once all Heroes have stopped or filled their Miss track slots, move to the resolution step.
Resolution Step
- Resolve the Miss track's triggered effects according to the number of runes allocated to the slots.
- Resolve the effects of Skill and fast Attack Feats, if any.
- Resolve the attack of all Enemies by revealing Enemy Attack cards.
- Choose 1 of the Heroes to defend the Enemy attack.
- Reveal the topmost card of the Enemy Attack deck and apply modifiers and abilities.
- The Hero defending the attack may use active Block Feats to prevent Health loss.
- Resolve the effects of the Heroes' unused Attack and Skill Feats.
- All Heroes involved in the combat may use their active Item.
Tests
There are 4 different types of tests, each associated with a rune color:
CHARISMA: Water rune. AGILITY: Wind rune. INTELLIGENCE: Earth rune. STRENGTH: Fire rune.
Each player performing a test must draw 7 runes from their bag. Each rune matching the required type counts as 1 success. To succeed, a player must draw a number of runes of the determined type equal to or higher than the test difficulty.