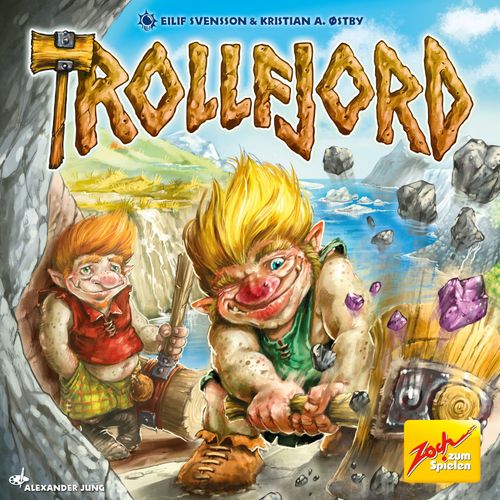
Trollfjord
Trollfjord Rulebook
Table of Contents
Table of Contents
The Game and the Goal
You gather your trolls at the fortresses and hammer boulders out of the Rock Tower. The mountain spirit rewards you with precious treasure from the surrounding regions. You let your trolls wander from lower to higher fortresses, but also to where a comrade is swinging his hammer, because by working together you can pocket even more treasure.
However, be careful not to hammer too many boulders of a single color out of the tower, as this angers the mountain spirit, and it costs you valuable gifts to appease him. Will your trolls collect the most valuable treasure?
Components
- 1 Rock Tower
- 1 Trollhammer
- 1 game board
- 10 wooden walkways
- 1 starting plank (back: hammer-blow counter)
- 1 slider
- 40 trolls (10 in each of 4 colors)
- 4 troll lords
- 42 treasures
- 4 treasure sacks
- 12 gifts (values 4, 8, 16)
- 44 boulders (11 of 4 colors)
- 3 crowns (value 6)
- 6 fortress bases
- 6 fortress numbers (two each of I, II and III)
Rock Tower
Try out the Rock Tower before playing. Drop all 44 boulders (11 of 4 colors) into the top and bash a few out with the hammer.
When hammering:
- Hold the tower firmly, but do not push it down too strongly on its base. Give it some wiggle room so that the boulders can fall out when you hit it.
- Cover the top of the tower slightly to stop the boulders from jumping out.
- Never hit the front or back of the tower. Hammer only on its sides.
- If boulders come out of the Rock Tower without it being hit by the hammer, or if some jump out of the top of it, drop them back in.
- Face the opening of the tower towards the middle of the table so that the boulders don't fall on to the floor.
- You can hit the tower hard. It's strong and can take a lot. Remember though, that wood is a natural material and enough force can break it. A good hitting technique (see above) will cause more boulders to fall out than will raw power.
Preparation
-
Place the board on the table.
-
Assemble the fortress bases. Put the six fortress numbers (two each of I, II and III) on the bases. Place them on the six fortress spaces as shown on the right. In later games, you can place the bases along with their numbers on any spaces of your choice.
-
Lay the ten wooden walkways face up around the edge of the board at random. Make sure they fit into the notches in the wooden frame along the edges of the board. The wander spaces (footprints) must be on the inside, with the round placement spaces on the outside.
-
Drop all the boulders into the Rock Tower and place it near the board. If any boulders fall out, drop them back in till all of them are inside. Place the Trollhammer nearby.
-
Shuffle the treasures face down. Deal one to each of the 12 regions and then flip them face up.
- 5a. Although the water landscapes (fjords) are adjoined, they count as two separate regions.
- 5b. Place the remaining treasures face down near the board.
Treasure values:
- 2 treasures valued 10 to 14
- 3 treasures valued 15 to 18
- 2 treasures valued 19 to 23
-
Place the three crowns near the board.
-
Place the slider near the board too.
-
Attach the first space of the starting plank to the lower right corner of the walkway.
-
Place the players' troll lords in a random order on the spaces of the starting plank. Always use spaces 1 and 2. With three players also use space 3. Only use space 4 with four players.
Each Player
Choose a color and, of this color, take:
- 1 troll lord
- 10 trolls – place them in front of you.
- 1 treasure sack – place it near you, visible to all.
Your treasure sack has four belt spaces at the top, with the fortress numbers I, II, III and a "+" space. Over the course of the game, these will hold the treasures you collect from fortresses of those numbers on your turns. Over each of the three left spaces there is a crown space for marking the most valuable treasure from this fortress number.
Beneath the belt is the patched bag, where you keep any treasures you win during your opponents' turns.
You have 3 gifts (values 4, 8, and 16). Put them in the appropriate gaps with their numbers showing. These let you appease the mountain spirit if you hit too many boulders of one color out of the Rock Tower.
The Landscapes / Placement Spaces
The six landscapes are: Mountain, Fjord, Glacier, Swamp, Tundra and Forest.
Overview
It's your turn whenever your troll lord is in last place. If it's still last at the end of your turn, it's your turn again, and so on until another player's troll lord is last.
Example: Sigrun (white) starts the game as her troll lord is farthest back on the starting plank.
Example: As Sven's troll lord (orange) is farthest back on the walkway, it's his turn. He continues taking turns till he overtakes Astrid's troll lord (brown). Then it's Astrid's turn.
What Your Turn Looks Like
A. Move trolls
- A1. Move your troll lord forward on the walkway.
- A2. Place trolls or let them wander.
- A3. Your opponents (might) get tailwind.
B. Hammer
- B1. Check whether you can (and want to) hammer at a fortress.
- B2. Check whether you would be hammering alone or with a comrade. Then decide whether to hammer or not.
- B3. Check how often you may hit the fortress, and how many boulders will annoy the mountain spirit.
- B4. If you want to, hammer boulders out of the Rock Tower.
C. Collect treasure
- C1. Successful hammering brings you (and your comrades) treasure.
- C2. Take a crown (maybe).
- C3. Clear trolls from a region. This goes for comrades too.
- C4. Drop boulders back in the tower.
A. Move Trolls
A1. Always on the walkway: your troll lord calls the shots
Move your troll lord clockwise along the walkway, to either a placement space or a wander space.
To move to a placement space, count the next 3 free placement spaces in front of your troll lord. Don't count any wander spaces. Then move your troll lord to any of those 3 spaces. Don't count occupied spaces!
Example: Astrid (brown) wants to move to a placement space. She counts the next 3 free placement spaces in front of her troll lord. Then she decides to move her troll lord to the second of those three spaces.
To move to a wander space, count the next 3 free wander spaces in front of your troll lord. Don't count any placement spaces. Then move your troll lord to any of those 3 spaces.
Example: Olaf (black) wants to move to a wander space. He counts the next 3 free wander spaces in front of his troll lord. Then he decides to move his troll lord to the third of those three spaces.
Once all troll lords have left the starting plank, flip it over and remove it from the starting position. On its back is the hammer-blow counter, which you use when hammering to count the hammer blows. Put the slider on it at space 0.
A2. Your trolls in action: placing and wandering
The placement spaces: place your trolls. If you've moved your troll lord to a placement space, you may place some trolls in a single region. The placement space you moved to determines which type of landscape this region is.
The maximum number of trolls you may place depends on how far you moved your troll lord:
- If you moved him one free space forward, place up to one troll.
- If you moved him two free spaces forward, place up to two trolls.
- If you moved him three free spaces forward, place up to three trolls.
You may forgo placing one or more trolls. You can only place trolls that are in front of you. You can never place more trolls than you have there.
Example: As Sven (orange) moved his troll lord 2 placement spaces to a dark green placement space, he now places 2 trolls in a forest.
The wander spaces: let your trolls wander! If you moved your troll lord to a wander space, you may let your trolls wander to adjoining regions.
How many times you wander depends on how far you moved your troll lord:
- If you moved him one free wander space forward, wander up to one time.
- If you moved him two free wander spaces forward, wander up to two times.
- If you moved him three free wander spaces forward, wander up to three times.
Moving a troll into an adjoining region counts as one wander. You can spread your wanders among one or more trolls. You can forgo one or more wanders.
Example: As Olaf (black) moved his troll lord 3 wander spaces, he wanders 3 times. He moves one troll (A) twice and another (B) once.
A3. Nice for your opponents: tailwind
After you move your troll lord, a tailwind helps the players whose troll lords are (still) in front of yours. Each of these players may (once you are finished placing/wandering):
- place one troll, if his troll lord is on a placement space. The placement space determines which type of landscape he may place on.
- wander once, if his troll lord is on a wander space.
First, the player whose troll lord is in front of yours receives this tailwind. Next, the player whose troll lord is in front of that one, and so on up to the troll lord farthest ahead. The owners of any troll lords behind yours receive no tailwind.
Example: After Olaf (black) moves his troll lord, Astrid's (brown) and Sigrun's (white) are in front of his. Both receive the tailwind, Astrid's first, as her troll lord is directly in front of Olaf's. As Astrid's troll lord is on a white placement space, she may place a troll on a glacier of her choice. Next, Sigrun lets one of her trolls wander, as her troll lord lies on a wander space ahead of Astrid's. Sven (orange) receives no tailwind as Olaf overtook his troll lord.
B. Hammering
If the mountain spirit allows it, you may now hammer boulders out of the Rock Tower. You can do this at one fortress a turn. How many trolls you have surrounding that fortress determines your maximum number of hits. One opponent may – as a comrade – hammer with you. In this case you also use his trolls. But beware – you will anger the mountain spirit if the number of boulders of a single color you hammer out exceeds the number of hammering trolls.
With the mountain spirit's permission, you (and your comrade) can, after hammering, collect an adjoining region's treasure whose value doesn't exceed the number of boulders you hammered out.
How to hammer: The four belt spaces of your treasure sack show – from left to right – the order you must follow when hammering at fortresses on your turn.
- First, you must collect a treasure for your belt space I at a number I fortress.
- Only then, on a later turn, may you hammer at a number II fortress, and put the treasure you find there on your belt space II.
- On a later turn, you can collect a treasure from a number III fortress and put it on your belt space III.
- Finally, the "+" space lets you collect your last treasure from a fortress of any number.
Your comrade may always hammer at the same fortress as you, regardless of what treasures are on his belt space (provided he complies with hammer slate 2, below).
B1. Where can you hammer? Choose a fortress!
The mountain spirit carved where you can hammer on your turn into two hammer slates. You can only hammer at a fortress that complies with both hammer slates.
Hammer slate 1: The fortress's number must be the same as the leftmost empty belt space on your treasure sack. If only belt space "+" is empty, you can hammer at any fortress (that complies with hammer slate 2).
- If there is no such fortress, you can't hammer. In this case, your turn ends.
- If there is more than one such fortress, choose one of them.
- If you hammer with a comrade, he only has to comply with hammer slate 2.
- If you don't comply with both slates or don't want to hammer, your turn ends.
Example: On Sven's turn his belt space I is empty. If he hammers, it must be at a fortress showing number I.
Example: When it is Olaf's turn, both his belt spaces I and II are occupied. His free belt space III means he can only hammer at a fortress showing number III.
Example: On Astrid's turn, her belt space I is occupied, but her belt space II is still empty. Therefore, she can only hammer at a fortress showing number II.
Example: In Sigrun's treasure sack just the "+" belt space is free. This means she can hammer at a fortress showing any number.
Hammer slate 2: You must have trolls in at least 2 regions adjoining this fortress.
Example: Sigrun (white) can't hammer at this fortress, as she has trolls in only one adjoining region. Astrid's brown trolls are in 2 of this fortress's regions, so she can hammer here. The same goes for Olaf (black), who has trolls in all 3 of this fortress's regions.
B2. Hammering alone or with a comrade?
Now tell your opponents which fortress you can and want to hammer at. You don't have to decide whether to hammer there or not until after you find out whether you'd be hammering alone or with a comrade.
Hammering alone: You can only hammer alone if no opponent joins you as a comrade.
Hammering in pairs: One opponent who complies with hammer slate 2 can hammer with you as a comrade. If exactly one of your opponents complies with hammer slate 2, he may be your comrade if he wishes. If more than one of your opponents complies with hammer slate 2 and wants to be your comrade, the one with the most trolls at this fortress will be your comrade.
Ties: If several players with the same number of trolls want to be your comrade, the one whose troll lord is farthest back on the walkway will be.
Example: Sigrun (white) wants to hammer at this fortress. Sven (orange) may join her as a comrade, as he has more trolls here than Olaf (black) does. Astrid's trolls (brown) don't count as they're only in one region. If Sven doesn't want to join in the hammering as a comrade, Olaf may do so. If Olaf doesn't want to either, Sigrun has no comrades. She may hammer alone, if she wants.
Anyone who – in the order described above – can be your comrade decides immediately whether he wants to join you or not. His decision holds, regardless of your wishes:
- He can join you hammering as a comrade even if you don't want him to.
- He can refuse to join you, even if you would like to have a comrade.
Example: Olaf (black) wants to hammer here. Astrid (brown) and Sven (orange) both have the same number of trolls (3) at this fortress. However, Astrid's troll lord lies farther back on the walkway. Therefore, she has the option to be the comrade. If she declines, Sven may be Olaf's comrade. If he also doesn't want to, Sigrun can hammer as the comrade. (As she has fewer trolls at the fortress than Astrid and Sven do, the position of her troll lord doesn't matter.)
Only once it's been determined whether you'd have a comrade, do you decide whether to hammer:
- If you would have a comrade, you can choose between hammering with him or not hammering at all.
- If you wouldn't have a comrade, you can choose between hammering alone or not hammering at all.
Didn't hammer? Then your turn ends!
B3. Number of hits, angry mountain spirit and gifts
Count your trolls in the three regions surrounding the fortress at which you are hammering. If a comrade is hammering with you, count his trolls in those regions too. The total of these hammering trolls determines:
- The hit limit: the maximum number of times you can hit the Rock Tower with the hammer.
- The color limit: how many boulders of the same color you can hammer out of the tower without angering the mountain spirit.
WHITE isn't a color as far as the mountain spirit is concerned. You can hammer any number of white boulders out of the tower without angering the mountain spirit.
Example: Olaf (black) has 4 trolls at this fortress. If he hammers alone, he can hit the tower up to four times and can hammer at most 4 boulders of each color out of it. If Astrid (brown) takes part as his comrade with her 2 trolls, it could be hit up to 6 times, and up to 6 boulders of the same color could come out of it safely.
The mountain spirit never allows more than 9 hammer hits. Even if more than 9 trolls are hammering, you still only hammer 9 times. The hit limit can never be exceeded.
More than 9 boulders of the same color always anger the mountain spirit (white is not a color). Even if more than 9 trolls are hammering, more than 9 boulders of the same color still can't be hammered out of the Rock Tower.
Exceeding the color limit and appeasing the mountain spirit
If you exceed the color limit, the mountain spirit gets angry. He forbids:
- further hammer blows. The hammering ends immediately. Giving gifts won't change this.
- collecting treasures – unless he is appeased with gifts.
However, you may decide to appease the mountain spirit. If you choose to do so, count how many boulders you've exceeded the color limit by. Then flip over that many gifts (of your choice) in your treasure sack, so that their values are no longer visible. Each disc counts as one gift. For each gift you flip this way, the mountain spirit counts a colored boulder as a white one. Flipped gifts are worthless and can't be used again this game, but unflipped ones will add their values to your score at the end of the game.
If the mountain spirit is appeased with gifts, you are now allowed once more to collect treasure (see Section C). If two of you are hammering together you can both contribute gifts – each giving your own. It doesn't matter who gives more, fewer or none. The appeased mountain spirit lets you both collect treasure again.
If you can't or don't want to appease the mountain spirit, don't give any gifts and don't collect any treasure.
Example: Olaf (black) and Astrid (brown) need 3 gifts, as they have broken their combined color limit (6) by one red boulder (7) and 2 yellow boulders (8). Unless they appease the mountain spirit with 3 gifts, neither of them is allowed to collect any treasure. Olaf and Astrid decide together that Olaf will give 2 gifts and Astrid will give one. The mountain spirit treats the 3 extra boulders as colorless white boulders and Olaf and Astrid are now allowed to collect their treasures (as described in Section C).
B4. Pick up the hammer and knock the boulders out!
Finally! Now you can hammer the boulders out of the tower.
If you have a comrade:
- All boulders hammered out count in full for you both.
- He can't back out and stop being your comrade while you are still hammering.
- He can keep hammering without you if you voluntarily stopped hammering (see Keep Hammering, below).
- An empty hit causes a change in roles: your comrade will swap roles with you. He'll become the hammerer, you'll become his comrade.
As the hammerer:
- Put the Rock Tower in front of you.
- Hit it with the hammer again and again.
- Count your hits aloud, while another player marks them with the slider on the hammer-blow counter.
- Count the boulders as they come out, and leave them on the table.
- Stop hammering:
- voluntarily, after any hit of your choice, or
- if you have to because you exceeded the color limit or reached the hit limit.
- If you stop hammering, you are the first one to collect treasure (see Section C).
Keep hammering: If you stop hammering neither reaching the hit limit nor exceeding the color limit, your comrade may keep hammering. Boulders already hammered out stay where they are and still count. He keeps counting hits from where the previous hammerer stopped. Color and hit limits stay the same. He can stop hammering after any hit of his choice, but must stop if he exceeds the color limit or reaches the hit limit. He only collects a treasure when he himself stops hammering (see Section C).
Once you've collected a treasure it's safe. You can keep it even if your comrade keeps hammering, exceeds the color limit and doesn't appease the mountain spirit.
Empty hit? Swap roles! The empty hit is treated (and counted) as another of your hits.
- If you are hammering alone, this empty hit has no effect.
- If you are hammering with a comrade, an empty hit causes a role swap: your comrade immediately becomes the hammerer and you become his comrade. He puts the Rock Tower in front of him and strikes any remaining hammer hits being now the hammerer. You are now his comrade and can't back out before he stops hammering. The hit count continues from where you left off. Any boulders already hammered out stay where they are and still count. The color and hit limits stay the same (the sum of your combined trolls at the fortress).
- He stops hammering, either voluntarily, after any hit of his choice, or if he has to because he exceeded the color limit or reached the hit limit. He may also stop immediately after your empty hit, without hitting the tower at all.
- Once he has finished hammering, he is the one who is allowed to start collecting a treasure (see Section C).
- Each subsequent empty hit causes another role swap, even if it was the last hit allowed by the hit limit.
Example: Sven's fourth hit was an empty hit. Now his former comrade Astrid becomes the hammerer (fifth hit). On the sixth hit, Astrid strikes an empty hit. Astrid becomes the comrade again and Sven is the hammerer once more. He decides to stop and can collect a treasure before Astrid does. As the hit limit wasn't reached and the color limit wasn't exceeded, Astrid can choose not to collect any treasure now and instead keep hammering.
C. Collect Treasure
There is a treasure in each of the three regions surrounding the fortress. When the hammering is finished, the mountain spirit can let you – and your comrade – each collect one of them.
C1. Collecting treasure and putting it in your treasure sack
The player who stops hammering (the hammering player) is the first to collect a treasure. He does this immediately. He is not affected if his comrade keeps hammering and exceeds the color limit. Then his comrade can collect one treasure. If the comrade keeps hammering (see "Keep Hammering"), he collects once he himself has finished hammering.
You can only collect a treasure if the mountain spirit allows it. The mountain spirit lets you collect a treasure if:
- enough boulders have been hammered out. You can only collect a treasure whose value is equal to or less than the number of boulders that were hammered out.
- you have trolls there. You can't collect treasure from a region in which you have no trolls.
- he isn't angry. As soon as the color limit is exceeded and the mountain spirit not appeased with enough gifts, no (further) treasure can be collected.
If you find no "allowed" treasures, you leave empty handed. If you find one or more "allowed" treasures, you must collect one of them.
Example: The total (19 boulders) is too low to collect the most valuable treasure (23). Astrid (brown), who was hammering, can choose between the two other treasures (17, 19). Whichever one she doesn't choose is left for her comrade, Sven (orange). Astrid chooses the mountain treasure (19), leaving the glacier treasure (17) for Sven.
Example: Although the total (19) is enough to collect any treasure, Astrid (brown), once finished hammering, can't collect the treasure in the glacier region, as she has no trolls there. Then her comrade Sven (orange) will collect this treasure, once Astrid has decided between the fjord treasure (18) and the tundra treasure (10).
Example: Astrid (brown) and her comrade Olaf (black) have exceeded the color limit (6) by one yellow boulder (7). Astrid doesn't give a gift and assumes that the angry mountain spirit will deny them both a treasure. However, Olaf appeases the mountain spirit with a gift. Even though Astrid, as the hammering player, will get to collect a treasure first, not enough boulders were knocked out for the most valuable treasure (28), and she has no trolls in the tundra. Olaf collects the treasure there, after Astrid has settled for treasure 16.
Where to put the treasure: belt space or patched sack?
- If you collected the treasure on your own turn, put it face up on your leftmost free belt space. Empty hits, role swaps, and tower swaps never change whose turn it is – your turn is always your turn.
- If you collected the treasure on an opponent's turn, put it face down in your patched sack. You can hold an unlimited number of treasures in your patched sack.
Example: Sigrun is first to put a treasure (19) in belt space II. She receives a crown and puts it in the crown space over that belt space. Sven owns the crown for the most valuable treasure (20) in belt space I. Later, Sven collects a treasure (24) for belt space II. It is worth more than Sigrun's, so he takes the crown from her. Olaf and Sven each have a treasure worth 20 in belt space I, but as Olaf collected his later, he takes the crown from Sven.
C2. Crowns
If you collect the most valuable treasure of a fortress, you put a crown above it.
- If you're the first player to put a treasure in a belt space of this number (I, II, or III), take a crown from the supply. Put it in the crown space above that belt space.
- If a player later puts a treasure of equal or greater value in a belt space of that number, he takes that crown and puts it over his own belt space.
- This player loses that crown to a player who later puts a treasure of equal or greater value in a belt space of that number, and so on.
- A player can have several crowns at the same time if he has the most valuable treasure (ties going to the one collected later) in several belt spaces.
Example: Olaf collected the treasure (21) for belt space III, and keeps the crown over it. (Had Astrid been able to collect the glacier treasure, she would have taken Olaf's crown and put it over her own belt space.)
C3. Clear region
The hammerer and his comrade must now remove all their trolls from one of the regions surrounding the fortress they were hammering at:
- If the player collected a treasure this turn, he removes his trolls from the region he took the treasure from.
- If he didn't collect a treasure this turn, he takes them from any of this fortress's regions.
- If two players were hammering, the player whose turn it is goes first.
Put your removed trolls back in front of you. You can use them again in later turns.
Now add a treasure to each region that doesn't have one any more. Take each treasure from the supply at random and turn it face up after adding it to the region.
Example: Sven (orange) collected a treasure from the forest and so must remove his trolls from there. Sigrun (white), who collected nothing as his comrade, decides to clear the glacier as this contains only one troll. If she cleared the mountain, she'd have to remove 4 trolls.
C4. Boulders back in the tower
Drop all the boulders that were hammered out back into the tower and set the slider back to space 0 of the hammer-blow counter. This ends the turn.
End of Game and Victory
If you are the first player to put a treasure in a "+" space, this is your last turn:
- Remove all your trolls from the board and lay your troll lord on his side on his space on the walkway. This space still counts as occupied.
Now the other players get one more turn each. After each final turn, that player removes his trolls and lays his troll lord on its side on its space. The turn order for these last turns, as always, depends on whose troll lord is farthest back. The lying-down troll lords of finished players don't count.
Finally, each player counts:
- the values of the treasures he collected
- the values of his unused gifts
- the values of the crowns over his belt spaces
If you have the highest total you are the undisputed King of the Trolls and win the game. Ties are broken in favor of the player whose troll lord is farther back on the walkway.
An Example Turn
It's the turn of Astrid (brown). She checks her treasure sack and sees that her leftmost free belt space is belt space III. If she wants to hammer this turn, she'll have to do so at a fortress number III.
Astrid sees that she doesn't have trolls in two regions at any fortress. She'll have to do something about this to be able to hammer.
Astrid moves her troll lord three wander spaces forward. She wanders three times to move two of her trolls to the swamp at fortress III. Astrid now has trolls at two regions here and so can hammer. If she hammers successfully, she can collect either the treasure from the swamp (15) or from the mountain (18). She lacks the trolls needed for the glacier's treasure.
Sigrun (white) and Sven (orange), whose troll lords are in front of Astrid's, receive tailwind. Sven wanders, as his troll lord is on a wander space. Sigrun places a troll on a glacier, as her troll lord is on a white placement space.
Sigrun's trolls are also in two of this fortress's regions. She'd like to be Astrid's comrade. Olaf (black) has as many trolls here, so he may be Astrid's comrade if he wants, as his troll lord is farther back than Sigrun's. However, he doesn't want to be, so Sigrun gets to be. Astrid could now decide against hammering, but she decides to hammer with Sigrun as a comrade.
The seven trolls that Astrid and Sigrun have together gathered here allow up to seven hammer hits. Astrid strikes the hits, as long as she doesn't strike an empty hit.
After five hammer hits, Astrid has hammered out 17 boulders. Sigrun wishes she could now back out and collect the treasure from the swamp (15), but as a comrade she must wait for Astrid to stop hammering. Astrid's sixth hit is an empty hit. Sigrun now becomes the hammerer and Astrid the comrade. Sigrun decides not to hit the tower any more, and stops hammering. She has four good reasons for this:
- The 17 boulders already hammered out are enough for her to collect the treasure in the swamp (15).
- These boulders are not enough for her comrade Astrid to also collect a treasure.
- Sigrun doubts that another hit would knock out the 5 or more boulders needed to collect the most valuable treasure (22) in the glacier. Also, more than 17 boulders would let Astrid collect the treasure from the mountain (18).
- There are already 7 red boulders on the table. The next hit could well exceed the color limit (7). In that case, Sigrun could only collect a treasure if the mountain spirit was appeased with gifts. She doesn't want to risk it.
As it's not Sigrun's turn, she places the swamp treasure face down in her patched sack. Then she clears her trolls from the swamp.
Astrid, the comrade, may keep hammering, as Sigrun stopped before she reached the hit limit and before she exceeded the color limit. This last hit knocks five more boulders out of the tower – including a red one, and so exceeds the color limit. Astrid decides to flip a gift over, so she can collect the mountain treasure (18). Then she clears her trolls from the mountain.
Though Astrid ended this turn as a comrade (because of her empty hit), it is still her turn. Therefore, she places the treasure she has collected face up on her belt space (III). Olaf keeps the crown for this belt space, as he owns the most valuable treasure of belt space III (21).
The final result of 22 boulders would have been enough to collect the glacier's treasure. But Sigrun, who has a troll there, had already stopped hammering (and collected the 15 treasure in the swamp). Astrid can't collect the glacier treasure, as she doesn't have any trolls there. Had she been able to collect it, she would have taken Olaf's crown and put it over it.