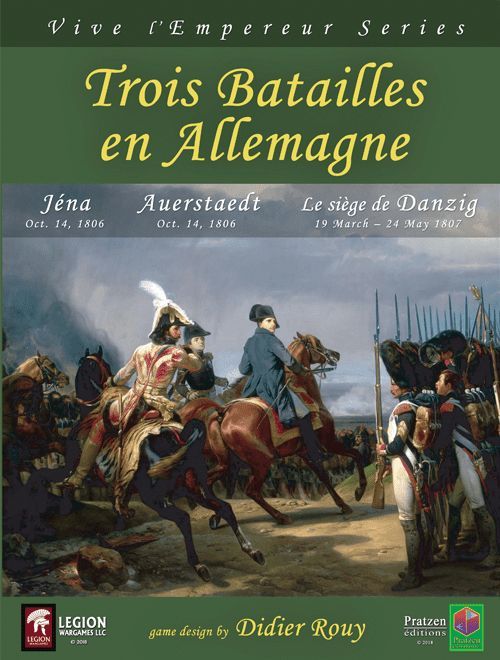
Trois Batailles en Allemagne
Trois Batailles en Allemagne Rulebook
Table of Contents
Table of Contents
- Approximate Scale
- 1.0 Introduction
- 2.0 Game Sequence
- 3.0 Game Components
- 4.0 Combat Formations
- 5.0 Stacking
- 6.0 Movement and Terrain Effects
- 7.0 Fire
- 8.0 Melee
- 9.0 Cavalry Charges
- 10.0 Morale
- 11.0 Rally
- 12.0 Army Morale
- 13.0 Reinforcements
- 14.0 Leaders
- 15.0 Lines of Communication
- Advanced Rules
- 16.0 Optional Rules
- 17.0 Command and Control
- 18.0 Strategic Deployment
- 19.0 Time Limits and Penalties
- 20.0 Interactive Game
Approximate Scale
- 1 counter = 1 infantry or cavalry regiment or 2 artillery batteries.
- 1 hexagon = about 250 meters.
- 1 game turn = 30 minutes.
- 1 loss step = 300 men or one artillery battery (about 6 guns).
1.0 Introduction
Each game can be played in several ways, either using only the standard rules for a simpler game, or using both the standard and advanced rules. In the latter case, the advanced rule prevails when they contradict the standard rules. The players can agree to use none, some or all advanced rules.
There is a third set of rules, known as specific rules. They apply to one game, and each game of the series has its own set of specific rules. The standard and advanced rules apply to all games of the series.
Some rule paragraphs may seem at first to be in the wrong chapter, or incomplete. But after you have read the whole rulebook, you will understand these paragraphs, which are summaries of rules explained farther in the rulebook. We urge you to read the rulebook at least twice, to fully understand the rules.
2.0 Game Sequence
"The Art of War is a simple art, and a performing art. There is nothing nebulous; everything is dictated by common sense, there is no ideology." Napoleon
Each phase must be over before the following phase may begin. The other player can participate only during the defensive fire phase or sometimes to form square, to countercharge or to perform opportunity fire.
At the end of the two player turns, the marker on the turn record is moved to the next box on the turn track.
- First player turn:
- Cavalry charges.
- Regular movement.
- Second player defensive fire.
- Offensive fire.
- Melee phase.
- Rally phase.
- Second player turn: same sequence as above, with the second player replacing the first player and vice versa.
Note: During his turn, the player is called attacker, and his opponent is called the defender whatever the tactical situation.
3.0 Game Components
3.1 Combat Units
They represent the various fighting formations, as opposed to the leader counters and game markers.
Identification: regiment number or abbreviation. The identification is completed by a colored number or letter (corps, army, etc). Additionally, each counter has a unit number, to help the players find the unit on the loss sheet. For example, the 024 unit will appear on the 24th line of the loss sheet.
- Fire Range: 5 to 7 hexes for artillery, 2 for light infantry only in skirmish formation. Always 1 for infantry when no number is printed. Cavalry cannot fight by fire. As an example see 4.6 Tirailleurs.
- Firepower: this value depends on the unit type. Cavalry has none.
- Melee value: this value represents the ability of each unit to fight at close range. It is multiplied by the number of steps to determine the melee strength.
- Number of Steps: each step represents about 300 men or 6 guns. The number of steps represents the initial strength of the unit.
- Movement Allowance: number of movement points (MP for short) a unit can use every time it moves. The various terrain types have different movement costs. See the terrain effect chart.
Each counter has two sides, the exposed side shows the current unit's formation:
- line or column for infantry and cavalry.
- limbered or unlimbered for artillery.
If in line or unlimbered, the unit is read "horizontally"; if in column or limbered, the unit is read "vertically". Moreover, various symbols and values are printed on them.
Morale: this value represents the staying power of a unit before breaking. At the start of the game, this value generally ranges from 6 to 11.
The melee and fire values can vary depending on the circumstances and the terrain. Round up each half. Example 5/2 = 2 1/2, rounded to 3.
3.2 Leader Counters
A leader counter represents not only the leader himself, but also his staff, his aides, and all his retinue. The counter shows the leader's name and three numerical values. These values are:
- the combat bonus (left)
- the morale bonus (middle)
- the movement allowance (right)
The first two values are die roll modifiers, the last one is a standard movement allowance.
On the reverse side, there are two other values, initiative on the top and obedience on the bottom. The "initiative" allows the leader to act on his own, without orders, while obedience is checked when he receives a new order (advanced rules, see 17).
3.3 Markers
You can find also two types of markers:
- Square markers: placed back of an infantry unit in square formation. Use the line side of the infantry counter, so the two counters will really represent a square. See an example at 4.4.
- Numeric markers: placed across disorganized units. The number is the game turn during which the unit was disorganized. They are also used to indicate the presence of voltigeurs in the advanced rules.
Note: These markers can also be used to show the number of step losses (see option 7.8).
3.4 Other Counters
- Dummies: decoys are used to lure the bad guy.
- Reserve: reserve counters are used to hide units and keep them behind the front line.
Reserve and random events are not available in every battle. Some battles may also have additional counters as explained in the special rules.
3.5 Maps
The maps represent the battlefield and are divided into hexagons (called "hexes"). Each hex contains a terrain type. Some terrain elements, such as ridges and streams also exist between hexes, along hexsides. The summary of terrain types used for a particular battle is given in the play aids.
For clarity's sake, there are two categories of waterways: "rivers", that is the rivers and the major streams, which cannot be crossed; and "streams", that is the brooks and the minor streams, which can be crossed with some restrictions.
The terrain type used is the one covering the majority of the hex. For example a single tree in a clear hex is played like a clear hex.
3.6 Play Aids
There are several player aids at the end of the special rules, they can be freely copied.
- Each player has an Army sheet, to keep track of the losses. Losses are recorded by checking boxes, starting with the rightmost. A unit's remaining strength is the number of unchecked boxes.
- A sheet with the Terrain Effects Chart. These effects apply to the movement, the formation, the fire and the melee.
- A sheet with the Fire Table, the Melee Table and the Formations Table.
4.0 Combat Formations
"The Art of War consists in deploying his troops so they are everywhere at the same time. Deploying the troops is the real Art of War." Napoleon
Each unit type can enter a number of formations, some of them voluntarily, other due to external factors like the terrain or the combat results (disorganized).
Formations are the heart of the game system, they determine each unit's movement and combat capabilities. The game was designed so the players will easily and instantly see a unit's current formation.
Each unit can have only one combat formation at a time, but it can change formation during the course of a game.
Infantry formations: line, column, square, general order, disorganized, and skirmishers (only for light infantry, that is infantry with a printed range 2).
Artillery formations: limbered (to move), unlimbered (to fire), disorganized.
Cavalry formations: column (usual formation for movement), line ("en bataille" during a charge), general order (town, forest, brush or castle), disorganized.
The formation greatly influences the exposed side and the facing of the counter. The front of a unit is marked with a colored line.
In most cases, a counter always has its small sides along the opposite hexsides, no matter which formation it is currently in.
4.A Infantry
Here is the complete list of formations the infantry can use, and their effects.
When attacking or defending through the front, use the printed melee value. It is reduced by half when attacked from a flank or rear hex.
Note: Flank and rear attacks are described in 8.6 (with the notable exceptions of mixed order and protected flank).
4.1 Infantry in Line Formation. The exposed side of the counter is the side with a line unit symbol on the long side. This unit symbol faces a hex junction, the small sides of the counters are along hexsides. Use the reduced movement allowance printed on this side. Can stack with artillery, limbered or unlimbered, provided the units have at least two common front hexes. Fire range is 1 hex (including light infantry).
4.2 Infantry in Column Formation. The exposed side of the counter is the side with a unit symbol on the short side.
- When defending, the unit has a three-hex front.
- When attacking by fire or by melee, the unit has a one-hex front. The other two hexes are front hexes, but they cannot be used for the attacks, either by fire or melee.
Movement can be executed through the hex facing the unit symbol only. Changing facing costs 1 MP per 60 degrees, except for the first change, before or after it crosses the hexside. Use the full movement allowance printed on this side.
The melee value is modified by +1 when attacking, but not when defending. Can stack with artillery, limbered or unlimbered, provided the units have at least two common front hexes. The melee value is reduced by half (round up) when attacked from a flank or rear hex.
Note: Flank and rear attacks are described in 8.6 (with the notable exceptions of mixed order and protected flank).
4.3 Infantry in General Order. This formation is mandatory in a town, castle, brush, or wood hex. Use the column side of the counter. The six adjacent hexes are front hexes. The firepower is 1. Use the printed melee value for attack and defense. Town and castle only: morale checks called for by combat results (fire and melee) are ignored.
Can stack with limbered artillery in a town or forest hex (on a road in this case).
Exceptions: an infantry unit does not adopt general order if it is disorganized (see 4.5).
4.4 Infantry in Square Formation. This formation is allowed only in clear, farm or difficult terrain (where there is no mandatory formation). Use the Line side of the counter, and place a square marker along the back of the unit counter. The six adjacent hexes are front hexes (no flank, no rear).
The movement allowance is 1 MP. Use the printed melee value against attacking cavalry.
Halve the printed melee value when defending against infantry. If a square is attacked both by infantry and cavalry, the defending infantry is halved and the cavalry melee value is reduced to 1.
A square cannot initiate melee. The firepower of a square is 1 regardless of its fire value in line.
The morale is modified by +2 against cavalry.
The square may include an unlimbered or limbered artillery unit in mixed order (see 9.6). Other infantry or artillery units may move through a square while in a different formation, but they cannot stop there except if they join the square. As opposed to other games, cavalry cannot enter an hex where an enemy infantry square is.
4.5 Disorganized Infantry. This is a formation for game purposes, but actually it is the state the unit is in after it loses cohesion, and until it recovers its cohesion after some time. Use the column side of the counter. Place a numeric marker across the unit counter. Use the current game turn number. The six adjacent hexes are front hexes (no flank, no rear).
Upon its disorganization, the unit immediately retreats 2 hexes (see 8.9).
A disorganized unit cannot attack in melee, but it can defend.
Use the column movement allowance, but the movement can only be executed towards the lines of communication (see 15). Disorganized units are allowed but not required to move in the movement phase, but may be required in the rally phase.
The firepower and the melee value are 1. Use the column morale with a -2 modifier.
If a disorganized unit suffers a second disorganization, it is eliminated for good.
Cannot stack with a good order unit (that is, any other formation).
4.6 Tirailleurs. Only light infantry can use this formation. Light infantry are infantry units with a printed range 2. This formation is allowed only in clear, farm or difficult terrain (where there is no mandatory formation) and sometimes in marshes according to the special rules. Use the "line" side of the counter, and place it on a hexside, to cover two hexes.
Note: this rule has been openly criticized because it allows the deployment of whole units. It has therefore been modified by allowing almost every unit to deploy a light company of voltigeurs, but the light infantry battalions cannot totally deploy this way. As the rule is different, it was placed in the "optional rules" section. We encourage the players to use it after they feel comfortable with the standard rules.
Note: when a unit enters or leaves the tirailleurs formation, the counter is moved one half hex. This operation is not a movement. It is just a change of formation. No opportunity fire or countercharge can take place except if the unit makes several formation changes to make a lateral move.
There are three front hexes, two flank hexes and three rear hexes.
Fire:
- at 1 hex range with the full firepower printed on the line side.
- at 2 hex range with a firepower modified by -2 with a minimum of 1.
Offensive and defensive fire range: 2 hexes. Opportunity fire range: 1 hex. Light infantry (with a fire range 2) can fire at this range only in tirailleurs formation. In any other formation, it behaves like a normal infantry with a range of 1 hex.
Even if just one "half-unit" (that is, what is on one of the two hexes) is disorganized because of the result of a combat that took place in one hex only, or for any other reason, the whole unit is disorganized.
Melee against tirailleurs is resolved as if the unit was defending both hexes. The melee value is reduced by half (round up) in every circumstance.
Every fire attack against a unit in tirailleurs is made with a -1 to the dice.
The melee value is reduced to 1 when attacking a square, brush, a town, a wood, or if the cavalry attacks from these terrain types. The melee value is halved when countercharged from a rear/flank hex.
Note: Flank and rear attacks are described in 8.6 (with the notable exception of protected flank).
Everything else is similar to the line formation (see 4.1).
4.B Cavalry
Here is the complete list of formations the cavalry can use, and their effects.
4.7 Cavalry in Line ("en bataille"). Facing is similar to infantry in line formation. Every charge or countercharge can be performed only in line. The formation change does not cost any MPs. The unit uses this formation after the countercharge morale check is resolved or at the beginning of the charge phase. The line formation is never allowed when using normal movement.
Reverts to column formation or general order formation when the charge combat is resolved.
Some terrain is forbidden: crossing a river, charging into a castle, gully or marsh.
The melee value is halved (round up) when attacked from a rear/flank hex.
Note: Flank and rear attacks are described in 8.6 (with the notable exception of protected flank).
4.8 Cavalry in Column. Facing is similar to column infantry. This formation is mandatory in the two following cases: the unit is not moving; the unit uses normal movement. Changing facing costs 1 MP per 60 degrees, except for the first change, before or after it crosses the hexside. The melee value is halved (round up) when attacked from a rear/flank hex.
Note: Flank and rear attacks are described in 8.6 (with the notable exception of protected flank).
4.9 Cavalry in General Order. Mandatory in town, wood, brush, and castle. Use the column side of the counter. The six adjacent hexes are front hexes (not flank, no rear). The melee value is 1 when the cavalry defends (no possible attack in general order). No morale check due to fire or melee while in a town or castle hex.
This formation is mandatory in the following cases:
- when the unit occupies a town, brush, castle or wood hex and is not moving;
- during normal movement as soon as the unit enters one of these terrain types, and until it leaves these terrain types.
Exceptions:
- if the cavalry is disorganized;
- if the cavalry charges or countercharges: it uses the line formation for the duration of the charge, with a melee value of 1 (see 9.1).
4.10 Disorganized Cavalry. This is a formation for game purposes, but actually it is the state the unit is in after it loses cohesion, and until the unit recovers. Use the column side of the counter. Place a numeric marker across the unit counter. Use the current game turn number. The six adjacent hexes are front hexes (no flank, no rear).
Upon disorganization, the unit immediately retreats 2 hexes (see 8.9).
Cannot charge.
Use the column movement allowance, but movement is allowed only toward the lines of communication (see 15).
The melee value is 1.
Use the column morale with a -2 modifier.
If a disorganized unit suffers a second disorganization, it is eliminated for good (exception when the army is demoralized, see 12.0).
Cannot stack with a good order unit (that is, any other formation).
A cavalry unit can voluntarily adopt a disorganized state (see 6.5). The decision is immediate, the cost is 0 MP.
Special: in this case, only, the marker is the previous turn's number.
4.C Artillery
Here is the complete list of formations the artillery can use, and their effects.
4.11 Limbered Artillery. Mandatory in town. In this case it has a front, flank and rear like in clear terrain. Movement not allowed in forest, brush, or marsh, except through a road. Changing facing costs 1 MP per 60 degrees, except for the first change, before or after it crosses the hexside. Facing is similar to column infantry. Fire is not allowed while limbered.
The melee value is the printed value when defending, but attacking is not allowed.
No morale check due to fire or melee while in a town hex.
4.12 Unlimbered Artillery. Allowed only in clear, farm or difficult terrain (where there is no mandatory formation). Facing is similar to infantry in line formation. The six adjacent hexes are front hexes (no flank, no rear). Same thing for the front hexes.
Movement 0 MP unless the unit changes formation. If the artillery changes from unlimbered to limbered, the formation change cost is 2 MPs, and is subtracted from the limbered movement allowance (see 6.3). If an artillery has 5 MPs while limbered, it can change from unlimbered to limbered, and then executes a 3 MP movement. The same applies if the artillery becomes disorganized, except that the movement cost is 0 MP.
Can pivot 60 degrees per turn for free.
Range dependent fire value: The fire value decreases with the distance to the target. Subtract the number of hexes between the firing artillery and the target, with a final minimum of 1 whatever the distance up to the maximum range.
For example, if the target is three hexes away (2 empty hexes between them), then the fire value will be 6-2=4. The "4" column will be used on the fire table (if no other modifier applies). A unit 7 hexes away (maximum range of some units) will be attacked at 6-6=0, therefore final value of 1.
Exception: Two batteries with one loss each combine their fire at long range. According to the rule they have a final value of 1+1=2. In this case the final value is 1, to avoid two half batteries firing better than one full battery.
The fire value can be decreased by terrain and if the battery takes losses (see 7.1).
Opportunity fire range is 2 hexes only, no matter what is the printed range.
Melee: attack is not allowed, but the artillery can defend with the normal rules.
Rear attack: see 8.6, and especially the exception that applies to unlimbered artilleries.
Artillery and Squares: see 9.6.
4.13 Disorganized Artillery. Place a numeric marker across the unit counter. Use the current game turn number. Upon its disorganization, the unit immediately retreats 2 hexes (see 8.9) except if optional rule 16.3 is in effect.
Use the printed morale with a -2 modifier.
Use the limbered movement allowance, but movement is allowed only toward the lines of communication (see 15).
Cannot attack with melee or fire.
Automatically eliminated if attacked in melee except if stacked with a disorganized infantry. In that case it is ignored for the melee but suffers the result of the infantry.
If a disorganized unit suffers a second disorganization, it is eliminated for good.
Cannot stack with a good order unit (that is, any other formation).
If a stack is already disorganized, it executes an additional 1 or 2 hex retreat (see 8.9). At the end of the movement, the prohibition against stacking cavalry with other types of units must be adhered to, and this can cause the player to execute as many additional retreats as necessary.
Historical Note: the artillery units' density was lower than the cavalry's and the infantry's. Therefore, we suggest that you apply optional rule 16.2.
5.0 Stacking
Several units can occupy the same hex, but they must obey some conditions. A player cannot examine the enemy stacks, only the upper unit.
5.1 Stacking Limits. A single hex can contain: either up to 10 steps of artillery and infantry, or up to 7 steps of cavalry. These limits are in effect at all instances, including during movement. If a unit must retreat into an hex where overstacking would occur, the whole stack is disorganized. If the stack is already disorganized, it executes an additional one or two hexes retreat, see 8.9.
5.2 Stacking Prohibitions. If a cavalry unit must enter an hex occupied by infantry or artillery, or vice versa (for example during a retreat move), the two stacks are immediately disorganized, and both retreat 2 hexes.
5.3 Stacking and Combat. When several units are stacked:
- Only the top unit can fire.
- A stack can attack only one hex, it cannot split to attack several hexes.
- All the units in the stack take part in melee, attack and defense alike.
Exceptions:
- If a unit's melee value is zero, it does not take part in melee, but it suffers the combat results D, D1 and E. If a melee requires a morale test, the first unit with a positive melee value of the stack checks.
- An unlimbered artillery attacked through the rear does not fight (see the end of 8.6).
5.4 Stacking and Losses. The step losses are applied to the top unit.
Exceptions:
- During melee, if the top unit has a zero melee value, the losses are applied to the unit underneath.
- If the top unit is completely eliminated and if the step loss result is not totally fulfilled, the remaining losses are applied to the next combat unit, and so on. Then this next unit will execute the morale check, if any is required.
- In the rare case where the top unit is artillery and the fire comes from the flank or the rear, the guns are ignored and the infantry under the artillery takes the losses. (Exception, protected flank as explained in 8.6, in that case the artillery takes the losses and checks for morale if needed).
5.5 Stacking and Morale Checks. If a morale check is required, the unit stacked on top executes this check. If it succeeds, the whole stack holds. If the test fails, the unit underneath executes a morale check modified by -2, and so on.
Note: the concept "stacked on top, therefore in front" is just an easy way to explain why only the top unit checks morale and fires. If the stack is fired upon from a rear hex, the losses are still applied to the top unit.
5.6 Stacking and Opportunity Fire. If a unit leaves the hex and exits to the rear, leaving other units in the hex, it is still subject to opportunity fire, no matter where this fire comes from. The static top unit does not screen the moving unit, the triggering event is simply exiting the hex (see 7.5). If this fire triggers a morale test, the entire stack performs it because the hex is the target.
5.7 Stacking and Facing. At the end of the movement phase, units stacked together and with the same formation must have a common facing. If several units are stacked together but with different formations, they can have different facings, but they must share at least two front hexes. This is called "mixed order".
Front hexes and flank/rear hexes are determined with respect to the whole stack, not individual units. If an adjacent hex is a front hex for one unit, it is a front hex for all the units in the stack (the first unit "covers" the other units).
Example: mixed order. The top infantry is in line to fire and the bottom infantry is in column to get its melee value modified by +1. Both units have two front hexes which are also front hexes for the other unit. Because of mixed order, the infantry in line formation has three front hexes if attacked, and the column has two possible front hexes for fire and melee, the two hexes that are also front hexes for the line.
Exception:
- An infantry in square formation cannot stack with an infantry in any other formation.
- Skirmishers can stack only with other skirmishers.
If two units end any phase stacked together but not with compatible facings, both execute a morale check. This can happen if a movement has been interrupted by a countercharge, or if a unit retreats before combat. If both morale checks succeed, the player must change the facing of one unit to obey the rule.
Note: this case is checked only at the end of a phase.
5.8 Disorganized Unit and Other Formation. A disorganized unit cannot be stacked with other formations, except during a retreat, or a voluntary move toward its line of communication, and in this case, the good order unit checks morale. Nevertheless, the disorganized unit cannot stay in the hex, and it continues the retreat until it enters an available empty hex.
A unit in good order can move through a disorganized unit, but it cannot stop there. Order and disorder cannot coexist on the same hex at the end of the movement phase. Exception, optional rule on artillery retreat.
5.9 Stacking: who is up, who is down. The player can change the order of his units in a stack during his movement or charge phase only (exception, artillery moving down upon infantry square formation, see 9.6). These changes are free.
6.0 Movement and Terrain Effects
"The Art of War consists in the following: with a less numerous army, you concentrate more troops than your enemy on the point where you attack, or on the point where you are attacked. But this art cannot be learned in the books, or acquired as a habit, it is a way of acting which is the proper genius for war." Napoleon
During his movement phase, a player can move all, some or none of his units, spending movement points (MPs) according to formation and terrain (see the Terrain Effect Table, in the play aids).
6.1 General Case. Movement is not mandatory. Unused MPs cannot be transferred to other units, nor accumulated to be used in a subsequent turn. Each turn a unit can use its full movement allowance.
Exception: if a cavalry executed or attempted to execute a charge during the charge phase prior to the regular movement phase, it cannot execute a voluntary movement during the movement phase.
A unit must finish its movement before the next unit can move (exception, combined charges see 9.5). A pile of units can move together, their movement allowance is the allowance of the slowest unit.
The number of MPs a unit can spend is indicated on the exposed face of the counter (exception, a square has 1 MP if it remains in square. Otherwise see below). Each spent MP is subtracted from the new movement allowance. If the number of spent MPs is now higher than the exposed face (when a column goes to line for example), then the unit stops. Regarding squares, the unit may use its 1 MP to change to another formation; this 1 MP is subtracted from the allowance indicated on the new face of the counter. This MP can not be used to move and then change formation, only change formation then move with the new movement allowance.
A unit with 0 MP left cannot change formation (exception, unlimbered battery). A unit must have enough MP to enter a hex, even if it is its only move that turn.
An infantry or artillery unit can enter an hex occupied by friendly units provided there is no overstacking (see 5.1). The same applies to the cavalry, which can cross an hex occupied by friendly cavalry. A disorganized unit cannot voluntarily cross an hex where there is a "good order" friendly unit (except during a retreat, see 5.8). A unit cannot enter an hex occupied by an enemy unit. A leader is not an unit.
6.2 Entering an Hex. Depending on its formation, a unit can, or cannot, enter any adjacent hex:
- Line: the unit can enter one of the 2 front hexes.
- Column, limbered: the unit can enter the central front hex (the hex where attack and fire is allowed).
- Square, general order, disorganized: the unit can enter any adjacent hex.
The MP cost when entering the hex is a function of the terrain type. See the Terrain Effect Table in the player aids. Sometimes, there is an additional cost to cross the hexside: gully, stream, going uphill, etc.
Example: a column infantry has 6 MPs. It enters a clear hex (1 MP), another clear terrain uphill, crossing a ridge (1+1=2 MPs), and ends its movement by entering a forest (2 MPs). The total movement cost is 5 MPs.
6.3 Formation Change. A voluntary change of formation is executed while staying in the hex, and costs 1 MP for infantry, 2 MPs for artillery. But a mandatory change of formation requires no MP expenditure (from or to disorganized, from or to general order). Disorganization and rally cost no MP. All the formation changes of cavalry are always mandatory (even going "en bataille" to charge), therefore free.
Column/Line: When a unit switches formation from column to line, including a cavalry going from column to "en bataille", the two line front hexes must be among the three column front hexes. The same is true for changes from line to column.
Limbered/Unlimbered: an unlimbered artillery has 0 MP. Yet, it can change to limbered. Its movement allowance is the limbered movement allowance, with 2 MPs already spent by the formation change. During a formation change, the orientation of the new formation is free.
Example: an artillery starts the movement phase unlimbered. The movement allowance on its limbered side is 5 MPs. It can limber by spending 2 MPs, and then move with the remaining 3 MPs.
Light Infantry (with a 2 hex fire range): Light infantry can adopt all the formations available to regular infantry. It can adopt an additional formation, Tirailleurs, which allows firing at a 2 hex range (see 4.6). The counter is placed on the line side, and across a hexside. The unit occupies both hexes. Note: this formation change does not trigger opportunity fire (or countercharge).
Special Cases:
- A 180 degree countermarch costs 2 MPs in any formation.
- A rearward move without a facing change or formation change costs 1 MP plus the normal terrain cost. Note: this does not apply to formations with six front hexes: general order, square and disorganized.
- The cost of facing change of charging cavalry is covered in chapter 9.
6.4 Facing Change. A unit spends 1 MP for each 60 degree facing change. There are two exceptions:
- unlimbered artillery can change facing 60 degrees per turn at no cost if this is its only move.
- column cavalry or infantry units, as well as limbered artillery: the first 60 degree facing change before or after entering a new hex is free. A column unit can use this free facing change at the start of its movement, and then each time it enters a new hex.
6.5 Deliberate Disorganization of the Cavalry. A cavalry unit can voluntarily adopt a disorganized state at any time:
- during its turn;
- or during its opponent's charge phase and movement phase when an enemy unit enters or starts a charge in an adjacent hex.
This decision must be immediately taken when the occasion occurs. Its cost is 0 MP. The unit must retreat two hexes (see 8.9 for the retreat precedence). A numeric marker is placed across the unit. Use the previous turn number.
This exception applies to deliberate disorganization only, not to any other disorganization. The cavalry will be able to check its rally as soon as the next turn.
After this deliberate disorganization, the enemy unit may continue its move or charge if it has any MP left.
6.6 Terrain Effects on Movement. To cross a bridge, a good order unit (exception: cavalry charge) must adopt the column formation (limbered for artillery) and if necessary pay the formation change MPs. No formation change is necessary for disorganized units crossing a stream or a bridge.
A stream can be crossed in any formation but the extra cost is shown in the terrain chart of the special rules. Other special rules may apply.
In a town, brush or wood hex, a good order infantry or a non charging good order cavalry must use the general order formation (remember: free formation change). Disorganized units do not change formation.
In a town, an artillery can only be limbered or disorganized. It can cross a brush or wood hex only by using road movement, while limbered or disorganized.
6.7 Road. To be eligible for road movement, infantry and cavalry must be in column or disorganized. Likewise, artillery must be limbered or disorganized.
When moving on a road, a unit spends 1 MP only per hex (the road cancels streams, forests, etc). As long as the unit stays on the road, no formation change is required (this is an exception to rule 6.5).
Movement Bonus: A unit has an additional 2 MPs in a turn if it executes its whole movement on a road. Technically this bonus can be used by a unit that melees a hex outside of the road, as long as it stays on the road for its movement.
Infantry/Cavalry: If the unit leaves the road while in a town, forest or brush hex, it immediately changes to general order (0 MPs). If the unit stops in a road hex within the town, brush or wood, the owning player must choose one of the two possibilities: either adopt the general order formation, or stay in column on the road. In this case the unit is marked with a blank counter until it leaves the terrain (the only purpose of this counter is to remind the players the unit is on the road). If any morale check is required, a unit in this situation is automatically disorganized.
Artillery: An artillery can cross a wood or a brush hex only by road. In town, artillery can be limbered or disorganized; other formations are forbidden. If the artillery stops in a road hex within the brush or the wood, it is marked with a blank counter until it leaves the terrain (the only purpose of this marker is to remind the players the artillery is on the road). If any morale check is required, the artillery is automatically disorganized.
As for cavalry and infantry, artillery does not pay any additional MP when changing facing to follow a road.
6.8 Cavalry Withdrawal. This movement is available only to good order cavalry not performing a charge. It can retreat 1 or 2 hexes as soon as an enemy unit enters an adjacent hex (not if the enemy starts its movement in an adjacent hex). Exception: It cannot retreat if charged by an enemy cavalry or if disorganized.
A cavalry unit can execute several retreats during the same enemy movement phase if several withdrawal occasions arise during the enemy movement phase. Or it can retreat one time and countercharge another time, see 9.7, or become disorganized as described in 6.5.
To retreat, check morale first, with no modifiers.
- If the morale check succeeds, the counter is displaced 1 or 2 hexes in the direction opposite to the enemy unit triggering this special movement. The withdrawing cavalry stays in its current formation if it is compatible with the terrain. Then, the enemy unit can continue its move. This movement can trigger opportunity fire. If the cavalry is attacked again by the same unit during the same movement phase, it can withdraw again, without checking morale.
- If the morale check fails, the cavalry is disorganized, with the usual results (see 8.9, including a 2 hex retreat). The enemy unit can move into the vacated hex and continue its movement.
7.0 Fire
During defensive and offensive fire:
"Military science consists in first computing all the probabilities, and then, evaluate precisely, with a nearly mathematical method, what is the share of chance... Chance is a mystery for lowly minds, and it becomes a real thing for superior men..." Napoleon
Infantry and artillery units (not cavalry) can open fire against enemy units within range. This can happen at several occasions during a turn. First, the enemy can use opportunity fire when the phasing player moves units, under some conditions. Then, during defensive fire phase, he executes the bulk of his fire attacks (usually against units about to attack him). And then, the phasing player can execute his own fire attacks, during the offensive fire phase.
Fire ranges:
- 1 hex for regular infantry, and for light infantry not in tirailleurs.
- 2 hexes for light infantry in tirailleurs.
- 5 to 7 hexes for unlimbered artillery (see the fire tables).
7.1 Firepower. This is the upper number on the left-hand side of the counters.
- Infantry firepower is a constant. It does not vary with the remaining number of steps.
- Artillery firepower is halved (round up) when an artillery loses one of its two steps. Example: a battery with a firepower of 5 or 6 has only 3 if reduced to one step.
- Note: some artilleries have 3 steps. In this case, they use a special rule, which is explained in the special rules for the battle.
- The firepower can be modified by other factors: the unit formation and the surrounding terrain. In some cases, it can even be reduced to 0, and the unit therefore cannot fire.
Historical Note: it may seem odd that the firepower is not proportional to the number of remaining steps. But when arrayed in a line formation, the frontage of a regiment was never more than 400 men. So, even if the regiment is reduced to this manpower, the firepower is the same as initially. This includes two-rank units like the British.
7.2 Range. This is the maximum distance from the firer to the target within which fire is possible. Remember that a unit can fire only through its front. For column infantry, only the central front hex is used, not the side front hexes.
Note: the farther an artillery fires, the less efficient its fire attack is (unless several artilleries fire together).
During opportunity fire:
- 1 hex for regular infantry, and for light infantry whatever its formation.
- 2 hexes for unlimbered artillery.
7.3 Fire. First compute the total modified firepower (with any modifiers for terrain or formation), and then roll a die. If several units fire into the same hex (including infantry and artillery firing together), they must combine their firepower into a single number, and the die is rolled only once. The target of the fire is an hex, not a unit from a pile. All the units in the pile can be involved, because even if only the top unit takes the losses, the other can be involved (if extra losses are required or if the top unit misses a morale check).
Then, read the result on the fire table:
- a # result is the number of steps the target loses. Any step loss induces an immediate morale check (see 7.9).
- a * result means that the target loses no steps, but it checks morale immediately.
Exception: a unit in a town or castle hex does not check morale when fired upon.
7.4 Offensive/Defensive Fire. Each unit can fire twice:
- once during the defensive fire phase (during the enemy player's turn)
- once during the offensive fire phase (during the player's own turn)
That is, twice per game turn.
7.5 Opportunity Fire. A unit (infantry or artillery) can execute "opportunity fire" each time a unit leaves an hex into which the friendly unit can fire.
- Infantry: any front hex for a line and the melee front hex for a column (see 4.A).
- Unlimbered artillery: any hex within the front area, and within a 2-hex range (no matter what is the real range of the artillery).
Opportunity fire combat is not available when the enemy unit just changes facing or adopts a new formation while staying in the hex. The enemy unit has to leave the hex to trigger opportunity fire. Melee in itself does not trigger opportunity fire, only certain moves after combat.
The enemy unit is immediately fired upon in the vacated hex, with the corresponding formation and facing, not the formation and facing within the entered hex. This fire therefore occurs after the formation and facing change, but before the movement. Likewise, if disorganized, the 2 hex retreat starts from the vacated hex, not the entered hex (see 8.9).
Remember that, if several units can fire on the same target, they add their modified firepower together, and only one opportunity fire attack is resolved per hex.
Diagram caption: the moving unit exits X and enters Y. Unit A can fire into X, because the moving unit is leaving X. Then the moving unit leaves Y. Unit A can fire a second time and Unit B can fire for the first time. This second fire is resolved in hex Y.
Each time an infantry or artillery gets an occasion to execute an opportunity fire attack, it is allowed to fire. There is no limit to the number of fire attacks the unit can execute, in addition to the offensive and defensive fires.
If the opportunity fire is triggered by a disorganized unit doing a retreat move, the unit that took part in the combat which disorganized the retreating unit (either fire combat or melee combat) cannot execute opportunity fire. Moreover, no unit involved in a melee that turn (either this melee, a melee resolved before in this melee phase or a melee to be resolved after but always in the same melee phase) can make an opportunity fire.
Special Cases:
- Retreating unit does not check morale if it is fired upon during its retreat.
- If several units move stacked together during the "dangerous" part of the movement, only one opportunity fire is executed, and losses are applied to the top unit (except if it is destroyed, see 5.4). This is done only if the units are stacked together during the move. If they move separately, even if the paths are the same, there are two or more opportunity fires.
- If an enemy unit or stack crosses several hexes under the fire of the same unit, it is subject to opportunity fire in each hex it leaves.
- If an enemy unit, stacked under another enemy unit, leaves the hex, it is subject to opportunity fire upon leaving the hex. Only this unit is the target of the fire attack (see 5.5).
7.6 Line of Sight for Artillery and Skirmishers. Line of Sight (LOS) represents what a unit can see beyond the adjacent hexes. Without a line of sight, a unit cannot fire. The line of sight is checked from the firing hex center to the target hex center. A line of sight passing exactly between the front and the flank is considered front. If it passes exactly between flank and rear it is considered flank.
7.7 Blocking Terrains. The line of sight cannot cross the following hexes (even partially crossing):
- a wood, brush, castle or town hex. Swamps and difficult terrain DO NOT block the line of sight except if otherwise stated in the special rules.
- a ridge hexside.
- a hex occupied by any unit (leaders are not units).
Note: The line of sight is blocked if it crosses the hex where the unit is, not just if it crosses the unit counter.
These terrains are blocking even if the firer is up one or even two levels, as these terrain changes of levels were typically minor change of elevation, not mountains. But fire is possible from these blocking hexes or to these hexes, with modifiers in some cases.
Exception: a line of fire going down, then up back to the same level, is not blocked if no other blocking terrain (unit or terrain) is in the way. Also, a gully never blocks lines of sight.
A ridge line is located on the hexside, even if the artwork does not exactly follow the hexside. It blocks fire, except:
- if the firing unit is adjacent to the ridge line, and up that ridge.
- or if the target unit is adjacent to the ridge line, and up that ridge.
Note: in some cases, the line of sight is drawn along a hexside. The line of sight is clear if at least one of the two hexes does not block the line of sight.
LOS examples (diagram): fire attack #1 is allowed because it is on the same level, the difficult terrain is not blocking, and the line does not cross the upper terrain. #2 is blocked because the target is down. #3 is allowed as the target is in the village, not beyond. In the present case the fire value will decrease 2. #4 is forbidden because the line of sight crosses the ridge. #5 is blocked as it crosses the ridge and the target is not adjacent to it. #6 is blocked because of the high ground in between. #7 is allowed because the target is up and adjacent to the ridge. #8 is blocked because the firer is down the ridge.
7.8 Losses. Losses are recorded on each player's Loss Sheet, by checking the boxes starting from the right. To ease this recording, each counter has a regiment name and a sequential number.
Option: The players can choose to use the numeric markers instead of checking the boxes on the sheet. They put the loss marker across and under the counter.
Hint: This option is a good way to show which artilleries have a reduced size.
7.9 Morale Check. A successful morale check has no effect. But a failed morale results in:
- the target unit is disorganized (if previously disorganized, the unit is eliminated).
- the target unit retreats two hexes according to the priorities explained in VIII.9.
Morale is modified if the fire is coming from the flank or the back of the target, as explained in 8.6.
If the fire result eliminates the last step of a unit, the morale check is executed by the unit underneath (if such a unit exists), but without the negative for being stacked under a unit that just failed a morale check.
Even if, because of the morale check, the hex is vacated by the elimination or the retreat of the target unit, the firing unit(s) cannot occupy the hex.
7.10 Fire Against a Square. The die is modified by +1 if the target is in square formation, no matter from whom the fire comes.
8.0 Melee
"The Art of War does not consist in elaborate maneuvers, simple ones are better; all you really need is common sense... This is like a fistfight: the more you give, the better..." Napoleon
During his melee phase, a player can attack one or more enemy units with adjacent friendly units. The higher the melee value or the step strength, the more powerful the attack. For infantry, column formation is ideal for melee. Cavalry is especially powerful when charging, except against an infantry square.
8.1 General Case. Each enemy unit can be attacked once per melee phase, even if it retreated after combat, ending its retreat in another unit's front. But a unit can be attacked by several units in a single combat.
Exception: a retreating unit can trigger a countercharge.
Melee is never mandatory. The phasing player decides whether he will attack or not.
8.2 Stacks and Melee. An attacking stack cannot be split to attack different hexes. If a stack attacks, every unit that can attack takes part in the melee.
Likewise, a defending stack cannot be split. If attacked, it must be attacked as a whole.
A unit cannot attack two hexes in a single melee.
8.3 Melee Value. The melee value is printed under the fire value. The melee value can be modified:
- Attacker: the formation and the defender's terrain can modify the attacker's melee value. See the Formation Table and the Terrain Effects Table in the play aids. All these modifiers are cumulative, except as indicated on the Terrain Chart.
- Defender: his formation and terrain can modify the melee value. The attacker's terrain is irrelevant (exception: charging cavalry from woods, town, brush).
The melee value is used to compute the unit's melee strength, used to resolve the combat (see 8.4).
If an attacking unit's modified melee value is 0, this unit does not take part in the melee, and it suffers no losses. If a defending unit's modified melee value is 0, it is ignored for the combat resolution, but it suffers the retreats, disorganizations and eliminations nevertheless.
8.4 Melee Strength. For each combat, the attacker and the defender compute their melee strengths, by multiplying each unit's modified melee value by the unit's current number of steps, and adding together the results. That means that the melee strength decreases as the unit takes losses.
Example: A unit's melee value is 2, and it currently has 5 steps remaining. Its melee strength is therefore 10 (2 x 5).
8.5 Attack Hexes. A unit can attack with melee combat only into front hexes.
- one of the 2 front hexes for a line infantry/charging cavalry.
- one of the 3 front hexes for skirmishers.
- the central front hex for a column infantry (no attack is allowed through the lateral front hexes). Cavalry can not attack in column.
- any one of the 6 adjacent hexes for an infantry in general order.
Remember that disorganized units and artillery cannot attack during the melee phase, but they can defend. 8.6 Flank/Rear Attack (melee and fire). A unit attacked from a rear or flank hex has its melee value reduced by half, rounded up. And if a morale check is required, it is modified:
- by -2 for a flank attack.
- by -3 for a rear attack.
Even if only one unit attacks from the rear or the flank, the modifiers are applied.
The attack must clearly come from the flank or rear for the modifiers to apply, sometimes a fire from 2, 4 or 6 hexes away can be on a line (from hex center to hex center) passing exactly between a flank hex and a front hex, or between a flank hex and a rear hex. In that case the modifier the most favorable to the defender applies.
Exceptions:
- Mixed Order: flank/rear attack does not apply if any defending unit is attacked from front hexes only (see 5.7).
- Protected Flank: If a friendly unit X is attacked by an enemy unit Y through the flank or the rear, its flank or rear can be "protected" if Y is itself in the front of a friendly unit Z*. In this case, the flank/rear negatives do not apply.
* except if Z is a limbered artillery, or a disorganized unit (whatever its type).
Unlimbered Artillery:
-
Artillery alone: if attacked from a flank or rear hex, the combat result applies to the defending artillery only. Any 0 or 1 result (with or without *) is replaced by D. All other combat results are applied normally.
Example: the combat ratio is 4 vs. 1, and the die roll is 1. The melee table gives a 1/1* result, but it is replaced 0/D; if the result had been 0/D1, it would have been applied without change.
-
Artillery stacked with infantry: if the artillery is stacked with infantry and is attacked through its rear or flank, it does not participate in the melee. But if the infantry is disorganized or eliminated, the artillery suffers the same adverse results. The infantry unit takes the first loss as in this case the artillery is simply ignored for losses purposes.
8.7 Melee Prohibitions. Some units cannot attack in melee:
- disorganized units.
- units with a melee value modified to zero (because of the terrain, for example).
- infantry in square formation.
- cavalry in column or general order.
- artilleries. They do not melee, but if they belong to the hex of attack they can not opportunity fire on units leaving their front.
Note: these units can still defend if attacked in melee. Moreover, infantries that fire can thereafter melee during the relevant phase.
8.8 Melee Combat. The attacker divides his melee strength by the defender's melee strength to get a combat ratio. This ratio is always rounded in favor of the defender. A die is rolled, possibly modified by a leader stacked with the attacker or the defender. The combat result from the Melee Table is applied immediately.
Combat results:
- 0 or 1: number of step losses.
- *: immediate morale check for the stack that took part in the combat, see X.2.
- D: Disorganization and 2 hexes retreat.
- D1: Disorganization, one step loss and 2 hexes retreat.
- E: Elimination of all units in the target hex.
The first result applies to the attacker, the second result to the defender (A/D).
Note: A unit already disorganized which suffers a D or D1 result is eliminated.
Exception: a unit in town or in a castle does not check morale if the melee result is *.
Example: An infantry in line formation with no loss (7 steps, melee value 2, melee strength 14) and a column infantry with two losses (7 - 2 = 5 steps, value 2 + column modifier 1, total strength 5 x 3 = 15) attack a unit in line formation with no loss (6 steps, value 2, total 12). The combat ratio is 29:12, rounded in favor of the defender to 2:1.
Example: A 4-step infantry in general order (in town) attacks an adjacent forest hex. Its basic melee value is 2. It is not modified by the attacker's terrain, but it is modified by -1 because of the defender's terrain. The melee value is 1, and the melee strength is 4 (4 x 1).
8.9 Disorganization and Retreat. If a combat result includes a disorganization (D, D1, or failed morale check), the involved unit(s) must retreat 2 hexes in the direction opposite to the attack. If there is a choice in the path of retreat, this retreat must be executed through empty hexes toward the line of communication, then through hexes occupied by friendly units toward the line of communication. If no such hex is available, the unit retreated into any other empty hex or into any other hex occupied by a friendly unit. The choice is made hex after hex during the retreat process.
Note: if all surrounding hexes are impassable or enemy-occupied, the disorganized unit cannot retreat, and is eliminated instead.
If the retreat path crosses one or several hexes occupied by friendly units, these units must immediately check morale, unless they are already disorganized.
Stacking limits must be obeyed (ex: automatic disorganization if infantry retreats over cavalry). See 5.0 Stacking.
If the retreat path crosses one or several front hexes of enemy units, the retreating units may be fired upon by the enemy units, using the rules of opportunity fire (see 7.5). But the fire cannot be executed by units that take part in a melee this phase. In other words, the retreating unit cannot be fired upon by the unit that repulsed it.
Retreating through enemy-occupied hexes is forbidden. An enemy leader is not a unit. Attacking empty hexes, hoping to get an advance after combat for free is also forbidden.
The retreat movement length is two hexes only, unless an impossibility occurs (e.g. terrain where the unit cannot stop). In this case, the unit can retreat one additional hex.
A unit that leaves the map while disorganized cannot come back. It counts as an eliminated unit for victory points purpose, except if the special rules indicate that units can exit the map through a line of communication (see 15).
8.10 Advance After Combat. If the hex is vacated (all the defenders have been disorganized and have retreated), one or several attacking units can occupy it. This movement is optional. A defender may choose not to advance if the attack hex is vacated.
The advancing units can neither change formation (unless the terrain requires another formation) nor facing, and they must obey the stacking rules. The attacking units can go no further during this phase (except in the case of a victorious cavalry charge, see 9.4).
Note: advance after combat is possible only for melee combat.
9.0 Cavalry Charges
"Do not attack the fronts of enemy positions when you can attack their flanks." Napoleon
Cavalry has a considerable melee strength when charging. The only response against it is the square formation (for infantry) or the countercharge (for cavalry). However, charging an artillery's front is not advisable.
Charges occur before the other units' movements.
Beware that the rules that apply to the charges and countercharges contain many exceptions to the other rules.
9.1 General Case. To attack, cavalry must charge. This move is performed during the charge phase. To make a regular move (with no combat), the cavalry moves during the movement phase. The units having performed a move (or a charge with no move) during the charge phase cannot make a regular move during the movement phase. The charging units will melee during the melee phase (exception: countercharges, which are resolved immediately).
The cavalry's formation for regular move is the column (or general order if need be). The cavalry's formation for a charge is always the line. There is no cost to change formation for a charge. Changing formation in line must obey the rule on orientation (see 6.3).
To defend, a cavalry unit may opt to stay in column or general order formation, or it may attempt a countercharge during the opponent's movement or charge phases. In this case, the defending cavalry becomes for a few moments the attacker. It may also choose to become disorganized, or retreat (if attacked by infantry only).
9.2 Charge Movement. During his charge phase, the active player states which units will attempt to charge, but he does not state which enemy units are targeted. The charging cavalries may not be disorganized. Charges do not need to be all declared at once. Players can decide during the charge phase if charges are actually started or not. On the other hand, a declared charge must be performed, as described below.
The unit executes a normal movement with the following restrictions:
- Only two 60 degree orientation changes can be performed for the whole charge move.
- Each of these orientation changes costs 2 MPs.
- Each unit can change 60 degrees only once per hex.
- There is no free orientation change (only in a regular move).
- During a charge, entering a village or a wood hex costs 6 MPs, brush 4 MPs, difficult terrain or a farm 2 MPs.
- If the unit starts its move in such a terrain, it pays this cost first.
- To cross a stream costs 6 MPs, to climb a ridge 2 MPs, to go down 2 MPs also.
- In a wood, brush, or town, the cavalry changes its formation to line for the charge. The same happens for a countercharge.
- A charging cavalry can pass through non charging friendly cavalries as long as the stacking limit is respected.
- A charging cavalry cannot cross a gully or a marsh, and cannot enter a castle or cross fortified walls.
- There may be different costs and rules depending on the battle. Follow the terrain effect table of each game.
- A charging unit does not need a clear line of sight in order to charge (remember, the turn is 30 minutes, long enough to receive an order for charging from the CO who is a few hexes ahead and can see the target).
Each charge is resolved separately. Yet, if several cavalries are stacked at the beginning of the charge phase, they can charge together. Cavalries can also come from different hexes, provided the player states he will attempt a "combined charge" (see 9.5).
Note: there is no morale check requirement to charge, except certain irregular or Cossack units as stated in the special rules. This morale check exists only for countercharges, see 9.7.
9.3 Charge Combat Resolution. All charge combats are resolved during the melee phase. The cavalry fights with the usual procedure, with all the modifiers that apply (value reduced to 1 when attacking a square, for example). Exception: a countercharge is resolved immediately upon its declaration (see 9.7).
A leader can charge with the cavalry if it is stacked from the beginning. In that case it will not be allowed to move further during the regular movement phase.
If the target of the charge contains no enemy unit (or only markers or leaders), the melee is considered over, the cavalry comes back to its column face or can choose to become voluntarily disorganized. This can happen when the defenders retreated after a fire and its morale check.
If, during the movement, the cavalry happens to be in the neighborhood of an enemy cavalry facing the right direction, this enemy cavalry may immediately attempt a countercharge, by checking morale.
When applying the combat results, an infantry targeted by a charge loses 1 additional step, except if in square or general order formation, or if the result was 0 step loss (see 9.6).
If the destination hex contains at least one infantry, the defender may attempt to form square (morale check 9.6).
Remember that an already disorganized unit which gets a "D" result is eliminated.
When a charging cavalry moves, the owning player can state which hex the cavalry will attack if, and when, he wants. Of course, a cavalry in line formation has two front hexes, and can attack either. The charging player may wait for the melee phase to state which hex he attacks. It is the defender's task to guess which hex is targeted... the cavalry can attack one hex, the other, or even none by choosing to become disorganized, but not both hexes.
At the end of the melee phase, every cavalry unit involved in a charge and not performing an exploitation as described below reverts to the column formation (or general order if within a town, forest or brush), obeying the rule about "facing with at least two front hexes in common", see 5.7.
A charging cavalry may voluntarily become disorganized at any time, (including after the combat, to be allowed to retreat 2 hexes). The game turn marker placed on the cavalry will have the previous game turn number (see 6.5 and optional rule 16.4).
A charge ends only by a melee, losing a morale check (after a loss due to fire for example) or by voluntarily becoming disorganized at any time. Once a unit starts a charge, it cannot voluntarily stop it. If it fails to make contact, it must disorganize voluntary. Exception: if the target has been vacated due to other causes (morale failure after fire for example), then disorganization is not mandatory, cavalry simply comes back to its column face if no melee occurs. More generally, if the charge movement stops voluntarily, the cavalry is disordered. If it stops for other reasons, as if there is no target left, then the disorganization is optional.
9.4 Charge Exploitation. If, when the combat is resolved, the target unit is disorganized (D combat result or failed morale check) or eliminated:
- a disorganized unit retreats 2 hexes (see 8.9).
- the cavalry can enter the combat hex, change its orientation by 60 degrees (no more) if needed, and then initiate another melee if an enemy unit is now immediately in its front.
- If the new enemy unit is infantry, it can form square before the cavalry enters the adjacent hex. If the infantry cannot see it no square attempt is possible.
- The new enemy unit can be already engaged in melee with another attack, the exploiting cavalry can simply join this other attack.
- At the end of the exploitation melee, the cavalry can enter the new empty hex, but there is no further exploitation.
9.5 Combined Charges. The charging player can declare a "combined charge" with several cavalry units from different hexes. These cavalries do not have to meet on a single hex as long as they attack the same target. This rule allows cavalries to fight together if countercharged. The defender must wait for all the moves to be done before declaring a countercharge. Then the cavalries can move and fight as a whole.
Units do not have to declare a combined charge in order to melee together the same target. The combined charge is only to avoid units countercharging one at a time small cavalry units that want to combine their strength.
9.6 Square. An infantry can be in square formation at the start of the charge, or it can attempt to form square at any moment during the charge (except if disorganized or if the cavalry is adjacent) even before the cavalry makes a single move.
An infantry not in square during a charge can suffer one additional step loss. When the melee is resolved, any result other than 0 implies an additional step loss. In the rare cases where 2 losses are required, the top unit takes them both.
Example: 0 still is 0, 1 becomes 2, D becomes D1, D1 becomes D2.
To attempt to form square, the defender executes a morale check, with all the usual modifiers, except the -2 for being attacked from a rear/flank hex (the troops from the last rank always looked behind from time to time, the contrary would be surprising... and the square was formed, no matter where the order was issued from). Moreover, the morale check is modified by the distance from the charging cavalry:
- If this distance is 3 hexes or more, a bonus of 1 applies.
- If this distance is 2 hexes, no modifier applies.
- If the cavalry is adjacent to the target, no square attempt can be made, the infantry must stand the melee unchanged.
The line of sight might be important. If the cavalry is 3 hexes away but is seen only at 2 hexes, the last will be used for the morale check.
If the morale check succeeds, the infantry immediately adopts the square formation. Other infantries (stacked underneath) automatically adopt this formation too.
Artillery in the square: Players can freely move artillery units up or down the pile during the square formation change, but cannot change the artillery formation. Artillery retains its orientation, it does not have 6 hexes of front as the square has.
- limbered artillery in the pile: it is protected by the square, no matter what its position in the stack is.
- unlimbered, stacked on the infantry: it can use only half of its fire value against cavalry (both in opportunity fire and regular defensive fire), and if the cavalry actually melees the hex, the artillery will take at least one step loss whatever the melee result.
The artillery has no +2 morale bonus for being stacked with a square, but if attacked by cavalry, this cavalry melee value is still reduced to 1 due to the presence of the protective square. If the square is attacked by infantry only, the fire value of the artillery is full.
- unlimbered, stacked under the infantry: it can only take part in melee and does not fire, but it benefits from the +2 morale bonus.
If the morale check fails, the infantry is disorganized, but does not retreat now. It will retreat when the charge combat is resolved, unless it is eliminated during this combat.
If several infantries are stacked together, the top unit checks morale. If successful, the whole stack adopts the square formation. If it fails, it becomes disorganized, and the second unit in the stack checks morale with a -2 modifier to form square (see 5.5). If all the units in the hex fail, they remain in place and wait for the melee result before retreating. If a single unit passes the morale check, the others retreat and do not wait for the cavalry melee. This avoids having units both in disorder and in square on the same hex.
9.7 Countercharge. An enemy cavalry can attempt to countercharge. This can happen during the charge, movement and melee phases. This is a charge "without movement", available only to the enemy cavalry. However it could happen during player A's turn if a unit from B retreats after a melee and passes in front of a non charging cavalry belonging to A.
Exception: a cavalry that is being already charged and chose not to countercharge, cannot countercharge another enemy unit passing in its front, as it is already "engaged" with the first charge.
If a unit enters one of the front hexes of an enemy cavalry unit, this cavalry can attempt to countercharge. It must first check morale:
- If the morale check fails, nothing happens and the countercharged unit may go on.
- If the morale check succeeds, the countercharging cavalry changes to line formation, but some terrain penalties may apply, see 9.1. Then, it immediately engages the enemy in melee without moving. The countercharging cavalry is the attacker for the resolution of the countercharge only.
If an infantry is countercharged, it cannot attempt to form square before the melee as the cavalry is now adjacent to this infantry.
A stack of cavalry units can also countercharge as one unit, pending all the units pass their morale check. Only the units that pass can countercharge. If the top unit fails its morale check, the unit under will check at -2 as for a regular morale check.
As the countercharge is not a movement it does not trigger opportunity fire, and as the melee is resolved before the fire phases the countercharged unit cannot fire. The countercharge is resolved like any other melee.
Several units can countercharge at the same time; they can combine their melee value for a single melee.
All the units currently stacked with the moving unit are countercharged, even if some of them were not involved in the charge.
Note: beware of combined charges! (See 9.5)
After the combat resolution:
- The countercharging cavalry does not move (no advance after combat), and reverts to the formation before the countercharge.
- No matter the combat result, the countercharge stops the active unit's movement.
- The charging cavalry reverts to column or general order (depending on the terrain where it has been countercharged). Its actions are over for this turn, which means for this present turn. It is free to move or charge at its next turn.
- But an infantry, even if countercharged, can engage in melee during the next melee phase (advance after combat is allowed).
Some remarks:
- A cavalry which failed its countercharge attempt will still be able to attempt other countercharges if a new possibility arises or any other allowed action.
- If several cavalry units are stacked together, and if some of them fail the countercharge morale check, they are ignored during the countercharge combat resolution. But they will have to check morale, if the countercharging cavalries were disorganized during the combat.
- A cavalry can initiate an unlimited number of countercharges per turn (but only once per action triggering a countercharge), whatever the result of previous countercharges.
10.0 Morale
"In war, three quarters is a question of morale; the test of strength is only one quarter." Napoleon
Each unit has a morale basic value, usually in the 7 to 11 range. This value has no connection with the unit's step, melee and fire values. There are many times when a unit is required to check morale, to know whether it will keep its cohesion. A failure results in disorganization and an early retreat. The unit will have to be "rallied" to recover its fighting spirit, and be arrayed in a combat formation.
10.1 Causes. Morale is checked:
- each time a unit is fired upon and suffers a * result, or one or more losses. Exception: the unit has just been disorganized, and is fired upon during its retreat. In this case, the unit does not check its morale. It just loses a few more steps;
- melee result, when the table yields a "*";
- a good order unit is occupying an hex through which a disorganized unit retreats;
- a cavalry attempts a countercharge (but failure does not result in a disorganization) or a retreat before combat;
- an infantry attempts to form square during a cavalry charge or countercharge;
- a disorganized unit attempts to rally.
10.2 Morale Check. To check morale, roll two dice and add both. If the result is lower than or equal to the morale value, the check succeeds. If the result is greater than the morale, the unit becomes disorganized or stays disorganized (depending on the cases above), and must retreat two hexes (beware of opportunity fire). See 8.9.
A disorganized unit that misses a morale check is eliminated, except if this test is to rally the unit. In that case it simply retreats 2 more hexes.
Note: there is a special case for the 2 hex retreat. This special case applies to failed rally attempts. In this case, the retreat can be toward a close forest or town, see 11.4.
10.3 Automatic Success and Automatic Failure. No matter the dice roll modifiers:
- a natural 2 is always a success.
- a natural 12 is always a failure.
10.4 Modifiers. All modifiers are cumulative. The morale is modified by:
- Formation:
- if the unit is disorganized: -2.
- if the unit is infantry in square formation, attacked by cavalry only: +2.
- Adjacent units: if the unit attempts to rally (see 11.2) in an hex adjacent to an enemy unit: -1.
- A leader: + morale bonus of the leader (middle value on his counter).
- The attack or fire direction:
- if the unit is attacked or fired upon through a flank hexside: -2.
- if the unit is attacked or fired upon through a rear hexside: -3.
- Exceptions: protected flanks, or when attempting to form square, see 9.6.
- Another morale check failure in the same hex: if a unit has just failed a morale check, the morale of the unit stacked underneath is modified by -2. If this one fails, the unit stacked underneath is modified by -4, ...
- Losses: if a unit has lost several steps, the morale may be lowered. On the army sheets, each time the losses reach a grey box, then the morale is lowered by 1. This is summarized on the table below to determine the morale negatives, which depends on the original step strength and the current step strength. Certain special rules may also apply.
| Original Strength \ Current Strength | 7+ | 6 | 5 | 4 | 3 | 2 | 1 |
|---|---|---|---|---|---|---|---|
| 9 | - | -1 | -1 | -1 | -2 | -2 | -2 |
| 8 | - | - | -1 | -1 | -1 | -2 | -2 |
| 7 | - | - | -1 | -1 | -2 | -2 |
Table results: "-": no effect; "-1": morale modified by -1; "-2": morale modified by -2.
Note: units with an original step strength of 3 steps or less never have their morale modified because of losses.
Note: some elite units may have a slower morale decrease, as indicated on the army loss charts.
* The army morale (demoralization or Desperate levels): as described in section 12 below.
11.0 Rally
During the rally phase, the player can attempt to rally his previously disorganized units with morale checks.
11.1 Eligible Units. A unit stays disorganized for at least two full turns before the first rally attempt. Exception: a cavalry choosing to become disordered, see 6.5. In other words, a unit can be rallied only if the number on its marker is 2 lower than the current turn number.
Example: during turn 8, the player will attempt to reorganize the units with markers numbered 6 or less.
11.2 Rally Check. Each eligible disorganized unit can check morale, with all proper modifiers, including the -2 modifier for being disorganized. A rally check is voluntary. Each turn, the owning player chooses which units will check, on a unit-per-unit basis.
Example: during turn 5, the player will attempt to reorganize the units with 1, 2 or 3 markers.
11.3 Success. If the rally die roll is successful, the "disorganized" marker is removed, and the owning player can choose any allowed formation for the unit, taking into account the terrain the unit is in.
11.4 Failure. If the rally die roll fails, the unit retreats two hexes:
- toward a line of communication.
- or toward a town hex or a wood hex within two hexes, in any direction.
A leader stacked with a unit failing a morale check can retreat with this unit.
If the unit is already in a town or forest hex, it is not required to retreat for failure of a rally attempt. On the other hand, a unit in forest or town in good order that becomes disorganized must retreat two hexes.
11.5 Disorganized Units Stacking. It may happen that units disorganized during different turns are stacked together. If a unit is reorganized and the other is still disorganized, the disorganized unit must retreat 2 additional hexes, even if it is in a wood or in a town. The reason is that a good order unit cannot stack with a disorganized unit.
12.0 Army Morale
"The outcome of a battle is the result of an instant, of a thought. We close in with various maneuvers, we mingle, we fight for some time, a moral fire lights, and the smallest reserve prevails." Napoleon
When a given level of losses and disorganization is reached, an army can become "demoralized" and then "desperate". In some scenarios, demoralization applies to army corps separately, instead of applying to the army as a whole.
Every turn, the players add the number of losses taken and the number of disorganized units and compare this total with the demoralization and desperate levels. These thresholds are given in the special rules for the battle.
When the demoralization level and then the desperate level are reached, the army (or corps) morale starts collapsing. As it includes the number of disorganized units, crossing the level can be reversible if units are rallied.
12.1 Demoralization Threshold and Effects. Demoralization occurs when the army (or corps) total reaches half of its total possible losses. Some elite corps may be excluded, depending on the special rules.
When the army is demoralized, each unit has its morale modified by -1.
When the army is demoralized, each unit in good order with at least one step loss immediately checks morale, including this -1 modifier.
This test is a one time thing, if the corps recovers good morale (because it rallies units) and then become again demoralized, there is no morale check, only the -1 modifier.
12.2 Desperate Threshold and Effects. Desperate occurs when the army (or corps) total reaches a level indicated in the special rules, typically depending on its average morale.
When the army is desperate, each unit has its morale permanently modified by -2.
When the army is desperate, each unit (in good order, even with no loss) immediately checks morale, including this -2 modifier.
This test is a one time thing, if the corps recovers better morale (because it rallies units) and then become again desperate, there is no morale check, only the -2 modifier.
When a unit in a desperate corps is disorganized, it can trigger a "chain reaction":
- every adjacent good order unit belonging to a desperate corps must immediately check morale.
- the same applies to such units adjacent to the 2 hex retreat path.
If these morale checks fail, the corresponding units are themselves disorganized, they retreat 2 hexes, and they can induce other units to check morale.
This chain reaction does not apply during the mandatory morale check required when the corps reaches the level, only in the following checks.
13.0 Reinforcements
They enter the map during the movement phase, in any formation and order the owning player desires, and they can fight at once, but cannot charge as they enter at the movement phase. If the entry hex is occupied by an enemy unit, reinforcements enter in the nearest empty hex on the map edge. Entry hexes must be playable.
If the entry hex is a road or a trail, a unit entering after the first one subtracts one MP, the next one 2 MP, and so on; this simulates the units on the road off map.
In some cases, reinforcements are placed on the map directly to a location as they become available (or released from a reserve for example). If an enemy unit enters in an hex adjacent to this location, the reinforcements are immediately placed and act normally.
All reinforcements are in command the turn they enter.
14.0 Leaders
"A warrior must have as much character strength as intelligence. Men with intelligence but no character strength are the worst; it is better to have much character strength and little intelligence." Napoleon
Each player has one leader per army corps, plus one or several army commander (usually Napoleon, for the French player).
Leaders provide benefits to the units they are stacked with, although they are not combat units themselves.
14.1 The Various Leaders. Usually, each leader commands an army corps. Units in his command have the number or the abbreviation of the corps on their counters.
Each player has also one or several army commanders, and usually a supreme commander, who leads the whole army. They can command and influence any unit belonging to their side. In some cases, there is an intermediate level in the chain of command (for example, wing leaders in the Russian army). Leaders have no firepower, and no melee value. They do not count for stacking, and they are never in a specific formation. Anytime the word "unit" is used, this does not include the leaders.
Leaders influence combats and morale checks. If several leaders are stacked with a unit, the highest rank influences the unit (for example a the supreme leader over a corps commander).
14.2 Values. The leader counters show three numerical values:
- the combat bonus (left);
- the morale bonus (center);
- the movement allowance (right).
The first two values are added to the die roll, the last one is a standard movement allowance. Use infantry costs when moving leader counters. During a movement phase, a leader can move by himself or join a pile. In any case he cannot spend more than his movement allowance by doing so. If he starts stacked with cavalry, he can join the charge but will not be able to move again at the movement phase.
14.3 Combat Value Effects. The combat bonus applies to melee only. Fire is never modified by a leader.
The melee value is added to the die roll when the leader attacks and it is subtracted when the leader defends. This bonus is added only to the units the leader commands. The army commander bonus applies to any unit belonging to his army, if the player opts to use the supreme commander instead of the corps commander.
Using the combat modifier is an option, and the player can choose not to use the leader (except in rare circumstance when the modifier is negative). The player has to clearly declare the use of the leader before rolling the die.
A leader can advance or retreat with a unit he is stacked with after melee.
A leader alone in a hex because his units were eliminated must check for survival (see 14.5) if enemy units enter the hex after melee.
Example: Oudinot attacks with a unit. His combat value is +1; therefore he adds 1 to the attack die roll. When defending, Oudinot subtracts 1 from the attacker's die roll.
Example (special case): the King of Prussia has a -1 combat value. If he attacks, the die roll is modified by -1, and if he defends, the attacker's die roll is modified by +1.
Historical Note: Napoleon's combat bonus is "1" only. This is a deliberate result of the game design, because Napoleon is the commander-in-chief and the sovereign. Therefore, he had to be careful about his life, and he had to stand away from the fighting.
14.4 Morale Effects. A leader provides a morale bonus to any unit he is stacked with. This bonus is algebraically added to the stacked units when checking morale.
This bonus is added only to the units the leader commands. Exception; if a corps commander is stacked with units from another corps, the maximum value he can use for these units is +1, instead of the real value, except if his value is 0. In that case the final modifier is 0.
The army commander can apply his bonus to any unit belonging to his army, instead of the corps commander's bonus, provided the units are stacked with the army commander.
Remember that an unmodified 12 is always a failure.
Example: Napoleon has a 6 morale bonus!
14.5 Elimination. A leader can be eliminated if:
- the leader is stacked with a unit that loses 2 or 3 steps in a single fire attack (2 or 3 result on the fire table). Roll another single die to check for casualty, a 6 eliminates the leader.
- the stack in the same hex is eliminated. Roll another single die, a 6 die roll eliminates the leader.
- If they are alone in an hex, and an enemy unit enters the hex, roll a die. A 6 eliminates the leader. Otherwise, he is shifted to an adjacent hex.
- Special: if a leader is totally surrounded by enemy units and is the lone survivor of a fight, a 4, 5 or 6 eliminates the leader. If he survives, he is placed on any hex one or two hexes away.
If several elimination cases occur simultaneously, several die rolls are executed. These tests are executed before the tests that apply to the units, such as morale checks.
If the army commander is eliminated, his army may immediately become demoralized depending on the special rules of each game.
Beware: losing a leader costs victory points. Losing the army commander is a good recipe for a major defeat.
If Napoleon dies in the battle, the French player immediately loses the game. This result is far worse than a major military defeat, because that means the end of the greatest epic of these times and of a glorious legend...
14.6 Substitute Leaders. If a leader is killed, a new one appears at the start of the next game turn, stacked with a unit belonging to the leader's corps. Suppose that a division general or an aide assumes the command.
The leader counter is used, reverse side up to remind the players that the historical general has been killed. This reverse side shows the initiative value. The new leader's values are: combat bonus +0, morale bonus +1, movement allowance 10 MPs. When playing advanced rules, the initiative and obedience values are 2.
If the substitute leader is killed himself, another substitute leader appears the next turn with the same procedure. Eliminating a replacement leader does not bring victory points.
15.0 Lines of Communication
The lines of communication were the backbone of the Army. This is where supply and reinforcements came from. In game terms, the lines of communication are the main retreat path for the units.
Each game will state the lines of communication for the armies.
If a unit leaves the map through a line of communication, it can provide victory points to the enemy, depending on the game special rules.
Advanced Rules
"The commander follows his own experience or his genius. Tactics, deployments, science can be learned in books, just like geometry. But knowledge of the higher principles of war can be acquired only through experience and by studying wars and the great captains' battles." Napoleon
Once they master the standard game, the players may want to use a more realistic rules system, to grasp more accurately the complexity of the battles of the Napoleonic Era. These new rules are optional, of course, and players can modify them as they see fit. A game becomes richer and richer through the players' input.
On a more practical side, the players agree before the game on which advanced rules they will use: none, one, some or all. Some advanced rules are rather simple, other are more difficult to apply, such as command and control.
Beware, the new modifiers (die roll, combat values, etc) are not printed on the charts.
16.0 Optional Rules
16.1 Voltigeurs. If this rule is used, do not use the tirailleurs formation as described in 4.6. Almost every infantry unit can deploy voltigeurs. They are implemented by using numerical markers (used for losses, or specific markers provided in future games) deployed in an adjacent hex. This hex must be free of any unit and in the front of the deploying unit. These voltigeurs are deployed like line infantry, and therefore have two front hexes. A line infantry in column or in general order can deploy one voltigeur, a line infantry in line two, the light infantry (called light, jagers, chasseurs, grenz, rifle, légère, usually all units with a printed range of 2) can deploy three. A disorganized unit, a unit in square, or a militia unit (militia, Archduke Charles Legion, Landwehr) cannot deploy any. A unit cannot deploy more voltigeurs than the number of losses step they have left. These markers are part of the mother unit, they do not subtract losses when they are deployed, and they only simulate the presence of voltigeurs.
- They can be deployed in any terrain where the movement is allowed.
- They are deployed in an hex where the mother unit can fire, except for light infantry where they are deployed in any adjacent hex.
- Only the upper unit of the stack can deploy voltigeurs.
- They do not block the line of sight.
- To deploy and reintegrate voltigeurs does not cost any MP. This action is voluntary during the movement phase or involuntary when a friendly or enemy unit enters the hex where the voltigeur is. A unit can deploy voltigeurs once during his movement phase, and once at the end of his rally phase.
- A voltigeur unit fires on an adjacent front hex with a fire power of 1. This value is not modified, can not be added to another voltigeur fire, but one (only) can be added to a regular fire.
- Fire on a unit beyond a voltigeur is made with a negative of 1, except if this value was already one. In this case it is not modified. Several voltigeurs on the path decrease only by 1 the final fire value. As a reminder, the line of sight is not blocked.
- Voltigeurs can not stack with enemy units. In the presence of an enemy voltigeur, both disappear.
- They can never be adjacent to an enemy cavalry unit.
- A friendly voltigeur stacked on a unit is simply ignored. It is reintegrated if still stacked at the end of the movement phase.
- When an enemy infantry or artillery enters a voltigeur hex, they trigger an opportunity fire if they enter from a front hex, then the voltigeurs are reintegrated. Exception: if the infantry enters preceded by its voltigeur, then the two voltigeurs from opposite sides annihilate each other and no opportunity fire from the voltigeurs is performed.
- When an enemy cavalry enters an hex adjacent to a voltigeur, the voltigeur is simply reintegrated with no fire.
- Practically, the movement of the mother unit is made first, then the voltigeurs follow and are set around. If any opportunity fires occur their precise position is set hex by hex. They do not trigger an opportunity fire by themselves. They cannot be attacked in any way.
16.2 Artillery Losses. Artillery fire did not have the same effect when the target was infantry in close order or when it was a lone artillery battery, with a much lower number of men. Moreover, artillery was arrayed in a single line, which is why ricochet fire achieved nothing.
This optional rule exists in two flavors: A or B. Players can choose either before the start of the game. This applies only to unlimbered artillery, limbered guns take losses normally.
System A - half losses: Each time an artillery is fired upon by enemy artillery, its losses are tallied as half-losses. The first time the fire table (not the melee table) indicates there is a step loss, the artillery suffers only one-half step loss, and a single bar, not a cross, is drawn on a square on the loss sheet. The artillery values are affected in no way by this half-loss. Half-losses trigger a normal morale check. The next time the artillery suffers a half-loss, another bar is drawn on the same square, which gives a complete cross. This time, the artillery suffers all the adverse effects of having lost a step.
If the artillery is stacked on infantry:
- the first step loss is applied to the artillery (and therefore only one half applies).
- the remaining step losses, if any, are applied to the infantry as full step losses.
The morale check is executed by the artillery.
If the fire attack is a combined attack by infantry (or skirmishers) and artillery, the half-loss rule applies if the artillery provides half the total fire value or more. Use the fire value modified by terrain, distance, and any other modifier for this computation.
System B - Random Losses: Each time an enemy artillery fires on a friendly artillery, the following applies:
- if the artillery is alone in the hex, roll a die. 1-3 the loss is effective, 4-6 the loss is ignored. In all cases, the artillery checks morale.
- if the result is 2 or 3 losses required, a die is rolled for each step loss required.
- if the artillery is stacked on an infantry unit, roll a die for the first step loss. 1-3 the loss is effective, 4-6 the loss is ignored. The remaining step losses, if any, are applied to the infantry. The artillery checks morale.
If the attack is a combined fire attack, use the same rule as in system A.
16.3 Artillery Retreat. A limbered artillery retreats normally if disorganized. If an unlimbered artillery is disorganized, it does not execute a retreat, but it stays in the hex. The player puts a turn number marker across the counter, but does not retreat the counter.
- an artillery disorganized in this fashion may rally normally.
- other units in the hex act as if the artillery had left the hex, they do not take the presence of the artillery into account.
- but if the enemy enters the hex, the artillery is automatically eliminated, with no combat. This includes an artillery alone in melee. If it gets disordered where it is, and if the attacker can enter the hex, then the artillery is eliminated as it does not retreat.
- During the movement phase of the following turn, the artillery can retreat as a regular disorganized unit does (use the limbered side of the counter).
16.4 Cavalry. During the Napoleonic Era, this arm was the most efficient, but also the most difficult to control, because from time to time the horses had something to say about all this. Hence possible difficulties!
So, to simulate more skill when you use your cavalry, here are some additional rules.
Light Cavalry: Cavalry units with a movement allowance of 10 or more are light cavalry. These units do not need to pass a morale check to retreat before combat (see 6.8). This automatic movement can be repeated as many times as necessary. They can change direction three times instead of twice per charge movement. They receive a +1 die roll modifier when meleeing against disorganized units.
Remember that withdrawal before combat is not allowed if the attacking unit is light or heavy cavalry (see 6.8).
Line Cavalry: cavalry unit with a movement allowance of 9. They must make a morale check to retreat before combat. They can change direction twice per charge movement. They receive a +1 die roll modifier in melee against light cavalry (-1 if countercharged by light cavalry).
Heavy Cavalry: cavalry units with a movement allowance of 8 or less are heavy cavalry. They can change direction only once per charge movement. When heavy cavalry charges, its die roll is modified by +1, except when charging against heavy cavalry (even stacked with light cavalry).
Charge: No cavalry unit can charge during two successive turns. A cavalry that has charged during the current turn must spend the next turn without charging, but normal movement and countercharge are authorized. Having charged does not prevent cavalry from making any defensive action, including countercharging. This rule does not apply to countercharge.
Opportunity charge: light cavalry can perform an opportunity charge 2 hexes away. The procedure is identical to a countercharge, but only if the enemy unit (by regular move or charge) becomes adjacent to a front hex of the countercharging unit. At that time there is an empty hex between them. After the morale check for countercharging, the unit advances one hex toward the charging or advancing unit. At that point the opportunity charge is resolved as a countercharge.
Cavalry Retreat: when the charge is over (not a countercharge), whatever the result, light or heavy cavalry can become disorganized (see 6.5 deliberate disorganization). It must retreat toward the lines of communication. The length of the retreat can be:
- 2 hexes.
- or, number of remaining movement points (at least 2).
Example: a light cavalry (10 MPs) uses 4 MPs during a charge. After the charge combat, no matter the result, it can adopt the disorganized formation and retreat with up to 6 MPs.
16.5 Rout. Rout can be used by the players who think that the disorganization of a unit already disorganized does not mean its elimination, but its rout. The rout makes rally more difficult, and it takes into account the stragglers who clutter the rear.
A unit already disorganized, suffering a new disorganization result (either a fire result or a melee result, but not for failing a rally morale check) becomes routed. Its marker is replaced by two markers equal to the current turn number plus 2.
Example: a disorganized unit suffers another disorganization result during turn 4. This unit receives two "6" markers. It will be able to rally no sooner than turn 8. The unit retreats with its whole movement allowance towards its lines of communications, and it will do the same each time it fails a rally morale check.
Other effects:
- Its morale is lowered by -3.
- Its fire value is 0.
- Its melee value is 0.
- It moves normally but only toward its lines of communications.
- Its front covers the six adjacent hexes.
- If an enemy unit enters one of the six front hexes, the routed unit retreats with its whole movement towards the lines of communication. Failing that, it retreats on any free hex. If this fails too, the unit is eliminated.
A routed unit that passes through a non routed unit "contaminates" this unit; that is, the other unit becomes immediately routed also, without any morale check. The opposite is true: if a unit in any morale status passes through the hex occupied by a routed unit, the first unit is routed too.
When rallied, a routed unit becomes in good order, just like a disorganized unit. There is no intermediate disorganized status.
16.6 Morale in Town, Fortified Farm and in a Castle. If one thinks a unit in town or on a castle is too powerful because it never tests its morale, apply the following:
- A unit in town has a morale bonus of 2, with a maximum of 11. It normally checks when it takes losses or after a melee, with this bonus of 2.
- A unit in a fortified farm or a castle as a morale bonus of 3, with a maximum of 11. It normally checks when it takes losses or after a melee, with this bonus of 3.
16.7 Troops Reintegration. A unit in good order, out of fire range of an enemy unit, with a leader on it, that did not move during a movement phase, that already took losses, can try to recover one loss during a rally phase. It must pass a morale check (adding the leader bonus) to recover one step. If more steps have to be recovered, it can follow the same procedure the following turns.
A unit totally eliminated cannot recover losses.
16.8 Modulated Demoralization. For a corps-based demoralization, to avoid the players knowing exactly when it will occur, the following process is used.
When the demoralization level -5 is reached, the player rolls two dice and adds this value to the normal value -5. This gives the new threshold of demoralization. For example, for a level of 30 the player rolls when it reaches 25. If it rolls a 6, the threshold will be 31. For a 9, it will be 34, and so on.
16.9 Fatigue. Warning: this very experimental rule can be very complex. It has been tested several times, but may not work in extreme situations. Please be flexible, and let us know if you experience any problems.
Fatigue is a new parameter, at the corps level, that makes a corps engaged for too long more fragile and less efficient during the day. Corps that moves and/or engages units in melee accumulate fatigue points. Complete rest decreases this level. Fatigue has consequences on the morale.
At the end of each player's turn:
- A corps which units move more than half of their movement allowance (round up) gets a fatigue point. Artilleries and cavalries attached to an infantry corps, as well as artilleries from cavalry corps are excluded from this rule. Add 1 to the level of a numerical marker set UNDER the leader counter. A unit moving on a road less than half its movement allowance gets a +1 MP bonus only. Disorganized units moves are not involved in this rule.
- A corps which a unit attacks in melee gets 1 fatigue point (this can be in addition to fatigue points taken in movement). Artilleries and cavalries from infantry corps do not count. Artilleries from cavalry corps do not count. Being the target of fire or melee including opportunity fire does not count. Firing does not count.
- A corps which no unit moves at all and no unit is engaged in melee during this turn recovers one fatigue point.
- A corps which no unit moves and no unit has been fired upon that turn recovers two points.
When 5 fatigue points are accumulated, the marker 5 under the leader is replaced by a marker 1 on THE TOP of the leader. This is the morale drop for all units of his corps. If the corps starts recovering, the marker 1 is replaced by a marker 4 under, and so on. If the corps fatigue keeps increasing, new markers 1 to 5 are placed under the leader, then the 1 on the top is replaced by a marker 2 after 5 new fatigue points (which means, morale -2). This system is therefore a base 5 system.
Consequences:
- 1-4 fatigue points: no effect.
- 5 fatigue points (marker 1 on the leader): all units from the corps (including cavalry and artillery) have a morale decreased by 1.
- 10 fatigue points (marker 2): all units from the corps have a morale decreased by 2.
- 15 fatigue points (marker 3): all units from the corps have a morale decreased by 3.
- 20 fatigue points (marker 4): all units from the corps have a morale decreased by 4.
One army leader (one per side per battle) can create a provisional corps (use an order marker) with units from a single corps, which can be engaged without its parent corps suffering from fatigue (for example, Legrand at Austerlitz, Duhesme at Waterloo, Wittgenstein's cavalry at Leipzig). This can be done only once per battle per side.
17.0 Command and Control
"Military genius is a gift from God, but the first quality of an overall commander is steadfastness and the will to win at all costs." Napoleon
There are 5 levels of optional rules for command and control, with increasing realism and complexity. Before the game starts, players agree which level to use. Using a given level implies using the lower levels also. For example, if the players choose the second level, they will use the rules from the first and second levels.
17.1 First Level: Leaders. Use all standard rules from chapter 14.
Additional option when a leader is eliminated. When a leader is eliminated, roll the die a second time.
- 1 to 5: this is the number of game turns the leader cannot act.
- 6: the leader is killed or severely wounded. He is out of the game for good.
If the leader is wounded, the victory points for an eliminated leader still apply, even if the leader returns to the battlefield a few turns later. But they do not apply the second time the leader is wounded or eliminated.
17.2 Second Level: Command Radius. Each unit must be within 6 hexes from its commander (corps, army or wing). The unit must draw a 6 hex path not passing through any enemy unit. The terrain cost is irrelevant, only impassable hexes are forbidden.
To be in command or not is decided at the beginning of the charge phase. Out of command units can be identified with an appropriate marker; they remain out of command for all the turn.
Leaders themselves must be within 10 hexes from their own superior commander to be allowed to move. Being out of command prevents only the leader from moving except by initiative as follows. Leaders out of the radius of a commander can move by rolling for initiative. If the die roll is equal or under the leader's initiative value, he can move up to half his movement rating this turn. If the die roll is over the value, he cannot move at all.
This has to be checked every turn. Whatever the status of their leader, the units (and possibly the subordinate leaders he commands) can move provided they stay within 6 hexes (or 10 hexes for the subordinate leaders). An overall commander does not bother about this, and can always move and lead. In addition, an army leader can directly command 3 units of his choice, as long as they are at 6 hexes or under.
Obviously independent units, detached from their parent corps, in the range of another leader are typically attached to that leader for the duration of the scenario, except if stated otherwise.
Out of command units cannot voluntarily exit their hex, except if they attempt to come back within their commander's radius. They remain out of command for that turn even if this move brings them back in the radius of command. Exception: disorganized units will move toward their line of communication if they voluntarily move during the movement phase.
Out of command units can:
- change facing, adopt a new formation, fire or melee;
- advance after combat;
- (for cavalry) charge into adjacent hexes (like a countercharge), countercharge or withdraw before combat (see 6.8).
During the first turn, all units and all leaders are under command.
17.3 Third Level: Tactical Orders. This level can be played only if each player trusts his opponent and plays a tenacious yet honest game...
With this level, the army commander sends secret orders to his subordinates. These leaders must lead their units so they will execute the army commander's plan. These orders are sent by aides (use numerical markers to represent them). See 17.5.
When using this rule, a leader no longer needs to be within 10 hexes from his superior to move.
The army commander's movement allowance is half of his normal movement allowance (round up) only. He gets back his whole movement allowance if the army is demoralized or if half of his corps (round up) have a retreat order. In this case, he no longer has to lead, and he can gallop to any place he likes.
When the aide reaches his destination, roll a die to check that the general will obey the order, see 17.6. If the test is successful, the order is applied the next game turn. Each time a general receives an order it cancels the previous one.
If the army commander is stacked with his subordinate, the order is immediately transmitted and automatically obeyed, no die roll is made. The order is put in effect the next turn.
Tactical Orders are:
-
Attack: the leader must engage at least one third of his good order units (round up). Artilleries are not taken into account for this computation. Engaged units must move at least 4 hexes toward the enemy, and if possible, attack (with fire or melee, as the owning player sees fit).
Exceptions:
- artillery can move and fight freely.
- disorganized infantry and cavalry do not count when computing the 1/3 fraction.
- in a Guard corps, the cavalry and the artillery can be engaged separately.
Special case: a cavalry corps can freely switch from an attack order to a march order, or vice-versa, at any time.
-
March: the units of the corps can move only in column or general order formation (limbered for artillery). No attack (fire or melee) is allowed, only opportunity fire is possible. Units cannot voluntarily be disorganized. The owning player can choose one unit, no more, in the corps, and act freely with this unit. This can be a different unit each turn. Units cannot exit the map.
The corps commander can switch to an attack or defense order freely, without checking initiative and without penalties. Once such a decision is taken, the new order is fully in effect.
Special case: a cavalry corps can freely switch from a march order to an attack order, or vice-versa, at any time.
All corps entering the battlefield have a free March order. Their destination must be specified once the leader of the corps enters the map.
-
Defense: the leader can move only 2 hexes per turn laterally but only one hex toward his line of communication, and he cannot move closer to the enemy lines of communication.
As soon as the defense order is in effect, the player must draw a line on his position, which is the forward limit of his defense area. This line is drawn 1 hex in front of the most forward units (looking toward the enemy lines of communication), and extends beyond the leftmost and rightmost units of the corps. The units belonging to the corps cannot cross this line (including during advance after combat).
When the corps commander receives an order (attack, defense, march, etc), the units are considered more apt to fight than the other units, having no combat fatigue. They have a +1 bonus to the die (in attack, -1 to the roll in defense) in each melee combat they execute for 3 turns (this turn and the next two turns).
Note: this bonus applies only if all friendly units involved in this combat are "new" units.
Cavalry Corps. A cavalry corps is autonomous: it can switch from an attack order to a march order (or vice-versa) at any time.
Special Cases:
- If the chain of command includes a wing commander between the army commander and the corps commander, the order must be sent from the army commander to the wing commander, and then from the wing commander to the corps commander. Specific leader rules are given for each scenario.
- At the start of the game, each leader has an initial order, freely allocated by the players. The owning player can choose any order, except if specified otherwise in the scenario.
- Corps without a valid order, either because the previous order is fulfilled and has no other order, or the order is no longer valid (for example a target destination is now occupied by the enemy) adopts a defense order. No corps can be without an order.
Army Commanders Order Capabilities.
- French: 3 orders per turn.
- Russia, Austria, Sweden, Spain: 1 order per turn.
- Prussian: 1 order per turn in 1807 or before, 2 orders per turn after 1807.
- English: 2 orders per turn.
These values can vary with the battle. See special rules.
Only the army commander can send new orders. A wing commander (if any) can never send a new order. On the other side, he can decide to send to all his corps an order that was sent for just one of his corps. All corps will receive the same order.
General Retreat Order. The army commander can send a retreat order to all corps, no matter how many corps are present nor what his order capability is. These orders are sent directly to the corps commanders, even if there are wing commanders. Of course, the army commander can send no other order this turn.
Notes:
- Movement distances are in straight line, except for forbidden terrain. To zigzag does not fulfill the requirement of a mandatory movement.
- An out of command unit complies with rule 17.2, not to its leader's orders.
- A disorganized unit obeys the rules 4.5, 4.10 or 4.13 and is not considered part of the corps as far as the orders are concerned.
- During the night, order generation, aides movement, order delivery and obedience checks are normal.
17.4 Fourth Level: Written Orders. Please read the warning for the third level rules. This system is the most elaborate, but also the most difficult to play and "interpret". The system is essentially the same as level 3, with the following change: additional information is written in a free format order after the standard order. Each order may contain several elements, including a tactic (like in the third level) and/or an objective (place, direction or enemy, with possibly a time limit), a combination of these including a succession of tactics and objectives, as well as any useful information.
Written Orders:
- Tactic (attack, march, defense, withdrawal, etc) like the third level command and control rules;
- Objective, which can be a place, a direction or an enemy (division or corps), with optional additional information like a time limit, or a start hour;
- secondary order, if the primary order succeeds;
- secondary order, if the primary order fails;
- a primary or secondary order can include additional conditions, about places, timetables or a units' actions;
- orders may be a succession of clear indications, "move to village X, fire on units XX, then deploy and attack".
A leader must execute his primary orders for at least 3 continuous turns. Then, starting with the fourth turn, he is allowed to consider his endeavor failed and to fall back to his secondary order. There is no penalty to change the order in this case.
Note: if a leader wants to disregard the order he has received and adopt another one, he must check initiative (see 17.7) and he gets a morale penalty.
Example:
- attack village XXX; then defend in XXX, and wait for AAA corps to occupy the ridge, or attack YYY if the ridge if already controlled; else withdraw to ZZZ.
Comment: if, after 3 turns have elapsed, XXX still is in enemy hands, the leader can consider during the 4th turn that the attack failed, and he can withdraw to ZZZ.
Example:
- defend forest EEE; else withdraw to TTT.
Comment: there is no success secondary order, because the primary order is a defense order.
Special Cases:
- If a primary order is fulfilled, and the corps has no secondary order for a successful primary order, the corps acts as if its order were a defense order, until it receives a new one.
- The same happens if for any reason an order becomes irrelevant (e.g. attack an already eliminated enemy, or an enemy which fled off the map).
Don't Do That: Written orders must be as clear as possible, with neither too many nor too few details. For example, do not write orders like the following:
- Attack the 24th Line (this order is too narrow, it targets a regiment, and what will the corps do when the regiment is eliminated?);
- Attack and annihilate II Corps (must include limits, else the friendly corps will have to pursue the enemy corps if it withdraws or routs, even if such a pursuit is tactically unsound);
- Defend where you are ("where you are" can vary, if units become disorganized and have to retreat farther and farther).
17.5 Aides and Order Transmission. This rule applies only to the level 3 and 4 Command and Control rules. Order generation, transmission and obedience checks are performed during the movement phase.
Orders are sent using aides, which appear on the map as numeric counters. An aide starts his movement from the army commander's hex, and moves toward the recipient of the order during the movement phase.
An aide has a 12 MP allowance per turn. He must spend all his MPs and end movement as near as possible from the recipient leader. Aides are not limited in number, only the number of generated orders per turn is limited.
An aide spends MPs like a column cavalry, while obeying the following rule:
- he must always be more than 2 hexes away from the nearest enemy unit;
- except if the leader is within 5 hexes, in which case the aide is allowed to be one hex away from the nearest enemy unit.
When the aide reaches the leader to which the order is sent, this leader checks obedience to ensure the order was correctly transmitted (received, interpreted and understood, see 17.6). This check is therefore performed during the movement phase, upon receipt of the order, and the order can be implemented the following turn.
Allied Armies: Some allied armies had a more rigid chain of command, with "wing leaders" commanding several corps. In this case, the aide must first reach the proper wing general, and next turn continues toward the corps commander. Note: this rule usually applies to the Russian Army.
Intercepting an Order: If an enemy unit moves within 2 hexes from a friendly aide, the enemy player immediately moves this aide beyond this distance, to an adjacent hex. Then the enemy unit can continue its movement. This movement can be executed more than once per aide and per turn if necessary.
Note: an aide does not constitute a valid target the enemy can attack. With the game scale, it would not be realistic.
17.6 Obeying Orders. This rule applies only to the level 3 and 4 Command and Control rules.
This rule shows how quickly the various leaders would put their commander's orders in effect.
The obedience value is indicated on the back of each leader counter. This value typically ranges from 3 to 5. The average value for each army is:
- France (and its allies): 4.
- Coalition: 3.
Special rules for each battle may give different values.
When the leader receives a new order, he must do an obedience check. The order is "accepted" if the die roll is less than or equal to the leader's obedience.
- Success: the previous order is still in effect for this turn (N); the new order is put in effect the next turn (N+1).
- Failure: the previous order is still in effect for this turn (N) and the next (N+1); a "delay check" is executed the next turn (N+1).
Delay Check: this check depends in no way on the leader's obedience value or any other value.
- 1-4 Success: the new order is put in effect the next turn (N+2).
- 5 Delay in the execution: same as above, but with one more delay turn (N+3).
- 6 Aide lost (or killed): the general never received the order; the previous order is still in effect.
Remember: if the army commander and the leader to which the order is sent are in the same hex, the order is automatically accepted. There is neither an obedience check nor delay check, the order is in effect the next turn.
Example: the army commander sends a new order to a corps commander during turn 2. The aide leaves the army commander's hex and reaches the leader's hex the same turn (with 12 MPs, the aide runs fast). The corps commander executes an obedience check. He has an obedience value equal to 3. If he succeeds, the order will be in effect at the start of turn 3. Unfortunately, the obedience check fails. During turn 3, the corps commander will try a delay check. On 1-4, the check will succeed, and the order will be put in effect during turn 4. On 5, the order will have a notable delay, and will be in effect during turn 5 only. On 6, the aide lost his way and never found the corps commander!
Note: if there is a wing commander, senior to the corps commander, the aide will have to reach the wing commander (with no check). Then, during turn 3, the aide will leave the wing commander and reach the corps commander. The obedience check will take place at this time. This route reflects the slowness of order transmissions in some coalition armies.
17.7 Initiative. This rule applies only to the level 3 and 4 Command and Control rules and to a certain extent to the level 2.
When a leader decides to modify his tactic, he rolls a die, and the new order is applied if the die roll is lower than or equal to the initiative value.
In level 2, initiative can be used by any leader out of range of any commander as explained in 17.2. A successful initiative check allows the corps leader to move half of his movement allowance for this turn.
- Success: the previous tactic is still in effect for this turn (N); the new tactic is put in effect the next turn (N+1); all units in the leader's command have a -1 morale negative during the next turn only (N+1).
- Failure: the previous tactic is still in effect; all units in the leader's command have a -2 morale negative during the next turn only (N+1).
Historical Note: negatives (including half moves of the leaders) represent the leader's hesitation and confusion, as well as those of his subordinates.
Note: a wing commander cannot use his initiative to alter the order of a subordinate corps commander.
17.8 Order Check. Use this rule with the level 4 Command and Control rules (or possibly level 3).
After all orders are delivered and the obedience checks performed, a corps commander can decide to act according to his own initiative, instead of obeying the order received from the army commander or the defense order generated by default as explained in the special cases in 17.3. He executes an initiative check.
An order is never revealed to the enemy except if the opponent feels he is being cheated, having noticed for example that the actions of a given corps seem rather awkward, and therefore in contradiction to a written order of any kind. In this case, the owning player must reveal the order to his opponent, and he can ask for the order of any enemy corps he chooses (this will prevent systematic and dishonest challenges).
If the leader does so, his units will have a morale penalty (in levels 3 and 4), and he will have some problems if he fails.
A common agreement or an initiative check can solve any problem. Of course, we recommend that you act faithfully, so you will enjoy playing the game.
Whatever the result of the check, the effects will take place the next turn.
On the leader counter and on his card, there is an initiative value. Special rules for each battle may give different values.
- genius: 5.
- good: 4.
- average: 3.
- bad: 2.
17.9 Fifth Level: Pen, Paper, and ... that's all! This new level is the most historical, as it is based on free written orders of which content is not regulated. It is also the most complex as players are free to interpret orders.
To be playable, the following rules are however in effect:
- Two first levels of the command and control system.
- Orders are transmitted with aides de camp at the same speed than for levels three and four.
- The number of orders is limited as in level three.
- There is no check for obedience or initiative.
Players are free to implement orders or not, but their commander can relieve them if he wishes to do so. This system is already used in the campaign system "The Flight of the Eagle" (Pratzen Editions); orders are simply written on free paper. They should include the place, time and person issuing the order, the place and recipient of the order, and the order to be followed. It can be as vague as "attack straight ahead" or extremely detailed, this is up to the players.
Message general format:
- From:
- Day and time:
- Origin location:
- To:
- Destination location:
- Message:
Twenty years of experience on the campaign system indicate that this system works perfectly, and includes human elements as bad faith, poor writing, misunderstandings, and trust. Playing this level requires that the players understand the degree of communication between them is limited to the written messages, except if they are physically in the same hex on the map. Of course players receiving the orders can NOT ask for verbal explanations, but they can ride to their Boss and talk.
Some perfectly historical examples:
Ex. 1a - Dispatch from Wellington to Colville on June 17, 1815:
To Major General the Hon. Sir C. Colville, G.C.B. 17th JUNE, 1815.
The army retired this day from its position at Quatre Bras to its present position in front of Waterloo.
The brigades of the 4th division at Braine le Comte are to retire at daylight tomorrow morning upon Hal.
Major General Colville must be guided by the intelligence he receives of the enemy's movements in his march to Hal, whether he moves by the direct route or by Enghien.
Prince Frederick of Orange is to occupy with his corps the position between Hal and Enghien, and is to defend it as long as possible.
The army will probably continue in its position in front of Waterloo to-morrow.
Lieut. Colonel Torrens will inform Lieut. General Sir C. Colville of the position and situation of the armies.
In this dispatch note the succession of positive orders (do that!) and conditional (if... then...).
Ex. 1b - Another example from June 15:
The Prince of Orange is requested to collect at Nivelles the 2nd and 3rd divisions of the army of the Low Countries; and, should that point have been attacked this day, to move the 3rd division of British infantry upon Nivelles as soon as collected.
This movement is not to take place until it is quite certain that the enemy's attack is upon the right of the Prussian army, and the left of the British army.
Ex. 2 - Order from Napoleon to Marmont, October 16, 1813, day of Wachau:
As I will attack the Austrians, I think it is good is you cross Leipzig and place yourself in reserve at half a league of the town, between Leipzig and Liebertwolkwitz, in echelon. From there you can go to Lindenau if the enemy makes a strong attack on this point, which sounds absurd to me. I will call you to me as soon as I will see the enemy forces and be sure he is attacking me. Finally, you can support Bertrand if, as unlikely as it looks, an enemy army arrives by the road from Halle.
Note how Napoleon gives several choices to Marmont depending on what happens. In fact, the whole army of Silesia under Blucher arrived by the road to Halle, and Marmont chose to stay there, which lead to the battle of Mockern.
Ex. 3 - Orders to the Army from Napoleon, at Brunn, December 1, 1805, eve of Austerlitz:
- Order to Marshal Davout to gather his troops at the Abbey of Raigern.
- Order to Marshal Bernadotte to take Cafarelli's position.
- Order to General Cafarelli to take the Grenadiers' position.
- Order to the Grenadiers to move beyond the hill, on the right of the road.
- Order to the Suchet division and to the Cafarelli division to move to the right of the road, at the level of the Santon.
- Order to the GHQ to move to the Hill.
Ex. 4 - Letter to Murat, November 6, 1805:
You did not give me any news yesterday, and I learn only this morning at 8 am about the fight you had yesterday. You must write to me twice or three times a day. If I had known that the enemy was there I would have reacted differently. Close the Suchet division to the Grenadiers, and make these divisions to march together. The officer you sent me is so stupid that he could not explain anything to me. I don't know if the enemy retreated, if he stayed, the number of his guns, and the part of the Oudinot division that was engaged.
Don't hesitate to use rich and formal language, after all that was 200 years ago... For example, in a 1815 campaign we played, Wellington sent the following message to Blucher:
My dear Field Marshal, I have just received news of your movement toward Dinant. I hope and trust that you reconsider this maneuver, which I fear may well be a false movement.
If the French are moving against Charleroi, as it appears they are, marching with your Second Corps to join your Third at Dinant only widens the gap between our two armies and may well expose half of your army to defeat by superior numbers of the more concentrated French. Should Bonaparte push north to Charleroi and take the crossroads there, he will be squarely between us. Nor can you maneuver effectively against his flank from Dinant, since the road network does not allow it and moving across the country would be slow and difficult. My own forces are scattered in their various cantonments and it will take at least two days to assemble a significant force at Nivelles, Quatre Bras, or Wavre. I earnestly beg you to consider the dangers of a hasty plunge into the midst of a more concentrated foe so far from our effectual aid. Your reply will find my headquarters on the road between Bruxelles and Mont St. Jean. Believe me to be your most humble and obedient servant, Wellington
18.0 Strategic Deployment
"Do not do what the enemy wants you to do, mainly because he wants you to do this. Avoid deploying your army in a battlefield he knows, and avoid at all costs a battlefield he has fortified and where he has entrenched." Napoleon
This optional rule allows an alternate battle set-up. A battle did not start with both sides agreeing on their respective set-up. The deployment was the result of small scale combats, probes, withdrawals, occupations of key positions, etc. And then the full scale battle would start. Most simulation games start with this resulting situation.
We suggest here that you simulate the various skirmishes preceding the real battle in an abbreviated way, so each army commander will more or less decide how his army will be arrayed for the battle.
Note: this is a generic rule. It is highly dependent on the game battlefield, and so it can be altered in each specific game.
18.1 Dividing the Map. The players mentally divide the map into 16 identical squares (4 by 4) of equal sizes. But this can vary with the simulated battle.
Each player takes in his hand the commander counters belonging to the infantry corps that were present at the start of the historical battle. He leaves the army commander and the cavalry commanders.
18.2 Entry of the Infantry Corps. The first player places one infantry corps leader counter face down on the map, in one of the four squares adjacent to his map edge. The other player does the same. Then alternating, they put another counter on the map edge, or they move an already present leader to an adjacent square (diagonal moves are not allowed), provided this square is not enemy-occupied.
This procedure lasts as long as a player has a leader to be placed who is present on the battlefield in the game setup.
Limit: during this phase, the stacking limit is 2 infantry corps per square.
Note: the cavalry corps are not tallied when checking the 2 corps stacking limit.
18.3 Entry of the Cavalry Corps. A cavalry corps can deploy and move with an infantry corps.
18.4 Unit Deployment. When one player decides that the deployment suits him, the strategic deployment ends, and the combat units are placed in the areas which correspond to the square their leaders occupy.
First, the leaders are placed face-up on the normal-scale map. Then, alternatively (or simultaneously if the players agree), each player places a unit in the hex where its commander is, and he executes a movement, with the full movement allowance, and any allowed formation. He must obey the following limits:
- the combat unit must stay within the area that corresponds to the square of deployment;
- the combat unit must not move within 3 hexes of any enemy unit;
- combat is not allowed, of course.
Note: units can be placed under a reserve marker as soon as they enter play.
18.5 Starting the Battle. When the deployment is over, the proper battle can begin, with the standard rules. The corps (infantry and cavalry) that have not deployed arrive as reinforcements, except if specified otherwise in the scenario rules.
19.0 Time Limits and Penalties
"Loss of time is a real problem in war. The reasons put forward to explain the failures are always bad ones, for the real reason is the delay." Napoleon
The real time available to a general to act and react is seldom simulated in wargames, yet it was a factor during battles.
This optional rule can be played after one or two games. You should use an hourglass.
19.1 Allowed Time. Each player has a limited time to execute his movement phase. This time limit varies with the game and is written in the battle special rules.
Yet, this time does not include the time required to execute the enemy's reactions (opportunity fire, countercharge and square formation). Counting time is halted when such reactions are resolved.
19.2 Penalty. If a player uses more time than his time limit, all units belonging to the corps have their morale lowered by -1 for each 30 seconds of excess time (round up). This penalty lasts until the start of the next game turn.
19.3 Desperate Army. "A desperate army has no time left!" Napoleon
The allowed time for a desperate army or corps is 15 seconds only, no matter what is written in the game special rules. Then the morale penalty is -1 for each 15 seconds of excess time. This penalty is recomputed each turn.
Remember that units belonging to a desperate army and with at least one step loss already have a -2 morale negative (see 12).
20.0 Interactive Game
This game variant adds more interaction, more uncertainties and more thrill to the game.
Each player activates one corps during a given time limit, and then his opponent activates one corps, and play returns to the first player.
This system allows variations on the historical set-up, while staying within reasonable limits.
This optional rule can be played after one or two games. You should use an hourglass.
20.1 Alternate Activation. The player with the more corps commanders activates one corps (the commander and the combat units). Once he has played all these units, the other player does the same, and this sequence lasts until there is no longer any unactivated corps.
A player can decline activating a corps if his number of unactivated corps is lower than his opponent's.
If the number of corps to activate is the same for both sides, the French player chooses who will begin the game turn.
The army commander can be activated at the same time as any corps, as the owning player sees fit.
A wing commander can be activated at the same time as any corps he commands.
Out of command units (if they exist) are played last.
20.2 Game Sequence. The game sequence for this optional rule is rather similar to the standard one:
- First activated corps turn (first player):
- Cavalry charges.
- Regular movement.
- Second player defensive fire.
- Offensive fire.
- Melee phase.
- Rally phase.
- Second activated corps turn (second player): same sequence as above, with the second player replacing the first player and vice versa.
- Third activated corps turn (first player): same sequence as above.
And so on.
Note: the attacker is the player to whom the activated corps belongs, and his opponent is the defender for the duration of the corps activation. Then, during the next activation, the roles are swapped.
20.3 Time Limit. A player has a finite time limit to move the activated units. This time limit is given in the battle special rules. If the player reaches his time limit, he immediately stops playing the current corps' units, and he activates another corps.
Yet, time counting is halted when executing the enemy's reactions (opportunity fire, countercharge and square formation). Exception: the player can spend more time than allowed, but he gets a morale penalty, as explained in the advanced rule "Time Limit", see 19.
20.4 Last Activated Leader. No corps can be activated twice in a row. Notably, the last activated corps in one turn cannot be the first activated corps during the next turn.
20.5 Cavalry Corps. A player can activate a cavalry corps and another corps (infantry or another cavalry corps) at the same time, in a joint activation. There is no penalty to do so. Both corps are played together, and they can freely execute combined attack. The player has a higher time limit than when activating a single corps (see the scenario special rules).
20.6 Cross-Attached Units. When activating a corps, the player can activate up to 2 units belonging to other corps, and temporarily cross-attach to the activated corps. This allows executing combined attacks with other corps.
Of course, these units will not be activated when their regular parent corps is activated.
Omitted from this transcription: the publisher's "Author's Notes", the "Online Support" links, and the designer's forewords to the second, third and present editions. They are design commentary rather than rules, and the rules above are complete without them.