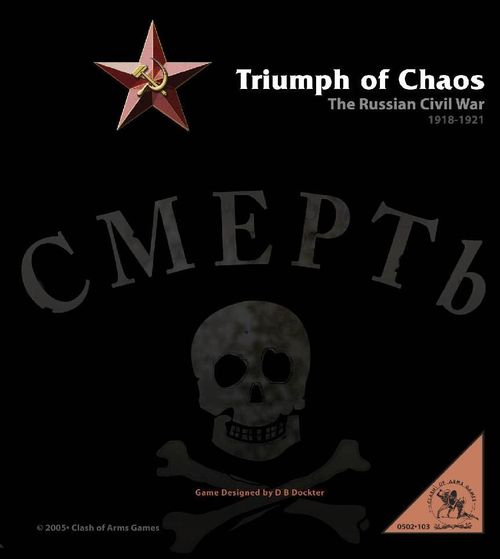
Triumph of Chaos: The Russian Civil War 1918-1921
Triumph of Chaos: The Russian Civil War 1918-1921 Rulebook
Table of Contents
Table of Contents
- 1. Introduction
- 3. Game Components
- 4. Definitions
- 5. Campaign Game/Scenarios
- 6. Victory Conditions
- 7. Turn Sequence
- 8. Political Phase and Factions
- 9. Action Phase
- 10. Movement
- 11. Combat
- 12. Strategic Redeployment
- 13. Supply/Attrition
- 14. Replacements/Reinforcements
- 15. Leaders
- 16. Miscellaneous Rules
- 16.1 Capturing An Enemy Victory City
- 16.2 Special RED/WHITE Units
- 16.21 Lenin
- 16.22 The Tsar
- 16.23 Don Cossack Restrictions (Optional rule)
- 16.24 Socialist Rev Army (WHITE AC#1)
- 16.25 Prince Lieven Army
- 16.26 Gajda Putsch
- 16.27 WHITE and RED Reserve Armies
- 16.28 Peoples' Armies
- 16.3 Other Special Units and Events
1. Introduction
Triumph of Chaos: The Russian Civil War 1918-1921 (ToC) is a two-player card driven strategic board-game. Players assume the side of RED (Communist forces) and WHITE (anti-Communist forces) in the Russian Civil War. The epic conflict involved the toppling of the 304 year Imperial Romanov dynasty, its replacement by a totalitarian communist ideology, significant foreign intervention by major powers, independence and anarchist movements in various Russian republics and wars between Russia and neighboring countries.
There are three phases to a game turn: Political, Action and Logistics. During the Political Phase (conducted on turns 1-9), each side utilizes a shared deck of 66 Political Cards to drive the control of 18 separate factions. Factions include Russian republics and independent countries. During the Action Phase, each player utilizes their respective deck of 55 Action Cards (ACs) to activate units for movement and combat, implement events (receive reinforcements, cause mutinies, etc), generate replacements or strategically deploy units. The Logistics Phase addresses attrition, rebuilding units and other odds and ends.
The campaign game is playable in about six to eight hours, while shorter scenarios take between two and three hours (the 1918 scenario is highly recommended).
If this is your first strategic card-driven board-game, do not be intimidated by the complexity of the game. Well over half of the Rulebook and Supplement contains non-game mechanics, tables, extensive cross referencing and designer comments, hopefully making the game easier to learn. The complexity arises from the number of military and political strategic choices available. Punch out the cardboard counters. Examine the cards. Glance at the rules — no need to memorize them. The preponderance of the rules address infrequent situations. Set up the game. Invite a friend over, or go online to play the game.
There are a number of resources available to players:
- Online game discussion: www.consimworld.com
- Online game play: www.acts.warhorsesim.com or www.vassalengine.org/community/index.php
- Boardgamer's association: www.boardgamers.org/
- Card driven strategic board-games like ToC and tournament info: www.wamconvention.com/
- Dedicated ToC website: www.triumphofchaos.com
There will be both Cyberboard and ADC2 modules of ToC. There is a very strong and active gaming community playing card driven historical games.
3. Game Components
We've tried to pay special attention to the look and feel of ToC components (map, cards, counters, etc) in order to accurately portray the "flavor" of the Russian Civil War (RCW). The game cover is from an actual RCW battle flag, Makhno's, "Death."
Components:
- 1 22" by 34" map
- 1 5/8" counter-sheet (143 armies, 32 leaders, 1 train)
- 1 1/2" counter-sheet (195 corps + 91 info's)
- 1 Rulebook (32 pages)
- 1 Supplement (32 pages)
- 2 Action Card Decks (55 cards each)
- 1 Political Card Deck (66 "shared" cards)
- 1 Leader Deck (44 cards)
- 1 Faction Control Table (FCT)
- 3 Faction Summaries (6 summaries per sheet)
- 2 Six-sided Dice
- Red & White control markers ("stones")
3.1 Game Map
The map depicts: Victory City, Space or "hex", and Region type (clear, mountain, swamp, forest, fortress or desert) associated with possible movement and/or combat effects. The only other special terrain type, river crossings, affects combat, but not movement. Rivers are otherwise ignored.
3.11 Spaces ("Hexes")
The game map includes a series of spaces (shaped like hexagons), which are occupied by the cardboard pieces ("counters") representing each side's military forces (armies, corps and leaders) and a variety of informational counters.
Each space is connected by either a road (Road 1 or 2) or rail line; permitting movement and combat between the spaces. Each space contains a terrain type (clear, mountain, swamp, forest, fortress or desert) associated with possible movement and/or combat effects. The only other special terrain type, river crossings, affects combat, but not movement. Rivers are otherwise ignored.
3.12 Boxes
A number of spaces are boxes, representing larger geographical areas. Boxes function similar to a normal space, except they may contain more military forces than a space (see "Stacking" rule 10.3).
All spaces and boxes are apart of one region with the following exceptions (rule citation): East Russia (10.216), Eastern Hungary and Eastern Romania (16.44), East Prussia (16.42) and the Yudenich Off-Board (16.47). Two boxes are located in the Baltic Sea; the RED Fleet – In Port box and the RED Fleet Sorties box. Only the RED and WHITE Fleet counters may occupy these boxes. See rule 16.73.
3.12 Victory Cities (VC)
Some spaces, marked with a flag, and larger than other spaces, are Victory Cities (VCs). There are 15 VCs outside of Russia, 9 VCs within RED Home Regions, and 7 VCs within WHITE Home Regions, for a total of 31 VCs in the game. Control of the Victory Cities are the key to winning the game, since the differential between the number WHITE and RED control generates Victory Points (VPs) each turn.
3.13 Regions
The map is divided into RED Home, WHITE Home, Green, Republic and Country regions:
Regions
| Region | Includes | Comments |
|---|---|---|
| RED Home Region | North, East, Central | All spaces in the region are RED controlled until subsequently controlled by WHITE or a Green force. |
| WHITE Home Region | Urals North, Urals Central, Don, Kuban | All spaces in the region are WHITE controlled until subsequently controlled by RED or a Green force. |
| Green | Southeast | Includes 4 boxes – SE 1, 2, 3 and 4. These spaces are unfriendly to both sides. |
| REPUBLIC | Astrakhan, Belarus, Khiva, Makhno, Transcaucas, Turkistan, Ukraine, West Ukraine | These regions can only be occupied by obtaining control of the Faction or declaring war on the Faction. |
| COUNTRY | Estonia, Finland, Lithuania, Latvia, Poland | Same as Republic |
3.14 Game Map Charts
The game map includes a number of charts:
Charts on the Game Map
| Item | Comment |
|---|---|
| Victory Conditions | Summary of how to win the game |
| Map Key | — |
| Combat Charts | Army & Corps Combat Tables and Combat sequence |
| WHITE Strategic Reserve | Contains off-board WHITE corps |
| WHITE Dead | Space for eliminated units |
| PC Generation Chart | Indicates number and method of selection of Political Cards |
| Other PC Box | Contains allocated ACs and PCs |
| WHITE PC Box | Contains allocated ACs and PCs |
| RED PC Box | Contains allocated ACs and PCs |
| Strategic Redeployment | Summary information |
| Polish Status | Tracks war and movement restriction status of Poland |
3.2 Forces: Leaders and Units
3.21 Leaders
Leaders represent key personalities in the war, their associated staff and concentrated logistical staff/resources. There are 13 RED, 13 WHITE, and 6 Faction leader counters (32 total) and 44 leader cards.
(There are 12 more Leader Cards than counters; there was extra space when the cards were printed, so the designers decided to provide the additional Leader Cards.)
All leaders have basic capabilities (rule 15.1) including: ability to initiate a multi-space attack, withdrawal, pursuit, reinforcement, exploitation, counterattack. A few leaders have "special capabilities" (see rule 15.17).
Each leader counter shows the Leader Rating, Camp and whether the leader Starts on map. The Leader Rating indicates a number (equal to or less than) that must be rolled to utilize basic leader capabilities (withdrawal, pursuit, reinforcement, counterattack and exploitation). The provided Leader Cards contain specific leader ratings for each capability. A leader's Movement Allowance (MA) also equals their leadership rating, except in the case of Makhno, Wrangel and Budyenny (rule 15.6; they have a MA of 5). On a few counters, a circled "P" indicates that the leader may be purchased with Replacement Steps. Use of the Leader Cards is optional.
3.22 Units
Units represent armies (5/8" counters) and corps (1/2" counters). Armies (143 in the game) generally contain 15,000 to 50,000 soldiers, while corps (195 in the game) contain 2,000 to 5,000.
Nothing radical here; there are mostly infantry, some cavalry and a smattering of air, artillery and tank/mechanized units.
Units have a combat strength (utilized to inflict losses on the enemy), a loss factor (utilized to absorb losses) and a movement allowance (the number of spaces a unit may move in one round).
Some units are elite (helpful in generating positive combat die roll modifiers), non-replaceable (may not be rebuilt or repaired), NR (no retreat – may cancel an otherwise required retreat) and R (revolt – garrison corps).
Information included on the unit counters (front and back sides):
- Cavalry (Cav): Indicates the unit is cavalry.
- Combat Strength (CS): This number is used on the Army Combat Table (if at least one army is participating in the combat) or the Corps Combat Table (if only corps are participating in the combat) to "fire" on an enemy force. The CS of a unit is indivisible.
- Loss Factor (LF): The number generated on the Combat Table from a side's "combat fire" indicates the Loss Factors inflicted on the enemy. By flipping full units or eliminating reduced units (those turned over to their back side), the Loss Factor is satisfied. Armies have LFs of 2 or 3, while corps have LFs of 1 or 2.
- Movement Allowance (MA): Indicates the number of spaces a unit may move in one action round.
- Asterisk by Movement Allowance: Mech/Tank, Air and Artillery units contain an asterisk by their movement allowance; indicating maximum MA if moving exclusively along a rail connection (otherwise only 1 space).
- Year of Entry (YE):
- S (begins game on the map)
- SR (begins game in the Strategic Reserve)
- 18 (1918), 19 (1919), 20 (1920) (enters via Action Card)
- V (variable – dependent on play of card or Faction rule)
- C (when a side gains control of a Faction, place on map)
- P (leader available for Logistics Phase "purchase")
- Reduced Unit: The backside of most units; indicated with a large X in tandem with an R in a square. Also referred to as a "flipped" or reduced unit.
3.23 Types of Units
Infantry: Represents the majority of ToC units.
Cavalry: The Russian Civil War was one of the last wars to witness significant cavalry action. Each side has a few cavalry units. Differences versus infantry include; cavalry having a higher movement allowance, being eligible for "exploitation" (see rule 15.15) and being required to achieve cavalry surprise. Five leaders (Wrangel, Krasnov, Budyenny, Ghai-Khan and Makhno) have a "special capability" for Cavalry Combat Surprise (fire first in combat). See rule 11.413.
Air: Aircraft provided important reconnaissance and harassment functions in the Russian Civil War (RCW). The side with more aircraft steps involved in a combat receives a +1 Combat Modifier and are helpful to achieve Combat Surprise. Air units may only move 1 space a round unless moving exclusively along a rail.
Artillery: These units represent unique concentrations of artillery. Artillery units may only move 1 space a round unless moving exclusively along a rail.
Tank or Mechanized: There were limited, but important, tank operations in the RCW. The side with more tank steps (same for Mechanized) involved in a combat receives a +1 Combat Die Modifier or may gamble and attempt to achieve Combat Surprise (see rule 11.411). Tank/Mechanized units may only move 1 space a round unless moving exclusively along a rail.
3.24 RED and WHITE "Camps"
Strategic level two-player wargames commonly have a number of design issues: complete unity of command, coordinated action on multiple fronts and a lack of the political dimension baked into games. "Camps" were used as the primary design mechanism to reflect the challenge of coordinating action on different fronts and internal political issues for both RED and WHITE.
WHITE: WHITE excelled at strategic and operational confusion. To simulate this, a number of "Camps" comprise the WHITE forces including, the "Russian Army" (the core of the WHITE forces, primarily operating in the south, historically designated the AFSR), the Siberian Army (operating in the east), Don Cossacks (south), Siberian Cossacks (east) and the Baltic & WHITE Finnish Forces (other forces including Yudenich, von der Goltz, the Finnish WHITEs, etc). WHITE leaders, armies and corps are all part of a particular Camp and are affected by In-Fighting (rule 16.5).
RED: In order to simulate internal political divisions within the Communist forces and to not further complicate the design, a similar type of "Camp division" is used for RED. Within the RED forces, there are three "Camps": Lenin, Trotsky and Stalin. These Camps are subject to In-Fighting (rule 16.5). Leaders and armies are identified with a CT (Trotsky), CS (Stalin) or no letter code (in which case they are a part of the Lenin Camp). RED Corps are NOT apart of the "Camps" (in contrast to WHITE).
3.3 Informational Counters
- Combat/Move: Activation markers placed on a space during the Action Phase, permitting attacks or movement from that space.
- Control Marker/Influence Points (IPs): Placed on the map to indicate which side controls a particular space, or utilized on the Faction Control Table to track Influence Points (IPs) – the key to gaining control of a Faction. Two Green counters have been provided to indicate units that are enemies of both RED and WHITE.
- Control Markers ("stones"): RED and WHITE "stones" have been provided to supplement the counter control markers. Recommended for keeping track of Victory City ownership.
- Faction Control Marker (FCM): 18 markers, 1 for each Faction. FCMs track control of an associated Faction on the Faction Control Table (FCT).
- In-Fighting: 10 counters for each side. When In-Fighting is triggered, a player secretly draws one of these chits each turn and is bound by its conditions. Each side may ignore a few In-Fighting chits at the cost of 2 VPs (see 16.514 and 16.524).
- NO ACT: Prevents activation of the space or leaders utilizing their capabilities until removed (rule 10.213).
- Reps: Utilized on Game Track to indicate the number of Replacement Steps (RSs) for each side.
- VPsx1 & x10: Tracks current Victory Point level (2 sided – VP level can be either RED or WHITE).
- VCx1 & x10: Tracks number of Victory City controlled by each side.
- Various event markers: Use these markers to keep track of game events triggered by the play of some Action Cards.
3.4 Political Cards (PCs)
A "shared deck" of 66 Political Cards generates Influence Points (IPs), which determine both sides' influence and control of 18 different Factions (see 4.0). PCs are covered extensively in the Supplement.
3.5 Action Cards (ACs)
Action Cards drive the game. ACs are the "fuel" to gain and maintain strategic initiative. During a turn, sides alternate playing ACs (representing their "move"). Each card has a variety of uses. Some ACs enable or prevent other ACs. The design consideration is to force and enable strategic tradeoffs. ToC uses a separate deck for each player's Action Phase, in contrast to a single "shared deck", reducing the ability of one side to monopolize "the best cards". However, a shared deck is utilized in the Political Phase.
Each player has a 55 card deck of Action Cards (ACs), containing three sub-decks: 1918, 1919 and 1920. Each side begins the turn with the appropriate number of ACs indicated by the Turn Chart (between 6 to 9 ACs). Additionally, each side adds AC#'s 53 & 54 to their hand for use during the Political Phase (only turns 1-9). AC#55 is a spare/replacement card.
During the Action Phase, sides alternate playing ACs. The number in the upper right hand corner of the AC is the Card Value (CV). Higher CVs provide players with more utility to conduct various game operations.
Each AC has the following uses:
- As an event
- Or to generate replacements
- Or to conduct Strategic Redeployment
- Or to activate spaces (combat or movement)
Instead of playing an Action Card during a round, a player may elect to take a Special Action (10.21).
3.6 Leader Cards (LCs) - Optional
The deck of 44 LCs provides additional detail to supplement leader counters. Whereas the rating on leader counter is utilized for all leader capabilities, the Leader Card replaces that standard rating with specific ratings for each basic leader capability. Additionally, all rules related to a particular leader are listed on the LC. Use of these cards is optional, and, as indicated earlier, 12 additional cards (marked with a NC in the leader portrait, above the 32 leader counters supplied) have been provided.
4. Definitions
Asterisk (*): If an event is marked with an asterisk (precedes the title on the AC), remove it from play after playing the AC as an event.
Activation: If a player utilizes an AC as operations, they may activate a number of spaces equal to the number (Card Value) in the upper right corner of the card. A space may be activated for either combat or movement. Activations are also known as "OPs".
Active Player: The side taking an action in a particular component of the turn sequence.
Camps: WHITE and RED have various "Camps" (rule 16.5) including RED: Lenin, Stalin, Trotsky and WHITE: Russian Army, Siberian Army, Don Cossacks, Siberian Cossacks, BAF (Baltic and WHITE Finnish).
Card Value (CV): Each Action Card has a value between 2 and 5 – indicated in the upper right hand corner of the card. During the Political Phase only, The Bluff and Influence Cards have CV's of 1 and a variable amount respectively.
Control of a Space (RED, WHITE, Neutral, Green): Spaces are either RED, WHITE, Green or Neutral. Forces always control the space they occupy. Generally, control of a space is determined by the last side that occupied a space (see rule 13.5). Control of a space may also change during the Attrition step of the Logistics Phase (due to a lack of supply). Neutral spaces (uncontrolled Faction territory) may not be entered by either side. Green spaces are considered "enemy controlled" to both sides.
Factions: The 18 Factions are the Countries, Major Powers and Republics representing other forces (versus RED and WHITE) involved in the conflict. Each side attempts to control these Factions; primarily attained via the Political Phase or conquering a Faction during the Action Phase. Factions have armies, corps, a few have leaders and non Major Power Factions have regions.
Friendly: Spaces and forces controlled by your side.
Forces: Units and leaders.
Green: Forces and spaces considered enemy to both RED and WHITE.
Influence Points (IPs): Contained on Political Cards (the code next to listed Factions), generated by game events and Action Cards and purchased during the Logistical Phase. IPs are key to "pushing/pulling" Factions into and out of RED and WHITE control.
Neutral: Spaces that may not be entered by either side until control of that Faction's region by one side.
RED/WHITE Forces: Forces that are a part of that particular side. They do NOT include any Factions that a side may control unless stated in a specific rule.
Region: A Country (example: Poland), Republic (example: Ukraine), Home Region (example: North or Don), or Green territory (Southeast begins Green). Uncontrolled Faction Regions are neutral.
Repair: "Flipping" a unit from its reduced side to its full side.
Round: Play of an AC or taking a Special Action, sequentially (WHITE then RED) during the Action Phase.
Stack: All forces in one space.
Steps: Most units have two sides (very few exceptions; example: Socialist Rev Army). Each side is a step. Combat losses are satisfied by flipping units from their full side to their reduced side and/or eliminating reduced units.
Units: Units are corps and armies. Informational markers are not units. Leaders are not units.
5. Campaign Game/Scenarios
Campaign Game & scenarios are contained in the Supplement.
6. Victory Conditions
6.1 Victory Points (VPs)
VPs are generated by:
- Differential at end of each turn between RED and WHITE Control of Victory Cities
- Subjugation of Republic Factions by RED (1 VP per Republic) (8.6)
- Elimination of player controlled Major Power armies at the time of a Major Power's withdrawal (VP(s) for the enemy) (6.13)
- Violation of an In-Fighting Chit (2 VPs for the enemy) (rules 16.154 & 16.524)
- Elimination or removal of a friendly RED or WHITE (not Faction) leader (see rule 15.5) (VPs for the enemy)
- Declaration of War on a Faction (1 VP for enemy) (8.52)
- Miscellaneous: Lenin counter eliminated (16.21) or Moskva bombed by WHITE Air units (16.62).
6.11 Victory City Differential
The differential between RED and WHITE controlled Victory Cities generates VPs at the end of the turn. For example, assume it is the end of Turn 1. There has been no change in control of any VC. The only change on the Faction Control Table from the opening is that the Czech Legion is now neutral.
RED controls 9 VCs: 1 in Finland (Helsinki 127), 3 in the North, 3 in the Central, 1 in the East (2 VCs in that region are not controlled by RED - Samara 623 controlled by WHITE Socialist Rev Army and Kazan 630, controlled by the Czech Faction), 1 in Don (Migulinskaya). WHITE controls 7 VCs: (2 in Kuban, 1 in Don (Rostov), 2 in Urals Central, 1 in Urals North and 1 in the East (Samara).
In this case, 2 RED VPs are generated. The VP total is tracked on the Game Track on the Map. The VP marker is subsequently adjusted at the end of each turn based by adding or subtracting the VP total from the leading side.
6.12 Subjugation of Republic Factions by RED
Essentially, conquering a Republic. See rule 8.6.
6.13 Elimination of Major Power Faction armies
When a Major Power Faction (Britain, France, USA, Central Powers and Czech Legion) withdraws, the non-controlling side receives 1 VP per Faction army that is currently eliminated. If neither side controls the Faction, no VPs are generated. For example, WHITE controls France. During the Logistics Phase, it is determined that France withdraws from the conflict. One French army is in a Dead Box. RED immediately receives one VP.
6.14 Violation of the terms of an In-Fighting chit
When In-Fighting is triggered for a side, that side is subject to the conditions of a randomly drawn chit (that is kept secret from the enemy) for the duration of the turn. Violating the terms of that chit generates 2 VPs for the enemy side. Some chits may not be violated. See rules 16.514 & 16.524.
6.15 Elimination or removal of a RED or WHITE (not Faction) leader
Under certain conditions (see rule 15.5), elimination or removal of a leader generates VPs for the enemy side.
6.16 Declaration of War on a Faction
The side declaring war on a Faction immediately losses 1 VP.
6.2 Automatic Victory (AV)
There are two possible paths to victory: automatic or "end-of-game".
6.21 EITHER Automatic
30 or more VPs (adjusted by the bid amount per rule 6.4) when checked during the Logistics Phase. Additionally, in the case of RED, they must control at least 1 VC in Don, Kuban, Ukraine and Urals Central Regions.
6.22 RED Automatic
Control at least 6 of the Victory Cities in the WHITE Home Regions (Urals North, Urals Central, Don and Kuban), control all 9 of the VCs in the RED Home Regions and the 2 Ukrainian VCs.
6.23 WHITE Automatic
Control Moskva and Petrograd.
6.3 End of Game Victory
If there has been no Automatic Victory, a winner is determined at the end of the Turn 16. Consult the current VP number. Adjust the VP number by any bid points per rule 6.4. Declare a winner and taunt the loser.
6.31 RED Republic Control Exception
In order for RED to achieve an "end of the game" victory, RED must control all VCs in Belarus, Makhno, Ukraine, Don, Kuban, Orenburg and control all VCs in their home regions (East, North and Central) – in addition, to having the most VPs. If this condition is not met, WHITE wins.
6.4 Tournament Play - Bidding
For tournament play of ToC, roll a die. High die declares the side they wish to play and bids a number of VPs (any whole number starting with 0). The opposing player may accept the bid or bid higher for the same side. Continue the process until a side accepts the bid. Subtract the bid VPs from either a AV or End of Game Victory.
7. Turn Sequence
7.1 Preparation
7.11 Deal Action Cards
ACs are dealt from the respective player "decks" to bring each sides hand size up to the number indicated on the Turn Chart:
Turn Chart
| Turn | Yr | Season | HAND SIZE: # of ACs per side | Action Rounds | Political Phase? |
|---|---|---|---|---|---|
| 1 | 18 | Sum 1 | 7 | 5 | Y |
| 2 | Sum 2 | 8 | 6 | Y | |
| 3 | Fall | 8 | 6 | Y | |
| 4 | 19 | Winter | 7 | 5 | Y |
| 5 |
NOTE: Bluff and Influence Action Cards are NOT included in the "Action Rounds" (hand size) column total. During Turns 1-9 both sides add AC 53 & 54 to their hands during the Political Phase.
7.12 Weather Roll (Spring 2 Only)
Roll a die on Spring 2 turns during 1919 and 1920. On a roll of 1-2, Mud condition applies.
7.13 Draw In-Fighting chits (if triggered)
See rule 16.5.
7.2 Action Cards (ACs)
Note: This section discusses rule 7.11 above.
7.21 Overview
Each players' ACs are divided into 3 segments: 1918, 1919, 1920 (indicated on each AC – upper right hand corner). At the beginning of the game (Turns 1-3), only the 1918 segment is utilized. On Turn 1, each player secretly draws or deals 7 random ACs from their 1918 deck and adds their Bluff and Influence Cards (AC#53 & 54) to their hand for the Political Phase (8.11). AC#53 & 54 are only utilized in the Political Phase. During the Political Phase, any of these ACs may be utilized to affect the determination of what Political Cards (PCs) are selected. During the Action Phase, ACs are:
- Played – (activations, replacements or strategic redeployment and end up in the discard pile)
- Played as an event – if marked with an asterisk are removed ("eliminated") from play. Otherwise place in the discard pile.
- Discarded – and end up in the discard pile
- Saved – for use in a future turn
Definitions referring to Action Cards (ACs):
The Deck: ACs that remain in the "to be drawn" pile.
Discards: ACs that have been played or discarded and will be reshuffled when directed (7.26). Players may examine their own or their opponents discard pile at anytime.
Eliminated: ACs that were played as events and contain an asterisk preceding the event title.
The Hand: ACs that you will use in a particular turn.
On turn 2, the hand size is 8. Players deal ACs from their deck to bring their hand size up to 8. Deal less than 8 if the player saved a card(s). Again, Bluff and Influence Cards (AC 53 & 54) are added to the players' hands for the Political Phase.
On Turn 4, reshuffle the discards, add any remaining cards in the deck (formed from the 1918 cards) and add the 1919 ACs to form a new deck. Draw the appropriate number of ACs (7 in for Turn 4) from the resulting shuffled deck and add AC#53 &54.
7.22 The Winter 1920 Option
On Turn 10, a player may EITHER select ALL 1920 Action Cards as their hand for the turn (they may NOT have saved cards) OR they may add the 1920 part to their deck (reshuffle, then deal). Filling their hand with the 1920 cards is called "Taking the 1920 Option". If they elect to "Take the 1920 Option", on turn 11 reshuffle (including the 1920 played cards) and draw the required six AC hand size for Turn 11.
7.23 May save cards
Players may elect to save any non-played cards in their hand from one turn to the next.
7.24 Hidden
ACs remain hidden from the opposing player until played or directed to be revealed by an AC.
7.25 Insufficient
Occasionally, (primarily Turn 3) a player may lack enough ACs after a reshuffle for the resulting deck to produce the required hand size. This can occur if one side played a very large portion of their ACs as events (a rare occurrence). In this case, a player will need to take a number of Special Actions that Action Phase (see rule 10.21).
7.26 Reshuffle
A reshuffle occurs when:
- Insufficient Deck: There are not enough ACs in the deck to complete the hand size. If this is the case, draw all remaining ACs, reshuffle and generate the required hand size.
- Turn 4: When the 1919 ACs are added to the game (and any yet to be drawn and played cards are added to the deck)
- Turn 10: If a player does not elect to "Take the 1920 Option"
- Turn 11: If a player elected to "Take the 1920 Option"
When the deck is reshuffled per item 1, "Insufficient", the player draws enough cards from the deck to bring their hand up to the proper hand size for that turn. Whenever a reshuffle is required, remember to add any cards from the discard pile and any new year's ACs if called for (Turn 4 and either Turn 10 or 11).
7.3 Political Phase (Turns 1-9 only)
Players utilize their Action Cards (ACs) to determine what Political Cards (PCs) are generated. Political Cards push and pull factions into and out of RED and WHITE control. Allocating a higher value AC to a particular Political Box gives a player a good chance to select the PCs they want. However, there is a catch; if both sides allocate the same value AC, the PCs are generated randomly – essentially, both sides have wasted their ACs in the Political Phase.
Political Phase Sequence of Play
- AC Placement: Each player adds their Bluff and Influence Cards to their "hand". Secretly allocate 3 Action Cards, 1 to each of the three Political Boxes (RED, WHITE, OTHER). The Political Boxes are located in the bottom left hand portion of the game map.
- PC/PB Resolution: Determine number of Political Cards (PCs) generated and how they are selected for the RED Political Box (PB). Select and place PCs face down in the RED PB. Repeat for WHITE PB. Repeat for the OTHER PB.
- Influence Points (IPs)/Faction Control Marker (FCM) Adjustment: Adjust FCM on the Faction Control Table, determined by IPs for each Faction. After FCM adjustment, eliminate all IPs.
- Setup: Setup any newly obtained Faction forces (restrictions govern when they can be utilized – 8.142).
Any Action Cards allocated to the Political Boxes are placed in the discard pile. Set the Bluff and Influence cards aside. They will be utilized in the next Political Phase and are not used in the Action Phase.
The Political Cards that were selected for the Political Boxes are placed in a "discard PC pile". These PCs are not used again until a reshuffle is directed by either PC#66 or there are not enough PCs to fill any one Political Box (at which time ALL PCs are reshuffled) to generate any additional required PCs.
The Political Phase, occurring at the beginning of Turns 1-9, is detailed in the Supplement. The Political Phase involves attempting to gain control of the 18 Factions in the game.
7.4 Action Phase (AP)
Each player has a hand size (between 6 and 9 – see the Turn Chart in 7.11), minus any ACs that were "spent" in the Political Phase) that will be utilized for "Rounds" in the Action Phase (AP). A player may end the Action Phase with none, one or some ACs, depending on the number of ACs played and what has or has not been saved.
The first Action Round begins with the WHITE player. Players alternate playing ACs or selecting Special Actions until the number rounds indicated on the Turn Chart have been completed.
7.5 Logistics Phase
Follow this order:
7.51 Major Power Withdrawal
See rule 8.4.
7.52 Attrition
Attrition of units (eliminated due to lack of supply) and control of spaces is verified – simultaneously for both sides (rule 13.6).
7.53 Factions Conquered
Check status of wars against Faction regarding whether a Faction is conquered (rule 8.53).
7.54 Subjugation
RED may declare "Subjugation" of eligible Factions (see rule 8.6).
7.55 VPs
Adjust the VP total (see rule 6.1). Conduct any required In-Fighting rolls (see 16.5).
7.56 AV Check
Determine whether Automatic Victory has been achieved (see rule 6.2).
7.57 Logistical Inefficiencies
See rule 14.8.
7.58 Replacements
Players spend accumulated Replacement Steps (RSs) (generated by various PCs, ACs and control of Factions/VCs). Both players (WHITE first) repair units, rebuild eliminated units, purchase and place IPs and/or buy leaders (see rule section 14). Additionally, each side may attempt to end In-Fighting (if it has been triggered and is now possible to end).
8. Political Phase and Factions
These rules are contained in the Supplement.
9. Action Phase
During the Action Phase (AP), WHITE, then RED, alternate playing Action Cards (conduct movement and combat, strategically redeploy units, generate replacements and implement an event) or selecting Special Actions (rule 10.21). Combat occurs after ALL movement is completed.
9.1 Action Phase (AP) Sequence
The Action Phase number of "rounds" is 2 less than the hand size in 1918-1919 and 1 less than the hand size in 1920 and 1921. After the WHITE player has completed their action, the RED player proceeds with an action. This constitutes one "round". Complete the number of rounds indicated on the Turn Track.
WHITE initiates the Action Phase. WHITE either plays an Action Card (AC) or selects a Special Action (rule 10.21). ACs may be played:
As an Event — Each card contains text that generates game events. When playing an AC as event, just follow the specific instructions listed on the card. If an asterisk precedes an event name, the card is eliminated from the game after the event is played.
...Or as Replacements — The Card Value of an AC indicates the number of Replacement Steps (RSs) that a side may use to replace eliminated steps/units, buy leaders or Influence Points (see Political Phase).
...Or as Strategic Redeployment — A side may move units into or out of their Strategic Reserve and/or move units on the map an unlimited number of rail connected friendly spaces.
...Or for Operations/Activations — The Card Value of an AC indicates the number of friendly spaces a side may activate for either movement or combat.
9.2 Action Cards
9.21 Sample Card
Each side has its own deck of Action Cards (ACs). AC#18 from the WHITE deck is one example. This AC, if played as an event, generates an army (Orenburg 1) and a Russian 1st corps. Instructions on the AC indicate unit(s) placement. Each Action Card carries a Card #, Card Value, Year it enters play, and (if applicable) an asterisk marking it as removed from play once played as an event.
9.22 Card Value
The Card Value (CV) of each AC is the number located in the upper right hand corner. The CV is utilized for:
Operations/Activations: Represents the number of friendly spaces that may be activated for movement or combat. Each space may only be activated for either movement or combat and any combination of movement or combat activations can occur up to the CV.
Replacement Steps: Generates a corresponding number of Replacement Steps (RSs) to rebuild eliminated or repair (un-flip) units, purchase IPs or leaders "available for purchase".
Strategic Redeployment: Cross reference the CV with the chart in rule 12.1 to generate the number of forces that may be strategically redeployed.
The Card Value may be used for any ONE of these three items or the AC may be played as an event. If the AC is used instead during the Political Phase, the higher the Card Value, the more likely a side will be able to influence the selection of Political Cards, and, hence control of Factions.
9.23 Initiative Cards (ICs)
Each side has 4 Initiative Cards (WHITE and RED ACs 8, 38, 45 and 48). These ACs are playable as events anytime subject to restriction in rule 11.21. ICs may even be played during an opponent's Action Phase Rounds after movement is finished. The Active player indicates first if they will play an IC, and then the Non-active player.
Specific uses for the initiative cards include: influencing combat, canceling an opponents combat activation marker, taking the place of a leader capability die roll (it makes the capability automatic), influencing FCM movement and even providing immediate Replacement Steps.
Initiative Cards played to cancel an enemy combat activation marker must be played after the enemy designates hexes for combat or movement activation and prior to the enemy beginning movement.
(If playing "online" or PBEM, it is recommended not allowing play of Initiative Cards during the opposing player's active rounds.)
9.24 Event and the asterisk
If an AC is played as an event and an asterisk precedes the event name, remove the AC from the game.
10. Movement
Basically, forces move space to space at the cost of one movement point. A few spaces require the entire movement allowance for a round.
10.1 General Rules
Rail and Road Connections: Each space on the map is connected by either a Rail or Road connection. The connection permits movement and combat between spaces. The type of connection does not impact combat, only strategic redeployment and movement. Although there are two types of Road connections (Road 1 & Road 2), the only difference between them relates to the ability to continue moving (Road 2 – see rule this section).
1 movement point = 1 space to space movement if connected by rail or road: When a space is activated for movement, forces move space to space (using either the rail or road connections) at a cost of one movement point. The number of spaces a unit or leader may move is equal to its movement allowance (the bottom right number on its counter), modified (if at all) by its supply condition at the time of space activation and the weather condition. Forces may not enter any enemy occupied space, UNLESS the enemy space is solely occupied by an enemy leader AND the moving force contains at least one army or corps (in which case the enemy leader may attempt withdrawal – see 15.11).
1: 1 full round: Some movement between spaces and boxes requires the entire movement for that round (indicated on game map by a "1" between two spaces).
Road 2 – Movement Restrictions: Road 2 is treated the same as Road 1 or a rail connected space except a unit may be forced to end its movement. There are a number of spaces on the map that are connected by Road 2 connections (example: Slutsk (236) to Moyzr (237)). When any army or corps moves from one space to another using a Road 2 connection, roll a die. If the result is 1 or 2, the army or corps may not move any further that round (it enters the space it was attempting to move into and stops). This roll is conducted for EACH army or corps and EACH time it moves on a Road 2 connection. As an optional rule, play without the Road 2 restriction.
L "Limited RED Crossing": This marks the road connection between Kerch (306) and Taman (307). When RED attempts to cross, it must roll a die and consult this table for each force (each unit and leader):
Kerch-Taman Crossing – Effect on RED
| Roll | Result |
|---|---|
| 1-2 | Eliminate unit or leader |
| 3-6 | No effect |
Modifiers:
- -2 if WHITE controls French or British Faction.
- +1 if Turn 10 or later.
10.11 Restrictions
A number of restrictions apply to entering particular spaces or boxes (see 16.4).
10.111 Entering an enemy space containing only enemy leaders
A unit may enter a space containing only an enemy leader(s). In this case, the enemy leader(s) may attempt withdrawal (see rule 15.11). If unsuccessful, the leader(s) is eliminated with any resulting VP cost (if RED or WHITE leader).
10.112 Friendly forces may not enter a space containing enemy units
(but may enter a space only containing enemy leaders).
10.2 Activation
A side places a number of Activation Markers (any combination of Combat or Movement - one per space) equal to the Card Value on FRIENDLY occupied spaces it wishes to activate for combat or movement (unless directed by an Action Card played as an event – ex: AC#6). The space may NOT contain a NO ACT chit. A side moves any or all forces, one space at a time, and upon completion of ALL movement, conducts combat (from those spaces marked with a Combat marker). Combat is resolved one enemy space, at a time at the discretion of the active side.
Supply state: Supply state for each unit in a space is determined at the moment of placing the Activation Markers and at the instant before combat fire.
Space activated for combat: Unit may move thru but not end their movement in a space activated for combat.
Activation restrictions are contained in rule 10.22 and in the Supplement: Faction specific rules including Great Britain & USA (require WHITE AC#1), Central Powers (activate only those units in one round), Makhno (roll a die when activating), Ukraine (activate only those units in one round).
NO ACT marker: Prevents activation of the space until removed (see rule 10.213).
WHITE Operations Bonus: See rule 8.111 – possibly triggered if RED utilizes an Action Card during the Political Phase with a Card Value of 5.
10.21 Special Action (SA)
Instead of playing an AC, a player may elect to utilize or "take" a Special Action. A side may use any one SA only once a turn with the exception of a One Space Activation.
(Special Actions generate a little more historical flavor for this particular conflict. ToC novices may want to play with only 10.211. If so, remove the NO ACT marker in the game setup.)
10.211 One space ("single") Activation
A player may activate one space for either combat or movement. This is the only SA that may be selected an unlimited number of times during a turn.
10.212 Key Leaders
WHITE Only: Wrangel. WHITE may activate a space for movement that contains the Wrangel leader. Roll a die. On a roll of 1-3, Wrangel may repair any Volunteer Army units in the space at no RS cost. Units in that space that were not repaired may move.
RED Only: Trotsky. RED may activate a space for movement that contains the Trotsky leader. Roll a die. On a roll of 1-3, Trotsky may flip any RED units (except armies that are part of the Stalin Camp) in the space to their full side at no RS cost. Units in that space that were not repaired may move. This option may not be selected if RED has the Trotsky In-Fighting counter.
10.213 Either Side: Propaganda
Propaganda: NO ACT (No Activation) Placement: A side selects an enemy space containing armies and/or corps (the target space) adjacent to a friendly leader (NOT itself marked with a NO ACT marker) and rolls a die:
Propaganda – Placing NO ACTs
| Roll | Result |
|---|---|
| 1-3 | Place a NO ACT counter |
| 4-6 | No effect |
Modifiers:
- -2 if attempting when enemy side (the target) has lost control of a Home Region VC this turn
- -1 if RED attempting and Trotsky is adjacent to target space
- +2 if Trotsky or Voroshilov in target space
- +1 if any other leader in the target space
- +1 if Elite or Cheka unit is in target space
NO ACT markers are limited to the counter mix (4). Spaces with NO ACT markers may not be activated and any leaders in that space may not use their capabilities. If units are forced to retreat as a result of combat or die OOS, remove the NO ACT marker.
Propaganda: NO ACT Removal: Instead of NO ACT counter placement, a side may identify a space and attempt a NO ACT removal:
Propaganda – Removing NO ACTs
| Roll | Result |
|---|---|
| 1-2 | Remove a NO ACT counter |
| 3-6 | No effect |
Modifiers:
- -1 if a 4 rated leader is in or adjacent to the target space
- -2 if Trotsky, Wrangel or Voroshilov is in or adjacent
- -1 if attempting side captured enemy controlled VC this turn
10.214 Either: Revolt
Either side may declare a Revolt SA option. The side selects any subjugated Faction and rolls a die for each Garrison corps. Indicated on the Garrison corps counter is the die roll (equal or less than the number) required to revolt. If the unit revolts, simply flip it to the desired side. If it is stacked with an enemy force, retreat the corps to an adjacent non-enemy occupied space. The corps is in supply this Action Phase. See rule 8.6 regarding Subjugation.
10.215 RED Only: Politburo
RED may call for a Politburo meeting. Roll a die and consult this chart:
Politburo Meeting
| Roll | Result |
|---|---|
| 1-2 | Conduct Accusation – see rule: 16.513 |
| 3-4 | No Effect |
| 5-6 | Disregard RED In-Fighting for remainder of turn – reveal chit. |
Modifiers:
- +1/-1 if RED ahead/behind in VCs
10.216 Either: Semenov and Japanese Army
Semenov and the Japanese Army: These two armies are included to reflect some of the historical dynamics related to the conflict in the Far East of Russia. The only effect they have in ToC is to reduce Replacement Steps (RSs) for either side (rule 14.8). Roll a die and consult this chart:
Semenov and Japanese Army Option
| Roll | Result |
|---|---|
| 1-2 | Place Semenov unit in Urals North – East Box |
| 3-4 | No Effect |
| 5-6 | Place Japanese Army in East Russia Box |
If either army is generated, place the unit in the appropriate map box. The units may not move, initiate combat or be attacked.
10.217 Either: Green Activation
Roll a die and consult this chart:
Green Activation
| Roll | Result |
|---|---|
| 1 | Activate 4 Green Spaces |
| 2 | Activate 3 Green Spaces |
| 3-4 | Activate 2 Green Spaces |
| 5 | Enemy activates 1 Green Space |
| 6 | Enemy activates 2 Green Spaces |
10.218 Either: Partisan/Green Corps Removal
Assuming a side currently has at least 2 Replacement Steps (RS) on the Game Track, roll a die:
Partisan/Green Corps Removal
| Roll | Result |
|---|---|
| 1-2 | Remove any two Partisan/Green corps units. Roll again: 1-2: No Replacement Step (RS) Cost; 3-5: Side subtracts 1 RS; 6: Side subtracts 2 RS |
| 3-5 | Same as above – except remove only 1 corps |
| 6 | No Effect |
NOTE: Side subtracting the Replacement Steps does so immediately.
10.219 Optional Rule: RED Only - Naval Operation
This allows RED to sortie their fleet in the Baltic Sea (see rule 16.73).
10.22 Activation Restrictions
10.221 WHITE: Multiple space activation in one region
In order to reflect WHITE's command coordination challenges between their various armies, WHITE activates spaces with the following restriction: WHITE may not activate more than one space in a region, except for one designated (by WHITE) region. This designation may change by round. This restriction is ignored (for the remainder of the game) if WHITE is able to trace a line of controlled and connected spaces from Orsk (504) to Yekaterinodar (310).
10.222 WHITE Insurrection Armies (IAs)
If a space is activated for combat that contains a WHITE Insurrection Army, other spaces may only be activated for combat by if they also contain IAs.
10.223 Factions: General
A side may not activate any space containing a newly controlled Faction during the first Round directly after the Political Phase or in the Action Round of gaining control unless control is achieved by becoming a Protector.
10.224 Factions: Other Restrictions
Contained in Faction Specific rules: Britain and USA require WHITE AC#1, some Factions may not be activated along with other spaces not containing their forces for a round (CP, CL – after WHITE AC#1, Poland and Ukraine) and Makhno encounters a die roll when activating.
10.255 Green
Only if a side selects Special Action 10.217 may it activate Green spaces.
10.3 Stacking
10.31 Spaces
Up to 3 friendly units (no more than two of which may be armies) may occupy a space at the end of movement (which means during movement, spaces may hold more than 3 units – just that no space may contain more than 3 units at the end of movement).
10.32 Boxes
The limit for boxes is 5 (no more than three of which may be armies).
Leaders, the IGSR Train and informational markers are not counted against either the space or box limits.
10.33 When
Stacking requirements must be met after movement (meaning that stacking can be violated during movement), combat retreat and advance. Any units eliminated for being over-stacked are eliminated as if OOS (see rule 13.4).
10.4 Seasonal Movement Effect
10.41 Winter
During winter, forces that would be normally considered to be in Full Supply are deemed to be in Limited Supply. These forces move one less space than Full Supply.
10.42 Spring (MUD)
During Spring 1 turns, forces may move only 1 space UNLESS movingly exclusively along spaces connected by rail. During Spring 2 turns, a die roll of 1 or 2 results in MUD and these restrictions are again in effect.
10.5 Supply State Movement Effects
Limited Supply forces move 1 less space than their stated movement allowance. Out of Supply (OOS) forces may move only 1 space per Action Round.
10.6 Neutral Faction Regions
A side may not move thru non-controlled (neutral) Faction regions.
10.7 One Space Minimum
Forces may always move 1 space.
11. Combat
Basically, friendly units fire at enemy units. If an army is present, a side inflicts losses on the enemy utilizing the army table. No army present? Use the corps table. Leaders allow defenders to withdraw, reinforce or counterattack and attackers to pursue, exploit, conduct multi-space attacks, and in some cases achieve Cavalry Combat Surprise. A differential in combat modifiers generated from a number of items (elites, terrain, leaders, Action Cards, tanks & air) produce actual combat die roll modifiers. Fire is conducted simultaneously, unless an attacker has "combat surprise".
Losing defending stacks retreat, although they may cancel retreat under some conditions.
11.1 General Rules
A side may only initiate combat fire from a space they have activated for combat.
Voluntary attacks: Any units in an activated space may participate in combat. Participating units take losses and/or forces may be eligible for advance after combat. A side may "call off" any attack from an activated space (placing the combat activation marker does not mean that an attack must proceed) prior to actually specifying the exact forces and spaces involved and declaring that they are ready to roll dice to resolve that combat. By calling off the attack, that side has effectively forfeited one activation.
One defending space once per round: Each combat involves only 1 defending space and at least 1 activated attacking adjacent space. Each defending space may only be attacked once per round.
Split attacks, but not split combat strength: Units in the same activated space may attack different spaces. Combat strength of a unit may not be divided.
Multi-space attacks only allowed with leaders: A space may only be attacked from more than one space if the attacker has a leader in one of the attacking spaces and at least one army from that leader space is participating in the attack. Leaders do not need to roll a die to use this capability: it is an automatic basic leader capability.
Resolved after movement: Combat is resolved after all movement of a particular side is completed.
11.11 Combat Sequence
- Declaration: The active side declares which units in which space(s) are attacking an enemy space (the object of the attack is the target space). This declaration is made one target space at a time and the combat is resolved prior to proceeding to the next declaration.
- Leadership (in each case the leader must successfully roll for the capability):
- 2.1 Withdrawal: The defender may retreat forces prior to combat if they include a leader. See rule 15.11.
- 2.2 Pursuit: Forces with a leader may attempt to pursue a withdrawing force. See rule 15.12.
- 2.3 Reinforce: Adjacent (to the target space) defending forces may attempt to reinforce prior to combat. See rule 15.13.
- Determine Combat Die Roll Modifiers: Attacker declares use of an Initiative Card (rule 11.2). Defender declares use of an Initiative Card (rule 11.2). Calculate Combat Modifiers (rule 11.3), which produce actual combat DIE ROLL modifiers.
- Conduct Combat Fire: Resolve fire simultaneously, unless combat surprise achieved (rule 11.41).
- Combat Resolution:
- 5.1 Determine Winner of Combat: See rule 11.4.
- 5.2 Defender Losses: See rule 11.5
- 5.3 Attacker Losses: See rule 11.5
5.5 Attacker Advance: See rule 11.7. Additionally, a leader with accompanying cavalry may advance after combat and diverge from the defenders path of retreat (Exploitation).
5.6 Counterattack: If the defender inflicted more LFs than it suffered, a leader may attempt to counterattack. See rule 15.14.
11.2 Initiative Cards Combat Capabilities
Initiative Cards (among each player's Action Cards) may affect combat. Follow the instructions on the card and apply any Combat Modifiers.
11.21 Restrictions
Initiative Cards (ICs) may not be played Turn 1 or by a side that is subject to In-Fighting. Additionally, a side may only play one IC a Round.
11.3 Combat Modifiers & Column Shifts
11.31 Combat Modifiers (CMs)
The differential between each side's combat modifiers (CMs) generates the actual combat DIE ROLL modifier to combat die rolls.
Usually, the only combat modifier will be for the side with the most Elite steps (which produces a simple +1 combat DIE ROLL modifier). The additional CMs exist because it is important to have a design that is capable of representing a wide range of combat outcomes.
CMs are generated by leaders reinforcing or failing a withdrawal attempt, Action Cards, types/quality of units and terrain. It is the combination of both sides' CMs that produces the actual combat die roll modifier for each side on the appropriate Army or Corps Combat Chart. The side with the higher CM total receives a benefit and the lower side may sustain a penalty.
Combat Modifiers
| Item | CM | Comment |
|---|---|---|
| Failed withdrawal | +1 | +1 to attacking side |
| Successfully reinforces | +1 | +1 for defending side |
| Initiative Cards | varies | As indicated on the cards |
| Elite Steps | +1 | the side with the most elite steps (armies count as 1, corps count as ½…reduced units are ½ strength their full value) |
| Mech/Tanks | +1 | the side with the most Mech/Tank steps |
| Air | +1 | the side with the most Air steps |
| Terrain: DEF on VCs | +2 | To defender for combat in selected Victory Cities marked on map with a +2 |
| Terrain: Forests |
NOTE: Game Map Key contains terrain effects.
Players follow these steps when calculating the actual combat DIE ROLL modifiers to be applied:
Generating actual die roll modifiers for combat
- Step 1: Add all CMs for each side
- Step 2: Subtract the lower total (Lower Side = LS) from the higher total (Higher Side = HS)
- Step 3: Consult this table:
- If result is 0 = no combat die roll modifiers
- If result is 1 = higher side (HS) +1 to their roll
- If result is 2 = HS +1 OR HS may give LS –1
- If result is 3 or more = HS +1, LS –1
11.32 Column Shifts
Generating column shifts for combat:
Column Shifts
| Condition | Shift |
|---|---|
| Defender in Marsh, Mountain, River, Desert | 1AL |
| Attacking using river crossings (see note) | 1AL |
| Attacking while in Limited Supply | 1AL |
| Attacking Fortress | 1AL |
| Defending Fortress | 1DR |
| Defending while Out of Supply (OOS) | 1DL |
| Attacking while Out of Supply (OOS) | 2AL |
Key: 1AL/1DL/1DR (shift attacker/defender one column to the left or right). All column shifts cumulative, except only one negative shift may occur from terrain.
Note: Negative column shifts occurs if half or more of the involved steps (corps count as a half) share that negative condition.
Maximum: Either side may be subjected to a maximum shift of 2AL and/or 2DL (for one side) in any one combat.
11.33 Supply State Check
The supply state of each unit involved in a combat is checked at the instant before combat.
11.4 Combat Resolution
Each side fires simultaneously, unless Combat Surprise is achieved (see rule 11.41). Each side rolls a die, applying the combat DIE ROLL modifiers, representing its fire. Each player consults the appropriate column (totals their combat strength) (shifting left or right if appropriate – rule 11.32) on either the Corps Combat Table (if only corps are present in firing side) or Army Combat Table (if at least one army is present in firing side).
The result of the fire is the number of Loss Factors (LFs) that must be satisfied by the opposing side (either by reducing (flipping) or eliminating units).
The side inflicting the higher LF is the winner of the combat OR the side avoiding elimination in the combat (if one side was eliminated). If LF's are tied and the defender is not eliminated, the defender wins the combat.
11.41 Combat Surprise
There are three circumstances under which an attacking side fires first in combat: Tank/Mechanized Surprise, Initiative Card Surprise or Cavalry Surprise. "Achieving combat surprise" results in firing prior to the enemy's fire (the enemy takes losses first, then returns fire). The attacker declares their intent and attempts to achieve combat surprise. Only one of these methods may be attempted in any one combat.
11.411 Tank/Mechanized Combat Surprise
If an attacker has more tank/mechanized steps that will participate in the combat than the defender, then the attacker declares their intent, rolls a die, and consults:
Tank/Mechanized Surprise Attempt
| Roll | Result |
|---|---|
| 1-2 | Surprise achieved – attacker fires first |
| 3 | Surprise achieved – eliminate tank/mech step prior to firing |
| 4 | Eliminate 1 tank/mechanized unit – no surprise |
| 5-6 | No surprise |
-1 to die roll if the attempting side has more Air steps participating than the enemy side.
11.412 Initiative Card Combat Surprise
Both RED and WHITE have various Initiative Cards (among their Action Cards) that allows an attacker to achieve combat surprise (see those ACs for specific details). The attacker simply plays the AC as an event, declares combat surprise and fires first.
11.413 Cavalry Combat Surprise
An attacker may attempt to achieve Cavalry Combat Surprise if four conditions are met:
- Weather: No Mud
- Terrain: Defending space not swamp, mountain, fortress or attacker subject to river crossing penalty
- Cavalry: Attacker has more cavalry steps (one step must be a cav army) than defender
- Leader: Krasnov, Wrangel, Budyenny, Ghai-Khan or Makhno is participating in the attack. A leader may attempt only once a game turn and a side may only attempt once an Action Round.
Cavalry Combat Surprise Attempt
| Roll | Result |
|---|---|
| 1-2 | Surprise achieved – attacker fires first |
| 3-4 | No surprise |
| 5 | No surprise and lose a cavalry step prior to combat fire |
| 6 | Defender fires first |
-1 to die roll if Wrangel or Budyenny attempting. -1 to die roll if the attempting side has more Air steps participating than the enemy side.
11.5 Taking Losses
LFs are satisfied by reducing (flipping) or eliminating units. Each unit reduced or eliminated satisfies the amount of LFs indicated on their counter. For example, the Konarmii 1st Cavalry Army detailed in rule 3.22 has a LF of 3. If the WHITE generated a LF of 3 with its combat fire, RED could either flip the unit, if it is currently at full strength, or eliminate the unit, if already flipped (or reduced) and place a cavalry corps from the Strategic Reserve. Players must satisfy all of the LF registered on their side, if possible. Occasionally, LFs that cannot be satisfied are ignored. For example, if the "full strength" Konarmii 1 Cavalry Army is alone and "suffers" 5 LFs of enemy fire, 2 LFs would be ignored since 6 LFs are require to reduce that unit from its full side to its reduced side and then to a replacing corps.
The DEFENDER always takes losses first.
11.51 Army Losses
The general rule of thumb is that corps replace the same type of armies (inf, cav, elite) from their camp (WHITE), Faction or side. A separate table is provided below for each side. Whenever an army is eliminated, place a full strength corps (use reduced strength corps if no full strength available) from the Strategic Reserve box to where the army was eliminated. This corps may suffer additional required losses if needed. If corps are not available, the army is permanently eliminated from the game (Exception; see Makhno specific rule - 8.320).
11.511 WHITE Guidelines
White Corps Replacing Armies
| Army | Corps that may replace |
|---|---|
| White Finn | White Finn c1, c2, c3 |
| North Army, NW 2, Kronstadt IA, Karelin IA, Volunteer 3, Res NW 1, Volunteer 1, 2 | Ru c1-8 (North Army, NW 2, Kronstadt IA, Karelin IA, Volunteer 3, Res NW 1); Ru Elite 1-3, Ru c1-8 (Volunteer 1, 2) |
| VDG 1, 2 | VDG c1-2 |
| Volunteer Cav, Shkuro Wolves, Cossack Cav | Ru Cav 1-2, Cossack Cav c1 |
| Siberian 1-2 | Siberian Elite c1-2, Siberian c1-6 |
| Siberian 3, Army West, Izhevsk IA | Siberian c1-6 |
| Siberian 4, Orenburg 1-2, Antonov IA 1&2 | Siberian Cos c1-3 |
| Si Cos Cav 1 | Siberian Cos Cav c1-2 |
| Don North | Don Cos c1-4, Don Cos Corps Elite (CE) 1 |
| Don Central, Don South | Don Cos c1-4 |
11.512 RED Guidelines
RED Corps Replacing Armies
| Army | Corps that may replace |
|---|---|
| Elite RED Inf Army | RED inf corps: elite or regular |
| RED Inf Army, Res or IA | RED inf corps |
| Elite RED Cav Army | RED cav corps: elite or regular |
| RED Cav Army | RED cav corps |
| Cheka Res | Cheka 1-3 |
11.513 Faction Guidelines
Elite or regular corps may replace Elite Army. Cavalry or infantry corps may replace Cavalry armies.
11.52 Leader Losses
If all of a leader's units are eliminated, roll a die. If the die roll is higher than their leadership rating, the leader is permanently eliminated from the game (this does not affect In-Fighting). Additionally, the side suffers a VP loss equal to the leader rating of RED or WHITE leaders (rule 15.51). If the leader survives, retreat the leader two spaces (following usual retreat priorities).
11.6 Retreats
If an attacker wins the combat, the defender is required to retreat unless the defender exercises the option to cancel retreat. Attackers do not retreat.
11.61 Length of Retreat
The defender retreats 1 space if the difference in LFs is 1 and 2 spaces if the difference in LFs is 2 or more.
11.62 Canceling Retreat
At least one defending unit must remain (after taking the additional step loss) to cancel retreat - otherwise retreat may not be cancelled. A defender may choose to attempt to cancel retreat if either condition below applies (but the defender may only choose either the "terrain" or the "unit" condition).
11.621 Terrain Condition
Defending units in Mountains, Swamps or Fortresses may cancel retreat depending on the table below. Roll a die. Consult this table:
Canceling Retreat: Terrain Condition
| Roll | Result |
|---|---|
| 1-4 | Defender may cancel by expending an extra step of losses |
| 5-6 | Defender must retreat and loses one additional step anyway |
Modifiers: -1 if Elite unit present, +1 if currently behind in VCs, +1 if side is currently subject to In-Fighting.
11.622 Unit Condition (units marked with NR)
Certain units may cancel retreat regardless of terrain. These units have NR indicated on their counter. If these units cancel retreat (by rolling a die equal to or less than the high number (3 or 4) indicated on the counter), the defender takes an additional step loss from any unit present in the stack.
11.63 Elimination Due to a Retreat
Forces which cannot retreat the required number of required spaces are eliminated. Armies eliminated in this manner are considered to have been eliminated Out-of-Supply (OOS) and RED or WHITE leaders suffer VP penalties (see rule 15.5).
11.64 Retreat Restrictions
The defender retreats their forces per these restrictions:
- May not enter a space with enemy units
- May not retreat back into the original defending space
- May retreat thru spaces in violation of stacking, but if forced to end in a space that violates stacking, the excess forces are eliminated (enemy choice).
Forces from one stack may retreat to different spaces.
Retreat priority:
First, a supplied controlled adjacent space. Second, a controlled adjacent space. Third, enemy controlled adjacent space(s) (paying one additional step (for the entire stack) if the retreating force ends in such a space). If a force ends in an enemy space(s), the space(s) converts to friendly control (forces always control the space they are in), but they do not convert space(s) they retreat thru.
11.65 Attacking Previously Retreated Units
If defending units retreat (retreating leaders are not affected) into a space that is attacked later in the Round, they do not add any defensive fire and are eliminated if the defender suffers any LFs.
11.7 Advance
Any remaining attacking forces (full or reduced if a unit) may advance if the defending units retreat or are completely eliminated (whether the attacker won or lost the combat).
11.71 Length of Advance
If the defending force was eliminated or retreats one space, any attacking units (leaders stacked with these attacking units) may advance into the defender's space (up to stacking limits). If the defender force retreats 2 spaces, any attacking units may follow the path of the retreating units. Exploitation may be attempted in either case, and in the case of a one space retreat, may advance up to two spaces (see rule 15.15).
MUD: During Mud turns, the length of advance is limited to 1 space in all cases.
11.72 Exploitation
Leaders and their exploiting units may utilize exploitation to follow a different path from retreating units. See rule 15.15.
11.73 Terrain and Advance
All advancing units must stop when entering a swamp, mountain or fortress.
11.8 Seasonal Combat Effects
11.81 Winter
All units that would normally be in full supply are in limited supply during the winter turns. Attacking units in limited supply suffer a negative column shift (one left).
11.82 Spring
If MUD occurs (always in Spring 1, a 1-2 die roll for Spring 2), advance after combat is limited to 1 space, regardless of the length of retreat. Leader Exploitation is prevented during MUD.
11.9 Supply State Combat Effects
Limited Supply attacking units suffer a one column shift to the left (example: 5 column becomes the 4 column when firing on either Combat Table).
Out of Supply (OOS) attacking units suffer a two column shift to the left, while defending units suffer a one column shift to the left.
In the case of a multi-space attack, the penalty applies if half or more of the units suffer the adverse supply condition.
12. Strategic Redeployment
12.1 General Rules
Players may use an AC for Strategic Redeployment (SR). They may not take this option in sequential Rounds (example: if a player "SRs" Round 1, they may not "SR" Round 2). By playing an AC as Strategic Redeployment, a player may move a number of forces (one at a time) according to the Card Value and table below:
Strategic Redeployment and CV
| Card Value | Maximum and type of forces for strategic redeployment |
|---|---|
| 2 | 2 corps |
| 3 | 3 corps or 1 leader or 1 army |
| 4 | 4 corps or 1 leader and army |
| 5 | 5 corps or 1 leader, army and corps |
12.2 On-Map SR
Forces may move an unlimited number of RAIL connected, controlled and supplied spaces.
12.3 Off-Map SR – The Strategic Reserve
Corps in the Strategic Reserve Box are "off map" units that can provided needed reinforcements. Additionally, they replace eliminated armies.
12.31 Into the Strategic Reserve box
Corps may SR into Strategic Reserve if they are in supply. Simply remove the corps and place in the Strategic Reserve. Armies and leaders may not enter the Strategic Reserve.
12.32 Out of the Strategic Reserve box – RED
Corps may SR out of the Strategic Reserve onto a controlled and supplied home region VC or on any space with a supplied RED unit as long as that space is connected via RAIL connections thru friendly spaces to a friendly, supplied Moskva. RED Fin corps may not be SR'd to Finland until the border restrictions (rule 16.45) are lifted.
12.33 Out of the Strategic Reserve box – WHITE
WHITE corps, depending on its Camp affiliation, may SR in the following ways:
Russian Army: Corps may SR out of the Strategic Reserve onto a controlled and supplied home region VC, or on any space with a supplied WHITE unit, as long as that space is connected via friendly rail spaces to a friendly Omsk (514), Yekaterinodar (310), Sevastopol (301), or any friendly port in the Baltics or Finland (if WHITE plays AC#43).
Don: may only SR to a controlled and supplied space in the Don or Kuban Region.
Siberian or Siberian Cossack: may only SR to a controlled and supplied space in Urals North or Urals Central.
Von der Goltz: may only SR into East Prussia.
White Finland: may only SR into Helsinki.
12.34 Out of the Strategic Reserve box – Factions
Faction corps may SR out of the Strategic Reserve onto controlled and supplied home region Victory Cities.
13. Supply/Attrition
ToC supply rules are similar to most strategic level games, hopefully somewhat simpler, but with enough detail to force players to grapple with the same strategic supply issues as RCW commanders. Forces must trace supply through controlled spaces to a friendly supply source (indicated on the map). A number of units cannot place control markers. Out of Supply (OOS) units can still move (1 space).
13.1 General Rules
Forces possess one of three supply states: Full, Limited and Out of Supply (OOS):
Full Supply (FS): To be in Full Supply, forces must trace supply thru connected, controlled and supplied spaces to a friendly supply source (indicated on the map).
Limited Supply (LS): To be in Limited Supply, forces either occupy a space in the Southeast region, or, during the winter, would otherwise be considered to be in Full Supply.
Out of Supply (OOS): Any force not in FS or LS.
13.2 Supply Sources
13.21 RED
Any controlled space marked with a RED supply symbol – see game map.
13.22 WHITE
Any controlled space marked with a WHITE supply symbol – see game map.
13.23 Factions - General
Any VC in their home territory or their controlling side's supply sources. As long as a Faction's forces can trace to any VC in their home territory, they are in full supply (except in winter – when they become LS like any other force). Makhno and West Ukraine forces are in supply if they are anywhere within their own region.
13.24 Factions – Specific: Attrition Supply
The Central Powers, Czech Legion and Makhno forces are always considered in supply for Attrition purposes only.
13.25 Insurrection Armies (IAs): Attrition Supply
IAs are always considered in supply for Attrition purposes only.
13.3 Limited Supply (LS) Effects
Forces in Limited Supply move one less space and units suffer a negative column shift when attacking.
13.4 Out of Supply (OOS) Effects
Activation: Activating an OOS stack costs 1 Activation for each leader or unit.
1 Space Movement: OOS forces move only 1 space.
Negative Column Shift: OOS units suffer negative shift(s) when attacking (2) or defending (1).
No SR: OOS forces may not SR nor may a unit be SR'd to an OOS space.
Elimination: OOS forces are eliminated during the Attrition Step of the Logistics Phase.
13.5 Control Markers
Control markers are placed to indicate control of a space. At the beginning of the game, all spaces within a side's home region are considered friendly, unless controlled by the enemy. When a supplied unit enters a space, place a control marker, subject to the restrictions in 13.51.
13.51 Forces that do not place control markers
- OOS Units
- Green Units
- Insurrection Armies (IAs)
- Leaders
- Partisans
- Garrison corps
All of these units, and leaders by themselves, do however control the space they occupy.
13.6 Attrition Step of Logistics Phase
Attrition is conducted simultaneously. Therefore, elimination of an OOS enemy unit cannot open a supply line to a friendly OOS unit. Ignore attrition for the Czech Legion and Central Powers units while they are non-controlled Factions.
13.61 Units
OOS corps are placed in the Dead Box. OOS armies are eliminated and placed on the turn track 3 turns later (when they may be rebuilt). Additionally, take a corps from the reserve for each OOS eliminated army and place in the Dead Box. If no corps exist, the army is permanently eliminated.
13.62 Spaces
Any friendly controlled space, that if it contained a force, it would be eliminated for OOS, becomes enemy controlled.
13.63 Leaders
Although a leader is not a unit, a leader is permanently removed from the game if it is OOS, with the resulting VP penalty for RED or WHITE leaders (see rule 15.5).
14. Replacements/Reinforcements
Two important uses of Action Cards include generating reinforcements (new units) and replacements (a way to repair/rebuild units). Replacement Steps (RS) may also be utilized to purchase Influence Points (utilized during the Political Phase) and some leaders.
One important difference from other strategic games is that repairing and rebuilding units is geographically restricted (Replacement Distribution Restriction); a player can't spend all of their RSs on replacements in one region unless they play a Concentration Action Card during their turn.
Additionally, both sides are subject to constraints, and penalties. However, either side can obtain bonuses thru control of key locations and selection of particular Political Cards (during the Political Phase).
14.1 General Rules
14.11 Reinforcements
Each side has a number of ACs (when played as an event) that generate additional forces, above those that begin the game on the map or in the Strategic Reserve. These ACs are removed from play when utilized as events (if an asterisk precedes the event name).
General Placement: Follow the instructions on each card regarding force placement. Forces placed in a specific location may NOT be placed if the location is either: OOS, enemy controlled or would result in over-stacking (if the reinforcing unit is a corps, it may be placed in the SR - if an army, it may be placed in the Dead Box). Exceptions regarding placement in a OOS or enemy controlled space include the AC#4 ("Switch Sides"), AC#6 ("Green Uprising"), AC#29 ("Partisans") and insurrection armies (per the particular Action Cards).
RED Army Reinforcements: Reinforcing RED armies enter flipped unless a leader is present in the reinforcing space. This restriction is permanently removed once RED controls all its home region VCs or it is 1920.
Sequential Round Restriction: Reinforcement cards may not be played in sequential rounds.
2 per Turn Restriction: Only 2 reinforcement cards (any card played as an event that generates reinforcements) may be played per turn per side. Faction reinforcement cards do NOT count towards this limit.
14.12 Replacements
Replacement Steps (RS): The card value of the AC generates that number of Replacement Steps (RS) for RED or WHITE units. In order to generate replacements for Factions, a Faction Replacement AC must be played.
Each corps step costs ½ replacement step (RS) to rebuild or repair, while each army step costs 1 RS each. Units marked with a dot in the upper right hand corner may not be rebuilt or repaired.
Sequential Round Restriction: Replacement cards may not be played in sequential rounds.
2 per Turn Restriction: Only 2 replacement cards may be played per turn per side. Faction replacement cards do NOT count towards this limit. Rule 14.22 can result in RED being further limited to playing only one card.
Use or lose: Replacements Steps cannot be saved from one turn to the next.
14.2 Blocked/Constrained Replacements
Before spending any Replacement Steps (RSs), verify that RSs are not "blocked". If not "blocked", then verify if Replacement Steps are constrained. Finally, apply any bonuses or penalties:
14.21 Blocked
RSs may not be spent if:
RED: Petrograd (709) OR Moskva (801) is WHITE controlled.
WHITE: Sevastopol (301) AND Omsk (514) are RED controlled.
Factions: Republic or Country: If a Faction's home region VC is enemy controlled (in the case of Poland, Warsaw and the in the case of Ukraine, Kyiv), the Faction controlling side may not spend Faction RS.
Factions: Czech Legion (CL), Britain, USA: If the Sevastopol and Omsk is enemy controlled, the Faction controlling side may not spend Faction RS on CL, Britain or USA.
14.22 Constrained
RSs are constrained by:
RED: Tula: RED may only play 1 replacement card per turn if Tula (817) is enemy controlled.
WHITE: RSs spent on Replacements are limited by number of WHITE Controlled VCs: WHITE may spend a number of Replacement Steps (RSs) on replacements equal to their home region controlled Victory Cities plus a WHITE controlled Voronezh and Tsaritsyn. WHITE begins the game with 6 Home Region VCs (1 in Don (one VC in Don begins under RED Control), 2 in Kuban, 2 in Urals Central and 1 in Urals North). If WHITE can recapture Migulinskaya (333), and gain control of Voronezh (819) and Tsaritsyn (601), they could spend a maximum of 9 RSs on replacements in a turn.
14.3 Replacement Bonuses and Penalties
14.31 Bonuses
BOTH:
Political Cards: Selected PCs provide free RSs for either side or their controlled Factions (limit of a combined 2 steps between a side and their controlled Factions).
Ukraine and Polish Replacement Steps & Bonus: Ukraine and Poland receive 1 Faction Replacement Step (RS) for each controlled VC. Additionally, if a side declared war on Ukraine, Ukraine receives an additional Faction RS per controlled VC. In the case of Poland, Poland receives an additional Faction RS per controlled VC if there is an enemy unit within Poland.
Finally, a side receives 1 RS (for use with RED or WHITE forces) for each controlled Ukrainian VC.
Victory Cities: Capture of enemy home region VC: 1 RS to the capturing side if the enemy controlled VC is captured during the Action Phase. Any one VC can only generate one such RS a turn (a designer clarification notes: capturing a VC, "losing control of it", and recapturing results in only 1 RS for the game turn).
Central Powers: WHITE Control of the CP generates 2 RS. RED Control of the CP results in WHITE subtracting 2 RS from their RS total at the beginning of the Logistics Phase.
RED
Turkistan: 1 free RS for RED if Turkistan is RED controlled.
Russian National Levy: See Polish Faction rules.
WHITE
Western Allies Bonus: WHITE receives 1 RS per each of the USA, France and Britain factions controlled during the Logistics Phase (so 3 RS maximum for controlling all three). France is CP restricted, so, consequently, the French RS bonus does not occur until after the CP withdraws.
Tsar: If the Tsar is "Rescued" on Turn 2 (rule 16.22), WHITE may roll a die starting on Turn 2 and each subsequent turn. On a 1-4, WHITE receives 1 free Replacement Step. If this RS option is not selected, WHITE receives a positive modifier on the WHITE Influence Card. The selection may change each turn.
AC#20: WHITE control of Britain provides 1 RS for use with the WHITE BAF Camp.
14.32 Penalties
Both: Logistic Inefficiencies: See rule 14.8.
In-Fighting: WHITE RSs may be further penalized by the One Russia Table (see 16.513) or a Siberian In-Fighting Chit.
14.4 Rebuilding Eliminated Units
14.41 Army Placement
RED: Any home region controlled VC.
WHITE: Any home region controlled VC – with these "Camp restrictions":
- BAF: Rebuilt in East Prussia. Exceptions: WHITE Finn 1 & 2 are rebuilt in any controlled Finnish port. The North Army may be rebuilt in any Baltic port, East Prussia, Murmansk or Archangel.
- Don Cossacks and Russian Army: Don or Kuban VC
- Siberian Army and Siberian Cossacks: Urals North or Urals Central VC.
Non Major Power Factions: Home region supplied VC, unless specified in Faction specific rules.
Major Power Factions: Czech Legion – a controlled VC or any controlled VC in Urals North or Urals Central. Great Britain – Slav Britain Legion at Archangelsk or Murmansk, RBEF 1&2 at they port where they arrived, USA – Omsk.
14.42 Corps Placement
ALL rebuilt Corps are placed in the Strategic Reserve.
14.43 Non "rebuild-able"
Units with a dot in the upper right hand corner of their counter may not be rebuilt.
14.44 Air Raids
Enemy air units may prevent taking replacements in a desired space (rule 16.61).
14.5 Repairing Units
Units must be in supply to be repaired ("flipped" from their reduced side to their full side). They may be in any region.
Non "repair-able" Units: Units with a dot in the upper right hand corner of their counter may not be repaired.
Air Raids: see rule 16.61 (an adjacent enemy air unit may prevent taking replacements in a desired space).
14.6 Other RS purchases
14.61 Leaders
Leaders (marked with a "P" on their counter) may be purchased (limit of 1 per turn) at a cost of their leadership rating on their counter (example: leader with a 2 rating costs 2). Purchased leaders are placed in a controlled VC subject to army Faction or Camp restrictions – see rule 14.41.
14.62 Influence Points
IPs are used to gain control of Factions (see rule 8.13). IPs may be purchased. Declare number of IPs (1 per Replacement Step spent) a side wishes to purchase. Consult this table:
Attempted Influence Point (IP) Purchase
| Roll | Result |
|---|---|
| 1 | All RSs wasted and IPs not generated |
| 2 | Receive 1 less IP than RSs spent |
| 3-5 | Receive IPs equal to RSs spent |
| 6 | Receive IPs equal to RSs spent +1 (a free IP) |
Modifiers: WHITE: +1 if Czar alive, -1 if Denikin on map. BOTH: +1/-1 if leading/trailing in VCs, -1 if In-Fighting in effect (for the side attempting IP purchase).
IPs generated are then immediately secretly placed on any faction (limit 2 per faction) and revealed after the RED Logistical Phase.
14.621 Optional Vinny Rule
Ignore the 2 per faction limit and/or the table in 14.62 – place IPs equal to RSs spent on any desired Faction(s).
14.7 Replacement Distribution Restriction (RDR)
Why the Replacement Distribution Restriction? It started with a desire to realistically reflect the inability of WHITE to concentrate their resources; WHITE lacked the ability to quickly shift resources between the northwest, southern and eastern fronts. RED also had their challenges, but, as with any central position, much better ability to "get there first-est with the most-est". Once the designer concluded a design mechanism was needed to constrain WHITE regarding their replacements, it was decided, for simplicity and play balance, to utilize the same approach with RED. The RDR also helps to somewhat address the "perfect knowledge" issue in any strategic game.
14.71 RED and WHITE RDR Restrictions
WHITE spends Replacement Steps (RS) first. Each side must abide by the following Replacement Distribution Restrictions:
Replacement Distribution Restrictions (RDR)
| # RS | Distribution Requirement |
|---|---|
| 2 | 1 RS in two different regions |
| 3 | 2 RS in one region, 1 RS in another region or 1 in 3 regions |
| 4 | 2 RS in two regions or 1 RS in four regions |
| 5 | 2 RS in two regions, 1 RS in a third region |
| 6 | 2 RS in three regions |
| 7 | 3 RS in one region, 2 RS in two regions |
| 8 | 3 RS in two regions, 2 RS in one region |
| 9 or more | 4 RS one region, 3 RS one region, 2 RS one region then place freely in those regions |
Notes:
- The Strategic Reserve can be utilized to satisfy the full or partial requirements of one or more regions
- Moskva can be utilized by RED to satisfy one region by itself without counting against the Central region.
- Play of Concentration AC allows a side to ignore the RDR
- Faction Replacements are not subject to the RDR
- Any RSs that cannot be spent per the guidelines are lost or may be spent on IP or Leader purchase
- British Bonus for BAF RS not subject to RDR
14.72 Factions not impacted by the RDR
Faction Replacement Steps are not subject to the RDR.
14.73 Concentration ACs negate RDR
Each side has Concentration ACs (example: WHITE AC#7) that allow a side to completely ignore the RDR.
14.8 Logistical Inefficiencies
14.81 East Russia (528) or Urals North East (527)
If Semenov or Japanese Army in play (on map):
Logistical Inefficiencies
| Roll | Result |
|---|---|
| 1 | Subtract 2 RS from WHITE if Semenov in play |
| 2 | Subtract 1 RS from WHITE if Semenov in play |
| 3 | No effect |
| 4 | Subtract 1 RS from both WHITE and RED if Japanese Army in play |
| 5 | Subtract 2 RS from RED if Japanese Army in play |
| 6 | Remove both units from play |
14.82 Death of Trotsky
If Trotsky is in play, ignore this section. If he has been removed from the game, roll a die: 1-2: Subtract 2 RS from RED, 3-4: Subtract 1 RS, 5-6: No Effect.
15. Leaders
A Russian Civil War game could not be made without leaders – too many great/infamous characters involved in the making of this history. Leader counters represent more than just the personality; they represent the associated organization and concentrated resources to conduct campaigns.
The other primary reason leaders were added was to enable players to exercise an amount of operational flexibility required in a fluid strategic game.
15.1 Leader Capabilities
All leaders have these basic capabilities:
15.11 Withdrawal
A stack may retreat to a friendly adjacent supplied space (or spaces) if combat is declared against the space it occupies. All units must retreat with the leader and may retreat to different adjacent spaces. A failed withdrawal attempt by the defender produces a +1 CM for the attacker. Additionally, a leader without units may attempt withdrawal if an enemy unit attempts to enter its space. A failed withdrawal in this case may costs VPs due to leader elimination. (see rule 15.5)
15.12 Pursuit
If a defending stack withdraws, a leader and at least one unit from the attacking stack(s) may enter the space (not all units in the leader's space are required). If the leader successfully pursues, and moves into the space the defender retreated from, mark the attacker's space with a combat marker. Combat may then be initiated against any adjacent enemy space(s). This process (withdrawal and pursuit) may continue as long as an enemy stack successfully withdraws and the attacking stack successfully pursues.
15.13 Reinforce
If an enemy stack attacks an adjacent space, a stack, which has not previously participated in withdrawal or reinforcement during the active player's round, may reinforce the attacked space up to the stacking limit. If successfully reinforcing, place the leader and at least one unit in the target space. Then, conduct combat. This also produces a +1 CM for the defender.
15.14 Counterattack
If a defending stack inflicts more losses than an attacker, a defending stack may counter attack (in one combined attack if attacker utilized multi-space attack). In this combat, there is no advance or retreat. Only those units that participated in the attack are subject to counterattack losses. No terrain combat shifts or combat modifiers are generated in a counterattack.
15.15 Exploitation
Exploitation occurs if:
- The attacker "won" the combat
- at least one cavalry unit participated
- it is not a MUD turn
- a defender retreated, and
- a leader is present (in the case of multi-space attacks the cavalry unit(s) and the leader do not need to be in the same space)
...then the leader may attempt exploitation along with any participating cavalry.
The first space entered must be the attacked defender's space. After that, the cavalry unit(s) and the leader (attacker's option) may advance into an adjacent space (Exploitation) that does not have a Combat marker regardless of whether the required retreat was one or two spaces, while abiding by advance after combat terrain restrictions on (11.73).
15.16 Multi-space Attacks
In order to attack an enemy space from more than one adjacent space, a side must have a leader present in at least one of the attacking spaces, and in that space there must be an army present, and unit(s) from that space must participate in the attack.
15.17 Special Capabilities
A number of leaders are other unique capabilities indicated in the rules including Cavalry Surprise (rule 11.4), movement (15.6), Special Actions (10.21) and add/subtract die roll modifiers to various tables.
15.2 Use of Leader Capabilities
15.21 Multi-space attacks
No die roll is required; only the presence of an army in the space with the leader and at least one unit from that same space must participate in the attack.
15.22 Other Basic Capabilities
In order to use any of the other capabilities (Withdrawal, Pursuit, Reinforce, Counterattack and Exploitation), a side:
- Must have an army present in the leader's space (Exception: Leader without units may attempt withdrawal).
- Declares an irreversible intention to use the capability and rolls a die: The resulting die roll is less than or equal to the leadership rating.
15.3 Leader Command Control
15.31 Armies trigger capabilities
RED & WHITE: At least 1 RED or WHITE Army must be stacked with the leader for that leader to utilize their capabilities. A controlled Faction army does not trigger the ability and its presence does not inhibit the capability.
Factions: At least 1 Faction Army must be stacked with the Faction's leader to utilize their capabilities. A controlling side's army does not trigger the ability and its presence does not inhibit the capability.
15.32 Multiple leaders in the same space
Only one leader per space may use their capabilities during an active player's Action Round.
15.4 Leader Purchase & Placement
During the replacement phase, a side may spend RSs equal to a "available for purchase" leader's rating to bring a leader onto the map (see Rule 14.61).
15.41 Wrangel Arrives (NEW)
Upon WHITE controlling 601 (Tsaritsyn) or 819 (Voronezh) for the first time during a replacement phase, WHITE receives Wrangel free (no RS cost) at either controlled VC.
15.5 Leader Elimination & Removal
15.51 Elimination
Leaders are permanently eliminated from the game in one of these ways:
- Play of a specific AC
- RED In-Fighting (Accusation)
- Major Power Withdrawal
- If a leader is eliminated OOS
- Leader loss: An enemy unit entering a space containing only a friendly leader(s) that fails to retreat
- Voluntary removal
If a RED or WHITE leader (not Faction) is eliminated via OOS, as a result of combat or a failed retreat, the controlling side loses a number of VPs equal to the leader's rating (ex: Trotsky minus 4 VPs).
15.52 Voluntary Removal
Non-OOS Friendly leaders may be voluntarily removed for a cost of 1 VP during the active player's Action Round.
15.53 Effect on In-Fighting
If a leader is eliminated or removed, it does not affect In-Fighting (example: the loss of Trotsky or Stalin).
15.54 Faction Leader removal or elimination
No VP cost to the controlling side.
15.6 Leader Movement
15.61 General
A leader's Movement Allowance (MA) is equal to their leadership rating (example: Denikin has a leader rating and MA of 4).
15.62 WHITE & RED Exceptions
Wrangel and Budyenny both have a MA of 5. Trotsky may either move an unlimited number of friendly controlled and supplied connected rail spaces (limit once a Game Turn) OR Trotsky may move 4 spaces.
15.63 Faction Exception
Makhno has a MA of 5. All other Faction leaders' MA equals their leader rating.
15.64 Supply
Leaders are subject to movement restrictions relating to their supply status (same as units).
15.65 Weather
Leaders are subject to movement restrictions relating to weather (same as units).
15.66 Combat
Leaders by themselves may be attacked. They may attempt to retreat prior to combat. If any LFs are inflicted, the leader is eliminated (with an associated VP penalty – see 15.51).
Leader Roster - RED
| Name | Rating | Comment |
|---|---|---|
| Lenin | None | See 16.21 – may not move |
| Antonov-Ovs | 3 | Lenin Camp – RED AC#1 |
| Bonch-Bruevich | 2 | Lenin Camp - Start – Urals North |
| Brusilov | 4 | Lenin Camp – RED AC#13 |
| Budyenny | 4 | Lenin Camp - RED AC#16 – MA of 5. Cavalry Surprise. |
| Egorov | 2 | Lenin Camp – Purchase only |
| Frunze | 4 | Lenin Camp – Purchase only |
| Ghai-Khan | 4 | Trotsky Camp – RED AC#21 - Cavalry Surprise possible. |
Leader Roster - WHITE
| Name | Rating | Comment |
|---|---|---|
| Tsar | None | See 16.22 – not on game map |
| Bogayevsky | 3 | Don Cos Camp – Purchase only |
| Denikin | 4 | Start – Don, Rus Army Camp |
| Dutov | 2 | Si Cos Camp - WHITE AC#16 |
| Gajda | 3 | Si Camp - WHITE AC#9 |
| Khanzhin | 4 | Si Camp - WHITE AC#37 |
| Kolchak | 2 | Si Camp – WHITE AC#1 |
| Krasnov | 3 | Start – Don – Don Cos Camp, Cavalry Surprise possible |
Leader Roster - Factions
| Name | Rating | Comment |
|---|---|---|
| Haller | 3 | Poland - Miracle on Vistula – WHITE AC#52 |
| Makhno | 4 | Makhno – MA of 5, Cavalry Surprise possible |
| Petliura | 2 | Ukraine - variable |
| Pilsudski | 3 | Poland - Miracle of Vistula |
| Syrovy | 3 | Start – East – Czech Legion |
| Tarnavskyi | 3 | West Ukraine - variable |
15.7 Leader Cards (Optional rule)
Leader Cards replace the generic leadership rating (on each leader counter) with specific ratings for leader capabilities. If playing with Leader Cards, still use the value on the counter for purchase of "available for purchase" leaders. There are 12 additional leader cards provided (versus the number of leader counters).
The leader portrait contains both the Camp (if applicable) and a Code. The code indicates how the leader enters ToC: P=purchase, C=when controlled, receive that leader, V=variable, XX=year via AC, nc=no counter in ToC/informational card only.
Any leader specific rules are contained under the historical commentary. Letters on extreme right of the LC are abbreviations for each leader capability and the associated leader rating utilized.
16. Miscellaneous Rules
16.1 Capturing An Enemy Victory City
The moment a side captures (occupies) an enemy controlled VC during the Action Phase it receives a free IP (immediately placed on any Faction). Additionally, if the VC was an enemy home region VC, the side receives a free replacement step during the replacement phase. There is a limit of one (for both the IP and RS bonus) per specific VC per turn (see rule 14.31).
16.2 Special RED/WHITE Units
First time ToC players may wish to elect to play without some of the items contained in rules 16.2 and 16.3.
16.21 Lenin
The Lenin leader begins the game in Moskva (801). He may not move, but may retreat in combat. If it is eliminated, Red In-Fighting (rule 16.51) continues for the entire game. Additionally, award WHITE 5 VPs. Lenin is NOT subject to In-Fighting.
16.22 The Tsar
Nicholas II, Emperor of Russia, and his entire family was murdered by the Bolsheviks on July 17, 1918 at Ekaterinburg. ToC begins after this development. However, this is a game about the Russian Civil War and ToC "needs" a Tsar counter. So, on Turn 2, before the ACs are allocated to the three Political Boxes, WHITE may use one AC to try to save Nicholas II.
In order to make this attempt, there are two prerequisites:
- WHITE controls the Czech Legion Faction
- Political Card #1, "Kill the whole lot" was not selected and implemented by RED (not removed, discarded or replaced by another RED PC) on Turn 1.
Assuming these prerequisites are met, WHITE may select an AC, declare that they are attempting to "Rescue the Tsar", discard the AC and rolls a die:
Rescue the Tsar (turn 2, WHITE must control Czech Legion and PC#1 did not appear in RED Political Box Turn 1)
| Card Value | Die Roll | Result |
|---|---|---|
| 5 | 1-2 | Tsar Rescued |
| 5 | 3-4 | Re-roll |
| 5 | 5-6 | Tsar dies |
| 4 | 1 | Tsar Rescued |
| 4 | 2 | Re-roll |
| 4 | 3-6 | Tsar dies |
| All other (including zero) | 1 | Re-roll. If 2nd roll is 1 or 2, Tsar rescued |
| All other (including zero) | 2-6 | Tsar dies |
If the Tsar dies, remove the counter from the game. If the Tsar is rescued, place the counter next to the Game Track. The effect of being rescued is to provide a positive modifier on the WHITE Influence Card OR possibly a free RS per turn (rule 14.31). The decision is by WHITE on a turn-by-turn basis.
16.23 Don Cossack Restrictions (Optional rule)
Area of operation: Don Cossack forces may not move out of the Don and Kuban region unless WHITE controls the four VCs in these regions, and Tsaritsyn (601). If any Don Cossack forces happen to be outside of the Don and Kuban the instant WHITE no longer meets this condition, roll a die for each unit, and consult this table:
Don Cossack Table
| Roll | Result |
|---|---|
| 1-2 | Place unit in the Dead Box |
| 3-4 | Place unit in or next to any controlled VC within Don or Kuban region |
| 5-6 | No effect on unit. |
Die Roll Modifiers: +1 if WHITE leads in VPs, -1 if WHITE is behind in VPs, +1 if WHITE controls Tsaritsyn.
No die roll is made for units in the Strategic Reserve. The Don Caucasus Table is only triggered (utilized) once a turn – at the first instance of occurrence (not in control of the four VCs plus Tsaritsyn).
16.24 Socialist Rev Army (WHITE AC#1)
At the beginning of the game, a NO ACT marker is placed upon the Socialist Rev Army (SRA). The army begins the game flipped to its WHITE side. If WHITE plays AC#1, roll a die and consults this table:
Socialist Rev Army Table
| Roll | Result |
|---|---|
| 1-3 | NO ACT remains. |
| 4-6 | Flip the unit to the RED side (becomes a RED unit). Remove NO ACT. |
+1 if Tsar is alive.
The RED/WHITE SRA does not have a reduced side. If it must "reduce", eliminate it the unit and do not place a replacement corps.
If the SRA is stacked with a WHITE unit(s) when it mutinies (and goes RED), immediately conduct a combat. If the SRA loses (suffers more or the same LFs), it is eliminated. If the SRA wins, WHITE retreats its units per the retreat guidelines.
16.25 Prince Lieven Army
If WHITE gains control of Latvia AND Lithuania, it immediately rolls a die and consults this table:
Prince Lieven Army
| Roll | Result |
|---|---|
| 1-4 | Place army in any friendly controlled space within Latvia or Lithuania |
| 5-6 | Army is not placed |
Army is removed if WHITE plays AC#25.
This provision only occurs the first time WHITE gains control of both factions i.e. it only occurs once in a game.
16.26 Gajda Putsch
When a Gajda Putsch is indicated on an Action Card and the WHITE leader Gajda is on the board, roll a die for each of the Siberian 2, 3 and 4 armies in play. On a roll of 1-4, place a NO ACT marker (if available) on spaces containing these units. RED selects which spaces if the NO ACT counter mix is limited.
16.27 WHITE and RED Reserve Armies
The WHITE and RED Reserve armies are awarded and immediately placed in any friendly VC under the following conditions:
WHITE: Control of VCs, Saratov (823) or Voronezh (819), OR Tula (817).
RED: Control of VCs: Rostov (324), Orenburg (507) OR Ekaterinburg (516).
The Reserve armies are only placed (in any Home Region VC) when any ONE of the VCs becomes friendly controlled. A player can elect not to place the army. Once placed, any subsequent event that would generate its placement is ignored.
16.28 Peoples' Armies
Prior to the instant of a combat involving any space containing Peoples armies, roll a die:
Peoples Armies
| Roll | Result |
|---|---|
| 1-3 | Eliminate the army (and replacing corps) |
| 4-6 | No effect |
Note: If RED is attacking, RED may call off the attack, after seeing the results of the die roll above. Modifiers: May apply one of these: Stacked with Cheka unit: +2, with a leader: +1, with elite unit: +1. Additionally, if defending, another +1 modifier.
16.3 Other Special Units and Events
16.31 The Imperial Gold and Silver Reserve (IGSR)
The Imperial Gold and Silver was captured by WHITE forces at Kazan. It required 36 freight cars to hold the treasure. The Czech Legion held onto the IGSR and later traded it for free passage out of Russia via Vladivostok.
The Imperial Gold and Silver Reserve Train (IGSR Train) begins the game at Kazan. It may not leave that space until the Czech Legion withdraws. At that time, the side controlling Kazan, may move the counter at a speed of 1 space per game turn along the rail line between Moskva-Kazan-Sarapul (801>630>636) without activating the space that contains the IGSR Train (only the train may move if the space is not activated for movement). It cannot be eliminated in combat. Whichever side controls the space IGSR Train space, controls the train. The IGSR Train provides a positive modifier on that side's Influence Card during the Political Phase.
16.32 Green Units
Green units are triggered by:
- Play of AC#6; which triggers Green corps
- Play of RED AC#37; which may triggers various Ukrainian and/or West Ukrainian armies becoming "Green"
- Green Peasant Army revolt
Green units have the following characteristics:
- They are considered enemy units to both sides (unless activated thru a Special Action – 10.217 or play of a "Greens" Action Card)
- They are in full supply (but bound by the weather restrictions)
- They may be activated only by a Green Activation Special Action (see rule 10.217), unless directed by an Action Card
- They do not place control markers
- They may not stack with any other forces
16.33 Green Peasant Army Revolt
When a Green Peasant Army Revolt is indicated by an Action Card (WHITE AC#24 & 26, RED AC# 22, 24 & 25) and the Green Peasant Army is not on the game map or has been eliminated (yes, it is still eligible), roll a die: on a roll of 1-3, the side playing the card must select one of its home regions and the enemy side may place the Green Peasant Army in any non-VC space. If the Green Peasant Army is eliminated, no replacing corps is placed.
16.34 Insurrection Armies (IAs)
Unless indicated otherwise on the Action Card that generates a particular Insurrection Army (IA), the following rules apply:
- IAs may not place control markers
- IAs are in full supply (Limited Supply during Winter) the turn they first appear.
- IAs are always in supply for Attrition purposes only
16.35 Serb Expeditionary Force (EF) Army
If the Serb EF Army is eliminated, place a Russian corps from the Strategic Reserve.
16.36 Action Cards
BOTH SIDES
AC#4 Switch Side Units: The Galician Army and Grigoriev Cav armies, and their replacing corps (placed in the SR when the army is generated), function like any other RED or WHITE unit after they are placed. A similar unit (mutiny corps replace corps, mutiny armies replace armies) may replace any enemy unit (corps or army) in the target space. If a corps is utilized as the replacing unit, the associated mutiny army may never enter play. Replaced units go to the Dead Box (plus the associated corps from the Strategic Reserve if army was eliminated). The units are in full supply (unless placed during winter - in which case they are in limited supply) during the entire turn.
If the unit must be placed in an adjacent space (enemy unit remains in the target space), the space selected by the placing player should be in supply. If not, the enemy may select the space.
Once both units have been placed, no further "switching of sides" may occur.
The targeted enemy unit of the switch side attempt must be adjacent to a friendly unit.
AC#29 Partisans: Triggered by AC#29, partisans have two differences from other RED and WHITE units: Partisans are always in supply (subject to weather) and they may not place Control Markers.
RED
RED AC#9 Faction Passivity and AC#40 Faction Inaction: If a Faction subject to either card is attacked at any point in the Action Phase, those restrictions are immediately lifted on that Faction. Optional: Restrictions are also lifted if an enemy occupies the home region of the Faction.
RED AC#10 Blustering in the Baltics: RED may choose to play this card for (1) the event listed or (2) RED may gain control of Estonia, Latvia and Lithuania may during the Political Phase (ignore other effects of the card). NOTE: If RED does not play this AC as this event, it may not gain control of the Baltics during the Political Phase.
RED AC#37 Violation of Ukraine: PREREQ: Poland WHITE Controlled and Ukraine uncontrolled, RED AC#44 not played and it is 1919.
RED AC#52 – "Typhoid": The steps losses inflicted on a target space are implemented first and then implement any indicated "further action".
WHITE
WHITE AC#2 "Poles, Finns or Cossacks": Rule 8.142 First Round Restriction applies.
WHITE AC#9 Czech Legion Commits: Place the Czech Legion Army 3 with any supplied Czech unit and the Corps 3 in the SR.
WHITE AC#12 Appeal for Foreign Intervention: When played by as an event, none of the Major Powers may move from WHITE Control during the Political Phase for reminder of the game.
WHITE AC#28 Faction Reinforcements: WHITE receives ALL units listed for whichever Factions it controls at that time.
WHITE AC#44 White Eagle Fights (C): Clarification: Condition #2: RED force is ANY RED army, corps or leader.
16.37 Timing Restraint on Green, Insurrection Armies (IAs) or Partisans
Neither side may play AC#6, AC#29 or Action Cards that generate IAs as an event during the last two Action Rounds of a turn. As an optional rule, ignore this rule, for a more "cut throat" game.
16.4 Special Geographic Rules
16.41 Urals North East Box (527) & East Russia (528)
The Urals North East box may only be entered by the Semenov Army and the East Russia box may only be entered by Japanese Army. Prior to Semenov or the Japanese Army appearing, both boxes are ignored for all game purposes. The boxes may not be attacked.
16.42 East Prussia (136)
This box may only be entered by VDG or Yudenich forces. It is a source of supply for these forces. It may not be attacked.
16.43 Kronstadt (123)
No units may enter this space until play of WHITE AC#47. The connection between Petrograd and Kronstadt is a rail line.
16.44 East Romania Box (246) and East Hungary Box (245)
Ignore for all game purposes. May be utilized in a possible ToC expansion.
16.45 Finland
At the beginning of the game, neither side may cross the Finnish/North Russia border. WHITE AC#43 lifts this restriction on the WHITE, while the restriction is lifted on RED if RED gains control of the Finland Faction or WHITE AC#43 is played. Once the restriction is lifted for either side, both sides may move freely (across the border) the remainder of the game.
16.46 Smolensk (807) and Tula (817)
Replacements and Reinforcements may be placed on these spaces as if they were a VC in the Central Region. WHITE capture of Tula also results in a replacement penalty for RED (see rule 14.32).
16.47 Yudenich Off-Board Box (120)
Upon play of WHITE AC#25, WHITE may elect to place the Yudenich forces (with the exception of one corps that is placed in the Strategic Reserve), into the Yudenich Off-Board Box (located on the game map next to the Baltics). In any subsequent phase, these forces may leave the box and are placed directly on a controlled Baltic port (or Finland if WHITE has played AC#43), at the cost of activating the box for movement. The forces end their phase in the port space.
16.48 Kerch-Taman Crossing (306 to 307)
See rule 10.1.
16.49 Poland
WHITE forces (other than Polish Faction) may not enter a WHITE controlled Poland; they may only enter an enemy controlled Poland (i.e. WHITE declares war on Poland).
16.5 In-Fighting
The In-Fighting rule reflects internal political divisions within the RED and WHITE Camps and internal "friction of war"; the inability of a side to utilize all of their resources to achieve goals. WHITE faced significant political obstacles, while RED grappled with some internal political divisions.
16.51 RED In-Fighting
16.511 The Camps
Within the Bolsheviks, there were two rivals: Trotsky and Stalin. In order to partially reflect this, RED has been "divided" into three Camps: Trotsky, Stalin and Lenin. ONLY armies and leaders are impacted by the Camp affiliation. Regarding leaders, the Trotsky Camp includes Trotsky, Ghai-Khan and Tukhachevsky, the Stalin Camp includes Stalin, Voroshilov, and Zhukov, while all remaining leaders are in the Lenin Camp. Armies and leaders are marked with a CT (Camp Trotsky), CS (Camp Stalin) or no indicator (in which case they belong to the Lenin Camp).
RED Camps
| Camp | Leaders | Armies |
|---|---|---|
| Trotsky | Trotsky, Tukhachevesky, Ghai-Kahn | 6 |
| Stalin | Stalin, Zhukov, Voroshilov | 8 |
| Lenin | Antonov-Ovs, Bonch-Bruevich, Budyenny, Brusilov, Egorov, Frunze, (and others) | 32 |
| TOTAL | 46 |
Informational only – RED corps are NOT apart of any camp: 54 RED (inf/cav/art/AF/Tank), 3 partisans and 9 garrison corps for a total of 66 corps.
16.512 The Cards
Play of WHITE AC#10 triggers RED In-Fighting. Play of RED AC#39 triggers the possible cancellation of RED In-Fighting.
16.513 The In-Fighting Counters
Following the turn in WHITE AC#10 is played, RED places the 10 RED In-Fighting counters into a cup and secretly draws 1 of the counters. During the turn, the counter effects RED play. At the end of the Action Phase, RED reveals the counter to WHITE. The process is repeated each turn until In-Fighting ends.
In-Fighting Counters
| Counter | Effect |
|---|---|
| Trotsky or Stalin | Only 1 space with an army of the indicated leader may be activated during any action round. No reinforcement card with armies from that Camp may be played as an event (e.g. in the case of Trotsky, the RED AC#1 may not be played that turn). RED may not take the special 1 OP Trotsky option (if Trotsky In-Fighting counter selected) |
| Lenin | Only armies not in the Trotsky or Stalin Camps may participate in an attack this turn. Prevents play of RED AC#36. Additionally, RED must take an enemy controlled VC this turn or RED loses a VP. |
| Accusation | During Logistic Phase (rule 7.55), roll a die. On 1-2, a trial occurs, a leader is guilty of treason, and removed from the game (from those on the map) (RED does NOT pay the Leader VP penalty – rule 15.5). Randomly determine a leader. Exclude Trotsky and Stalin from the possible roll for elimination. RED may only be subjected to 3 such rolls during the game (becomes a No Effect counter if drawn after that). |
| Defeatism | Roll a die on the Defeatism Table for each space activated for combat in a round after the first activated space (one space "free" of effects) |
| One Russia | Roll a die on the One Russia Table (yes, this benefits RED) |
| No Effect | No In-Fighting effect for RED this turn. |
| Desertion | At the end of the Action Phase, if RED is BEHIND in VCs, randomly determine a region (among North, Central and East), and roll a die: 1-4: eliminate 2 army steps; 5: eliminate 1 army step; 6: no effect. Determine armies randomly. Modifier: +1 if Trotsky in region. |
One Russia (same for RED & WHITE)
| Die Roll | Result |
|---|---|
| 1-2 | RED may place 1 IP on each of any 3 Factions |
| 3-4 | WHITE subtracts 2 RS from the game track |
| 5 | WHITE subtracts 1 RS from the game track |
| 6 | No effect |
Modifiers: -1 if Denikin on the map. Note: RS=Replacement Step.
16.514 Violation of the In-Fighting counter
If the terms of the In-Fighting counter are violated (either thru player choice or accident) during the turn, a 2 VP penalty is assessed during Logistics Phase (see rule 7.55).
Any required In-Fighting die rolls (example: rolling on the Accusation table) are conducted at this time.
RED may only choose to violate the Trotsky, Stalin or Lenin In-Fighting Chits.
16.515 Ending In-Fighting
After play of RED AC#39, RED may attempt to end In-Fighting during the Logistics Phase (and each subsequent Logistics Phase if it fails). Roll a die:
The End of RED In-Fighting
| Roll | Result |
|---|---|
| 1-4 | In-Fighting ends |
| 5-6 | In-Fighting continues; retry next game turn. |
Modifiers: -1 if 1920.
16.516 Elimination of Trotsky and/or Stalin
Elimination of these leaders does not affect In-Fighting.
Defeatism
| Die Roll | Result |
|---|---|
| 1-3 | Attack may proceed |
| 4-6 | Attack may not proceed (and RED is still "charged" an activation) |
-1 if Trotsky in or adjacent to the activated space. -1 if RED currently controls the most VCs. -1 if Elite unit in space activated.
16.52 WHITE In-Fighting
16.521 The Camps
Within the non-communist forces, there were many rival groups and interests. Accordingly, WHITE armies, corps and leaders have been "divided" into the following Camps:
WHITE Camps (A=Armies, C=Corps)
| Camp | Leaders | A | C | Other info |
|---|---|---|---|---|
| Russian Army | Denikin, Wrangel, Mai-Maevski | 7 | 18 | Primarily operates in the South |
| Partisans | * | 3 | ||
| Garrisons | * | 9 | If they revolt | |
| Siberian Army | Kolchak, Khanzhin | 5 | 9 | Primarily operates in the Urals |
| Gajda | 1 | * | IA Izhevsk |
16.522 The Cards
Play of RED AC#12 triggers WHITE In-Fighting. Play of WHITE AC#41 triggers the possible cancellation of WHITE In-Fighting.
16.523 The In-Fighting Counters
Following the turn in RED AC#12 is played, WHITE places the 10 WHITE In-Fighting counters into a cup and secretly draws 1 of the counters. During the turn, the counter effects WHITE play. At the end of the Action Phase, WHITE reveals the counter to RED. The process is repeated each turn until In-Fighting ends.
NOTE: In contrast to RED, all WHITE armies AND corps AND Leaders of a Camp are affected by their respective In-Fighting counter.
WHITE In-Fighting Counters
| Counter (#) | Effect |
|---|---|
| Siberian (1) | These units may not be repaired or rebuilt this turn. Additionally, these leaders may not use their capabilities |
| Don Cossacks (2) | These units may not attack this turn. Additionally, these leaders may not use their capabilities. |
| Siberian Cossacks (1) | These units may not attack this turn. Additionally, these leaders may not use their capabilities. |
| Other (2) | Only 1 space containing BAF, Siberian or WHITE controlled Faction units may be activated per round this turn. Additionally, these leaders may not use their capabilities. |
| One Russia (1) | During Logistic Phase (rule 7.55), Roll die on the One Russia Table |
| Desertion (1) | During Logistic Phase (rule 7.55), if BEHIND in VCs, determine a random region (among Don, Kuban, Urals Central or Urals North and RED East), then roll a die: 1-4: eliminate 2 army steps; 5: eliminate 1 army step; 6: no effect |
| No VC= –VP (1) | Capture an enemy VC this turn, during the Action Phase, or lose 2 VPs |
| -VC = -FCM (1) | If WHITE loses a VC this turn (not during the Political Phase), RED may shift 3 uncontrolled FCMs 1 space towards RED control but not into RED control. |
16.524 Violation of the In-Fighting counter
If the terms of the In-Fighting counter are violated (either thru player choice or accident) during the turn, a 2 VP penalty is assessed during Logistics Phase (rule 7.55).
Any required In-Fighting die rolls (example: rolling on the "One Russia" table) are conducted at this time.
WHITE may only choose to violate the Siberian, Don Cossacks, Siberian Cossacks or Other In-Fighting Chits.
16.525 Ending In-Fighting
After play of WHITE AC#41, WHITE may attempt to end In-Fighting during the Logistics Phase (and each subsequent Logistics Phase if it fails). Roll a die:
The End of WHITE In-Fighting
| Die Roll | Result |
|---|---|
| 1-4 | In-Fighting ends |
| 5-6 | In-Fighting continues; retry next game turn. |
Modifiers: -1 if 1920. -1 for WHITE if either Denikin or Kolchak has been permanently eliminated.
16.6 Air Units
16.61 Air Operations
Combat Surprise: If a side has more air steps involved in a particular combat, that side receives a modifier when attempting to achieve Tank/Mechanized and/or Cavalry Combat Surprise (rule 11.411).
Combat: The side with the most air steps receives a +1 CM in combat (rule 11.31).
Logistics: During the Logistics Phase, a side may initiate an Air Raid (1 per turn) prior to the enemy side taking replacements. The side attempting an air raid declares a friendly space that contains an Air step, selects an adjacent enemy space, and rolls on this table:
Air Raids
| Roll | Effect |
|---|---|
| 1-2 | Air raids effective: the space may not take replacements (but the "attempted" replacement steps may be spent elsewhere) |
| 3-4 | No effect |
| 5-6 | Eliminate air unit that attempted raid |
Movement: Air units (like Tank/Mechanized and Artillery – which all are marked with an asterisk by their Movement Allowance) may only move 1 space a round unless moving along a rail.
16.62 AZ Squadron
The British AZ Squadron radioed London for permission to bomb Moskva. Permission was denied. In order to simulate this possible bombing raid on Moskva, WHITE may utilize the following rule once a game. If WHITE activates for combat a space within two spaces of Moskva, that contains the AZ Squadron, WHITE may roll a die (if Moskva is RED controlled) and consult the following chart:
The Day They Almost Bombed Moskva
| Roll | Effect |
|---|---|
| 1-2 | WHITE receives 1 VP |
| 3-5 | Permission denied – No effect |
| 6 | Churchill's folly. Roll again. On a 5-6, Britain withdraws from the conflict at the end of the game turn. |
16.7 Other Optional Rules
16.71 Speeding Play
In order to speed play and the learning curve, players may try to play ToC without:
- In-Fighting (rule 16.5)
- Special Actions (rule 10.21)
16.72 Political Phase
Modify the Political Phase by:
- Each side receives 1 less Action Card turns 1-9.
- Do not play with Initiative or Bluff cards
- Randomly deal 1, 2 or 3 (determine with a die roll) Political Cards (of appropriate type; ex: RED PCs 1-18 to the RED PB) to each Political Box
- Reveal all PCs simultaneously, determine net IPs for each faction and adjust FCMs accordingly.
16.73 Naval Rules
Naval rules are heavily abstracted in ToC. River flotillas, which played a part in the RCW, have been highly abstracted in ToC in order to concentrate on other components of the war. A RED fleet counter is included for use in the Baltic Sea. At the beginning of the game, place the RED fleet counter in port. During any turn in 1919, RED may select the Naval Special Action. Place the fleet in the sortie box and roll a die:
RED Fleet Sorties
| Roll | Result |
|---|---|
| 1 | WHITE forces may not enter Finland this turn (only controlled Finnish Faction) |
| 2 | Roll again: 1-4: Baltic WHITE supply sources ignored for Action Phase (but not Logistics Phase); 5-6: Units may not leave Yudenich Off Board Box this turn |
| 3-4 | No effect |
| 5-6 | RED Fleet destroyed…place WHITE Fleet counter in former RED Fleet port. |
Place the RED Fleet back in the "In Port" space on the map if it was not destroyed. The RED Fleet is eliminated from play upon arrival of the Kronstadt Insurrection Army. The WHITE Fleet has no game function other than to indicate that the RED Fleet is not available.
16.74 White Tide
WHITE receives a -1 to Cavalry Surprise and a +1 CM for WHITE attacks involving at least 1 cavalry step and a WHITE cavalry leader drawing supply from 301 (Sevatopol), 310 (Yekaterinodar) or 324 (Rostov) providing:
- WHITE controls a RED home VC by the end of Turn 2
- WHITE has more VCs than RED
- Wrangel has arrived (rule 15.41)
Subsequently, WHITE loses "White Tide" immediately (for the game) when WHITE has less VCs than RED or Wrangel is eliminated.