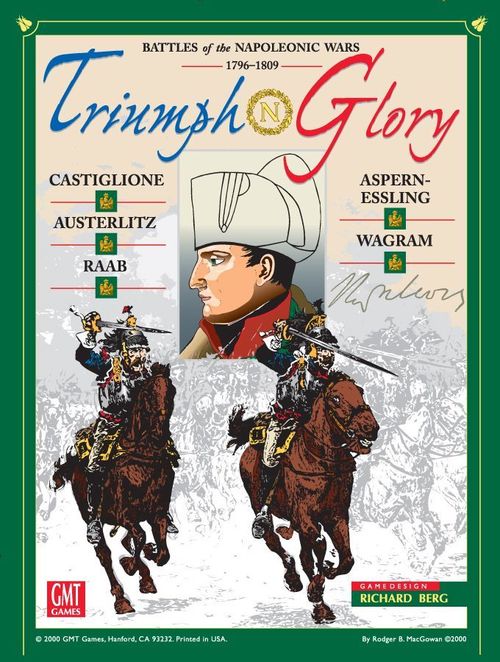
Triumph & Glory: Battles of the Napoleonic Wars 1796-1809
Triumph & Glory: Battles of the Napoleonic Wars 1796-1809 Rulebook
Table of Contents
Table of Contents
1.0 Introduction
Caveat: There are some minor rules differences between this version of the system and the one being used by Vae Victis magazine.
2.0 Components
The game includes the following items:
- 2 22"x34" game maps, back-printed
- 4 counter sheets
- 1 Rules Book
- 1 Scenario Book
- 1 Charts and Tables Card
- 1 ten-sided die
2.1 The Maps
The game maps cover the area over which the battles were fought. The map is overlaid with a grid of hexagons -- hexes -- that are used to regulate movement.
2.2 The Counters
Triumph & Glory includes counters representing infantry, cavalry and artillery units, plus Leaders, Activation Markers, Orders markers, Rout markers, etc.
Play Note: We highly recommend sorting out the counters for the different battles (those for Wagram and Aspern may remain together), otherwise it may be difficult to tell which of several variations of a given unit is the one to use. Use the letter -- corresponding to the battle -- on each counter as an aid.
There are three different types of combat units: infantry, cavalry and artillery. They are all color-coded for ease in identifying to which Activation Group they belong. All combat units are printed on both sides; the reverse shows the unit in a "Disordered" state.
Because of the changes in command structure, the counters' Unit Designations often reflect differing hierarchy and unit type. Each scenario briefly describes what the counters for that unit represent.
All combat units have a small Scenario Code letter, indicating in which battle they are used:
- C = Castiglione
- E = Aspern-Essling
- R = Raab
- A = Austerlitz
- W = Wagram
- EW = Both Aspern and Wagram
Combat Unit Values
- Infantry unit: Scenario Code, Defensive Fire DRM, Shock Strength, Activation Group Indicator, Unit Designation, Movement Allowance, Cohesion.
- Cavalry unit: Scenario Code, Cavalry Type, Shock Strength, Activation Group Indicator, Unit Designation, Movement Allowance, Cohesion.
- Artillery unit: Scenario Code, Effective Fire Range, Fire Strength, Activation Group Indicator, Unit Designation, Maximum Fire Range, Movement Allowance, Cohesion.
Activation Markers show the Activation Group, the Scenario Code and an Orders Rating.
Orders Markers are marked for each nation (France, Russia, Austria), with a "Under Orders" side and a "No Orders" side.
The Activation Markers [4.1] indicate the Activation Group to be activated and the battle they apply to. The numbers are a die roll range used to give Full Efficiency to units in that command that have No Orders. The Orders Markers designate which Orders Commands are operating "Under Orders" or "Without Orders."
2.3 The Die
The game uses a ten-sided die to resolve combat. A '0' is a "zero," not a "ten."
2.4 Definitions/Abbreviations
Awareness of the following terms will help as you read through the rules:
- AM: Abbreviation for Activation Marker. Each Activation Group has two Activation Markers.
- Activation Group: A group of combat units from the same parent organization (usually a corps), as defined by the Activation Group Indicator line on the counter.
- Cohesion: A rating used to represent Morale, Training, Weaponry, etc. Used for a variety of purposes, and probably the most important of the ratings.
- Combat Units: Infantry, Artillery and Cavalry units are considered combat units; Leaders and markers are not.
- Commitment: The ability of an individual unit to engage in Shock.
- DRM: Die Roll Modifier
- Horse Artillery: Artillery units with a Movement Allowance of 8.
- Orders Command: All or part of an Activation Group operating under the same order.
- Shock Strength: A unit's ability when involved in Shock, a number based on how many men are present.
- The Pool: An opaque cup used to hold the Activation markers.
- ZOC: Zone of Control, or the ability of a unit to extend its presence into adjacent hexes.
2.5 Game Scale
The map scale is approximately 325 yards per hex. Each turn covers about 75 minutes of real time. Each Infantry Shock Strength Point equals about 200 men; cavalry, 150 men/horses. Units are usually, but not always, regiments. Each Artillery Strength Point represents about 4 guns, sometimes adjusted for effectiveness.
2.6 Questions
Questions about play may be sent to GMT Games (ATTN: Triumph & Glory Q's, POB 1308, Hanford CA) or discussed via the GMT website (www.gmtgames.com), which features "Living Rules" and a discussion board, and on Consimworld's discussion boards (www.consimworld.com).
3.0 Sequence of Play
Each game-turn follows a set sequence. Within that sequence, when individual units move is somewhat random, depending on when their Activation Marker is drawn.
A. Orders Phase:
- Players roll for possible Orders Delay.
- Players decide which Orders Commands will receive Orders.
B. Initiative Determination Phase.
- Roll the die to see who goes first.
- Initiative Player selects one Activation Marker for the Activation Group which will Activate first in the turn.
- All other Activation Markers for Groups that are either on the map or scheduled to enter that turn are placed in The Pool.
C. Activation Phase
- Draw Activation Marker from Pool (except for the first Activation, when you use the one selected by the Initiative Player).
- Check Orders Status.
- Activation Sequence (in order): a. Artillery Fire b. Units Move c. Shock and/or Cavalry Charge d. Rally (for units that did none of the above)
This Phase is repeated until there are no Activation Markers left in the Pool. When that happens, go to the Reserve Phase.
D. Reserve Phase. Each player may activate one Reserve Group.
E. Command Morale Phase.
- Check for Collapse
- Rout Movement. All Routed units undertake Rout Movement
F. Overall Commander Movement Phase. Players may move their Overall Commander.
4.0 Orders and Activation
4.1 Commands and Groups
4.11 Activation Groups consist of all units with the same Activation Group Indicator (generally a Corps) and are activated, regardless of where they are on the map, when that command's Activation Marker is drawn.
4.12 Orders Commands are groups of units operating under the same orders, as defined below. All units of an individual Orders Command must also be members of the same Activation Group. An Orders Command may be an entire Activation Group, or a subset of units from an Activation Group.
- Units of a single Orders Command must be from the same Activation Group (i.e., have the same Activation Group Indicator line).
- Each unit in an Orders Command must be within two hexes of another unit in that Orders Command. This "chain" may be continued for any length.
- Individual units that are more than two hexes from any unit in that Orders Command are treated as a separate Orders Command. The presence of an enemy unit blocks tracing that range; however, an enemy ZOC does not.
- Regardless of the Orders Command a unit belongs to, it is activated when the appropriate Activation Marker is drawn for its Activation Group.
Example: In the French initial set-up for Austerlitz, Soult's IV corps units are separated into (possibly) 3 separate Orders Commands. Thus, the units in Telnitz-Sokolnitz-Pheasant Garden are one Orders Command (or two, if you configure them differently), and the large group west of Puntokowitz a second. Both commands are Activated by the Soult Activation Marker, but they each receive separate "Orders."
Play Note: A battle may have special rules enabling units nominally under one Group to be affected by another Group (e.g., Murat at Austerlitz).
4.2 Orders
For an Orders Command to operate at peak efficiency it must receive Orders.
4.21 At the beginning of each turn, each Player decides which of his Orders Commands will receive Orders, thus placing them Under Orders, and which will not. Orders Delay may prevent a player from changing his orders.
4.22 The number of Orders Commands a player may place Under Orders is limited by his Overall Commander's Orders Rating for that scenario.
Example: At Austerlitz, Napoleon has an Orders Rating of '3'. He may place three of his commands Under Orders. All other commands, in excess of that number, will have No Orders.
4.23 Players indicate what the Orders status of each Orders Command is by placing an Orders marker, face/status down, either near that command on the map, or in the accompanying Command/Orders boxes for that game. The Orders marker is not revealed until that Orders Command's first Activation Marker of the turn is drawn.
4.24 If a unit becomes separated from its Orders Command, it still uses the Orders status assigned at the beginning of the turn. If an Orders Command that began Under Orders has separated into more than one Orders Command, the separate Commands retain the Under Orders status until the beginning of the next Orders Phase, at which time the player will have to decide which remains Under Orders (with the remainder becoming No Orders). Units of separate Orders Commands which return into range of each other may adopt the Orders Status of either command, during the Orders Phase of the subsequent turn.
Play Note: This means that, if during the turn, unit "A" becomes separated from its Orders Command (the "proximity" requirement) it still uses the Orders it received at the beginning of the turn. However, if still separated at the beginning of the next turn, it is then treated as an individual Orders Command.
4.25 Reinforcements may be placed Under Orders, use Reinforcement Extended Movement, or have No Orders. See the Reinforcement rules for details.
4.26 Units of an Orders Command that is Under Orders may:
- Fire Artillery
- Use Normal Movement
- Use Extended Movement, if eligible
- Shock Attack
4.27 Units of an Orders Command with No Orders may:
- Fire Artillery
- Use Restricted Movement
- Shock Attack, but they add one (+1) to their Commitment die roll, unless the unit is within the Orders Range of its Overall Commander.
4.28 If an Orders Command has No Orders, the player may wish to attempt to put that Command Under Orders when its Activation Marker is drawn. To do so, the player rolls the die and compares it to the Orders Rating printed on the Activation Marker just drawn. If any unit in the Orders Command is within the Orders Range of the Overall Commander, the Overall Commander's Command Rating is subtracted from the die roll.
- If the adjusted die roll is less than or equal to the Activation Marker's Orders Rating, its units are Under Orders for that Activation only. The Command reverts to No Orders status when finished with that Activation.
- If the adjusted die roll is higher than the Rating, the units of that Command may not do anything, except to Rally.
Play Note: Thus a French Orders Command at Austerlitz that has No Orders but wishes to die roll for Under Orders would, if any unit in the Command was in Napoleon's Range, subtract three (-3) from that die roll.
4.29 Orders Delay. Each scenario provides an Orders Delay rating, which limits an Overall Commander's ability to change the Orders he already has in place. In the Orders Phase of each turn, other than the first, the player can roll the die. If the die roll is less than or equal to the Orders Delay rating, the player can issue new, different orders to all Orders Commands. If the die roll is greater than the Orders Delay rating, the player's army operates with the same Orders as the previous turn.
- For each turn a player fails his Orders Delay roll, subtract one from the next die roll (i.e., if the player fails once, subtract 1; twice, subtract 2, etc.).
- Napoleon does not roll for Orders Delay. He may issue new orders every turn.
Historical Note: Most of the armies of the day did not have the staff necessary to implement dissemination of orders. Consequently, it took a great deal of time to change Orders, or even issue new ones. The French, however, and Napoleon's massive and excellent staff of aides-de-camp had mastered the art.
4.3 Activation Markers
4.31 Activation Markers are used to determine the order in which each player's units may move and fight. Each Activation Group has two Activation Markers representing it.
Example: The Austerlitz Activation Marker for Davout/III would apply to -- and activate -- all III Corps units, regardless of where they are on the map.
4.32 At the beginning of each turn, the Activation Markers for all on-map units and reinforcements for that turn are placed in The Pool. Note that some reinforcements only receive one Activation Marker the turn they enter.
4.33 In some scenarios, an Artillery Barrage Activation Marker may be available for one or both players. Placing this Activation Marker in the Pool costs a player one Orders Rating Point. Only one Artillery Barrage Activation Marker may be placed in the Pool by a player each turn. In some scenarios, use of this Activation Marker may be restricted.
4.34 Depending on the scenario, players may have the ability to use the Combined Group Activation Marker. This is used to Activate two Activation Groups at the same time. To use this Activation Marker, the player places it in the Pool, retaining one Activation Marker from each of two groups he wishes to Activate together. The retained markers will designate which groups are to be Activated by the Combined Group marker. When the Combined Group Activation Marker is drawn, both Activation Groups move as if they were one Activation Group. The number of times a player may use the Combined Group Activation Marker during the game is indicated in the special rules for each scenario.
Play Note: When using the Combined Group Activation Marker, one Activation Marker from each chosen Activation Group is held out, while the other is still placed in the Pool.
4.35 The decision to use either the Artillery Barrage or Combined Group Activation Markers (if available) is made after Initiative is determined, but before the Initiative Player chooses his initial AM. Either of them may be chosen, if desired, by the Initiative Player as his first AM.
4.4 Using Activation Markers
4.41 The first Activation Marker used in each game turn is selected by the Initiative Player. He may choose any of his Activation Markers (even the Combined Group AM or the Artillery Barrage AM) as the first Activation.
4.42 All remaining Activation Markers are drawn randomly, one at a time, from the Pool.
4.43 When an Activation Marker is drawn, the units of that Activation Group may Move and engage in Combat, the extent of which depends on what their Orders status is. Units that do neither of those may attempt to Rally, regardless of Orders status.
4.44 When all the units of the selected Group have finished their actions, that Activation Marker is set aside and a player draws another Activation Marker, repeating the process above, until all Activation Markers have been drawn.
Play Note: This means that it is possible for an Orders Command to get three activations in one turn.
4.5 Activation As Reserve
4.51 In the Reserve Phase, each Player may activate one of his Orders Commands, as below. The Initiative Player chooses whether he, or his opponent, will go first in this phase. If there is no Initiative Player, each player rolls a die to see who goes first during Reserve Activation, with the high roll going first. Re-roll any ties.
4.52 In order to be activated in the Reserve Phase,
- the Command (or at least one unit thereof) must be in the Overall Commander's Orders Range.
- only units in that Command that are not adjacent to an enemy unit may be activated as Reserves.
4.53 Units activated as Reserves function as if they had No Orders. Moreover,
- they may not Rally
- each unit, when it finishes movement, must roll a die for possible Disorder. If the die roll is higher than the Cohesion, the unit is Disordered.
Exception: Units that do not move during a Reserve Activation do not roll for Disorder. Artillery does not roll for Disorder when Reserve activated, unless it fires during that activation. Disordered units that roll for Disorder (following movement in a Reserve activation) and fail, Rout.
4.54 The Reserve Phase may not be used to activate Commands that did not have an Activation Marker in The Pool. This usually refers to restrictive rules on using the various Guard units.
Design Note: This rule does not appear in the Vae Victis games.
4.6 Overall Commanders
Overall Commander Values: Name, Scenario Code, Command DRM, Orders Delay Rating, Orders, Orders Range.
4.61 Each scenario has an Overall Commander. The Overall Commander has four ratings:
- Orders Delay: used to change orders during the game.
- Command DRM: used to modify the die roll when rolling for Under Orders status and for Shock Commitment.
- Orders: the number of Orders Commands the Overall Commander can automatically place Under Orders, subject to Delay.
- Orders Range: the range, in hexes, over which the Overall Commander can use his Command DRM. Count the range from the Overall Commander to the unit, excluding the hex the Overall Commander is in.
4.62 The Overall Commander may move only in the Overall Commander Movement Phase, at the end of the turn. Overall Commanders have a Movement Allowance of '8' (treated as cavalry).
4.63 If a hex containing an Overall Commander is entered by enemy units, either during combat or movement, the Overall Commander is immediately moved to the nearest friendly unit. Overall Commanders are not affected in any way by combat.
Design Note: The Overall Commander counters represent the presence and effect of the leader.
5.0 Initiative
In the Initiative Determination Phase, each player rolls the die, to which he may add his Overall Commander's Orders Rating (see scenario). High total has the Initiative for that turn. If there is a tie, no player has the Initiative, and all Activation Markers go into The Pool.
The Player with the Initiative may choose one Activation Marker -- and therefore, Activation Group -- he wants to start with that turn. That group may be either Under Orders or No Orders.
6.0 Facing, Stacking, & Zones of Control
Play Note: Facing -- the position of a unit -- affects the ability of that unit to fire and/or move. Zones of Control are independent of facing; they restrict the movement capability of enemy units. To a certain extent, this is a bit different from what many historical games do.
6.1 Facing
6.11 All units must be faced in a hex so that the top of the unit (the side with its unit name) faces towards a vertex (joint) of the hex it is in -- not a hexside -- as per the diagram. All units in a hex must be faced the same way, except as noted below. The two hexes to the front are called the Frontal Hexes; the four behind, the Rear.
Exceptions:
- Infantry units (only) in villages, castles and redoubts have frontal facing into all six hexes surrounding them.
- Cavalry that is neither Disordered nor Routed has a special "Defensive Facing," wherein the two frontal and the two "flank" hexes (as per the diagram) are all considered Frontal for purposes of deciding attacker position (only). Disordered or Routed cavalry has standard facing.
6.12 Facing has no effect on movement or ZOC, and a unit is free to change its facing at any time during and at the end of movement. Rallied routed units may also change facing. Units do not have to be facing a particular hex to enter that hex.
6.13 Facing does have an effect on combat:
- A unit may fire or shock into/from only its Frontal hexsides.
- when a unit is attacked through its Rear hexes, there are negative effects.
6.14 If an artillery unit is stacked with an infantry unit the two units do not have to have the same facing. Any facing effects on the Shock die roll apply to the infantry unit's orientation. Artillery stacked with cavalry is not required to face the same direction as the cavalry.
6.2 Stacking
6.21 Stacking refers to having more than one unit in a hex at any one time. There may never be more than 3 combat units in any one hex.
- Infantry and Cavalry may never stack with each other.
- A maximum of two infantry or cavalry units is allowed in a hex, unless all units in the hex are from the same brigade, in which case three units may stack together.
- Jaegers count as infantry for all stacking purposes.
- No more than one artillery unit may be stacked with any non-artillery unit.
Note: Artillery may only stack with two infantry units if the infantry units are both from the same brigade.
- A maximum of two artillery units, from the same Activation Group, with a combined total of no more than six Strength Points may be stacked in one hex, as long as no non-artillery units are in the hex.
6.22 Non-artillery units may not stack during Extended Movement. Artillery units may stack, up to the maximum of 6 Strength Points. Non-Artillery units may begin Extended Movement stacked, but may not remain that way.
Units that are using Extended Movement may not move through other friendly units.
Play Note: This means that brigades with 3 units, such as Dumont (French, Austerlitz), may all stack in the same hex. Whether or not this is advantageous is up to you; check out the Massed Target modifier for Artillery Fire.
6.23 Markers do not count for stacking purposes.
6.24 Stacking restrictions apply at the end of Movement and all during Combat (Shock and/or Fire).
6.25 A unit may never move into or through a hex containing an enemy combat unit.
6.26 Stacking affects combat in the following ways:
- All units in a stack may Shock, but the top unit has to pass the Commitment die roll.
- Artillery may Fire regardless of where it is in a stack.
- Only the top Infantry unit in a stack may use its Defensive Fire rating to adjust enemy Commitment die rolls.
- Artillery Fire affects all units in a Stack, except for Artillery Reaction Fire against an infantry Shock attack, which affects only the top infantry unit.
- When a stack is required to make a Cohesion check, only the top infantry/cavalry unit in the stack makes the Cohesion check, with the results of that Cohesion check applied to all units in the stack.
6.27 A unit moving into and stopping in a hex occupied by another unit always is placed at the bottom of the stack. Stacking order may be changed at the beginning or end of that unit's Activation Marker phase and at no other time. In addition a unit in an enemy ZOC may not change stacking.
6.28 Routed, retreating units may not enter and remain in a hex occupied by another unit. They may pass through, but, in doing so, require the stationary unit(s) to undergo a Disorder die roll.
6.3 Zones of Control (ZOC)
Zones of Control represent the presence a unit extends outside the immediate area it is in.
6.31 Each combat unit exerts a ZOC into all six hexes surrounding it. Exceptions:
- Artillery units do not exert a ZOC.
- Units in Square have no ZOC.
- Disordered units do not exert any ZOC
- ZOC are not extended across impassable hexsides, nor do they extend across Bridges. They do extend across fords and crossable streams/rivers, unless noted otherwise.
Design Note: The lack of an artillery ZOC is one of the changes from the Vae Victis version.
6.32 Units must stop moving upon entering an enemy ZOC (although they can alter their facing as they enter that hex). There is normally no cost to enter an enemy ZOC, except for Disordered Units, which pay an additional Movement Point to enter an enemy ZOC.
Play Note: Yes, artillery may enter any enemy ZOC, even if alone. This has more to do with the scale than tactical doctrine of the era.
6.33 Units may leave an enemy ZOC if they start their activation there, but
- to do so costs one additional MP (in addition to the cost of the hex), and
- that unit may not enter an enemy-controlled Frontal Hex during that activation. (That means they may move directly to a non-frontal controlled hex, at which point they stop)
Note: This rule does allow a unit to move from one Zone of Control to another, as long as it does not enter a Frontal ZOC in that activation.
6.34 A unit that starts movement in an enemy ZOC may thus do one of three things, in terms of Movement:
- Stand still
- Move away
- Stay and change its facing. Units that start in an enemy ZOC can change their facing while in that ZOC, even if they do not leave.
7.0 Movement
7.1 Movement Allowances
7.11 Normal Movement. Each combat unit has a Movement Allowance (MA) printed on the counter. This represents the maximum number of Movement Points that unit may "normally" expend during a single Activation Phase (when Under Orders). Units may always move less than their allowed Movement Allowance.
7.12 Restricted Movement. If a unit has No Orders, it may only expend MP up to one-half of its printed MA (rounded up). Thus, infantry without orders has an MA of '2,' Light Cavalry, '4.'
7.13 Extended Movement. A command Under Orders may have its units use Extended Movement, as long as no unit starts or moves within three hexes of an enemy combat unit. Extended Movement applies to the entire Orders Command; all units must use it, or none may. If the player wishes to move any unit in the Orders Command closer than three hexes from an enemy unit, the entire Orders Command may not use Extended Movement. Units using Extended Movement
- Double (x2) their printed MA.
- May not stack, unless they are artillery units.
Play Note: You may use only one type of movement during any given phase. You may not start using Extended and then switch to Normal.
7.14 Units do not pay any Movement Point cost to change facing.
7.2 Movement and Terrain
7.21 A unit expends Movement Points for each hex it enters. Movement Point costs depend on unit type; see the Terrain Chart.
7.22 Units using Roads pay the Road cost if they are entering that hex from a hex containing a connecting road/trail hex; otherwise, they pay the cost of the other terrain in the hex. Roads/trails do not negate elevation costs.
7.23 Certain hexes/hexsides are impassable; units may not enter or cross them unless they are traversed by a Bridge or Road.
Example: in Austerlitz, units may not cross the Littawa River, except by bridge (at no extra cost).
7.24 Roads negate the Movement cost (only) of crossing streams, even if there is no bridge. Where they do this, it is called a Ford.
7.3 Movement Restrictions
7.31 As a unit moves it traces a path of contiguous hexes through the hex grid, paying the cost of each hex entered. Each unit moves separately, and one unit's movement must be completed before another can begin.
7.32 A unit may never move into or through a hex containing an enemy combat unit.
7.33 A unit may be moved in any direction or combination of directions. A unit's Facing has no effect on how or where it may move.
7.34 A moving unit must have enough MP's to pay the terrain cost of entering a hex; if it doesn't, it may not enter that hex. A unit may always move one hex (Minimum Move) if the hex moved into is not prohibited to that unit. Units using a Minimum Move may not enter an enemy Zone of Control.
7.35 All artillery fire is resolved before any unit moves. Artillery units that fire are marked with a "Fired-1/2 Move" marker. After all artillery fire is completed, artillery may move, but they may use only half their MA, and they may not move adjacent to an enemy unit. After all movement is completed, remove the Fired-1/2 Move marker.
Artillery may not Fire when using Extended Movement.
7.36 Units may not use Road costs to move adjacent to an enemy unit; they must use the MP cost of the "other" terrain in the hex. They may, however, use Ford costs.
7.37 It costs +1 MP to enter a friendly-occupied hex in order to move through that stationary unit. See the Stacking rules for the effects of stopping in such a hex.
7.4 Reinforcements
7.41 Reinforcements enter the game when their Activation Marker is drawn. (Thus, their Activation Markers are available the turn they are scheduled to enter). They enter, by Activation Group, through the Entry hex stated in the scenario as if they were in a "line" extending off the map: the second unit in that Group pays the cost of the entry hex plus the cost that the first paid for that entry hex, etc.
7.42 A Player has a choice when he has commands entering as Reinforcements. He may either:
- Use one of his Orders Points to give them Orders, or
- Have them enter using Reinforcement Extended Movement. This allows the units in that command to use Extended Movement. However, they may do so only if they use, and stay on, a Road. Use the "Reinf/EM" marker as its Orders counter. At any time the units may no longer use Extended Movement, they change immediately to "No Orders" status.
- Barring the above two choices, reinforcements will enter with "No Orders."
7.43 Reinforcement Extended Movement is available only for the first Activation Marker drawn for that command in the first turn of its entry. When the next Activation Marker is drawn, the command changes to No Orders status.
7.44 No unit may move within two hexes of an enemy Entry Hex until all reinforcements have entered the game.
8.0 Combat
8.1 Types of Combat
There are two types of combat: Shock and Fire. Infantry and Cavalry use Shock. Fire is used (only) by Artillery.
- Routed units may not Shock attack.
- Disordered Infantry or Cavalry may not Shock Attack.
- Artillery cannot Shock.
- Disordered Artillery cannot Fire
Design Note: Most infantry fire took place within 50-60 yards of the target and is incorporated into Shock combat. Reduces die rolling, if nothing else.
8.2 Artillery Fire
Artillery may Fire before moving or instead of moving; they may not fire after moving.
8.21 Artillery fires using its Fire strength, possibly modified by factors listed below. Each unit fires separately, with the following exceptions:
- If two artillery units are stacked in the same hex, they may combine fire. To do so, use the higher Strength (do not combine the strengths) and add two (+2) to the die roll.
- the player has selected/drawn the Artillery Barrage Activation Marker.
Units may be attacked by Artillery more than once in an Activation. The results of each fire are implemented prior to any additional fires.
8.22 Fire Range. Artillery units are rated for Effective Fire Range and Maximum Fire Range (in hexes). The latter is the maximum distance over which an artillery unit may fire. Range affects the die roll, as follows:
- Fire at a range of one hex (adjacent) against non-artillery units: +1 DRM
- Fire within Effective Range, excluding the above: 0 DRM
- Fire within Maximum Range: -2 DRM for each hex beyond Effective Range.
Design Note: Fire at extended ranges was diminished not so much by the capability of the guns, but the inability to see and gauge a target at over 1000 or so yards.
8.23 Line of Sight. Artillery firing at a range of two hexes or more (counted from guns to target, not counting the hex the firing unit is in) can fire only if they can see the target. LOS is blocked:
- If any intervening hex is of a higher elevation than both target and firing hex
- If any intervening hex between target and firer is Woods, and neither target nor firer is at a higher elevation than that woods hex. If both are higher, the woods are ignored.
- If the firing hex is higher than the target and the intervening woods hex, LOS is blocked if the woods is halfway between the two or closer to the target.
- If the target hex is higher than the firing hex and the intervening woods hex, LOS is blocked if the woods is halfway between the two or closer to the firing hex.
- Combat units and villages do not block LOS, however, see the rules for Misguided Friendly Fire, below.
- If the LOS coincides with a hexside, the terrain on the hexside is considered as if it were an intervening hex.
- Flood Walls have no effect on Artillery fire at a range greater than one.
- LOS is only traced through Frontal hexsides.
8.24 Artillery fire is resolved by rolling the die, adding the (range-adjusted) Fire strength to the die roll, applying any possible modifiers and then consulting the Artillery Fire Table.
- Artillery Fire affects all units in the target hex, so, any results that require an additional die roll are applied, separately and individually, to each unit in that hex.
- If there is an enemy unit in an artillery's adjacent, Frontal hex(es), the latter must fire at that unit rather than another unit.
- Artillery can change facing (without leaving the hex) and Fire in the same friendly phase. It may not change facing, fire, then move, however, in the same Activation.
- See the Artillery Fire Table for results of the adjusted die roll.
8.25 Artillery Reaction Fire. An artillery unit in a hex that is the target of a Shock Attack may fire at the unit(s) attacking it. It may do this only once per Activation or Reserve Activation, and this is in addition to Counter-Battery.
Artillery Reaction Fire takes place immediately after Commitment die rolls have been made, and before Shock Resolution or Charge Movement.
8.26 Counter-Battery. In addition to Shock Reaction Fire, an artillery unit may always Fire Back at any artillery unit that fires at it. Such fire is not simultaneous; it occurs after the original fire. A unit may Counter-Battery only once per Activation or Reserve Activation.
8.27 Misguided Friendly Fire. If an intervening, unit-occupied hex is adjacent to the target hex, and the occupying unit is friendly to the firing unit, there is a possibility that the artillery fire hits the friendly unit, not the target. If the unadjusted Fire die roll is '2' or less, the intervening friendly unit undergoes a Cohesion die roll with a -2 DRM. If the adjusted roll is greater than the unit's cohesion, the unit suffers a Disorder result.
8.28 Artillery Barrage. When an Artillery Barrage Activation Marker is drawn, the player may fire all artillery units, and may combine the fire of any artillery units that are stacked or adjacent. Add two (+2) for each unit over the first. It costs one Orders Point to use the Artillery Barrage Activation Marker, and only one may be used per turn. See specific scenarios for any further restrictions.
8.29 Massed Target. When artillery fires at any hex in which there are two or more non-artillery, non-Jaeger units stacked, it gets a +1 DRM for each target unit in that hex beyond the first.
Exception: The exclusion of Jaegers from massed target does not apply to the Jaeger units belonging to the Coalition in Austerlitz.
Units in Square are considered Massed Targets, regardless of the number of units in the hex.
8.3 Commitment
Play Note: This rule is somewhat different from that used in the Vae Victis version.
8.31 In order for a unit to Shock Attack (and this includes Charging Cavalry), it must pass a Commitment die roll. This applies to attacking units regardless of Orders status. Defenders do not need to undergo Commitment.
8.32 To check for Commitment, the player rolls for the top unit in each stack with which he wants to attack. The following DRM may apply:
- If the Orders Command the unit is in is Under Orders, and at least one unit from that Command is within the Overall Commander's Range, the player may use his Overall Commander's Command Rating (a negative DRM) to adjust the Commitment die roll (down).
- If the unit has No Orders, add one (+1) to the die roll.
- If the attacker is attacking through the defending units' frontal hexes (except for Cavalry Charges), add to the Commitment die roll the defender's Defensive Fire Shock DRM of the top unit (if infantry) in each target hex.
Design Note: The Defensive Fire Shock DRM represents the use of skirmisher-style musket fire infantry to deter the approaching line of attackers from closing for Shock. As you can see, it became more effective, and more commonplace, in later years.
8.33 Commitment Results
- If the adjusted Commitment die roll is the same as or lower than the attacking unit's Cohesion Rating, that unit, and all other units in that stack, must Shock (unless it has been Disordered by Artillery Reaction Fire).
- If the die roll is higher than the unit's Cohesion Rating, that unit may not Shock or Charge.
Example: A unit with a Cohesion of '5' that is Under Orders and within range of its OC, who has a -2 Command Rating, that is rolling for Commitment against a defender with a Defensive Fire Rating of '1' would need to roll a "natural" 6 or less to Commit.
8.34 A player must announce, and pre-designate, all Shock attacks (and Charges) before rolling for Commitment. The die roll, when required, is undertaken only for the top unit in a stack. If it passes all others follow; if not, no shock. Commitment die rolls are made the instant the player wants to shock/charge. All commitment die rolls must be made before any Shock combat is resolved.
8.4 Shock
8.41 An Active, Committed unit that is not Disordered may Shock any enemy unit(s) in its Frontal hexes, except if separated by impassable terrain. Cavalry units may Shock only if they began the Activation adjacent to the enemy unit to be attacked, or if they are Charging.
8.42 A unit attempting to Shock must do so against all enemy units in its Frontal hexes, unless one (or more) of those enemy units is also being Shocked by another friendly unit.
8.43 Disordered units may not Shock attack, and if the top unit in a stack is Disordered, no unit in the stack may Shock. Infantry or non-Charging cavalry units that are Disordered due to Artillery Reaction Fire may not Shock. Charging Cavalry which is Disordered by Artillery Reaction Fire may still Shock; however, they lose all Charge DRMs.
Play Note: If a situation exists where a friendly unit is attacking only one of two stacks of enemy in (each of) its Frontal hexes because the other is being attacked by another friendly unit, and the latter fails its Commitment check, the former must now shock both of those enemy units!
8.44 To resolve a Shock, the attacking player rolls the die and adjusts that die roll by the following, where/if applicable:
-
Strength odds/ratio. To determine the DRM for odds/ratio, each player totals the Strength of all his units involved in the Shock. The attacker then compares the strength of his units with that of the defending units, stated as an odds ratio reduced to its simplest form and rounded off in favor of the Defender. Thus, a 9 point unit attacking an enemy 4 point unit would undertake a Shock at 2-to-1. If it were a 5 SP unit attacking a 7 SP unit, it would round off to 1-to-1 1/2. See the Odds/Ratio Chart for the applicable DRMs.
Exception: Infantry, Charging Cavalry and non-Charging Cavalry may not combine their strengths when attacking the same unit. Each attack is resolved separately, in the following order: Cavalry Charge, Cavalry Shock, and Infantry Shock. After all attacks are resolved, Advance after combat (if any) is performed in the same order (i.e., the Charging Cavalry advances first).
-
Cohesion Differential. The attacker subtracts the defender's highest Cohesion rating from the Attacker's best, and the difference is the DRM. Obviously, if the defender's Cohesion is better than the attacker's, that DRM will be a negative. Artillery Cohesion is not used for this determination.
-
Terrain Effects. See the Terrain Chart. If the attacker is attacking the same unit or stack from different hexes, and the defender occupies any terrain or is behind any hexside feature that gives a beneficial modifier (at least a -1), the Defender chooses which terrain modifier to use. Otherwise, the attacker may choose.
Note: The +1 Shock DRM for defender in Clear Terrain is only applicable if:
- The Attacker is attacking from one or more of the Defender's Frontal Hexes.
- At least one of the two hexes in the Defender's Zone of Control adjacent to the Defender's Frontal Hexes (the flank hexes) is vacant and does not have a different unit belonging to the Defender exerting a Zone of Control upon it.
- Infantry attacking Cavalry never receive this DRM.
See the Shock Table for the results of the Adjusted Die Roll.
8.45 Advance. If a defender vacates its hex (retreats or is eliminated) as a result of Shock, the single (stack of) attacking units with the highest Cohesion must advance into the vacated hex. The unit or stack may change facing as it enters that hex. If more than one unit or stack has the highest cohesion, the attacker chooses which one advances.
If a unit advances into a hex which would normally Automatically Disorder the unit, it becomes Disordered.
Exception: In determining who advances, Charging cavalry always take precedence over infantry, even if latter has a higher Cohesion.
8.46 Secondary Shock. There are two possible results in which a unit may continue to attack, or, possibly, counter-attack: Breakthrough (infantry)/Pursuit (cavalry), and Counter-Shock. A unit may use Secondary Shock only once per Phase, with the exception of Pursuit (cavalry only). Cavalry that is not Pursuing (that is, non-Charging Cavalry) may not use Secondary Shock.
Breakthrough/Pursuit. If the result was a possible Breakthrough or Pursuit, an Advancing Attacker may, if the player wishes, Shock again, but without changing Facing. If it does so, a Commitment die roll is not required (i.e., Shock is automatic), but the attacker must Shock all enemy units in its Frontal Hexes.
Counter-Shock. If the result was a possible Counter-Shock, the defender may move one hex and shock any enemy units it places in its Frontal hex(es), as per normal shock rules. This is resolved before proceeding to any other Shock resolution.
8.47 Cavalry may retreat one or two hexes before being Shocked by infantry, as may Light Cavalry being charged solely by Heavy Cavalry, even if it is Disordered. Routed cavalry may not do so. It must make this decision before any Commitment die roll is made. In this case, the attacker may (not must) advance into the vacated hex.
Horse Artillery may retreat before Shock in the same manner as Light Cavalry. Light Cavalry (and Horse Artillery) may retreat before Shocking or Charging Heavy Cavalry. Light Cavalry/Horse Artillery which retreats before Shock from Charging Heavy Cavalry must roll against its Cohesion for possible Disorder (which may rout already Disordered units).
Play Note: Cavalry may not so Retreat before being fired at by artillery.
Cavalry that retreats before shock may not do so into a ZOC of another enemy unit, nor may they retreat through the ZOC of the unit they are retreating from.
8.48 Jaegers may retreat one hex before being Shocked by infantry. However, such decision must be made before the attacker rolls for Commitment, and it applies to unstacked or stacked Jaegers. Again, advance is voluntary.
Jaegers that retreat before shock may not do so into a ZOC of another enemy unit, nor may they retreat through the ZOC of the unit they are retreating from.
8.49 Artillery never participates in Shock; it has no Shock strength.
- If stacked with units that must retreat, it must also retreat. Otherwise, it takes the same result as the unit or units it is stacked with.
- If Shocked while alone in a hex (or stacked with another artillery unit), it is automatically eliminated.
- Otherwise Shock has no effect on artillery.
8.5 Cavalry Charge
The Charge Resolution Sequence
- Declare Charges and specify targets
- Targets roll for going into Square [8.55]
- Cavalry rolls for Commitment or Recall
- Charging units move adjacent to targets
- Targets roll for Counter-Charge
- Resolve the Charge
8.51 A Cavalry Charge is a version of Shock in which the cavalry unit starts the Activation at least two hexes, but not more than three hexes away from its designated target. It does not move that turn as "Movement"; it charges as part of Shock resolution. A cavalry unit may charge only against a target it could see (had a Line of Sight to) before it started movement, and Disordered cavalry may not Charge.
- The one or two hexes being Charged through/into must be designated when the charge is declared.
- Charging Cavalry may change facing up to one vertex per hex entered.
- Cavalry that does not start the Activation adjacent to an enemy unit must Charge if it wishes to Shock Attack.
- Cavalry which begin their Activation in an enemy Zone of Control may not Charge, and may only use Shock combat against the unit or units in whose Zone(s) of Control they began the Activation. They may change facing one vertex. If they move out of their starting hex, they may not Shock attack during that Activation.
- If the designated route of a Charge passes through (not into, through) an enemy cavalry Frontal ZOC, the Charge is not allowed.
Historical Note: If cavalry "charged" the equivalent of 3+ hexes, more than 1/2 a mile, it would probably be too disordered to be effective.
8.52 Prior to undertaking the Charge movement, the Player must decide whether he wants to Charge (Commitment) or not Charge (Recall). Recall is available only if the target has formed square.
Commitment takes place before the actual charge movement, and uses all the normal rules, with one exception: the target may not use its Defensive Fire Rating to adjust the Commitment DRM.
Play Note: Why not? Charging cavalry moved too fast for what the Defensive Fire Shock DRM simulates for that fire to have any decisive effect.
Recall. If a targeted unit has successfully formed Square, the charging cavalry can attempt to stop its Charge through a Recall. Roll the die.
- if the die roll is less than or equal to the unit's Cohesion it has been Recalled. It does not Charge; instead, it stays where it is, changing facing as it wishes.
- if the die roll is higher than the unit's Cohesion, it must Charge (and does not require a Commitment die roll).
8.53 Terrain often determines whether a cavalry unit may or may not Charge:
- Cavalry may not Charge a unit in a Marsh, Woods or Village/Castle/Redoubt hex
- During charge movement, or to effect the attack, a cavalry unit may not move into a hex that would cost more than 2 MP total.
Example: Cavalry at Raab may not charge across any stream hex.
8.54 A Charge earns the following Charge DRM:
- If at least one charging Heavy cavalry unit is involved in Shock, add three (+3) to the Shock die roll;
- If at least one charging Light (but no Heavy) Cavalry unit is involved in Shock, add one (+1).
The above apply even if the defender is also being attacked, at the same time, by infantry and/or non-charging cavalry.
At the conclusion of a Charge (or Pursuit), all charging, counter-charging and/or pursuing cavalry units are Disordered, except for those already Disordered. This does not apply to cavalry involved in Shock that are not charging.
Charging Cavalry that does not actually perform Shock combat is not Disordered following Shock resolution.
8.55 Square. Infantry units that are the target of a Charge (but not a Counter-Charge) and are not Disordered or Routed, may attempt to form Square to protect themselves, even if charged from the Rear. If there are any Disordered infantry units in a stack, that stack may not attempt to form Square. Infantry that is Charged by Pursuing Cavalry performing Secondary Shock may roll to form Square. Note that the Cavalry may not roll for Recall in this instance. Artillery and Jaegers may not do so, unless stacked with infantry, in which case it does whatever the infantry does. Units that are in the ZOC of an enemy unit may not form Square. Roll the die before resolving the Charge, using the cohesion of the top infantry unit in the stack:
- if the die roll is the same as or lower than the unit's Cohesion the stack has formed Square. Place a Square marker over it.
- if the die roll is higher than the unit's Cohesion, the stack has not formed Square, and all units in the stack (including Jaegers and artillery) become Disordered.
8.56 Square has the following effects:
- Cavalry Charging square may attempt to Recall [8.52].
- Cavalry does not gain any Charge benefit. Instead, subtract two (-2) from its Shock die roll. This also applies when more than one stack is being attacked by a Cavalry Charge and one or more of the stacks are in Square
- Units in Square may not Shock Attack; they defend normally.
- Units in Square have no ZOC; however, all of the surrounding hexes are treated as Frontal hexes for purposes of combat and fire.
- Units in Square may move one hex, as long as they do not begin or move into an enemy ZOC, and the terrain being moved into costs 2 or less MP to enter.
- It costs 1 MP to leave Square. Units may not leave Square if they are in the ZOC of an enemy unit.
- Units in Square that suffer a Disorder are automatically out of Square.
- Units in Square are treated as a Massed Target for Artillery Fire purposes.
8.57 Counter-Charge. Thus is the ability of a defending cavalry unit to counter the inertia of the on-coming enemy troops by supplying some of its own, under the "Best Defense is a Good Offense" theory.
If a cavalry unit is in the Frontal ZOC of a non-charging enemy Cavalry unit, it may not Counter-Charge.
Against Charging Cavalry: If the target of a Cavalry Charge is a cavalry unit that is neither Disordered or Routed, and it is being charged through its Frontal hexes, the defender may attempt to Counter-Charge. Roll a die prior to resolving the Charge, adding two (+2) to the die roll if the Counter-Charging unit is a Light cavalry unit attempting to counter-charge oncoming Heavy cavalry:
- if the die roll is the same as or lower than the Counter-Charging unit's Cohesion, the counter-charge is successful. The (original) attacking cavalry unit does not gain any Charge benefit.
- if the die roll is higher than the Counter-Charging unit's Cohesion, there is no counter-charge and the Charge, or Infantry Shock, is resolved as per the normal Charge rules.
- Additionally, if the Counter-Charging unit is Heavy Cav. and the Charging unit is Light Cav., the -1 DRM for Heavy Cav. Counter-Charging Light Cav. applies to the Light Cav.'s Shock die roll.
Against Shocking Infantry: If the target of an infantry (only) attack is a cavalry unit that is neither Disordered or Routed, and it is being shocked through its Frontal hexes, the defending cavalry may choose (no die roll necessary) to Retreat, Stand or Counter-Charge. If he chooses Counter-Charge, the infantry may not attempt to form Square and the counter-charging cavalry get the usual Charge DRM.
Play Note: Using infantry to attack cavalry can be a tricky proposition for both players.
8.58 Pursuit. If a charging cavalry unit (this rule does not apply to normal shock) causes the defender to vacate the hex (retreat or eliminated), the victorious cavalry will Pursue (the cavalry form of Breakthrough).
- If the defender is retreating/routing, the charging cavalry pursues, following the retreat path, until it moves adjacent to the retreating unit or enters an enemy ZOC, whichever occurs first.
- Pursuing Cavalry may not change facing.
- If the defender was eliminated, the charging cavalry advances into the vacated hex and stops.
- The number of cavalry that Pursue is limited only by stacking restrictions. If there are more units than would be allowed, Heavy cavalry has precedence, and then Cohesion Rating. All rules for Advancing apply.
8.59 If a charging cavalry unit's Pursuit ends so that the retreating enemy unit is in the charging unit's Frontal Hex it must charge that unit. If it ends Pursuit so that a different enemy unit is in its Frontal hex, it may, if the player wishes, shock/charge that unit. There is no limit to how many times this will occur in a turn; however, each time that unit Pursuit Charges, subtract one (-1), cumulatively, from its Shock die roll. Automatic Disorder is not applied until all Pursuit has been resolved/completed.
8.6 Jaegers
Design Note: Jaegers are available only for the Austrians, and not in all scenarios. They represent the Austrian attempt to use the skirmisher system (embodied in the Defensive Fire Shock DRM mechanic) that the French had developed. While the Austrian Jaegers were often quite good, their presence was usually sporadic.
8.61 Jaegers have the following, different Movement properties:
- Stacking (see the Stacking rules).
- Extended Movement. Jaegers are treated as a regular infantry unit for Extended Movement.
- Jaegers that are not stacked with non-Jaeger infantry may not form square.
- Jaeger ZOC is the same as that of regular infantry.
- Enemy ZOC. Jaegers may not enter an enemy ZOC unless stacked with a friendly non-Jaeger unit, or there is already such a unit in that hex.
Play Note: A Jaeger stacked atop 2 Disordered infantry will give that stack a ZOC.
8.62 They have the following different Combat properties:
- Shock Defense. Jaegers may add their SP to those of the entire hex. However, if the player wishes, after his opponent's Commitment die roll, for which the Jaegers have supplied a DRM, he may retreat the Jaegers one hex before resolving the actual Shock, which means they do not add their SP in, nor are they affected by the combat.
- Shock Attack. Jaegers may never Shock attack by themselves. However, if at the top of an attacking stack, the Jaeger Defensive Fire Rating is subtracted from that of the target unit when determining that DRM for Commitment. When used in this manner they are subject to any negative results incurred.
- Jaeger Cohesion. This rating may not be used to determine Cohesion differential, unless the Jaegers are the only unit being shocked.
- If attacked when alone in a hex they defend like a normal infantry unit. However, if alone in a hex when an enemy infantry unit moves into its ZOC, and not Disordered or Routed, Jaegers may retreat one hex regardless of facing. They may not fire, but the enemy unit stops, ceasing movement for the turn (no advance).
8.7 Combat Results
Disorder
8.71 A unit that suffers a Disorder result is flipped to its Disordered side. If it is already Disordered it Routs. If it is already Routed, it is eliminated.
8.72 Disordered units:
- May not use Extended Movement
- If Jaegers, may not retreat before Shock
- Pay +1 MP to enter an enemy ZOC
- Have no ZOC
- May not Shock attack (except for Charging Cavalry Disordered by Artillery Reaction Fire).
- Artillery may not fire
- May neither form Square nor Counter-Charge
Combat-Initiated Retreat
8.73 A unit that retreats as a direct result of Shock must move one hex away from the enemy unit that caused the retreat. It maintains the facing it had before retreating; it may not change facing. If a Disordered unit receives another Disorder result, and therefore Routs, ignore the one-hex mandate and Rout the unit instead. If it cannot complete its retreat, it is eliminated.
8.74 A retreating unit:
- may not enter a friendly occupied hex, unless a) allowed by Stacking rules and b) that is the only path of retreat (see below). If a unit is forced to retreat into a friendly-occupied hex, its facing is changed to be the same as the units currently in the hex.
- may not cross an uncrossable hexside.
- may retreat into an enemy Frontal Hex, but suffers an additional Disorder result for each such hex entered.
8.75 If a unit's only path of retreat is into a friendly unit with which it cannot stack, the retreating unit may move through the stationary unit, even if it has to move further than it normally would. The stationary unit then undergoes a Disorder Cohesion check. If the stationary unit fails this check, it receives a Disordered result (which means that already Disordered units Rout). This may be repeated until the retreating unit finds a hex in which it can stay. If the stationary unit is a Routed unit, the latter automatically Rout Moves instead of undergoing a Disorder Cohesion check.
Rout
8.76 A Disordered non-Artillery unit that suffers an additional Disorder result Routs. If the unit is Artillery it is eliminated. Artillery stacked with a unit which routs are eliminated if there are no unrouted non-artillery units remaining in the hex. When a unit is Routed it must immediately Retreat one half its Disordered Movement Allowance, rounded up. If it cannot complete that movement it is, instead, eliminated. Unless the terrain is prohibited to a unit, it may always retreat one hex, regardless of the movement cost.
8.77 In an Activation Phase, a Routed unit:
- May not move, shock, or fire. It will defend against Shock.
- Has no ZOC
- May not stack
- May neither form Square nor Counter-Charge
- Does not have any specific facing.
- If Shocked, attacker adds two (+2) to his die roll (which accounts for its lack of cohesive formation or facing)
- If it suffers an additional Disorder, it is eliminated
- If Cavalry or Jaegers, may not retreat before Shock
8.78 In the Rout Movement step of the Command Morale Phase, Routed units must move their full, Disordered Movement Allowance towards the nearest designated Retreat Hex, as per scenario instructions, in as direct a path as possible using Retreat rules. However, a routed unit is always faced in the direction to which it is headed. Units that Rout off the map are eliminated; they may not return.
8.79 A unit retreating/routing into a Town, Village, Castle or Redoubt may stop there and consider its Retreat completed. Units which become Routed in a Town, Village, Castle or Redoubt hex are not required to Rout Move at all. It does not have to Rout Move again (it also has the opportunity to automatically Rally to Disordered Status in the Rout Movement Phase). Stacking restrictions still apply, however.
8.8 Rally
8.81 Disordered units that have neither moved (and, for this purpose, changing facing is movement) nor Fired; and all Routed units, may undertake Rally attempts at the end of their Activation Group's Activation Phase. Units adjacent to an enemy unit may not undertake Rally. Rally is not dependent on Orders status.
8.82 Disorder Rally. To rally a Disordered unit, roll the die. If the die roll is the same as or lower than its (Disordered) Cohesion, flip the unit to its Normal side and reface it as desired. If the die roll is greater than the unit's (Disordered) Cohesion, it fails the Rally attempt, and remains Disordered.
8.83 Rout Rally. When attempting to rally a routing unit, the player rolls the die. One of three things can happen:
- If the die roll is at least two times (2x) that of the unit's Disordered Cohesion, that unit is eliminated.
- If the die roll is higher than the unit's (Disordered) Cohesion, but less than 2x, nothing happens. (It's still routed, etc.)
- If the die roll is equal to or lower than the Cohesion, the unit is Rallied to Disordered status. The unit may not change facing.
8.84 Routed units that start the Rout Movement Phase in a Village or Castle (but not a Redoubt) are automatically rallied to Disorder status in the Rout Movement Phase. However, they may not attempt to Rally as described above.
8.9 Collapse
8.91 Each Activation Group (AG) has a point where, having taken too many losses, it will no longer function efficiently. Collapse is determined in the Group Morale Phase (E) at the end of the turn.
8.92 When at least 2/3 of the units (not strength points) in an AG -- not counting artillery; they have no bearing on this rule -- have either Routed (and are still on the map) or been eliminated, all of the remaining units in that AG are automatically Disordered (even if it's a second Disorder, or the unit is already Routed!!). They may never get better than Disorder for the remainder of the game, even if some of the Routed units rally.