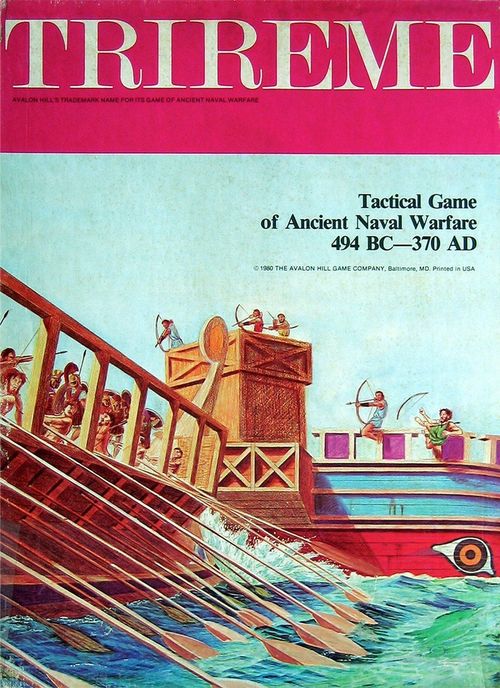
Trireme: Tactical Game of Ancient Naval Warfare 494 BC-370 AD
Trireme: Tactical Game of Ancient Naval Warfare 494 BC-370 AD Rulebook
Table of Contents
Table of Contents
FLEET GAME
Introduction
The Fleet Game rules for Trireme are quick, easy to learn, and represent the ships and tactics of ancient naval warfare. If you are unfamiliar with wargames, it is an excellent introductory game. If you are an experienced wargamer, you may wish to play the Fleet Game with the optional rules as well, which provide greater complexity, sophistication, and variety. The Fleet Game allows easy handling of many ships, and thus larger scenarios and battles can be fought using these rules, than using the Ship Game rules. In addition, the Ship Game rules are more complex, and require bookkeeping not needed in the Fleet Game.
Crew Quality
Ships have either Expert, Average, Green, or Slave crews. Historically, slaves were not used on warships, but are included here for Hollywood fans. Each scenario indicates which ships are which quality level.
Preparing for Play
Select one of the scenarios in the back of this booklet, and set up as specified there.
Playing Procedure
Trireme is played in turns. Each turn, play proceeds in the following steps, called phases:
- Cripple Recovery: crippled ships may attempt to recover.
- First Player Movement: the player (side in multi-player games) who moves first now moves his ships.
- Second Player Movement: the other player (side) now moves his ships.
- Ram Results: all rams of ships are resolved.
- Boarding Results: all boarding battle situations are resolved.
The game continues, turn after turn, until one player (or side) meets the victory conditions, or until only one player has ships remaining on the mapboard. The scenario rules will indicate which player is first, and which is the second player.
Movement
General Rules
Each player moves his ships in his own phase. Move ships one at a time. Finish moving one ship before you start moving another. You can move none, one, some, or all of your ships, as you desire.
Basically, each ship has movement points (MPs). Each new hex, or "move," a ship makes costs one MP from its allowance. Movement points cannot be accumulated, nor can they be transferred between ships.
Actually, each ship has two movement speeds: normal cruising speed, and a special full speed. A ship can use either cruising or full speed in a turn, but never both. A ship will have a different number of MPs (movement points), depending on the speed selected.
A tired ship cannot use full speed, it can only use cruising speed.
No ship can enter another ship's hex, except to ram.
Standard Movement
A ship can move straight ahead, or into one of the hexes to either side of its bow. When the bow half of a ship enters a new hex, the stern follows and occupies the hex originally occupied by the bow. This means a ship really has three possible moves, each of which costs a movement point (MP) to execute:
- Moving Ahead (one MP)
- Turning to Starboard (one MP)
- Turning to Port (one MP)
A ship can combine ahead, port, and/or starboard turns in any way or order desired. Exception: ships using fast speed may have special limitations (see below). A ship can make a series of moves, until it either expends its last MP for that turn, or you wish to halt the ship.
Backwater Movement
A ship may backwater instead of making a normal move. A ship can never combine a backwater move with any other type of move. A backwater move is always one hex per turn, never more. There are three options for making a backwater move:
- Backwater Directly Astern (all MP)
- Backwater to Starboard (all MP)
- Backwater to Port (all MP)
Full Speed
A ship may use full speed, unless crippled and/or it has tired oarsmen. Except for Lembi type ships, a ship using fast speed cannot make two turns in a row. After each turn move, the ship must make an ahead move. A ship can still make multiple turns in a phase, provided it uses a MP for a turn, then a MP ahead, then another MP for a turn, etc.
A ship need not use its full MP allowance when it makes a "full speed" move. In fact, a ship can declare itself using full speed, and then not move at all, or just backwater. Of course, such a practice is somewhat peculiar.
When a ship finishes a full speed move (even if full MP was not used), it must roll a die to see if the oarsmen become tired. If the oarsmen do become tired, the ship cannot make any more fast speed moves in the game. Place a tired counter on the ship as a reminder:
| ship crew quality | die roll result for tired crew | die roll result for crew not tired |
|---|---|---|
| expert | 1 | 2, 3, 4, 5, 6 |
| average | 1, 2 | 3, 4, 5, 6 |
| green | 1, 2, 3 | 4, 5, 6 |
| slave | 1, 2, 3, 4, 5 | 6 |
Reefs & Shoreline
No ship may enter a shoreline hex.
A ship may enter a reef hex, but when it does, it must immediately roll a die to determine whether it is instantly stopped and wrecked, or can continue moving. Each new reef hex entered must be checked separately. If a ship passes safely through a reef hex, and then enters it again at some later time, it must roll a die again. Die roll results for reef passage are:
| die roll | results |
|---|---|
| 1 | ship strikes reef and is sunk, regardless of type or size |
| 2 or 3 | ship strikes reef and is sunk, unless it is a Lembi or Saxon, which pass safely |
| 4 | ship strikes reef and is sunk, but only if it is a Veneti ship, Merchant ship, or has a boarding value of 12 or more, all other ships pass safely |
| 5 | ship strikes reef and is sunk only if it is a size (6) Veneti ship, size (5) merchant ship, or a Sedekieres |
| 6 | ship passes safely over reef regardless of size or type |
Ramming
General Rules
A ship rams another ship by spending a movement point, to make a straight ahead move into the hex occupied by the target. Instead of actually executing this move, and entering an occupied hex, the ship stays where it is, and a ram occurs.
When a ship makes a ram, it automatically ends its move. A ship cannot continue moving that phase, even if it has movement points remaining.
If a ship is rammed, it cannot move for the rest of that turn. This means that a ship which moves in the second player's phase, rammed by a ship which moved in the first player's phase, will lose its turn. Depending on ram results and grappling (if any), one or both ships may be able to move on the following turn.
Resolving a Ram
During the ram resolution phase, all ram situations are resolved, in any convenient order. All rams are presumed to occur simultaneously, and thus no results are applied until all rams are resolved.
To resolve a ram, the rammer and his target each roll two dice, and add all appropriate modifiers. These modifiers are:
a) Ship Size Value: add size value of ship, given on the counter
b) Crew Quality: add crew quality value for ship, see below
c) Situation Modifier: add situation modifiers that apply, ramming ship uses one group of modifiers; target ship uses the other, below:
Crew Quality Values
- +3 expert crew
- +2 average crew
- +1 green crew
- +0 slave crew
Ramming Ship - Situation Modifiers
- +5 ship rams target in any beam ram
- +2 ship rams target in stern
- -1 ship is moving at cruising speed this turn
- -2 ship is crippled
Target Ship - Situation Modifiers
- +3 ship rammed in bow beam
- +1 ship rammed in quarter beam
- +1 ship has higher full speed than rammer
- -2 ship is crippled
Each ship now compares its total to the other ship's total, by subtracting the other total from its own. For example, if the rammer had a total of 15, and the target a total of 9, the rammer would have a "+6" comparison, and the target a "-6" comparison. Each ship finds its own total on the list below, and applies the result:
| comparison | result |
|---|---|
| +3 or more | no effect |
| -2 to +2 | ship is crippled if its total is an even number, no effect if the total is an odd number |
| -3 to -6 | ship is crippled |
| -7 or less | ship is sunk |
Special Ram Rules
No Ram Bow: Ships with a parenthesized "( )" size value do not have ram bows. These ships may not ram other ships. However, these ships may still be rammed, and use their size value as given in those cases.
After Ram: on the turn following a ram, unless grappled together, the ships are free to move as desired. The only exception is the ramming ship. The first move a ramming ship makes, after contact, must be a backwater move. This move may be a number of turns hence, if the ship remains grappled for numerous turns.
Oar Rakes
Instead of a normal ram, a ship may make an oar rake.
An oar rake is only allowed in cases where the ship is at full speed, and rams on the bow beam or quarter beam. In any other situation, no oar rake is allowed.
A ship making an oar rake need not travel ahead when expending movement points for contact. The movement point expended for the rake may be a turn move instead.
After a ship makes an oar rake, and expends the movement points and determines the result (see below), it may continue moving. Unlike a ram, an oar rake does not end movement. Similarly, a ship attacked by an oar rake may, on its phase, move also.
A ship may not make more than one oar rake attack per turn per enemy ship. In addition, a ship may not make an oar rake attack on a ship, and then ram it with the same attacking ship. An oar rake attack (successful or not) prohibits a ram attack at the same enemy. However, a ship could rake one enemy, and then ram another, in the same move.
Resolving an Oar Rake
To resolve an oar rake, the ramming/raking ship and target ship each roll a die. If one ship has a better crew (expert is the best, slave the worst), it adds one (+1) to its die roll.
If the raker rolls the higher amount, the target is crippled. If the roll is equal, or the raker rolls less, neither the raking nor the target ship are affected.
Oar rakes are resolved at the instant they occur, during movement. This allows the raking ship to continue moving as appropriate.
Boarding Battles
Grappling
At the start of boarding battles, any ship next to (adjacent to) another ship may attempt grappling. If the other ship does not resist, the grappling is automatic. If the other ship does resist the attempt, each ship rolls a die, and the grappler must roll higher to succeed. Each ship adds and subtracts all appropriate modifiers to its die roll:
Die roll modifiers (grappling, for each ship):
- +1 rammed other ship this turn
- +1 has better crew than other ship
- -1 is crippled
Ships may attempt to grapple each other, but even if both are successful, only one grappling situation exists between them. A ship grapples separately with each other ship, friendly or enemy. A ship may make one grappling attempt per ship per turn. Thus a ship can make multiple attempts, provided each attempt is against a different ship.
To indicate ships grappled together, put a "grappled" counter between them.
Boarding Battles
If two hostile ships are grappled together, they must fight a boarding battle in the appropriate phase of the turn (see Playing Procedure). A boarding battle may result in one ship capturing the other, or in a stalemate.
A ship may be required to fight two or more boarding battles at once, because it is grappled to two or more hostile ships. In this case, the player controlling the ship must apportion his boarding value, using some in one battle, some in another, as he desires. He must use at least one point of his value in each battle, or his ship is automatically captured.
All boarding battles occur simultaneously. A ship may be captured by the enemy, but it can still fight any other enemy ships, and perhaps capture them at the same time.
Resolving a Boarding Battle
To resolve a boarding battle, compare the two boarding values, and roll a die. Consult the table below, cross-referencing the value comparison with the die roll:
| boarding value comparison | 1 | 2 | 3 | 4 | 5 | 6 |
|---|---|---|---|---|---|---|
| stronger ship triple (3x) or more value of the weaker ship | - | Sw | Sw | Sw | Sw | Sw |
| stronger ship double (2x) or more value of the weaker ship | - | - | - | Sw | Sw | Sw |
| stronger ship higher, but not double (2x) value of weaker | Ws | - | - | - | Sw | Sw |
| values exactly equal | Ws |
Results codes mean:
- Sw = stronger ship captures weaker ship
- Ws = weaker ship captures stronger ship
- - = stalemate (battle continues unless ships degrapple)
Captures
If a ship is captured, the new owner places a marine group counter of his color on the ship, to show ownership. If the ship is later recaptured by its original owner, the original owner puts his color marine counter on the ship instead. Captured and recaptured ships must always be marked by marine groups.
When a ship is captured or recaptured, it automatically becomes tired and crippled both. It may attempt to recover from the crippling, but not the tiring.
A captured ship is always presumed to have a slave quality crew, regardless of normal crew quality. When a ship is captured, it is still presumed to have a slave quality crew, due to the losses inflicted on the crewmen while the ship was in enemy hands. This is why a marine group counter is always needed - to show the ship is now slave quality, due to being captured or recaptured.
Continued Battles & Degrappling
After a boarding battle is resolved, ships may attempt to break grapples. A ship may make one degrappling attempt for each separate ship it is grappled to.
When a ship announces a degrappling attempt, if the player controlling the other ship consents, the grapple is automatically broken, and removed. If the other player objects, and wishes to keep the ships grappled, both must roll a die. The player whose ship has a better crew may add one (+1) to his die roll. The degrappler succeeds in breaking the grapple only if his die roll total is higher. If the total is equal, or the degrappler is lower, the grapple remains.
If ships remain grappled together at the start of a new turn (because there was no degrappling), neither ship can move (except to drift, see optional rules), and a boarding battle must be fought again if the ships are hostile.
Cripples
Effect of Crippling
A crippled ship is indicated by placing a "crippled" counter on it.
A crippled ship is reduced to one (1) movement point per turn. It cannot use fast speed at all. In addition, the boarding value of a crippled ship is cut in half, and any fractions are dropped. Exception: ships with a boarding value of "1" are cut to "1/2" when crippled, and that fraction is used, instead of zero. This halving of boarding value and the speed reduction only apply as long as the ship is crippled.
If a ship is crippled, and then suffers another cripple, there is no further effect. However, if a ship has partly recovered from a cripple (has rolled a '4' under recovery, see below), and is crippled again, the full crippling effect is applied once more.
Recovery from Crippling
At the start of each turn, each crippled ship may roll a die and attempt recovery, at that player's discretion. A ship is never required to attempt recovery. No ship can attempt recovery more than once per turn. Die roll results are:
| die roll | result |
|---|---|
| 1 | ship flounders and sinks, is removed from the game |
| 2 | ship permanently crippled, cannot attempt further recovery; indicate this by placing a second cripple counter on the ship |
| 3 | no effect, ship may attempt to recover again next turn |
| 4 | ship recovers full boarding factor, but speed reduction still applies, turn over cripple counter to show partial recovery, ship may attempt to recover again next turn, and adds two (+2) to the die roll |
| 5 or more | ship recovers completely, remove cripple counter |
FLEET GAME OPTIONAL RULES
Sailing
Wind Direction
The scenario may indicate the direction of the wind. If not, roll a die to determine what direction the wind blows from:
| 1 | 2 | 3 | 4 | 5 | 6 |
|---|---|---|---|---|---|
| N | NE | SE | S | SW | NW |
Sails
A ship may use a boatsail, or a mainsail. All ships carry a boatsail. Ships without oars (have "sail" instead of fast and cruising speed values) always have a mainsail. Oar powered ships normally do have mainsails, but may carry them. If an oared ship carries a mainsail, it should be placed on the ship counter upside down, and one (1) must be subtracted from the normal fast speed allowance of the ship, due to the increased weight. Cruising speed is unaffected if a mainsail is carried.
A ship can raise or lower sail, instead of making a normal move. The turn the sail is raised or lowered, the ship may not move (exception: Hemiolas and Triemiolas). A ship can simultaneously raise one sail while lowering another, all in the same turn.
If a ship rams or is rammed while a sail is raised, the ram jars the ship so badly the raised mast and sails collapse into wreckage. The sail is permanently lost. However, a ship may grapple and degrapple with sails raised, with no adverse effects on the sails.
Sailing Movement
A ship with sails raised will use sailing movement. Movement depends on the direction the wind is striking the ship at the start of the turn. See the Wind & Sailing Attitudes diagram for details. Movement points (MP) allowed depend on the wind attitude, and the type of sail used:
| attitude | MP with mainsail | MP with boatsail |
|---|---|---|
| A | 2* | 2 |
| B | 2 | 1 |
| C | 1 | 0 |
| D | 0 | 0 |
*3 MP instead if ship has oars and has size value of '7' or less, or if ship is Veneti.
A ship may turn while moving, changing its attitude toward the wind. This does not affect its speed.
A ship may start a turn in an attitude that allows it zero (0) movement points. In this situation, the ship may move its bow into either adjacent hex to the side, thus rotating the ship 60 degrees, instead of making a normal move. This special turn is shown in a diagram in the original rulebook (a ship with zero sailing MP pivoting its bow into either adjacent side hex).
Combination Sail & Oar
A ship with sails raised may still use oars. However, oars are used solely to add one extra movement point (MP) to the normal allowance. A tired and/or crippled ship cannot use sail and oar combination movement.
Hemiolas & Triemiolas
These were special oar/sail ships that were specially designed for quick raising and lowering of the mainsail.
A Hemiola or Triemiola can raise and use a mainsail all in the same turn, or it can lower a mainsail and use oars in the same turn. This is different from all other ships, which cannot move the turn they raise or lower sail.
A Hemiola or Triemiola cannot use full speed the same turn it raises or lowers any sails, but it can use cruising speed.
Hemiolas and Triemiolas carry mainsails without any effect on their full speed. They also carry boatsails, in case they lose their mainsail, or do not wish to have the mainsail raised.
Wrecks & Drift
Wrecks
If a ship is sunk, it is not immediately removed from the game. Instead, the ship counter is turned over, and becomes a floating wreck. Wrecks are waterlogged hulks that cannot fight, but can still cause damage by colliding with intact ships. At the end of each turn, roll a die for each wreck on the map. If a "6" occurs, the wreck finally breaks up and is removed from the game. Otherwise, it remains on the map.
Drifting
If a ship or wreck does not move for two consecutive turns, at the end of the second turn, the ship will drift one hex with the wind. Drift movement is executed after all normal movement for both players is finished.
A ship or wreck drifts with bow and stern simultaneously. Both the bow hex and stern hex of the ship change to a position one hex downwind. This means the ship may end up moving sideways or even backwards.
Collisions
If a ship or wreck drifts into another, instead of entering an already occupied hex, it remains in place and a collision occurs. When ships collide, both are automatically crippled. If a ship collides with a wreck, or vice versa, the ship is crippled, and the wreck is unaffected.
A ship under sail, and involved in a collision, counts as if the sail were instantly lowered. However, the sail is not permanently damaged, and can be raised again.
Special Equipment
Grappling Equipment
Some ships carried special devices to assist in grappling. These include the corvus and various grappling hooks, including hooks fired from engines, generally termed "iron hands." A ship with "iron hands" is shown by keeping a grappled marker on it at all times.
A ship with grappling equipment adds one (+1) to its die roll, whenever it attempts to grapple another ship.
A ship with grappling equipment also adds one (+1) to its die roll whenever it is resisting the degrappling attempt of an enemy ship.
Grappling equipment does not help a ship resist enemy grappling, nor does it help a ship making a degrappling attempt.
Boarding Equipment
Some ships carried special constructions to improve the efficiency of its marines in boarding battles. These include towers on decks, extra armament for rowers, improved marine equipment, and other historical devices. In the Fleet Game, this is represented by having boarding equipment.
A ship with boarding equipment adds its size value onto its normal boarding value, for the net boarding value in battle. For example, a Dekares with a boarding value of 40, would add its size value of 11, for a total boarding value of 51, if it had special boarding equipment on board.
This special equipment is shown by having a white marine group counter on the ship at all times.
Losing Special Equipment
A ship with grappling and/or boarding equipment on board cannot recover from crippling. No recovery attempt can be made unless the grappling and boarding equipment is jettisoned. A player may jettison this equipment at any time, in order to begin making cripple recovery attempts. Once jettisoned, the equipment is permanently lost. It cannot be recovered.
Selective Additions
Players familiar with the Ship Game may wish to add aspects of those rules to the Fleet Game. In essence, the Fleet Game is just a simplified and generalized version of the Ship Game, so that any aspect of the former can be replaced by the latter.
However, in particular, the optional Ship Game rules regarding weather, wind, sea state, drift, sailing ability, ships on shore, flame weapons, etc., can be used without any special adjustments to the Fleet Game.
Players who don't mind a little bookkeeping may wish to use the Ship Game method of determining tiring, based on crew quality and moves under oars at full speed, rather than using the simpler die roll system here in the Fleet Game.
SHIP GAME
Introduction
The Ship Game rules for Trireme are more complex, and require more study than the Fleet Game. Although many of the same concepts are used, the Ship Game is entirely different from the Fleet Game. No rules are "carried over" or "borrowed" from the simpler Fleet Game.
The best way to learn a complex game is to read the rules once, completely and quickly. Then immediately play a game. As you play, look up any rules questions or problems you may have. This way, you learn the finer points as you play, and need not memorize them. After a few games, you will have a complete knowledge of the rules and game, without having to extensively study the rules. In effect, you learn while you play the game.
Prepare for Play
To start the game, players first select one of the scenarios, and follow all appropriate procedures given there.
Then, each player must fill out a log sheet for each of his ships. The log sheet has room for three different ships, and can be used front and back. Use the Ship Data Table for the log sheet information, following the instructions below.
-
Name: Select a counter for the ship, and record the ship's name from the counter (last word on the counter).
-
Type: Indicate the type of ship here (the first word(s) on the counter).
-
Crew Quality: Indicate the crew quality (expert, average, poor, slave) here as specified in the scenario.
-
Size: Indicate here the ship size number, as found on the ship data table.
-
Oar Speed: Indicate the full speed ("fs") and cruising speed of the ship here, in the two boxes. Full speed depends on the cargo points carried by the ship. On the ship data table are a number of different full speeds, with different cargo limits after each. Total the cargo points carried by the ship, and use the appropriate full speed rating. Cargo points cannot exceed the highest value, listed for that ship type. If cargo points are less than the minimum number listed for the ship, simply use the highest given full speed. For example, if a Cataphract (Ct) Quinquereme carries 0 to 6 cargo points, it has a full speed of 4. If it carries 7, its full speed is only 3, and if it carries 8 (the maximum possible) its full speed is only 2.
If the full speed of a ship equals the cruising speed, the ship has no full speed, just a cruising speed.
Each point of marines, and each artillery engine, counts as one cargo point. Other optional rules equipment often counts as cargo too. In addition, certain items in the optional rules may not count as cargo, but reduce speed above and beyond that determined by cargo alone.
-
Holes: These boxes are checked during the battle, if a ship is holed.
(The log sheet example is a diagram in the original rulebook. On the log sheet, deck crew, heavy marines (3 factors/pt), light marines (2 factors/pt), missile marines (1 factor/pt), artillery engines (bow and stern), towers (4 factors), and oarsmen (1 factor/pt) each have a box; the orders section has columns for turn, movement orders, and notes.)
Playing Procedure
Trireme is played in turns, and each turn is divided into phases. The phases must be followed in strict order every turn. The game continues, turn after turn, until either one side wins, or one side surrenders. The game can never end in the middle of a turn, it always continues through the end of the current turn.
Phases in a Turn
- Wind & Weather: if optional rules for wind, weather, tides, etc., are used, any change in these conditions is determined.
- Movement Orders: all players write movement orders for all their ships.
- Simultaneous Movement: all ships are moved according to their orders. For ease in resolving movement, this phase is subdivided into five steps (1, 2, 3, 4, 5), see simultaneous movement rules. Collisions, rams, and oar rakes (optional rules) are resolved as they occur.
- Drift Movement: if optional drift rules are used, all ships required to drift do so now, and any collisions are resolved.
- Missiles: ships carrying missile-firing marines or engines may now shoot.
- Grappling: ships may attempt to grapple where allowed.
- Boarding Battles: grappled hostile ships fight boarding battles.
- Morale: a ship required to check morale must do so now.
- Marine Groups: groups of boarding parties are formed and placed on captured ships or transferred to friendly ships where allowed and desired.
- Degrappling: grappled ships may attempt to degrapple and release themselves.
- Cripple Recovery: crippled ships may attempt to recover now.
Movement Orders
General Rule
Each turn, players write movement orders for their ship(s). A ship can only move according to its orders. Movement orders are written secretly on the log pad, and then revealed when simultaneous movement begins.
Order Errors: if a ship has incorrect or ambiguous orders, it is in confusion, and cannot move at all that turn (except to drift, if optional rules are used).
Movement Speeds
Most ships moving under oars have two speeds, "cruising" and "full speed." Ships are presumed to travel at cruising speed unless otherwise ordered. Full speed is used whenever you write "fs" (full speed) in the notes section just after normal movement orders. This permits the ship to use full speed movement points, instead of the cruising speed movement points.
Tiring occurs each time full speed is used. Each time you write "fs" for a ship, check or cross off one of the "tired" boxes. Depending on the quality of the ship's crew, after so many boxes the crew is tired, and cannot use full speed again during the battle. Slaves are tired after one fs, green oarsmen after two, average after four, and expert after six, as shown on the log sheet. Check off the boxes from left to right, when you cross off the box with the crew quality named in it, the ship is tired. A tired marker is placed on the ship as a reminder of its state.
Movement Points
Depending on speed selected (and damage), a ship is allowed between one (1) and five (5) movement points, or none at all. The number of points allowed determines how far it can move each turn. Each movement order normally costs one (1) movement point. Therefore, if a ship has five points, it can have up to five movement orders.
Movement points cannot be accumulated from turn to turn, nor can they be transferred from ship to ship.
A ship need not use up all movement points, it can pause for one or more points, instead of using them for movement.
Ram and/or collision effects (crippling and/or holed) may reduce the movement points allowed a ship. Full speed is reduced first. When full speed is reduced to cruising speed, or the ship has no full speed, all losses are taken from cruising speed instead, and the ship has no more full speed. See Ram/Collision rules.
Movement Orders
The various types of movement orders allowed are shown below, with an explanation of each. Orders can be combined and/or repeated as desired. However, backwater (B), bow starboard (bS), and bow port (bP) orders cannot be used when a ship is at full speed. In addition, a backwater (B) move order cannot be used in the same turn any ahead (A), starboard (S), and/or port (P) orders are given.
- Pause "-": 1 movement point. Ship remains in place, uses up one MP.
- Ahead "A": 1 movement point. Move ahead one hex.
- Starboard "S": 2 movement points (1 MP if ship size 1-3). Turn ship to right and ahead.
- Port "P": 2 movement points (1 MP if ship size 1-3). Turn ship to left and ahead.
- Bow Starboard "bS": 1 movement point. Turn bow to right. Prohibited at full speed.
- Bow Port "bP": 1 movement point. Turn bow to left. Prohibited at full speed.
- Backwater "B": 2 movement points. Move backwards one hex. Backwater (B) moves are prohibited if the ship is at full speed, and/or, on any turn the ship also uses an Ahead (A), Starboard (S), or Port (P) movement order.
(The original shows each order as a hex diagram, and an example of orders "-/P/A/-/S" and "B/bP".)
Two point Orders: when a movement order costs two (2) movement points, a double order must be used. The first order is always a pause "-", and the very next order is the actual 'action' order. For example, a Trireme (no. 6 size) has a starboard turn as "-/S". Note that no. 1, 2 and 3 size ships need only spend one movement point for port and starboard turns, while all larger sizes must use two movement points.
If a ship only has one movement point left in a turn (including ships with only one point per turn), a two-point order can be written as a two-turn action. For the first turn, the "-" pause is written, and then the second 'action' half is written for the following turn. An order planned ahead this way must be followed, it cannot be changed. Exception: if a ship is involved in a ram or collision (including oar rakes, if optional rules are used) on the first turn, the second turn order is cancelled if the ship's movement is halted. The ship will start the next turn "fresh", with no pre-planned orders.
Orders Accounting
A ship should have a movement order for each movement point available that turn. If orders are insufficient for the movement points allowed, the ship will automatically have pauses following the orders, to make up the difference.
For example, a ship with four movement points only has "A/A" orders. This is considered "A/A/-/-" instead.
Gaining Way
If a ship had bS, bP, or B orders during a turn, that ship cannot use full speed (fs) on the next turn. A ship must have only A, S, and/or P orders one turn in order to use full speed on the next. A ship can have pause orders one turn, and full speed the next, provided the ship has A, S, and/or P in addition to pause on the first turn.
Crippled Ships
A crippled ship is only allowed one movement order per turn, instead of its normal allowance. This order could be any one-point or two-point order, as desired. A crippled ship cannot use full speed. This restriction lasts as long as the ship is crippled, when the ship recovers, it regains normal allowance and movement rules.
Immobile Ships
Damage may reduce a ship to zero (0) movement points. Such a ship cannot be given any movement orders, it must remain in place (exception: optional rules may permit use of sails instead, or drift). Damage cannot reduce a ship below zero movement points. If optional oarsmen rules are used, additional damage that causes oarsmen losses is still taken, to those oarsmen, even though movement is zero.
Shoreline
If the bow or stern of a ship enters any shore hex, the ship has run aground and is wrecked. The crew is presumed to immediately abandon ship, and the ship itself is lost to both sides for the battle. It cannot be captured or refloated.
Exception: see optional rules for ships on shore.
Reefs
Reef hexes are marked with a light blue counter, as specified on the scenario maps. "Reef" hexes historically include rocks, sand bars, marshy areas, etc.
When a ship enters a reef hex with either bow or stern, it must immediately roll a die to determine whether it is stopped or not. If the ship successfully passes, the entire ship may move through the reef hex without trouble. However, any new attempt to pass the hex requires a new die roll. If the ship does not successfully pass, see the results explanations below. Scenario conditions indicate whether the tide is flooding or ebbing. Compare the tidal state with the roll of a die below:
| die roll | flooding (rising) tide | ebbing (falling) tide |
|---|---|---|
| 3 or less | successfully passes | successfully passes |
| 4 | successfully passes | stopped |
| 5 | stopped | wrecked |
| 6 or more | wrecked | wrecked |
Depending on the type and size value of the ship, one or more may be added or subtracted to the die roll:
- -1 if ship is Lembi or Saxon
- +1 if ship is Sexteres, Hepteres, Octares, Novares, Dekares, size no. 4 Veneti, or Small Merchant
- +2 if ship is size no. 6 Veneti, Large Merchant, or Sedekieres
Stopped: ship immediately halts and is crippled. It will not move any further this turn, ignore all remaining movement orders. If optional sailing rules are used, and any sails are raised, these collapse and must be cut away, as if the ship was rammed. On subsequent turns the ship may move, but cannot use A, S or P orders until it is clear of the reef at the start of some turn.
Wrecked: bottom of ship is torn out, ship is lost, all hands abandon it. Ship will break up, and therefore never forms a floating wreck (if that optional rule is used). Ship cannot be captured by either side after being wrecked.
Map Edges
Unless scenario conditions specify otherwise, ships may exit off map edges. Normally, scenarios are limited to a certain part of a larger battle, or a strategically important coastal area. Therefore, when either part of a ship exits the map, the entire ship is removed from the game. The ship may not return to the map, but still counts as afloat and in control of its last owners, for victory purposes (unless the scenario specifies otherwise).
In some cases, the battle may occur between small squadrons on the open sea. In this case, the map is presumed to be an endless expanse of water. Instead of exiting the map, all ships are displaced the same direction and distance on the map, preserving distance and directional relationships. This adjustment is made to gain more "sea room" for maneuver, if the battle approaches any map edge. Players with additional copies of Trireme may wish to "leapfrog" mapsheets to achieve the same effect, without displacing ships.
Ship Data Table
| abbrv | type | size | cruising speed | full speed (cargo limit) | deck crew | oarsmen | sailing A | B | C | D |
|---|---|---|---|---|---|---|---|---|---|---|
| Le | Lembi | 1 | 2 | 3 (0), 2 (1) | 0 | 1 | 3 | 2 | 0 | 0 |
| Pt | Pentakonter | 2 | 2 | 3 (0), 2 (1) | 1 | 2 | 3 | 2 |
Ship Data Table Notes:
- Abbrv: ship type abbreviation.
- Type: type of ship.
- Size: size value for ship, parenthesized "( )" values have no ram bow.
- Cruising Speed: normal cruising speed, in movement points (MPs). "Sail only" means no oars on ship.
- Full Speed (cargo limit): full speed and cargo limit given as a pair. A variety of full speeds and cargo limits are usually noted. Ships with sails only have a single cargo limit.
- Deck Crew: number of deck crew points on ship.
- Oarsmen: number of oarsmen points.
- Sailing Speeds: sailing speed, in movement points (MPs) for each wind attitude, A through D.
Simultaneous Movement
Simultaneity & Proportional Movement
Movement by all ships is simultaneous. Each ship follows its written orders exactly. When ships pass nearby, or come into contact, simultaneous movement can cause some confusion, especially with different ships moving at different speeds. To simplify the resolution of simultaneous movement, the phase is divided into five steps.
Each movement step, a ship will execute one movement point from its orders, or do nothing, depending on its speed:
- Step One (1): 5 point ships execute their first point; 4 point ships execute their first point
- Step Two (2): 5 point ships execute their second point; 3 point ships execute their first point
- Step Three (3): 5 point ships execute their third point; 4 point ships execute their second point; 3 point ships execute their second point; 2 point ships execute their first point
- Step Four (4): 5 point ships execute their fourth point; 4 point ships execute their third point
- Step Five (5): all ships execute their last point
This procedure is summarized on the movement step chart, below. For each step, read the appropriate row to see which ships can move ("M" indicates the ship expends one movement point, "-" indicates the ship doesn't expend a movement point).
| ship speed | step 1 | step 2 | step 3 | step 4 | step 5 |
|---|---|---|---|---|---|
| 5 points | M | M | M | M | M |
| 4 points | M | - | M | M | M |
| 3 points | - | M | M | - | M |
| 2 points | - | - | M | - | M |
| 1 point |
Rams & Collisions
Entering an occupied hex: if a ship is ordered into a hex currently occupied by another ship, it rams that ship instead of entering the hex. If the other ship is leaving the hex at the same instant, the ships just miss, with one taking the place of the other. Therefore, careful attention to exactly what ship moves in what step is very important in determining rams. Exception: see accidental collisions below.
Simultaneous Entry: if two ships move into the same hex at the same time, the ship with the poorer crew enters, and then the ship with the better crew rams it instead of entering the hex. If crews are equal quality, the larger ship enters first (ship with higher size value), then the smaller ship rams it. If size is also equal, roll a die for each ship, the lower roll moves into the hex, and then the higher rams it.
Accidental Collision: if a ship enters a hex by backwater, bow turn movement, or optional drift in any direction but directly ahead, no ram occurs. Instead, if the hex is already occupied or being entered simultaneously, the ram becomes a collision. Ships stop as above, but collision rather than ram procedure is used.
Remaining Movement: if ships ram or collide, they instantly stop for the rest of the turn, and drop all remaining movement orders. That is, all remaining movement for the turn becomes a pause "-". (Exception: see optional oar rake rules)
Multiple Ship Conflicts: if three or more ships simultaneously attempt to enter any hex, no rams may occur. Instead, each ship is presumed to collide with all other ships also attempting entry. If all ships are attempting to enter the hex, and no ship starts in the hex, the ship with highest crew quality, smallest size, and highest die roll (in that order, as needed) may occupy the hex if it desires. If that ship declines to occupy the hex, the ship with the next highest crew quality, next smallest size, and next highest die roll (as needed) has the option, etc. If all others decline, the last ship must occupy the hex.
Movement after Ram or Collision
After Ram: if a ship rams another, its next movement order must be backwater (B). After this mandatory order, the ship is free to write any additional order(s) desired and allowed. Exception: if a ship rammed and sank its target, this restriction does not apply, the rammer may use any movement order desired on the following turn, including full speed when otherwise allowed.
If a ship was rammed by another, its next movement orders can be anything desired, but the ship can only use cruising speed on that first turn of movement. It cannot use full speed on the first turn of movement after the ram.
After Collision: if a ship was involved in a collision (regardless of whether it was moving or not), on its first turn of movement afterward it cannot use full speed, it can only use cruising speed.
(Ram Example diagram: Bireme Theta orders A/A/-/S; Bireme Epsilon orders -/P/-/S. A second diagram shows the final position after a ram, with the ram made through a marked hexside.)
Resolving Rams & Collisions
Types of Rams
In ram situations, the ship making the ram is the "rammer." The ship hit is the "target." Note that movement conflicts are always resolved so that one ship is the rammer, and one the target.
The type of ram depends on which hexside the rammer came over, as he attempted to enter the target's hex. The final position of the rammer is irrelevant, only the hexside of attempted entrance is considered. See the Ram Directions diagram.
Ram Resolution
To resolve a ram, the ram ratio is computed and compared to a dice total, and the result cross-indexed on the Ship Damage Table. The result is applied immediately, during the movement step in which the ram occurred.
Ram Ratio: this number is the rammer's ship size number, minus the target's ship size number. If the rammer is larger than the target, the ratio will be positive ("+"), while if the rammer is smaller than the target, the ratio will be negative ("-"). Then, add or subtract all relevant ram ratio modifiers, as given below:
- +1 stationary: target had no move orders this turn
- +1 target crippled
- +1 rammer has better quality crew than target
- -1 target has better quality crew than rammer
For example, if an average Quinquereme (size 7) rams a poor Trireme (size 6), the result is 7-6+1, or "2", a positive result. However, if an average Quinquereme rammed an expert Dekares (size 11), the result is 7-11-1 or "-5".
Dice Roll: the rammer rolls two dice, and adds them together, when consulting the Ship Damage Table. To his dice total he adds and subtracts all applicable modifiers, as given below:
- +1 rammer made contact with target using an ahead (A) move
- +1 rammer contacted target in forward beam or after beam
- -1 rammer did not use full speed (fs) this turn
- -1 rammer is crippled
Bow Rams
In a bow ram, after the rammer consults the ship damage table, but before the results are applied, the target also uses the ram resolution procedure. The target ship is temporarily considered the rammer, and the original rammer his target. Ram ratio and dice roll are computed, and the ship damage table consulted. This represents a bow-to-bow situation where the ships are actually hitting each other.
In bow rams, both the results of the original ram, and the special result for the reversed roles ram, are both applied.
Ships without Ram Bows
Merchants, Pharsali, Veneti, and Saxon ships lack ram bows. As a result, the maximum ram ratio they can achieve, when ramming another ship, is zero (0). If such a ship has a ram ratio of one (1) or higher, the ratio is considered zero (0) instead.
Ram Results
Ram results boxes on the ship damage table have two lines. The top line is the result to the rammer, with results prefixed by an "r-" as a reminder. The bottom line is for the target, with results prefixed by a "t-" instead. After the prefix are one or more code letters, indicating the particular effect on that ship:
- X = sunk: ship breaks up and sinks. It is removed from the map immediately (exception: see optional drift & wreck rules). If the target sinks, the rammer automatically enters the hex it attempted to occupy when making the ram (completing its last move before the ram). The rammer does not travel any further. The rammer is not required to backwater (B) as his first move after the ram when the target is sunk.
- H = holed: ship is holed, place "hole" marker on the ship and immediately consult the Holed Table.
- H* = beam holed, otherwise crippled: ship is holed (see H) only in beam rams, in bow or stern ram the ship is crippled (see C) instead.
- C = crippled: ship has a "cripple" marker placed on it. See the Cripples rules below for details and recovery.
- g = grapple with ease: ship is allowed an advantage with any grappling attempt this turn against the other ship involved in the ram.
Note: the Ship Damage Table itself (the chart that cross-indexes the ram ratio and dice total) is printed on the separate Game Tables Card, and was not present in the source documents used for this transcription. It is not reproduced here.
Collisions
When ships collide, a different procedure is used to determine effects. Generally, both ships involved in a collision are automatically crippled. Each may grapple the other with ease (advantage allowed in grappling attempt, see grappling rules). There is no possibility of being holed or sunk in a collision.
A ship may attempt to avoid crippling in collision by invoking a special procedure. If either ship elects this, the procedure is used once, and applies to both:
Crippling Avoidance: a die is rolled for each ship, and then the hull size is added to the die roll as appropriate. The die roll plus hull size total is then compared. If a ship has an equal or higher total than the other involved, it may escape crippling:
- Expert equal +: a ship with an expert crew escapes crippling by having an equal or higher total than the other ship.
- Average one +: a ship with an average crew escapes crippling by having a higher total than the other ship.
- Green two +: a ship with a green crew escapes crippling by having a total two (2) or more above the other ship.
- Slave three +: a ship with a slave crew escapes crippling by having a total three (3) or more above the other ship.
Cripples & Recovery
A crippled ship is reduced to one movement point per turn. It cannot use full speed. A ship may have two or more "cripples" on it, but the effect is the same: regardless of the number of cripples, the ship can still move one, and just one, movement point per turn.
For each cripple effect, a ship may dice once at the end of each turn for recovery. Thus if a ship has three cripplings, it dices three times, if it only has one, it dices just once, etc. Each 'dicing' is done by rolling two dice, adding them together, and comparing the result to the ship's crew quality on the Cripple Recovery Table below:
| crew quality | 2 | 3 | 4 | 5 | 6 | 7 | 8 | 9 | 10 | 11 | 12 |
|---|---|---|---|---|---|---|---|---|---|---|---|
| expert | A | - | - | - | - | - | R | R | R | Rsl | Rsl |
| average | A | - | - | - | - | - | - |
(In the scan, intermediate "-" cells are faint; the entries for dice totals 3 through 7 are "-" for every crew quality.)
Results Key:
- A = Abandon Ship: crew leaves ship empty and immobile (may drift if optional rules used). Crew is presumed swimming in water, and of no further consequence in the game.
- - = No Recovery: that crippling effect remains, but ship may attempt recovery again next turn.
- R = Recovery: ship recovers from that crippling effect, which is removed.
- Rsl = Recovery, with speed loss: ship recovers from that crippling effect, but full speed of the ship is reduced one point. If this reduces full speed below cruising speed, full speed ability is permanently lost, and the cruising speed is reduced one point instead. Additional losses will further reduce cruising speed, rather than full speed.
Holed Ships
If a ship is holed by a ram, a die is immediately rolled and the holed table consulted, below:
| die roll | result |
|---|---|
| 1 | Ship loses one point of men, is crippled if involved in a ram with a larger ship |
| 2 | Ship loses one point of men, and is crippled |
| 3 | Ship has full speed reduced one, and must either lose all equipment or become crippled (ship player's option) |
| 4 | Ship has full speed reduced one, loses one point of men, and loses all equipment. Ship is crippled if involved in a ram with a larger size ship |
| 5 | Ship has full speed reduced one, is crippled, loses two points of men, loses all equipment, and will sink if it already has two holes (one hole, if size no. 1 or 2) |
| 6 | Ship has full speed reduced one, is crippled, loses three points of men, loses all equipment, and will sink if it already has two holes (one hole, if size no. 1 or 2) |
Results Key:
Full Speed Reduction: if full speed is reduced below cruising speed, full speed ability is permanently lost, and cruising speed is reduced a point instead (as above in crippled ships).
Men: one to three points of men may be lost on the ship. If present, missile marine points must be lost first, then heavy marines, then light marines, and then (if using optional oarsmen rules) the oarsmen. If no points are remaining to be lost, none are lost.
Equipment: equipment includes all artillery engines, towers, corvus, iron hands, firepots, masts and sails. When lost, all this material is presumed thrown overboard to keep the ship afloat, and cannot be recovered. Equipment cannot be selectively lost, either all or none is lost.
Sinking: if the ship sinks, it is treated as if an "X" or "sunk" result occurred on the Ship Damage Table (see ram results, above).
There is no recovery from holes. Each hole is a permanent effect, and holes simply accumulate until a ship rolls a sunk result, or the battle ends. There is no limit to the number of holes a ship can receive, provided it remains lucky enough to avoid sinking each time it consults the holed ships table. Notice that once a ship has two holes, additional holes need not be marked, as they have no additional implications when the table is used. However, the table must still be consulted for each new hole.
Missiles
Types of Missiles
Missile Marines on a warship have one hex range, which can be measured from either the bow or stern as desired (the marines can move about the ship freely). That is, the missiles can be fired into any neighboring hex beside the ship. Each missile marine point has one (1) point of firepower.
Artillery Engines on a warship must be mounted in the bow or stern, as originally recorded on the log sheet. Engines cannot be moved. An engine has a maximum range of two hexes (not counting the hex the engine occupies, but counting the hex it fires to).
An engine cannot shoot directly along the deck of its own ship. Thus an engine in the bow couldn't shoot into the hex directly astern of the ship, while an engine in the stern couldn't shoot into the hex directly ahead of the ship.
If an artillery engine fires two hexes, the engine has firepower of one (1) point. If the engine fires just one hex, it has a firepower of two (2) points. If a number of engines are firing, these firepower points add up.
Effect of Missiles
Missiles are fired at other ships, in an attempt to kill men on its decks. For each firepower point you shoot at a ship, roll a die. If the result is "5" or "6", one point of enemy men is killed. If you have five points shooting, roll the die five times, and each 5 or 6 is a point of men killed, etc.
If a ship loses men to missile fire, they must be lost in the order below, with lower priority types only removed if no higher priority types exist on board. Types are listed from highest to lowest priority:
- Missile Marines
- Light Marines
- Deck Crew
- Heavy Marines*
- Artillery Engines
- Oarsmen on non-cataphract ships
*Each Heavy Marine point "killed" by missile fire is allowed a "saving throw" representing armor. For each point killed, roll a die. A score of 5 or 6 means the point is saved by the armor. A heavy marine point is allowed a saving throw each time he is "killed" by missiles. If a heavy marine point fails his saving throw at any time, he is truly killed and immediately deducted from the total on the log sheet.
Oarsmen on Cataphract Warships cannot be hurt by missile fire, as they are fully protected by wooden hulls and decking.
Grappling
General Rules
In the grappling phase, each ship is allowed one grappling attempt against each adjacent ship, friendly and/or enemy. Multiple attempts against the same ship in the same turn are prohibited. However, a ship can make multiple attempts against different ships, one attempt at each ship. It is possible for two ships to attempt to grapple each other, each ship making a check against the other.
If one or more successful grappling attempts are made between ships, the ships are "grappled" together. This causes boarding battles, and prevents movement (except for drift, if those optional rules are used). Ships remain grappled together until they degrapple. While grappled together, ships may not have movement orders.
If ships are grappled together, in the degrappling phase each ship is allowed one degrappling attempt against each ship it is grappled to. That is, if a Quinquereme were grappled to a Pentakonter and a Trireme, the Quinquereme could make one degrappling attempt against the Pentakonter, and one against the Trireme. If successful, the ship frees itself from just that one enemy ship. Even if two ships successfully grappled each other, one successful degrappling is sufficient to cut the grapples and free the ships.
Procedure
In the appropriate phase, each player announces as desired his intention to grapple or degrapple, and resolves that attempt immediately. The order in which announcements and resolutions are made is immaterial, the phase continues until all players have made all the attempts they are allowed and desire.
Grappling
To resolve a grappling attempt for a ship, against any other ship, roll two dice. Add and subtract all applicable modifiers. If the result is "9" or higher, the grappling is successful, and a grappled marker is placed between the two ships. If the result is "8" or less, the attempt was unsuccessful. Grappling modifiers are:
- +3 grappling advantage: ship allowed advantage as a result of the Ship Damage Table
- +3 friendly ship: ship is attempting to grapple with another friendly ship
- +1 in collision: ship collided with target of grappling attempt
- +1 target crippled: target of grapple attempt is crippled
- +1 better crew: ship attempting grapple has crew quality superior to target of grappling attempt
- -1 poorer crew: ship attempting to grapple has inferior crew
- -1 target at full speed: ship attempting to grapple with target ship moving at full speed; ignore this modifier if ship was involved in ram or collision with target this turn
- -1 only oarsmen: ship attempting to grapple has no marines nor deck crew points remaining
- -1 crippled: ship attempting to grapple is crippled
- +2 using iron hands (optional rules only)
Degrappling
Degrappling is resolved just like grappling: roll two dice, add and subtract all applicable modifiers. A result of "9" or higher means the degrappling is successful, "8" or less and the ships remain grappled (unless the other ship involved also attempts to degrapple, and succeeds). Degrappling modifiers are:
- +3 friendly ship: ship is attempting to degrapple from another friendly ship
- +2 won boarding battle: ship attempting to degrapple won the boarding battle (lost fewer boarding factors) this turn
- +1 better crew: ship attempting to degrapple has crew quality superior to other ship
- -1 inferior crew: ship attempting to degrapple has crew quality inferior to the other ship
- -3 enemy used corvus to grapple (optional rules only)
Boarding Battles
When two enemy ships are grappled together in the boarding battle phase, they must fight a boarding battle. The battle is fought between the marines and deck crews of each ship. Oarsmen are not involved unless appropriate optional rules are used.
Boarding Factors
To fight a boarding battle, the number of "boarding factors" available to each ship must be computed. Each point of crew or troops is worth one or more boarding factors, depending on the type:
Each heavy marine point is worth three (3) boarding factors. Losses taken in factors become losses in thirds of a point. Thus a ship with 3 points of heavy marines has 9 boarding factors, and if it loses one factor, has only 2 2/3 points left (8 factors).
Each light marine point is worth two (2) boarding factors. Losses taken in factors become losses in half points.
Each missile marine point is worth one (1) boarding factor.
Each deck crew point is worth one (1) boarding factor.
All other equipment, including artillery engines, is worth zero boarding factors. Exception: see optional rules.
For example, a ship with 4 heavy marines, 1 light marine, 1 missile marine, and 1 deck crew point would have 16 boarding factors (4x3 + 2 + 1 + 1) altogether.
Boarding Resolution Procedure
To resolve a boarding battle, each ship determines how many enemy factors it kills. To do this, total your boarding factors, and cross reference them with a die roll on the Boarding Battle Table. The result is the number of enemy factors (not pts) killed.
Often, the number of boarding factors available does not exactly fit one of the columns on the Boarding Battle Table. In this case, find the next lower column. Roll once using that column. Then find the column for the remaining factors, and roll once for that. If the remaining factors still don't exactly fit one of the columns, use this procedure again, as needed.
For example, if a ship has 71 boarding factors, it would use the 25 column twice, then the 20 column, and then the 1 column.
Total all the results from the Boarding Battle Table. That is the number of enemy factors killed.
Note: the Boarding Battle Table itself (printed on the separate Game Tables Card) was not present in the source documents used for this transcription. It is not reproduced here.
The player suffering the boarding losses selects which marines and/or deck crew will suffer the factors lost. Losses are taken by crossing out the current strength (in points) on the log sheet, and writing the new, reduced strength in its place. Fractional losses may be taken, and are recorded on the log sheet.
The winner is the ship with fewer factors lost, the loser is the ship which lost more. If losses are equal, both ships are considered losers that turn.
If a boarding battle continues into the next turn, because ships remain grappled, the procedure is used all over again. Winning and losing is based solely on factors lost in the current turn. Results of battles on earlier turns are not considered.
In a multi-ship battle (see below), if a ship both wins and loses, it counts overall as a loser for that turn.
Multi-Ship Battles
If a ship is grappled to two or more enemy ships, it must use part of its boarding factors against each. No marine or deck crew point can fight in more than one boarding battle per turn. Therefore, some must fight in one battle, and some in the other.
A player can divide his boarding factors as he desires against different enemies. If the enemy being fought is also involved against two or more ships, there can be a problem determining who allocates factors first! In this case, each player should write down in the notes section of his log how many factors he will use against each enemy ship. These allocations are then revealed, and the battles are resolved.
No Boarding Factors
If a ship has no boarding factors (due to no marines or deck crew left), it can still participate in a boarding battle, but cannot inflict any casualties. If it suffers any casualties, it is automatically the loser in the boarding battle, and will automatically surrender (see morale) to an enemy with any boarding factors left.
If two opposing ships are in a boarding battle, and neither has any boarding factors, each will be the loser in each boarding battle, and thus both will have to check morale normally each turn.
Morale
Checking Morale
A ship must check morale each time it loses a boarding battle. Checks are made after boarding battles are finished. If a ship is involved in battles with two or more enemy ships, for each battle it loses, it must check morale.
For example, a ship is grappled to three enemy ships, wins a boarding battle against one, and loses against two others. It must check morale twice, once for each defeat.
To check morale of a ship, simply roll two dice. Depending on the quality of the ship's crew, it will either surrender, or keep on fighting:
- Slave ships surrender if the dice roll is 7 through 12 inclusive. However, a slave ship will not surrender on a roll of "10" if the oarsmen points are outnumbered by surviving deck crew and marine points (combined).
- Green ships surrender if the dice roll is 8 through 11, inclusive.
- Average ships surrender if the dice roll is 8, 9 or 11.
- Expert ships only surrender if the dice roll is 9 or 10.
Morale of Holed Ships
If a ship is holed, and must check morale, any dice roll of 3, 4 or 5 means it automatically surrenders, regardless of crew quality.
Automatic Surrender
A ship will automatically surrender if it loses a boarding battle, and has no marines or deck crew points left. The only exception is if the ship it lost the battle to also has no boarding factors. In such a case, both ships must check morale, but neither makes an automatic surrender to each other.
Note that if a ship is fighting two or more enemies, as long as it has some marines or deck crew points surviving in one of those battles, it will not automatically surrender. It will instead make morale checks for each battle it loses.
Multiple Surrenders
If two ships surrender to each other in the same turn, both surrenders will cancel out. All other surrender results will still apply. For example, if a ship surrenders to one enemy, and another enemy surrenders to it, change of control occurs on both ships. A ship can still transfer marines in the turn it surrenders, provided it has some captured or friendly ship to which it is grappled, and can therefore transfer marines to.
Surrender, Capture & Marine Groups
Surrender & Capture
When a ship surrenders in a boarding battle, the winner can form a marine group (if he has any marines) and take possession. To form a marine group, simply select a marine group counter not in use, and place it on the captured ship. Deduct one or more points of marines from the winning ship, and list those points on the appropriate line for the marine group on the log pad.
Deck crew, oarsmen, and all other equipment on a ship cannot be formed into marine groups, only light, heavy, and missile marines can be in a marine group.
For example, a ship with 7 heavy marines, 2 light marines, and 2 missile marines wins a boarding battle. The enemy ship checks morale and surrenders. The winner now creates a marine group and takes possession. The winner puts 3 heavy and 2 missile marine points into the group, and lists this in the appropriate section of the log pad. Now he must deduct that same amount from the victorious ship, which now has left only 4 heavy and 2 light marine points.
You are not required to take possession of a captured ship, instead you can set it afire and voluntarily sink it. A burned ship is presumed instantly sunk and removed, unless optional flame rules are used.
Capture of Abandoned Ships
If a ship is abandoned, the first side to grapple and place a marine group aboard it captures the ship. If opposing sides grapple on the same turn, a boarding battle between the marine groups ensues. Since placing of marine groups occurs after boarding battles in a turn, resolution of the battle doesn't start until the next turn.
Transfer of Marines
Two friendly ships can grapple, and then one can form a marine group and transfer it to the other ship. This means appropriate marines are deducted from one ship, and added to the other. Actual use of a marine group counter isn't necessary.
If marines from different quality ships are mixed, the mixture becomes the worst of the two. For example, if marines from an expert ship are transferred to a green ship, all marines on the green ship are that quality now (the experts become green). If marines from a green ship are transferred to an average ship, the average ship will become green, etc.
The only exception is marines from a slave ship. If transferred to a non-slave ship, these marines are considered green instead of slave quality.
Combining Marine Groups
If two or more friendly ships transfer a marine group to a single enemy ship, those groups will automatically combine. Similarly, if a new marine group is transferred to a ship which already has one, those will also combine. The quality (expert, average, green, or slave) is that of the worst group involved in the combination, as in transfer of marines above.
Use of Captured Ships
A ship that is captured after surrender is presumed to have a crew of slave oarsmen. All deck crew and marines are thrown overboard by the captors, and are therefore killed when the captors take possession. The oarsmen live, however, and if the ship is recaptured the oarsmen are restored to their original status. A captured ship is considered a slave ship despite the quality of the marine group holding it. However, keep track of the "real" quality of that marine group, in case it is transferred elsewhere.
An abandoned ship has no crew, and cannot move. A marine group on board simply has physical possession for victory purposes. Exception: see optional rules.
If a captured ship is recaptured, the crew does regain its original status, but is presumed automatically tired. It cannot use full speed again during the battle.
SHIP GAME OPTIONAL RULES
The optional rules add the final level of realism and complexity to the Ship Game. The sailing rules are suggested for most games, but the other optional rules should be selected carefully, and used only after you become experienced in the standard rules. The optional rules need not be used as a unit, some can be used, and others not used, as desired.
Weather
For game purposes, weather is divided into two categories: wind and sea state. The former tends to affect the latter. However, time of year and general region also affects weather considerably.
Time of Year
Weather in the Mediterranean area is generally divided into two seasons: summer (May through October) and winter (November through April). Normally ships were laid up during the winter, so most naval operations occurred in the summer. However, winter weather effects are included for players who wish to investigate the rare winter campaign.
Region
Three general regions for naval operations are covered here:
Northeastern Atlantic - the western coast of Spain, ocean coast of Europe from Biscay to the Skaggerak, and the waters around the British Isles. This is the only region where Veneti and Saxon ships were used. No oared ships larger than size seven (7) appeared here, and Pharsali were extremely uncommon.
Western Mediterranean - from Gibraltar to the western coast of Greece, including the Tyrrhenian, Ionian, and Adriatic Seas. Veneti and Saxon ships never appeared here, and Pharsali were uncommon.
Eastern Mediterranean - the major area of ancient naval operations, including the eastern coast of Greece, coastlines of Russia, Turkey, the Middle East, and Egypt, including the Aegean and Black Seas. Veneti and Saxon ships never appeared here.
Region can be established by mutual agreement, or players may wish to roll a die, based on the historical probability of battle in each area:
| die roll | region |
|---|---|
| 1 | NE Atlantic |
| 2, 3 | West Med. |
| 4, 5, 6 | East Med. |
Wind Source
To determine the direction from which the wind comes, roll a die, and consult the appropriate table below, depending on the region. If time of year and region rules are not being used, assume the battle occurs in the Eastern Mediterranean in the summer.
Eastern Mediterranean Wind Source
| die roll | summer wind | winter wind |
|---|---|---|
| 1 | North | North |
| 2 | North | Northeast |
| 3 | Northeast | Northwest |
| 4 | Northwest | Northwest |
| 5 | Southeast | South |
| 6 | Southwest | Southeast |
Western Mediterranean Wind Source
| die roll | summer wind | winter wind |
|---|---|---|
| 1 | North | North |
| 2 | Northeast | Northeast |
| 3 | Northwest | Northwest |
| 4 | Northwest | Southeast |
| 5 | Southeast | Southwest |
| 6 | Southwest | Southwest |
Northeastern Atlantic Wind Source
| die roll | summer wind | winter wind |
|---|---|---|
| 1 | North | Northeast |
| 2 | Northeast | Northwest |
| 3 | Northwest | South |
| 4 | Northwest | Southeast |
| 5 | Southeast | Southwest |
| 6 | Southwest | Southwest |
Wind Strength
To determine the strength of the wind, and its effect in the game, roll two dice and consult the table below:
| dice roll | wind strength & effects |
|---|---|
| 2, 3, 4 | Calm: ships with mainsail are allowed 1 movement point when wind direction is from 'A'. In all other situations a ship has no movement points under sail. |
| 5, 6 | Light Airs: maximum movement point allowance under sail is two (2), regardless of normal allowance. |
| 7, 8, 9 | Breeze: no special effect |
| 10, 11 | Strong Breeze: maximum movement point allowance under sail is two (2), regardless of normal allowances. Oars may not be used with sail if seas are choppy or heavy. |
| 12, 13 | Storm: mainsail may not be used, must be lowered. Only boatsails may be used. Oars may not be used in conjunction with sail, regardless of sea state. |
| 14 | Gale: no sails or oars may be used. Ships can only drift |
During winter, add two (+2) to dice roll for wind strength.
Sea State
Sea state depends on the wind strength. With each wind change, sea state must be determined again. To determine the sea state, compare the wind strength with a die roll below:
| wind strength | 1 | 2 | 3 | 4 | 5 | 6 |
|---|---|---|---|---|---|---|
| calm | flat | flat | flat | flat | swells | swells |
| light airs | flat | flat | flat | swells | swells | swells |
| breeze | flat | flat | swells | swells | swells | chop |
| strong breeze | flat | swells |
Results Key:
- Flat Sea = no special effects or restrictions.
- Swells = all ships of no. 1 size cannot use full speed.
- Chop = all ships of no. 1 to 5 size inclusive cannot use full speed. In addition, no. 1 size ships have cruising speed reduced by one (-1) movement point each turn.
- Heavy = no ships can use full speed. No. 7 size and smaller ships have their cruising speed reduced to one (1) movement point per turn.
Wind Change
At the start of each turn, determine if the wind strength changes by rolling two dice:
- 2 - wind strength drops one level, if already at calm (lowest level), it remains there.
- 3 to 11 - wind strength remains the same.
- 12 - wind strength increases one level, if already at gale (the highest level), it remains there.
If the wind strength changes, sea state must be checked all over again, based on the new wind strength. Wind direction does not change during the battle.
Drift
Types of Drift
Ocean Current: any ship not on a river is vulnerable to ocean current. Ocean currents travel in the same direction as the wind. Any ship liable to drifting must check once for ocean current drift.
Tidal Current: if any shoreline is present in the scenario, a tidal current will exist. The tide will be either flooding (rising) or ebbing (falling). Flooding tide is toward the shore, ebbing tide away from shore. If not defined in the scenario, players should agree on the direction which best approximates toward and away from shore, and roll a die to determine tidal state (1, 2, 3 - flooding; 4, 5, 6 - ebbing). Any ship liable to drift must check once for tidal current drift. This is in addition to ocean current drift, and may mean a second check and drift move.
River Current: a ship on a river will drift downstream, toward the sea, if the tide is ebbing only. If the tide is flooding, there is no drift. Ocean currents do not affect rivers. In some cases, a number of different hexes may be considered downstream. In this case, the ship is moved toward the centermost hex in the river which is downstream. The boundary between river and ocean should be defined, since once a ship leaves the river, it becomes vulnerable to normal ocean and tidal currents. In point-choice scenarios, the player who deploys the coastline may determine if any rivers are present, and their boundaries.
Drifting
The sea state determines whether a ship may or may not drift. Consult the drift probability chart below for each ship liable to drift. Depending on the situation of each ship, a certain die roll is needed for the ship to drift:
| sea state | ships liable to drift | die roll that results in drift |
|---|---|---|
| flat or river | not under oars or sail | 1 |
| swells | not under oars or sail | 1, 2, 3 |
| swells | under sails only | 1 |
| chop | not under oars or sail | 1, 2, 3, 4 |
| chop | under sail only | 1, 2 |
| chop | under oars | 1 |
| heavy | not under oars or sail | 1, 2, 3, 4, 5 |
| heavy | under sail only | 1, 2, 3 |
Under Oars: ship is able to use two (2) or more movement points with oars. Ships with one or no movement points, including all cripples, are not under oars for drift purposes. Ships prohibited from using movement orders are not under oars, but ships able to use movement orders, but which elect to pause with their 2 or more MPs, are considered under oars.
Under Sail: ship has boatsail or mainsail raised. A ship with a normal oar speed of two or more, when under sail, also counts as able to be under oars. However, if a ship has no more than one movement point maximum available by oar, even if that is used with sails, counts as the ship under sail.
If a ship cannot count as either under oar or sail as defined above, it falls into the "not under oars or sail" category. This includes crippled ships with no sails raised, a ship unable to move due to ramming, etc.
Executing Drift
Check ships vulnerable to drift individually, with a separate die roll for each. This often results in some ships drifting, while others do not. In coastal ocean areas, a ship may have to check twice, once for tidal drift, and once for ocean current drift.
Drift movement is executed simultaneously by all ships. If a ship must make a double drift, the second drift is done after all ships have finished their first drift. When a ship drifts, both bow and stern travel one hex in the appropriate direction. A ship never turns while drifting. Note that drift often results in a ship travelling sideways, or even backwards.
Sails
Sail
All ships carry a small "boatsail." In addition, any ship may carry a large mainsail (scenario rules permitting). However, the extra bulk and weight of the mainmast and mainsail automatically reduce full speed by one (-1) movement point when under oars. This speed reduction remains in effect while the mainsail is aboard. The mainsail may be jettisoned at the start of any turn, and thereafter the speed reduction is dropped also.
It takes one complete turn to raise or lower the boatsail, during which the ship cannot have any movement orders, but will drift (if that optional rule is used). In the notes section of the movement orders, specify "raise boatsail" or "lower boatsail."
It takes two complete and consecutive turns to raise or lower the mainsail, if carried. Again, the ship cannot have any movement orders, and "raise mainsail" or "lower mainsail" should be listed in the movement orders notes for two turns running.
If the boatsail is already raised, it still takes two turns to raise the mainsail, but the boatsail is presumed taken down simultaneously. Either the mainsail or the boatsail is up at any one time, but never both. Similarly, when the mainsail is being lowered, the boatsail can be simultaneously raised.
Hemiolas and Triemiolas are special ships designed to carry mainsails. Their full speed under oar is not reduced when a mainsail is carried. In addition, a Hemiola and Triemiola may continue to move under oars while raising or lowering any type of sail. The only restriction is that the ship can only use cruising speed, never full speed, while raising or lowering sail.
Sailing Movement
A ship with sails raised has its movement rate determined by the direction the wind strikes the ship at the start of the turn. Depending on wind direction, and type of ship (see Ship Data Chart), movement allowance varies from zero (none) to three (3) movement points. See the Wind & Sailing Attitudes diagram.
A ship with mainsail raised has the full movement allowance for sails (varies with ship type, see data).
A ship with boatsail raised has one less (-1) MP than normal allowance in all wind directions. For example, a ship with 3-2-1-0 movement allowance with sails has only a 2-1-0-0 allowance with a boatsail.
A ship under sail may only use ahead (A), starboard (S), port (P), and/or pause (-) movement orders.
In addition, a ship under sail may use bow starboard (bS) or bow port (bP) orders, but only if that is the only order that turn. This may be used even if the ship has zero movement points, and can thus be used to turn the ship when it is in a zero MP wind attitude.
A ship under sail may never use backwater (B) movement orders.
If a ship under sail turns so that movement allowance changes for the new direction, the ship gains no additional movement that turn, nor does it lose any additional movement, above that needed for the turn. However, if a ship turns into a direction which gives it zero MPs, it must end its move with that turn. The MP allowance of a ship under sail is always determined by the wind attitude at the start of the ship's movement phase.
Combination Sail & Oar Movement
A ship with sails raised may also use oars to improve its movement rate. After the sailing movement orders, one movement point of oar movement can be added. This can help complete (or start) an S or P order, or can be used for any other oar movement action, including bS, bP, or B. Note that regardless of the normal oar movement speed of the ship, no more than one (1) movement point can be added with oars while a ship is under sail.
Oars cannot be used while sails are being raised or lowered, except on a Hemiola or Triemiola.
Ramming & Sails
A ship with sails, and either rammed, ramming, or involved in a collision, will automatically lose its sails. This includes a ship with sails raised, a ship in the process of raising sails, or lowering sails.
When a sail collapses, it is destroyed, but must be cut away before the ship can move again. During the degrappling phase at the end of the turn, each ship with collapsed sails rolls a die:
- 1, 2 - sails are cut away, ship may move next turn.
- 3, 4, 5, 6 - sails still entangled, ship cannot move next turn.
A ship can continue to attempt cutting away sails, once per turn, until successful. A ship unable to move due to collapsed and entangling sails, may still drift if that optional rule is used.
Once sails collapse, they cannot be used again, regardless of whether they are cut away or not.
Crippling & Sails
Crippled results do not apply to ships under sails. Crippling results and effects only apply to oar power. A crippled ship cannot use combination sail and oar movement, it can only use sails. While under sail, a crippled ship may attempt recovery. A crippled Hemiola or Triemiola cannot move under oars while raising or lowering sail, it must have no movement orders just like other ships. Any ship may attempt cripple recovery while raising or lowering sails.
Sailing Ships
Merchant and Veneti ships have no oars. They can only move by sail. Therefore, their masts and rigging are stronger than a normal ship. If a Merchant or Veneti ship rams, is rammed, or is involved in a collision, the sail collapses only if the ship suffers a crippled (C) and/or holed (H or H*) result on the Ship Damage Table. Otherwise, the sail remains intact.
If a Merchant or Veneti ship loses its mainsail, it can still raise a boatsail and use that instead. This boatsail represents temporary repairs, and if it too is lost by another ram/collision, the ship has no sails left, and can only drift.
Oar Rakes
A ship that rams the beam (forward or after beam, starboard or port) of another ship may elect to make an oar rake instead of a normal ram. An oar rake is an attempt to cripple the target by sheering off its oars. A crippled ship may not make an oar rake. It can only make a normal ram. An oar rake cannot be made against a ship that is only using sails for movement that turn.
Oar rake rams have the special characteristic of allowing continued movement by the rammer after contact, if the rammer desires and has movement points remaining. After the ram is made, on the next movement point, the raking ship makes a bS or bP turn, to travel parallel to the target. On any further movement points, the raking ship then moves ahead (A) up to its movement allowance. This special turn and movement can be made even at full speed, and is the only case where a bS or bP is allowed at full speed. Furthermore, this move replaces the original movement orders, and is therefore the only case where movement orders are actually changed during the execution of movement.
An oar rake ship need not take this extra movement. It can stop at the point of contact. However, if it does take the extra movement, it must take the maximum possible move for its remaining movement points.
An oar rake is resolved just like a normal ram, except that instead of comparing ship sizes for a ram ratio, the crew quality is compared instead. An expert crew is the highest quality, then average, then green, and finally slave, which is the worst. This results in the raking ship having a better, equal or poorer crew than its target. The proper column is found in the 'oar rake' section of the Ship Damage Table, two dice are rolled, dice roll modifiers below are used where appropriate, and the results read and applied just like a normal ram.
Oar Rake Example
The Dekares is not moving this turn, while the Trireme has A/A/A/A movement orders.
- The Trireme executes its first move point ahead (A).
- The Trireme executes its second movement point ahead (A) and hits the Dekares. The Trireme decides to make an oar rake instead of a normal beam ram, therefore,
- On the third movement point the Trireme can make a bP turn, and does so, instead of its normal "A" movement orders.
- On the fourth movement point, the Trireme now continues moving ahead. Regardless of original movement orders, at this point onward the Trireme can only travel ahead after the oar rake.
After movement the oar rake is resolved. The Trireme has an average crew, while the Dekares has a green crew. Therefore, the raker uses the "better crew" column, and rolls a "6" on two dice. However, because the target ship was stationary, two is added (+2) to the dice roll, for a net of "8". The result is "rg tC." The Trireme is allowed an advantage in a grappling attempt (rg), and the Dekares is crippled (tC).
Reinforced Bow
Any size no. 5 or larger oared ship, except a Pharsali, may reinforce its bow area. This causes the ship's size rating to increase by one, but only when it is involved in a bow-to-bow ram situation. In all other ram situations, the ship's size rating remains normal.
A reinforced bow consumes one tenth (1/10th) of a ship's cargo space, rounded off to the nearest whole number. The reinforcement, however, always consumes a minimum of one cargo point of space.
Floating Wrecks
In the basic tactical ship rules, ships may be sunk by ramming, by deliberate destruction, and by burning (if optional flame rules are used). However, in reality, ancient ships were quite buoyant, and a wrecked ship usually just capsized or sank to the gunwale level, leaving significant bodies of timber floating.
A ship is not removed from the map when sunk, using these rules. Instead, it is inverted and considered a floating wreck. At the end of each turn, roll a die for each wreck. If a "6" results, the wreck finally breaks up and sinks, and the counter is removed.
Until a wreck sinks, it is still considered a ship in play. It can only drift, but may collide with other ships as a result. A wreck cannot attempt to avoid a collision, but the ship it hits still can, using the normal procedure (see Rams & Collisions).
The crew and equipment of a floating wreck is lost the instant it turns into a wreck. Actually, some bedraggled survivors may be clinging to the wreck, but these have no military value, and are ignored for game purposes.
A ship engulfed in flame or voluntarily destroyed by fire becomes a flaming and floating wreck, and may cause flame damage if it collides with other ships. See Flame Weapons for details.
Ships on Shore
Some shoreline hexes may be designated as beaches. This is indicated by turning over the shoreline counter, so the white instead of the green side is upward.
Ships may "beach" themselves voluntarily on beach hexes. This is accomplished by moving the bow or stern of the ship into the beach hex at cruising speed or less. Once a ship is beached, it is no longer subject to any drifting, and it cannot be rammed.
A ship with a ram bow may not beach itself bow-first. It can only beach itself by backwatering the stern half of the ship up onto the beach.
Towers
Carrying Towers
A ship may carry towers in addition to other equipment. Veneti ships automatically count as having two towers at no expense to cargo value. Veneti, cataphract ships, and Pharsali may mount any number of towers aboard. All other ships may not have more than one tower on them.
Each tower consumes one cargo point of space, except the two "free" towers of a Veneti ship.
Missile Modifications
For each tower a ship has, one missile marine point is presumed firing at an advantage, and will hit the target with a die roll of "4", "5" or "6", instead of just 5 or 6. If a ship has two towers, two missile marine points have this firing advantage, three towers, three missile marine points, etc.
Boarding Value
Each tower is worth four (4) boarding factors. Towers are used and fight just like marines in a boarding battle, except they cannot be assigned to marine groups or otherwise moved from their ship. Towers can be lost like marines in battle, and if lost are destroyed (not given to the enemy).
A ship can only add as many tower boarding factors as it has other boarding factors available. For example, a ship has four towers, four points of heavy marines, and one point of deck crew. This is a total of 26 boarding factors, not 29. The marines are worth 12, the deck crew 1, and the towers only 13. This is because the tower value cannot exceed the crew value. The crew value is only 13, and therefore the towers count as 13 also, instead of their normal 16.
Iron Hands
A Roman ship of 100 BC or later armed with one or more artillery engines may equip those engines with special grappling missiles, called the Harpax, or "Iron Hands." Such a ship may fire "Iron Hands" instead of normal missiles from all engines on board, during the missile fire phase of the turn. This is simply announced at that time, no resolution is yet made. The engines cannot fire normal missiles and iron hands on the same turn.
If the ship fires iron hands, and then attempts to grapple the same enemy ship in the next phase (grappling phase), the ship adds two (+2) to its grappling attempt dice roll.
Note that iron hands, to be effective, can only be fired at one hex range, as grappling attempts beyond that range are impossible. In addition, the normal restrictions on artillery engines (bow mounts cannot shoot directly astern, stern mounts cannot shoot directly ahead) apply when firing iron hands as well.
Corvus
The corvus was a Roman invention of the Third Century BC, and used against the Carthaginians during the Punic Wars. The device was a long ramp with an iron spike at the end. It was carried in a hoisted position, then cut loose to fall with a crash onto an adjacent ship, the spike firmly fixing the ramp into the enemy's deck. Marines could then storm over, getting into the fight faster, in larger numbers, and with greater ease.
Carrying a Corvus
Only a cataphract ship may carry a corvus, a maximum of one corvus per ship. Cargo space consumed by the device varies with the ship size. This is because larger ships needed larger ramps to accommodate their proportionately larger marine complement.
- Ship size no. 7 or no. 8 - 1 point cargo space for corvus
- Ship size no. 9 - 2 points cargo space for the corvus
- Ship size no. 10 - 3 points cargo space for the corvus
- Ship size no. 11 - 4 points cargo space for the corvus
- Ship size no. 12 - 5 points cargo space for the corvus
Grappling & Degrappling
A corvus can be used instead of normal grappling tools, for any grappling attempt. However, a corvus can only be used for grappling when the enemy ship is in one of the three forward hexes, as shown in a diagram in the original rulebook (the hex directly ahead of the bow and the two hexes to either side of it).
If a corvus is used, grappling is automatic. No die roll is required, and no evasion is possible.
If a player wishes to degrapple from a corvus, the normal degrappling procedure is used. However, the player must subtract three (-3) from his dice roll if the enemy grappled him using a corvus.
If the owner of the corvus successfully degrapples, he is assumed to have hoisted the corvus again, and has it available for future use. If the ship hit by the corvus successfully degrapples, he is presumed to have chopped apart the ramp to free himself, thus destroying the corvus.
Boarding Battle Effect
If a player used a corvus to grapple an enemy ship, he adds one extra factor (+1) to his total when resolving boarding battles against the enemy.
Flame Weapons
Ancient warships were constructed of wood, and vulnerable to flame. However, for this reason, furnaces and open flames were not carried on board. Flame weapons were flammable mixtures ignited just before use, either in pots, or on missiles. The famous "Greek Fire" was developed later by the Byzantines, but similar mixtures were used in the classical Greek and Roman period.
Flame weapon effects are rated in "flame factors" (ff). A ship may be struck with one or more 'ff' in a turn, and at the end of the turn results are determined.
Flame Missiles
Missile marines and artillery engines can use flaming missiles instead of normal ones. Missiles are fired in the same manner, except that instead of killing a point of men with each 5 or 6 (or 4, 5, 6 if firing from a tower), no men are killed. Instead, the target ship itself suffers one flame factor (ff) of damage.
Fire Pots
A ship may have fire pots hanging over its bow. Each time the ship rams another, the pots are lighted and dropped onto the deck of the target. Firepots can only be used if a ram is actually made, not in collisions, oar rakes, or when the ship is rammed by the enemy. Exception: if a ship is rammed in the bow, and is therefore allowed to make a ram attack back, firepots can be used.
When firepots are used, the user simply rolls a die, and the result is the number of flame factors (ff) that land on the target.
Firepots are presumed re-rigged and filled after each ram, and can be used again and again. However, they are equipment, and must be jettisoned if a holed ship result requires (see Rams & Collisions).
Flame Effects
At the end of each turn, total all flame factors that have landed on each ship. For each ship with one or more flame factors on it, (including ships which have flame factors carried over from previous turns), roll two dice, and add to it the current 'ff' total. For each total, effects are listed below:
| flame factors | effect on ship |
|---|---|
| 14 or more | Ship engulfed by fire and destroyed. All crewmen and equipment are lost, ship is burning wreck. |
| 11 to 13 | Serious Fire, all flame factors are carried over to the next turn. Entire crew is fighting fire, ship cannot move (except to drift), use missiles, or participate in boarding battles. If involved in a boarding battle, or boarded next turn, the ship must automatically surrender. |
| 8 to 10 | Moderate Fire, half ff carried over to next turn. Half the deck crew and marine points (player's choice of which marines) are fighting fire, cannot be used to fire missiles, or participate in boarding battles. Remainder of crew and marines can function normally, including oarsmen. No sails can be raised or lowered. |
| 7 or less | Fire Out, no effect. |
Burning Ships & Wrecks
Any player who possesses a ship may voluntarily set it afire at the end of the turn. This causes the ship to be automatically engulfed in flame and lost (unless wreck rules are used, see below).
If wreck optional rules are used, a ship engulfed in flame remains afloat and burning until a "6" is rolled. Using the drift rules, a burning wreck could collide with another ship. If it collides with another wreck, both become burning wrecks. If it collides into a player's ship, the ship hit rolls a die and immediately suffers that many flame factors.
Oarsmen in Battle
Participation in Battle
In actual naval battles, the oarsmen were armed and participated in boarding battles. Therefore, in all but slave ships, oarsmen may participate in boarding battles as allowed below:
Saxon Ships: oarsmen on a Saxon ship count each point as a point of light marines, at two (2) boarding factors per oarsman point. The oarsmen can participate in the first turn of battle, as well as following turns, just like marines.
Non-cataphract Ships: oarsmen on non-cataphract ships (Lembi, Pentakonters, Biremes, Liburnians, Triremes, Quadremes, Quinqueremes, Hemiolas, Triemiolas) may have half their strength, in points, participate in the first turn of boarding battles, and the remainder join for the second and following turns (if any). Each oarsman point is worth one (1) boarding factor in battle.
Cataphract Ships: oarsmen on all cataphract ships, including the Pharsali, may not participate in the first round of boarding battle. However, if the battle continues into a second and later turns, the oarsmen may join the battle. Each oarsman point is worth one (1) boarding factor in battle.
Oarsmen Lost in Battle
For every 1/5th of the ship's original strength, in oarsmen, lost in battle, the full speed of the ship is reduced by one. Therefore, if 2/5ths were lost, the full speed would be reduced by two, etc. If all full speed is lost, the ship is unable to use full speed, and cruising speed is reduced instead.
Loss that are not quite 1/5th do not impose a speed loss. A full 1/5th, or the nearest whole number in excess of that, is required.
This speed loss only occurs from oarsmen lost in battle. Oarsmen lost by crippling or holed effects (see below) do not impose any additional speed loss.
Oarsmen Lost by Crippling & Holing
Every time a ship is crippled, and/or has its full speed reduced by one due to being holed, oarsmen will be lost. This loss does not impose any additional speed loss, beyond the normal cripple result, but it does reduce the oarsmen, and therefore potential strength in boarding battles.
Each cripple or hole kills one tenth (1/10th) of the remaining oarsmen on the ship. Fractions are retained, not rounded off. For example, an open Trireme has 8 oarsmen points, and is crippled. It loses 8/10's (or 0.8) oarsmen points, leaving the ship with 7.2 points of oarsmen.
A ship with a fraction number of oarsmen ignores that fraction when computing boarding factors. For example, the Trireme above with 7.2 points of oarsmen counts as having 7 boarding factors in battle. However, the true strength in oarsmen, including the fraction, is always retained.
SCENARIOS
Each of the ten scenarios is a separate game. In addition, the point choice scenario system allows players to create an unlimited number of additional scenarios.
Each scenario either represents a part of a much larger historical battle, an actual battle in reduced scale, or a representative historical situation (in the Saxon Shore). Scenarios are given in chronological order, and players are encouraged to look through them all, before selecting one that suits their tastes and interests.
Players should each select one of the two counter colors, yellow or red. The gray ships are used by either side, as necessary. The yellow and red set of counters are exactly the same, and represent a balanced group of ships. In some scenarios, insufficient quantities of certain ships may exist. In this case, select any one other similar type not used in that scenario, and "call" it the necessary type. Remember to mentally adjust the values as needed in the Fleet Game. In the Ship Game, these substitute ships should be identified by an asterisk (*) for easy reference on the log sheet.
The victory conditions for a scenario are constant, regardless of whether the Fleet Game or Ship Game rules are used. For victory purposes, a "controlled" ship includes all ships you started with in the game, if you still have them or have recaptured them, plus all enemy ships you captured and still hold. Both ships on and off the map are counted unless otherwise specified. For end of battle purposes, ships controlled by neither side (floating wrecks, etc.) are ignored.
Normally, ships can exit off any edge of the map, as allowed in the movement rules. However, once any part of a ship leaves the map, the entire ship is removed, and cannot return. However, in certain scenarios, some parts of the map edge cannot be exited. These are marked on the deployment map diagram.
Starting positions or deployment areas for each fleet, in each scenario, are shown on a miniature map of the gameboard. North is always toward the top of the map. The following symbols are used to show the different types of ships (each is a small counter-shaped symbol in the original): Lembi, Pentakonter, Bireme, Liburnian, Trireme, Ct Trireme, Quadreme, Ct Quadreme, Quinquereme, Ct Quinquereme, Ct Sexteres, Ct Hepteres, Ct Octares, Ct Novares, Ct Dekares, Ct Sedekieres, Hemiola, Triemiola, Merchant size no. 2, Merchant size no. 5, Veneti size no. 4, Veneti size no. 6, Pharsali, Saxon.
Note: the deployment map diagrams that accompany each scenario are graphical and are not reproduced in this transcription; only the text (including any deployment descriptions given in words) is included.
Ladae
494 BC in the Eastern Mediterranean. The Battle in the Center, Chios Squadron vs Persian Squadron.
During the early 5th Century BC, Persia was extending her control over the entire Aegean area. The first Greeks to feel the Empire's might were the Ionian cities on the western coastline of Anatolia (modern Turkey). Melitus was one of the more powerful city-states, and in 494 BC revolted against Persian lordship. The critical engagement of the revolt was the sea battle of Ladae, where treachery and cowardice on the Greek flanks doomed their cause. However, in the center a squadron of Chians fought a bloody battle with the Persians, eventually breaking through the triple Persian line and escaping. This scenario shows one squadron of Chians attacking a segment of the Persian line. Another nine or ten squadrons to both sides were making similar attacks in the central battle, which is why an artificial "shoreline" is given on the map.
Victory Conditions
Chians score one point for each of their own ships which exit off the southern area, and one point for each Persian ship sunk, captured and exited, or turned into a floating wreck.
Persians score two points for each enemy ship they control, have sunk, or turn into a floating wreck.
Special Rules (both Fleet & Ship Games)
Persian ships cannot turn or backwater until after the first ship (of either side) rams, grapples, or oar rakes an enemy ship.
Fleet Game Scenario
Both squadrons are set up as shown (deployment map; Northern Exit Area and Southern Exit Area marked, with out of bounds areas).
Chian squadron has average crews, except for the first ship in the column, which has an expert crew.
All Persian ships have green crews.
Persians move first, Chians second.
Wind is from the southeast.
Ship Game Scenario
Chian Squadron: 10 Triremes, first in column has expert crew, all the rest have average crews, each has 2 pts heavy marines.
Persian Squadron: 12 Triremes, green crews, each has 2 pts light marines.
Optional Rules
No optional rules are required. If used, wind is light airs from the southeast, sea state is calm, ocean current is running with the wind. There is a tidal current ebbing toward the southwest.
Salamis, 480 BC
480 BC in the Eastern Mediterranean. The Western Passage: Corinthian Squadron vs Egyptian Squadron.
The main Battle of Salamis was fought around the island of that name, between the Persian fleet and its various subject allies, and the Greek confederation. However, an additional entrance existed to the bay where the Greek fleet stood on the defense. A large Egyptian squadron was dispatched to use this entrance and take the Greeks in the rear. However, the Greeks had sent their own Corinthian contingent to guard this entrance. Historically, the Corinthians were successful in holding off the larger Egyptian force in the narrow waters, partly because the Egyptian ships were lighter than the Greek. This scenario is a reduced version of that battle, with the area of battle and ships involved a fraction of the actual action.
Victory Conditions
The Egyptians must exit at least six Egyptian ships off the northern exit area of the map. Captured Corinthian ships may not be counted toward exiting. Each Egyptian Lembi exited counts as only half a ship.
To win the Egyptians must succeed, if they fail, the Corinthians win.
Fleet Game Scenario
The Corinthians deploy seven (7) Triremes with expert crews and three (3) Pentakonters with average crews first, in the area specified on the map (Greek (Corinthian) Deployment Area; the east edge is marked Exit Prohibited).
Then the Egyptians deploy one (1) Trireme, ten (10) Liburnians, and four (4) Lembi, all with average crews, in the area specified on the map (Persian (Egyptian) Deployment Area).
Egyptians move first, Corinthians move second.
Optional Rules: either side may carry mainsails if desired. Wind is from the northwest.
Ship Game Scenario
Corinthian Squadron
- 7 Triremes, expert crews, 2 pts of heavy marines.
- 3 Pentakonters, average crews, may have 1 pt of light marines if desired.
Egyptian Squadron
- 1 Trireme, average crew, 1 pt heavy marines, 1 pt light marines, and 1 pt missile marines.
- 10 Liburnians, average crew, 1 pt heavy marines.
- 4 Lembi, average crews, may have 1 pt of heavy, light, or missile marines, as and if desired.
Optional Rules
If used, any ship may carry a mainsail if desired.
Wind is from the northwest, a breeze, sea state is swells, ocean current not present, but tide is running out (ebbing) with the wind.
Salamis, 306 BC
306 BC in the Eastern Mediterranean. Demetrius' Victory: Diadochi vs Ptolemies.
When Alexander the Great died in 323 BC, his successors (the "Diadochi") divided his kingdom and eventually fell to squabbling over it. Among these interminable wars was a campaign by the Antigonids, self-styled heirs to the entire kingdom, against the King of Egypt (Ptolemy), also one of the heirs, who had more limited ambitions. The article of dispute was the island of Cyprus. Demetrius, son of Antigonus, had developed warships larger than the Cataphract Quinquereme, and begun using artillery engines and towers on them. With this fleet, he met and defeated a fleet of the Ptolemies off the eastern end of Cyprus, near the city of Salamis (an entirely different place than the island of Salamis off the Greek coast, namesake for the previous scenario's battle). Although Demetrius was outnumbered, he managed to outflank the Ptolemaic fleet by putting his troop transports into the center of his line. This scenario shows, in reduced scale, the battle at the eastern end of the line, where the heavier warships of Demetrius rolled up the Ptolemaic line, rescued the transports, and won a crushing victory.
Victory Conditions
Battle ends when only one player has ships on the map. Player controlling the most ships, including those exited from the map, wins the battle.
Fleet Game Scenario
Deploy the Diadochi and Ptolemaic ships as shown (deployment map). All Diadochi Hepteres and Quadremes have expert crews, Sexteres and Quinqueremes average crews, Liburnians and Pharsali green crews. All Ptolemaic ships have average crews.
Diadochi move first, Ptolemies move second.
Optional Rules: if used, Diadochi Hepteres, Sexteres, and Quinqueremes have boarding battle equipment. No mainsails may be carried. Wind is from the north.
Ship Game Scenario
Diadochi Squadron
- 1 Cataphract Hepteres, expert crew, 1 artillery engine in bow, another in the stern, 2 towers, 6 pts heavy marines, firepots, flame missiles. This ship is Demetrius' flagship.
- 2 Cataphract Sexteres, average crews, 1 artillery engine in bow, 1 tower, 6 pts heavy marines, firepots, flame missiles.
- 3 Cataphract Quinqueremes, average crews, 1 artillery engine in bow, 6 pts heavy marines, firepots, flame missiles.
- 4 Cataphract Quadremes, expert crews, 5 pts heavy marines. These are Athenian allied ships serving with Demetrius.
- 1 Quadreme, expert crew, 3 pts heavy marines. Another Athenian allied ship.
- 4 Liburnians, green crews, 1 pt heavy marines, 1 pt light marines.
- 3 Pharsali, green crews, 2 pts of heavy marines.
Ptolemaic Squadron
- 9 Cataphract Quinqueremes, average crews, 5 pts heavy marines, 1 pt light marines, 1 pt missile marines.
- 9 Cataphract Quadremes, average crews, 5 pts heavy marines, 1 pt light marines.
Optional Rules
Should use towers, drift, wrecks, and flame weapons. All others suggested.
Wind is from the north, light airs, sea state is calm, current is running with the wind. A tide is flooding (rising) toward the northwest.
Economus
256 BC in the Western Mediterranean. Romans vs Carthaginians off Sicily.
During the First Punic War, largely fought over Sicily, a Roman fleet attempted to bypass that island and stage a direct invasion of Carthage in Africa. The Carthaginian fleet intercepted them off the Sicilian coast. The Romans, aware of their inferior seamanship, adopted a wedge-like box formation to protect their horse transports. The Carthaginians formed a line, to outflank the Romans and hopefully encircle them, a tactic similar to Hannibal's at Cannae fifty years later. However, the Punic center was unable to hold long enough for the outflanking maneuver. This resulted in the splitting of the Carthaginian fleet, allowing the Romans to first force the seaward wing to retreat, and then to deal with the landward wing, which was backed up against the coast and lost most of its ships. This scenario depicts the entire battle in a much reduced scale.
Victory Conditions
The battle ends when one side no longer controls any ships on the map. The fleet which controls the larger number of ships at the end of the battle (including ships off map) is the victor. Each Roman merchant ship counts as a quarter (1/4) ship for victory.
Fleet Game Scenario
Each player sets up ships as shown (deployment map: Carthaginian Fleet, all ships Ct Quinqueremes; Roman Fleet in a wedge-like box formation). All Carthaginian ships have expert crews, all Roman ships have average crews except the Merchants, which have poor crews.
Carthaginians move first, Romans move second.
Special Rule: boarding value of each Roman merchant is only one (1).
Optional Rules: Sailing rules must be used, wind is from the south. No ships except merchants may have mainsails. If special equipment is used, the four Roman Quinqueremes set up directly ahead of the merchants have special grappling equipment.
Ship Game Scenario
Roman Fleet
- 1 Cataphract Sexteres, average crew, 6 pts heavy marines, 2 pts light marines.
- 4 Cataphract Quinqueremes, average crew, 4 pts heavy marines, 3 pts light marines, corvus. These are the ships deployed directly ahead of the merchants.
- 10 Cataphract Quinqueremes, average crew, 4 pts heavy marines, 3 pts light marines.
- 4 Large Merchants (size no. 5), poor crews, 1 point light marines. Have mainsails.
Carthaginian Fleet
- 16 Cataphract Quinqueremes, expert crews, 1 pt heavy marines, 5 pts light marines.
Optional Rules
Sailing and weather rules must be used. Wind is a breeze from the south, sea state is calm, current running with the wind. Tide is flooding in toward the southeast.
Corvus optional rule must be used.
Entire shoreline is considered beach, if ships on shore optional rule is used.
Drepanum
249 BC in the Western Mediterranean. The Battle of the Center: Romans vs Carthaginians.
In this year, also during the First Punic War, P. Claudius Pulcher led a Roman fleet in a raid against the key Carthaginian naval base at Drepanum. However, the attack was compromised by a late arrival, and then by additional chaos as the Romans withdrew the advance guard from the harbor area to fight the Carthaginian squadrons already putting out to sea. Finally the fleets engaged, but the Romans had a hostile coast behind them. This proved the difference in a rather evenly matched battle, as the Carthaginians made the best of their sea-room and superior crews to virtually annihilate the Roman fleet.
Victory Conditions
The battle ends when only one side controls ships on the map. The side which controls the most ships, on and off the map, at the end of the battle, is the victor.
Special Map Rules
The two rows of hexes on the east and west edge of the map are out of bounds. This represents the battle occurring to the left and right of the central action shown in this scenario.
Fleet Game Scenario
Ships are deployed on the map as shown. All Roman ships have average crews, all Carthaginian ships expert.
If optional rules are used, Romans have grappling and boarding battle equipment. Wind is from the southwest.
Romans move first, Carthaginians move second.
Ship Game Scenario
Roman Squadron: 18 Cataphract Quinqueremes, average crews, 5 pts heavy marines, 1 tower, a corvus.
Carthaginian Squadron: 18 Cataphract Quinqueremes, expert crews, 6 pts light marines.
Optional Rules
Corvus and towers rules must be used. Other optional rules may be used if desired.
Wind is a breeze from the southwest, sea state is swells, ocean current is running with the wind. Tide is ebbing out to the north.
Chios
201 BC in the Eastern Mediterranean. The Eastern Battle: Macedonians vs Pergamenes.
King Phillip V of Macedonia was pursuing a campaign of conquest against other Greeks in the Aegean, and had the city-state of Pergamum in Ionia under siege. However, the Pergamenes responded by acquiring Rhodes (another city-state) as an ally. The resulting allied fleet was considerably superior to the Macedonian, despite Phillip's use of small Lembi to flesh out his ranks. Phillip therefore withdrew from Pergamum, and was pursued and brought to battle by the allies off the island of Chios. This scenario depicts, in reduced form, the action on the right half of the Macedonian fleet, where Phillip's personal flagship was captured. King Attalus of Pergamum also lost his ship in a melee, but like Phillip V, managed to escape to another ship before being captured.
Victory Conditions
The battle ends when only one side controls ships on the map. That surviving side is the victor.
Fleet Game Scenario
Ships are deployed as shown (deployment map). All ships have average crews.
Macedonians move first, Pergamenes move second.
If optional rules are used, wind is from the north, and all Macedonian ships except the Lembi have special boarding battle equipment. Pergamene cataphract Quadremes and Quinqueremes also have special boarding battle equipment.
Ship Game Scenario
Macedonian Fleet
- 1 Cataphract Dekares, average crew, 2 towers, 4 artillery engines (2 in bow, 2 in stern), 10 pts heavy marines, 3 pts light marines, 3 pts missile marines. Phillip V's flagship.
- 1 Cataphract Octares, average crew, 1 tower, 2 artillery engines (1 in bow, 1 in stern), 6 pts heavy marines, 2 pts light marines, 2 pts missile marines.
- 1 Cataphract Hepteres, average crew, 1 tower, 1 artillery engine in bow, 6 pts heavy marines, 1 pt light marines, 1 point missile marines.
- 2 Cataphract Quinqueremes, average crew, 1 tower, 3 pts heavy marines, 1 pt light marines, 1 pt missile marines.
- 4 Cataphract Quadremes, average crew, 1 tower, 2 points heavy marines, 1 point missile marines, 1 point light marines.
- 11 Lembi, average crew, 1 point heavy marines.
Pergamene Fleet
- 6 Cataphract Quinqueremes, average crew, 1 tower, 4 pts heavy marines, 1 pt missile marines.
- 4 Cataphract Quadremes, average crew, 1 tower, 4 points heavy marines.
- 3 Cataphract Triremes, average crew, 3 pts heavy marines.
- 1 Triemiola, average crew, 1 pt heavy marines, 1 pt light marines, mainsail carried.
Optional Rules
Sailing rules should be used. Wind is a breeze from the north. Sea state is calm, ocean current is running with the wind. There is no tide.
Pompey & the Pirates
67 BC in the Eastern Mediterranean. Somewhere off Crete.
During the later days of the Roman Republic, the constant wars between Romans and Greek states, not to mention Romans against Romans, fostered the growth of piracy. Independent pirates reached their zenith in the 70's and 60's BC. Pompey, later the great rival of Julius Caesar, rose to power by acquiring a commission as special Proconsul with extraordinary powers to use against the pirate menace. This scenario represents an action at the start of his campaign, where Roman warships escorting a grain fleet from Egypt are beset by a squadron of pirates. Ultimately, Pompey was successful against the pirates, and used the gratitude of Rome to build his career.
Victory Conditions
The game ends when all merchant ships, and/or all ships under pirate control, are off the map.
The pirates win if they end the game with more ships under their control than when they started. The Romans win if the pirates have fewer ships under their control than at the start of the game. If the pirates control exactly six ships (same as start) at the end of the game, the battle is a draw.
Map Exit Notes: Fleet & Ship Games
Control of a merchant ship that exited the map is determined by where the merchant exited. The player who controlled the ship at the time of exit is irrelevant.
If the merchant ship exited in the "Merchant Exit Area", it is under Roman control. If the merchant ship exited anywhere else, it is under Pirate control.
Fleet Game Scenario
Romans deploy as shown on the map. The pirates then move onto the map from any one of the four edges in a special pre-game move. Pirates may not enter from the south edge.
All ships begin under sail, mainsail if carried, otherwise boatsail.
Romans move first, Pirates move second.
Roman ships have average crews, except the Pentakonters and Merchants, which have green crews. All merchant ships have a boarding value of zero (0). All Roman ships carry mainsails except Triremes and Biremes.
Pirate ships are two Liburnians and four Hemiolas, all with expert crews and mainsails raised.
Optional Rules: sailing rules must be used. Wind is from the southeast. Special equipment optional rules are not used.
Ship Game Scenario
Pirate Squadron
- 2x Liburnians, expert crew, 1 pt heavy marines, mainsail
- 4x Hemiolas, expert crews, 1 pt heavy marines, mainsail
Pirates move onto the map at start of game in a special pre-game move. Pirates may enter from any one map edge except the south. After Pirate entrance movement, game starts with the normal turn procedure. All pirate ships have mainsails raised at the start.
Roman Squadron
- 1x Cataphract Trireme, average crew, 3 pts heavy marines.
- 1x Triemiola, average crew, 2 pts heavy marines, mainsail
- 4x Biremes, average crew, 1 pt heavy marines.
- 2x Pentakonters, green crew, 1 pt light marines, mainsail
- 6x Merchants size no. 2, green crew, no marines.
Merchants and Pentakonters start the battle with mainsails raised. Other ships start the battle with boatsails raised.
Optional Rules
Weather and sailing rules must be used. Wind is a breeze from the southeast. Sea state is swells, current running with the wind. Sea state does not affect Pentakonters provided they are under sail, but does affect them if they use oars.
Oceanus Britannicus
56 BC in the Northeastern Atlantic. Romans vs Veneti along the coast of Gaul.
During Julius Caesar's campaign to subjugate Gaul, he was obliged to bring the Veneti under the Roman heel. This proved a difficult task by land, as Veneti fortified towns were on the coast, with inaccessible land entrances, and a strong fleet to keep them supplied by sea. Therefore, Caesar had to defeat this fleet to make his campaign a success. Despite having to build his own ships, types more suited for the Mediterranean than the Atlantic, Caesar managed to win his battle. At just the right time, a wind failure occurred, leaving the Veneti powerless and helpless against the Roman galleys.
Victory Conditions
The battle ends when only one side has ships remaining on the map. The side which controls more ships at the end of the battle is the victor.
Fleet Game Scenario
Roman fleet deploys first in the area marked (Roman Deployment Area; Exit Prohibited to Romans along the southern part of the map edge). The Romans have 2 Cataphract Quadremes, 4 Cataphract Triremes, 5 Liburnians, 3 Biremes, and 3 Pentakonters.
Then the Veneti Fleet deploys in the area marked (Veneti Deployment Area), and has the following: 2 Veneti size no. 6, 7 Veneti size 4, 6 Merchants size 2, and 2 Merchants size 5. Merchants are considered Veneti warships in this scenario.
Roman ships have average crews, Veneti ships have experts.
Romans move first each turn, Veneti move second.
Optional Rules: sailing rules must be used. Wind is from the southeast. If special equipment rules are used, Romans have grappling and boarding equipment, Veneti have boarding equipment on all their ships.
Ship Game Scenario
Roman Fleet
- 2 Cataphract Quadremes, average crew, tower, 4 pts heavy marines.
- 4 Cataphract Triremes, average crew, 2 pts heavy marines, tower.
- 5 Liburnians, average crews, 2 pts heavy marines.
- 3 Biremes, average crews, 1 point heavy marines.
- 3 Pentakonters, average crews, 1 point heavy marines.
Romans deploy first in the area marked.
Veneti Fleet
- 2 Veneti size 6, expert crews, 5 pts light marines, 1 point missile marines, integral towers (see optional rules).
- 7 Veneti size 4, expert crews, 4 pts light marines, integral towers (see optional rules).
- 2 Merchants size 5, expert crews, 3 pts light marines, integral towers (see optional rules).
- 6 Merchants size 2, expert crews, 1 point light marines, no integral towers.
All merchant ships are considered Veneti type sailing warships in this scenario. Sailing speeds for merchants are changed to A:3, B:2, C:1, D:0 with mainsails.
Veneti deploy second, in area marked.
Optional Rules
Weather and sailing rules must be used. Wind is light airs from the southeast, sea state is swells, there is no ocean current, but tide is flooding to the south.
For wind change, use the following dice roll results instead of the normal one:
- 2 or 3 - wind strength decreases one level
- 4 to 11 - wind strength remains the same.
- 12 - wind strength increases one level.
Towers optional rules must be used. Corvus and iron hands rules are not used.
(The printed rulebook repeats the first paragraph of these Optional Rules, "Weather and sailing rules must be used. Wind is light airs from the southeast, sea state is swells, there is no ocean current, but tide is flooding", a second time, once ending "but tide is flooding" with no direction. It is given once here.)
Actium
31 BC in the Eastern Mediterranean. Battle on the Northern Wing: Octavius vs Anthony.
The assassination of Julius Caesar in 44 BC plunged the Roman Republic into its last, and fatal civil war. Ultimately the Republic died, and the Empire was created. During this war, after many vicissitudes, battles, and elimination of contenders, the field was reduced to Mark Anthony and his lover/ally Cleopatra, and Octavius, naturalized heir of Julius Caesar. The final campaign was decided at Actium, where Octavian's forces besieged the Antonians by land and sea. Anthony was obliged to fight at sea for supplies. In this battle, despite his larger ships with better boarding capacity, Anthony lost. Octavius' victory was due to his admiral Agrippa, who used ram tactics with fire pots and flaming missiles, destroying many Antonian ships before they had a chance to board.
Victory Conditions
Battle ends when only one side has ships on the map. Side which controls more ships at the end of the battle is the victor.
Special Rule: Octavian ships may not exit the map until after the second Antonian ship has done so.
Fleet Game
Antonians set up first, then Octavians. Each must deploy a ship in the area marked on the deployment map above, but the player has the choice of which ship to deploy at which point.
Antonian Fleet, with all green crews, has 2 Ct Dekares, 1 Ct Novares, 1 Ct Octares, 3 Ct Hepteres, 3 Ct Sexteres, 3 Ct Quinqueremes, and 2 Ct Quadremes.
All Antonian ships carry mainsails.
Octavian Fleet, with all average crews, has 1 Ct Octares, 6 Ct Quinqueremes, 4 Ct Quadremes, 1 Quadreme, 5 Ct Triremes, 1 Trireme, and 1 Liburnian.
Antonians move first, Octavians move second.
Optional Rules: all optional rules are suggested. Wind is from the northeast. Antonian ships have special boarding equipment, Octavian ships have special grappling equipment. Players may wish to use Ship Game Flame Weapons rules, except for flaming missiles.
Ship Game
Antonian Fleet
- 2 Ct Dekares, green crew, 4 towers, 2 artillery engines (1 in bow, 1 in stern), 3 pts missile marines, 13 pts heavy marines, mainsail carried.
- 1 Ct Novares, green crew, 3 towers, 2 artillery engines (1 in bow, 1 in stern), 2 pts missile marines, 10 pts heavy marines, mainsail carried.
- 1 Ct Octares, green crew, 2 towers, 1 artillery engine in bow, 1 pt missile marines, 9 pts heavy marines, mainsail carried.
- 3 Ct Hepteres, green crew, 1 tower, 1 pt missile marines, 8 pts heavy marines, mainsail carried.
- 3 Ct Sexteres, green crew, 1 tower, 7 pts heavy marines, mainsail carried.
- 3 Ct Quinqueremes, green crew, 1 tower, 5 pts heavy marines, mainsail carried.
- 2 Ct Quadremes, green crew, 1 tower, 4 pts heavy marines, mainsail carried.
Antonian ships are deployed first, one ship in each location marked on map above. Antonian player has choice of which ship is deployed in each location.
Octavian Fleet
- 1 Ct Octares, average crew, 1 tower, 2 artillery engines in bow, 2 pts missile marines, 6 pts heavy marines, firepots, fire missiles, iron hands.
- 6 Ct Quinqueremes, average crew, 1 tower, 1 artillery engine in bow, 1 pt missile marines, 3 pts heavy marines, firepots, fire missiles, iron hands.
- 1 Quinquereme, average crew, 1 artillery engine in bow, 3 pts heavy marines, firepots, fire missiles, iron hands.
- 4 Ct Quadremes, average crew, 1 artillery engine in bow, 1 pt missile marines, 3 pts heavy marines, firepots, fire missiles, iron hands.
- 1 Quadreme, average crew, 1 pt missile marines, 2 pts heavy marines, firepots, fire missiles, iron hands.
- 5 Ct Triremes, average crew, 1 artillery engine in bow, 2 pts heavy marines, firepots, fire missiles, iron hands.
- 1 Trireme, average crew, 2 pts heavy marines, firepots
- 1 Liburnian, average crew, 1 pt heavy marines, firepots
Octavian ships are deployed after Antonian, the same fashion, but in the Octavian deployment locations.
Optional Rules
Sailing, weather, iron hands, and flame weapons rules must be used. Wind is breeze from the northeast. Sea state is calm. There is no ocean current, but tide is ebbing to the south.
All other optional rules may be used, as desired.
The Saxon Shore
370 AD in the Northeastern Atlantic. Roman Britain vs Barbarian Raiders.
In the fourth century AD Roman Britain, like many other outworks of the Empire, was left largely to its own devices while innumerable pretenders to the Emperorship fought interminable civil wars (an ancient habit Rome never outgrew). The most energetic raiders to Britain were the Saxons. They used shallow draft clinker-built ships, predecessors in a crude way to the Viking longship. The situation became so bad that major areas of the British coastline became known as the "Saxon shore", and eventually the Saxons settled there. However, about 370 AD Valentinian I was Emperor of the western half of Rome. A good military man, if a poor emperor, Valentinian expended considerable resources to eliminate the Saxon menace. One favorite Roman tactic was to meet the Saxons on their way home from a raid, when the Saxons were laden with booty and disinclined to fight. This scenario represents a typical situation: the Saxons are emerging from a river mouth after a raid inland, and the Romans are waiting for them. Ultimately, Valentinian failed against the Saxons, in that he wasn't emperor long enough to completely destroy them. Roman Britain, therefore, became Saxon Britain in the centuries to come.
Victory Conditions
Saxons score one point for every ship they control off the map. Saxons must score 5 points or more to win. Romans win if the Saxons score 4 or less.
Fleet Game Scenario
Saxons set up first in the area marked (Saxon Exit Prohibited along the marked map edges). All Saxon ships have average crews, and may carry a mainsail if desired. Saxons have 7 Saxon ships and 2 Lembi.
Romans set up second, in the area marked. Romans have 2 Liburnians and 3 Lembi with average crews, 2 Biremes and a Pentakonter with green crews.
Romans move first each turn, Saxons move second.
Optional Rules: none required, but all except special equipment are suggested. Wind is from the south.
Ship Game Scenario
Saxon Fleet
- 7 Saxon Ships, average crews
- 2 Lembi, average crews
Saxons may carry as many light marines as desired on the above ships up to the cargo limits. Lembi are presumed to have Saxon oarsmen, just like Saxon Ships. Ships may carry mainsails if desired.
Roman Fleet
- 2 Liburnians, average crews
- 2 Biremes, green crews
- 1 Pentakonter, green crew
- 3 Lembi, average crews
Romans may carry any number and type of marines on each ship, up to its cargo capacity. Romans may not carry any other type of equipment except mainsails, which may be carried.
Optional Rules
Weather, drift, sails, oar rakes, ships on shore, floating wrecks, and oarsmen in battle suggested.
Wind is a breeze from the south. Sea state is swells, current is running with the wind outside the river mouth area. Tide is ebbing and moving toward the southwest. Therefore, there is a current running out to sea along the river.
Point Choice Scenarios
Trireme is a game that allows infinite expansion and variation. You can create your own scenarios, even your own fleets, on a nearly infinite variety of battlefields. To insure a fair match, opposing fleets should have an equal point value, and every ship and piece of equipment a point value as well. Therefore, if opposing sides have equal points, they will have equal forces.
Use the following procedure to create your own "point choice" scenarios:
Scenario Creation Procedure
- Select the region of battle (if using Ship Game optional weather rules).
- Determine the number of points allowed to each side. In the fleet game, 1,000 points makes for a smallish battle, 1,500 a moderate sized one, and 2,000 a large one. In the ship game, about 2/3rds the points of an equivalent Fleet Game is wise.
- Each side secretly selects the ships and equipment it desires, up to the point limit allowed. In the ship game, log sheets should be filled out, in the fleet game, a simple listing of items selected.
- The map is laid out, ocean, coast, or island type battle is selected, and shore and reef markers are placed if needed.
- Weather conditions are determined, if optional rules are used.
- Opposing fleets are deployed in the proper deployment areas.
- First turn of battle begins.
Fleet Game Point Values
Each type of ship has a specific point value, which varies with the type of crew. In addition, if optional special equipment rules are used, each type of ship must spend an extra amount for grappling equipment, and another amount for boarding equipment. Sails may be added at no point cost in the Fleet Game.
| ship type | expert | average | green | slave | grapple | board |
|---|---|---|---|---|---|---|
| Lembi | 25 | 16 | 10 | 6 | 1 | 1 |
| Pentakonter | 30 | 20 | 13 | 8 | 2 | 2 |
| Bireme | 48 | 33 | 23 | 15 | 3 | 3 |
| Liburnian | 66 | 47 |
Ship Game Point Values
To determine the point value of a ship in this game, individual elements must be selected and paid for, as allowed and required. The following items must be purchased for each ship:
- The ship itself, including deck crew, cost varies with the type of ship.
- Oarsmen for all ships except Merchants and Veneti. A full complement is required, and all oarsmen must be the same quality. A ship cannot be "undermanned" with insufficient oarsmen.
In addition, a ship may pay extra for marines, engines, towers, and various optional rules equipment. Boatsails are free (no cost), but in the Ship Game, mainsails do have a point value, even on Hemiolas, Triemiolas, Merchants, Veneti, and Pharsali.
Ship Costs (includes deck crew)
| points | ship |
|---|---|
| 2 | Lembi |
| 4 | Pentakonter |
| 6 | Bireme |
| 9 | Liburnian |
| 11 | Trireme |
| 14 | Ct Trireme |
| 14 | Quadreme |
| 16 | Ct Quadreme |
| 16 | Quinquereme |
| 17 | Ct Quinquereme |
| 22 | Ct Sexteres |
| 26 | Ct Hepteres |
Each Point of Oarsmen
- 1 per slave oarsman
- 2 per green oarsman
- 3 per average oarsman
- 4 per expert oarsman
- +1 per point Saxon oarsman (only if optional Oarsmen in Battle rules are used)
Each Point of Marines
- 2 per missile marine
- 2 per light marine
- 4 per heavy marine
Each Item of Equipment
- 4 mainsail carried
- 5 iron hands carried
- 8 per tower carried
- 8 per artillery engine
- 5 flaming missiles carried
- 10 firepots carried
- 15 ship has reinforced bow
- 20 corvus carried
Mapboard Layout & Deployment
Three types of mapboard layouts can be used: ocean, coastal, or island/riverine. Players may select one of these three, or roll a die: 1, 2, 3 - coastal; 4, 5 - island/riverine; 6 - ocean.
In ocean mapboards, the sea area is endless. If ships approach a map edge, all are adjusted the same distance toward the map center (see movement rules, map edges & exits).
On a coastal mapboard, one player selects either the east or west edge as the edge across which exit is prohibited. Then, on that half of the map, excluding the central row of hexes, he sets up 20-35 shore and 1-5 reef markers, one per hex. The pattern must create a solid shoreline from north to south. The opposing side then selects north or south edge for its deployment area (see below).
On an island map, the set-up is the same as coastal, except 55-85 shore and 7-15 reef markers must be used. Shore and reef markers can be placed anywhere on the map, but a solid shoreline must exist on the half with the prohibited map edge. This solid shoreline can be interrupted once for a river mouth, and exit off map through the river mouth is allowed.
Each fleet can deploy its ships, at the start of the game, within six hexes of the north or south edge. The side which did not set up the map (in an island or coastal game) selects whether it will take the north or south edge. In ocean games, both sides roll a die, higher roller takes the north edge, lower the south.
Deployment is secret and simultaneous. Place boxes or books across the center of the map to conceal deployment while the counters are placed. Then remove the barrier and begin play.
Victory Conditions
The battle ends when only one side controls ships on the map. Victory is determined by each side totalling the point value of all the ships it controls. Permanently crippled ships count half value, wrecks do not count, even if still floating. The side which still has ships on the map may then add 10% (1/10th) of its original point value to its final total, as a bonus for remaining on the battlefield. The higher total is the victor.
Giant Games
Two or more Trireme games can be combined, for a larger map area and a greater selection of ships. Truly monster games can be created, with multiple players per side, and perhaps hundreds of ships. Generally, the Fleet Game is more suitable to multi-player monster battles than the Ship Game.
NOTES
Designer's Notes
Trireme is loosely based on a British wargame of the same title and subject published in 1973, long before the advent of tactical naval wargames in America. A considerable amount of redesign was done in the Ship Game, to allow new and broader historical viewpoints, and greater playability. However, the Ship Game is still a complex, tactical game with the mechanically time-consuming process of simultaneous movement. Therefore, to permit larger battles, and quick, enjoyable games, the Fleet Game was designed and also included. Although Trireme is not specifically designed to recreate entire ancient naval battles, which often involved hundreds of ships, using the Fleet Game, a half dozen people, and numerous Trireme games combined, such a battle could be put together as a "monster" game.
Some notes about ancient warships are certainly in order, as the impressions most have are little more than pure Hollywood. Ancient galleys were quite unlike the seagoing warships of today. They were much more like modern racing shells, built for short bursts of speed in relatively smooth waters. A Trireme or Quinquereme probably drew only three or four feet of water. In fact, by running the crew to the stern, the bow (with ram!) could be lifted out of the water entirely! Ships travelled along the coastline and beached at night, so the crew could forage for food and water. Long voyages of many nights over open sea were avoided, and for good reason. Any significant storm was likely to sink the ship! More than one ancient admiral exercised bad judgement concerning sea and weather, and found his whole fleet caught in a storm and sunk!
In battle, the ancient galley had excellent speed and maneuverability. Skill at the oars determined whether a ship would ram or be rammed. Therefore, oarsmen were highly paid, and greatly sought. Availability of skilled crews made or broke the reputation of every ancient navy except Rome. The Romans got by with mediocre crews by having excellent marines and gadgets. In any event, slaves at the oars was worse than useless, since a ship with such poor oarsmen wouldn't survive in battle against a well-crewed vessel. Slave crews are noted in the game only to show how ludicrous the idea really is!
The Trireme was probably the fastest and most flexible of all warships in the ancient world, and had 85 rowers per side, one per oar. Rowers were staggered above and behind each other, so the overall length of the ship would be about 120 feet. The beam, including outriggers for mounting oars and oarsmen, would be about 18 feet. The overall crew was somewhat over 200, and with the crew working at maximum capacity, the ship might have developed 7 to 9 knots of speed. However, within twenty to thirty minutes the crew would be blown. A battle speed of 4 to 5 knots might be maintained for a few hours, and is what the cruising speed (in the game) is based upon. However, long voyages were manned by rowers in rotation, and the average speed was no more than 2 or 3 knots. One "knot" is 2,000 yards per hour.
The Trireme was the standard warship of the Greek-Persian wars, and the Peloponnesian wars shortly thereafter. The open trireme was primarily a vessel of maneuver, requiring ram tactics and an excellent crew. In the Peloponnesian wars, the Athenian navy reached such a level of crew excellence that her opponents avoided naval battles, and when forced to fight, relied on larger and larger marine contingents to win in boarding actions. This led rapidly to the cataphract ship, with a deck over the rowers, giving more room for marines. This in turn made triremes, with their three banks of oars, rather top-heavy. Gradually the one-man-per-oar concept was replaced by multiple men per oar, in two banks. In the Punic wars between Rome and Carthage, a century or two later, the cataphract quinquereme had become the standard warship. It had two banks of oars, three men per upper oar, two per lower. By the time of the Roman Civil Wars, the dekares had become a common heavy battleship of the fleet, but even it still had only two oar banks, five men per oar. The slightly increased beam and greatly increased length of the bigger cataphract ships allowed greatly increased deck area for marines and machines, but did little to strengthen the overall structure of the ship. Thus a fleet with smaller but more skillfully crewed ships still had a fighting chance.
Another misconception fostered by Hollywood is that missiles played a large role in ancient naval battles. Long range missile fire from a galley would be quite inaccurate. In fact, an artillery engine firing a stone heavy enough to damage a ship would have a far larger recoil, tearing apart the ship the engine was mounted upon! Flame weapons were the only effective ship-killers. But to be effective, a large commitment to flame tactics was needed, as well as the element of surprise. Greek Fire, with siphon-like spigots, was a later invention of the Byzantine Empire.
The sailing rules and speeds are somewhat peculiar to those with a passing familiarity with ships under sail. The reason is quite simple: ancient ships had no keel, a very shallow draft, and a relatively flat bottom. All of these factors combine to make the ship awkward to handle when the wind is on the beam, including the quarter, usually the best point of sailing. Ancient ships performed best when running before the wind. In fact, on oared ships the masts and sails were as light as possible, and the mainmast was often left ashore to conserve weight and space in battle. Only merchants relied on sails, because it was far cheaper to borrow the wind than pay for oarsmen.
There are no general "morale" rules in the game. Individual warships may surrender or be captured, but rarely did a whole squadron give up the fight. More frequently, an admiral might give up the fight himself, and lead his squadron away from the action. This was especially common in fleets composed of allied factions, who sometimes betrayed each other. The only way to effectively represent this is with complex, multi-player monster scenarios with varying and often contradictory victory conditions.
The two main tactical methods in ancient naval warfare were "ram" and "board." Fleets with better crews relied on "ram" tactics, and often deployed in short columns for the diekplus maneuver. In this, the column would cut through the enemy line, opening the hole with the lead ships, broadening it and covering the leaders with the following ships. The "board" school got by with less skillful oarsmen, and instead relied on huge quantities of marines and various gadgets to bring the enemy into a gigantic melee of a boarding battle, with everyone grappled to everyone else.
In the final analysis, neither school was proved perfect. The Athenian fleet using ram tactics was triumphant in its day, while the Roman fleet using board tactics also enjoyed considerable success. This game allows you to investigate both techniques, and decide for yourself which is superior.
For further historical reference and information, an excellent and readable source, including much technical data, is Warfleets of Antiquity, by R.B. Nelson. This book is also suggested to players designing their own scenarios, especially monster games.
PLAYING EQUIPMENT AND CHARTS
This section is transcribed from the separate "Trireme Game Tables Card" and Fleet Game charts sheet (BGG file page 117063, "Trireme Fleet Game Charts", tables reformatted for letter-size printing).
Playing Equipment
Rules
Trireme has two separate sets of rules. First is the Fleet Game, an easier game recommended for beginners. The fleet game will also be interesting to experienced wargamers wishing a quicker game, or interested in playing larger battles.
The second set of rules is the Ship Game. This is a more complex game. Knowledge of the Fleet Game is not required for the Ship Game, but beginners are encouraged to master the Fleet Game before trying the Ship Game.
The best way to learn any set of wargame rules is to read them once quickly. Then start playing a game immediately. As you play, rules questions will come up. Refer back to the booklet for the answer to each question. This way, you learn the details as you play, and after a couple games the rules are second nature. Don't attempt to read the rules thoroughly once, memorizing them, and then play like an expert. Complex wargame rules, such as Trireme, should be learned progressively, through experience.
Counters
Punch out the two sheets of die-cut counters.
In the Ship Game, all information for each ship is recorded on the log pad. The die cut playing pieces are only used to show the current position of the ship, and to remind players about certain situations during the course of the game.
In the Fleet Game, all information for each ship is found directly on the counter, as shown below. The log pad is not used. The various extra sail, grappled, tired, marine group, etc. counters are used to show special situations as they occur.
(Diagram of a ship counter, "Ct Trireme Alpha": the counter shows the ship size, boarding value, cruising speed and fast speed (for example 4-2 on the counter), the ship type, and the ship name.)
Other counters: Coastline Marker (green); Reef Marker (green/blue); Marine Group (with identifying letter); Oarsmen tired; Boat Sail raised; Main Sail raised; Ship crippled; Ships grappled.
Note: due to a proofing error, the yellow Lembi Theta counter has an incorrect size value of "2". The actual size value should be "1", like all other Lembi.
Ship counters are in three colors: red, yellow, and gray. Red and yellow fleets are exactly alike, and are a representative mix of ship types actually used by ancient navies, based on the construction programs actually used by ancient navies. Gray ships represent special ships and "neutral" types that can be added to either red or yellow (such as additional lembi, merchant ships, etc.). Similarly, the white marine group counters can be used as needed, like the gray ships.
Mapboard
The blue map sheet represents an area of ocean. Coastline and reef counters are placed on it to show the limits of the water area in various scenarios.
Charts
This summary chart sheet includes useful charts and tables for both the Fleet Game and the Ship Game.
Log Pad
This is used in the Ship Game only, to record information about each ship, including turn by turn movement orders. It is important that each ship have its own log entry, and be kept up to date for each ship. Players may photocopy additional log sheets from those provided, as desired and needed.
Other Equipment
One or more six-sided dice, marked in the normal fashion (1 through 6) are required. A pencil or pen for marking on the log pad, and for general notes, is also required.
Ram Directions
(Diagram.) Always position the ship on the map as shown, in two hexes, with the center across a single hexside. The diagram labels the directions from which a ship can be rammed: bow ram; bow beam (on each side); forward beam (on each side); after beam (on each side); quarter beam (on each side); stern ram. The port side beam rams and the starboard side beam rams are the beam rams on either side of the ship.
Wind & Sailing Attitudes
(Diagram.) The attitude of a ship toward the wind is shown by a diagram with an attitude letter at each arrow around the ship: D at the bow, C at the arrows at the bow and forward beam on each side, B at the arrows at the after beam and quarter on each side, and A at the stern. The Sailing Movement chart (see below, and the Sailing section of the Fleet Game Optional Rules) gives movement points by attitude.
Fleet Game Charts & Tables
Playing Procedure
- Cripple Recovery
- First Player Movement
- Second Player Movement
- Ram Results
- Boarding Battles
Cripple Recovery
| die roll | results |
|---|---|
| 1 | ship flounders and sinks |
| 2 | ship permanently crippled |
| 3 | no effect, may attempt recovery again |
| 4 | recover boarding factor, speed reduction remains, +2 future recovery |
| 5+ | recovers completely |
Full Speed & Tiring
| crew quality | to tire | okay |
|---|---|---|
| expert | 1 | 2-6 |
| average | 1-2 | 3-6 |
| green | 1-3 | 4-6 |
| slave | 1-5 | 6 |
Sailing Movement Rates
| attitude | mainsail | boatsail |
|---|---|---|
| A | 2* | 2 |
| B | 2 | 1 |
| C | 1 | 0 |
| D | 0 | 0 |
*3 if has oars, and size 1-7, or Veneti
Ram Modifiers
Crew quality: +3 expert; +2 average; +1 green; 0 slave
Ramming ship: +5 ram in beam; +2 ram in stern; -1 at cruising speed; -2 crippled
Target ship: +3 rammed in bow beam; +1 rammed in quarter beam; +1 has higher full speed; -2 crippled
Ram Results
| comparison | result |
|---|---|
| +3 or more | no effect |
| -2 to +2 | crippled if even total, no effect if odd total |
| -3 to -6 | crippled |
| -7 or less | sunk |
Grappling
- +1 rammed other ship
- +1 has better crew
- -1 is crippled
- +1 grappling equipment (optional)
Boarding Battle Table
| boarding value comparison | 1 | 2 | 3 | 4 | 5 | 6 |
|---|---|---|---|---|---|---|
| stronger ship triple (3x) or more value of the weaker ship | - | Sw | Sw | Sw | Sw | Sw |
| stronger ship double (2x) or more value of the weaker ship | - | - | - | Sw | Sw | Sw |
| stronger ship higher, but not double the value of weaker | Ws | - | - | - | Sw | Sw |
| values exactly equal | Ws |
Sw = stronger ship captures weaker ship; Ws = weaker ship captures stronger ship; - = stalemate, battle continues unless ships degrapple.
Note on missing charts: the printed Game Tables Card also carried the Ship Game charts (including the Ship Damage Table and the Ship Game Boarding Battle Table referred to in the Ship Game rules). Those Ship Game charts were not present in the source documents available for this transcription and are not reproduced here.