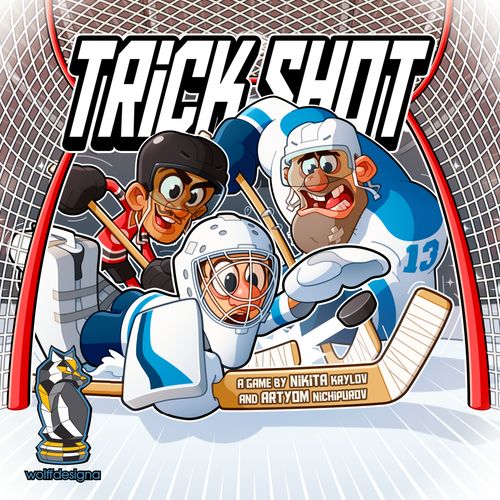
Trick Shot
Trick Shot Rulebook
Table of Contents
Table of Contents
- How to Win?
- Player Count
- Game Length
- Component List
- Setup
- Face-off
- Resetting the Board
- Turn Structure
- Dice Faces
- The Board, Player Profiles
- Move Action, Checking, Reaction Move
- Pass Action
- Shoot Action
- Poke Action, Hit Action, Penalties
- Offside Rule, Offside Move
- Fights, Pulling the Goalie
- Line Cards, Arena Cards
- Example of Play
How to Win?
Winning is simple. Get the puck into the opponent's net to score a goal. The team which scores the most goals by the end of the game — wins.
Player Count
Trick Shot can be played with 2-4 players. Regardless of how many players are in the game, there are always exactly two opposing teams. With 3 and 4 players the game is set-up and played in almost the same way as a 2 player game would, with a few changes described in the Playing with More than One Player per Team section.
Game Length
Before the game players agree to play a friendly match or a full game. A friendly match consists of one period — a total of 10 turns. A team which scored the most goals by the end of the period wins the game. In case of a tie — it's a draw. A friendly match should take around 30 minutes. We recommend playing friendly matches for your first few games.
A full game consists of three periods. Each period begins with a face-off and ends after 10 turns. The team which scored the most goals over the course of three periods wins. If by the end of the last period no team scored the most goals, play 4 additional turns. The first team to score a goal wins the game. If no team managed to score a goal during the overtime, the game is a draw.
Component List
- 1 Game board
- 1 Rulebook
- 6 Custom dice
- 1 Score tracker
- 6 Double-sided stamina tokens
- 1 Turn marker token
- 2 Pucks (1 spare)
- 4 Reference cards
- 32 Red Line cards
- 32 Blue Line cards
- 34 Arena cards (2 blank)
- 14 colored bases
- 2 Goalies
- 4 Centers (2 spare)
- 4 Wingers
- 4 Defensemen
Setup
A. Each player chooses a side of the board and a team color.
B. Place the 4 reference cards near the board, within easy reach of all players.
C. Each team places 2 Defensemen, 2 Wingers, 1 Center and a goalie onto the board, according to the setup diagram. Each team will have 1 center as a spare player.
D. Place the puck in the middle of the board, between the two Centers.
E. Place the turn marker right under the first space of the turn track (the one with the "20:00" on it).
F. Set the dials on the score tracker to 0:0.
G. Place the 3 stamina tokens of each color on the corresponding bench area with the ready side up (the one where the player numbers are visible).
H. Place all the dice within easy reach of all players.
I. If any of the players are playing for the first time, skip this step. Otherwise, deal 1 Arena card and 4 corresponding Line cards to each team, following the steps in the Line Cards, Arena Cards section.
J. Roll for face-off (see below).
Face-off
Each period in the game starts with a Face-off roll.
Each team rolls 3 dice for their Centers. The Center which rolls the most Bounce and Reaction symbols wins the face off — place the puck next to him. Re-roll if tied.
Resetting the Board
Whenever a goal is scored, after a fight, or when a goalie catches the puck, reset the board. To reset the board, repeat the setup steps C, D, G, and J.
If the Face-off is won by the team who had the previous turn, that team takes another turn — do not move the turn marker forward. Otherwise, move the turn marker 1 space forward.
If your center is in the penalty box when the board is reset, place your right-most winger in the center's place before Face-off.
Turn Structure
On Your Turn
At the start of your turn, and each time after you successfully perform an action, choose one of the following:
- Perform an Action.
- Make a Line Change
Perform an Action
-
Activate a player.
Select one of your players to activate. You may not activate the same player two times in a row in the same turn.
-
Choose an action.
Choose one action for your player to attempt: Move, Pass, Shoot, Poke or Hit.
-
Roll.
Add 1 die to your dice pool, then roll that die and any dice already in your dice pool (You roll one die on your first activation, two dice on the second activation etc.). There is no limit on how many dice can be in the dice pool. If you run out of dice, remember the results and keep rolling.
-
Re-roll.
You may choose to spend one of your "ready" Stamina tokens to make a re-roll, by flipping it to its exhausted side. You must re-roll all the dice with symbols (do not re-roll blanks). You may then re-roll again, spending one Stamina on every re-roll.
-
Resolve the action.
If you roll at least one Fail symbol (after re-rolls), your action has failed; otherwise your action succeeds. See the action sections below for a detailed description of all the actions in the game and how they are affected by your roll.
-
Opponent's reaction
If you roll one or more Reaction symbols, your opponent may now perform a reaction — they may move 1 of their players, or a goalie, 1 space orthogonally (see Reaction Move).
There is at maximum one reaction move, regardless of how many Reaction symbols are rolled. A player must be able to move to make a reaction move.
-
Offside moves
If after resolving the action the puck or the puck carrier leaves the offensive zone, perform the Offside moves (see Offside Rule, Offside Move).
Make a Line Change
-
Refresh Stamina.
Flip all exhausted stamina tokens to their Ready side.
-
Swap the Line card (Advanced rules).
Flip your face-up Line card face down and set it aside. Then play a replacement card from your hand (see the Line change section in Line Cards, Arena Cards).
-
End your turn.
Ending Your Turn
Once you fail an action, or decide to make a Line change, your turn ends.
- Empty your dice pool.
- If there is no face-off, move the turn marker 1 space forward on the turn track.
Playing with More than One Player per Team
Trick Shot can be played with 4 players with the following changes to the rules:
- Players on the same team must alternate activations (not turns) and reaction moves. Players on the same team use the same dice pool and stamina.
- Players on the same team are not allowed to discuss tactics with their teammate during their turn. If they do, the opposing team may refresh 1 stamina and make a reaction.
You may use the same rules to play with 3 players. In this case, the more experienced players should play as a team versus a less experienced player.
Dice Faces
Trick Shot's 6 custom dice each have the following faces: 1 Fail, 1 Reaction, 2 Bounce, and 2 Blank.
The Board, Player Profiles
The Anatomy of the Board
The board is a hockey rink laid out symmetrically for the Blue team and the Red team. From one end to the other it has: the Blue team's net with its Goal line and Crease, the Red offensive zone / Blue defensive zone, the Blue line, the Neutral zone, the Blue bench and Red bench along the sides, the Turn track and Penalty boxes along the side, then the second Blue line, the Blue offensive zone / Red defensive zone, and finally the Red team's net with its Crease and Goal line.
Player Profiles
The four player types in the game are Wingers, Centers, Defensemen and Goalies. Each has it's own size/speed profile, listed on the corresponding reference card. The speed and size of the player affects how he can perform various actions.
- Winger — "Quick and Agile": Size 1 / Speed 3. Good at skating, bad at hitting and fighting.
- Center — "The Allrounder": Size 2 / Speed 3. As fast as a Winger, capable at fighting and hitting.
- Defenseman — "Tough and Mean": Size 3 / Speed 1. Best hitter and fighter, at the expense of speed.
- Goalie — "Valiant Defender": Size 0* / Speed 1**. *Can't hit or be hit. **Can't move diagonally.
The Puck, the Puck Carrier, the Goalie
The puck is a small black disk which players need to shoot into the opponent's net to score a goal.
- If the puck is in the same square as a player, that player is called the puck carrier. When the puck carrier moves, the puck moves with him. A player who wins the Face off becomes the puck carrier.
- If the puck is not carried and a player moves through (or stops on) the same square as the puck, he becomes the puck carrier.
- After any activation, if your player is the puck carrier and the puck is outside of your defensive zone, immediately move your goalie to his starting square.
- If your goalie is the puck carrier when your turn ends, reset the board (see the Resetting the Board section).
Move Action, Checking, Reaction Move
Move Action
Move action lets you move your players.
A player may move:
- The number of spaces less or equal to their Speed parameter (see the Player Profiles section).
- Either only diagonally or only orthogonally, in one direction.
- When moving a puck carrier, move the puck with him.
A player may not move:
- Into or through a space occupied by another player.
- Into or through the goal Crease or the net itself (see The Anatomy of the Board). The Goalie may move into the Crease.
- Into the offensive zone (see The Anatomy of the Board), unless the moving player is the puck carrier, or when the puck is already in the offensive zone (see the Offside rule).
- When a player is checked (see Checking below).
Checking
Checking refers to angling, lifting a stick, poking the puck, pushing and contacting the puck carrier without throwing a full on body check. This is a key defensive tactic.
Only the puck carrier can be checked. When the puck carrier is adjacent to an opposing player before making a move, he is considered checked.
Unless stated otherwise, count adjacency orthogonally. I.e. each square is adjacent to 4 other squares.
A checked puck carrier may not use the Move action, the Hit action, or make a reaction move. A checked player may only use the Pass and Shoot actions.
Successful Move / Failed Move
The player moves regardless if the roll was successful or failed. The only possible negative consequence of rolling a Fail is that it ends your turn (The opponent may still get a reaction move - see below).
Reaction Move
After you resolve any action, If you rolled one or more Reaction results, your opponent may choose to make a reaction move. There is a maximum of one reaction move, regardless of how many Reaction results were rolled.
A reaction move follows all the same rules as the Move action (including checking), with two additional limitations:
- The reaction move is always at the Speed of 1.
- The reaction move can't be diagonal.
Pass Action
The Pass action lets your puck carrier pass the puck.
The puck carrier may pass:
- Any number of squares either diagonally or orthogonally.
- To one of your other players, including the goalie.
- Even if the puck carrier is checked.
The puck carrier is not allowed to pass:
- Through a space occupied by any other player or the net.
- To an opposing player.
Successful Pass
As long as no Fail symbols are rolled, the pass is successful. In this case any Bounce symbols are ignored.
Receiving a pass is not an action — you may activate a player who has just received a pass.
Failed Pass
A failed Pass can result in one of the following outcomes:
- If you roll one or more Fail symbols, but not a single Bounce symbol when making a pass, the target player becomes the puck carrier, but the pass wasn't clean enough and your team's turn ends.
- If in addition to rolling the Fail symbol, you have also rolled any Bounce symbols, the puck carrier made an imprecise pass - move the puck 1 additional space in the same direction for every Bounce symbol rolled.
If the puck reaches the boards this way, it bounces off:
- If the pass was diagonal, it keeps moving diagonally (In the corner square it bounces back diagonally).
- If the pass was orthogonal, the puck bounces back orthogonally (in the corner square it bounces at 90 degrees angle and follows the boards).
- If the puck enters the Crease or the net this way, the Goalie becomes the puck carrier and your turn ends.
Clear Ice Pass (Advanced Rules)
You may pass the puck to a square with no players, with these additional conditions:
- Before the roll, add 2 extra dice to your dice pool.
- The puck carrier must be in the neutral zone.
- The target square must be either in the neutral zone or touch the blue line.
- The puck bounces for every Bounce symbol regardless if Fail was rolled, or not. The bounce rules are the same as with a failed pass.
Reminder! Remember to perform the mandatory Offside moves (see Offside Rule, Offside Move) if the Puck leaves the offensive zone!
Shoot Action
The Shoot action is how your players score goals by sending the puck flying into the opposing team's net. Only the Puck carrier may perform this action.
The puck carrier may shoot:
- Either diagonally or orthogonally (in one direction).
- At the opposing team's net (See The Anatomy of the Board).
The puck carrier is not allowed to shoot:
- Through a space occupied by any other player.
- When the player is not in the offensive zone.
Slapshot! (Advanced Rules)
Slapshot is a Shot at the goal from outside the offensive zone.
- Slapshot may not be rerolled using Stamina tokens.
- For every line, except the goal line, that the puck crosses, add 2 dice to your dice pool, before making the roll.
Successful Shot
He shoots! He scores! If you roll no Fail symbols, your team scores a goal! Increase your score by 1 on the score tracker.
Return the defending team's players back to the board from the penalty box, if there are any.
Reset the board (see the Resetting the Board section).
Failed Shot
A failed shot can result in one of the following two outcomes:
-
If you roll two or more Fail symbols, it's a Save! The opposing goalie becomes the puck carrier and your turn ends.
-
If you roll exactly one Fail symbol, it's a Rebound! The goal is not scored, the puck changes direction and continues moving. After a Rebound your turn ends.
If the shot was diagonal, the puck bounces diagonally, if the shot was orthogonal, the puck bounces back orthogonally.
First move the puck enough squares to leave the Crease. Then move the puck a number of squares equal to the number of Bounce symbols rolled (similar to a failed Pass).
The puck may move through players, or stop on a square occupied by a player during a rebound.
There is a rebound even if you did not roll any Bounce symbols along with the Fail symbol. In that case the puck leaves the Crease and stops.
Poke Action, Hit Action, Penalties
Poke Action
Poke action is the main (and also the safest) way to take the puck away from the opponent's puck carrier.
- To Poke the opposing puck carrier the player performing the poke must be orthogonally adjacent to the target.
- A goalie may attempt a poke, but adds +2 extra dice to your dice pool.
Successful Poke
Your player steals the puck and becomes the puck carrier.
Failed Poke
- If you roll exactly one Fail symbol, the Poke action failed. Your turn ends and the puck carrier keeps the puck.
- If you roll two or more Fail symbols, the Poke action failed with a Penalty. (See the Penalties section). Your turn ends and the puck carrier keeps the puck.
Hit Action (Advanced Rules)
The Hit action is a combination of a Move and a Poke.
You may Hit a player when all of this is true:
- You would be able to move into that player's square, if that player wasn't there. (Effects that increase your speed, do not change your hit distance).
- The hitting player is of the same size as the target or larger.
You may not Hit a player if any of this is true:
- The hitting player is checked.
- The target is larger in size than the hitting player.
Regardless of the roll, the target player is pushed from his original position 1 square away from the hitting player in the direction of the hit. The hitting player then moves into the square previously occupied by the target.
If the space behind the target is occupied, or there's an edge of the rink, the hitting player chooses an orthogonally or diagonally adjacent empty square instead.
Successful Hit
If the target was a puck carrier - the hitting player become the puck carrier.
Failed Hit
If you roll any Fail symbols, the Hit action failed with a Penalty. Penalties may not be re-rolled! Your turn ends. If the target player was the puck carrier, he keeps the puck.
Penalties
A failed Poke (with a roll of two Fail symbols or more) or a failed Hit (with a roll of one Fail symbol) results in a penalty. Penalties may not be re-rolled! The player receiving a penalty "goes to the penalty box" — remove his figure from the board and place it on the turn track, two spaces after the current turn.
Both teams then must make a line change, but neither team restores any stamina. There is no Face-off. Do not reset the board.
When the turn marker reaches a space with a player, or if the opponent scores a goal, place the penalized player in the neutral zone in an empty square nearest to their penalty box.
When a Hit is failed with a roll of two Fail symbols or more, or a poke is failed with a roll of three Fail symbols or more, a fight occurs instead (See the Fights section). This roll may not be re-rolled!
Offside Rule, Offside Move
Offside Rule
A Player may only enter his offensive zone (cross the blue line towards the opponent's net) if either of the following is true:
- The puck is already in his offensive zone.
- The player entering the zone is a puck carrier.
Offside Move
If after any activation during any player's turn, the puck leaves the offensive zone, immediately perform the following steps:
-
Place all the attacking players who were in the offensive zone to the first empty square across the blue line in the direction of their net.
If the first square is occupied, place the player in the next empty square etc. There is no limitation on how far a player can be moved this way.
-
Place all defending player (except the goalie) who were in their defensive zone to the first empty square before the blue line. If that square is occupied, place them in the next empty square in the direction of their net.
Fights, Pulling the Goalie
Fights (Advanced Rules)
When a player rolls two Fail symbols on a Hit attempt, or three Fail symbols on a Poke attempt, a fight occurs.
Each team adds a number of dice to their Fight pool equal to their player's Size plus one (see Player Profiles).
Both teams roll the dice in their Fight pools simultaneously. For every Fail result, the team loses 1 die from their Fight pool. For every Reaction result, the opposing team loses 1 die from their Fight pool. Keep rolling dice, until any team runs out of dice in the Fight pool.
If only one team loses all the dice in the Fight pool, that team is considered to have lost the fight. If both teams lose all the dice in their Fight pool simultaneously, they have both won the fight.
At the end of the fight:
- Both players receive a penalty (See Penalties).
- Reset the board (see the Resetting the Board section). When resetting the board after a fight, only a winning team may refresh stamina.
Pulling the Goalie (Advanced Rules)
In the last period of the game, as a last resort, the losing team may choose to pull the goalie when making a line change to increase their chance of scoring.
- The team must be carrying the puck.
- Pulling the goalie is done as part of the line change
Remove the goalie miniature from the board. Then place the spare player miniature onto any unoccupied square in the center zone.
As long as a team has no goalie on the board, any roll to Shoot at their net is automatically successful.
On the next Face off remove the spare player from the board and return the goalie to the board (see the Resetting the Board section).
Line Cards, Arena Cards
Line Cards and Arena Cards (Advanced Rules)
Each Line card represents five of the hockey players on your team. A Line card grants its advantage for as long as that line card is in play. There are two identical decks of Line cards - one for the red team and one for the blue team, but only 4 Line cards are used during the game by each team.
Arena cards represent both the hockey arena itself and the team which plays there.
Note: It's not recommended to use the Arena and Line cards during your first few games, or if any of the players are playing the game for the first time.
Choosing Your Team (Advanced Rules)
There are two primary ways to select your team's line cards.
Pre-made team:
- Each team first chooses an Arena card.
- The Arena card has a set of four Line cards listed under the city name. These are the Line cards your team will use.
Drafted team:
- Shuffle any one deck of Line cards and deal 5 cards to each team.
- Each team then simultaneously sets aside one Line card to use and passes the remaining cards to the other team.
- Once both teams set aside four Line cards, return the remaining line cards to the deck.
- Each team will use the 4 line cards they've set aside.
- Each team may then choose 1 Arena card.
Dream team:
- Each team selects any 1 Arena card and any 4 Line cards.
Using the Line Cards (Advanced Rules)
- At the start of each period both teams choose one of their 4 Line cards to play face down. Then the chosen cards are revealed simultaneously and become active.
- Each time you make a line change, a new Line card is played, simulating fresh players entering the Ice.
- After a line card is played, previously active line card is discarded into your discard pile.
- When you play the last line card from your hand, take all the line cards from your discard pile back into your hand.
- If a Line card allows you to make a free action, that action automatically succeeds. No dice are rolled or added to the dice pool.
Using the Arena Cards (Advanced Rules)
In addition to determining the Line card composition for premade teams (see Choosing Your Team), each arena card has it's own rule text.
If the Arena cards are used in the game, players must first agree (or determine randomly), which of the two teams will be the home team.
Only the rule text of the home team's Arena card is active during the game. That special rule affects both teams.
After the first game, the second team becomes the home team and the next game is played using that team's arena rule text.
Tournament Play (Advanced Rules)
After you are comfortable with playing single matches, you can play a "Tournament season". A series of games with persistent team composition, where the winner is determined by the total number of wins.
At the start of the tournament season each player selects a premade team to play. Players manage their teams by adding and removing Line cards.
After every two games (when each team played on their home arena once) there is a line card draft.
During a draft, each team returns a line card of their choice to the line card deck. Then, starting with the team which scored the least total goals (in case of a tie, determine randomly), select one card to replace it. The new card may not be a copy of a card already taken by either team.
Example of Play
The blue team wins the Face off by rolling 3 Bounce and Reaction symbols over the red's 2 and their Center (A) becomes the puck carrier. It is now Blue team's turn 1.
As their first activation, the blue team moves the Winger (C) 2 squares down, towards the boards. The blue team adds 1 die to their dice pool and rolls. Success!
The blue team makes a pass from their Center (A) to their Winger (C) and rolls a single Reaction symbol on their 2 dice. The red team moves Defenseman (D) back.
The blue Winger (C) moves 3 spaces forward (receiving a Pass is not an activation), but rolls a Fail. The blue team flips one Stamina token to re-roll.
After re-rolling two dice, the blue team rolls one success and a Fail. They decide to save stamina for the next turn and not make another re-roll. Blue Turn 1 ends.
The red team starts the turn by moving the Defenseman (D) down 2 squares to check the blue Winger (C).
With the blue Winger checked and the red Winger blocking potential diagonal pass, The red team moves the Center (E) to create an opening. Success!
The red Defenseman (D) can now attempt a Poke. Perfect roll! The red Defenseman becomes the puck carrier. Since the red Defenseman was just activated, he can't activate for the second time in a row and can't make the pass to the Center yet.
The red team moves the Winger up 1 square and rolls a Fail. Not wanting to risk wasting stamina on re-rolling 4 dice, the Red team ends their Turn.
...And now it's your turn!