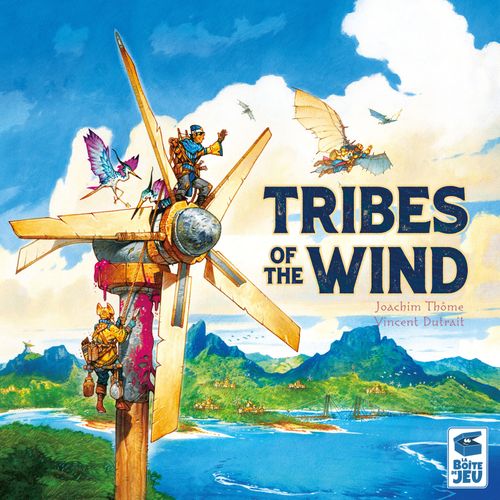
Tribes of the Wind
Tribes of the Wind Rulebook
Table of Contents
Table of Contents
Components
- 5 Player boards
- 5 card holders
- 80 Element cards
- 30 Village cards
- 20 Guide cards
- 39 Forest/Village tiles
- 5 Starting tiles
- 25 Village markers
- 20 Temple markers
- 35 Wind Rider markers
- 90 Pollution tokens
- 76 Water tokens
- 6 Water ×5 tokens
- 1 Game End token
Setup
Shared Area
- Place the Game End token on the table within easy reach of every player.
- Place the Water and Pollution tokens on the table to form the supply.
- Shuffle all Element cards to form a face down draw pile in the middle of the table. Keep some room next to the draw pile for the discard pile (discarded cards should be placed face up to avoid confusion). Draw the top 4 cards of the draw pile and set them aside, face down, to form the Elemental display.
- Do the same to form the Village display. However, cards from the Village display should be face up, not face down.
- Do the same for the Forest draw pile and the Forest display. Forest tiles should be placed Forest side up (you must be able to see the white Wind Rider Spots). The other side of the tile is called "Village side". Check the number in the upper left corner of every tile to make sure that you use the tiles matching your number of players:
- 2 players: tiles without any symbol*
- 3 players: add the tiles with a 3+ symbol
- 4 players: add the tiles with a 3+ and a 4+ symbol
- 5 players: play with all tiles
* Also check the 2-player specific rules at the end of this booklet.
Hint: If your draw pile of tiles is too high, you may split it in five little draw piles to form the display. What matters is having 5 available tiles at all times.
Forest tile anatomy: Number of players (upper left), Wind Rider Spot, Building Pollution, Forest Color, Building Bonus.
Personal Area
A. Choose a Player board (every player chooses their own board). Player boards are all different.
B. Take the 4 Guide cards matching the character of your Player board and keep them next to you.
C. Take 7 Wind Riders and place them in the Capital area of your Player board. Take 5 Village markers and place them on the dedicated spot in the upper part of your Player board.
D. Take 16 Pollution tokens and place them in the Terrain area of your Player board (pay attention to the quantities indicated on each space).
E. Take 4 temples and place them in the Temple area.
F. Take a card holder. Draw 5 Element cards from the top of the draw pile and place them in your card holder (your opponents must be able to see the back of each card). This is your starting hand of cards.
G. Determine a first player at random. Starting with that player and proceeding clockwise, deal out the Starting tiles (with a flag symbol): the first player receives the "1" tile, the second receives the "2" tile, and so on. Place your tile with the colored side up of the space showing a flag in the Terrain area of your Player board.
Starting tile anatomy: Order of play, Forest color, Starting bonuses, Starting Tile symbol.
H. Gain the Starting bonuses indicated in the upper right corner of your Starting tile:
- X Pollution: Remove X Pollution tokens from your Terrain area (anywhere).
- X Water: Take X Water tokens and place them in your personal supply.
- X Wind Riders: Move X Wind Riders from your Capital to your Starting tile.
I. Draw a Village card from the top of the Village draw pile and slide this card under the left side of your Player board. This gives you a first objective for this game.
How to Play
Each round, starting from the first player (see Setup) and proceeding clockwise, each player plays their turn. The round ends when all players have played their turn.
A new round then begins, and so on until a player triggers the end of the game by building their 5th village. When this happens, complete the current round so that everyone has played the same number of rounds; then, play a final round (all players play their turn).
Each turn is divided in two phases:
- Take an action
- Refill your hand of cards
You must complete both phases on your turn. Then, the next player plays their turn, and so on.
1. Take an Action
You must take an action among the following three:
- Play an Element Card, or
- Place a Temple, or
- Build a Village
Play an Element Card
This is the most common action of the game. It allows you to trigger specific effects thanks to the elements that are in your hand and/or in your neighbors' hands. Look at the back of the cards of your neighbors to know their elements.
Element card anatomy: Color / Element of the card, Requirement (left), Effect (right).
Element cards from your hand have one or two rows of symbols.
Symbols on the left are the requirements that you have to meet to play the card; symbols on the right are the effects triggered by the card once it is played.
If the card has two rows, you must fulfill either the top requirement (the small one) or the bottom requirement (the big one).
Requirements
Here are the different possible requirements (the examples below are illustrated with specific elements, but symbols may be declined for every existing element). When a rule affects "your neighbor", it indifferently refers to your left or your right neighbor:
| Symbol | Meaning |
|---|---|
| X + element + hands | Count the total number of cards of this element owned by you and both of your neighbors to determine the strength of this effect. |
| element with arrows pointing to one hand / to both hands | 1 of your neighbors (small req.) or both (big req.) must own at least one card of this element. |
| the four element symbols | You must own at least 1 card of each element. |
| + element, above one hand / above both hands | You must own more cards of this element than one of your neighbors (small req.) or than each of your neighbors (big req.). |
| a number + an element (e.g. 2 fire) | You must own at least the indicated number of cards of this element. |
| an element crossed out | You must not have any card of this element. |
| – element, above one hand / above both hands | You must have fewer cards of this element than one of your neighbors (small req.) or than each of your neighbors (big req.). You cannot have less cards than a neighbor who has 0 cards of this element. |
| 2 / 4 / 6 + element + hands | Count the total number of cards of this element owned by you and both of your neighbors. The strength of the effect will depend on the number of cards that you all have: 2 (or 3), 4 (or 5), or 6 (and more). |
IMPORTANT: The card that you play always counts for its own requirements. Check your whole hand BEFORE playing the card to check if you meet the requirements.
Effects
After playing the card, resolve its effect. Here are the different possible effects:
Water (a number of water drops): Take the indicated number of Water tokens (here, 4) from the main supply and place them in your personal supply.
Pollution (a number on a pollution token): Remove the indicated number of Pollution tokens (here, 2) from your Terrain area and place them back in the main supply. Pollution tokens may be taken from anywhere, from the same or different spaces.
Forest tile (a number of water drops on a tree): Spend Water tokens (here, 6) from your personal supply to take a Forest tile from the Forest display or from the top of the Forest draw pile. Place this tile, Forest side up, on any empty space (no tile and no Pollution token) of your Terrain area. That empty space must be adjacent to another tile that you already placed. If needed, refill the Forest display so that there are always 4 visible tiles.
Example: With her Element card, Jennifer can spend 4 Water tokens to take a Forest tile from the display. She places the tile on an empty space of her Terrain area, making sure that this space is adjacent to a tile that she already placed before. Then, she refills the Forest display so that there are 4 visible tiles.
Wind Riders (a number on a Wind Rider): Perform as many Wind Riders moves as indicated (here, 3). Moving one Wind Rider to any orthogonally adjacent tile counts as a move. The Capital is considered adjacent to the Starting tile. Moving a Wind Rider from the Capital to the Starting tiles takes one move.
Example: Jennifer has 5 moves. 2 Wind Riders move 2 spaces from the Capital. Another one moves one space elsewhere.
Water or Wind Rider moves (a number on a Wind Rider and a water drop): Take as many Water tokens as indicated or move a Wind Rider as many times as indicated (here, 6). You can also split your choices (for instance, take 2 Water tokens and perform 4 moves).
X: If an effect mentions an X, it means the number defined by X in the requirement.
8–X Water: This is another example where X means the number defined by X in the requirement. The final cost cannot be less than 1 Water.
Example: If you and your neighbors own 6 forest cards, then you can buy a Forest Tile for 8 – 6 = 2 Water tokens.
"+" and "/": If the effect features several icons, pay attention to the signs. "+" means AND, which means you resolve all effects, while "/" means OR, which means you must choose one effect among several.
Columns of icons: If 2 or 3 icons form a column, one above the others, match their values to those of the column that appears in the requirement section to know which icon applies to your case.
Example: Joachim plays this card. He owns 3 fire cards in his hand. His left neighbor owns 1 fire card while his right neighbor doesn't own any fire card. Since they have a total of 4 fire cards, Joachim removes 2 Pollution tokens from his Terrain area.
Once a card has been played, its requirement fulfilled, and its effects resolved, place it face up in the discard pile.
Place a Temple
Discard 3 Element cards from your hand (you don't have to meet their requirements, and you do not trigger their effects) to place a temple.
Hint: This action may be useful (even upon the beginning of the game) if all of your cards' requirements are difficult or impossible to meet, or if you want to replace your cards faster (see Refill your hand p.9).
Choose a temple from the Temple area of your board (you can build them in any order).
Place the temple on a tile of your Terrain area without any temple (you cannot have more than one temple per tile). A village, however, does not prevent you from placing a temple (see Build a Village).
The spot where you choose to place the temple may be important to achieve some Village cards' objectives.
Depending on the temple that you built, you immediately trigger an effect whose strength depends on your Player board.
You cannot reuse an effect granted by a previous temple.
Example: Ben discards 3 cards from his hand and places a temple on a tile from his Terrain area. This temple allows him to immediately perform 2 Wind Rider moves.
Build a Village
Reminder: Villages do not build themselves automatically. You need to use your whole turn to take this action!
The Wind Rider space symbol marks a Wind Rider space. Each Forest tile features between 2 and 4 of those. When all spaces are occupied with Wind Riders (one per space), you may flip the tile on its Village side. You can only build one village per turn. Remove the Wind Riders from the spaces and place them back in your Capital. Any extra Wind Rider on the tile and any Temple remain there (place them back on the Village side of the tile once it has been flipped).
Place a Pollution token on each Terrain space that is orthogonally adjacent to the new Village tile and that does not contain a tile already (the pollution icon acts as a reminder).
Then, take one of your Village Markers from the upper part of your board and place it on the tile that you flipped.
Building bonuses
Each tile features one or several building bonus(es) that activate once when the tile gets flipped on its Village side. As long as the tile is on its Forest side, the bonus is grayed out to indicate that it is not active:
- If the tile features a Wind Turbine, do not place any Pollution token when building this village. (Also note that the tile has no pollution icon).
- If the tile features a Catapult, when you build the village, you can move any Wind Rider from your board (including one from the Capital) to any other tile (including those that are not adjacent to the catapult). You can use this bonus to move one of the Wind Riders that you used to build the village.
- Some tiles feature a Wind Portal. This has no effect when building the village; however, a village with a Wind Portal is considered as adjacent to the Capital and to other Wind Portals. For a Wind Rider, moving from the Capital to a Wind Portal, or between two Wind Portals, only takes one move.
Example: Jennifer played a card that allows her to perform 2 moves. She moves as follows.
Village card
Each time that you build a village, take one Village card of your choice from the display. You can either immediately use its right side, or keep the card to try and complete the objective given on its left side by the end of the game.
If you choose the right side, immediately resolve the indicated effects, then discard the card.
- A Catapult allows you to move one of your Wind Riders to any tile.
- A Temple allows you to immediately take the action Place a Temple without discarding Element cards – you still trigger the temple's effect.
If you choose the left side, slide the card below the left side of your board, keeping only the left part visible. You cannot change your mind later to use the right side. You cannot have more than 4 Village cards on the left of your board (including the one that you placed during Setup). If you gain a 5th Village card and wish to use its left side, you must discard another Village card from your board. You will score extra points at the end of the game if you manage to complete the objectives given on the cards that you keep.
Village card objectives
Here are the different existing objectives (types, spaces, quantities, regions and bonus may vary, and the color requirement may be "of the same color" or "of different colors"). Note that all objectives apply to your Terrain area:
| Objective | Meaning |
|---|---|
| Two Terrain spaces with a red cross | Both of these Terrain spaces must be covered with a tile. |
| Grid with Village markers on specific spaces | Each indicated space must be covered with a Village marker. |
| Grid with Temple markers on specific spaces | Each indicated space must be covered with a Temple marker. |
| Grid with a highlighted region and "3× tile" | You must place at least X tiles in the highlighted region (here, 3 tiles in the bottom row). |
| 3 tiles in a row, with an arrow | You must have a row of 3 adjacent tiles of the same color. |
| 3 tiles in a column, with an arrow | You must have a column of 3 adjacent tiles of the same color. |
| 3 tiles in a diagonal, with a rotation arrow | You must have a diagonal (it can be reversed) of 3 adjacent tiles of the same color. |
| 3 tiles in an L shape, with a rotation arrow | You must have a L-shaped pattern (oriented as you wish) of 3 adjacent tiles of the same color. |
| "3×" + Village marker + a building bonus | You must have at least that many tiles with a village featuring the same building bonus (here, 3 tiles with a Village marker and a Wind Portal). |
| "9×" + Village marker + all building bonuses | You must have 9 Building bonuses on your tiles with a Village marker. |
2. Refill Your Hand
At the end of your turn, after completing your action, take as many cards as necessary, until you have 5 cards in hand. Take them from the Elemental display and/or from the top of the Elemental draw pile.
If you have to draw 3 cards because of a Place a Temple action, do not check your cards one by one as you draw them: draw your 3 cards at once.
Once you've refilled your hand, refill the display (if needed) to 4 cards.
Guide's Powers
Each Player board features two specific requirements known as the "Guide Requirements".
If you meet a Guide Requirement, you may choose one of your Guide cards at the very end of your turn. This gives you access to a new power. Each requirement can only be met once. If you meet both of your Guide Requirements, you'll have access to two powers!
Guide Requirements
One of the requirements is to place your tiles according to a given layout. Each guide has their own layout of colors.
To meet this requirement, the tiles must be orthogonally adjacent and in the correct order. Each tile can only be used once. Besides that, you are free to create your "path" as you wish: your Starting tile is not necessarily the starting tile of your path, and you can even build a path without the Starting tile.
Example: The following layout is legal.
The other Guide Requirement is specific to each Guide:
| Requirement | Meaning |
|---|---|
| 8 + crossed-out Pollution token | Have 8 Terrain spaces without a Pollution token (regardless of the number of Pollution tokens on the other spaces). Spaces with a tile (including the Starting tile) also count. |
| 2 ! | Use the right side of two Village cards. |
| 3 star | Slide 3 Village cards under your board (including the one placed during Setup). |
| Highlighted region + Village marker | Build a village on one of the highlighted Terrain spaces of this region. |
| Highlighted region + 1× Temple | Place a temple on one of the highlighted Terrain spaces of this region. |
At the very end of your turn, when you meet one of your Guide Requirements, choose one of your Guide cards and slide it under the right part of your Player board. You can use the card's effect upon your next turn. It is possible to meet both Guide Requirements during the same turn, in which case you can choose 2 Guide cards at the end of your turn.
Here are the powers that can be unlocked (the examples are illustrated with specific elements and colors, but symbols may be declined for every existing element and color):
| Power | Meaning |
|---|---|
| play a red card » 3 Wind Rider moves | Each time that you play a given card (here, red), gain the indicated benefit (here, 3 moves). This power does not trigger if the card is discarded with the Place a Temple action. It only works with the Play an Element Card action. |
| 2 Water = 3 Pollution (once per turn) | On each of your turns, you can discard a given amount of Water tokens to gain the indicated benefit (here, discard 2 Water to remove 3 Pollution). You can only do this once per turn. |
| add a Forest tile » 4 Water | Each time that you add a Forest tile to your Terrain area, gain the indicated benefit (here, take 4 Water tokens). |
| Pollution +1 | Each time that you resolve the indicated effect because of an Element card, a temple or a Village card, the effect is amended as indicated (here, when you remove Pollution tokens, remove 1 extra token). |
| 2 Water = Catapult (once per turn) | On each of your turns, you can discard 2 Water tokens to move any Wind Rider to any destination. You can only do this once per turn. |
| add a Forest tile » Catapult | Each time that you add a Forest tile to your Terrain area, you can move one of your Wind Riders to any destination. |
| add a Forest tile » crossed-out Pollution | Each time that you add a Forest Tile to your Terrain area, you can remove all Pollution tokens from one of your Terrain spaces. |
| –1 Water on Forest tile » remove 1 Pollution | Spend one less Water token to place your Forest tiles. Also, remove one Pollution token when you place a Forest tile. You must still spend at least 1 Water token. |
| remove Pollution 1,2,3… » gain Water 2,4,6… | For each Pollution token that you remove, gain 2 Water tokens. |
| 6 Water for a Forest tile (once per turn) | Once per turn, you may spend 6 Water tokens to place a Forest tile (in addition to your action). |
| –2 Water on Forest tiles (minimum 1) | Spend 2 less Water tokens to place your Forest tiles. You must still spend at least 1 Water token. |
End of the Game
The end of the game is triggered when someone builds their 5th village. This player takes the Game End token and places it next to them. Complete the current round (all remaining players play their turn, the player with the highest numbered Starting tile playing last) so that everyone has played the same number of turns. Then, play a final round (everyone plays a last turn).
Final Scoring
Victory Points (VP) are identified with the VP symbol. Check the bottom part of your board for a quick reminder about how you can score points.
- If you have the Game End token (because you were the first one to build your 5th village) then you score 5 VP.
- Each Village marker placed in your Terrain area is worth 3 VP.
- If you have placed your 4 temples in your Terrain area, score 7 VP. If you have placed only 3 temples, score 3 VP.
- Depending on the number of Terrain spaces that still contain Pollution tokens (no matter how many), score VP as follows:
| Number of polluted Terrain spaces | 0 | 1 | 2 | 3 or more |
|---|---|---|---|---|
| Victory Points | 12 | 7 | 3 | 0 |
- Depending on the number of tiles (with or without a Village marker, and including your Starting tile) in your Terrain area, score VP as follows:
| Number of tiles | 9 or more | 8 | 7 | 6 or less |
|---|---|---|---|---|
| Victory Points | 12 | 7 | 3 | 0 |
- Also score VP for the completed objectives of your Village cards, if any.
Add up all your VP. The player with the most VP wins. In the case of a tie, the player with the most Water tokens wins. If the tie persists, the tied players share victory.
Example: Here is Joachim's board at the end of the game.
He does not have the Game End token (0 VP).
He has placed 5 Village markers (5 × 3 = 15 VP).
He has only placed 2 Temples (0 VP).
His board contains 7 tiles (3 VP).
He only has one Terrain space with Pollution tokens (7 VP).
He completed the objective listed on his first Village card (8 VP) and the one listed on his second Village card (10 VP). However, he did not complete his third objective (0 VP).
His final score is 43 VP.
Two-Player Game
All rules remain the same, except for Element card requirements. Treat the Elemental display + the back of the Elemental draw pile (a total of 5 card backs) as your second neighbor.
In the diagram, the 4 cards of the Elemental display are labelled "1st neighbor" and the back of the Elemental draw pile is labelled "2nd neighbor".
Don't Forget!
Do not get the icons on the back of the cards and the icons that refer to the game pieces mixed up. Card requirements always refer to card backs, while card effects always refer to game pieces, tokens or tiles.
Only take your own cards and the cards of your (left and right) neighbors into consideration. If there are more than 3 players, do not take into consideration the cards of the players that do not sit next to you.
The card that you play always counts for its own requirement. Check your whole hand BEFORE playing the card to see if you meet the requirement.
Temples allow you to avoid being blocked. If the requirements of your cards do not go well together, a temple will allow you to reset part of your hand and to make a fresh start.
The game is a race: the first player to build their 5th village gains a bonus and ends the game! Watch your opponents, keep an eye on their villages, and make sure to build your own villages! The game might end sooner than you think.
Acknowledgments
Joachim Thôme warmy thanks his team of Wind Riders who made that game possible: Yann, Jérôme, Marie, Charlot, Pieter, Luc, Arthur, Xavier, Elisa, Benoit, as well as Aline and Achille.
The designer also wishes to thank La Boîte de Jeu for their trust and their exceptional work.
Translation: Antoine Prono