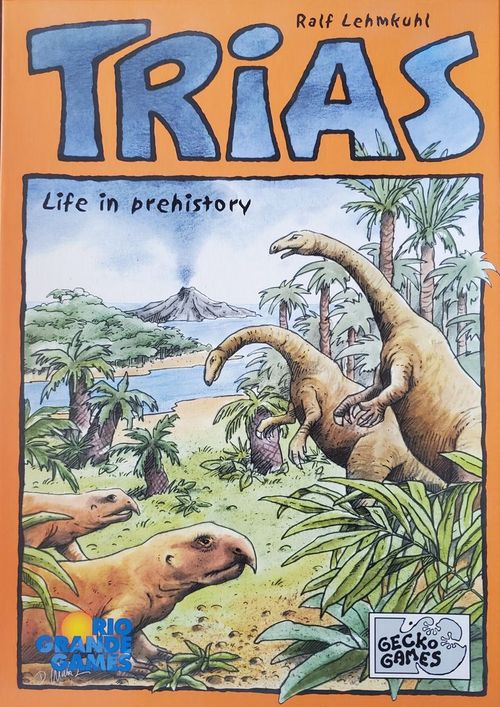
Trias
Trias Rulebook
Table of Contents
Table of Contents
Components
- 39 hexagonal tiles — 9 mountains, 15 steppe, 12 woods, 2 water, 1 "South Pole"
- 16 wooden cubes in 5 different colours — 1 wooden cube = 1 herd. (Due to production constraints there may be extra cubes.)
- 39 cards
- 1-deck: 7 mountains, 13 steppe, 10 woods
- 2-deck: 2 mountains, 3 steppe, 3 woods, 1 "Meteorite Impact" (end of the game card)
- The cards are marked with a 1 or a 2 on their backs.
- A scoring track for counting victory points
- These rules and 5 Rules Summary cards
Idea of the Game
The super-continent Pangaea threatens to split into various parts. The players represent herds of living creatures which can move and reproduce. With skillful tactics each player tries to keep his creatures safe on the new land masses (that is, connected land areas) and gain majorities there.
Setting Up the Game
The Alternate Rules for Two Players are at the end of this document.
- The board is built into one big, symmetric hexagon using the hexagonal tiles. It consists of three concentric rings with the South Pole in the middle. Shuffle all land tiles. Randomly deal and place 16 of these plus the two water tiles to form the two inner rings. Build the third ring using the rest of the tiles. Two tiles will be left over; remove them from the game. After completing the board, remove the water tiles. All areas having no tile are considered to be water.
- Shuffle the decks labeled 1 and 2 separately. Place the 1-deck face down on top of the face down 2-deck. Together they are now called the deck.
- The players agree on a start player.
- Each player is dealt one card face down from the deck and is given 15 herd cubes. One additional cube is placed next to the scoring track.
- In anti-clockwise order, beginning with the start player, each player places 2 herds together on a vacant tile.
- Continuing anti-clockwise, each player once again places 2 herds together on a vacant tile.
- The last player to place 2 herds starts play of the main game.
Tip: Extensive dispersion of your own herds and presence on many land tiles is an advantage. Too much concentration in one area makes development difficult.
Tip: It is mostly unwise to place too far towards the center, since everything tends to move to the outer part of the board and thus too many movement points are required. But being too far to the outside can mean your creatures are already swimming before you have even had a turn.
Course of the Game
The direction of play is clockwise. Each turn has four phases, played in a fixed sequence:
- Phase 1: Mandatory Drift
- Phase 2: Optional Actions
- Phase 3: Swimmers / Overpopulation
- Phase 4: Hand Card
Phase 1: Mandatory Drift
Each player decides whether to play his hand card. If he does not want to play his hand card, he may draw a card from the deck — he must then play the drawn card.
The colour of the card indicates which type of tile drifts. If the drawn card is the Meteorite Impact card, this player's turn is the beginning of the last round.
Drifting
- A tile bordering the surrounding water (not an interior sea!) is picked up. The picked-up tile must be moved so that it borders another tile, so that it is now further away from the South Pole than before, and so that at least one edge borders the surrounding water.
- A tile may only be picked up from a land mass where you have at least one herd.
- Taken tiles must be connected back to the same land mass again. Special case: if removing a tile causes two or more distinct land masses to arise, the player may connect it to any of these land masses, even if he is not present there.
- It is allowed to take tiles on which herds are present. These herds remain in position, which is now water. They are called Swimmers.
- If a player has no herds on land masses which include the type he must drift, or if he is unable to move any of these tiles further away from the South Pole, he must choose a tile of another colour.
If the drifting of tiles causes any new land masses to arise, there can be interim scoring (see Scoring, below).
Remark 1: If a land mass consists of only 1 tile, it may no longer drift.
Remark 2: The South Pole never drifts (never moves).
Example 1
It is Black's turn. He must drift a tile having the same colour as his hand card, either from the big land mass of size 11 or from the small land mass of size 2. The chosen tile must be placed further away from the South Pole and must be re-connected to the same land mass. The tile marked with an X in the middle may not be used, because it does not border water. Black cannot take any tile from the land mass consisting of 3 tiles, because he is not present there.
Phase 2: Optional Actions
Each player on his turn has four actions. There are four different options to spend them on. He may combine these actions in any way he likes, so a particular option may be performed more than once per turn. He is not required to use all of his actions, but unused actions are lost.
Announcement Requirement: with each action the player must announce how many actions he has already taken.
| Option | Cost | Meaning |
|---|---|---|
| Drift | 3 actions per tile | No card is played, but you drift a qualifying tile as described in the drift rules above. |
| Move | 1 action per herd and tile | Movement is only possible from one tile to an adjacent tile. A herd may be moved more than once per turn. |
| Rescue | 1 action for 3 swimmers | You can rescue up to 3 of your own swimmers, which need not be at the same location. Rescue places them on a tile adjacent to their locations. Each herd may move to a different adjacent tile, but is not required to do so. |
| Reproduce | 1 action per herd | Any herd on a tile can reproduce only once in the player's turn. A new herd from the player's stock is placed on the same tile. Reproduction is independent of whether the herds have already moved or not. Herds which have just arrived via reproduction this turn may first reproduce only on the player's next turn. |
Herd Capacity (general rule for the entire game)
The herd capacity of each tile is limited depending on food, and this capacity may never be exceeded. At maximum occupation the herds present constitute a blockade, which prevents the tile from being entered or crossed and also prevents any herds there from reproducing.
The allowed number of herds depends on the landscape type:
| Landscape | Capacity |
|---|---|
| Mountains (grey) | 2 herds |
| Steppe (brown) | 3 herds |
| Woods (green) | 4 herds |
Phase 3: Swimmers / Overpopulation
All Swimmers and all herds on overpopulated tiles of the active player are placed back into his stock.
Remark: Overpopulation is only possible when a tile arises under swimmers and the tile capacity is exceeded. Fully populated or overpopulated tiles may not be entered or crossed.
If the tile is overpopulated, the player must return herds to his stock until the tile capacity is reached. Herds of other players on this tile are only affected on their own turns.
Phase 4: Hand Card
If the player used his hand card in Phase 1, he receives a new card from the deck. If this new card is the Meteorite Impact card, it is immediately revealed and the last round begins with the player to his left. Each player always has exactly 1 hand card.
Last Round and End of the Game
In the last round there is no mandatory drift. Each player has 2 actions. Afterwards there is final scoring.
Tip: If you have no more herds in your stock before your last turn, you can only move. One or two herds in your stock can possibly still change some majorities on the land masses.
Scoring
Scoring is tracked using the cube of the player's colour on the scoring track.
A. Interim Scoring (immediately after a mandatory or optional drift)
- If a new land mass arises after separation from the main land mass (= the land mass containing the South Pole), score this land mass if the drifted tile is connected to the new land mass. A connection to the main land mass will not be scored.
- If the division causes yet another new land mass to arise, score the land mass to which the taken tile is connected.
- If through the above cases no new land mass is created, but rather this land mass is connected with another land mass or with the main land mass, there is no scoring.
- All players having the majority of herds on the scored land mass receive 2 victory points. All other players having the second most herds receive 1 victory point.
Example 2 — the ways a tile can be connected
It is Black's turn and he takes the tile labeled "X". The herd on this tile becomes a swimmer at that position. The player now has the following options for connecting the tile:
- a. On an A-position. There is no scoring, because the land mass contains the South Pole.
- b. On a B-position. The new land mass with 4 tiles is immediately scored. Grey and the X-player have 3 herds each and receive 2 points. White is present only twice and gets 1 point. Black, in third place with only 1, gets no points.
- c. On a C-position. There is an immediate scoring on the land mass with 3 tiles. Black is present twice and gets 2 points. White is present once and gets 1 point.
- d. On a D-position. This is a re-connection of two land masses, and therefore there is no interim scoring.
- e. All other water positions are not allowed, because either they are not further from the South Pole or they do not border the original land mass.
B. Final Scoring (once at the end of the game)
- All land masses are scored separately.
- The land mass containing the South Pole is not scored.
- In final scoring all fractional points are rounded up to the next largest integer value.
- The player with the largest number of herds on the scored land mass receives 1 victory point per tile of that land mass. The player with the second largest number of herds receives half this number of points.
- If a player is the only one with herds on a land mass, he receives only the points for first rank.
- If two or more players are tied for the most herds, they split the sum of the victory points for first and second place. All other players get no points.
- If there is a single player in first place and two or more players tied for second, the first place player receives the tile count as victory points, and all second place players divide half the tile count as victory points.
Tip: Final scoring provides most of the points in the game, and also the largest differences; nevertheless, no one should neglect the interim scorings.
Example 3 — a completed final scoring
Points scored by each of four players on land masses A through H, as they would be carried over to the scoring track:
| Land mass | Player 1 | Player 2 | Player 3 | Player 4 |
|---|---|---|---|---|
| A | 3 | – | 2 | – |
| B | – | 2 | 2 | 2 |
| C | 6 | – | 6 | – |
| D | – | 5 | 5 | – |
| E | – | 1 | – | 1 |
| F |
Winner
The player with the most victory points wins.
In case of identical points, the player who has most herds in his stock wins. If there is still a tie, the player who is present on more land masses wins. If still tied, all such players win.
Alternate Rules for 2 Players
Components:
- 10 herds per player, plus 1 cube each for the scoring track
- 19 tiles: 1 South Pole, 5 mountains, 7 steppe, 6 woods
- 1-deck: 5 mountains, 6 steppe, 5 woods
- 2-deck: 1 mountains, 2 steppe, 1 woods, 1 Meteorite Impact card
Rules changes:
- During Phase 2 each player receives only 3 actions per turn.
- There is no interim scoring.