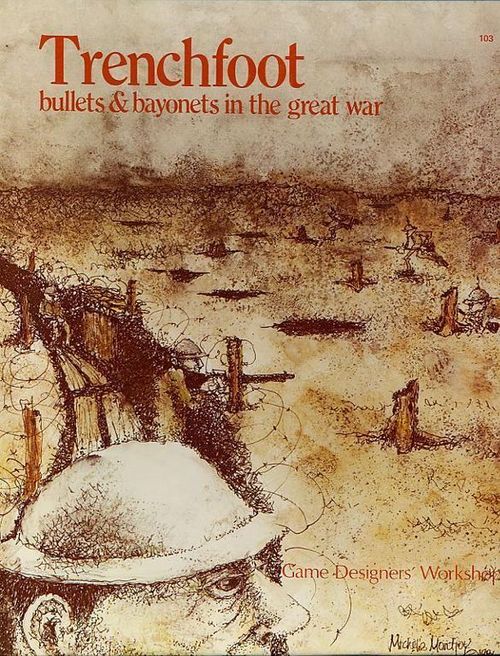
Trenchfoot: Bullets & Bayonets in the Great War
Trenchfoot: Bullets & Bayonets in the Great War Rulebook
Table of Contents
Table of Contents
The Mapboard
As you read this rule, examine the mapboard. It depicts a typical section of trench and nearby portions of no-man's land. A hexagonal grid has been superimposed on the map to regularize movement and placement of playing pieces. Each hexagonal cell (hereafter referred to as a hex) represents one yard of actual terrain, measured from side to side.
A variety of terrain features are represented on the map. The majority of the hexes are clear terrain, colored light brown. There are also a number of puddles of water, colored blue, and several sections of coiled concertina wire. Also prominent are a number of shell craters. Each crater is surrounded by a crater lip and contains a puddle in its center.
Running generally from left to right is the trench, bounded by black trench walls. In the trench there are several types of terrain in addition to clear terrain and puddles. To give the defenders easy access to different parts of the trench, wooden duckboards have been laid down in places. Since the trench is deeper than an average man's height, five firing steps (each 3 hexes long) have been carved out of the side of the trench to enable riflemen to fire across no-man's land. There is a circular weapons pit thrust forward from the main trench with firing steps all around its faces. Finally, four dugouts, colored dark brown, have been constructed to provide protection during barrages. Each dugout has a single entrance, from the trench; those entering a dugout hex from any other direction will be on top of the dugout, in clear terrain. The dugouts are individually identified with a letter from A to D.
Playing Pieces
The game includes 240 playing pieces, most representing individual soldiers of various nations; the rest are informational markers used during play. Soldiers are color-coded as listed below.
Counter Colors
- Feldgrau (gray-green): Germany
- Blue: France, Austria-Hungary
- Golden Brown: Japan, Turkey
- Olive Green: Serbia, Bolivia
- Dark Green: Russia
- Light Green: Italy
- Khaki: Great Britain, U.S.A., Paraguay
The nationality and type can be further identified by the silhouette on the counter. A complete illustration of all counter silhouettes appears on the game chart enclosed. There are five different types of soldiers. All countries have officers (armed with pistol and sabre or pistol alone), riflemen (armed with rifles), and grenadiers (armed with hand grenades and entrenching tools). Bolivia, Paraguay, and the United States also have soldiers armed with automatic rifles (BARs), and the U.S. has soldiers armed with shotguns. Each counter is also marked with a letter for identification.
Playing the Game
Trenchfoot is played in a series of turns, each representing about one second of real time. Each turn is divided into eight discrete phases, conducted in the following order.
- Initiative Phase: Each player rolls a die to determine which moves first. The player with the high die roll is allowed to choose whether he wishes to move first or second.
- First Movement Phase: One of the players (as decided in the initiative phase) moves his pieces.
- Second Movement Phase: The remaining player moves his pieces.
- Grenade Explosion Phase: All grenades thrown the previous turn now explode.
- Aimed Fire Phase: Both players conduct any aimed fire they wish.
- Grenade Throwing Phase: Both players may throw grenades. The player who moved first throws grenades first.
- Quick Shot Phase: Both players conduct any quick shots they wish.
- Melee Phase: Any melees which are occurring in this turn are resolved.
All actions in one phase must be finished before the next phase can begin; for instance, the player moving second cannot move any of his soldiers during the first movement phase. After all eight phases have been completed, the next turn begins.
Plotting Actions
Both players must plot (write down) the general actions of their men for several turns in advance. A piece of ruled paper is sufficient for plotting actions. Divide the paper into columns with each column corresponding to one of the player's soldiers and each line corresponding to one turn of the game. Write the letter identification for each soldier at the top of his column.
At the beginning of the game, the defending player (the player who occupies the trench) must plot three turns worth of action for each of his men. The attacker must plot six turns worth of action for each of his men. At the end of the third turn the defender will have completed all of his plotted actions and must then plot six more turns of action. At the end of the sixth turn the attacker will have completed all of his plotted actions and must then plot six more turns. This continues until the end of the game.
Types of Actions: There are two general types of actions: planned actions and optional actions. Each soldier must have one, and only one, planned action plotted per turn. During the phase in which a player is to move his soldiers certain optional actions may be added to the plot before any movement is done. Which optional action may be added (and whether any optional action may be added at all) depends upon which planned action has been plotted for the turn. In any case, no more than one optional action may be added to a soldier's plot each turn. Some optional actions are in addition to the planned action, and others substitute for the planned action.
A further complication is that a soldier may fall down during the course of his movement, becoming prone, and may be unable to get up for several turns. Many planned actions may not be performed while prone, and other optional actions must be substituted.
All of the possible planned and optional actions are listed below, along with a description of the nature and restrictions of the action. Following the name of the action is a one or two letter code in parentheses which is the recommended abbreviation to use when plotting. All of this information is repeated on the game chart in tabular form for ease of reference.
Planned Actions: These actions are plotted in advance for each soldier, in six-turn blocks. Walk, trot, run, jump, and leave trench are movement actions and are further explained in the movement rule. Aim and load are further explained in the fire combat rule. Pull pin and throw grenade are further explained in the grenade rule.
- Walk (W): A soldier given this order must expend 1 or 2 movement points in movement.
- Trot (T): A soldier given this order must expend 3 or 4 movement points in movement.
- Run (R): A soldier given this order must expend 5 or 6 movement points in movement.
- Jump (J): This action is used to get into a trench. The soldier expends 2 movement points in movement and then jumps. See the movement rule for an explanation of jumping.
- Leave Trench (LT): This action is used to climb out of a trench. The soldier expends 1 movement point moving from a hex in a trench to an adjacent hex outside a trench. After this the soldier is considered to be prone.
- Aim (A): The soldier aims his weapon, watching for enemy soldiers in front of him, and may fire if a target presents itself.
- Load (L): The soldier loads ammunition into the magazine of his weapon.
- Pull Pin (PP): A grenadier may pull the pin on a grenade in preparation for throwing it. A grenade will not explode unless its pin has been pulled.
- Throw Grenade (TG): A grenadier may throw a grenade at any time (although it will not explode unless the pin has been pulled).
- Lie Down (LD): The soldier lies down; place a prone marker on him. Soldiers may wish to lie down to take advantage of cover.
- Stand Up (SU): A soldier who is prone attempts to stand up; if he is successful, remove the marker. See the falling down rule.
Optional Actions: These actions may be added to or substituted for planned actions at the beginning of a player's movement phase for each turn. Crawl is further explained in the movement rule. Quick shot and rechamber are further explained in the fire combat rule. Melee is further explained in the melee rule.
- Crawl (C): A prone soldier may record crawl as a substitution for any plotted action except load, pull pin, throw grenade, stand up, or stand still. A crawling soldier must expend 1 or 2 movement points in movement.
- Quick Shot (QS): A quick shot is a quick, unplanned, and largely unaimed shot. It has less chance of hitting than does an aimed shot, but is often the only type of fire available to a soldier. A quick shot may be plotted as an optional plot in addition to a planned action of walk, trot, run, stand still, or draw pistol, and does not interfere with these actions in any way. It may be plotted as a substitution for aim or jump.
- Rechamber (RC): Rechamber is the act of working the action of a rifle or shotgun to move a round from the magazine to the firing chamber. Rechamber may be plotted as an optional plot in addition to a planned action of walk, trot, run, or stand still, and does not interfere with these actions in any way. It may be plotted as a substitution for an aim plot.
- Melee (M): Melee may be recorded as an optional plot in addition to a planned action of walk, trot, or run, and does not interfere with these actions in any way. It may be plotted only if the soldier's movement will place him adjacent to an enemy soldier.
Prone: There are there are three ways to become prone: lying down, falling down, and leaving a trench. When a soldier becomes prone, place a prone marker on him. Any soldier without a prone marker is assumed to be standing up. A soldier who is prone remains so until he stands up. Soldiers who are prone are unable to perform several actions, and if plotted to do so must either substitute an allowed optional action or do nothing. Prone soldiers may not walk, trot, run, jump, leave trench, lie down, or draw sabre. They may not plot the optional action melee.
Movement
During his movement phase (either the first or second movement phase, depending on the result of the initiative phase), a player must move all of his soldiers who are plotted to perform a movement action. Movement actions are walk, trot, run, jump, leave trench, and crawl.
Soldiers move from hex to hex, expending movement points to enter each hex. It costs 2 movement points to enter a crater lip hex, and 1 movement point to enter any other hex. A soldier who enters a concertina wire hex expends all his remaining movement points and ends his movement for the turn in that hex.
The number of movement points a soldier must expend in a turn depends on his plotted action. For example, a soldier plotted to trot must expend either 3 or 4 movement points; he might do this by moving one hex into clear terrain (1 movement point), from there to a crater lip (2 points), and from there into the inside of the crater (1 point, for a total of 4).
A soldier may never enter a hex already containing another soldier, and may never enter the same hex twice in a turn.
Trenches: A trench (including the weapons pit) may be entered only by jumping, and may be left only by executing a leave trench action.
To jump, a soldier first expends two movement points in movement (to get a running start) and then leaps. Roll a die, halve the result, and round fractions up. The result is the number of hexes the soldier jumps. The leap is in a straight line which is a continuation of the last portion of the running start. If a soldier would land in a hex occupied by another soldier, he lands in an adjacent hex instead. Roll a die and consult the grenade scatter diagram printed on the map to determine where he lands; however, if his original landing point was in the trench, he must land in the trench; if his original landing point was outside the trench, he must land outside the trench.
To leave a trench, a soldier must begin the movement phase next to the trench wall. He climbs the wall, expending one movement point, and is then considered prone in an adjacent hex outside the trench.
Falling Down: After each soldier moves (or stands up or throws a grenade), the player must determine if he falls down. The falling down table gives a soldier's chance of falling down (roll the number given or less), depending on the action he performed. Several other factors make it easier to fall down, and are expressed as modifiers to the die roll. These modifiers are cumulative. For instance, the basic die roll for a trotting soldier to fall down is 1; if he also is demoralized and moves through a puddle, he will fall down if he rolls a 3 or less.
A soldier who falls down is prone; place a prone marker on him. A soldier falls down in whatever hex he is in after movement, unless he passed through a puddle, in which case he is moved back to the last puddle hex he was in. A soldier who falls down in a concertina wire hex immediately receives one wound point.
Standing Up: A soldier who is prone may stand up only if that action has been plotted for him. Note that it is possible to fall down again immediately upon attempting to stand up. If a soldier attempts to stand up but is unsuccessful, he may immediately substitute a stand up action for his next turn's plot, regardless of what it is.
Fire Combat
There are two types of fire combat: aimed shots and quick shots. Aimed shots are conducted by a soldier plotted to aim during the turn. Quick shots may be conducted by a soldier plotted to fire a quick shot (as an additional or substitute action) during the turn.
A soldier who is aiming is not required to fire; a soldier who is plotted for a quick shot is required to fire, even if he has no target.
All aimed shots are conducted during the aimed fire phase, and all such shots by both players are considered to be simultaneous. All quick shots are conducted during the quick shot phase and all such shots by both players are considered to be simultaneous. Note that since the quick shot phase comes after the aimed fire phase it is possible for a soldier to be wounded or killed by aimed fire and be prevented from firing a quick shot.
Resolving Fire Combat: Each weapon type in the game has three fire tables: one each for aimed fire, quick shots at up to ten hexes of range, and quick shots at over ten hexes of range. Range is determined by counting the shortest path of hexes between the firing soldier and the target soldier, including the hex the target is in but not the hex the firer is in. Thus, a soldier firing at an adjacent enemy soldier would be firing at a range of one hex. Note that range only affects quick shots, not aimed shots.
After determining the correct table to be used, roll one die. The die roll, when referenced against the table, will yield one of three results.
- Kill: The target soldier is killed and is removed from play permanently.
- Wound: The target soldier is wounded. Roll one die, the number being the number of wound points the soldier takes. Regardless of the number of wound points the soldier takes, place a light wound marker on him. Mark the number of wound points the soldier has suffered on his column of the player's plotting sheet. If he is wounded again later in the game, add the additional wound points suffered to his total. As soon as a soldier takes five wound points, he falls down (but may later stand up again); after this point, he automatically falls down again each time he suffers an additional wound, regardless of how many additional wound points it causes. Once a soldier takes a total of ten wound points he is unconscious from his wounds and is removed from play. Wound results in parentheses count as misses if the target is under cover (see below).
- Miss: The shot misses the soldier and has no effect.
Facing and Arc of Fire: A soldier is always considered to be facing in a specific direction; for the sake of definition, this is toward the top of the counter. The top of the counter must always be oriented toward one of the six corners of the hex the soldier occupies, as shown in the diagram below. A soldier's arc of fire (the area into which he can shoot) is also illustrated in the diagram. The arc of fire for aimed fire is the narrow band toward the soldier's front. The arc of fire for quick shots includes the arc of fire for aimed fire and additional areas on both sides.
Each soldier's facing (and thus his arc of fire) may be changed at the end of a player's movement phase, regardless of his plotted action.
Line of Sight: Even if a target is in a soldier's arc of fire, he may not fire if his line of sight is blocked by trench walls, dugout walls, or other soldiers. The line of sight is a straight line from the center of the firing hex to the center of the target hex.
Soldiers: A soldier may not fire through a hex containing another soldier; if the line of sight passes through any part of a hex containing a soldier, it is blocked. However, a standing soldier may fire through a hex containing a prone soldier; soldiers outside the trench may fire through hexes inside the trench; and soldiers on firing steps may not fire through hexes outside the trench containing prone soldiers.
Trenches: A soldier outside the trench may see into the trench (including the weapons pit) only if adjacent to the trench wall; conversely, a soldier in the trench may see only those soldiers outside the trench who are adjacent to the trench wall. Soldiers standing on firing steps whose plotted actions are aim or quick fire may see and be seen by soldiers outside the trench; soldiers not plotted for one of these actions may not see or be seen from outside the trench. Soldiers inside the trench may see other soldiers inside the trench as long as the line of sight does not pass through the trench wall (i.e., soldiers can't see through the wall).
Dugouts: A soldier in a dugout may not see or be seen by any soldier outside the dugout.
Cover: A soldier who is prone inside a crater is considered to be under cover (unless being fired at from within the same crater); treat all parenthetical wound results as misses. A soldier standing on a firing step and plotted to aim or quick fire is considered to be under excellent cover (unless being fired at from inside the trench); add one to the fire die roll and treat all parenthetical wounds as misses. A soldier on a firing step who is not aiming or quick firing may not be fired upon from outside the trench at all.
Multiple Shot Weapons: Automatic pistols may fire two shots a turn and automatic rifles (BARs) may fire four shots a turn. This number of shots may be fired only if the soldier is aiming. If so, the first shot is resolved as an aimed shot and the rest are resolved as quick shots (in the quick shot phase). The firing soldier must specify the target of all of his shots before any are resolved. If the soldier is not aiming, but is executing a quick shot, then one less than the stated number of shots may be made, all as quick shots. (An automatic pistol could fire once, a BAR could fire three times.)
Loading and Rechambering: Each time a weapon fires, it uses one bullet; to keep track of this, place a mark on the soldier's plot each time he fires. The number of bullets in the weapon initially is indicated by the scenario information. When a weapon has expended all of its bullets, it is necessary to reload. The time required to reload a weapon depends on the specific type of weapon. After a soldier has finished reloading a weapon, the soldier must also rechamber a round (if the weapon requires rechambering normally) before a shot may be fired.
After a rifle or shotgun has been fired, a new round must be placed in the chamber by working the weapon's mechanism before it may be fired again. This is done by plotting the optional action rechamber. Different weapons require different amounts of time to rechamber (1 or 2 turns).
Turns spent loading and rechambering need not be consecutive. The length of time required to load or rechamber each type of weapon is given on the weapon information chart.
Colt .45 Automatic: The U.S. Army's Colt .45 caliber automatic pistol was widely known for its great stopping power. As a result, whenever a wound is inflicted on a soldier by a Colt automatic the soldier automatically falls down, regardless of the number of wound points suffered.
Melee
Melee takes place between adjacent enemy soldiers in the melee phase if one of them has plotted melee as an optional action. If the soldier initiating the melee moves during the first movement phase, the soldier being attacked may not move away during the second movement phase. When a soldier who has plotted melee moves adjacent to an enemy soldier, he may stop moving even if he has not used all his movement points.
Melee Resolution: Each player rolls a die and adds his soldier's melee value to the result. Melee value is determined by the weapon with which the soldier is armed, and is listed on the melee value table. Note that all grenadiers are armed with entrenching tools for melee purposes. All prone soldiers are treated as unarmed, regardless of their weapon. If the two die rolls, after modification, are the same or differ by only one, the melee has no effect on either soldier. If the difference is two or more, the player with the lower modified roll suffers the effect listed on the melee table. Kill and wound results are treated identically to kill and wound results from fire combat.
If a soldier plotted to melee is adjacent to two enemy soldiers, the player chooses which one he fights. If two soldiers plotted to melee are adjacent to the same enemy soldier, they both fight him separately and simultaneously.
If a soldier was in melee on the previous turn and still faces the same opponent, he may substitute a melee plot for his planned action, regardless of what it was (if he is standing up).
Melee and Fire: A soldier who is approached for melee by an enemy soldier may fire a plotted quick shot at him, but may not perform aimed fire. If the player fires a quick shot he is considered unarmed during the turn's melee; a player may decide not to fire a quick shot in order to use his weapon in melee. The pistol is an exception; an officer armed with one may use it for a quick shot and for melee in the same turn.
Grenades
Grenadiers, and only grenadiers, may throw grenades. First the grenadier must pull the pin on the grenade. The grenadier may then throw the grenade on the next, or any subsequent, turn. A grenadier who holds a grenade after the pin is pulled, however, melees as if unarmed, and if the grenadier falls down he is assumed to have dropped the grenade in the hex he falls in.
When a grenadier throws a grenade, the owning player picks a target hex which may be anywhere on the board. The distance the grenade is thrown affects its chances of scattering to a different hex. There is no chance of scatter if the grenade is thrown to a distance up to six hexes, a one third chance of scatter up to fourteen hexes, and a two thirds chance of scatter over fifteen hexes. If the grenade scatters, roll a die and consult the grenade scatter diagram on the map to find the direction of scatter. Then roll one die to determine how many hexes it is moved in the indicated direction, the number rolled being the number of hexes moved. When the final hex is known, place an explosion marker in the hex.
The grenade does not explode the turn in which it is thrown, instead exploding in the grenade explosion phase of the next turn. When the grenade explodes, all soldiers within four hexes of the explosion are subject to injury. Roll the die once for each such soldier and consult the grenade table. Note that the farther away from the explosion, the less chance there is of a soldier being injured. If the soldier is prone, add one to the die roll.
If a grenade explodes in the trench (including the weapons pit) it affects only those soldiers in the trench, and soldiers separated from the explosion by bends in the trench wall are not affected. If a grenade explodes outside the trench, it affects only those soldiers outside the trench. If a grenade explodes in a shell crater it does not affect any soldier who is prone outside the shell crater. If a grenade explodes outside a shell crater, it does not affect any soldier prone inside a shell crater or behind the crater lip.
Demoralization
In some scenarios, one or more sides may be listed as demoralized. The effect of demoralization is to make it easier to fall down, as shown on the falling down table.
[The scanned rules sheet ends here. The four-page scan does not include the remainder of the rules.]