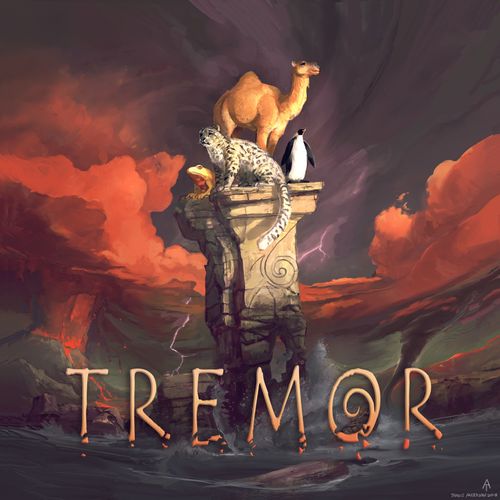
Tremor
Tremor Rulebook
Table of Contents
Table of Contents
Overview
In Tremor, you guide and protect an animal species as they try to reach their last remaining natural habitat. The game is played across a modular tile board, filled with disasters that you must leverage to sling yourself towards your Habitat Tile, and your rivals away from theirs.
To win, you will need to navigate a maze of debris in the physical world of the tile board, while amassing your power in the ethereal world of the Spirit Realm which will enable you to trigger disasters. These disasters cause real effects on the tile board, swapping, shifting or twisting tiles, moving players around, and creating blocks. Blocks prevent tiles from being moved onto, twisted, or impacted by other disaster effects. The direction and position of the disasters (which are found on the tiles themselves) determines where the effect of that disaster will occur.
The Spirit Board features six disaster tracks, each with three wedges that players can fill in order to trigger the disasters of that type. It also tracks the turn order, and the progression of the Earthquake, which will shuffle all surrounding tiles every time it erupts. Each disaster that a player triggers contributes one step towards the Earthquake going off.
The goal is to save your species by helping them reach their last remaining natural habitat in the opposite corner of the board, before your rivals get to theirs. The game ends as soon as one species reaches their Habitat. All other species are lost to the apocalypse.
Components
- 4 Double Sided Turn Order Markers
- 4 x 20 Tremor Tokens
- 2 Disaster Dice
- 25 Tiles: 4 Habitat Tiles, 3 Oasis Tiles, 1 Earthquake Tile, 17 Disaster Tiles
- 14 Catastrophe Cards
- 4 x 10 Double Sided Spirit Counters
- 44 Climate Cards
- 4 Double Sided Species Cards
- 8 Animal Meeples
- 1 Spirit Board
- 4 Double Sided Player Aid Sheets
- 1 Seismic Counter
Game Setup
- Place the Earthquake Tile (A) face up in the centre of the play area. Then randomly place all other octagonal tiles face down as shown (B).
- Each player chooses a Species Card (C). Pick one of the species found on that Species Card and take your corresponding coloured meeple and game pieces.
- Look at the hourglass found on your Species Card (D). The player with the lowest number places their square turn order marker on Spirit Track 1, which is found on the Spirit Board (E). The next lowest number places theirs on Track 2, and so on (F). The number on your Spirit Track represents your place in the turn order.
- Place your Habitat Tiles (G) (identified on your Species Card) in the opposite corner of the board to where you're sitting to make a 5 by 5 grid. It is your goal to reach this tile before anyone else reaches theirs. In two and three player games, fill empty corners with unused Habitat Tiles.
- Place your animal meeple (H) on the tile in the opposite corner of the board to your Habitat Tile.
- In four player games, place the Earthquake Counter (I) on "9" on the Earthquake Track (E). In two and three player games, place it on "7".
- Use one Disaster Dice for three and four player games, and both Disaster Dice for two player games.
- Shuffle the Climate Deck. Each player draws two Climate Cards which are kept hidden from other players (J).
- Separate the Catastrophe Cards (K) into two decks according to their card backs and place them near the Spirit Board.
- Begin Exploration in turn order (see next page).
The highlighted area of the setup diagram shows how the remaining octagonal tiles should be placed. The sections highlighted on the Spirit Board are the Spirit Tracks (top) and the Seismic Track (bottom). The Emperor Penguin has the number '5' on its card. In this case this player goes third, as the Goliath Frog has number '1', and the Arabian Camel has number '4'.
Exploration
Exploration is the last part of game setup. Players begin carving a path to their natural Habitat by flipping the two tiles adjacent to their starting hostile Habitat. Exploration is your first opportunity to place Tremor Tokens on the Spirit Board (L). Players compete with Tremor Tokens on Disaster Wedges for the right to trigger specific disasters, which will allow you to manipulate the tile board.
In turn order, each player explores the two unexplored tiles next to their starting Habitat (M). Then, for each tile place a Tremor Token on any Disaster Wedge (found on the Spirit Board) that corresponds with one of the disasters revealed by the tile.
If you Explore an Oasis at any time, you may place your Tremor Token on any disaster track.
You cannot place a third Tremor Token on any individual Disaster Wedge during Exploration (O).
Exploration example: The starting player, in this case the Goliath Frog (N), explores the two tiles adjacent to their habitat. They can place the first Tremor Token anywhere as they flipped an Oasis. They must place their other Tremor Token on either a Volcano or Flood Wedge on the Spirit Board. If you explore this tile, you must place a Tremor Token on any open space on the six Volcano or Flood Wedges. The player in this example has chosen a Flood Wedge.
To the right is an example of how some of the Disaster Wedges may look by the end of Exploration. If you now explored one of the remaining Volcano or Flood Tiles, you would not be able to place a Tremor Token on the central Volcano Wedge, nor the leftmost Flood Wedge. You would be able to place on the other Volcano and Flood Wedges. If you Explored a Landslide Tile, you could place on any Landslide Wedge.
Survival
After game setup, the rest of the game is simply Survival. During survival each player takes turns moving and manipulating the board to create a path to their habitat. Each turn, you must perform three actions if able: Traverse, Tectonic Twist and Scout. These can be done in any order, and each action only once. After you have performed your actions, you must roll the Disaster Dice.
Traverse
Move your meeple to an adjacent connected tile. Connected tiles are those that have neighbouring edges without any debris. Debris is indicated by the thick black lines on a tile's edge.
You cannot Traverse diagonally, onto blocked tiles, onto unexplored tiles, or through debris. You can Traverse off of a blocked tile. If you are able to, you must Traverse, even if it means moving backwards. However, you are allowed to manipulate the board with your other actions so that you cannot move.
Traverse example: The Arabian Camel can move onto the tile to the East, but cannot move to the tile to the West, as the tile is unexplored, nor to the tiles to the North and South as there is debris in the way. If the tile to the East became blocked, and the Camel does not Traverse, then place a Spirit Counter.
Tectonic Twist
Twist any tile on the board by rotating it 90 degrees either clockwise or anti-clockwise. You may Twist a tile even if it is occupied by another player. However, you may not Twist blocked tiles, Habitat Tiles, or opponent's occupied Oases Tiles. Those tiles are considered immovable. Tectonic Twists are used to connect and disconnect tiles and reorient disasters.
Diagram labels: Tile Twisted Anti-Clockwise; Starting Position; Tile Twisted Clockwise.
Scout
The Scout action is a choice between two component actions; Explore and Forecast. Using this action is how players add Tremor Tokens to the Spirit Board and ignite disasters.
Explore is the same action you used in Exploration. Flip an unrevealed tile, then place a Tremor Token on any open Disaster Wedge corresponding with one of the disasters revealed by the tile (see page 7 for an explanation of open Disaster Wedges.) Token placements from Exploring may ignite disasters. Blocked tiles cannot be explored. If you Explore an Oasis at any time, continue exploring until you flip a non-Oasis tile and place a Tremor Token as if you had explored that tile.
Alternatively, you may Forecast. Place one of your Tremor Tokens on any open Disaster Wedge. If there are no open Disaster Wedges available for your Explore or Forecast action, you are not allowed to place a Tremor Token.
Failed to Traverse
If you did not Traverse this turn, place one Spirit Counter on your Spirit Track. If you moved backwards, you do not get to place a Spirit Counter. This occurs after all your actions have been taken, before you take your disaster roll.
Disaster Roll
Once you have completed your three actions, roll the Disaster Dice and place one Tremor Token on any open Disaster Wedge of the disaster/s you roll. You may ignite disasters from your roll, and their effects occur immediately. If you ignite multiple disasters from a roll, you may choose the order in which they occur.
If there are no open Disaster Wedges available for your roll, you are not allowed to place a Tremor Token.
After your Disaster Roll is resolved, your turn is over.
The Spirit Board
The Spirit Board is where players compete to ignite disasters, draw Climate Cards (see page 11) and monitor the Earthquake and Catastrophes (see page 10). There are three Disaster Wedges for each Disaster, and each individual wedge can contain three Tremor Tokens.
You can only ignite open Disaster Wedges. An individual Disaster Wedge is closed if it has two Tremor Tokens belonging to other players on it. In all other cases, the wedge is open. If one wedge is closed, you are not prevented from placing on other Disaster Wedges of that same disaster type.
The diagram on the Spirit Board has everything you need to know about the Spirit Board, placing Tremor Tokens, drawing Climate Cards through the Spirit Tracks, and how the Seismic and Earthquake Tracks work. We suggest you read in order of A-D.
-
A - Disaster Wedges. If you look at the light blue box, you will see three triangles. Each triangle is a Tsunami Disaster Wedge. Each wedge can hold three Tremor Tokens. Any player can place the first or second Tremor Token on any wedge, but only a player already present on a wedge can place the third Tremor Token, which ignites the disaster. (For explanations of each disaster, see pages 8-9.)
Example: Imagine you are the Yellow Player. For current Tremor Token placements, all wedges on the Spirit Board are open apart from these four highlighted wedges. These four wedges are closed to you as each one has two Tremor Tokens that do not belong to you.
-
B - Igniting a wedge. If for any reason you place the third Tremor Token on a Disaster Wedge, immediately ignite any corresponding Disaster Tile on the tile board. For example, when the Yellow Player ignites this Disaster Wedge, they would pick any Flood Tile on the board, and fulfil the Flood effect from that tile. Blocked tiles cannot be ignited.
After activating a Disaster Wedge, remove the Tremor Tokens of all players from that wedge. Then place one of your Tremor Tokens on the Earthquake Track (C) and one of your Spirit Counters on your Spirit Track (D) (see page 11 for more on Spirit Tracks).
-
C - Earthquake Track. In the centre of the Spirit Board lies the Earthquake Track. Below the Earthquake Track lies the Seismic Track. The Seismic Track dictates when Catastrophes are revealed and how many Tremor Tokens are needed on the Earthquake Track before the Earthquake erupts (see page 10). Players place a Tremor Token on the Earthquake Track every time they ignite a disaster. On this board, 5 disasters have been ignited so far; 2 by the Blue Player, and 1 each by the White, Green and Yellow players. Accordingly, once 4 more disasters are ignited, the Earthquake will erupt, the Tremor Tokens will be cleared from the Earthquake Track, and the Earthquake Counter will move down to 7.
-
D - Spirit Track. After a Disaster is ignited, players must also place a Spirit Counter (the same counters that are used for blocking tiles) on their Spirit Track. After you place the third Spirit Counter on your track, you draw a Climate Card.
Maneuvering Disasters
Maneuvering Disasters are used to help you move across the board, send opponents backwards and reposition or reorient tiles. If you are occupying a tile affected by a Maneuvering Disaster, you are liable to be shifted. There are three Maneuvering Disasters: Tsunami, Cyclone and Tornado.
Understanding Tile Orientation. Every tile is split into two disaster triangles. "Facing" refers to the edges of the disaster. Every disaster is "facing" two directions. Between those two directions is the direction a disaster is "pointing".
Example: The Volcano disaster is facing North and East. It is pointing North-East. The Landslide disaster is facing South and West. It is pointing South-West.
Tsunami
When you ignite a Tsunami, choose three tiles in one of the directions the Tsunami is facing, either the row or the column. Swap those tiles with the three adjacent tiles in the other direction that the Tsunami is facing.
You cannot swap a blocked tile or an Occupied Oasis. (For a visual example of a blocked Tsunami, see page 12.)
Cyclone
Cyclone shifts four tiles in a square based on the direction it's pointing. You choose whether to shift the tiles clockwise or anti-clockwise, and only shift them once.
If any of the tiles are blocked or Occupied Oases, exclude them when shifting, but shift the other tiles. (For a visual example of a blocked Cyclone, see page 12.)
Tornado
Tornado affects four tiles in a square based on the way it's pointing. You can twist each tile, including the ignited Tornado Tile, as many times as you want. You may twist each individual tile in different directions.
You cannot twist a blocked tile or Occupied Oases.
Note: You should twist the tiles that Tornado is pointing at before you twist the Tornado Tile itself, so there is no confusion about the direction it was originally pointing.
Blocking Disasters
Blocking Disasters can be used to stop opponents moving, stop yourself moving, or to strategically block tiles. There are three Blocking Disasters: Volcano, Flood and Landslide.
Volcano
Volcano creates a straight-line block in either a row or a column, your choice, based on the way it is facing.
Flood
Flood creates a square block based on the direction it's pointing.
Landslide
Landslide creates a triangular block on the tile it is pointing at, and one of its other corner tiles, your choice.
Five important Rules for Blocked Tiles
- When you ignite a Blocking Disaster place your Spirit Counters on the Blocked Tiles to indicate that they are blocked. They remain blocked until the beginning of your next turn.
- Blocked tiles become Immovable Tiles while they are blocked.
- You cannot move onto blocked tiles, but you can move off of blocked tiles.
- Blocking disasters do not re-block nor pass through other blocked tiles or Occupied Oases.
- You cannot block Habitat Tiles, or Occupied Oases.
Immovable Tiles
Immovable tiles are not affected by any disaster effects. Therefore, they cannot be swapped, shifted, shuffled, twisted or blocked. Immovable Tiles include:
- Habitat Tiles
- Blocked Tiles
- Occupied Oases - these can be twisted by occupying players.
Keep in mind
- The ignited tile is always included in the disaster effect.
- The area of effect of any disaster is determined by the position and orientation of the ignited tile.
- When a disaster's area of effect extends beyond the edge of the game board, resolve it as best you can, but do not move any tiles outside the 5x5 tile grid.
Unique Tiles
Earthquake
The Earthquake randomizes its surrounding tiles and has the potential to dramatically alter the positions of exposed players.
Players are exposed to the Earthquake if they are on one of its surrounding tiles (A). Immovable Tiles are not exposed, except for the Earthquake Tile, which is always exposed, even if blocked.
WARNING! If a player is on the Earthquake Tile when it erupts, they go back to their starting habitat, even if it is blocked.
Players do not have direct control over the Earthquake. After a disaster has been ignited, the igniting player places one of their Tremor Tokens on the Earthquake Track. When the number of Tremor Tokens on the Earthquake Track reaches the number indicated by the Seismic Counter, the Earthquake erupts. When the Earthquake erupts do the following in order:
- Resolve the disaster that adds the final token to the Earthquake Track.
- Each exposed player must remember the tile they're occupying (tiles are numbered).
- Remove the Earthquake Tile (even if it is blocked) and all surrounding tiles. Immovable Tiles are not included. Unexplored tiles are included.
- Shuffle all removed tiles, then randomly redistribute them face up in the vacated area.
- Place players back onto their original tile. It will likely be in a different position.
- Remove all Tremor Tokens from the Earthquake Track and move the Seismic Counter down one level. If the Seismic Counter is at the end of the Seismic Track, move it up one level (B).
- Reveal a Catastrophe from the Catastrophe Deck that corresponds with the symbol revealed by the Seismic Counter (C).
Between eruptions, the Earthquake Tile behaves like all other tiles, it can be blocked, shifted, swapped and twisted.
Surrounding Tiles: At the start of the game, the highlighted tiles are considered surrounding tiles. As the game progresses, it is likely that the Earthquake will move, and different sections of the board will become exposed.
(B) Reaching the end of the Seismic Track: The level of the Seismic Counter on the Seismic Track indicates the number of Tremor Tokens required to set off the Earthquake, and which Catastrophe occurs with the Earthquake. For example, when it sits at '3', only three Tremor Tokens need to be placed on the Earthquake Track to cause the Earthquake to erupt. In this case, when resolving the Earthquake, move the Seismic Counter up to '5' and reveal a card from the Stage 1 Catastrophe Deck.
Catastrophes
Catastrophes occur more frequently as the game progresses and have global effects that impact all players. When the Earthquake erupts at levels '9', '7', and '3' reveal a Stage 1 Catastrophe. Whenever an Earthquake erupts at levels '5' reveal a Stage 2 Catastrophe.
If a Catastrophe pictures an Hourglass Symbol, players add or remove their own Tremor Tokens from the Spirit Board depending on their place in the turn order (see Hourglass Symbols below).
Habitats
Habitats are Immovable Tiles, they cannot be swapped, shuffled, shifted, twisted or blocked. You may move onto other player's Habitat Tiles.
Oases
When an Oasis is occupied, it becomes an Immovable Tile. However, Occupied Oases can be twisted by occupying players when using their Tectonic Twist action. Multiple players can occupy an Oasis Tile.
When unoccupied, Oasis Tiles behave like any other regular tile, and can be moved and blocked.
Species Traits and Climate Cards
There are two game elements that enable players to take additional actions on their turn; Species Traits and Climate Cards. The following symbols describe when they can be played:
- Lightning symbol: The card or ability can be used at any time, as long as the conditions for its use (if any) are met. The conditions are specified on each card or ability.
- Disaster Dice symbol: This card or ability can be played at any time on your turn before you roll the Disaster Dice.
- Exclamation mark: The card must be used before you take any actions on your turn. You are included in any global effects of the card.
Species Traits
Each species has a unique ability, found on your Species Card. They can be used multiple times (if relevant) unless otherwise specified.
Example Species Traits (shown on the sample cards in the rulebook):
- Nest (Disaster Dice symbol): When using your Tectonic Twist action, you may twist that tile twice.
- Poison (Disaster Dice symbol): Once per turn, other players on your tile lose an action of your choice for their next turn. In 3/4 player games, you cannot poison the same player 2 turns in a row.
- Delay (Lightning symbol): After rolling your dice, instead of placing one token on the Catastrophe board, place one on your Species Card. Next turn, place it on any disaster you roll. You cannot delay two turns in a row. (On the printed card the last line of this text runs off the edge of the card.)
- Reflex (Lightning symbol): When the tile you occupy becomes blocked, you may twist it once.
Climate Cards
Climate Cards are used to amplify, counter and combo existing disaster effects, or create global effects. They are discarded after use and kept hidden from other players.
At the beginning of the game each player draws two Climate Cards from the Climate Deck. There is no limit to how many Climate Cards you can have. After you use a Climate Card, place it in the discard pile. If another player uses a Climate Card or Species Trait in response to yours, theirs is resolved first.
Spirit Tracks
Spirit tracks are used to keep track of the turn order, and each player's progress towards their next Climate Card. Every time you ignite a disaster put one of your Spirit Counters on your Spirit Track.
Every time you place the third Spirit Counter on your Spirit Track, you draw a Climate Card and remove all Spirit Counters from your Spirit Track.
Hourglass Symbols
When a Catastrophe pictures an Hourglass Symbol, players immediately add or remove Tremor Tokens from the Spirit Board according to their positions on the Spirit Tracks. Do this in turn order. Disasters cannot be ignited by these token placements.
- Position 1 - add 2 of your Tremor Tokens.
- Position 2 - add 1 of your Tremor Tokens.
- Position 3 - do nothing.
- Position 4 - remove 1 of your Tremor Tokens.
Game Variants
Cooperative
You can play Tremor as a 2 vs 2 co-operative game rather than a free-for-all. Follow the four player Tremor rules, with the following adjustments. When the first player of each team reaches their Habitat Tile, they give their remaining Climate Cards to their partner, and can no longer Traverse, Tectonic Twist, or use their Species Traits. However, they keep their Scout action, and continue to Roll the Disaster Dice, so that they can strategically place Tremor Tokens, ignite disasters and place their Spirit Counters on their ally's Spirit Track. The first team to have both animals reach their respective Habitat Tiles wins the game.
Royal Rumble
In the Royal Rumble game variant, the objective of every player is to occupy the Earthquake Tile when it erupts. When only one player occupies the erupting Earthquake, they win the game. If multiple players occupy the Earthquake Tile, the game continues. If any players do not make it to the Earthquake Tile for eruption, they are eliminated from play. Draw four Climate Cards at the beginning of the game instead of two. The Seismic Counter starts at '7' on the Seismic Track. If there are only two players left in play, they roll two dice at the end of their turns instead of one. Otherwise, follow the four player Tremor Rules.
Hardcore Mode
Tremor began as an abstract strategy game like Chess or Go. If you want an intense strategic experience you can remove various elements of luck, such as the Catastrophes, Climate Cards, Species Traits, or any combination of these.
Immovable Tile Interactions
Immovable Tiles include blocked tiles, Occupied Oases, and Habitat Tiles. When igniting Cyclone and Tsunami Disasters around Immovable Tiles, you should pay special attention as it may result in:
- Cyclone Disasters shifting a tile diagonally.
- Cyclone Disasters swapping only two tiles.
- Tsunami Disasters failing to swap adjacent tiles.
Strategy Hint: Sometimes an Immovable Tile can be a good thing. Set up the right block and the Cyclone could move you or your opponent's diagonally, which is twice as far!
Cyclone Example: The player igniting the Cyclone disaster chooses to shift the tiles anti-clockwise. The Arabian Camel is moved diagonally with their tile because the bottom left tile is blocked. The same effect would occur if the bottom left tile was an Occupied Oasis Tile. If two opposite corners were blocked, the remaining two tiles would simply swap positions.
Tsunami Example: The player igniting the Tsunami disaster chooses to swap the column tiles. These get swapped with their adjacent tiles in the other direction the Tsunami is facing. As the Snow Leopard is occupying an Oasis Tile, the tiles in the middle row do not swap. However, the top and bottom row tiles on either side of the Oasis are still swapped. The same effect would occur if either or both tiles in the middle row were blocked.
Edge Case: When a Cyclone points off the board in one direction, simply swap it with the adjacent tile in the other direction it's facing. Imagine shifting the tiles normally in a square, but when moving a tile off the board it continues shifting around until it fills the vacant space left by the other tile.