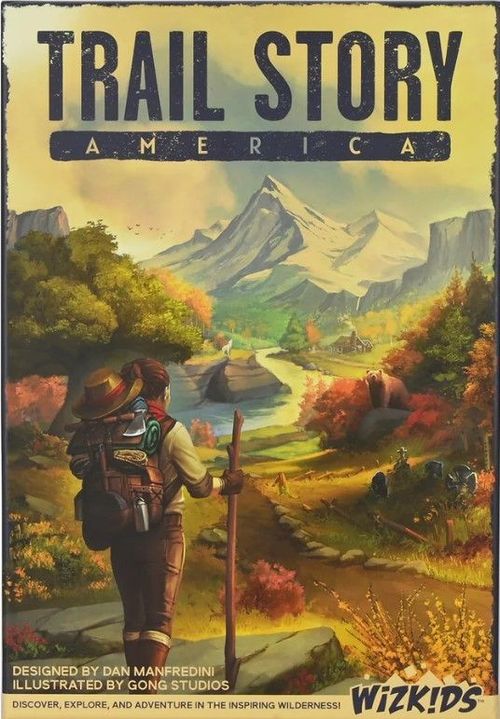
Trail Story: America
Trail Story: America Rulebook
Table of Contents
Table of Contents
Overview
Objective
The object of Trail Story: America is to collect the most points by establishing Havens across the land and writing about your travels in your journal.
Components
- (4) Player Placards
- (1) Large Board Piece
- (2) Small Board Pieces
- (80) Story Cards (20 each of Friend, Enemy, Beast, and Mystery)
- (4) Dice
- (8) Trinket Tokens
- (4) Wanderer Pawns
- (4) Hope Markers
- (40) Story Tokens (10 each of Friend, Enemy, Beast, and Mystery)
- (24) Food Tokens (8 each of Nuts & Berries, Fish, and Meat)
- (24) Trinket Cards
- (24) Ability Cards
- (9) Despair Cards
- (72) Skill/Experience Cubes
- (24) Inspiration Crystals
- (4) Journals
- (6) Campsite Cards
- (52) Wanderlust Tokens (13 per player)
- (4) Reference Cards
- (1) Scorepad
- (1) Story Token Bag
Setup
- Place the large board piece on the table. Then, for 2 players, add one small board piece to either side, to make a 3x4 grid; for 3 or 4 players, use both small board pieces, one on either side, to make a 4x4 grid. You can use any side of a small board piece.
- Place all of the Story tokens (Friend, Enemy, Beast, and Mystery) into the bag. Then for each border between two sites that has a black dot, pull one token from the bag and place it onto that border.
- Separate the cards by type: Friend, Enemy, Beast, Mystery, Ability, Trinket, Despair, and Campsite. Shuffle each deck of cards separately and place them next to the board. Leave room for discard piles.
- Place the rest of the tiles, crystals, and tokens in their respective piles around the board.
- Each player takes a placard, their matching colored Wanderer pawn, and a journal that is placed next to the placard.
- Each player takes their 13 Wanderlust tokens and places one on each of the following spaces: the left two Intelligence spaces, the left two Strength spaces, the left two Agility spaces, the right two Memory spaces, the right two Item spaces, and the right three Movement spaces.
- Each player takes two Inspiration crystals and places them on the two left-most active Inspiration spaces (Mother and Father).
- Each player takes three cubes and places one on each open Skill space.
- Each player takes a Hope marker and places it on their placard, Hope (light) side up.
- Randomly choose a starting player. The starting player receives no Experience cubes, the 2nd player receives 1 Intelligence Experience, the 3rd player receives 1 Strength Experience and 1 Agility Experience, and the 4th player receives 1 Experience in each Skill.
- Then, starting with the player to the right of the starting player and going counterclockwise, each player chooses a different starting site on the board and places their Wanderer pawn there. The starting site must be on the edge of the board. Although they must begin on a different site, once the game starts, pawns can move around and share the same site.
Playing Your Turn
On your turn, you are the Wanderer. The Wanderer must do one (and only one) action:
- Scout
- Travel
- Camp
- Reflect
- Journal
In the unlikely event that the bag has less tokens than empty paths, the Wanderer takes the missing tokens from other spaces on the board instead of from the bag. These are considered drawn for gaining Experience.
Action - Scout
Scouting is a way for the Wanderer to discover their surroundings.
Whenever the Wanderer takes a Scout action, they draw one Story token from the bag for each empty path that connects their site to an adjacent site. (An empty path is a border between two sites that does not contain a Story token.)
The Wanderer choses which of the drawn tokens to place on each empty path. Only one Story token can be on a path at any given time.
Additionally, for each Story token drawn, gain one Experience (cube from the supply) and place them in any Experience section (in the same or different Skills).
Each Experience section can only hold three Experience - any excess is discarded instead.
Each Story token has a type and a difficulty level. The four types are Friend, Enemy, Beast, and Mystery. The difficulty of the stories ranges from one star to three stars.
Example: Sara is at a site with four paths. Three are empty and one already has a Story token. Sara takes the Scout action and draws three Story tokens from the bag. She looks at what she has drawn: Friend, Enemy, and Beast. She decides which path to place each of the tokens. Then she gains three Experience; she takes three cubes and adds them to any of her Experience spaces.
Action - Travel
Traveling is how the Wanderer moves around their surroundings.
Whenever the Wanderer takes the Travel action, they must move their pawn to another site. They must move orthogonally (they cannot move diagonally) and cannot backtrack. They must cross a path that includes at least one Story token.
At the beginning of the game, a Wanderer only has a movement of one, so they may only move to an adjacent site (assuming there is a Story token present). Later on, movement can be increased by various means (using the Reflect action for example). You'll be able to move up to that number of sites (minimum 1).
Example: Sara has no Story tokens on any of the paths on her current site: if she had a movement of 1 she would not be able to take the Travel action. However, she has a movement of 2 so moves across 2 paths, the second move containing a Mystery token. She could also have moved straight twice, crossing over the Friend token.
After their pawn is moved, the Wanderer takes one Story token from among the paths they traveled through and places it in front of them. A Story card is revealed matching the type of the Story token taken by the Wanderer.
Example, continued: Sara places the Mystery Story token in front of her and reveals a Mystery card.
Story Cards
There are 4 types of Story cards to match the 4 types of Story tokens. The backs of the Story cards give an indication of the main types of Skills needed to succeed as well as some of the potential rewards for succeeding. Use that information when you have a choice of Story tokens to take.
When a Story card is revealed, you will resolve the story, however, if there is an Ability or Trinket symbol anywhere on the card, draw the appropriate card before resolving the Story.
Story cards have one or more sections that must be resolved in order from top to bottom. If there are multiple sections they will be separated by a bold "AND" line.
Each section has one or more tasks. Those sections with tasks separated by "OR" require the Wanderer to choose one of those tasks to resolve.
In summary, all "AND" tasks must be resolved and one choice of tasks separated by one or more "OR"s must be resolved.
Tasks
Each task involves rolling dice to determine success or failure. There are four parts to each task:
- Name - The first part is the name which describes the task.
- Cost - The second part is the method of activating dice.
- Success - The third part is the reward for success, if any.
- Failure - The fourth part is the penalty (in some cases, reward) for failure, if any.
The River Crossing requires you to resolve the Endure task first, before choosing and resolving the task of either Camp or Fish.
Task Costs
Each task has a cost which determines how dice are activated. The cost corresponds to one of the three Skills: Intelligence, Strength, and Agility. By default, no dice are activated.
To activate one die, the Wanderer moves one Skill of the specified type into the matching Experience area of their placard. This may be done as much as the Wanderer likes.
Remember: Do not discard your Skill! Move it to your Experience section.
Note: Each Experience section can only hold three Experience - if more would be moved over, they are discarded instead.
Additionally, no matter the Skill type, the Wanderer may spend any number of Inspiration to activate that many more dice. They can do this even if no Skill cubes were used! To spend Inspiration, move it down to the inactive Inspiration section.
The maximum number of dice that can be activated is four.
If the cost section shows a "any Skill" symbol instead of a single Skill, it means that the Wanderer chooses any one of the three types of Skill to spend. Inspiration may still be used as well.
The activated dice are then rolled, and success or failure is determined. The dice are only activated for the duration of that one task even if there are more sections/tasks to deal with. Therefore, on attempting another task on the same Story card, more Skill/Inspiration will need to be spent to activate dice.
The Wanderer is not obligated to spend Skill or Inspiration to roll dice: they can choose to make no attempt at a task and fail it automatically.
Task Success
A task is a success if the number of stars on the rolled dice is greater than or equal to the story's difficulty (the number of stars on the Story token).
If the task was a success, the Wanderer activates the success side of the task. (See Story Card Symbols, below.)
Task Failure
A task is a failure if the number of stars on the rolled dice is less than the story's difficulty (the number of stars on the Story token).
If the task was a failure, the Wanderer activates the failure side of the task. (See Story Card Symbols, below.)
Example: The 2-star Friend token reveals a Farmer. There is an Ability symbol present so an Ability card is drawn. The Farmer has one section with a choice of 3 tasks, each using Melissa's Intelligence Skill, which currently has 2 cubes in it. She can Learn from the Farmer, and if successful, gain the Ability drawn. She can choose to Share with the Farmer, and if successful, gain Nuts & Berries. Finally, she can Chat with the Farmer, and if successful, gain 3 Experience. The first two tasks offer no result if she fails, however, the third task allows her to restore her Hope if she fails.
Melissa chooses to Chat since gaining 3 Experience can help her with a Haven on a subsequent turn and with her Hope currently flipped over, she feels even failing will be of benefit. Since she needs to roll 2 stars, she uses her 2 cubes in Intelligence, moving them over to Experience, to activate 2 dice. However, to give herself a better chance, she uses her Father's Inspiration to add another die to her roll.
Another Example: If the Wanderer encounters a Foggy Swamp, they will have to Trudge through it and then either choose to Fish or Catch Frog. When they Trudge, they will be able to use any Skill, and if they succeed, they'll gain 2 Experience anywhere. If they fail, however, they draw a Despair card. Then they have a choice of their next task, which will either gain them a Fish or a Meat for succeeding, but lose an Item (Trinket or Food) if they fail either task.
Multiple Story Cards
Through special symbols, it may be possible to encounter multiple Story cards on a given turn. Treat the sections on those cards as if they were all part of the same Story card, with the most recently drawn card being at the bottom.
Example: If the Wanderer succeeds in the task of Rescue, they will draw a Friend card. They will encounter that Friend card after they try to Fend Off the Cougar. Note, in the Rescue task, if they fail, they can choose to discard a Meat token (if they have one) in order to draw a Friend card, which will be resolved after trying to Fend Off the Cougar.
Story Attempted
A story is attempted if at least one die has been rolled during any of its tasks.
If the story was attempted, after the entire story is resolved, the Wanderer takes the Story token and places it on an empty space on the Memory section of their placard. This is now a memory of that story. At the end of the turn, if there are more memories than spaces, tokens must be returned to the bag to make space.
If the story was not attempted, the Wanderer places the Story token back in the bag.
Example: Using the Cougar example from above, if a die was rolled in the Rescue attempt but then the Wanderer had no desire to spend Skill/Inspiration or had anything left to spend to roll a die to Fend Off the Cougar, they will have still attempted the story and can take the Story token. (This also happens if they decide to not roll or are unable to roll a die for the Rescue task but roll for the Fend Off task.)
Hope
If a task fails, or even if no dice were activated at all, the Wanderer may use their Hope token (flip to its dark side) to automatically make it a success. This is considered an attempt, so the Story token would be collected.
Story Clean Up
At the end of a story, no matter the outcome, keep the Story card(s) near your journal (but not under it). Any Ability or Trinket cards not gained are discarded.
The stories collected can be journaled later through a Journal action in order to gain endgame points found on the top of the Story cards.
Action - Camp
Camping is how a Wanderer replenishes themselves, and potentially enjoy the company of strangers.
Whenever the Wanderer takes a Camp action, they reveal the top card of the Campsite deck. They then take the benefits at the top of the card.
Example: Jessica needs some more Skill to help her succeed so she declares a Camp action and reveals the top card of the Campsite deck. It is "Sunset by the Water", which shows a benefit of restoring her Hope and that she may eat.
Eating
One of the benefits that appears on all campsite cards is eating.
When the Wanderer eats, they may discard any number of their own Food Items to gain Skill and/or restore Inspiration.
- For each Nuts & Berries they eat, they gain one Skill and restore two Inspiration.
- For each Fish they eat, they gain two Skill.
- For each Meat they eat, they choose one Skill and fill all of its empty spaces with cubes from the supply.
If more cubes are gained than available Skill spaces, the extra cubes are discarded.
If more Inspiration is restored than there are inactive Inspiration, ignore the extra.
Example: Jessica restores her Hope by flipping it back to its unused side. Then she chooses to eat her Nuts & Berries as well as her Meat.
The Nuts & Berries give her one Skill which she places in Intelligence. It also restores two Inspiration, but since she only has one inactive Inspiration available, she restores only that one Inspiration, forfeiting the second one. For the Meat, she chooses Strength. She has three empty Strength spaces, so she adds one cube from the supply to each of those spaces.
Visiting the Campsite
After the Wanderer takes their benefits, each other player will need to make a few decisions (in turn order after the Wanderer):
First, the player must decide if they will visit the Wanderer at the campsite. This is only possible if the campsite is within range (two or three spaces away as depicted on the campsite card). If they decide to visit, they move their pawn to the campsite location.
Second, if the player chose to visit the campsite, they must now decide how much they want to interact at the campsite in order to gain some benefits. They can choose one of the following options:
- Enjoy Company - The visitor is content to just be with someone. Gain 1 basic benefit.
- Share a Story - The visitor gives one of their Story cards (not Journaled) to the Wanderer. Gain 2 basic benefits.
- Bond - The Wanderer takes any one Story card (not Journaled) from the visitor. Gain 3 benefits (basic or special).
Each choice offers the visitor a benefit as depicted on the bottom of the Campsite card.
The basic benefits (in white) are always available, and the special benefit (in green), may only be chosen if "Bond" is chosen. Each benefit icon may be chosen once per visitor.
When the Camp action is complete, shuffle the card back into the Campsite deck.
Example: The next player in turn order after the Wanderer is Lauren, who is more than 3 spaces away from the campsite, so cannot enjoy a "Sunset by the Water".
The next player, Kenith, is within range, but decides not to visit because it doesn't fit with his current strategy.
Finally, the last player, Jun, is within range and decides to visit the campsite. He chooses to "Bond" so Jessica takes one of his Story cards. He then gains 3 benefits. While Jun would love to restore three of his Inspiration, there are only two such symbols present so the most he can restore is two Inspiration, using two of his benefits - which he does. For his third benefit he restores his Hope.
Another Example: Using the previous example, had Kenith decided to visit the campsite, he could have chosen any interaction and gained the benefits bestowed by that choice. It would not have affected Jun's choice of interaction, nor benefits gained from that choice. So if Kenith decided to "Bond" as well, he could have chosen to gain the Eating benefit, as well as restoring one Inspiration, and Moving Forward one space. Or any combination of 3 benefits from those depicted on the card.
Action - Reflect
Reflecting is how the Wanderer looks back at their experiences and grows from it.
All Reflecting involves returning Experience cubes back into the supply for a benefit.
The Wanderer can Reflect as much as they want on a turn in any combination.
There are two ways to Reflect: Find a Haven and Find Inspiration.
Find a Haven
If the Wanderer's current site is not a Haven (from any player), they may make one. A Haven is a site with one or more stacked Wanderlust tokens. To make a Haven, discard three Experience from the same row as the Wanderlust token you want to place onto the current site over the compass symbol.
They may do this once for each row of Experience. Place multiple Wanderlust tokens in a stack over the compass symbol of the current site.
Haven Talents
When the Wanderer creates their first Haven of a particular terrain type, they will discover a new talent for that terrain. The Wanderer will place a cube on their placard, on the Haven they created, to remind them of their new talent.
- Forest Talent - (Forage) - Whenever you Scout at any forest, gain one Nuts & Berries. (Familiarity) - Whenever you Reflect at any forest, gain Hope.
- River Talent - (Fishing) - Whenever you Scout at any river, gain one Fish. (Familiarity) - Whenever you Reflect at any river, gain Hope.
- Meadow Talent - (Fire-building) - Whenever you Camp at any meadow, gain one basic benefit from the Campsite card. (Familiarity) - Whenever you Reflect at any meadow, gain Hope.
- Mountain Talent - (Meditation) - Whenever you Journal at any mountain, spend one less star total and you are not required to match a story symbol for one card. (Familiarity) - Whenever you Reflect at any mountain, gain Hope.
Find Inspiration
If the current site has an Inspiration symbol and the Wanderer does not already have an Inspiration matching that terrain type, discard any four Experience to gain an Inspiration crystal from the supply, to place on that terrain type on their placard. Additionally, all their other Inspiration is restored.
Example: Thomas decides to take a Reflect action. He has three Experience in Intelligence, two in Strength, and two in Agility. He decides to discard the three Intelligence Experience to move a Wanderlust token from his Intelligence Skill (though he could have chosen his Memories) to his current site, making it a Haven. His current site also contains an Inspiration symbol, so he then discards the two Strength Experience and two Agility Experience to gain a meadow Inspiration. Finally, all his Inspiration are restored.
Action - Journal
Journaling is the way the Wanderer records their adventures.
Whenever the Wanderer takes a Journal action, they may choose one of their unwritten Story cards and tuck it under their journal (with the title and scoring showing). The cost is paid with memories (Story tokens) from their placard. The total number of stars on the memories used must be greater than or equal to four (for the first page of a journal, the cost is two stars). At least one of the memories must match the same type as the story being written.
Sometimes you have to get a bit creative with your stories, so each Inspiration can be spent to gain a star.
The Wanderer may Journal more than one card on a turn, provided they have the resources for each card.
The Story tokens are then returned to the bag.
Example: Olivia decides to take a Journal action. Since she has not Journaled before, the first one will cost only two stars. She wants to write down her story of a Brown Bear (a Beast). Her matching Beast memory has two stars so she only has to discard that one token in order to journal the Brown Bear. She tucks the card under the journal and returns the Beast Story token to the bag. Then she wants to write about her story of the Lumberjack (a Friend) and luckily one of her remaining tokens matches. Her Friend and Enemy tokens only add up to three stars, however, so she uses an Inspiration to reach four stars.
Journaled Story cards offer different scoring opportunities at the end of the game. Some will score for having Havens in specific terrains, having no Wanderlust tokens, having certain types of journal pages, etc. (See back of journal.)
End of the Game
The game end triggers when one of these events occurs:
- At least two players have four stories each in their journals.
- At least one player has five stories in their journal.
- All sites are Havens (have Wanderlust tokens).
When the game end is triggered, each player will have one more turn, including the player who triggered the end.
Scoring
Each player scores the following at the end of the game:
- Each of your Havens (sites) is worth 1 point.
- Each of your Wanderlust tokens at each site is worth 1 point.
- Each of your Journaled cards is worth 1 point.
- Each of your Journaled cards is worth additional points based on its scoring bonus. (See back of journal.)
- Each of your Items (Trinkets & Food) is worth 1 point.
- Count your remaining resources: Skill, Experience, activated Inspiration, and Stars on memories. Each three remaining resources is worth 1 point.
- Despair cards may modify scoring for that player based on the card.
The player with the most points is the winner. In case of a tie, among those tied, the player with the most Story cards (in the journal or not) is the winner. In all other cases, they share the win.
Example: At the end of the game, Jun scores as follows:
- 3 Havens = 3 points
- 4 Wanderlust tokens in Havens = 4 points
- 4 Journal cards = 4 points
- Journal bonuses: 2 points for two forest Havens (Lumberjack), 2 points for two Abilities (Grandmother), 2 points for having no Wanderlust tokens in Memory (Storyteller), and 4 points for having three Journaled Friend pages and one Friend Memory token (Cemetery) = 10 points
- 2 Items: 2 points (1 for each Food)
- 10 resources: 3 points
- Despair. Subtract 2 points since the Meat does not score.
Jun's total score is 24 points.
Other Rules
Skill Spaces
Each Skill space can hold one Skill cube. Cubes cannot be placed on a Skill space with a Wanderlust token.
Memory Spaces
Each Memory space can hold one Story token. At the end of a turn, if you ever have more Story tokens than you can hold, you 'forget' (discard to the bag) Story tokens until you can hold them all. Story tokens cannot be placed on a Memory space with a Wanderlust token.
Item Spaces
Each Item space can hold one Item token (Trinket or Food). Identical Food items can be stored two on one space (Food tokens are double-sided to represent 1 or 2 of that Food. If you are asked to discard a food token, you may flip a token from 2 to 1 instead.)
At the end of a turn, if you ever have more Items than you can hold, you must discard tokens until you can hold them all. Item tokens cannot be placed on an Item space with a Wanderlust token.
Limited Supply
Some components are limited quantity. When a player would gain one and there are none left in the general supply, then they forfeit the component. All Item tokens are limited.
Skill cubes are unlimited.
Story Card Symbols
Story cards use symbols to describe effects and actions.
- Ability symbol - Reveal an Ability card. The Wanderer may gain this Ability card. If they do, they put it next to their placard.
- Trinket symbol - Reveal a Trinket card. The Wanderer may gain this Trinket card. If they do, they put it next to their placard. They also gain a Trinket token to be placed in one of their Item spaces. If a Trinket token is discarded for any reason, one Trinket card must also be discarded.
- Food symbols (Nuts & Berries, Fish, Meat) - The Wanderer gains one Food token of the type shown from the supply and places it on one of their Item spaces not containing a Wanderlust token. You can keep two of the same Food on one Item space by flipping the token. This token counts as 2 Food and therefore 2 Items.
- Skill symbol (#) - The Wanderer gains Skill cubes equal to the number written in the center. The cubes are taken from the supply and placed on any empty Skill spaces. Discard any excess cubes.
- Experience symbol (#) - The Wanderer gains Experience cubes equal to the number written in the center. The cubes are taken from the supply and placed on any empty Experience spaces. Discard any excess cubes.
- Restore Inspiration symbol (#) - The Wanderer restores Inspiration equal to the number written in the center. Move the Inspiration from the inactive to the active side.
- Gain Inspiration symbol - The Wanderer gains an Inspiration crystal from the supply and places it on the active position of the depicted terrain in the Inspiration section, as long as there isn't an Inspiration of that type present. Then they restore the rest of their Inspiration.
- Travel symbol - The Wanderer may take a Travel action. This bonus happens after the current turn is over.
- Reflect symbol - The Wanderer may take a Reflect action.
- Journal symbol - The Wanderer may take a Journal action.
- Camp symbol - The Wanderer may take a Camp action.
- Scout symbol - The Wanderer may take a Scout action.
- Stop symbol (crossed circle) - All remaining tasks are ignored. No further tasks this turn count as failures or successes. The story is considered attempted.