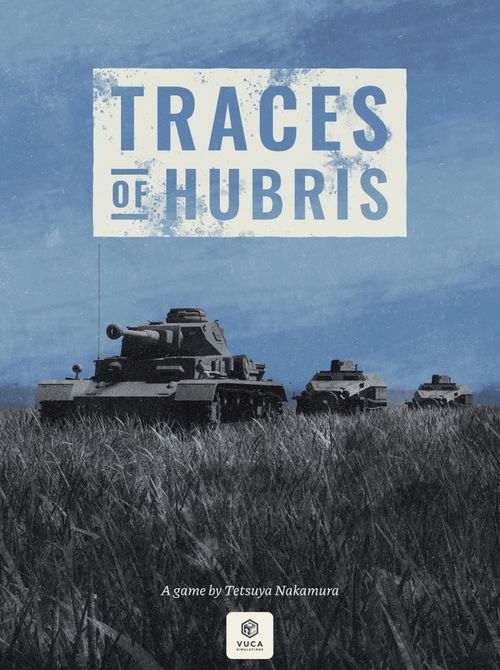
Traces of Hubris
Traces of Hubris Rulebook
Table of Contents
Table of Contents
- 1.0 Introduction
- 2.0 Game Components
- 3.0 Preparation for Play
- 4.0 Sequence of Play
- 5.0 Stacking
- 6.0 Control: Zone of Control (ZOC) & Hex Control
- 7.0 Luftwaffe Air Support
- 8.0 Supply
- 9.0 Movement
- 10.0 Combat
- 11.0 Reinforcements
- 12.0 Special Rules
- 13.0 Victory Conditions
- 14.0 Optional Rules
- 15.0 Developer Notes
- 16.0 Strategy & Player Notes
- 17.0 Historical Notes
1.0 Introduction
1.1 Scale
A hex represents roughly 22.5 kilometers of terrain from side to side. Each Turn represents a month (July & August: 2 weeks/Turn). Combat unit sizes are mainly divisions for both sides (Soviet mechanized units are Corps).
1.2 Components
- Two 23.2"x32.7" (590x830mm) maps
- 297–5/8" (16mm) and 24–3/4" (18mm) round counters
- Two player aid sheets
- One solitaire track sheet
- One rulebook
- One 6-sided die
1.3 Calculation Conventions
When halving, always round fractions down.
Examples: One half of 3 (1.5) is rounded down to 1.
When the combat strengths of stacked units must be halved, add them up before halving.
2.0 Game Components
You will need an opaque cup to play this game.
2.1 Map
The map represents the southern area of the Soviet Union (including the Caucasus) over which the historical campaign was fought.
A grid of hexagons (called hexes) is superimposed upon it to facilitate the positioning and movement of the playing pieces (called counters).
Colored symbols printed on the map show where various Axis and Soviet units must be set up at the start of the game.
The following tracks and boxes are printed on the map:
- The Combat Results Table (CRT) is used to resolve combats.
- The Luftwaffe Box is a holding box for the German Luftwaffe markers.
- The Turn Track is used to record the Turn currently in progress and indicates the available number of Axis and Soviet Command Chits per Turn.
- The VP & Reinforcement Order Nº Track is used to record both the Victory Points and the actual Soviet reinforcement order number.
- The Axis Reinforcement Table indicates how many units of each type the Axis player receives in the current Turn.
- The Soviet Reinforcement Table indicates how many units of each type the Soviet player receives in the current order number.
- The German Withdrawal Table indicates the number of units and of which type the German player has to remove from the map in the current Turn.
- The Axis Rail Transfer Box is a holding box for Axis units being under rail transfer. Any eliminated Axis HQ is placed in this box too.
- The Axis & Soviet Command Chit Pools are used to hold inactive and executed Command Chits.
- The Luftwaffe Table indicates the number of Luftwaffe markers the Axis player may obtain each Turn.
- The Axis & Soviet Force Pools are used to hold the units that may appear as reinforcements later in the game.
Other symbols and map features:
- Supply Source hex: A hex with a red supply source symbol indicates a supply source for the Soviet units; a grey supply source symbol indicates a supply source for the Axis units.
- Bridge hexside: A river hexside crossed by a road or railroad is a bridged river hexside. Conversely, a river hexside not crossed by a road or railroad is an unbridged river hexside.
- Axis Target hex: The Axis player may win the game by control of 9 Target hexes when checking for victory. If Axis controlled and supplied, they give VPs to the Axis too.
- City/Town hex: Provides beneficial combat modifiers for the defender. Soviet Fortifications can be constructed in Cities.
- Taman Deployment Area: The orange hexes (0033, 0133, 0233, 0034, 0134) are used for the 11A deployment later in the game. They can't be entered by the Soviet units.
2.2 Combat Units
The combat units represent the military forces that took part in the historical campaign. They are color-coded by nationality: Soviet forces (Soviet, Soviet Guard) and Axis forces (German, Italian, Romanian, Hungarian).
The numerical ratings and symbols printed on combat units can be read as follows:
Non-mechanized units show: setup color indicator, unit ID, unit size, unit type, side symbol, combat strength, movement allowance, and a reduced-strength side (with a reduced strength indicator).
Mechanized units show the same information, but with combat strength split into separate attack and defense strength values.
- Unit Sizes: XX = Division, XXX = Army Corps.
- Non-mechanized unit types: Infantry, Cavalry, Mountain Infantry, NKVD, NKVD Cavalry.
- Mechanized unit types: NKVD Motorized, Motorized NKVD, Mechanized Infantry, Armor.
Unit Type: All units have NATO symbols to show what type of unit a unit is (armored units are also available with tank silhouettes).
Unit ID: This is the historical name of the unit and has no effect on gameplay.
Setup color indicator: This color facilitates setup and has no effect on gameplay. All units with a color indicator are termed "At start units". All that have none are "Reinforcement units". When eliminated, the "at start units" may be used as reinforcements too.
Axis setup indicators: 17th A, 4th PzA, H 2nd A, It 8th A, 1st PzA, 6th Army, R 3rd A.
Soviet setup indicators: Soviet Front Line, 2nd Line.
Combat Strength: Used to resolve combat. The combat strength of Mechanized units is separated into attack and defense strengths. Non-Mechanized units have a combat strength that is used both in attack and defense.
Movement Allowance: Determines how far the unit can move and is given in Movement Points (MP).
Steps: Indicates how many steps a unit has left. Most combat units have two steps: A full-strength side (front) and a reduced-strength side (back) with decreased combat strength; some only have one step (the back is blank). When a unit suffers a combat loss, the unit is flipped over to its reduced-strength side or is eliminated if it has no reduced-strength side, or was already in its reduced-strength side. Combat units are always set up or enter the game on their full-strength side.
SS Unit: The Wiking German Mechanized Infantry is like any other mechanized unit, but it enters the map as Reinforcement (by the Reinforcements Table "SS" results).
2.3 Headquarters
An HQ unit represents the HQ itself as well as minor combat units under its direct control. HQ units have a Zone of Control (ZOC), move, advance, retreat and conduct combat as normal combat units with a few exceptions:
- Only one HQ unit may stack within normal stacking limitations. An HQ unit may pass over another HQ unit during movement.
- An eliminated Axis HQ is placed in the Axis Rail Transfer box, and arrives as reinforcement when the next Axis Reinforcement Chit is drawn.
- An eliminated Soviet HQ is placed on the Soviet Reinforcement Track at the column where the "Soviet Reinf. Number" marker is, and arrives as reinforcement when the next Soviet Reinforcement Chit is drawn.
The numerical ratings and symbols printed on HQs can be read as on combat units, except the following:
- HQ Type: This is only for historical information. Panzer HQs operate exactly as other HQs. HQ types are: Soviet Front, Axis Army, German Panzer Army.
- Command Range: This rating is used to determine which combat units the HQ can activate. It does not extend across blocked hexsides and Water hexes. Supply status, enemy units, or enemy ZOCs have no effect on Command Range.
Command Range Example: Unit A is outside of Command Range. Units B and C are within Command Range, which is not blocked by EZOCs or units.
Determine Command Range at the instant an HQ is activated: Activated units may later leave the HQ's Command Range as a result of movement, retreat, or advance after combat. A unit that becomes out of Command Range when the activated HQ moves is still considered activated. A unit that finds itself inside Command Range only after the HQ's move is not activated.
Tip: If the activated HQ leaves its "activation hex" place the HQ Mov Starting Pt marker in the hex to remember which units were in its radius at the start of the activation. You may rotate the activated units to remember during combat which ones were activated (because after the movement they may be outside the range, but still capable of combat).
Nationality: An HQ may activate only units of its nationality.
Exception: A Minor Axis HQ may include in its activation two German combat units. And the 11A/KG HQs may include two Romanian combat units.
Note: A German HQ can't activate any Minor Axis units, only German units (setup colors don't matter).
Some special rules apply to HQs (12.2).
Soviet HQ ID abbreviations: Vrnzh = Voronezh, SEast = South-East, SWest = South-West, CS = Caucasus, Stgr = Stalingrad.
Axis HQ ID abbreviations: A = Armee, PzA = Panzer Armee, Rom = Romania, Hun = Hungary, Ita = Italy.
2.4 Command Chits
HQ Command Chits are used to activate specific HQs, which in turn allow combat units within their Command Range to move and attack. Each Turn, a number of Axis and Soviet Command Chits are placed in a cup, from which they are randomly drawn one by one.
There is at least one corresponding Command Chit for each HQ in the game.
Other Command Chits for special game phases or events are:
- Supply Chit (see 8.0)
- Soviet Reinforcements Chit (see 11.1)
- Soviet STAVKA Chit: When drawn, the Soviet player may choose any one of his HQs to get activated.
- Axis OKH Chit: When drawn, the Axis player may choose any one of his HQs to get activated.
- Axis Reinforcements Chit (see 11.2)
2.5 Markers
- Soviet Reinf. Number marker: Used to mark the current order/column on the Soviet Reinforcement Track.
- Game Turn marker: Used to record the current Turn on the Turn Track.
- Fortification marker: Used to mark a City hex with a Fortification.
- Axis Control markers: Used on the map to mark Cities and Towns that are under Axis control. The back side has the Soviet Control, but it won't be used unless it's difficult to define if a Town/City is still under Soviet control.
- Victory Point marker: Used to mark the current number of Axis Victory Points on the VP Track. Use its back side to show Soviet VPs, just in case the VPs go "negative".
- HQ Movement Starting Point marker: One for each the Axis and Soviet players. You may place it in the hex of an activated HQ, as a reminder (if it moves) of which units are in Command Range. The number at the side is the Command Range used for Axis (4) and Soviet (6).
Note: we provide 2 extra markers for use with the Traces of War game, both with Range 6.
- Luftwaffe markers: Only available to the Axis player and abstractly represent the Axis aviation forces that supported the ground war on the Eastern Front.
2.6 Player Aid Sheets
Several charts and tables are printed on the player aids:
- The Terrain Effects Chart (TEC) provides a map key and shows the effects of different terrain features on movement and combat.
- The Combat Results Table (CRT) is used to resolve combats.
- The Luftwaffe Table indicates the number of Luftwaffe markers available to the Axis player.
- The Axis Reinforcement Table indicates how many units of each type the Axis player receives in the current Turn.
- The Soviet Reinforcement Table indicates how many units of each type the Soviet player receives in the current order, as they are not bound by Turn number, but by reinforcement order (shown by the position of the Soviet Reinf. Number marker).
- The German Withdrawal Table indicates the number of units and of which type the German player has to remove from the map in the current Turn.
2.7 Solitaire Track Sheet
This sheet contains information and tracks as they appear on each player's map side, for ease of use when playing solitaire.
3.0 Preparation for Play
- Both players decide which side to play and set up their HQs according to the setup info on the map.
- Axis 'at start' units (those with a setup color indicator, 2.2) are set up in their respective parent HQ's set up areas (at least one unit per hex, and maximum as per stacking rules, 5.0) on the map. The areas marked with the HQ symbol are for the HQ units (and any other of their setup color units if desired, up to the stacking limit).
- 32 Soviet units marked with the 'Front Line' color (light grey) are set up one unit in each Front Line setup hex (do not use the HQ setup hexes for them). Soviet HQs are set up in their designated hexes. 7 units marked with the '2nd line' color (dark grey) are set up in any Soviet controlled City or Town hex (one maximum per City / Town).
- Other combat units and HQs without any setup information are placed in each side's force pools and will appear in the game as reinforcements.
Note: There are two sets of counters for Armor units: one with NATO symbols, and one with silhouettes. Use only one of the sets, not both.
- The Game Turn marker is placed on the first Turn box on the Turn Track.
- The Axis VP marker is placed on the number zero box on the VP & Reinforcement Order Nº Track.
- The Soviet Reinf. Number marker is placed on the number one box on the VP & Reinforcement Order Nº Track.
- All Soviet Command Chits are placed in the Soviet Command Chit Pool Inactive box.
- All Axis Command Chits are placed in the Axis Command Chit Pool Inactive box.
- All reinforcement units are placed in their respective reinforcement pools.
- All other markers such as Supply, etc. are set aside for later use.
4.0 Sequence of Play
The following sequence of phases constitutes a game Turn and is repeated until the last Turn has been played or until the specific scenario or victory conditions have been met (13.0). The Action Phase is repeated until all selected Command Chits have been played.
- Luftwaffe Reorganization Phase
- Command Chit Selection Phase
- Action Phase
- Turn End Phase
Sequence of Play summary:
- Luftwaffe Reorganization Phase
- Command Chit Selection Phase
- Action Phase
- HQ Command Chit
- Activation
- Actions
- Supply Chit
- Soviet Reinforcement Chit
- Axis Reinforcement Chit
- STAVKA
- OKH
- HQ Command Chit
- Turn End Phase
- Victory Determination
- Turn Advance
4.1 Luftwaffe Reorganization Phase
The Axis player (only) determines if any Luftwaffe markers are available for the current Turn by referencing the Luftwaffe Reorganization Table.
4.2 Command Chit Selection Phase
Both players secretly select a given number of their available Command Chits and put all of them into the same cup.
Exception: Axis special combat activation in Turn 1, see 12.1.
The Supply Chit is common to both players and must be added to the cup each Turn (8.0).
The remaining Command Chits are placed face down in each player's Inactive Command Chit holding boxes and are not in use this Turn.
Note: Players may never check the Command Chits in the cup or the opponent's Inactive Command Chit pool.
4.2.1 Soviet Chit Selection
The Soviet player selects the number of HQ Chits as indicated on the Turn Track for the current Turn. This number varies from three to four.
In addition to these, the Soviet player also selects either the Soviet Reinforcement Chit or the STAVKA Chit.
4.2.2 Axis Chit Selection
The Axis player selects the indicated number of German HQ Chits as indicated on the Turn Track for the current Turn (if available). This number varies from three to six.
In addition to these, the Axis player also selects:
- The indicated number of Chits from the pool of Axis Minors HQs (if available), and
- The indicated Axis Reinforcement and OKH Chits. When only "1", the Axis player selects either the Reinforcement Chit or the OKH Chit.
Exception: For Turns 8 and 9 there is no OKH Chit, and the Axis Player may select the Axis Reinforcement Chit in place of one of the Axis Minors HQs.
4.3 Action Phase
A Command Chit is drawn randomly from the cup. The player to whom the Chit belongs becomes the active player.
Exception: The Supply Chit belongs to both players.
Here is an overview of the different possible actions depending on the just drawn Chit:
1. HQ Command Chit
Activations: Activate the respective HQ. When an HQ is activated, all combat units within its Command Range are activated, following the rules/restrictions described in 2.3.
Actions: The active player may conduct movement with the activated units. After all movement is completed, the active player may do combat with the activated units. See Movement (9.0) and Combat (10.0).
2. Supply Chit
Both players follow the procedure explained in 8.0, where they must check if their units can trace a line of supply to a friendly supply source (8.1), possibly roll for Operation Blücher, do German Withdrawal, Axis Rail Transfer, and Fortification construction.
3. Soviet Reinforcement Chit
The Soviet player receives reinforcements (11.1).
4. Axis Reinforcement Chit
The Axis player receives reinforcements (11.2).
5. STAVKA Chit
The Soviet player can choose any one of his HQs to be activated (as in HQ Command Chit above). Note that this may allow for an HQ to be activated twice.
6. OKH Chit
The Axis player can choose any one of his HQs (German or Minor Axis) to be activated (as in HQ Command Chit above). Note that this may allow for an HQ to be activated two or even three times.
4.4 Turn End Phase
4.4.1 Victory Determination
See 13.0.
4.4.2 Turn Advance
If the last game Turn has not been played yet, advance the Game Turn marker to the next box on the Turn Track and start the next game Turn.
5.0 Stacking
Having two or more friendly units in the same hex is called stacking.
The stacking limit is checked at the moment reinforcement units are placed on the map and whenever a unit finishes its movement, retreat or advance after combat. Stacking limits do not apply during movement.
- A maximum of two combat units (full or reduced-strength) and one HQ, all of the same player (even if different nationalities), can occupy a single hex.
- An HQ cannot be stacked with another HQ.
- Soviet and Axis units can never share the same hex.
- Important: The Fortification marker has no effect on stacking.
6.0 Control: Zone of Control (ZOC) & Hex Control
All units exert a ZOC into their six surrounding hexes.
A ZOC extends across all Minor and Major river hexsides. The only exceptions are that ZOCs do not extend across blocked hexsides.
Two or more ZOCs overlapping in one hex have the same effect as a single ZOC.
ZOCs affect supply lines, movement, retreat, and reinforcement placement, as noted in the respective rules sections. Command Range is not impacted by ZOCs at all.
6.1 Hex Control
Only City and Town hexes as well as Supply Sources are subject to control.
At start of the game, all City and Town hexes east of the starting line are under Soviet control, and all City and Town hexes west of the starting line are under Axis control.
Control of any City and Town hex changes at the instant an enemy unit enters the hex.
Note: Supply Sources and Axis Target hexes that are not located in a City or Town are only controlled by the enemy (the non-original owner) if the enemy has a unit in the hex. Once the enemy leaves this kind of a hex, its control reverts to the original owner. On the other hand, Cities and Towns are controlled by the player owning the last unit that passed through them, no need to keep a "garrison".
7.0 Luftwaffe Air Support
The Luftwaffe may provide air support in combat, supply for units beyond their lines, and a positive DRM to the entry of 11A, and is only available to the Axis player.
In the Luftwaffe Reorganization Phase, the Axis player determines the number of available Luftwaffe markers by rolling 1 die on the Luftwaffe Table.
Then, he secretly chooses the type of the markers for the current Turn with the following limitation: any number of them may be chosen for Offensive Air Support, but a maximum of one third of them (round up) may be chosen for Air Supply.
Luftwaffe Air Support table (Markers available → Air Supply range → Offensive Air Support range):
- 0 markers → 0 Air Supply → 0 Offensive AS
- 1 marker → 0-1 Air Supply → 0-1 Offensive AS
- 2 markers → 0-1 Air Supply → 1-2 Offensive AS
- 3 markers → 0-1 Air Supply → 2-3 Offensive AS
- 4 markers → 0-2 Air Supply → 2-4 Offensive AS
- 5 markers → 0-2 Air Supply → 3-5 Offensive AS
- 6 markers → 0-2 Air Supply → 4-6 Offensive AS
- 7 markers → 0-3 Air Supply → 4-7 Offensive AS
- 8 markers → 0-3 Air Supply → 5-8 Offensive AS
- 9 markers → 0-3 Air Supply → 6-9 Offensive AS
The die roll is public, but the chosen markers can only be checked by the Axis player.
Example: It's Turn 4. The Axis player now determines how many Luftwaffe markers he will have for this Turn, and rolls a 3. It results in 5 Luftwaffe markers, and for these 5 markers the player may choose the type of each marker. He may choose to have up to 2 Air Supply (5:3 rounded up), and from 3 to 5 Offensive Air Support. He finally settles for 1 Air-dropped and 4 Offensive markers.
When a marker has been used, it is returned to the Luftwaffe Pool. At the end of the Action Phase, any remaining unused markers are returned to the Luftwaffe box.
Combat: Each Offensive Air Support marker allows a two-column shift to the right on the CRT in an Axis attack. The Offensive Air Support is limited to one marker per attacked hex, and three markers per activation. At least one German unit must participate in the attack to be able to use the marker.
Example: 1-1 is modified to 2-1. (1 shift from 1:1 to 1.5:1, and 1 shift from 1.5:1 to 2:1).
Supply: Each Air Supply marker cancels the effect of being Out of Supply (losing a step) for all the units in one hex.
Example: When the Supply Chit appears, there are 2 units Out of Supply in the Stalingrad South hex. By returning 1 Luftwaffe Air Supply marker to the pool, the units won't lose a step.
Operation Blücher: By returning 3 Luftwaffe markers (any type) to the pool, the Axis can get a +1 DRM for the 11A entry roll on that Turn (see 12.4).
8.0 Supply
If the Supply Chit is drawn, follow the procedure:
- Both players must simultaneously check the supply status of all their units. See 8.1.
- Axis player must roll for Operation Blücher (Turn 3 onward). See 12.4.
- Axis player must do German Withdrawal. See 8.2.
- Axis player may do Rail Transfer. See 8.3.
- Soviet player may do Fortification construction. See 8.4.
8.1 Supply Determination
Supply Lines: A supply line is a series of adjacent hexes going from a unit to a friendly supply source and is used for the judgment of the supply state, construction of Soviet Fortifications, retreat path, and placement of reinforcements.
Note: An enemy occupied friendly Supply Source is not a valid Supply Source for either player.
The line cannot pass through an enemy-controlled hex (see 7.0), an enemy occupied hex, an enemy ZOC (which however can be negated by the presence of a friendly combat unit or HQ), a Water hex, or a blocked hexside.
The line cannot pass through a Mountain hex, unless by a road hexside.
Note: The line may start in a Mountain hex.
The unit may trace a supply line first up to 6 hexes to a railroad hex (or to its supply source); and from there, any length by railroad hexsides.
Exception - Operation Uranus (12.5): From Turn 7 to Turn 9, the Soviet units may trace the supply line with an unlimited length.
Supply Effects: A unit is in supply if it can trace a supply line to a friendly Supply Source. If not, it loses one step.
- Any combat unit that loses its last step is eliminated and moved to its Force Pool.
- Any HQ that loses its last step is moved to the Axis Rail Transfer box (if Axis HQ) or the Soviet reinforcement track (if Soviet HQ). See 12.2.
Note: When the game starts, all units on the map are considered to be in supply.
Important: During the Supply Determination step (only), supply is checked simultaneously for both players, and thus, the supply status of all units is considered before any units are removed from the map by lack of supply.
Supply Line Example: Unit A's (Soviet 73C) supply line is longer than 6 hexes to the nearest Soviet-controlled railroad. It's not in supply. Unit B (Soviet 147) is able to trace a supply line through 25G which negates EZOC in hex 3046. It's in supply. Unit C (Soviet 25G) is able to trace a supply line to 3148. It's in supply.
8.2 German Withdrawal
The number of units and of which type that the German player must remove from the map (to the Turn Track), each time the Supply Chit is drawn, is decided by rolling a die and referring to the German Withdrawal Table.
Note: The units are removed to the Turn Track, not the Force Pool, and thus, they won't be able to return as Reinforcements (because they are not in the Force Pool).
Example: A die roll of 3 removes 2 infantry divisions.
Restrictions:
- Only German (not Minor Axis) Armor, and Infantry/Mountain divisions (not Mechanized Infantry).
- A reduced-strength division may only be selected if no full-strength unit of the specific type is present on the map.
- The unit may be removed from any hex as long as it can trace a supply line.
- Units in the Axis Rail Transfer Holding Box can be selected.
Note: If no supplied unit of the indicated type is present either on the map or in the Axis Rail Transfer Holding Box, nothing happens.
8.3 Axis Rail Transfer
The Axis player may perform off-map rail movement.
Any friendly unit on the map, in supply and not in an EZOC may be moved to the Axis Rail Transfer Holding Box.
Units transferred off map by rail will return to the map the next time the Axis Reinforcement Chit is drawn, with the same restrictions as the normal reinforcements (see 11.2).
8.4 Fortification Construction
The Soviet player may construct Fortifications at any City where supply can be traced (see 12.3).
9.0 Movement
The active player can move an activated HQ and all activated combat units.
Units are moved one at a time. A unit cannot start moving until the previous unit has completed its move. A unit cannot finish its movement in a hex where the stacking limit is exceeded. Units are moved by either Normal Movement or Strategic Movement.
A unit may not move off-map, into Water, or across a blocked hexside.
9.1 Normal Movement
In the Movement Segment, each activated unit may use all, some, or none of its Movement Points (MPs). Unused MPs are lost.
To enter an adjacent hex, a unit must spend the MP cost of the hex as indicated by the TEC, adding any hexside costs, if applicable. A unit cannot enter a hex if it has insufficient remaining MPs.
River: To cross an unbridged Minor river, a unit must spend one MP in addition to the normal MP cost to enter the hex. To cross an unbridged Major river, a unit must start its movement adjacent to the river and spend all its MPs to enter the hex. A river hexside crossed by a road or railroad is considered to be a bridged river hexside and the MP costs for crossing the river are negated.
Mountain: Non-mountain units can only enter a Mountain hex by a road hexside. Mountain units can enter a Mountain hex without a road hexside by starting its movement adjacent to the Mountain hex and spending all its MPs to enter it. See 9.3 for ZOC effects.
Road: A unit spends one MP per hex when moving from one road hex to another, regardless of terrain (normal movement across road hexsides).
Railroad: Have no effect on normal or strategic movement.
Note: Railroads have no effect on movement, but a river crossed by a railroad (as if by road) is a bridged river.
9.2 Strategic Movement
A unit using a road to enter an adjacent hex along this particular road expends only 0.5 MPs instead of the normal MP cost of the terrain if the following conditions are met:
- The unit must start its movement in a hex containing a road and keep moving along a road during its entire movement.
- The unit must neither start its movement in an EZOC nor enter an EZOC during its entire movement.
Strategic Movement Example: An infantry unit with a movement allowance of 4 moves to hex 1810 by Strategic Movement, using 4 MPs. Extra cost for crossing Minor river hexsides is negated by the roads.
9.3 ZOC Effects on Movement
Enemy ZOCs (EZOCs) affect movement in the following ways:
Entering or leaving a hex within an enemy ZOC costs a unit two additional MPs. These extra costs are cumulative.
Crossing a Major river hexside is not allowed if the hexes on each side of the river (the hex in which the unit starts and the one it wants to enter) are in enemy ZOCs, even if the river hexside is a bridged hexside, and even if there are friendly units in the enemy ZOCs.
A mountain unit cannot enter a Mountain hex (by a non-road hexside) if both hexes (the hex in which it starts and the one it wants to enter) are in enemy ZOC, even if there are friendly units in the enemy ZOCs.
ZOC Effects on Movement Example: A tank unit with 10 MPs moves to hex 2622 using 10 MPs. 2423 and 2523 are Clear hexes and cost 1 MP each. MP cost for A (2523 to 2623): 1 MP for moving to a Clear hex, and another +2 MPs for entering an EZOC. MP cost for B (2623 to 2622): 1 MP for moving to a Clear hex and +2 MPs for leaving an EZOC and another +2 MPs for entering an EZOC (using all its MPs). The Minor river hexside does not block movement, even if both hexes are in EZOC. If it were a Major river hexside, movement would not be possible for the Axis unit. MP cost for C (2525 to 2424): 1 MP for moving to a Clear hex, and +2 MPs for leaving an EZOC.
10.0 Combat
In combat, the active player is termed the Attacker and the other player is termed the Defender. The active player can attack adjacent enemy combat units.
A single activated unit can participate in only one combat in the same activation. Two units stacked in the same hex may attack two different hexes separately.
Non-activated units cannot participate in attacks, even if adjacent to a defending hex.
Note: Remember that activation was done at the start of the HQ Command Chit Activation, so it's plausible for a unit to be activated, move out of Command Range, and still be considered activated for the combat.
Combat is voluntary; activated units are not forced to attack enemy units.
Each hex can only be attacked once in each activation. Units in two or more hexes adjacent to the same hex can make a combined attack; their attack strengths are added together, and only one combat is resolved.
If several enemy units are stacked in the attacked hex, the Attacker must attack all of them. Their defense strengths are added together. A unit cannot attack across a blocked hexside.
10.1 Combat Procedure
Combats are resolved one by one, in the order of the Attacker's choice and according to the following procedure.
- Declare which hex is attacked by which units.
- Determine the total attack and defense strength, and calculate the combat ratio.
- The Axis player may declare any use of Luftwaffe air support (7.0).
- Modify the combat ratio with any column shift modifiers.
- Roll one die on the CRT and apply the combat result.
10.2 Combat Ratio Determination
Attack and Defense Strengths: To resolve combat, first combine the attack strengths of the Attacker's participating units. Then combine the defense strengths of the Defender's participating units.
Units attacking across a river hexside (bridged or unbridged) halve their attack strength. If combat involves units that attack across a river hexside and units that do not, only those attacking across the river hexside halve their attack strength.
When two combat units are stacked in a hex and their combat strengths must be halved, first add them up before halving and then round them down.
A unit that retreated from another hex to this attacked hex in this activation does not add its strength to the defense.
Combat Ratio: The total attack strength divided by total defense strength gives the Combat Ratio. When calculating ratios, fractions are rounded down to either the nearest column on the CRT or (when above 10-1) the nearest whole ratio.
Examples: 15:5 gives a 3–1 Combat Ratio. 26:9 gives a 2–1 Combat Ratio. 12:7 gives a 1.5–1 Combat Ratio. 18:13 gives a 1–1 Combat Ratio. 25:2 gives a 10–1 Combat Ratio.
Ratio Shifts: When occupied by the Defender's units, some terrain types provide favorable ratio shifts (see TEC). A combat ratio above 10–1 is reduced to the 10-1+ column. Any ratio shifts are cumulative.
Examples: A Wood hex with a Town provides two Ratio shifts down in favor of the Defender, and thus a 3–1 attack would be reduced to 1.5–1 (first shift to 2–1, second shift to 1.5–1), and 12–1 would be reduced to 8–1.
If the final Combat Ratio is less than 1–1 after any shifts and strength adjustments from terrain are applied (do not apply the Luftwaffe Offensive AS yet), the attack is not possible.
If the total defense strength in a hex is reduced to 0 by rounding down, or due to all the attacked units being units that retreated from another hex, the combat is automatically resolved on the 10–1+ column of the CRT, regardless of any possible terrain ratio shifts.
10.3 Combat Results Determination
Once the final Combat Ratio has been computed, the Attacker rolls one die and reads the result on the corresponding row under the appropriate column of the CRT.
Step Losses: Remove one step by flipping a full-strength unit to its reduced-strength side or by eliminating a reduced-strength unit or a unit with no reduced-strength side. The owning player allocates step losses.
- Any combat unit that loses its last step is eliminated and moved to its Force Pool.
- Any HQ that loses its last step is moved to the Axis Rail Transfer box (if Axis HQ) or the Soviet reinforcement track (if Soviet HQ). See 12.2.
Example: If two full-strength (2-step) units in the same hex suffer a 2-step loss, the owning player can either eliminate one unit or flip both units to their reduced-strength side.
10.4 Retreat
Units affected by 'R' or 'RR' results must retreat one or two hexes after combat.
A retreat is not considered normal movement; retreating units do not expend MPs. Units in a stack that is forced to retreat can split up and retreat into different hexes.
Retreat Restrictions: A retreating unit always retreats in such a way as to get closer to a hex where it would be in Supply.
Every unit forced to retreat into an enemy ZOC (even if this ZOC contains friendly units) must lose one additional step. A retreating unit must satisfy as many as possible of the following conditions:
- The stacking limit is not exceeded in the last hex of the retreat.
- Enter the fewest hexes in enemy ZOCs (and thus to suffer the fewest step losses). The previous condition (1) takes precedence over this if both cannot be satisfied.
Stacking Limits: If a unit exceeds the stacking limit in the last hex of a retreat, it must retreat one additional hex, within the above restrictions. If it exceeds the stacking limit in this new hex, it must retreat into another hex, etc.
Terrain: Minor river hexsides have no effect on retreats. Major river hexsides have the following effect on retreats: Retreating across a Major river hexside (even if bridged) is allowed only if the combat unit starts its retreat adjacent to the hexside.
Units forced to retreat off map, into a prohibited hex (Water, enemy unit, or across a Major river at 2nd hex of the retreating) or across a blocked hexside are eliminated.
Effect: A unit that retreats and is attacked again in the new hex during the same activation doesn't add its combat strength to the defense, but it's still affected by the combat result.
10.5 Advance After Combat
If an attacked hex becomes empty as a result of combat (the defending units either retreated or were eliminated), the attacking unit/units may advance one or two hexes:
- Non-mechanized combat units may advance one hex.
- Mechanized combat units may advance one or two hexes (even if the Defender only retreated one hex).
- HQs may advance with any combat units they are stacked with.
Advance after combat is optional; the Attacker may advance all, some, or none of the attacking units. Advance after combat is not considered normal movement. Advancing units do not expend MPs and enemy ZOCs are ignored.
The first hex of an advance must be the attacked hex.
Mechanized units that participated in the same combat can advance a second hex with the following restrictions:
- The hex must be Clear terrain,
- The unit didn't cross a river hexside, nor may it cross a river hexside for this second hex.
Note: The units may end their advance in different hexes. And "river" is Major and Minor, even if bridged.
It is prohibited to advance:
- Outside of the map.
- Across a blocked hexside.
- If the stacking limit is exceeded in the last advance after combat hex.
Combat Example: The Axis player decides to attack hex 1219 (which is adjacent to several of his units), and declares his intent to the Soviet player. Hex 1219 contains stack A. He chooses to do a combined attack with stack B, and unit C, which are in hexes 1119 and 1218. He proceeds to calculate the attack and defense strengths of the involved units: the attacker has 14 attack points in total, while the defender has 4 defense points, making the combat ratio 3.5 to 1, rounded down to 3:1 (before applying column shifts). Hex 1219 is a Town hex, which gives a column shift in favor of the defenders. The column to be used would be the 2:1 ratio one. The Axis player chooses to use offensive air support which provides a 2-column shift. The column to be used is finally the 4:1 ratio one. The Axis player now rolls on the CRT to determine the combat result. He rolls a 6 which gives a result of 1RR when referencing the correct column and row in the CRT. The result means a unit in the stack loses a step (it's flipped to its reduced side). The Soviet player chooses 38th Rifle Division to lose a step. And in addition, the stack must retreat 2 hexes, avoiding EZOCs while doing so. Stack A retreats 2 hexes, to 1420. The retreat path does not put it closer to a friendly supply source, but it is the only one that allows it to avoid any EZOC. Retreating to 1418 is not possible as it would additionally entail crossing a Major river and the stack was not adjacent to it before retreat. Hex 1219 is left vacant, and the Axis player is allowed an advance after combat into it, moving stack B into it. Within the stack, the 14th Panzer Division unit is mechanized, making it able to advance 2 hexes if the 2nd hex is Clear terrain, but remains with the 44th. Unit C is also allowed to advance, but as the advance would cause overstacking, because the Panzer decided not to advance further, the unit must remain in hex 1218.
11.0 Reinforcements
Both sides receive their reinforcements when their respective Reinforcement Command Chit is drawn from the cup.
Reinforcements are placed on their full strength side on any railroad hex that can trace a continuous railroad route, not blocked by enemy ZOCs (even if occupied by a friendly unit) or enemy units (including HQs) or an enemy-controlled hex to a friendly Supply Source.
A unit can't be placed in a hex where the stacking limit would be exceeded. They can be placed in hexes out of the Command Range of friendly HQs. Friendly units do not negate EZOCs for the purpose of placement.
Note: New HQs come with their Command Chit, available the next Turn for selection, within the usual limits of number of Command Chits. The 11A/KG HQs are an exception to this rule, as their Command Chit is put in the cup when they enter (Operation Blücher).
11.1 Soviet
The Soviet player receives reinforcements in a specific order (not a specific game Turn!). The position of the Soviet Reinforcement marker decides how many units of each type are available (from the Soviet Force Pool) in the current Turn.
If a specific unit type isn't available in the Force Pool, that reinforcement is lost. Include freely in the reinforcements any Soviet HQ on the reinforcement track (they are those removed by combat or supply earlier). This phase ends by advancing the Reinforcement Number marker to the next column on the Soviet Reinforcement Track.
Example: The following units are received the second time the Reinforcement Chit is drawn: 1 HQ, 2 Tank armies, 22 Rifle divisions, 1 Guard Rifle division, 2 NKVD Motorized divisions.
11.2 Axis
The Axis player receives reinforcements according to the Axis Reinforcement Table. A die roll decides how many units of each type are available (from the Axis Force Pool) in the current Turn.
For the German (not Minor Axis) the types are: Armor (PZ), the SS Wik division (SS), and Infantry/Mountain divisions (INF).
German Mechanized Infantry units can't appear as reinforcement. The SS Wik is the only one, and if it's eliminated, it won't return to the map.
For Axis Minors, the units may be from any type of that same nationality (even the Romanian HQ).
If a specific unit type isn't available in the Axis Force Pool, that reinforcement is lost.
Axis Rail Transfer: In addition to the above, the Axis player can select any 2 units from the Rail Transfer Box. Units on their reduced side will appear on their reduced side, not on their full side. An Axis HQ on the box (including those removed by combat or supply earlier) may be selected for free. Any other extra HQs (other than the first) may be selected within the general limit of 2 units.
Example: The following units are received with a die roll of 4: The German Wik SS division, 1 German Infantry division, 2 Romanian divisions/HQ, 2 Italian divisions. Also, the Axis player may receive 1 HQ and up to 2 units (combat units and HQs) from the Rail Transfer Box.
12.0 Special Rules
12.1 Turn 1
Just after the Luftwaffe Reorganization Phase, and before the Command Chit Selection Phase of the first Turn (only), the Axis player chooses 1 of his HQs and executes the activation as if the HQ Command Chit was drawn. All activated units can move and then conduct combat. After this special activation, proceed to the Command Chit Selection Phase.
At the start of the game, all units on the map are in supply.
12.2 HQ Special Rules
An HQ unit represents the headquarter itself and other units under its direct control. It functions in the same manner as a regular combat unit but with the following restrictions:
- An HQ cannot be activated by another HQ.
- An HQ removed from the map may appear again as reinforcement in the next friendly reinforcement phase.
- A removed Soviet HQ is put on the current location of the Soviet Reinforcement marker on the Soviet Reinforcement Order Track.
- A removed Axis HQ is put in the Axis Rail Transfer Holding Box.
- A drawn HQ Command Chit without its HQ on the map has no effect and is put in the Executed Command Chit box.
- Axis HQs can only activate units of the same nationality, with the exception of Axis Minor HQs, who can activate their nationality and also 2 German units, and the 11A/KG HQ who can activate Germans and 2 Romanian units.
12.3 Fortifications
Fortifications are a kind of Soviet marker that benefit Soviet units in its hex.
Construction: The construction of a Fortification is a two-step procedure from start to finish. When the Supply Chit is drawn, the Soviet player may either:
- Place 1 new Fortification marker on the map (on its reduced +0 side) in a friendly controlled City hex free from enemy ZOC and able to trace a supply line to a friendly supply source, or
- Upgrade 1 reduced Fortification already on the map (to its ready +1 side) if it's able to trace a supply line to a friendly supply source.
Effects (for any level of Fortification, unless stated):
- A ready (2 step) Fortification provides one extra defense factor in combat.
- A Fortification negates any enemy ZOC in the hex it occupies.
- The Fortification marker has no effect on stacking.
- Only combat results can cause a Fortification to take a step loss. Being out of supply during the Supply determination step of the Supply Chit doesn't cause a step loss to the Fortification marker.
- A ready Fortification that loses one step in combat can be rebuilt (upgraded) as long as all requirements are fulfilled. A reduced Fortification that loses one step is destroyed.
- When a Fortification hex occupied by friendly units is attacked, any 'R' and 'RR' combat results may be converted respectively into one or two step losses (and it may avoid the need to retreat). Any step losses (direct or 'R/RR' converted), are freely distributed by the Soviet player between the marker and the units.
Example: The Axis attacks the Stalingrad City southern hex. There are 2 full Soviet infantry units and a Ready Fortification marker. The attack roll results in a "2RR". The Soviet player may:
a) Eliminate 1 unit, reduce the other, and reduce the Fortification. b) Eliminate 1 unit, and eliminate the Fortification. c) Reduce 2 units and eliminate the Fortification. d) Eliminate the Fortification and retreat 2 hexes. e) Reduce 1 unit, reduce the Fortification, and retreat 2 hexes. f) Reduce 1 unit, eliminate the Fortification, and retreat 1 hex.
Other options, like leaving the Fortification marker with no unit there, will surely end with the Axis advancing into the hex and destroying the marker.
Limitations:
- Only available to the Soviet player.
- Only two Fortification markers can be built during the game. And there can be only one marker per hex.
- A Fortification is a marker, not a unit. A Fortification marker cannot move, attack, nor advance after combat.
- If alone in a hex, Axis units can enter the hex (via movement or advance after combat) and destroy it.
- The Soviet player cannot "remove" Fortification steps by himself.
- If the Fortification is destroyed, the Fortification marker is permanently removed from the game.
12.4 Operation Blücher (11th Army)
The German 11th Army, led by Erich von Manstein, was involved in the Battle of Sevastopol at the start of Fall Blau. After the occupation of Crimea and the capture of the city, the 11th Army divisions were sent to Leningrad (with Manstein), and as reinforcements for Army Group Center and Army Group South. Later, at September, the Kerch strait was crossed (Operation Blücher II) with only 2 Divisions. But it could have been different, with a big part of the 11A crossing the straits and participating in Fall Blau, as the original Operation Blücher was devised, if Sevastopol had fallen earlier, or Hitler had decided different than he did.
The 11A may appear in the game as reinforcements from Turn 3 onwards. When the Supply Chit is drawn, the Axis player rolls a die with the following DRMs:
- DRM +1: From Turn 6 onwards.
- DRM +1: If 3 Luftwaffe markers are discarded.
- DRM +1: If Rostov-na-Donu is under Axis control.
- DRM +1: If Tikhoretsk is under Axis control or an Axis unit is within 3 hexes.
- DRM +1: If Krasnodar is under Axis control or an Axis unit is within 3 hexes.
- DRM +2: If Novorossiysk is under Axis control or an Axis unit within 3 hexes.
A modified die roll of 6 or more results in a successful Operation Blücher. Axis units are deployed in the five Taman deployment hexes of the Taman peninsula according to the Turn the die roll is a success.
Schedule (based on Turn of Operation Blücher success):
- T3: 11A HQ + 5 German Infantry + 2 Romanian Mountain Inf.
- T4: 11A HQ + 4 German Infantry + 2 Romanian Mountain Inf.
- T5: KG HQ + 3 German Infantry + 1 Romanian Mountain Inf.
- T6 onwards: KG HQ + 1 German Infantry + 1 Romanian Mountain Inf.
- Put immediately the Command Chit of the new HQ (11A or KG) in the cup. For the following Turns, the Command Chit may be selected and put in the cup as any other German Command Chit.
Taman Deployment Areas:
- The Taman hexes can't be entered by the Soviet units at any moment (but may be attacked).
Once Operation Blücher succeeds:
- The Supply Source in the Taman hexes is operative (not before).
- New reinforcements drawn by the Axis Reinforcement Chit may also be placed in the Taman hexes, or in Novorossiysk or using the railroad from Novorossiysk (if Axis controlled). This has effect from this same Turn's Axis Reinforcement Chit (if any) onwards.
11A HQ: When activated, the 11A HQ can activate all German units and up to 2 Romanian units in its range.
When activated, the KG HQ ("Kampfgruppe") can activate all German units and up to 2 Romanian units in its range.
Geographical limitation: The 11A and KG HQs can't enter or be placed in hexes north of the hex row xx30 by voluntary movement, as reinforcements, or by rail transfer. If forced to by retreat, they must exit the zone when their Command Chit appears later.
12.5 Operation Uranus
The Soviet counteroffensive aimed at enveloping and isolating the bulk of the German Army that was besieging Stalingrad. The operation started in November (Turn 8), and this rule is not so much about the operation itself, as this is a player's decision of where and how to do it, but about the preparations prior to the operation.
From Turn 7 to Turn 9, the Soviet units may trace the supply line with an unlimited length, no need to trace it to a railroad hex before.
13.0 Victory Conditions
The Axis player starts the game in control of 4 Axis Target hexes, and wins the game if in control of 9 Axis Target hexes during the Victory Determination step at the end of any Turn.
Each Axis Target hex under Axis control must be able to trace a Supply line to an Axis Supply source as if it was an Axis unit.
If during the Victory Determination step of Turn 9 the Axis hasn't won by control of 9 Axis Target hexes, then, victory is determined by Axis VPs:
A. If the Axis VPs are higher than 15, the game ends in a draw. But you may consider it a Soviet Minor Victory, although the Axis ended up in better position than historically. Maybe you should play again to have a clear winner.
B. If the Axis VPs are 15 or lower, the game ends in a Soviet victory.
The Axis player wins 1 VP per each Axis Target hex beyond 4 under Axis control and able to trace Supply during the Victory Determination step of each Turn.
Exception: for acquiring VPs purpose only, for the four Axis Targets of the Caucasus (Maykop, Grozny, Makhachkala, and hex 1450) the Supply line may be of any length, and not necessarily by railroad. For winning by having 9 Target hexes, all of them need to trace a regular Supply line.
The Axis player loses VPs when the following unit types are destroyed in combat or by failing a supply check. Subtract the VPs at the moment it happens:
- -5 VP: For each HQ.
- -5 VP: For the Wiking SS mechanized unit.
- -4 VP: For each German mechanized unit.
- -2 VP: For each German non-mechanized unit.
- 0 VP: For each Axis Minor unit.
At the end of Turn 9, barring an Axis automatic victory, all units have to trace a supply line (simultaneously) and if unable to do so are considered destroyed (count VPs).
Example: During the End Phase of Turn 3, the Axis player controls (and can trace supply to them) Kursk, Bilhorod, Kharkiv, Stalino, and Voronezh. That makes 5 Axis Target hexes, not enough to win. Anyways, he wins 1 VP (1 Axis Target hex more than 4), and then he subtracts 8 VPs for losses during the game (2 German non-mechanized units and 1 German mechanized unit), for a total of -7 VPs. During Turn 4, he loses another mechanized unit (-4 VPs for this loss, -11 VP total now). At the End of Turn 4, he controls Kursk, Bilhorod, Kharkiv, Stalino, Voronezh, and Rostov-na-Donu (captured this Turn). That's 6 Axis Target hexes, but Voronezh has been encircled and can't trace Supply, and thus it's 5 Axis Target hexes (1 Axis Target hex more than 4), adding +1 VP, to a total of -10 VPs. Not a good Turn, and it seems the Axis player must go for an Axis Target hex Victory because the odds of losing by VPs are against him…
14.0 Optional Rules
14.1 Mobile Warfare
In the Traces of War game, the HQ selected an Action Mode before executing the actions. The modes were Movement-Combat and Combat-Movement. The designer did so to treat the mobile defense operations by the German Army. This game, and campaign, is different, and so, he didn't feel it was part of the design letting the players choose an Action Mode, and it's fixed as Movement-Combat.
If both players want to see how it would evolve (beware, the Soviets may use that kind of mobile defense that the Germans did one year later and it may result advantageous to them), use this rule.
When the HQ activates, the active player does an Action Mode Selection, just before the Actions: Movement-Combat or Combat-Movement.
Then, the active player conducts movement and combat with all activated units (or combat and then movement with all activated units) according to the selected Action Mode. See Movement (9.0) and Combat (10.0).
14.2 Axis Minors Enmity
Hungarian units can't stack in the same hex with Romanian units, and vice versa.
14.3 HQ Voluntary Relocation
In the Traces of War game, the HQ had the option to voluntarily relocate instead of move. The original design for this game had no relocation, and it was somewhat substituted with the Railroad Transfer for the Axis player and nothing at all for the Soviet player.
If both players want to see how the HQ Relocation rule could lead to interesting effects on the campaign, like the relocation of 4PzA to the South after Voronezh is taken by the Axis, and a more flexible Operation Uranus, use it.
Be aware that this rule will make for a very different game, and surely an advantaged one for the Axis player. If you choose to use this rule, we recommend that you use it only for the Soviet side, unless you find that the Axis player needs an extra boost.
An activated HQ may move by Normal Movement and by Strategic Movement. However, the HQ may also be voluntarily relocated to a destination hex that meets the following restrictions:
- Must be at least five hexes away from the initial hex.
- Must not be in an EZOC.
- The HQ must be able to trace a line of supply to a friendly supply source.
The relocation of an HQ comes at a cost in VPs: -2 VPs for an Axis HQ, and +2 VPs for a Soviet HQ.
Change to the Axis Rail Transfer rule (11.2) if you use this rule also for the Axis player: An Axis HQ on the box cannot be selected for free and always counts towards the 2 units/HQs limit.
14.4 Luftwaffe Attacks on Cities
The Luftwaffe Offensive marker is really effective in negating the defensive modifier of City terrain. And it would make taking Stalingrad easier than it was, even when the initial bombing was not so useful and even created debris that helped the defenders.
When using Luftwaffe markers to attack a City, there is only one-column shift per marker, but you may use up to two markers.
15.0 Developer Notes
What is Traces of Hubris?
The title refers to two things. On the one hand, to Traces of War, the wargame published by the same designer and series (A Victory Lost) and which is taken as a reference to match or improve this one and in which it signifies that heritage ("Traces of..."). On the other hand, to that unbridled ambition that is the significant signature of this campaign, Case Blue 1942. The Oxford Dictionary defines it very well as: "The fact of being too proud. In literature, a character with this quality ignores warnings and laws and this usually results in their downfall and death". And it fits him like a glove.
Traces of Hubris is not a simple re-release of Fierce Fight Stalingrad, from Game Journal magazine issue 47. Nor is it a new game at all, as Stalingrad is the foundation and heart of Traces of Hubris. So when the opportunity arose to publish another design by Tetsuya Nakamura, and in particular the Caucasus campaign that also draws from A Victory Lost, as much time and effort as possible was spent to update and polish it, while keeping its essence.
What made us want to give the old Stalingrad a new twist?
The original map reduced the size of the Caucasus, did not respect distances, and had unplayable areas in the south and east. Also, the railroad lines, very important in the rules, did not match all the historical ones. Neither did the roads.
Then there was the gameplay experience. In the original, the Axis player had a hard time (near impossible) winning, a lot of experience was required, and with their victory conditions it was an "all or nothing" game. When the Soviet player could go on the counter-attack in the last third of the game it was very clear whether the Axis was going to win or lose, so there was little point in stretching the game out, leading to an unpleasant premature end of game.
And finally, there was a wish to be able to replicate the initial Axis advance, and to eliminate the tactics of some Soviet players of "human barriers" that made an unrealistic, and impossible to achieve, Axis advance, given the number and length of the game turns and unit activations.
What does this new edition consist of?
The base consists of a new revised map, with real distances. The southern and eastern parts have been cut, as they were areas where there was no option to play at all, leaving it as the first edition of Nakamura (the one before the Game Journal 47). In addition, all the railroad lines have been redrawn, this time taken from military maps of the time. Same with the roads. The only exception is for the railroad and roads next to the Volga to Stalingrad at the East side: a rule for reinforcements and supply with the Volga, and for positioning units for the Uranus operation could have been written, but it was better done with less text and exceptions by shifting one hex the railroad and extending it 1-2 hexes to the city.
In terms of gameplay and having historical advances, always depending on the order in which the Command Chits are rolled and the luck of the dice, of course (as a 100% replica was not the goal, but if the conditions are right it is possible to repeat what happened in 1942), the following has been modified:
- Inclusion of the Luftwaffe, which is losing steam as it is required in other war scenarios and the weather worsens.
- Inclusion of von Manstein's 11th Army, which after the capture of Sevastopol could have been able to participate in Case Blue through Operation Blücher.
- Change in the Soviet Supply for the first two thirds of the game. This way the Soviet player has to worry about his units and not leave them anywhere to get in the way of the Axis without consequences.
- The OKH Command Chit, which gives the Axis a boost early in the campaign.
- The Victory Conditions, in which the Axis can now go for the win, but the Soviet must also work to win.
16.0 Strategy & Player Notes
Solitaire
This game works quite well as a solo game, thanks to the chit-pull system and the fact that, for the first three Turns, unfortunately, the Soviet player can do little more than try to survive the steamroller and (re)position reinforcements.
Even after these first Turns it is still perfectly playable as a solo game, although the Soviet player now has more options.
Victory conditions
The VP conditions are based on the Case Blue Axis' maximum advance: 1 Target hex short, and very disputed, of the two in Stalingrad. The game should be able to replicate it, and make it a game winnable for both sides, and interesting also for the Soviet player, and that's why the game extends into December and includes the Operation Uranus (with the extra HQs and reinforcements).
As the Axis controls 4 of the 9 Target hexes required to win, that means he needs another 5 Target hexes:
- Easy to get Targets: The ones in the vicinity of the Axis forces; Voronezh, and Rostov-na-Donu.
- Medium-Hard: The Supply Source near Voronezh (the road to Moscow). But trying to get it means diverting the forces to this northern sector, lowering the chances at the others in the south.
- Hard: The 2 in Stalingrad, and Maykop in the Caucasus.
- Nearly impossible: Saratov, the Supply north of Saratov, Grozny, Makhachkala and the Supply Source in the South, leading to Batumi. Unless you dedicate your forces and activations to get some of them (1-2), losing the game in the other fronts.
The game leads you to 2-3 strategies once you get Voronezh and Rostov-na-Donu (needing other 3 Target hexes):
- North-Center: Go for the Voronezh Supply hex (1 target) and Stalingrad (2 targets).
- Center-South: Go for the Stalingrad ones (2) and Maykop (1), or try Grozny if both Stalingrad hexes are too hard and you only get one.
- Balanced: Go for the Voronezh Supply (1), Maykop (1), and 1 of Stalingrad or Grozny.
If you go for Stalingrad or the Caucasus, after Voronezh has fallen, send the 4PzA HQ and all the units that are not needed for the Voronezh defense quickly to the South. The 4PzA has 2 Activation Chits, really useful. And also, it's easy to keep a defense at Voronezh, using only the H2A, or even 6A if you want to leave it there. And, yes, there is no von Salmuth's 2nd Army HQ in the game, it's the H2A and its ability to activate 2 German units (as other Axis minor HQs do as well).
If, as the Axis, you can't win by capturing 9 target hexes, and having them in Supply, you should try to get as many VPs as possible, just in case the Soviets may hurt your units enough.
As the Soviet, you must ensure of:
- Saving as many units as possible. You have a lot of reinforcements, but they are needed in every sector, and they are brittle against the German forces. They will be needed for the last Turns of the game.
- Choosing wisely where to build the Fortifications, and when. And remember, there are only 2.
- Wait for the final blow, gaining enough VPs to make sure the Axis loses at the end of Turn 9.
- Resist. And don't succumb to discouragement. This is the toughest side to play. A punching ball. Be stoic.
Encirclements & Supply
The basic tactic is to close off pockets of enemy units with your units and ZOCs, so that they lose steps due to lack of supply and retreats in combat. The Axis has it easier, as its panzer and mechanized units move 10 hexes, being able to infiltrate up to 2 hexes in a row into EZOCs. German infantry also has the ability to enter EZOC from EZOC by moving 5 MP.
Note also that a unit exerting ZOC on another enemy unit subtracts 2 MPs from its ability to move out. The Germans can be like "glue" for the Soviets, who only move 4 MPs, but the Soviet can also annoy the German, though not to the same extent.
On the Soviet side the strategy is to see the German's weaknesses (the railroads from where they draw supply) and wait for the right moment, and in the final Turns, flood in with its numerical superiority (if it has managed to hold enough troops) and its ability to trace Supply without rail (Operation Uranus).
Don't forget that the Axis may have taken some Luftwaffe Air Supply markers in order to advance the panzers inland and disrupt the Soviet defenses.
Stalingrad defense
Any Fortification has the ability to negate Axis EZOC in its hex. What does this mean? Well, thanks to it a unit can move into, or out of, an adjacent hex, reinforcing the Fortification if its units are reduced. In the case of Stalingrad, there is the Volga on one of its flanks. Soviet units in those hexes can move in and out of a City hex if the City has a Fortification.
And who says Stalingrad says Rostov-na-Donu... there are more defensive and siege applications and methods. Up to you!
The Spearhead
Evidently, the multiple activations by 1PzA and 4PzA, and their panzer units, makes those two HQs really powerful. Their use, well thought out and applied, makes a difference.
17.0 Historical Notes
The Genesis of Overconfidence
Case Blue, the 1942 strategic summer offensive in southern Russia starting on June of that year, the Eastern Front had been a battleground of changing fortunes was born out of Adolf Hitler's hubris following early successes in the Soviet Union. This overconfidence, stemming from the initial triumphs of Operation Barbarossa, led to a dangerous underestimation of Soviet capabilities and resilience. The stark shift from rapid advancement to a stagnated front by the harsh winter of 1941-1942, logistical challenges, and strong Soviet resistance did little to dampen this misplaced confidence.
Operation Case Blue, therefore, can be seen as a consequence of Hitler's inflated self-belief and his conviction in the invincibility of the German war machine.
Case Blue: Objectives and Phases
Operation Case Blue aimed to secure crucial resources and strategic positions in the Soviet Union. The primary objectives included capturing the oil-rich Caucasus region and, in a mid-operation change of objectives, controlling Stalingrad for its strategic and symbolic importance. The operation was executed in phases, with an initial push towards Southern Russia and the Volga, followed by the Caucasus campaign and eventual consolidation and defense against expected Soviet counterattacks.
The initial phase consisted of the German 4PzA and 2A, supported by the Hungarian H2A, attacking from Kursk to Voronezh and then continue the advance towards the Volga. The German 6A would move in parallel with 4PzA, to reach the Volga at Stalingrad. After the first successes on the northern and mid sectors, the German 1PzA would attack towards the lower Don River, with 17A on the western flank and Romanian R4A on the eastern flank, and the support of the Italian It8A.
Hitler's Interference. Stalingrad.
This plan, however, was marked by a fundamental strategic overreach, caused by Hitler's dictatorial command style and his refusal to heed his generals' advice. His insistence on capturing Stalingrad, motivated more by symbolic value than strategic necessity, while advancing into the Caucasus, splitting Army Group South into two Army Groups, overstretched German forces and complicated the campaign. The operation, sprawling over vast and diverse territories, demanded more resources and manpower than Germany could sustainably commit. Simultaneously, Hitler's decision to divert resources and attention to other fronts and operations, impacted the overall effectiveness of the German military efforts during Case Blue.
This strategic miscalculation was a clear manifestation of Hitler's hubris, disregarding logistical realities and the limits of his military, ultimately leading to catastrophic consequences.
Operation Uranus and Wintergewitter: Turning Points
The Soviet counteroffensive, Operation Uranus, dramatically changed the course of Case Blue and highlighted the vulnerabilities created by Hitler's overambitious plans. Launched in November 1942, it aimed to encircle the German 6A in Stalingrad by hitting the weak wings of the Army, mainly the Axis allied troops, leading to one of the most significant encirclements in military history. Operation Wintergewitter, a German attempt to relieve the encircled forces in December 1942, failed, marking a major defeat for Germany that was not just a military disaster but also a symbolic defeat, shattering the myth of German invincibility. It may be considered a major turning point on the Eastern Front.
Civilian Suffering and the Siege of Stalingrad
The siege and battle of Stalingrad were catastrophic in terms of human suffering. Hitler's obsession with the city led to one of the most brutal battles in history. The prolonged siege and intense urban combat led to immense civilian suffering, with shortages of food, water, and basic necessities. The Siege of Stalingrad became a symbol of the brutality of the Eastern Front and the suffering endured by civilians in wartime.
Stalin, the other side of the broken mirror
In contrast, the other dictator in the ring, Stalin, also with an authoritarian leadership style, showed a greater capacity for adaptation and delegation. His initial underestimation of the German offensive led to a lack of Soviet preparedness, and enormous losses in men and material during the initial Axis attacks. However, after the disastrous early months of the war, he showed a greater willingness to learn from mistakes and adapt strategies accordingly, and unlike Hitler, he began to delegate more military decisions to his generals. He relied on the expertise of commanders like Zhukov and Rokossovsky, particularly in planning and executing Operation Uranus. Stalin's decision to hold Stalingrad at all costs became a turning point in Soviet resistance, and he also demonstrated patience in waiting for the right moment to launch counter-offensives. His ability to endure and then capitalize on German overextension was crucial in the Soviet Union's eventual success.
Conclusion: The Perils of Overconfidence
The failure of Case Blue and the surrender of 6A was a huge blow to German morale and it came as a great shock to Hitler. It marked a significant turning point in World War II and ended the German offensive in the East, while initiating the Soviet westward push.
In retrospect, Case Blue is a stark reminder of the dangers of hubris in military and political leadership. Hitler's overconfidence, disregard for practical limitations, and dictatorial decision-making led to one of the most significant military failures in history.