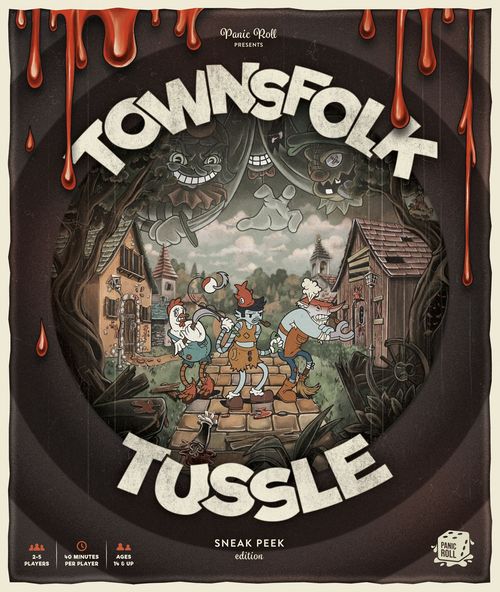
Townsfolk Tussle
Townsfolk Tussle Rulebook
Table of Contents
Table of Contents
Game Components
- Main Board
- Two-Sided Sideboard
- 7 Two-Sided Townsfolk Cards
- 12 Two-Sided Ruffian Cards
- 7 Standard Townsfolk Minis: Henlo, Melba, Blopsy, Quintus, Yancy, Norman, Georgie
- 12 Oversized Ruffian Minis: Barlow, Qing & Kween, Dozy, Handsy, Strawman, Pinchetti, Bort, Pepin, Bundits, Virginia, Umbrello, Waggums (+ Alternative Standees)
- 15 Starting Gear
- 177 Peddler Gear
- 36 Ruffian Gear
- 28 Unique Gear
- 75 Feats of Mettle
- 180 Action Cards
- 100 Town Events
- 20 Terrain Cards
- 49 Double-sided Terrain Pieces
- 60 Coins
- 46 Counters
- Additional Pieces: 19 Character Tokens, 5 Custom Dice, 5 Cheatsheet Cards, 1 Crit Hit Card, 2 Cloth Bags, 24 Unlockable Gear, 1 Town Map Poster
Setup & Preparation
"For quick setup, check the back of this booklet!"
- Lay out the main board and place the sideboard to the right, Town Phase face up.
- Keep the game box nearby to grab components when needed. We recommend keeping Town Events, Feats, and half the Peddler gear nearby for easy access.
- Flip all Ruffian tokens face down, then select four at random and place them on the Town Map.
- Each player chooses a townsfolk and receives their townsfolk card. Place a counter on the highlighted starting number on each stat bar.
- Each player receives 10 Coins and the starting gear listed at the bottom of their townsfolk card.
- Place each townsfolk's corresponding token on the Buyin'/Beatin' Order bar in the order of your choice. We recommend a clockwise rotation, starting with the most violent player.
Make sure Town Events, Peddler gear, and Feats of Mettle are shuffled, and you're all set to play! Continue reading to learn the basics, or begin the Town Phase on Pg. 10!
Choosing a Townsfolk
"Who will stand against the Ruffians?"
Players begin the game by picking a townsfolk, each having their own unique quirks, stats, and starting gear. Some townsfolk are sturdier than others, or provide benefits to the team rather than pack a wallop. Don't stress too much over your choice; the gear you find along the way will let you change your play style. Each two-sided townsfolk card has the following information:
- Townsfolk Introduction — The back of each townsfolk card gives some insight into who the townsfolk is. We recommend using this backstory to guide your decision in picking a townsfolk!
- Gear Slots — Gear slots line the edge of the townsfolk card. Equipping gear strengthens your townsfolk and provides new abilities.
- Stat Bars — These bars are used to mark your stats throughout the game. A townsfolk's starting stats are highlighted in their color.
- Health (HP): Your townsfolk's health. Taking DMG (damage) lowers your HP. Once this goes below 1, your townsfolk is knocked out and removed from the fight. Optional Health 'Stoppers': If you'd like a way to keep track of your Max HP while taking hits, feel free to use a red counter to 'cap' your HP. It can sit on the number above your Max HP.
- Movement (MVMT): This stat represents the MVMT you have available to use on each of your turns. It takes one point of MVMT to move to one orthogonal square. Townsfolk cannot move diagonally. You should not adjust your MVMT stat when moving, since it simply represents the MVMT you have available on each of your turns.
- Moxie (MOX): This stat represents the MOX you have available to use on each of your turns. All actions (attacking, interacting with terrain, etc.) have a MOX cost, so higher MOX means a more effective turn. You should not adjust your MOX stat when taking actions on your turn, since it simply represents the MOX you have available on each of your turns.
- Accuracy (ACC): This modifier affects the townsfolk's chance to land an attack. This number is added to your accuracy roll when attacking with any weapon. Low ACC means the townsfolk is less likely to be effective in combat.
- Townsfolk Abilities — Each townsfolk has two unique abilities to aid them on their journey. Some abilities provide a bonus during the Town Phase, while others can be activated during a fight to provide support for the team. Be sure to utilize your abilities well!
- Starting Gear — The gear this townsfolk will receive at the start of the game.
Gear
"Don't go running into battle naked, fella!"
Gear is a core mechanic of Townsfolk Tussle, and the main method for strengthening your townsfolk. Most gear alters a townsfolk's stats or grants them new abilities, making them into a more efficient murdering machine!
Each townsfolk has the same gear slots: Left Hand, Right Hand, Head, Chest, Leg, and Accessory. Gear can be equipped in town by placing it next to your townsfolk card in its corresponding slot.
Gear Breakdown & Sample Equipment — a gear card shows its Gear Name, Gear Description (indicates the slot the gear can fit into, as well as weapon information), Gear Cost, Weapon Stats (MOX, ACC, DMG, and Range), and Gear Ability. Some gear also has a Stat Bonus.
As long as gear is equipped, you can activate its ability! If a weapon is 2-handed, you cannot use your other hand slot while it's equipped.
Starting Gear
Each townsfolk begins the game with a small stash of gear, which is shown at the bottom of their character card. Starting gear can be identified by its gray border. As with all gear, starting gear can be destroyed.
Unlockable Alternative Starting Gear: Each townsfolk has an alternative set of starting gear which can be unlocked by completing special objectives during the Final Fight (Pg. 21). Once it is unlocked, it is added to the normal starting gear deck. A townsfolk's alternative starting gear will have their name written along the left side of the card, and a thumbs-up in the top right corner. At the start of the game, a townsfolk can choose to start with their unlocked alternative gear instead of their normal starting gear.
Peddler Gear
Gear available for purchase from the Peddler. Peddler gear can be identified by its blue border.
Unique Gear
Unique gear cannot be bought, and is only rewarded under special circumstances. Unique gear can be identified by its yellow border.
Ruffian Gear
Once your team has successfully murdered a Ruffian, you get to loot their supple corpse for some Ruffian gear! Ruffian gear often has powerful stat bonuses and abilities. Accomplish some Feats of Mettle (Pg.10) and earn a piece for yourself! Each Ruffian has 3 pieces of gear that can be rewarded; they are indicated at the bottom of their Ruffian card. Ruffian gear can be identified by its purple border.
Equipping Gear
Equipping gear allows you to use the gear in battle, and increase your stats before the fight begins. To equip gear, place it in its corresponding gear slot next to your townsfolk card. A single piece of gear can be equipped to each slot at a time. Gear may be equipped freely before the Fight Phase begins, but changing gear during a fight costs 2 MOX (Pg.18 for details).
1-Handed and 2-Handed Gear (Weapons)
Gear marked as 1-handed or 2-handed are considered weapons, and are held in your hand slots. If an equipped piece of gear is 2-handed, you cannot have another piece of gear in your other hand slot.
Head, Chest, Leg Gear, and Accessories
This gear is equipped to their corresponding slots and provide a variety of stat bonuses and abilities.
Consumable Gear
Consumable gear acts the same as any other gear and must be equipped to use. They are normally discarded (consumed) and lost forever upon use, but give your townsfolk a one-time—but often game-changing—bonus.
Special Gear
Some gear has the tag 'Special Gear'. This gear cannot be equipped. Its passive abilities are always active for your townsfolk, and can be activated without being equipped. Gear not currently equipped to your townsfolk is considered stashed, and can be kept nearby your townsfolk card. The effects of 'Special Gear' (like a Beggar's Top Hat) are always active, even when stashed!
Stashing Gear
There is no limit to the amount of gear a townsfolk can hold. Any gear a townsfolk does not have equipped can be swapped in during a fight. A townsfolk does not receive the benefits of gear they do not have equipped, unless it is Special Gear.
Discarding Gear
Certain Ruffian actions or events will cause gear to be discarded. If a piece of gear is discarded, it is lost forever! It is removed from the townsfolk and returned back to the game box. If you no longer need a piece of gear and would like to discard it yourself, it can be sold to the Peddler (Pg.11).
Unlockable Gear
Not all gear is available when you begin playing Townsfolk Tussle; you'll need to earn them! A plethora of gear is hidden in the game box, and can be earned by completing special objectives during Final Fights (Pg.21).
Trading Gear
Townsfolk cannot trade gear with one another, although some Town Events will allow townsfolk to exchange gear.
The Town Phase
"Prepare while you still can!"
A game of Townsfolk Tussle consists of 4 rounds, split between a Town Phase and a Fight Phase. If the townsfolk manage to take down all 4 Ruffians invading Eureka Springs, they win!
Round 1: Town → Fight. Round 2: Town → Fight. Round 3: Town → Fight. Round 4: Town → Fight.
The game begins in the Town Phase, where the townsfolk get a chance to prepare for the battles to come. In the Town Phase:
- Each townsfolk draws back up to 3 unaccomplished Feats of Mettle. In the first Town Phase, each townsfolk simply draws 3 Feats of Mettle.
- Each townsfolk receives a Town Event card and resolves them out loud in Buyin' Order.
- Shop with the Peddler. Lay out 10 items from the Peddler deck onto the Town Phase board. Each player may buy or sell one item on their turn (in Buyin' Order). This continues until no players wish to buy or sell.
- Prepare to fight! Once all townsfolk are done purchasing, put all unpurchased gear at the bottom of the Peddler deck and begin the Fight Phase.
Buyin'/Beatin' Bar
The Buyin'/Beatin' Bar determines the turn order during the two phases of the game. From top to bottom is the Beatin' Order, which is used during the Fight Phase. Bottom to top is the Buyin' Order, used during the Town Phase. After the end of each fight, the order rotates, and the townsfolk token at the top is moved to the bottom. Note that the Ruffian is always first in Beatin' Order, meaning they always go first!
Feats of Mettle
Feats of Mettle (Feats) are valiant deeds you can accomplish to receive a boost of Coins or fightin' power. Feats are drawn at the start of the Town Phase, and kept face-down until they are accomplished. Each Feat has a goal written on it: if a townsfolk accomplishes one of their goals after it is received, they reveal it and immediately receive the reward dictated by the Feat. Accomplished Feats of Mettle are kept face-up in front of their accomplisher. At the end of each Fight Phase, the townsfolk who accomplished the most Feats during the round without getting knocked out earns a precious piece of Ruffian gear from the defeated Ruffian!
In the first Town Phase, each player will draw 3 Feats of Mettle. At the end of each Fight Phase, players may discard any unaccomplished Feats they do not wish to keep. At the start of every Town Phase beyond the first, each player will draw back up to 3 unaccomplished Feats. For example, if you enter the Town Phase with 2 unaccomplished Feats from the previous round, you will only draw 1 new Feat.
Example Feats of Mettle: Reckless — End your turn adjacent to the Ruffian. If you achieve this: 0 points. Safety First — Be the only townsfolk at Max HP during the fight. If you achieve this: 1 point, +1 MOX (one fight). Martyr — Be the first townsfolk to get knocked out in a fight. If you achieve this: 2 points, +2 DMG to Ruffian.
Becoming the New Sheriff: While setting up the Final Fight, the player with the most Feat points will be declared the new sheriff, and receive vital gear for the final encounter. But be careful, there's a lot of weight on the sheriff's shoulders. If they are knocked out in the Final Fight, the game is over!
Town Events
During the Town Phase, each player receives one Town Event card and resolves them out loud in Buyin' Order. If the event requires you to roll, a single D10 is used. The result may be affected by your stats; for example, if the event says 'Roll (+Max MVMT)', your MVMT is added to the result. Secret events, labeled with a red bar at the top of the card, are not revealed to other players, but instead are activated when a certain goal on the card is met. They are kept until they are activated, even through multiple rounds if necessary. Players cannot discuss their secret Town Events with other players, and they still activate when the townsfolk is knocked out if possible!
The Peddler
The Peddler is a traveling saleswoman that frequents Eureka Springs. She carries a vast array of gear that can help you in a pinch, as long as you can afford it. During the Town Phase, 10 pieces of gear from the Peddler deck are laid out on the Town Phase board. Each townsfolk can buy and sell gear on their turn. A townsfolk may either buy or sell one piece of gear on their turn. This order repeats until everyone is done buying and selling. All unpurchased gear is returned to the bottom of the Peddler gear deck.
Shop Reset: Don't like anything available in the shop? Not to worry; the Peddler always has more gear in stock. After laying out Peddler gear, the townsfolk may pay a collective 2 Coins per townsfolk, divided as they choose, to have the Peddler reset her shop. It is up to the group to decide how much each person contributes, but all players must be in agreement to reset the shop. If they do, discard all gear in the shop and replace it with new Peddler gear. This must be done before any townsfolk shops, activates abilities, or activates Peddler-specific Town Events, and can only be done once per Town Phase.
Buying: The cost of an item is labeled on the right edge of the gear. Players need to pay that much Coin to acquire that gear from the Peddler.
Selling: Players may opt to sell gear they no longer need. If they do, they receive half of its value, rounded down. For example, a piece of gear valued at 15 Coins can be sold for 7 Coins. Starting gear cannot be sold.
The Town Map
The Town Map holds the four Ruffians you'll need to defeat to win the game. Four Ruffian tokens are placed facedown on this at random at the start of the game. Ruffians will have different abilities depending on when you run into them!
Once the Town Phase ends, you'll be flipping and fighting the next facedown Ruffian token on the Town Map, from top to bottom.
The Fight Phase
"Quit cryin' and stay sharp, there's a battle brewing!"
When the Town Phase ends, the Fight Phase begins! Here, you have one goal: Take down the Ruffian! To set up the Fight Phase:
- Flip the sideboard to reveal the Fight Phase board.
- Reveal the next Ruffian from the Town Map (top to bottom). Place their token at the top of the Beatin' Order.
- Place the corresponding Ruffian card onto the Fight Phase board.
- Shuffle the Ruffian's action deck and place it below the Ruffian card.
- Use the back of the Ruffian card to set up the landscape, placing terrain pieces on the board where they are shown. Squares marked (FF) are terrain pieces that are only placed during the Final Fight.
- For each terrain piece on the landscape, place their matching terrain card below the landscape.
- Townsfolk choose their starting position in Beatin' Order. Available positions are marked with a (T).
- Place the Ruffian on the position marked (R), facing the townsfolk closest to them.
- Mark the Ruffian's starting health (HP) and movement (MVMT). These stats are shown on the front of the Ruffian card, and vary with the number of controlled townsfolk.
- If this is the Final Fight, follow the additional setup directions on the back of the Ruffian card.
Once setup is complete, the fight begins with the Ruffian's turn!
The Landscape
"Pay attention to your surroundings or it'll cost ya!"
Each Ruffian can be found in their own unique section of town, dictated by the back of their Ruffian card. This will determine the obstacles and features of the landscape, as well as the townsfolk's starting positions. Use the back of this rulebook if you need help matching terrain pieces with their cards!
Terrain Pieces & Terrain Cards
Terrain will dramatically alter your strategy when taking on a Ruffian. Some terrain will prevent movement, while others can provide a variety of beneficial effects if used wisely. Each terrain piece has a corresponding terrain card that explains its effects. The card for each terrain piece on the landscape should be placed below the landscape before each fight begins.
Terrain Type
A piece of terrain is marked as either an obstacle or feature on its terrain card. Their differences are listed below.
Obstacles: Obstacles block the movement of both townsfolk and Ruffians, and cannot be traveled through. A townsfolk must be standing adjacent to an obstacle to interact with it (diagonal is not considered adjacent). Some obstacles require specific positioning for interaction; the terrain card will state if this is necessary. For example, a townsfolk must be standing at the door of the Rickety Farm to interact with it.
Features: Features do not block the movement of townsfolk or Ruffians, and can be freely traveled through. A townsfolk must be standing inside of a feature to interact with it.
Interacting with Terrain
Some terrain features and obstacles are interactive. A townsfolk must pay the MOX or Coin cost shown on the terrain card in order to interact with it. Townsfolk can interact with each piece of terrain once per turn.
Terrain Card Breakdown
A terrain card shows the Terrain Name, Terrain Type (Feature or Obstacle), Terrain Effect, and Interaction Details & Cost.
Example — Dense Woods (Feature): It costs 2 MVMT to enter any Dense Woods square. Does not affect Ruffians or movement via gear or abilities. 1 MOX: Climb a tree/climb higher! You gain +2 range with ranged weapons. All bonus range is lost if you move from your current square. If a collision causes you to move out of the square, you take 2 DMG.
Example — Rickety Farm (Obstacle): Obstacles block movement! When at the door, 1 MOX: Knock for assistance! Roll. 1-3: The owner refuses to answer the door. 4-7: The owner tosses you a bandage! Restore 2 HP. Rickety Farm can no longer be activated. 8+: The owner reluctantly obliges! He lines his shotgun through the window and nails the Ruffian for 3 DMG! Rickety Farm can no longer be activated.
Ruffians
"Golly, these chums are out for blood!"
In the Fight Phase, the Ruffian and townsfolk take their respective turns, navigating the landscape and doing their best to rip each other apart. The Ruffians actions and skills are determined by their Ruffian card and action deck.
Ruffian cards give the player some insight towards the battle ahead. In addition to some lore, each two-sided Ruffian card shows the following information:
- Ruffian Abilities — Depending on when you encounter a Ruffian, their abilities and fighting habits can change. When the Ruffian is revealed on the Town Map, their ability level will be shown underneath; this ranges from 'Chump' to 'Final Fight'. The Ruffian gains the corresponding ability shown on their Ruffian card for the entirety of the fight.
- Ruffian Movement (MVMT) — The Ruffian's movement (MVMT). A Ruffian's MVMT changes depending on the number of controlled townsfolk. This stat determines how far a Ruffian can move when taking an action.
- Ruffian Health (HP) — The Ruffian's starting health (HP). A Ruffian's HP changes depending on the number of controlled townsfolk. A Ruffian cannot gain HP beyond their starting HP.
- Ruffian Weakness — Each Ruffian has a weakness that can be activated if the right conditions are met—normally during a Ruffian action. If you succeed, be sure to mark the weakness as activated and keep track of the effect!
- Ruffian Loot Rewards — If you manage to defeat the Ruffian, a lucky townsfolk will grab a piece of gear off their corpse. That gear is listed at the bottom of the Ruffian card.
- Landscape Setup — Shows the terrain to be placed on the board before the fight begins.
- Final Fight Rules — Describes the unique setup for the fourth Fight Phase, also known as the Final Fight. Do not read this information unless it is the Final Fight! Read more about Final Fights on page 21.
Ruffian's Turn
"What doesn't kill you probably won't make you stronger."
On the Ruffian's turn, all you need to do is play and discard the next card in the Ruffian action deck. Each Ruffian has 15 action cards, each with their own way to make your lives miserable! Follow the actions on the card from start to finish to resolve the Ruffian's turn. Each action has the following information:
- Action Name & Flavor Text — The name and description of the action.
- The Target — Determines who the Ruffian will aim for with their action. If there is a tie for targeting, townsfolk roll to determine the target.
- Move/Act — Determines the movement and main action of the turn; this often involves moving and attacking the target.
- Aftereffect — The aftereffect is a bonus effect that is triggered if the target takes DMG, or is otherwise stated. Not all actions have aftereffects.
Actions come in various forms. Not all of them will deal damage to your team; some aim to cripple and disorient you instead!
Targeting
The target for an action can be a single townsfolk, a group of townsfolk, or no one at all! Targets are determined before the rest of the action is played, and the distance to a target is measured the same as movement: by adjacent squares, never diagonally. If there is a tie for a single target action, the townsfolk roll to determine the target; the lowest roll is targeted. An action plays out in its entirety even if there is no valid target. If there are no valid targets for a placement action, the townsfolk or Ruffian does not move. Players may decide; use it to your advantage!
Ruffian Movement & Terrain
When it comes to terrain, Ruffians follow the same movement rules as townsfolk. They can move through most terrain features, but not obstacles.
Ranged Attacks
Some Move/Act steps on a Ruffian card will be labeled as a 'ranged attack'. These actions require the target to be within a certain number of squares from the Ruffian. Unlike townsfolk, Ruffians can deal DMG with ranged attacks even if an obstacle is blocking the path to the target.
Colliding with Townsfolk
Some actions require the Ruffian to move onto a square with a townsfolk on it. When they do, the townsfolk is pushed out of that square, and into an adjacent square of their choice. This can occur multiple times per action, and allow the townsfolk to strategically navigate to a better position on the board. If a Ruffian would collide with a townsfolk and there are no suitable adjacent squares for the townsfolk to move into, they are placed in the nearest possible square not occupied by a townsfolk, Ruffian, or obstacle.
Placing VS. Moving
When a Ruffian is 'moved' (move towards the target, move completely into target, etc.), they will use their indicated MVMT to move through squares across the board. When someone is 'placed', their character is placed directly on the indicated position, regardless of distance—no actual moving is done. If a unit already occupies a space where a character would be placed, the character is placed in the next nearest possible location. When there are multiple ways to place the Ruffian, players may decide; use it to your advantage! If there are no valid targets for a placement action, the townsfolk or Ruffian does not move.
Moving the Ruffian
A Ruffian's MVMT determines the max amount of squares they may travel during each action. Each point of MVMT allows the Ruffian to move to one adjacent set of squares (Ruffians themselves cover 4 squares). Ruffians, like townsfolk, cannot move diagonally. When a Ruffian moves, they will face the target and try to take the shortest route possible to reach them. If the Ruffian can take multiple paths to reach their target, all which take the same amount of MVMT, the players may choose the path the Ruffian takes. If one of those paths would involve taking DMG, the Ruffian must avoid that path.
Reshuffling the Action Deck
If the action deck is empty, shuffle the discard pile and use it to replenish the action deck. Some Ruffian actions cause the action deck to be reshuffled; shuffle in all cards from the discard pile when this occurs.
Ruffian Actions Breakdown
Common Ruffian Targets
- Closest townsfolk: The townsfolk that would require the least movement (MVMT) for the Ruffian to reach. Note: Even if the target is too far away to reach, the Ruffian will still move towards them.
- Farthest townsfolk: The townsfolk that would require the most movement (MVMT) for the Ruffian to reach. Note: Even if the target is too far away to reach, the Ruffian will still move towards them.
- Weakest townsfolk: The townsfolk with the least remaining health (HP). Note: Even if the target is too far away to reach, the Ruffian will still move towards them.
- All townsfolk within 2 squares: The action will target all townsfolk within 2 squares of the Ruffian. This distance is measured by adjacent squares, and never diagonally.
- None. Some actions have no target! Just follow the action as it is described.
Common Move/Acts
- Move towards target. If you reach them, deal 1 DMG. The Ruffian would turn and move towards the target, attempting to end the movement adjacent to them in the least squares possible. If they reach the target, the target would take 1 DMG. If they cannot reach the target, no DMG is dealt.
- Deal 1 DMG to all targets. Move towards the farthest townsfolk. The Ruffian would deal 1 DMG to all targets, then move towards the farthest townsfolk, aiming to end their turn adjacent to them.
- Keep this card in front of the townsfolk... Actions with this clause usually have an effect later in the fight. Until they are activated, they sit in front of the group or target, instead of going to the discard pile.
- Face the target and move forward. The Ruffian would turn to face the target, then move forward X squares, where X is their MVMT. If the target is positioned diagonally, the Ruffian will face the direction that will leave them closest to the target at the end of the movement. If the target is at a perfect diagonal from the Ruffian, players may choose a direction for the Ruffian to face.
Ruffian Movement Examples
The squares highlighted in blue are considered adjacent to the Ruffian. The area in blue highlights how far the Ruffian can move in a straight line with 3 MVMT. The area in blue highlights ALL squares the Ruffian can move to with 3 MVMT.
If a Ruffian would specifically move forward and collide with terrain they cannot pass through, the movement ends. Ruffians will always attempt to take the shortest path to their target. While moving, Ruffians will push townsfolk out of their path and into the closest possible square. In this situation, the townsfolk can choose to be placed in the red square of their choice.
Ruffian Action Examples
Example — Conqueror's Warcry: Let's pretend the townsfolk marked in red currently has 2 HP—the lowest of the group. In this action, Qing & Kween will move towards that townsfolk and deal 1 DMG. Since the target of the action took DMG, the aftereffect will trigger, and the target will be forced to unequip their chest gear.
Example — Corn Padding: For this action, Strawman will make his way into the target—the target being the Overgrown Cornfield. He's able to reach it from his current location, which causes the aftereffect to trigger. Even if Strawman can only end his turn partially inside the cornfield, the aftereffect would still trigger. The aftereffect restores 2 HP to Strawman, and the townsfolk marked in red takes 2 DMG for his poor positioning!
Example — Aerial Drop-Off: The target of this action is the closest townsfolk with leg gear equipped. The red and blue townsfolk are the only ones with leg gear equipped, but since the red townsfolk is closer, they will be the target. Umbrello will move towards the target, reaching them and triggering the aftereffect. The red townsfolk is placed on the top-left corner of the board and takes 1 DMG. Umbrello is then placed adjacent to that red townsfolk. Keep in mind that when a character is 'placed' rather than moved, it is done regardless of distance (the character's MVMT does not matter). If a character already occupied these squares, the units are placed in the next nearest possible location instead.
Townsfolk Turn
"Now's your time to shine!"
On a townsfolk's turn, they have some decisions to make! The following options are available to do in any order, as long as they have the moxie (MOX) and movement (MVMT) to do so. If you find yourself getting lost in battle, use the two-sided cheatsheet to keep your thoughts in order! It'll serve as a reminder of the options you have on your turn.
Moving
A townsfolk's movement (MVMT) determines how far they can move on each of their turns. It takes one MVMT to move to one orthogonal square. Townsfolk and Ruffians cannot move diagonally.
For example, if your townsfolk has 4 MVMT, you can move up to 4 squares each turn. Moving can be split; for instance, a townsfolk can move 2 squares, attack, then move another 2 squares. Townsfolk can move through each other, but not through the Ruffian.
Interacting with Terrain
A townsfolk can interact with a terrain piece by paying its required MOX or Coin cost (dictated by its terrain card). A townsfolk must be adjacent to an obstacle or inside of a feature to interact with it. Townsfolk can interact with each piece of terrain once per turn. Note that some terrain requires more specific positioning (ex. You must be at the front door of the Rickety Farm to interact with it).
Activating Gear Abilities
Some pieces of gear have abilities that can be activated to give you the upper hand in combat. An activated ability can be found at the bottom of a piece of gear. They usually cost MOX to activate, but some may require you to lower stats, pay Coins, or even take damage instead! Each ability can be activated once per turn, unless otherwise stated.
Some pieces of gear use counters to activate abilities. Counters placed on gear are not removed between rounds, or when the gear is unequipped.
Activating Townsfolk Abilities
Townsfolk abilities that cost MOX can be activated during their turn, but only once per turn.
Changing Gear (During a Fight)
For 2 MOX, a townsfolk may equip gear from their stash to a gear slot of their choice. Any gear equipped to that slot prior is sent to their stash. You can change gear as many times as you'd like in a single turn. Gear in your hand slots may be changed simultaneously. Ex. You may unequip a 1-handed dagger and a 1-handed mace to equip a 2-handed spear for only 2 MOX.
Things to Consider when Changing Gear: Unequipping a piece of gear that raises max HP does not cause you to take DMG: If unequipping a piece of gear would lower your max HP, your HP is lowered down to that new maximum. You do not gain HP when equipping gear that increases max HP mid-fight.
Equipping a piece of gear that grants MVMT, MOX, or ACC immediately grants the additional stats on that turn. Unequipping a piece of gear that grants MVMT, MOX, or ACC immediately lowers your stats by the gear's associated bonus.
Attacking
A townsfolk's main goal should be to defeat the Ruffian, and that can be done by attacking. Each weapon can only attack once per turn, unless otherwise stated. Making an attack consists of three main steps: get in range to make the attack, pay your weapon's MOX cost, then roll a D10 for accuracy (adding your townsfolk's ACC to the total). If that number is greater than or equal to your weapon's ACC requirement, the attack hits! Check the next page for an in-depth attack example.
Critical Hits & Whiffs: A critical hit occurs whenever a townsfolk rolls a Critical Hit symbol while making an attack on the Ruffian. This results in an automatic hit and a bonus to your attack (Pg.20 for details). A whiff occurs whenever a townsfolk rolls a natural 1 when attacking the Ruffian. This results in an automatic miss, regardless of a weapon's ACC requirement.
Melee Weapons: Most weapons in Townsfolk Tussle are melee weapons. Unless otherwise stated, they are considered to have a range of 1. A townsfolk can only attack the Ruffian with a melee weapon when standing in an adjacent square (in all circumstances, diagonal is not considered adjacent).
Ranged Weapons: Ranged weapons can attack from a distance. The range is specified in the ability text (Range: X.). This is how many squares away a townsfolk can be from the Ruffian when attacking, measured in the same manner as movement (orthogonal squares). Obstacles block ranged attacks for townsfolk, but not Ruffians. To determine if an obstacle would block a ranged attack, imagine drawing a straight line from any point of the townsfolk's square to any point on the Ruffian's squares. If the line does not touch an obstacle square, the attack can be made.
In one movement example, a ranged attack is not blocked because no obstacle intersects the line of sight; in another, a ranged attack would be blocked by the obstacle. Plan your ranged attacks carefully!
Weapon Breakdown
A weapon's gear card shows: Gear Description (tells you if the weapon is ranged or melee, if it's 1-handed or 2-handed, and its weapon type), Moxie (MOX) Cost (how much MOX it costs to attack with this weapon), Accuracy (ACC) Requirement (how high a townsfolk needs to roll to hit with this weapon, modified by the townsfolk's ACC stat), Damage (DMG) (how much DMG the weapon will do on a successful hit), and Gear Ability (some weapons have a bonus ability; they can be passive (ex. Range: 4) or activated (ex. 1 MOX: Take 1 DMG and gain +1 ACC). Activated abilities can be used once per turn, unless otherwise stated.
Example: The Big Barrel (Ranged, 1-handed, Gun) — 2 MOX, 5+ ACC, 3 DMG. Range: 7. When used, this weapon cannot attack the following turn.
Making an Attack
Let's pretend a townsfolk is making an attack on the Ruffian, and is equipped with the Extend-O-Pole (Melee, 1-handed, Staff — when equipped, your other weapons have +5 range; 7 cost) and the Floppy Scimitar (Melee, 1-handed, Sword — 1 MOX, 4+ ACC, 2 DMG; 11 cost). Attacking the Ruffian will resolve as follows:
- Make sure the townsfolk is in range of the Ruffian to swing with their selected weapon. This townsfolk plans to attack with the Floppy Scimitar. Normally, since the scimitar is a melee weapon, the townsfolk would need to be adjacent to the Ruffian to attack (unless otherwise stated, melee weapons have a base range of 1). But since they also have the Extend-O-Pole equipped, their scimitar has a range of 6. With no obstacles blocking the way, the townsfolk is in position to attack!
- Pay the weapon's MOX cost to swing with the selected weapon. The cost to swing with the Floppy Scimitar is 1 MOX. This townsfolk has 2 MOX, so they will still have 1 MOX remaining after the attack.
- Roll a D10 for accuracy, then add their character's ACC modifier to the result. If that number is greater than or equal to the weapon's ACC requirement, the attack hits! The Floppy Scimitar requires an accuracy roll of 4+ to hit, and the townsfolk rolls a 3. This would usually be a miss, but since this townsfolk has an ACC of +1, the roll is increased to 4 and counts as a hit!
- On a successful hit, the Ruffian takes DMG equal to the weapon's DMG. The scimitar deals 2 DMG to the Ruffian. Well done, townsfolk!
Make sure you take all factors into consideration before attacking. Can you get in range to attack? Do you have enough MOX to swing? What are your chances of landing the attack?
Combat Factors & Victory
"Learn the finer details of battle to ensure success!"
Critical Hit
A critical hit occurs whenever a townsfolk rolls a Critical Hit symbol while making an attack on the Ruffian. A critical hit is considered a roll of 10, and always counts as a hit. If you roll a critical hit when attacking the Ruffian, immediately make an additional roll on the Crit Hit chart; this will add a bonus to your attack! The DMG from your attack is dealt simultaneously with the critical hit bonus. The Crit Hit chart can be found on the back of this rule book, and on the poker-sized Crit Hit card.
Well done, you rolled a critical hit! Just make sure you follow through; a poor follow-up roll can be disastrous!
Lowering Stats
Some Ruffians cause a townsfolk's stats to be lowered. When this happens, simply lower your townsfolk's stat bar by that amount. Stat losses from Ruffians are removed at the end of each fight.
Getting Knocked Out
If a townsfolk's health (HP) goes below 1, they are knocked out and removed from the board. Knocked out townsfolk still receive Coins if the Ruffian is defeated, but are not eligible to receive the Ruffian loot, regardless of how many Feats they've accomplished this round. As long as one fellow townsfolk survives the fight, all townsfolk are restored back to full health at the beginning of the next Town Phase!
Losing the Game
Players lose the game if all townsfolk are knocked out during a fight, or if all remaining townsfolk are removed from the board with no way to return. If this occurs, the game is over!
Triggering Breaking Points
Once a Ruffian's HP drops to a certain amount, they hit their breaking point. These thresholds are marked with a breaking-point symbol on the Ruffian's HP bar at 4 HP, 7 HP, 12 HP, and 18 HP. If DMG causes a Ruffian's HP to drop to or below these points, the Ruffian reaches their breaking point, causing them to lash out with vigor! If this occurs during a townsfolk's turn, that townsfolk's turn immediately ends and the Ruffian takes an action. Turn order then picks up after the interrupted character's turn. If this occurs during the Ruffian's turn, they take a bonus action after their turn ends. Breaking points can trigger multiple times if the Ruffian heals back over a threshold, so tread carefully!
Be careful when making an attack; if you trigger a breaking point, your turn will immediately end, and you'll be at the mercy of the Ruffian!
Removed from the Board
Some actions and gear can remove characters from the board. While a townsfolk is removed from the board, they cannot be targeted, nor can they activate gear or abilities. While a Ruffian is removed from the board, they cannot be targeted or take DMG.
Defeating the Ruffian
If a Ruffian's HP would go below 1, they are defeated and the fight is over! Upon defeating the Ruffian, the townsfolk will do the following:
- Townsfolk may discard any unaccomplished Feats they do not want for the next round.
- Each townsfolk receives 6 Coins, courtesy of the Ruffian's wallet.
- Search their mutilated corpse for goodies to help you on your journey! Each Ruffian has their own 3 pieces of Ruffian gear; they are listed at the bottom of their Ruffian card. The townsfolk who accomplished the most Feats (not most Feat points) this round receives one of these at random. Knocked out townsfolk are not eligible for the reward! In case of a tie, highest roll earns the gear.
- Restore each townsfolk's stats. Stat effects from actions, Town Events, and terrain are removed. Only stat changes from your gear should remain.
- Rotate the townsfolk order on the Buyin'/Beatin' Bar. The townsfolk on top is moved to the bottom.
- Return to town and recuperate! Flip the sideboard and begin the next Town Phase.
Use the Fight Phase sideboard as reference for starting or finishing the Fight Phase.
The Final Fight
"Alright...which one of y'all is our new sheriff?"
The last Ruffian you encounter won't be as easy to take down as the others, and will fight by their own set of rules in the Final Fight! But have faith, if you manage to take them down, you and your companions win the game!
The back of a Ruffian's card (below the landscape set up) tells you the specifics of your final encounter. Here you will find details on how to set up any Final Fight terrain and defeat the Ruffian using their explicit Final Fight rules.
-
Final Fight Setup — After reading about your Final Fight predicament, the Setup section will tell you any additional steps you need to take. This usually involves placing additional terrain pieces, and most importantly, naming a new sheriff.
New Sheriff in Town: The position of sheriff is awarded to the townsfolk with the highest total Feat of Mettle points (not just quantity of Feats)! In case of a tie, the townsfolk may collectively decide the best option between the tied townsfolk. If they cannot come to a decision, the tied townsfolk roll; the highest roller becomes the sheriff! They'll receive a unique piece of gear to aid them in the Final Fight. The other townsfolk will need to work together with their new symbol of justice. Special win conditions apply to the Final Fight, and they always involve keeping the new sheriff safe!
-
Final Fight Factors
Terrain: Some Final Fights require you to place additional terrain pieces on the landscape, which will be described in the setup. Their positions on the landscape will be labeled FF (for Final Fight). If there are multiple terrain pieces, they may be labeled FF1, FF2, FF3, and so on, to dictate placement order. The amount of Final Fight terrain pieces is often determined by the number of controlled townsfolk.
Townsfolk/Ruffian Abilities: Final Fights may bolster the Ruffians or townsfolk with special abilities. Be sure to keep them in mind during the fight!
-
How to Win — This section describes the necessary win conditions to defeat the Ruffian, as well as a special objective. Completing the special objective will reward you with an alternate ending to your journey, as well as bonus gear to use in future playthroughs!
-
The Results — Each Final Fight can result in 3 different endings; one if you win, one if you lose, and one if you complete the special objective. When the fight has concluded, read the corresponding results passage (starting on Pg. 22) to find your ending!
The new sheriff is granted a piece of unique gear for the Final Fight. It often holds the key to taking down the final Ruffian!
The Results
"Let's see how your tale comes to an end..."
These pages contain the final results of your journey. Only read the entry dictated by your Final Fight results!
01. From Townsfolk to Fertilizer — Strawman impales the newly appointed sheriff, replacing their spine with a wooden pole. Looks like there's a new scarecrow in town! Strawman takes his time slicing the rest of the team into mincemeat with his garden shears. On the bright side, you'll make fantastic fertilizer for the recovering landscape!
One would assume Strawman would continue his reign of terror, ripping through the rest of Eureka Springs with his trimmers and army of crows. But that wasn't the case! As it turns out, your little group of townsfolk accounted for 90% of the litter being dumped in Eureka Springs. With the sheriff and you pesky litterbugs out of the picture, Strawman decided it was time to take his stance on littering to the town hall. The surviving citizens, quite impressed by Strawman's policy on trash and clean-up, decided to elect him as the new new Sheriff. Eureka Springs will never be cleaner! Sorry, but you lose; better luck next time!
02. Norman Makes a Friend — Umbrello hovers low overhead, bloody and bruised. The new sheriff grabs him by the foot and slams him to the ground. Norman Fishboy shoves a fish straight down Umbrello's throat, sealing his fate. The town is saved! Unfortunately, that giant wave he summoned caused a bit of damage.
Eureka Springs spent the next month partially submerged in water, but no worries—they're adaptable folk. Norman Fishboy in particular made a swell time of it! The water critters from the nearby lake followed Norman around all month—they couldn't get enough of him. Once the flooding dissipated, he decided to keep one as a pet.
With the town returning back to normal, the townsfolk can rejoice in a job well done. Congratulations, you win the game!
You've unlocked Norman Fishboy's alternative starting gear! Search the secret gear deck (check under the box insert!) for Looong Eel and Fish Stick. When selecting Norman as your townsfolk in future games, you may choose to use this gear instead of his traditional starting gear.
03. Sliced in Twain — All the gear in the world couldn't protect Qing and Kween from the thrashing they received! They wrap their arms around each other, trying to defend against the bloodthirsty townsfolk. The newly appointed sheriff grabs Qing's claymore from the ground and delivers a devastating blow, cutting Qing and Kween straight down the middle. Hooray, the battle is over!
The future looks bright for Eureka Springs. You didn't just save the town after all—by taking down Qing & Kween, you saved the entire continent! Tourists flood in from all over the countryside to see the fellas who took down the Conquering Twins—as well as their corpses, which hang from separate gallows in the town square. The citizens of Eureka Springs have never felt safer with the new sheriff in charge. Thanks to their hard work and a dedication to violence, the town is safe. Congratulations, you win the game!
04. Flash Flood Failure — The townsfolk are no match for Umbrello. Your team lays defeated on the ground as water rises all around you. The last thing you see through the rain is Umbrello floating above you with a dastardly grin.
Fast forward a few weeks and Sprinkle Falls is doing great! Tourism is thriving thanks to the lakeside view (courtesy of Eureka Springs). In the center of the newly formed lake, Umbrello had a lovely little fountain installed: it's the corpse of that newly appointed sheriff, posed in a ballerina's stance. It was a valiant and violent effort by your group, but you lose!
05. Dethroning the Dairylord — The townsfolk land a fatal blow on Pepin, sending him flying backwards into a puddle of his despicable dairy. He screams in agony as his skin melts on contact with the vile fluid. Pepin howls in denial, "It's not even that bad—my milk doubles as a moisturizer, I swear!" Within seconds, all that remains of Pepin is a green pile of goop with a milkman's hat resting on top. With Pepin's milk off the streets, Eureka Springs can finally rest easy. The other townsfolk will forever remember your valiant and violent murders. Congratulations, you win the game!
06. Nothin' but Bundo Fodder — The Bundits swarm your group, pulling you beneath their grass cloak one-by-one. The first to go under is the newly-appointed sheriff. There's a muffled scream, a satisfying 'pop', then silence. The other townsfolk try to run, but it's no use; their journey ends today.
It doesn't take long before Eureka Springs becomes completely overrun by Bundos; the locals have no choice but to abandon the town to these invaders. Within a few days, The Bundits pick Eureka Springs clean of resources and move on to the next town, leaving your once thriving home a husk of what it once was. It was a valiant and violent effort by your group, but you lose!
07. Exorcised & Eviscerated — The ghosts protecting Barlow dissipate into thin air, leaving him defenseless. The townsfolk use this opportunity to surround him, grabbing him by the handles and flipping him upside down. The new sheriff plunges their weapon deep into Barlow's hull, and the rest of the townsfolk follow suit. Barlow's underside quickly turns into swiss cheese, with dirt pouring out of each new orifice. The townsfolk know the deed is done when they see Barlow's wheel go limp. Hooray, the town is saved!
In the aftermath of the Ruffian attacks, the town was left covered in carcasses. Who better to clean up the mess than the old gravedigger? The new sheriff restores Barlow's remains to be used for corpse carrying—so resourceful! Eureka Springs returns to its clean and healthy state in no time. Those who survived this nightmare will forever remember their valiant and violent murders. Congratulations, you win the game!
08. That Boy Ain't Right... — Oh no, what is that deranged boy doing? While the other townsfolk are trying to carefully sedate Waggums, Quintus charges straight at the deputy, driving his weapon straight through the poor pup. Waggums' eyes go blank, and within seconds he is chopped into tiny bits by this diabolical child. The team looks on in absolute horror, watching someone they know and love become mincemeat. Something is severely wrong with that boy—all this fighting made him more detestable than he already was...
Regardless, with all the Ruffians (and one good friend) murdered, Eureka Springs is saved! The other townsfolk will forever remember the valiant and violent deeds of the new sheriff and his cohorts. Congratulations, you win the game!
You've unlocked Quintus Binch's alternative starting gear! Search the secret gear deck (check under the box insert!) for Bloody Badge and Mugger's Bat. When selecting Quintus as your townsfolk in future games, you may choose to use this gear instead of his traditional starting gear.
09. A Death Way Overdue — Dozy stumbles slightly and the townsfolk take advantage, piling on top of him and beating him senseless. The new sheriff grabs a nearby rock and delivers the final blow to Dozy's noggin, ensuring he won't be getting back up. You see a single tear roll down his 'wife's' cheek as they run off into the distance. They must have really bonded during this scuffle. Any-who, you did it; the town was saved!
The next few weeks are rough, but Eureka Springs perseveres under the jurisdiction of the new sheriff. The Ruffians cease their attacks, and the new sheriff leads an effort to clear out all the dead bodies from town. They personally take the initiative by chopping up Dozy's corpse for easy removal—what a team player! Things are finally looking up for Eureka Springs. Congratulations, you win the game!
10. Just Back Away Slowly... — Henlo looks on in horror as her fellow townsfolk tear Bort limb from limb. You see, Henlo knows Bort—they're from the same hometown! She also knows that Bort wouldn't hurt a fly, and y'all just took part in murdering an innocent man. But in order to keep a low profile, Henlo keeps her beak shut and tiptoes away. Helping out these townsfolk has been nothing but trouble for Henlo; maybe she'll stick with the 'recluse farmer' persona from now on...
By the time the townsfolk are finished, all that remains of Bort is a bloody pile of giblets. Hooray, the town is saved! It'll be a long time coming before another Ruffian sets foot in Eureka Springs. Congratulations, you win!
You've unlocked Henlo Bulwark's alternative starting gear! Search the secret gear deck (check under the box insert!) for Covert Disguise and Sad Harvest. When selecting Henlo as your townsfolk in future games, you may choose to use this gear instead of her traditional starting gear.
11. Community, Friendship, and Potatoes — What a scene! The townsfolk are surrounded by towering flames, beating on a clearly motionless pile of hay. Samuel Strawman has been defeated! The new sheriff lights the pile of hay on fire just to be certain. Other townsfolk start to crawl out from their hiding places, but instead of joy, their faces are stricken with grief. A frail old fella known as Old Man Gooby speaks up. "What in tarnation...what have you done? Those crops were supposed to feed the town through winter! You've doomed us all to death by starvation!" As Gooby begins to tie himself a noose, the new sheriff speaks up. "Quit yer bellyachin', we'll be fine. Look!" The new sheriff digs through some ashes and reveals a delicious-looking potato—freshly baked. It seems Strawman was hiding the tasty spuds deep inside the cornfield for his own eating pleasure!
An era of peace followed that fateful day, with townsfolk from all walks of life coming together to work through this charbroiled hardship you created. Eureka Springs learned the value of community, friendship, and more importantly, the humble potato. Such a glorious achievement, and all thanks to none other than the new sheriff, along with their team of valiant (and murderous) townsfolk. Congratulations, you win!
You've unlocked new Peddler gear! Search the secret gear deck (check under the box insert!) for Banner of Unity and Surplus Spuds, then shuffle them into the Peddler deck. Keep an eye out for them in future games!
12. Debt Repaid...? — Virginia counts the mass of Coins surrounding her and her mood instantly changes. She waves to her circus crew, who are waiting in the woods nearby. "This calls for a celebration, let's put on a show!" The townsfolk are too afraid to decline; the next thing they know, circus tents are up and survivors of the chaos begin flooding in.
What a show! There are clowns juggling lost limbs and performers balancing on tightropes made from expired townsfolk intestines—what more could you want? The townsfolk forget all about the violence from the day and have a jolly good time. At the end of the show, Virginia hands the new sheriff a bill for the performance, causing them to promptly faint. She takes her leave the next day—guess she'll be back for her payment eventually. For the time being, the town is safe and sound. Congratulations, you win the game!
13. A Terrible Performance, Hands Down — Handsy proves to be too much for your group to handle. One by one, she plucks the limbs from your bodies, leaving your sausage-like corpses in the woods to decorate her nest. She rampages through the town strangling citizens with your repossessed hands. She seems to prefer using the new sheriff's hands the most—they're delicate, yet sturdy! By the time Handsy is finished, no living remains in town, and Handsy's plume is a vibrant rainbow of blood and fists. On a positive note, Eureka Springs will be written into a folktale of its own: The Town That Gave Handsy Her Feathers. It was a valiant and violent effort by your group, but you lose!
14. A Glorious Bundo Beating — The Bundo Queen is murdered, along with a gigantic pile of Bundos. You've successfully defended the town! Eureka Springs celebrates their victory with a rabbit roast. The delicious Bundo meat will provide sustenance for weeks to come, and the Bundo fur coats will surely stimulate Eureka Springs' economy! All Ruffians have been murdered, and the townsfolk of Eureka Springs celebrate their valiant and violent deeds. Congratulations, you win the game!
15. Under New Management — Penny strips you of the deed, securing it in her ledger. She grabs each townsfolk by the collar, tossing them one-by-one into her goopy, organ and Coin-filled vault body. It's a tedious and extremely painful process, but each of you are melted down by Penny's stomach acids. Eureka Springs' last hope has been vanquished!
With the deed in Penny's hands, she becomes the (un)rightful owner of Eureka Springs. She decides to take up residence in the short-lived new sheriff's home, acting as a landlord of sorts. Surviving townsfolk are subject to insanely high tax rates under Penny's ownership. It doesn't take long before the residents of Eureka Springs are forced out of their homes, or into a life of poverty. All you needed to do was protect a piece of paper—how did things go so terribly wrong? Sorry, you lose!
16. An Unwilling Sacrifice — Barlow stands above the ritual mark and his ghosts dissipate, leaving him defenseless. All the townsfolk make short work disassembling Barlow while his guard is down...all but one, that is. One lone townsfolk lays dead on the ground; the new sheriff killed one of his own comrades for the greater good! The team stands over their sacrificed friend with tear-filled eyes. A ghost slithers out of their lifeless mouth and points angrily at the new sheriff. "I'll never forget this! I'll haunt you for the rest of yo—" Foomp! While the townsfolk had their attention on the apparition, The Peddler moseyed on by and trapped the pour soul inside a jar. She must have sensed the battle drawing to an end and began looting early! Who knows what else she grabbed from Barlow...anywho, the fight is over and the town is saved!
After that day, things returned to normal in Eureka Springs. The new sheriff ordered a statue to be erected in honor of that brave townsfolk's sacrifice—bless their soul. Whatever eases your guilt-filled heart, sheriff! Your party did a fantastic job overcoming the odds, and y'all deserve a pat on the back. Congratulations, you win!
You've unlocked new Peddler gear! Search the secret gear deck (check under the box insert!) for Cursed Wand and Reluctant Ghost, then shuffle them into the Peddler deck. Keep an eye out for them in future games!
17. A Marvelous Milkman Murder — The new sheriff throws Jerry at Pepin's face and he latches on tight. Pepin falls to the ground and croaks in terror as Jerry claws his eyes out! The team concludes that Jerry has things covered, and they head over to Pepin's milk truck to make sure all of his fetid milk is properly disposed of. Before they can get inside, the Peddler scurries out, clearly hiding something behind her back. The new sheriff lets her slide; she's been a huge help and deserves her own reward—whatever that may be. The Peddler takes her leave and the team heads inside the van. They tip over the remaining jugs, ensuring the town has seen the last of Pepin's vile substance. Upon returning to the battleground, all that can be found is a single frog leg and an extremely engorged cat.
The citizens of Eureka Springs can rest easy with heroes like Jerry and the new sheriff. Your group will be honored for years to come for their valiant and violent deeds. Congratulations, you win the game!
You've unlocked new Peddler gear! Search the secret gear deck (check under the box insert!) for Charm Handbook and Secret Ingredient, then shuffle them into the Peddler deck. Keep an eye out for them in future games!
18. A Picture Perfect Defeat — Bort snaps a photo of himself in front of the Rickety Farm. "What a great trip," he exclaims, "I'll have to come back next year!" He takes one last look around and strolls out of the town, failing to notice the sad pile of townsfolk that lie crumpled across the landscape.
Life in Eureka Springs carried on as normal for most townsfolk. Not for your group, of course—you somehow died to a harmless tourist! But look on the bright side—Bort told all of his coworkers about Eureka Springs, which lead to a boom in tourism. It seems things will be fine without you. Sorry, you lose!
19. No Place for Tourists — The townsfolk surround Bort, brandishing their weapons as Bort smiles back nervously. "Howdy, any of you fellas know where I can find a bathr—" His sentence is cut short as the new sheriff delivers a devastating blow to the back of his head with their handbook. The others join in, stomping Bort into nothing but a pile of borsht. That's what happens when you come to Eureka Springs looking for trouble!
After that day, things were quiet around Eureka Springs. The town was safer than ever under the new sheriff's watchful eye, but for some reason, tourism was at an all time low. Oh well, that's an issue for another day. For the time being, Eureka Springs is safe and sound. Congratulations, you win the game!
20. Once a Sheriff, Always a Sheriff — One by one, Dozy strangles the life out of the townsfolk. He plucks the badge off of the new sheriff and tosses their corpse to the side. Looks like Dozy will be reclaiming his position as the sheriff of Eureka Springs!
It takes some time, but the surviving citizens learn to live under Dozy's strict and nonsensical rule. He sentenced nine townsfolk to death for petty crimes in his first week—but at least he forgot to follow through on three of them! It's hard to say what will come of Eureka Springs, but that's not for you to worry about...you're dead, after all. It was a valiant and violent effort, but you lose!
21. An Extremely Toasty Victory — What a scene! The townsfolk are surrounded by towering flames, beating on a clearly motionless pile of hay. Samuel Strawman has been defeated! The new sheriff lights the pile of hay on fire just to be certain. The town is...saved?
Unfortunately, the rest of the town did not approve of your 'burn everything to the ground' method. It will take months, maybe years to rebuild and regrow all those crops. The next day, the town holds an emergency meeting, where it is decided that your group is to be exiled from Eureka Springs forever. Look on the bright side—at least you won't have to deal with the famine that's sure to follow! Your little group leaves the town together, looking forward to the journey ahead. Maybe they'll visit Sprinkle Falls; they've heard decent things. Congratulations are in order; you win the game!
22. Sedated & Set Straight — The sedatives begin to take effect on Waggums. He stumbles over his front paws and the new sheriff leaps on top of him, ripping the guns from his holsters. Waggums is already fast asleep before he can be reprimanded for his accidental actions.
With things finally winding down in Eureka Springs, the townsfolk can consider their defense of the town successful. The new sheriff shows Waggums mercy for his unintentional manslaughtering by making him the new town gravedigger. Everyone wins; the townsfolk have someone to bury all these bodies, and Waggums gets to meet new people—and then bury them, of course.
The citizens of Eureka Springs can rest easy with your crew around; the survivors of this nightmarish day will forever remember your valiant and violent deeds. Congratulations, you win the game!
23. Remembering Granny's Glory Days — Granny makes a flying leap onto Dozy's head and delivers a devastating blow with her cane. He falls to the ground with a thunderous bang and the other townsfolk pile on top, ensuring he won't be getting back up. After doing her part, Granny limps to the sidelines and lets the others finish Dozy off. Her eye notices a photo that fell out of Dozy's shirt pocket in the chaos. Picking it up, she sees it's a young Dozy, posing next to an even younger Granny Melba, who is donning her old performer's outfit. Dozy must have been a fan of Melba back in the day. Granny keeps the picture for herself...she sure looked good! She wonders if she'd still fit into that outfit—maybe she'll try it on when she gets home! Anywho, with Dozy defeated, the town is safe. Surely it will remain that way under the watchful eye of the new sheriff. Congratulations, you win the game!
You've unlocked Granny Melba's alternative starting gear! Search the secret gear deck (check under the box insert!) for Performer's Corset and Performer's Baton. When selecting Melba as your townsfolk in future games, you may choose to use this gear instead of her traditional starting gear.
24. Ending a Life-Long Grudge — Yancy stands over Handsy, looking her dead in the eyes. Today, Yancy ends a lifelong feud with this nightmarish monstrosity! For years people have accused Yancy of making up stories, but Yancy never lied! His hand was stolen by Handsy, not caught in a jalopy door! Yancy winds up his makeshift wrench hand and punches Handsy's head clean off. Her body stumbles backwards and collapses into her nest. Yancy spots something in the corner of his eye—could it be? Yes, it's his long-lost hand! He grabs it and pulls out some old parchment paper, quickly scribbling some notes. "No Ruffian is gonna get the best of me, never again," Yancy murmurs to himself. He might have ended a life-long feud today, but his stubbornness and paranoia remain!
With all the Ruffians successfully murdered, Eureka Springs is safe. Your party will be honored for years to come for their valiant and violent deeds. Congratulations, you win the game!
You've unlocked Yancy Plover's alternative starting gear! Search the secret gear deck (check under the box insert!) for Manic Notes and Commanding Hand. When selecting Yancy as your townsfolk in future games, you may choose to use this gear instead of his traditional starting gear.
25. A Poor Choice of Sheriff — Humming merrily, Virginia begins to count the Coins she's been paid; it was the best part of the job after all. While the townsfolk of Eureka Springs begin to clean up the area, she notices the new sheriff idly standing by, staring into space with a finger up their nose. Virginia can't help but feel irritated at the sight of it—in her circus, any clown caught slacking off paid for that time in blood. Deciding to take matters into her own hands, Virginia makes her exit, but not before throwing one final knife straight through the new sheriff's neck. Their head falls to their feet and the other townsfolk recoil in shock. "Trust me—you're all better off," she cackles, before disappearing beyond the town limits. The townsfolk are still frozen in fear as the Peddler begins to shamelessly loot the sheriff's body of anything salvageable—head included!
All in all, the town recovers from the Ruffian ransacking. The surviving townsfolk form a neighborhood watch to keep Eureka Springs safe without a sheriff; those sheriffs seem to be prone to dying anyway. The town is safe thanks to your collective efforts, at least for the time being. Congratulations, you win the game!
You've unlocked new Peddler gear! Search the secret gear deck (check under the box insert!) for Rusted Badge and Eerie Sack, then shuffle them into the Peddler deck. Keep an eye out for them in future games!
26. Penny Pays the Ultimate Price — The new sheriff and Penny are playing tug of war with the town deed. The deed looks as though it's about to tear in two when the rest of the team comes to the rescue, driving their weapons into Penny's back. The impact sends her faceplate flying, and a plethora of entrails and knick-knacks flow out of her vault-like body. Penny collapses to the ground, and it's clear the battle is over. The townsfolk cheer in victory, while the Peddler sneakily extracts goodies from Penny's guts.
After that day, things returned to normal in Eureka Springs—normal being a tax-free, care-free lifestyle, of course. Your ragtag group of townsfolk were able to prevent the town from falling into the wrong hands, and that deserves applause. Congratulations, you win!
You've unlocked new Peddler gear! Search the secret gear deck (check under the box insert!) for Panic Button and Donor's Checkbook, then shuffle them into the Peddler deck. Keep an eye out for them in future games!
27. Six Feet Under — Barlow and his ghostly friends prove too much for your group to handle. One by one, the townsfolk are snatched up by Barlow's monstrous mitts and plunged deep into his barrow. After a few muffled screams, the dirt in the barrow settles and the team is no more.
With no one left to defend it, Barlow massacres the town with ease. He lays all his victims to rest in the old graveyard; all except for the ones that were foolish enough to oppose him. They get to accompany Barlow forever, their ghosts trapped for eternity in Barlow's barrow. With Eureka Springs becoming a literal ghost town, it's safe to say your efforts were in vain. Sorry, you lose!
28. Clothesless & Conquered — The townsfolk are left running around half-naked with no hope for victory. Qing & Kween make short work of them, leaving the landscape littered with discarded trinkets and bloody body parts. It is safe to say that Eureka Springs has been conquered by the Conquering Twins.
The town is a ramshackled mess by the time Qing & Kween finish their ransacking. They collect every Coin they can find before heading back to their throne in Biformia. The Conquering Twins deliver one final order to the remaining citizens: to have your bodies collectively sewn into a townsfolk-skin rug, which will adorn their Eureka Springs summer home. It was a valiant and violent effort, but you lose!
29. From Sheriff to Sideshow — Your team is unable to get Virginia her money! She takes her time mincing you all into teeny tiny pieces, all except the new sheriff, that is. She informs the new sheriff that it'll be their job to ensure Virginia gets her payment, one way or another. Virginia grabs them by the neck and drags them out of Eureka Springs, never to return.
After that day, the town lived peacefully. Every now and then the citizens hear news of Virginia's traveling circus and their new main attraction: The Living Pincushion! The show involves Virginia chucking a barrage of blades at some poor individual—the same one each night! They're covered in blood, but they certainly look familiar in the promotional flyer. Eureka Springs may have survived, but your journey was a failure; you lose!
30. Royal Memories — As the group is savagely ripping apart members of The Bundits, Georgie stands over the Bundo Queen. The crown on her head stirs memories long forgotten. I was royalty once, he thinks, how have I grown so primitive? Perhaps Georgie is gaining control of his senses again!
...Or perhaps not. At the moment, Georgie's mouth-gut opens wide and swallows the Bundo Queen whole. He daintily wipes the spittle from the corner of his mouth-gut—that's something! Maybe the old Georgie is in there after all.
With all the Ruffians successfully murdered, Eureka Springs is safe. The townsfolk will be honored for years to come for their valiant and violent deeds. Congratulations, you win the game!
You've unlocked Georgie Irongut's alternative starting gear! Search the secret gear deck (check under the box insert!) for Napkin Bib and Dinner Fork. When selecting Georgie as your townsfolk in future games, you may choose to use this gear instead of his traditional starting gear.
31. Bad Dog, Bad! — Waggums dives head-first into the vegetable patch, and things go quiet. Is he dead? Sleeping? The new sheriff cautiously creeps towards the vegetable patch with the other townsfolk in tow. Then, in a flash of incredible speed, Waggums leaps out from the veggies and onto the new sheriff, licking his face. Waggums' revolvers weren't as friendly, however. They send a barrage of bullets into the townsfolk, with a bullet finding each head in the vicinity. Just like that, the battle is over.
Waggums scours the town for friends, unintentionally making short work of any remaining survivors. Still hungry for attention and affection, Waggums hits the road in search of more people, leaving Eureka Springs a sad pile of corpses. It was a valiant and violent effort by your group, but you lose!
32. Crime Never Pays — The team surrounds Penny, holding her in place while the new sheriff whacks wildly at the hinges of her face. A few good smacks and her face comes unhinged. It falls to the ground with a thud, and a goopy assortment of entrails, Coins, and paperwork flow out of her. Hooray, the town is saved from the threat of death and taxes!
Eureka Springs thrived from that day forward under the watchful eyes of the new sheriff. The deed is kept safe in a display case near the town square, which is made from none other than Penny's hollowed-out corpse. It was a bloody endeavor, but you've proven your mettle and saved the day. Congratulations, you win!
33. A Prominent Parasol Pummeling — Umbrello hovers low overhead, bloody and bruised. The new sheriff grabs him by the foot and slams him to the ground, where the other townsfolk beat him mercilessly. Citizens hiding nearby peek out from their hiding spots to see a splendid rainbow hovering above your team, who are taking turns stomping on what appears to be an old rickety parasol. Jolly day, you've prevented Eureka Springs from going under! May the new sheriff enjoy the clear weather for years to come. Congratulations, you win!
34. Family Reunion — The Blopsy Twins stand over Qing and Kween with a malicious grin on their faces. The team has never seen the duo so worked up! They decide to let the twins handle it from here. Sensing the hatred radiating from the twins, Kween puts on a nervous smile and speaks up. "Come on now you two, you know your parents love you very mu-" WHACK! Before Kween can finish her sentence, the twins grab Qing's claymore from the ground and slice its owner in twain. The other townsfolk look on in terror as one twin continues to swing at the lifeless corpse and the other picks through its pockets—who knew they had hands in those shoes? Have the Blopsy Twins awakened their violent side, or was it always there?
Although it was rather unpleasant to watch, their death signifies a victory for Eureka Springs! It'll be a long time coming before another Ruffian steps foot in town with a crew like y'all protecting it. Congratulations, you win!
You've unlocked the Blopsy Twins' alternative starting gear! Search the secret gear deck (check under the box insert!) for Bloody Gem and Tag Team. When selecting the Blopsy Twins as your townsfolk in future games, you may choose to use this gear instead of their traditional starting gear.
35. Putting an End to a Legend — The team surrounds Handsy, leaving her nowhere to run. She lays weakened and defeated on the floor. The townsfolk take turns ripping the hands off her body one by one, until she is nothing but a motionless pile of feathers. The new sheriff kicks what is left of Handsy straight down the Wishing Well—excellent form! The hiding citizens look on in horror from their hiding spots, clearly in awe of your collective moxie. Eureka Springs can now rest easy with people like you in charge. Congratulations, you win the game!
36. Beaten & Bottled — Pepin incapacitates your party with ease. He melts down your bodies with his volatile milk, then quickly rebottles it as not to waste any of the precious liquid. Over the next few days, Pepin goes door-to-door in Eureka Springs, peddling that same vile dairy. Surprisingly, sales are good! Of course, there are no repeat customers; they tend to disintegrate after the first bottle. Within days, Eureka Springs is nothing but a goop-filled ghost town. It's safe to say you've been thoroughly defeated by the protein-peddling Milkfrog. It was a valiant and violent effort by your group, but you lose!
Special Objective Tracker
- Pepin Milkfrog — Secret Ingredient, Charm Handbook
- The Bundits — Napkin Bib, Dinner Fork
- Samuel Strawman — Banner of Unity, Surplus Spuds
- Umbrello — Fish Stick, Looong Eel
- Virginia Fitz — Rusted Badge, Eerie Sack
- Will Barlow — Reluctant Ghost, Cursed Wand
- Qing & Kween — Tag Team, Bloody Gem
- Deputy Waggums — Bloody Badge, Mugger's Bat
- Lawman Dozy — Bulging Corset, Tossing Baton
- Handsy — Manic Notes, Commanding Hand
- Penny Pinchetti — Panic Button, Donor's Checkbook
- Bort Dovis — Covert Disguise, Sad Harvest
Game Mode Variants
Solo Variant: Looking to play Townsfolk Tussle alone? Although it's not the intended way to explore Eureka Springs, we've got a solution for ya. For the solo variant, you control 3 townsfolk at once. All rules and setup remain the same, but secret events are removed from the Town Event deck at the start of the game.
Doublin' Down: Double the townsfolk, double the fun! In this 2-player variant, each player controls 2 townsfolk each. All rules and setup remain the same, but secret events are removed from the Town Event deck at the start of the game.
All for One, One for All (Trading Variant): With our combined loot stashes, anything is possible! In this variant, players may freely exchange gear with one another during the Town Phase. All other rules and setup remain the same. Note: this will decrease the difficulty of the game.
Random FAQs
In what order do abilities and action effects occur? Actions and abilities are reactionary; if you have an ability that is triggered by a Ruffian moving, targeting, etc., that ability happens immediately. For example, if a Ruffian would take DMG from targeting a townsfolk, that DMG is dealt before the rest of the action takes place.
Can I target myself as an 'adjacent' townsfolk? No; you are not considered adjacent to yourself, and thus cannot target yourself with abilities that require an adjacent townsfolk.
What do I do with revealed Peddler gear cards while searching for a specific type of gear? Put all revealed Peddler gear cards on the bottom of the deck. If you manage to get through all Peddler gear, the deck is reshuffled.
In what order are Feats of Mettle resolved at the end of a fight? First come, first served!
What if I run into a conflicting interaction between my gear/townsfolk and the Ruffian? You may run into a situation where two rules conflict one another. Choose a resolution that benefits the Ruffian if possible; if there is none, players may use their best judgment.
How many dice do I roll? A single D10 is used for all rolling situations. This includes Town Events, attacking, and Ruffian actions.
What happens if I land a critical hit on the Ruffian, and the attack's DMG would push the Ruffian over a breaking point? The DMG from your attack is dealt simultaneously with the critical hit bonus, so the breaking point would trigger after the crit hit bonus resolves.
Why do certain pieces of Ruffian gear have a star symbol on them? Ruffian gear marked with a star can be earned during a fight with a well-placed critical hit!
How do I measure distances for ranged weapons, targeting, etc.? ALL distances are measured in the same manner as movement: by orthogonal squares, never diagonally.
Quick Lookup
- ACC: Accuracy. Determines your chance to hit the Ruffian. (Pg.7)
- Adjacent: Any character in an orthogonal square (not diagonal) is considered adjacent. Abilities that target an adjacent townsfolk cannot target yourself.
- Attacking: You may attack with a weapon once per turn, unless otherwise stated. Pay your weapon's MOX cost, roll for accuracy, then add/subtract your townsfolk's ACC modifier. If the result is equal or greater than the weapon's ACC requirement, it's a hit! (Pg.18-19)
- Breaking Point: Marked with a symbol on the Ruffian's HP. Reaching these causes the current townsfolk's turn to end and the Ruffian immediately takes an action. (Pg.20)
- Changing Gear: Townsfolk may swap gear in a single slot (or both hands) for 2 MOX on their turn. (Pg.18)
- Characters: Refers to both townsfolk and Ruffians.
- Colliding: If the Ruffian would collide with a townsfolk, the townsfolk is pushed to the nearest adjacent square. (Pg.15)
- Counters: Some gear use counters to activate abilities. Counters placed on gear are not removed between rounds, or when the gear is unequipped. (Pg.18)
- Critical Hit: If you roll a critical hit symbol for ACC when attacking the Ruffian, this is considered a critical hit. Immediately make a roll on the Crit Hit chart and gain the corresponding bonus. (Pg.20)
- Discarding Gear: If a piece of gear is discarded, it is lost forever! It is removed from the townsfolk and returned back to the game box. (Pg.8)
- DMG: Damage. Dealing or taking DMG lowers HP.
- Empty Square: Any square that does not contain terrain, a Ruffian, or a townsfolk.
- Feats of Mettle: Valiant deeds the townsfolk can accomplish to receive a reward. They are not revealed until they are accomplished. (Pg.10)
- Features: Terrain that can be passed through. Must be inside to interact. (Pg.13)
- Final Fight: The last Ruffian encounter. Final Fight details are found on the back of each Ruffian card. (Pg.21)
- Gear Abilities: May be activated by paying the associated cost (usually MOX, but could be Coins, lowering stats, etc.). Each gear ability can be activated once per turn, unless otherwise stated. (Pg.18)
- Gear Slots: Found on the outer edges of a townsfolk card. There are 6 slots in total: 2 hand slots, a head slot, chest slot, leg slot, and accessory slot. (Pg.7)
- HP: Health. When a character's HP is reduced to 0, they are knocked out. (Pg.7)
Crit Hit!
Upon landing a critical hit on the Ruffian, roll!
- 1: Your attack sends the Ruffian into a fit of rage! Your turn ends immediately after the attack, and the Ruffian takes an action.
- 2-3: Your hit leaves the Ruffian flustered; their anger makes them predictable! Reveal the next Ruffian action.
- 4-5: You crush the Ruffian's walky-bits! Lower the Ruffian's MVMT by 1.
- 6-7: You're invigored by your hefty hit! Increase your MVMT, MOX, or ACC by 1 for the fight.
- 8: A brilliant blow! Your attack deals +1 DMG.
- 9+: Holy moly, you send bits of the Ruffian flying! Receive the Ruffian's Gear marked with a star (★) on their rewards. You may equip it immediately. If this has already been activated this fight, the attack deals +1 DMG instead.
Terrain Guide
The full set of terrain pieces used across the Ruffian landscapes: Murky Moat, Dangerous Ditch, Town Pond, Rickety Farm, Dense Woods, Overgrown Cornfield, Vegetable Patch, Doc's Hut, Wooden Fence, Hidey Haystack, Deserted Picnic, Old Jalopy, Tool Shed, Wishing Well, Buzzing Hive, Foul Outhouse, Mushroom Grove, Big Barrel, Bear Trap, Dynamite & Detonator.
Quick Play Guide
-
Each player chooses a townsfolk, receives their starting gear and 10 Coins, and places themselves on the Buyin'/Beatin' Bar.
-
Town Phase: Flip the sideboard to the Town Phase. Each townsfolk draws back up to 3 unaccomplished Feats. In the first Town Phase, simply draw 3 Feats. Each townsfolk receives and resolves a Town Event. Shop with the Peddler. Equip your gear and enter the Fight Phase.
-
Fight Phase: Flip the sideboard to the Fight Phase. Reveal the next Ruffian on the Town Map. Place their token at the top of the Beatin' Order. Place their Ruffian card and action deck onto the sideboard. Mark their HP and MVMT. Use the back of the Ruffian card to set up the terrain pieces and cards. Players position themselves and the Ruffian on the landscape. The fight begins, starting with the Ruffian's turn.
-
On Ruffian Defeat: Townsfolk may discard any unaccomplished Feats they do not want for the next round. Each townsfolk receives 6 Coins. The townsfolk who accomplished the most Feats this round receives a piece of Ruffian gear. In case of a tie, roll; highest roll earns the gear. Restore each townsfolk's stats. Only stat changes from gear should remain. Rotate the Buyin'/Beatin' Bar order. Return to the Town Phase.