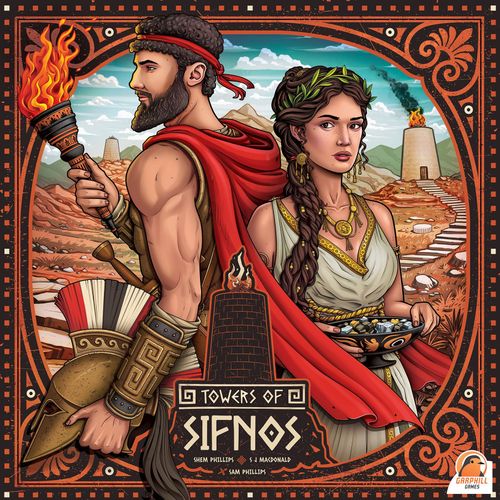
Towers of Sifnos
Towers of Sifnos Rulebook
Table of Contents
Table of Contents
- Aim of the Game
- General Components
- Player Components
- Solo Components
- Main Board Setup
- Player Board Setup
- Final Setup Steps
- Gameplay Overview
- Dice
- Influence Tracks
- Cards
- Hand Limits and Shuffling
- The Map
- Soldiers
- Actions
- Prepare
- Major Actions
- Invest
- Construct
- Beacons
- Tower Networks
- Muster
- Forts
- Defend
- Resolving an Invasion
- Determining Might
- Defend (continued)
- Workshop Dice
- Buildings
- Recoup
- Moving Ships
- Drawing Ships
- End of the Game
- Final Scoring
- Solo Setup
- Solo Gameplay Overview
- Solo Marker and Influence
- Step 1: Scheme Card
- Step 2: Defend
- Step 3: Draw Cards
- Final Scoring
- 2 Player vs Solo Rules
- Scoring Tiles
Aim of the Game
The aim of Towers of Sifnos is to be the player with the most Victory Points (VP) at the game's end. Points are primarily gained by increasing influence, and successfully defending the mining operations of the island's 3 predominant minerals: Gold, Silver, and Lead. Players track their influence over these minerals on their Player Boards. Several invasions will occur over the course of the game, granting players the opportunity to prove their proficiency and might. After each invasion, the pirates will either grow in number or much needed allied reinforcements will arrive. The game ends immediately after 3 waves of reinforcements have arrived at the island.
General Components
- 23 Ships (5 Allies, 6 Lead, 6 Silver, 6 Gold)
- 12 Influence Markers (4 Lead, 4 Silver, 4 Gold)
- 6 Mineral Markers (2 Lead, 2 Silver, 2 Gold)
- 108 Cards
- 6 Setup Aids
- 1 Bag
- 4 Player Boards
- 1 Main Board
- 1 Invasion Marker
- 8 Scoring Tiles
Player Components
In each of the 4 player colours:
- 20 Towers
- 6 Beacons
- 6 Forts
- 20 Dice
- 5 Soldiers
- 6 Tents
Solo Components
- 1 Main Board
- 1 Solo Board
- 18 Schemes
- 1 Solo Marker
Main Board Setup
Follow these steps to set up the Main Board for Towers of Sifnos:
- Place the Main Board in the centre of the play area.
- Mix the Scoring Tiles and randomly place the required number faceup onto the spaces on the right side of the Main Board. There should be 1 Scoring Tile per player, plus 1 extra. Return any excess Scoring Tiles to the box.
- Mix the 6 Mineral Markers and randomly place 1 onto each space featuring their outline on the Main Board.
- Shuffle all 108 Cards into a facedown Draw Pile at the bottom-left corner of the Main Board. Above this is a space for faceup discards to be placed.
- From the top of the Draw Pile, draw and place the required number of Cards faceup onto the spaces in the top-right corner of the Main Board. There should be 1 Card placed per player in the game.
- Mix 2 Lead, 2 Silver, and 2 Gold Ships in the Bag. From the Bag, draw and place 1 Ship onto each front-most Ship space surrounding the island. These are the spaces that feature the "any 1 Influence" icon.
- Place 1 Ally Ship (orange) into the Bag. Also place 1 of each other Ship type into the Bag for each player in the game. For example, a game with 3 players would have 1 Ally Ship, 3 Lead Ships, 3 Silver Ships, and 3 Gold Ships. If playing with fewer than 4 players, return any excess Lead, Silver, and Gold Ships to the box. Set the Bag with its Ships near the Main Board.
- Place the Invasion Marker near the Main Board.
Player Board Setup
Give each player 1 Player Board, 1 of each coloured Influence Marker, 1 Ally Ship, and all components in their chosen player colour. Follow these steps to set up each Player Board area for Towers of Sifnos:
- Place their Player Board in front of them, allowing plenty of space above for Cards to be placed.
- Stack the 3 Influence Markers on the 0 space of the Influence Track. Their order does not matter.
- Place the Ally Ship on space 7/8/9 of the Influence Track for a game with 4/3/2 players.
- Mix the 6 Forts and randomly place 1 faceup onto each outlined space on the left end of the Player Board. Do the same for the 6 Beacons.
- Place the 6 Tents and 5 Soldiers onto their outlined spaces on the right half of the Player Board. Where the Soldiers are placed is known as the "Barracks".
- Place all Dice and Towers into a Reserve nearby the Player Board.
Final Setup Steps
Follow these steps after all previous Main Board and Player Board Setup steps have been completed:
- Shuffle the 6 Setup Aids, dealing 1 to each player. If this is a 2 player game, instead deal 2 to each player.
- Each player places the indicated Dice and Towers of their dealt Setup Aids onto the specified spaces of the Main Board. Note that the Dice values and Tower images will match those printed on the Main Board.
- Randomly determine a first player. In clockwise turn order, have each player resolve their starting effects shown on the reverse side of the Setup Aids. After this, return all Setup Aids to the box.
- 1st Player: Draw 3 Cards to hand.
- 2nd Player: Draw 4 Cards to hand and move 1 Soldier up from their Barracks to their Supply (top-right corner of their Player Board).
- 3rd Player: Same as the 2nd player, but also roll 1 Die, placing it in their Workshop (the "hammer" icon in the Defend column of their Player Board).
- 4th Player: Same as the 3rd player, but drawing 6 Cards to hand instead of 4.
- 2 player games only: The 2nd player resolves the 3rd player starting effects instead.
- After this, all players mix all Towers in their Reserve facedown, and randomly place 2 faceup into their Supply.
- Each player rolls 2 Dice from their Reserve, and places them into their Supply.
Gameplay Overview
Towers of Sifnos begins with the first player taking their turn in full, followed by the next player in clockwise turn order, then the next player, and so on. Players continue taking turns in order until the game ends. On each of their turns, players carry out a number of actions in order. These actions are outlined from left to right across the top of the Player Board:
- Prepare
- Perform 2 major actions (Invest, Construct, Muster)
- Defend
- Recoup
For each action, players can carry out any number of effects shown within that action's column, in any order. Each effect may only be carried out once, and all effects are optional unless stated otherwise. In the first few turns, only the effects printed on the Player Board are available, but as the game progresses, more effects will be added as Cards are placed above.
Many effects have triggers, such as: "When placing a Fort, gain 1 Card to hand". Each effect like this can only be triggered once per action. However, 1 trigger could cause multiple effects to be resolved. For example, this effect would still only provide 1 Card, even when placing 2 Forts during the same action. But if a player had 2 of this same effect, placing 1 Fort would trigger them both, providing 2 Cards.
As seen on the Player Board above, similar effects can appear within multiple actions, such as manipulating Dice values, and discarding Cards. Rather than repeating these rules, we'll first cover some key concepts to make learning each action much easier.
Dice
Players start with 2 Dice in their Supply, and many more in their Reserve. Players seated in 3rd and 4th positions also start with 1 Die in their Workshop. Dice can also be placed onto the Main Board using the Invest action, and will eventually be added to the 6 Buildings under construction on the Player Board after the Defend action.
Any time players gain this effect, they may increase or decrease 1 Die by 1. This can only be used on Dice in a player's own Supply or Workshop. A Die of value 1 cannot be decreased to a 6, and a 6 cannot be increased to a 1.
Dice are limited. If a player was to gain a Die, and they have none in their Reserve, they do not gain a Die or any other compensation. Any time players gain a new Die, it must be rolled before being added to their Supply/Workshop.
Influence Tracks
The majority of Victory Points in the game come from the Influence Track. Many effects will allow players to gain Influence. For each Influence gained, players must move the corresponding Influence Marker 1 space to the right along the Influence Track.
Any 1 Influence. / 1 Lead Influence. / 1 Silver Influence. / 1 Gold Influence.
At certain points along the Influence Track, effects may be triggered:
- When their Influence corresponding to the Mineral Marker below the faceup Cards at the top of the Main Board reaches the third space, a player immediately takes any 1 of these remaining faceup Cards, places it above their Player Board, and gains 1 Influence of the Card's matching mineral. This follows the same rules for placing Cards as described on the next page, but without requiring the player to discard any Cards (the Card is free).
- When their Influence corresponding to the Mineral Marker above the Scoring Tiles on the Main Board reaches the fifth space, a player immediately claims 1 Scoring Tile, resolves its immediate effect, and places it above the Barracks on their Player Board. See page 28 for an explanation of all Scoring Tiles.
- When any Influence Marker reaches the space containing the Allied Ship that was placed on the Influence Track during Setup, that Ship must immediately be placed into the Bag.
The icon for end-game Victory Points represents Victory Points that are gained at the end of the game and do not allow players to move any of their Influence Markers.
Cards
Each Card has a mineral type and cost. Many effects will require a Card of a specific mineral to be discarded. In these cases, only the type is important, not the cost.
- This effect requires any 1 Card to be discarded.
- This effect requires 1 Gold Card to be discarded.
Discards should always be placed faceup on the dedicated space above the Draw Pile.
Players will also be placing Cards above their Player Board. In these cases, a cost in the form of discards must be paid. Importantly, all Cards being discarded must be of the same mineral type as the Card being placed. For example, a Silver Card with a cost of 4 would require 4 Silver Cards to be discarded.
Every time a Card is placed above a Player Board by any means, it immediately gains that player 1 Influence of the matching mineral type.
In the example here on the right, a player just placed a Lead Card with a cost of 3 to their Invest column. They would have discarded 3 Lead Cards, and gained 1 Lead Influence.
Cards must be placed above their associated action column. For future Cards added to that same column, overlay the lower Cards so that only the effects are still visible. Players may have multiples of the same Card effect. In fact, that is part of building a strong engine in the game. There is no limit to how many Cards may be placed into each column.
Any 2 Cards = any 1 Card. In every situation, players may always discard any 2 Cards in place of 1 required Card. This can be done multiple times. For example, placing a Gold Card with a cost of 2 could be paid for by discarding 3 Lead Cards, and 1 Silver Card instead of 2 Gold Cards.
Hand Limits and Shuffling
There is no hand limit. Players cannot examine their opponents' hands, but are permitted to know how many Cards they have. Should the Draw Pile ever run out, shuffle all discards to form a new Draw Pile.
The Map
The map on the Main Board is divided up into 7 uniquely coloured Provinces. There is 1 central Province, containing only 1 Region, and 6 larger Provinces, each consisting of 3 separate Regions. Each Region is surrounded by 4 Tower spaces, and neighbours 2 or more other Regions. Regions that share borders are considered to be adjacent. Borders are the black and orange patterned lines running between the various Tower spaces.
Along the shores of each larger Province are 4 Ship spaces. Throughout the game, existing Ships will move, and new Ships will be added. All Ships within each Province must fill the front-most spaces first. The front-most space is that featuring the "any 1 Influence" icon.
If a Ship enters a Province, it is placed in the front-most empty space (back of the queue). If a Ship leaves a Province, any Ships that were previously behind it should move closer to the front, filling the empty space it created.
Ships only ever move clockwise around the island. If a Ship would move into a Province that already has 4 Ships, it skips over to the next Province in its clockwise direction.
When a player gains an effect to move a Ship, they may move any chosen Ship clockwise around the island to the next Province containing an empty Ship space.
Soldiers
Players each have 5 Soldiers, most of which start in their Barracks. All players except for the 1st player also start with 1 Soldier in their Supply. Soldiers can be placed and moved across the Main Board, mostly through the Muster action, but also from other Card effects.
- This effect requires 1 Lead Card to be discarded in order to place a Soldier. Only Soldiers in a player's Supply may be placed onto the Main Board. Those in their Barracks are not yet available.
- This effect allows a player to move 1 of their Soldiers. This can either be from their Barracks to their Supply, or from 1 Region on the Main Board to an adjacent Region.
Each Region may only ever contain 1 Soldier. The exception to this is the central Region. As denoted by the iconography seen there, it may contain any number of Soldiers. Any time players gain the effect to place a Soldier, they may place them into the central Region, even if their major actions were being resolved in a different Region.
Actions
Now that we have covered a lot of the key concepts of the game, we can move on to explaining each of the actions, the first of which is Prepare.
Prepare
This is the first action to be resolved on each turn. During this action, players may pay to place a Card above their Player Board, manipulate their Dice values, and even potentially move Soldiers.
Player Board Effects
- Discard the required Cards of the matching mineral type in order to place 1 Card above the Player Board. Also remember to gain 1 Influence of the matching mineral type. See page 9 as a reminder.
- Discard any 1 Card to increase or decrease 1 Die by 1.
Card Effects
- This is the same as the Player Board effect listed above (therefore allowing players to place more than 1 Card during their Prepare action).
- Discard 1 Card of the indicated mineral type to discount the cost of placing Cards by 1 for each of the other indicated mineral types. Each discount may only be applied to 1 single Card placement.
- Discard 1 Card of the indicated mineral type to discount the cost of placing 1 Card of the same type by 2.
- Discount the cost of placing 1 Card of the indicated mineral type by 1.
- Discard any Card to increase or decrease 1 Die by 1, and move 1 Soldier.
- Increase or decrease 1 Die by 1.
It is possible through certain Card effects that a player may be permitted to place multiple Cards during their Prepare action. Just remember that any discounts gained from other effects may only be applied to 1 single Card.
Major Actions
After preparing, players may perform up to 2 of the 3 possible major actions (Invest, Construct, Muster). Regardless of which 2 they select, they may be resolved in either order. Each major action must be completed in full before proceeding to the next.
Importantly, unless specified otherwise, all effects related to the 2 selected major actions must be performed within 1 single Region. This Region is known as the "Active Region."
The illustrated examples in this section show the following:
- In the first example, the red player has first selected to Construct. This allowed them to place a Tower. Since Towers are at the intersections of Regions, rather than being contained within a single Region, they will need to define which Region they are acting in when proceeding to Invest or Muster. If they Invest, they will be able to place a Die into 1 of the Regions surrounding their newly placed Tower. However, they will only have 3 options since the top Region already contains a Die. Likewise, if they Muster, they won't be able to select either of the 2 Regions containing their opponents' Soldiers.
- In the second example, Red has just Mustered. This allowed them to place and move Soldiers, and even place a Fort in the middle Region. Their next action could be to Invest, placing a Die in their Fort, or Construct to place a Tower on any of the 4 spaces surrounding the Region (covering over existing Towers is permitted, at a cost).
Invest
The Invest action is about mining, trading, and boosting the island's economy. This is great for the inhabitants of Sifnos, but also makes it more attractive to raiding pirates.
Player Board Effects
- Discard 1 Gold Card to increase or decrease 1 Die by 1, and then the same again for another Die or the same Die.
- Place 1 Die into the Active Region. This Die must come from the Player's Supply. If there is no Fort in the Region, the Die's value must match the value printed in that Region. If there is a Fort, it may be any value.
When placing a Die on a Fort belonging to an opponent, the player must first select any 1 Card from their hand, and add it to their opponent's hand. There is a reminder of this cost to the right of the Draw Pile on the Main Board.
Each Region may only ever contain 1 Die. If there is already a Die in the Active Region, a player may not Invest there.
Card Effects
- After placing a Die on a Fort, place an available Soldier in the same Region, or in the central Region.
- After placing a Die on a Fort, move 1 Soldier. This may be from their Barracks to their Supply, or from any 1 Region to an adjacent Region (movements are never tied to the Active Region).
- After placing the first Die of any player in a Province, draw 1 Card to hand.
- After placing the first Die of any player in a Province, place an available Soldier in the same Region, or in the central Region.
- After placing the second Die of any player in a Province, draw 1 Card to hand.
- After placing the second Die of any player in a Province, move 1 Ship clockwise around the island. Remember to move Ships towards the front-most spaces if an empty space is created.
Reminder: A Province is a coloured area comprised of 3 Regions.
Construct
The Construct action is about building the Tower Network and preparing Beacons for Towers.
Player Board Effects
- Discard 1 Lead Card to ignore the required image when placing a Tower.
- Place 1 Tower on a Tower space surrounding the Active Region. Unless the above effect has been used, the Tower being placed must match the image of the selected Tower space (horse to horse, jar to jar, etc).
If there is already a Tower belonging to an opponent there, the new Tower being placed must match the existing Tower's image. Additionally, if placing on top of an opponent's Tower, the player must first select any 2 Cards from their hand, and add them to their opponent's hand. There is a reminder of this cost to the right of the Draw Pile on the Main Board.
Once a player has placed a Tower, they cannot place another Tower in that same space, even if they get covered. Placing Towers can also lead to Beacons being placed.
Beacons
Immediately after placing their fourth Tower around a Region, a player may also place a Beacon on a Tower surrounding that same Region (which may or may not be the Active Region). It does not matter if 1 or more of the 4 required Towers are covered by opposing Towers. The Beacon can be placed on any Tower not covered by any opposing Tower or an existing Beacon. It is possible that a newly placed Tower is the fourth Tower for multiple Regions. In this case, resolve each Beacon placement 1 at a time.
To place a Beacon, a player takes any 1 Beacon still on their Player Board, gains 1 Influence of the mineral shown on the selected Beacon, turns the Beacon over, and places it on the chosen Tower. When placing Beacons (and Forts), it may also reward an additional effect if it was the third Beacon/Fort removed from that column (see page 16).
In this example, the green player has planned to place a Tower on top of the purple Tower with the jar image. This will cost them a few Cards:
- They must discard 1 Lead Card to ignore the required jar image.
- They must give 2 Cards to the purple player to cover their Tower.
After paying these costs, they have successfully placed Towers on all 4 spaces surrounding the Region, allowing them to place a Beacon.
Card Effects
- If placing a Tower on top of an opponent's Tower, draw 1 Card to hand (after first giving them 2 Cards).
- If placing a Tower on top of an opponent's Tower, move 1 Soldier. This may be from their Barracks to their Supply, or from any 1 Region to an adjacent Region (movements are never tied to the Active Region).
- If placing 1 or more Beacons, move 1 Ship clockwise around the island. Remember to move Ships towards the front-most spaces if an empty space is created.
- If placing 1 or more Beacons, place an available Soldier in the Active Region or in the central Region.
- Discard 1 Card of the indicated mineral type to use a Tower network. This allows a player to place a Tower in a different Region than their Active Region.
Tower Networks
A player's Tower network is an unbroken chain of Towers connected by the black and orange Borders between Regions. Players can have multiple Tower Networks. A Tower network consists of all Towers, even if they are covered by opposing Towers.
In this example, the red player has chosen to place a Tower along the shore of the purple Province. Usually this would mean they could then Invest or Muster in 1 of the 2 adjacent Regions.
However, they have the effect available to discard a Card to use their Tower Network. Since their new Tower is adjacent to their "horse" Tower, which is adjacent to their "helmet" Tower, they can now legally Invest or Muster in 1 of the Regions surrounding those Towers instead.
Of course, each Region can still only have at most 1 Die, and 1 Soldier - so their options are still somewhat limited in certain Regions.
Muster
The Muster action is about deploying Soldiers and building Forts to better defend against the incoming invasions.
Player Board Effects
- Discard 1 Silver Card to either move up to 2 Soldiers (or the same Soldier twice), or place 1 Soldier.
- Either move 1 Soldier, place 1 Soldier, or remove 1 Soldier to place a Fort.
Forts
To place a Fort, a player must remove 1 Soldier from the Active Region to place a Fort in that same Region. The Soldier being removed is returned to the player's Barracks. The player then takes any 1 Fort still on their Player Board, resolves its printed effect, turns the Fort over, and places it in the Active Region, covering the printed Die icon there. While not often beneficial, players may legally place a Fort beneath where a Die has already been placed if they wish.
The printed Fort effects are: Gain any 1 Influence. / Draw 1 Card to Hand. / Move 1 Soldier.
When placing Forts (and Beacons), it may also reward an additional effect if it was the third Beacon/Fort removed from that column. From left to right, these effects are:
- Roll 1 Die from their Reserve, placing it in the Workshop (the "hammer" icon in the Defend column of their Player Board).
- Gain any 1 Influence.
- Move 1 Ship clockwise around the island.
- Draw 1 Card to Hand.
Also note that emptying all 4 Beacons/Forts from a row rewards 1-3 Victory Points at the end of the game.
Once placed, Forts allow Dice of any value to be placed in their Region. Each Region may only ever contain 1 Fort.
Card Effects
- Move 1 Soldier.
- Discard any 1 Card to move 1 Soldier.
- Discard 1 Card of the indicated mineral type to place 1 Soldier.
- Discard 1 Card of the indicated mineral type to move 1 Ship clockwise around the island. Remember to move Ships towards the front-most spaces if an empty space is created.
- If placing a Fort, draw 1 Card to hand.
- If placing a Fort, move 1 Ship clockwise around the island. Remember to move Ships towards the front-most spaces if an empty space is created.
Important Reminders for Soldiers:
- Each Region may only ever contain 1 Soldier. The exception to this is the central Region. As denoted by the iconography seen there, it may contain any number of Soldiers.
- Any time players gain the effect to place a Soldier, they may place them in their Active Region or in the central Region.
- Each Soldier movement may be from a player's Barracks to their Supply, or from any 1 Region to an adjacent Region (movements are never tied to the Active Region). If multiple movements are gained, these options can be taken in any combination.
Pushing out opposing Soldiers
While each Region may only contain 1 Soldier, it is possible to push out opposing Soldiers.
To move a Soldier into an adjacent Region containing an opposing Soldier, a player must first select any 1 Card from their hand, and add it to their opponent's hand. After doing so, both their Soldier, and the opposing Soldier are returned to their respective Barracks. There is a reminder of this cost to the right of the Draw Pile on the Main Board.
Importantly, this effect is only permitted when moving Soldiers, not when placing them. If there is already a Soldier in a Region, no other Soldiers of any players may be placed there.
Defend
This action is about defending against the invading Ships, and reaping the rewards of previous investments to build various structures on Sifnos.
Player Board Effects
- This is the Workshop, which holds Dice that will be placed to construct Buildings at the end of the Defend action.
- This is a reminder to resolve an invasion if there are 3 Dice in a single Province.
Resolving an Invasion
If after completing Major Actions, there are now 3 Dice in a single Province, an invasion must be resolved. The invasion steps are:
- Place the Invasion Marker nearby the Province as a reminder.
- The player with the most Influence of the mineral type corresponding to the Mineral Marker in the bottom-right corner of the Main Board may move 1 Soldier, following the usual rules. If 1 or more players are tied for the most Influence, no player gains this benefit.
- The player with the most Might in the Province gains 1 Influence per Ship in the Province of the corresponding mineral types, and any benefits visible in empty Ship spaces of that Province (gaining any 1 Influence if there are no Ships, plus drawing 1 Card to hand if there are fewer than 3 Ships). They must also return all their Soldiers in the Province to their Barracks.
- All other players draw 1 Card to hand per Tower they have in the Province not covered by opposing Towers, and 1 Card to hand per Tent they have in the Province. Any Soldiers they have in the Province remain where they are.
- All Dice in the Province are placed into the Workshops of their respective owners, maintaining their values.
Determining Might
Dice, Towers, Forts, and Tents all provide 1 Might, while Soldiers provide 2 Might. The downside to Soldiers is that their presence on the map is temporary. If 1 or more players are tied for the most Might, the player whose next turn will come earlier wins the tie (the player who has been waiting the longest since their last turn).
Only Towers not covered by other Towers count for Might. Covered Towers have no benefit during invasions.
In this example, each player has the following Might:
- Green (7):
- 4 from their Towers (their Beacon does not add any extra Might).
- 2 from their Soldier.
- 1 from their Die.
- 0 from their covered Tower.
- Red (4):
- 2 from their Soldier.
- 1 from their Tent.
- 1 from their Fort (under the purple Die).
- 0 from their covered Tower.
- 0 from their other Tower and Soldier, as they are not in the Province being resolved.
- Blue (2):
- 1 from their Tower.
- 1 from their Die.
- Purple (2):
- 1 from their Tower.
- 1 from their Die.
- 0 from their covered Tower.
With the most Might, the green player gains 1 Gold Influence, and 1 Lead Influence from the 2 Ships in the Province. They also draw 1 Card to hand from the empty Ship space. They must return their Soldier to their Barracks, and place their Die in their Workshop, maintaining its value of 4.
Red draws 1 Card to hand due to their Tent, and their Soldier remains in its Region.
Blue and Purple each draw 1 Card to hand due to their Towers, and they each place their Die in their Workshop, maintaining their values.
Defend (continued)
Card Effects
Cards placed into the Defend column act differently than those in other action columns. Rather than providing a new effect that can be resolved during each Defend action, they instead allow a player to immediately place a Tent into the specified Province. This is a one-time effect that happens when the Card is first placed above the Player Board.
- To place a Tent, take the left-most Tent from the Player Board, and place it anywhere within the indicated Province. Which Region it is in within that Province has no impact. Each Province may have any number of Tents.
Workshop Dice
After all invasion steps have been completed, or if there was no invasion, the current player must place any Dice from their Workshop onto their Buildings. It is possible for a player to gain Workshop Dice on another player's turn. That player must place these Dice into their Workshop to be resolved on their next turn.
Buildings
There are 6 different Buildings where Workshop Dice can be placed. Each has their own unique restrictions, and available effects when placing Dice. However, they all follow 1 common placement rule: Dice must be placed on the lower spaces before those above. There are arrows below the lowest Dice spaces as a reminder.
- The Gate requires that all 6 Dice have unique values. There are 2 sides to the Gate, and each side is built up independently. Once the final Die has been placed, an additional 2 Gold Influence is rewarded.
- The Storehouse can have any values placed, but will reward either 1 or 2 Influence depending on the total sum of all 4 Dice once placed. When gaining 2 Influence, they can be of 1 mineral or 2 different.
- The Columns consist of 3 independent Column structures which each require a total sum of 7 across their 2 Dice. When the first Column is completed, gain 1 Influence of the corresponding mineral. When the second Column is completed, gain 2 Influence of that mineral, and 3 Influence for the third Column.
- The Temple requires that Dice on the lower levels are higher in value than those placed above. The Dice on the higher levels can only be placed when both Dice below them have been placed.
- The Obelisk requires that all 5 Dice are of the same value. Only once both bottom Dice have been placed can the third Die be placed.
- The Theatre requires that all adjacent Dice are exactly 1 higher or 1 lower in value than each other. For example, a 4 can only have 3's or 5's placed adjacent to it.
Recoup
The final action of each player's turn is to Recoup. This allows players to draw new Cards to hand, and replenish their supply of Dice and Towers for their next turn.
Player Board Effects
- Draw back up to 2 Dice and 2 Towers, and draw 2 Cards to hand.
- If there was an invasion, move all Ships from that Province and draw a new Ship from the Bag. After this, remove the Invasion Marker from that Province, keeping it near the Main Board.
Moving Ships
When moving Ships during Recoup, first move the Ship that is furthest back in its queue to the next Province in a clockwise direction around the island. Then move the next back-most Ship to the Province after that (skipping the Province where the first Ship was moved to). Then move the next back-most Ship to the Province after that, and so on. In this way, each of the Ships from the invaded Province will move to a different Province. However, it is possible for 1 of the Ships being moved to return back to the Province that it came from.
See page 10 for a reminder of other basic Ship movement rules.
The example shows how the 4 Ships from the purple Province would be moved after an invasion:
- The Lead Ship at the back moves to the next Province.
- The back-most Silver Ship would move to the Province after that, but it already has 4 Ships, so it skips to the next Province.
- The Gold Ship moves to the Province clockwise from where the Silver Ship was just placed.
- The front-most Silver Ship ends up moving to the Province behind where it came from (it almost sailed around the entire island).
Drawing Ships
After all Ships have moved, draw 1 Ship randomly from the Bag. If this is a Lead, Silver, or Gold Ship, place it into the front-most empty space of the Province that was just invaded. If it is an Allied Ship (orange), place it into the left-most empty space in the top-left corner of the Main Board and resolve its placement effect.
- When the first Allied Ship is placed, all players draw 1 Card to hand per 2 Influence that they have of the indicated mineral (rounded down).
- When the second Allied Ship is placed, all players draw 1 Card to hand per 3 Influence that they have of the indicated mineral (rounded down).
- When the third Allied Ship is placed, the game immediately ends.
In the rare case that a Ship needs to be drawn but there are none left in the Bag, the game immediately ends. In this case no players are awarded the indicated VP from the space where the third Allied Ship would have been placed.
Card Effects
- Discard 1 Card of the indicated mineral type to draw 2 Cards to hand. It is permitted to Draw Cards from other effects first, and then discard 1 of those Cards to use this effect.
- Draw 1 Card to hand.
- Draw back up to 1 additional Die.
- Draw back up to 1 additional Tower.
Card effects that increase how many Dice or Towers a player draws are essentially increasing the hand size for these components. Having multiples of these effects will each increase that hand size by 1.
End of the Game
The game ends immediately when either the third Allied Ship is added to the Main Board, or when a Ship needs to be drawn while the Bag is empty. There are no additional turns after this.
Before final scoring, all players return any Dice on the map that are on top of their own Forts, and place them into their Workshops. Then, proceeding clockwise from the player that ended the game, players place any Dice in their Workshops onto Buildings following the normal rules. Any Dice not on Forts, or on opposing Forts, remain there.
Final Scoring
Players add up their scores for the following:
- If the third Allied Ship was revealed, the player with the most Influence of the indicated mineral gains 4VP, and the player with the second-most gains 2VP.
- If 2 players are tied for the most Influence, they each gain 3VP, and no second place is awarded.
- If 3 or 4 players are tied for the most, they each gain 2VP, and no second place is awarded.
- If 2 or more players are tied for second place, they each gain 1VP.
- In games with only 2 players, second place is only awarded if they are within 4 Influence of the player with the most influence. For example, if the player with the most had 17 Influence, the other player would need to have a minimum of 13 Influence to claim 2VP for being second place.
- VP equal to their Influence in each of the 3 minerals.
- VP from rows of Forts/Beacons on their Player Board that have been emptied.
- VP from placed Tents (1VP per every 2 placed).
- VP from their Scoring Tile, if applicable. See page 28 for an explanation of all Scoring Tiles.
- 1VP per set of 4 Cards in hand and/or Soldiers on the Main Board.
The player with the most Victory Points is the winner! If tied, the tied player whose next turn would have come earlier is declared the winner (the player who has been waiting the longest since their last turn).
Solo Setup
Set up the solo game of Towers of Sifnos as you would for a 2 player game. Assign your opponent a player colour, giving them all components in that colour. Follow these steps to set up your opponent's play area:
- Give your opponent the Solo Board instead of a Player Board. Place the Solo Marker on the top-left space of its Track.
- Stack their 3 Influence Markers on the 0 space of the Influence Track. Their order does not matter.
- Shuffle their Schemes, separating them into 3 facedown Decks of 6 Cards each. Place these to the left of the Solo Board. On top of the 2 left Decks place an Allied Ship. The Deck without an Allied Ship is their Active Deck.
- Place their Forts and Beacons facedown near the Solo Board.
- Place their Tents, Soldiers, Dice and Towers (faceup) near the Solo Board.
After dealing yourself 2 Setup Aids, give the other 4 to your opponent. Place their 4 Dice and 4 Towers as indicated by their Setup Aids, just as you would for yourself. When placing your opponent's Dice, their values do not matter (during Setup and while playing).
You are the first player, and therefore draw 3 Cards to hand. Your opponent gains no benefits from the Setup Aids for being the second player.
Solo Gameplay Overview
Your turns function exactly the same as in the multiplayer game, with 1 minor change: any time you would need to place a Card into your opponent's hand, you instead discard the Card, and move their Solo Marker 1 space clockwise around its Track. Likewise, any time your opponent would need to place Cards into your hand, you instead draw the required Cards from the top of the Draw Pile (their Solo Marker does not move).
Your opponent's turns are driven by their Schemes. As reminded on the Solo Board, each turn they will carry out 3 steps:
- Reveal and resolve 1 Scheme.
- Defend if needed.
- Draw 2 Cards (they move the Solo Marker 2 spaces clockwise around its Track rather than drawing Cards).
Solo Marker and Influence
The Solo Marker moves clockwise around its Track any time your opponent would have gained a Card, or when granted the effect to move a Soldier. When the Solo Marker reaches a corner space, it gains the corresponding Influence, moving that Influence Marker clockwise along the Influence Track of the Solo Board.
Spaces 3 and 5 of the Influence Track function just as they do for you. When your opponent would gain 1 of the faceup Cards from the Main Board, they discard the left Card if their Solo Marker is on the left half of its Track, or the right Card if on the right half. They also gain 1 Influence of the discarded Card's mineral type.
When your opponent would gain 1 of the Scoring Tiles, they use the vertical position of their Solo Marker in a similar way. If all 3 Scoring Tiles are available, they take the top Scoring Tile if their Solo Marker is in 1 of the top spaces, the bottom Scoring Tile if it is in 1 of the bottom spaces, or the middle Scoring Tile if it is in 1 of the middle 4 spaces. If there are only 2 Scoring Tiles, they take the top Scoring Tile if their Solo Marker is in the top half of its Track, and the bottom Scoring Tile if in the bottom half.
Your opponent ignores all icons on Scoring Tiles. Place their collected Scoring Tile facedown near the Solo Board. This will be worth 6VP for them at the game's end.
Any time your opponent gains this effect, move their Influence Marker corresponding to the mineral shown beneath where the third Ally Ship would be placed on the Main Board (the mineral that scores 4/2VP).
They can gain this effect from the Solo Marker's Track, empty Ship spaces during invasions, placing Forts featuring the icon, and from some of their Schemes.
If an Influence Marker returns to the 0 space, do not advance it any further. Its value is 20, and it cannot exceed this.
Step 1: Scheme Card
At the start of their turns, your opponent reveals 1 Scheme from their Active Deck. If their Active Deck is empty, place the Allied Ship from 1 of their remaining Decks into the Bag. This Deck is now their new Active Deck. If all Schemes are in their Discard Pile, shuffle them to form a new Active Deck. Each Scheme has a map reference depicting 3 possible Active Regions. Some also feature a priority for placing Towers. To determine the Active Region, first check if both main effects can be resolved in the Region marked with an "A". If that is not possible, check "B", and then "C". If they cannot resolve both effects in "C", reveal a new Scheme. Keep doing so until they reveal a Scheme that they can resolve.
Reasons for not being able to resolve both main effects include not being able to place the required Die, Tower, Soldier, or Fort.
Bonus Effect
After resolving both main effects, resolve the bonus effect if able.
- They will always resolve bonus effects that do not have any special clauses, such as this.
- They will only resolve these bonus effects after the first Allied Ship has been revealed.
- They will only resolve these bonus effects after the first 2 Allied Ships have been revealed.
Dice
To place a Die, take a Die from their Supply and place it into the Active Region. Its value does not matter. If that Region contained your Fort, draw 1 Card from the top of the Draw Pile.
Towers
To place a Tower, first determine where it will be placed. They will always prioritise placing where there is no Tower over where you have a Tower. They must also always match the Tower's image (once they have placed 4 "jars" they will place no more). If there are still multiple options, use the number priorities pictured around the Active Region, favouring lower numbers over higher. If they cover your Tower, draw 2 Cards from the top of the Draw Pile.
Beacons
To place a Beacon, select 1 from their Supply at random and reveal it. They gain the depicted Influence. Turn it back facedown, and place it on 1 of their Towers surrounding the Region using the priority numbers. Note that this won't necessarily be the Active Region. If there is any doubt, just place it on the Tower that caused the Beacon to be placed. If they gain more than 1 Beacon, resolve 1 at a time as normal.
Soldiers
To place a Soldier, take 1 from their Supply and place it into the Active Region. They never place Soldiers in the central Region, and they do not move Soldiers.
Forts
To place a Fort, select 1 from their Supply at random and reveal it. They gain the depicted effect. Turn it back facedown and place it into the Active Region.
Tents
To place a Tent, take 1 from their Supply and place it into the Province of the Active Region.
Step 2: Defend
If an invasion needs to be resolved on their turn, follow all the usual steps. If they gain the Soldier movement due to having the most Influence of the corresponding mineral, they advance their Solo Marker around its Track 1 space instead. Do the same for any Cards they would gain during the invasion. They gain Influence per Ship just as a player would.
Workshop Dice gained during invasions should be placed in the middle of their Solo Board. After all invasion steps have been completed, or if there was no invasion, return any Workshop Dice to their Supply. They gain 1 Influence for each Workshop Die they return. When doing so, they always increase their lowest Influence. If 2 or more Influence Tokens are on the same space, increase the Influence Token that is on the top of the stack. Resolve each Influence gained 1 at a time, always increasing the current lowest.
Step 3: Draw Cards
During this move, the Solo Marker moves 2 spaces clockwise around its Track to represent them drawing 2 Cards.
Final Scoring
Your opponent scores for the following:
- If the third Allied Ship was revealed, the player/solo opponent with the most Influence of the indicated mineral gains 4VP. The player/solo opponent with the second-most gains 2VP if they are within 4 Influence of the player with the most. If both are tied for the most, they each gain 3VP.
- VP equal to their Influence in each of the 3 minerals.
- 6VP if they have a Scoring Tile.
- 1VP if they have 4-5 Soldiers on the Main Board.
Ties are broken in the same way as the multiplayer game.
2 Player vs Solo Rules
The solo opponent can also be incorporated into a 2 player game to add more competition on the map.
Setup Changes
Set up the faceup Cards and Scoring Tiles on the Main Board as for a 2 player game, but set up the Bag as for a 3 player game (10 Ships in total). Do not give the solo opponent the Solo Board, Solo Marker, or its 3 Influence Markers. Set up their Schemes into only 2 Decks with 9 Cards each, placing 1 Ally Ship on top of 1 Deck. Leave the solo opponent's Tents in the box. Both players and the solo opponent gain 2 Setup Aids to determine their starting Dice and Towers. The 2nd player gains the 2nd player starting effects instead of the 3rd player effects. The solo opponent is the 3rd player, but still gains no starting effects.
Gameplay Changes
The solo opponent's turns function as in the solo game, but they no longer gain Cards (moving their Solo Marker). Placing Dice on their Forts, covering their Towers, and pushing out their Soldiers still requires players to discard Cards, and players still draw Cards when the solo opponent does the same to them. The solo opponent does not gain Influence or score Victory Points. They are purely in the game to compete for the most Might during each invasion, denying both players in some situations. Lastly, ignore all bonus effects on Schemes.
Scoring Tiles
- Immediate: Draw 1 Card to hand. Scoring: Gain 1VP per 3 of the Influence of which you have the most (rounded down).
- Immediate: Gain any 1 Influence. Scoring: Gain 1VP per 2 of the Influence of which you have the least (rounded down).
- Immediate: Place 1 Tent in any Province. Scoring: Gain 1VP per Tent you have placed.
- Immediate: Place 1 Fort in any Region not already containing a Fort. Scoring: Gain 1VP per Fort you have placed.
- Immediate: Place 1 Card from your hand above your Player Board at no cost (still gaining 1 Influence). Scoring: Gain 1VP per every 2 Cards above your Player Board (rounded down).
- Immediate: Place 1 Beacon on any of your uncovered Towers that does not already have a Beacon. Scoring: Gain 1VP per Beacon you have placed.
- Immediate: Place 1 Soldier in any Region not already containing a Soldier. Scoring: Gain 1VP per Province connected via 1 of your Tower Networks.
- Immediate: Roll 1 Die from your Reserve, and place it in your Workshop. Scoring: Gain 2VP per completed Building (those with all Dice placed).