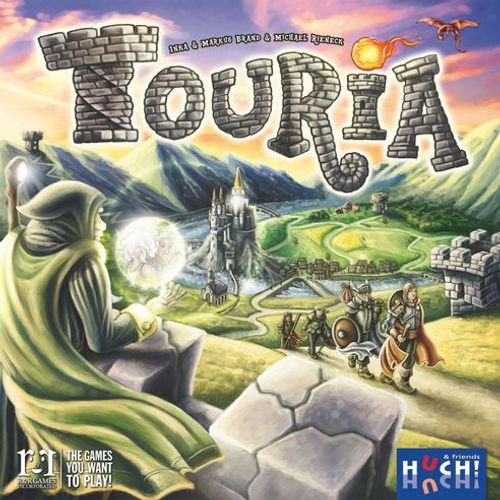
Touria
Touria Rulebook
Table of Contents
Table of Contents
Game Components
- 1 gameboard
- 4 towers (to be assembled before the first game)
- 4 screens
- 9 castle doors
- 1 heroes' group
- 4 elixirs
- 16 magical items
- 16 swords
- 32 hearts
- 4 crests in player colors
- 37 gold coins (in values of "1" and "3")
- 18 trader orders
- 65 gems in 6 colors (20x black, 10x blue, 10x red, 10x green, 10x yellow, and 5x purple)
- 1 color die with the 6 gem colors
- 1 cloth bag
- 1 information banner
- 2 supplementary sheets
- 4 overviews
You're about to experience an adventure in the country of the Dancing Towers. If you like, you can already start out at this point and meet the primary and secondary characters of this story. They are happy to tell you something about themselves. Their stories will help you to better memorize their functions in the game. However, you can also just read the upper part of the instructions.
Tara & Talan (the princess and the prince):
- "Father never lets us leave the house! How wonderful it would be if finally a hero came and asked for my hand!"
- "I want a wife who has traveled all over Touria. She has to tell me everything!"
- "He should have experienced adventures: fighting dragons, winning jousts…"
- "She would bring gifts even from the farthest regions of the empire."
- "Ah, yes, gems and magnificent jewelry as a sign of true love."
Set-up
Place the gameboard in the middle of the table. It shows Touria with its different locations that are connected by a road network. In the center lies the castle, where the royal family lives.
Note: Players should be seated around the table according to the four cardinal directions, each on one side. If this is not possible, rotate either the 4 towers or the gameboard in such a way that one player is clearly facing one side of each tower.
Distribute the 4 towers onto the 4 tower spaces in the corners of the gameboard, each of them with the starting orientation as indicated on the board.
Mix the 9 castle doors face down – and randomly distribute them – with the door side up – onto the 9 door spaces in the castle. Place the heroes' group in the castle.
Shuffle the 16 magical items and put them as a face-down stack on the marked space between the forest and the river on the gameboard. Place the two top tiles face up on the two appropriate spaces next to the forest fairy. These are the magical items that the forest fairy currently can give away to the heroes.
Sort the trader orders into 3 separate stacks (differentiated by the back of the tiles) according to the number of gems required, and shuffle these stacks. Then place each of the stacks face down on its designated space next to the trader. After that, reveal the top tile. These are the 3 current trader orders.
Place the overviews next to the board, if needed; they explain the course of a game turn and the abilities of the magical items.
Roll the color die and place it – with the rolled color facing up – on the appropriate space next to the goldsmith.
The gold coins form a separate supply next to the gameboard. The same applies to the hearts and the swords.
Fill the cloth bag with the 65 gems. Then draw 2 gems for each of the 6 gem mines on the gameboard and put them on the appropriate mine space.
ATTENTION! Any combination of gems in the mines is allowed – with one important exception: At no time may there be 2 black gems in the same mine! Black gems are considered to be cursed in Touria. If, after drawing the gems from the bag, 2 black gems end up in the same mine, draw 2 new gems and then throw the two black ones back into the bag. This also applies during the game.
Each player takes 1 screen and the corresponding crest of his choice, 1 elixir, and 3 gold coins as seed capital.
The player who most wants to get married (or most recently got married) becomes the starting player. Beginning with the player to the right of the starting player, each player picks one starting bonus; they can choose among any one gem from the bag (but not a purple one), a gold coin and a sword. Note: The back side of the information banner lists all the things that can be chosen. The starting player doesn't get any bonus, but begins the game.
The King: "It's high time that the children marry. I don't mind if they dream of heroic deeds. The important thing is that the soon-to-be son-in-law and daughter-in-law bring a respectable dowry with them – none of these drifters is allowed access to the castle without gold."
Trader: "In former times, I was a miner, spending my days in the mines of Touria. But fortunately, those times are over. You just get too many cursed gems. Meanwhile, I can afford sitting in my warm chamber and waiting for gem suppliers. As to what I pay good money for, please refer to the notices in front of my store."
Goldsmith: "Gems from Touria's mines – that's all well and good, but every child knows that you win the royal heart only with brilliantly set pieces of jewelry. And when the courting heroes visit me, they come to the right place: Nobody can resist my tiaras, necklaces and rings. But in a pinch, I would also buy one or the other little gem."
Finnia, the Fountain Fairy: "Touria's mines are famous for their resources, but not every gem makes you happy. And as you know, it is forbidden to carry cursed gems into the royal castle. Therefore, you'd better come to me and throw the black gems into the fountain, from where the evil magic can't escape."
Object of the Game
The object of the game is to ask for the hand of the princess or the prince. But in order to be allowed to go down the aisle, you have to meet the following conditions:
- You need to have at least 7 hearts (as a sign of your love for the princess or prince).
- You need to have at least 7 gold coins (for the king).
- You must not have any black gem (cursed gems may not be brought into the castle!).
If you fulfill all these conditions, you may return to the castle. But all this does not secure you the win yet. For this, you need to also find the object of your desire. The royal brother and sister are hidden behind one of the 9 castle doors (see "End of the Game").
Note: In order to become familiar with the mechanisms of play, we advise you to play an abbreviated first game. In this game, it will suffice to return to the castle with 5 (instead of 7) hearts and 5 (instead of 7) gold coins. The other rules remain unchanged. As a reminder, you can put the information banner with the applicable note on the castle. After you have played one or two games this way, you should be able to play Touria with the normal winning conditions within the suggested time of about one hour.
Thief: "Grrr, it's not easy to be an upstanding thief. Just because we know how you get hold of gems for free, that does not mean that any random wannabe hero is allowed to pinch stuff from us. Darn it! Do they really believe we aren't aware of this only because they don't grab all treasures at once? We lose every third gem to these pilferers. We are not a self-service shop, after all! If this continues the way it's going, our den of thieves will soon no longer be just a cover, but will have to sustain the whole gang."
Fernia, the Forest Fairy: "Hello, here they are again, the heroes! Of course, it's much safer to sail into the harbor of marriage with the help of magic. What would you like this time? Seven-league boots? A magical paintbrush? Or maybe a magical compass? Pick a magical item. It's free!"
General Course of the Game
All players, in turn, move the same figure, that is, the heroes' group. They execute their turns in clockwise order. The starting player begins.
On your turn, you carry out exactly one Tower action. The Tower actions are depicted on the sides of the towers and show which action you may perform on the corresponding location space. You always have exactly one action from each of the 4 towers at your disposal, namely the one that is facing you.
So you normally have the choice among 4 actions (one per tower) and have to pick one of them. There are 8 different actions overall, spread among the 16 tower sides. Each action appears once on 2 towers. This means that you sometimes can choose only from 3 different actions (but always at least 2 different ones), if 2 towers with the same action point in your direction.
The Tower action automatically determines the location on the gameboard to which you have to move the heroes' group. There is exactly one destination for each Tower action (exception: the wizard's observatory).
First, you announce which of the actions you choose from the ones visible to you. For example: "I'm going to the trader."
After that, you have to rotate the respective tower counter-clockwise 90 degrees. With this, you automatically change the Tower actions for this tower, i.e., the actions that the other players see and that are currently available to them on this tower.
After you have turned the tower, your actual game turn follows. Now you must move the heroes' group to the location space that is associated with the Tower action. The following movement rules apply:
- You move the heroes' group along the roads from one location to another.
- You may move the heroes' group 0 to 3 spaces for free. Every additional step costs 1 gold coin per step, to be put into the supply.
Example: It costs 1 gold coin to move the heroes' group from the Dragon to the Goldsmith, since it moves 4 spaces.
- The castle counts as a normal location space and may be passed through during the game (see example above). Any black gem that you have behind your screen doesn't keep you from crossing the castle courtyard, but you may not bring any into the castle at the end of the game.
- You must reach the destination space that you have determined by choosing a certain Tower action. You may not end your turn anywhere else; that means, you may never land on a hexagonal road space: gem mine, bridge space to the magical tournament grounds, castle courtyard.
- Which roads to use is left to you. You do not have to choose the shortest way.
- Each road may be used only once per game turn. So you may not move back and forth between 2 spaces.
- You can decide not to move if one of the towers shows the location where the heroes' group is already standing. In this case, you rotate the tower one more time and carry out the action on the location space without moving. (However, you are also allowed to take a circular route in order to collect gems along the way – but not just to a mine and back on the same route.)
On your arrival at your destination, you may carry out the respective action of that location once. This action is optional – you may carry it out, but you don't have to.
If you pass through a gem mine on the way to your destination, you have to collect the gems there. Two different cases can occur:
- There are one black gem and one gem of another color in the gem mine. You have to take both gems and put them behind your screen.
- There are 1 or 2 colored gems in the gem mine, but no black one. You take 1 gem from the mine and put it behind your screen. If there are 2 gems in the mine, you may choose which one to take.
Important: You collect the gems in passing. If this entails that a mine is emptied, draw 2 new gems from the bag right after you leave the mine, and put them in the mine. Here, too, the rule applies that there may not be 2 black gems in one mine; if need be, you have to draw again.
The Tower actions are explained on the enclosed supplementary sheet, which may be used as a player aid during the first rounds of the game.
Wizard: "I can help traveling heroes – for a small contribution, of course. If you stop by my observatory in the tower, I can convey you to any location in Touria in next to no time – even to the magical tournament grounds, whose guard I am. You find it only if you assure yourselves of my support. Equip yourselves with weapons from the sword master. Be victorious at the magical tournament grounds and you'll capture any royal heart in the country."
Sword Master: "My swords are the best in all Touria. It goes without saying that they are perfectly suited for fighting – you can put them to the test at the magical tournament grounds. But in addition, they have very special abilities beyond that. Try it out when you get to the towers – my swords make them dance. And I have heard that even the dragon in the Northern Mountains likes my blades – he is said to have an entire collection of them."
Additional Rules
The purple gems
The purple gems have a special ability. They are very rare, though. If you give up a purple gem into the bag, you may use the action at the location you just went to twice (instead of only once). If you visited the sword master, for example, you would get 4 swords; the fountain fairy would allow you to "dispose of" 2 black gems; the forest fairy would enable you to take 2 magical items, etc.
The elixirs
At the beginning of the game, each player has 1 elixir. He can use it to participate in another player's action.
As soon as the active player has carried out his action at his destination, all other players, in turn, have the opportunity to give an elixir to the active player. In return, they may carry out the location's action once as well (for example, also roll the die at the Dragon and gain 1 heart for a gem). This way, the elixirs can change hands multiple times during the game.
Note: Elixirs allow you to copy another player's actions, whereas purple gems enable you to double your own action. An action that has been copied by using an elixir can not be doubled with a purple gem.
The swords
There are different possibilities to use the swords:
- For giving up a sword, you can repeat the die roll at the dragon.
- If the wizard helps you to get to the magical tournament grounds, you can exchange 1 sword for 1 heart or 3 gold coins there.
- For giving up a sword, you can also rotate any tower 90 degrees counter-clockwise at the beginning of your game turn. This is a significant tactical element, since you don't have time to lose. The tower roofs always show you which action would be available next. Therefore, it might be a rewarding "investment" from time to time to spend a sword in order to bring a tower into the right position and then be able to carry out the action you want.
Dragon: "I keep asking myself who started this stupid rumor that to prove your heroism you have to fight dragons. Sheer nonsense! And a disturbance of the peace! But – in contrast to these love-crazed 'heroes' – we dragons are no fools. YOU NEED PROOF OF YOUR BRAVERY? HERE, TAKE A SCALE! JUST GIVE ME ONE GEM FOR IT! HAHAHA! I need to shed my skin anyway. So it's nice if somebody tidies up and even pays for that. What I like best, of course, are the fools who also leave their sword with me, just because I seem not to like the color of the gem they offer. Hard to believe that they fall for that bit of fire magic time and again…"
End of the Game
As soon as you have collected 7 hearts and 7 gold coins and have no black gems behind your screen, you return to the castle on your next turn. For this, you don't have to use a Tower action any more and you no longer move the heroes' group. Instead, you first place your crest in the chapel, indicating that you have left the group in order to finally get married. As proof that you have at least 7 hearts and 7 gold coins, but have no black gem left, you lift your screen. You immediately give up the 7 hearts and the 7 gold coins.
Then you may open 1 door of your choice. If you find the king's children, you win. If you open a wrong door, you have to give up a certain item, depending on the castle dweller you have revealed. If you are able to do this, you may immediately open another door. If you are not able to, your game turn ends, and you may open another door only on your next turn.
Opened doors remain open; this way, it should make it easier for heroes who arrive at the castle later on to search for the right door.
The individual castle dwellers demand the following duties:
- 1 elixir (herbalist)
- 1 sword (court marshal)
- 1 magical item (court jester)
- 1 gold coin (bursar)
- 1 yellow gem (lady's maid)
- 1 green gem (cupbearer)
- 1 red gem (bard)
- 1 blue gem (guard)
Alternative End: Sudden Marriage
If a group of players thinks that the luck element regarding the opening of the doors is too high and takes away from their achievements during the game, they can end the game earlier, as soon as one player fulfills the requirements for entering the castle. In this case, these are the only winning conditions. If you have collected 7 hearts and 7 gold coins and have no more black gems, you directly go to the altar and win the game. Of course, the introductory game, in which you play only for 5 hearts and 5 gold coins, can also end immediately as soon as the first player fulfills the conditions.
Magical Boots: "Sometimes it's also worthwhile to take a detour through the mines of Touria. You can easily recoup the costs for this by dropping off a few interesting gems for the trader, for example, or fighting for money at the magical tournament grounds."
Magical Bird: "Make it double! With my help or that of a purple gem, you can do one of your actions twice!"
Magical Frog: "Don't be afraid of cursed gems! The benefit of the good gems prevails by far when you bring them to the trader or the goldsmith. And the dragon sometimes even takes black gems. Otherwise, I'm still there for you – and, above all, so is our good fountain fairy."
Appendix
The 16 Magical Items
The magical items that you get as a present from the forest fairy can be kept behind your screen and used at the appropriate moment. After using them once, put the magical items on a face-up discard pile next to the gameboard.
- The magical rose: It counts as a heart. You keep it until you return to the castle.
- The magical paintbrush: You can use it to change the color of any gem – but not a black one, and not into purple! For instance, you can give the trader a green gem as a blue gem, etc.
- The magical compass: The active player can use it once on his turn to jump from one gem mine to any other one. This costs only one step.
- The magical scale: If you hand it to the trader, you immediately obtain 3 gold coins from the supply. You don't necessarily have to fulfill an order at the trader to be allowed to convert the scale into money.
- The magical crystal ball: You can use it to secretly look behind 2 castle doors.
- The magical helmet: You can use it at the magical tournament grounds to exchange 2 swords.
- The magical frog: You can use it to remove 1 black gem in your possession from the game without having to move to the fountain fairy for this.
- The magical chest: You can put it on the discard pile anytime during your game turn in order to take one of the two magical items that are currently on display at the forest fairy.
- The magical mirror: You can use it on your turn to copy the top magical item on the discard pile; that means you can use the ability of the last-used magical item once, too. After that, the mirror is put on the discard pile.
- The magical hourglass: If you give it up at the end of your own game turn, you may execute another complete turn; that means you have 2 turns in a row.
The Towers and Their Actions
This player-aid section is a faithful transcription of the game's official English-language supplementary sheet ("Screen_Touria_Beiblatt_Tuerme.pdf"), which explains in detail the 8 Tower actions summarized above.
Sword master: If you move the heroes' group to the sword master, you immediately get 2 swords from the supply.
Trader: If you move the heroes' group to the trader, you can fulfill one of the 3 orders on display. To this end, you put the gems indicated on the tile into the supply (bag) and take the applicable number of gold coins. Shove the completed order underneath the appropriate stack. After that, reveal the next order.
Forest fairy: If you move the heroes' group to the forest fairy, you may take one of the two magical items on display and lay it down in front of you. After that, reveal a new magical item from the stack so that the next player also can choose from 2 items. The magical abilities of the different items that the forest fairy gives to her guests are explained at the end of the instructions. If the stack is depleted, the used magical items (collected in a discard pile) are reshuffled and put out as a new draw pile.
Fountain fairy: If you move the heroes' group to the fountain fairy, you can throw 1 undesired black gem in your possession into the fountain. With this, the gem is out of the game – it is not put back into the bag, but is returned to the box.
Thief: If you move the heroes' group to the den of thieves, you may randomly draw 3 gems from the bag. You may choose 1 of them and put it behind your screen. Throw the other 2 gems back into the bag. If you happen to draw 3 black gems, you keep drawing gems from the bag until you get a colored one; put this gem behind your screen and throw the black gems back into the bag.
Dragon: If you move the heroes' group to the dragon, you can try to defeat him. To this end, you roll the color die lying next to the goldsmith. If you are able to give up (i.e., put back into the bag) a gem in the color that you have rolled, you receive 1 heart for your bravery; if you don't have any suitable gem, nothing happens. However, you can give up a sword in order to repeat the die roll. You can make multiple attempts, as long as you are able to use swords. But once you have captured one heart, your action is over.
Important: If you are lucky with your die roll(s), the dragon might even have to take one of the undesirable black gems.
After the Dragon action, you have to give the die back to the goldsmith, with the recently-rolled color facing up.
Goldsmith: If you move the heroes' group to the goldsmith, you can choose to:
- exchange any 1 gem for 1 gold coin, or
- give up 2 gems of the same color in order to receive 1 heart, or
- give up 3 gems of the same color in order to receive 2 hearts.
Put the gem(s) back into the bag and the heart(s) or the coin behind your own screen.
Note: If the 3 given-up gems are of the color that the die lying next to the goldsmith shows, you obtain even 1 more heart, that is to say, 3. But here, the improvement by the die color only applies if 3 gems are given up. If you give up 1 or 2 gems, the die has no effect.
Attention: Of course, it is not possible to have a present for the princess or the prince made using black gems. And you can't have a single black gem exchanged for a gold coin by the goldsmith either. If the die is lying next to the goldsmith with its black side facing up, you don't have any chance at this moment to gain an additional heart in return for 3 gems.
The wizard's observatory: The wizard has a special function – and, unlike the other 7 actions, you can't use him for free. If you choose him as a Tower action, you immediately have to pay 1 gold coin into the supply. In return, the wizard conjures you and the heroes' group to any location, where you carry out the associated action.
- Being conjured to a location means that the heroes' group moves directly to this location without using the roads or passing through gem mines.
- Only with the wizard can you reach the magical tournament grounds, which is also connected to the road network on the gameboard, but for the ordinary transient traveler it is invisible. Only if you use the wizard to be conjured to the magical tournament grounds can you take part in the tournament and give up 1 sword there in order to receive 1 heart. Alternatively, you may also take 3 gold coins (instead of the heart) for the sword.
- The hexagonal bridge space to the tournament grounds counts as a normal space in the road network. However, you may never end your turn there. If you have the wizard take you to the tournament grounds, you place the heroes' group directly on the round knight's space. When you leave the magical tournament grounds, you do not include the bridge in the count.