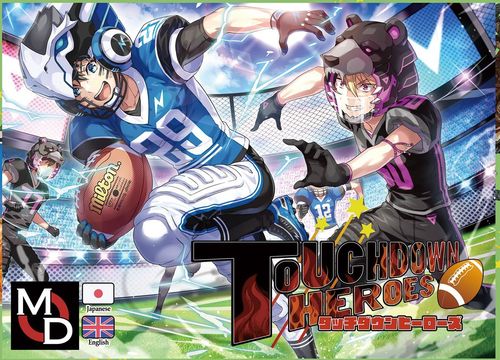
Touchdown Heroes
Touchdown Heroes Rulebook
Table of Contents
Table of Contents
Components
- Play cards: 40 cards (10 of each). Cards that conceptually represent the various plays of the game. There are four suits: Power (red), Speed (blue), Stamina (yellow) and Tactics (green). Each suit has numbers 1 to 10 (the circled numeral ①). Each number also has its own unique play-book text (②, tactical in nature).
- Hero cards: 10 cards. Players with outstanding technique. Each has a uniform number (①) and one unique skill (②).
- Field card and ball (one set). A card that schematically represents the 100-yard field, and a marker that represents the ball. The field is divided into 10 squares of 10 yards each. It tracks the current attacking team and the position of the ball. Advancing the ball to "0" (either end of the card) scores points.
- Series cards: 3 cards. These show the remaining number of attacks (downs). Each time an attack ends, turn over the series cards in order, starting from the smallest number, to show the remaining attacks. When all series cards have been turned over, the attacks are used up and possession changes (possession also changes in other situations).
- Summary cards: 16 cards (4 of each). Cards with the important rules written in simplified form. They form a set of 4, and each player is given one set. (Their printed text is not reproduced separately in this file; the rules they summarize are transcribed in full below.)
- Team cards and score marker. The two teams, the Eagles and the Bears, are represented by team cards showing which team a player belongs to. Players on the same team (including yourself) are allies; players on the other team are enemies. There are two team cards for each team. One of the two cards for each team carries a score track, and one score marker is provided. The player who is dealt a team card with a score track also keeps track of the team's score.
- Lead marker: 1. Shows the current lead (the start player).
Game Setup
This game is for 4 players only. Do not play with any other number of players.
1. Team Creation
First, the participating players sit in a circle. Teams must be formed so that turn order alternates between teams, that is, each player's teammate (partner) is the player two seats to the left. Form the teams this way.
Next, shuffle the hero cards well and deal one to each player, face up, in front of them. Remove the remaining hero cards from the game; they are not used.
The player who was dealt the hero with the lowest uniform number becomes the lead (start player). The lead takes the lead marker and receives the Eagles team card (their partner receives it too). The other team receives the Bears team card.
Both teams are given attack rights alternately; in principle, each team is given attack rights 3 times. The team that has attack rights is the attacking team; the other team is the defending team.
Using Heroes
During the game, you can use the special power of your dealt hero, called the skill. When you use a skill, turn the hero card face down and apply the skill effect (see each card's text for when it applies). A hero card that has been turned face down cannot be used again until it is turned face up again by the effect of a play-book (described later).
2. Field Setup
Place the field card in the center of the play area; this is the field. The field has two numbers, which show the distance to each team's goal. For each team, the side of the card opposite that team's icon (outside the card) is "0", and the goal lies beyond it.
Place the ball marker near the field. Also place the series cards face up near the field. Give out summary cards to each player as needed.
Game Flow
The game flow diagram of the manual shows the following sequence:
- Briefing: players show each other their hands and plan their strategy.
- Kickoff: a normal kick places the ball marker on the "8" square; a random kick places it on the square given by "1D6+3". (The diagram also shows that a successful onside kick sends possession to the other team; see below.)
- Play: one of three plays is made. A run play uses the must-follow format; a pass play uses the may-follow format; a kick play advances the ball only by 1D6.
- Possession change: possession changes when the attacks are used up (the series cards are all turned over), when an onside kick succeeds, or after a kick play (a kick play always changes possession).
- After a possession change, play returns to Play.
- When a score is made, the game returns to Kickoff (the scoring team's possession change is carried out as part of this).
- When a team runs out of cards in hand, the half ends. After the first half and the second half have each ended, the game ends.
Game Progress
This game is played as two games: the first half (前半戦) and the second half (後半戦). The teams are divided into the attacking team and the defending team. Players repeat a mini-game called a trick until their hands run out, carrying the ball toward the goal of the enemy's end of the field.
Follow the steps below to play the game.
1. Briefing
Shuffle the play cards well and deal 9 to each player as your hand. Place the remaining cards in a face-down pile (draw pile). These are basically not used, but may be used by the effect of a skill.
After checking your hand, choose 3 cards from it and pass them to your partner. After your partner has checked the cards passed to them, they return them. (Both members of each pair do this with each other.)
Translator's note: the Japanese wording of this step ("ペアは渡されたカードを確認した後、それを戻してください") is terse; it is translated literally here, as "return them", and the publisher's manual does not specify further detail.
Tip: which cards should I show during briefing?
Basically, it is best to show your strongest card (the card with the lowest number). If your suits are lopsided, it is also good to tell your partner about that.
Once you are used to the game, showing "3", "5" or "10", which have powerful play-book effects, or "7", which is convenient for adjusting numbers, widens your tactical options.
If your hand is weak and you have no card you want to show, deliberately showing a middle number to tell your partner that your hand is poor is also one method.
2. Kickoff
The kickoff is a special phase performed only at the start of the first half and the second half, and after either team scores. In it, the defending team kicks the ball toward the enemy's end of the field.
The first defending team of each game is decided in advance: it is the Bears in the first half, and the Eagles in the second half.
The defending team discusses the choice in pairs and chooses one of the following two kicks.
Normal kick. Place the ball marker on the "8" position of the attacking team's side. Normally this is used unless you are aiming for an onside kick (described below).
Random kick. Determine the distance of the kick with the die. Roll the die once, and place the ball marker on the attacking team's square "3 + the number rolled". If the roll is 1, the kick is an onside kick (success). In that case, possession changes immediately: move the lead marker to the player on the left, and proceed to the next phase. After possession changes, the ball starts at position 7 (the ball sits at position 4 under the old attacking team, and possession changes, so the position is 11 − 4 = 7).
The field diagram in the manual shows the ball moving toward the scoring end (reaching it scores), and an onside kick causing a possession change.
3. Play
The attacking team carries the ball toward the enemy's end. At this time, if a player on the defending team holds the lead marker, pass the lead marker to the player on the left (as a general rule, the lead is held by the attacking team).
The lead declares one of the following plays and it is carried out. However, if you have no cards in hand, you may only choose a kick play.
Run play (must-follow format). Carry the ball into the enemy's end. Players play cards in turn, clockwise from the lead. If you hold a card of the same suit as the card the lead played, you must play it face up. This is called "follow". If you have no card of the same suit, play a card of your choice face up and apply its play-book effect (valid for this trick only). This is called "not follow".
After everyone has played, proceed to the next phase.
Pass play (may-follow format). Throw the ball to a teammate in the enemy's territory. Players play cards in turn, clockwise from the lead, playing a card of their choice. If the card you play is of a different suit from the lead's card (not follow), apply its play-book effect (valid for this trick only).
After everyone has played, proceed to the next phase.
Kick play. Kick the ball toward the enemy's end. Roll the die once and advance the ball marker on the field by the number of squares rolled.
If the ball marker reaches beyond "0", you gain 1 point and possession changes. Turn all series cards face up and return to "2: Kickoff". If you have no cards in hand, proceed to "5: End of the first half / second half".
Even if the ball does not reach "0", possession is forcibly changed. Turn all series cards face up, move the ball to the opposite side of the field (the position "11 − the current value"), and return to "3: Play". If you have no cards in hand, proceed to "5: End of the first half / second half".
The manual's example: the die shows 4, so the ball advances 4 squares and possession changes. After the possession change, the ball is moved to the opposite side of the field.
Tip: when should I perform a kick play?
A kick play always results in a possession change, but because it moves the ball unconditionally, it is a good choice when you have used two attacks without advancing much. Also, a kick play does not consume a card from your hand, so it can be used to adjust the length of the match. It is also worth trying to end an attack with a kick play from your last remaining card, betting on an onside kick!
However, the handling differs depending on whether a score was made or not, so take care not to confuse the two.
4. Judgement Phase
The judgement method is the same for a run play (must-follow) and a pass play (may-follow).
The lowest number among the followed cards wins the trick.
Leave the cards you played face up in front of you. All of these are public information, so arrange them so that the number and suit can be seen.
Next, the player who won the trick becomes the new lead and receives the lead marker. If there are several such players, priority goes to the one farther clockwise from the lead.
Next, if the player who won the trick is on the attacking team, the attack is a "attack success"; if on the defending team, it is an "attack failure". Carry out the following processing.
Attack success
Move the ball marker on the field toward the enemy's end (the side with the smaller numbers) by the number of squares equal to the number on the card that won the trick.
At this time, if the new lead is a player of the same attacking team who was not the previous lead, a "combination bonus" occurs, and the ball advances an additional 2 squares.
After that, turn one series card face down and return to "3: Play". If all series cards have been turned face down, possession changes. Turn all series cards face up, move the ball to the opposite side of the field (the position "11 − the current value"), and return to "3: Play". If you have no cards in hand, proceed to "5: End of the first half / second half".
The manual's example: the lead plays a 4, and the other players play a 1, a 2 and a 7 (the 1 is not a card of the lead's suit). Among the followed cards, the lowest number is the 2, so player B wins the trick. The attack advances 2 squares, but the combination bonus applies (player B is a teammate of the lead, and is not the lead), so the ball advances 4 squares in total. The manual notes that when all series cards are turned face down and possession changes, the ball marker stays where it is and moves to the opposite side, and the opposing team's attack starts from there.
Touchdown
When the advancing ball marker reaches "0" (outside the card), it is a touchdown: score 2 points. If the ball overshoots "0" by even one square, score 3 points instead.
The manual's examples: from position "3", advancing 3 squares reaches "0", which scores 2 points. From position "3", advancing 4 squares reaches "−1", which scores 3 points.
After scoring, possession changes. Turn all series cards face up and return to "2: Kickoff". If you have no cards in hand, proceed to "5: End of the first half / second half".
Attack failure
The attacking team cannot advance the ball. Turn one series card face down and return to "3: Play".
If all series cards are turned face down, possession changes. If an intercept (インターセプト) has occurred through a play-book effect, possession is forced to change even if face-up series cards remain.
When possession changes, turn all series cards face up, move the ball to the opposite side of the field (the position "11 − the current value"), and return to "3: Play". If you have no cards in hand, proceed to "5: End of the first half / second half".
Moving the lead (summary)
As a general principle, the lead must always be a player of the attacking team. Therefore, if a score causes a possession change, or if an attack fails (the defending team wins the trick), the lead must be moved to the attacking team.
The manual's example: the defending team's player D has the lowest number (1) and wins the trick (an attack failure), and also takes the lead marker. If this does not cause a possession change, the attack by team AC continues. For that reason, at the start of the next play, the lead marker that D won is moved to the player on D's left, A, who becomes the new lead.
5. End of the First Half / Second Half
If your hands are empty when a possession change occurs, the first half or the second half ends. (Even with no cards in hand, if attack attempts remain, you may perform a kick play.)
When the first half ends, it is halftime. Collect all play cards and return to "1: Briefing" to begin the second half. In the second half, the Bears are the first attacking team. If a player of the Eagles was the lead at the end of the first half, move the lead to the player on the left at the start of play.
When the second half also ends, the game is over. The team that has scored more points in total wins. If the points are equal, the game is a draw.
Play-Book Effects and Hero Skills
Each play card's number has its own play-book effect (②), and each hero has one skill (②). The manual's component and FAQ pages refer to these effects, but the individual effect texts for play-book numbers 1 to 10 and for each hero's skill are printed on the cards themselves. In the source pages they appear only as small card images, which could not be read reliably, so they are not transcribed in this file. Refer to the printed cards for those texts.
The rules for when they apply are as follows. A play-book effect is applied when a card is played as not follow, that is, when its suit differs from the lead's card (in a run play, when no card of the lead's suit is held; in a pass play, when the card's suit differs from the lead's). The effect is valid for that trick only. A hero's skill is used by turning the hero card face down, at the timing given on that card. A face-down hero card can be turned face up again only by a play-book effect.
FAQ
Play-book
Q: Can the "1" effect target the "1" card played in this turn? A: Yes, it can.
Q: If the "2" effect is applied and the highest number is tied, what happens? A: As normal, priority goes to the player farther clockwise from the lead.
Q: When the "4" effect is applied and my hero card is face up (skill not used), what happens? A: The effect is not applied.
Q: If the "5" effect is already applied and another "5" play-book effect is applied, what happens? A: Nothing changes. The "5" play-book effect played later is nullified before it is applied.
Q: Even when I am on the attacking team, if I play "3", "8" or "10" with not follow, is the effect applied? A: Yes, it is applied. Any disadvantageous effect is applied if its conditions are met, so take care. Likewise, the "6" effect is applied even when on the defending team.
Q: When the attack fails due to the "3" or "10" effect, what is the new lead? A: Judge as normal; the player who won the trick becomes the new lead. In more detail, the "3" and "10" effects mean: "When the attacking team wins the trick, the attack is not a success; it is made an attack failure."
Q: Are the "6" and "8" effects applied even if the attack failed due to the "3" or "10" effect? A: Yes, they are applied.
Q: Can the "7" or "9" effects target myself (the "7" or "9" I played in this turn)? A: Yes, they can. For example, with the "2" effect applied, you may play a not-follow "9" and then, with the "9" play-book effect, change the "9" you just played to the follow state. Other technical plays are also possible.
Q: Can the lead be the target of the "9" effect? A: Yes. The lead is basically in the follow state, so if desired it can be made not-follow. Even then, the lead suit does not change. The lead becomes not-follow, but the play-book effect does not activate (that is, no rewind process is performed).
Skills
Q: Can the "Monster" skill be used at kickoff? A: Yes, it can.
Q: Can the "Monster" skill be used even if I am not the lead? A: Yes, it can.
Q: Can the "Birdman" and "Blue Wind" skills be declared after an attack success is confirmed? A: Yes. The attack success is the condition for use, so that timing is correct.
Q: Can the "Birdman" and "Blue Wind" skills target myself? A: Yes. Whether it is myself or my partner, the skill can be used if either of them wins the trick by the specified method.
Q: What exactly is "start of play", the usage condition of "Officer" and "Dragon"? A: It is before the lead plays a card.
Q: After using the "Skull Man" skill, can I play a not-follow "8" and apply its play-book effect? A: Yes, it can.
Q: Can the "Wonder Girl" skill target myself? A: Yes, it can. "Teammates" include oneself.
Q: Must the "The Ninja" skill be used before I play? A: Yes, it can be used before I play.
Q: Do I need to declare the "The Ninja" skill myself? A: No, you do not.
Q: Can I combine the play-book "7" effect with the "Tough Man" skill to move the ball of the team that succeeded in its attack back 1 square? A: Yes, it can.
Q: What if, in addition, the ball is on the "10" square and the above situation occurs? A: It becomes an own goal, and 2 points are scored.
Other
Q: If a kick play advances beyond 0, can I gain additional points? A: No, it is not possible. That bonus applies only to touchdowns.