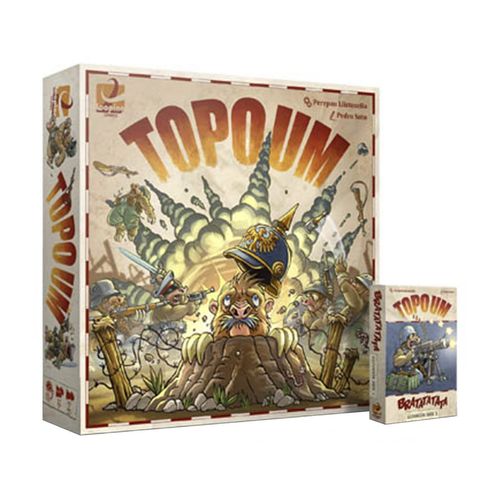
Topoum
Topoum Rulebook
Table of Contents
Table of Contents
1. Components
- 1 Game Board.
- 8 Score Markers in 4 colours: red, blue, yellow and black.
- 18 Wooden Moles: 16 in the 4 colours, 1 white ("Red Cross") and 1 brown*.
- 64 Base tiles: 16 barracks in the 4 colours on one side, neutral terrain on the other side.
- 8 Obstacle Tiles: 4 Water/Rock and 4 Ice/Gas.
- 6 Farmer Tiles: 1 Turnip/Trap, 1 Footprint/Dynamite and 4 Crates.
- 165 Cards: 154 Action cards, 1 Peace, 1 Whistle, 1 Press and 8 Farmers.
- 2 Set of Rules: spanish and english.
* The brown mole will be used in expansions to come.
2. Setup of the Game
- Unfold the board in the middle of the table.
- Each player receives 4 moles, 16 base tiles and 2 score markers in their chosen colour.
- Each player places a score marker on the "10" square at the Medals Track and leaves the other marker aside. It will be used for scores over 50 and 100 medals.
- The player with the most diopters (or one randomly chosen) receives the "Whistle" card, which indicates who is the starting player.
- Now it is turn to prepare the Action Deck and the initial Battlefield deployment.
LAWS OF WAR — Topoum basic rules are simple and easy to learn. This notes will show the most important and specific details.
Action Deck Setup
If this is your first game, you may use some of the suggested combinations at the bottom of this very page.
If you already know how to play, you must select at random or by mutual agreement 7 of the 22 types of cards from all those contained in the game. You may also use the random system suggested at the inner side of the box.
The most important thing to keep in mind is that you must include at least one type of card from each category: Combat, Movement, Expansion, Special.
Once the 7 types are selected, you must select the following number of cards, depending on the number of players:
- 2 players: 5 of each type. The deck contains 35 cards.
- 3 players: 6 of each type. The deck contains 42 cards.
- 4 players: 7 of each type. The deck contains 49 cards.
Shuffle this deck properly. Put the last 5 cards aside and shuffle among them the "Peace" card, which activates the end of the game. Put these 6 cards at the bottom of the deck, so it is not know when the end of the game is exactly coming.
Deal 2 cards from the deck to each player. Players can look at their cards but must keep them secret.
Put the deck in its place on the board and arrange the top 5 cards on the Line of Operations.
Initial Battlefield Setup
Follow these three steps in order:
- The initial player put one of her base tiles in the centre of the battlefield, neutral terrain side up.
- Starting with the initial player and moving clockwise, each player places a barracks of her colour adjacent to the central neutral terrain.
- Starting again with the initial player and moving clockwise, each player places a barracks of her colour, with one of her moles on top, adjacent to any other tile on the board.
The board consists of spaces. The battlefield is the one formed by every connected tile. A neutral terrain tile is a Square (Neutral Terrain); a tile with a colored barracks icon is a Square (Barrack).
EXAMPLE: Red, Blue and Yellow begin a game. Red is the initial player, places a neutral terrain tile on the central space of the board (0) and then places a red barrack tile compulsorily adjacent to the neutral one (1a). Blue and Yellow do the same (1b and 1c). In a second round, Red places a red barrack with a red mole anywhere adjacent to the battlefield area and decides to do it next to the centre (2a). After that, Blue and Yellow place their barracks and moles (2b and 2c).
The battle is about to begin with a loud bang! TOPOUM!!
Suggested Action Decks
Four preset 7-card combinations are suggested for players who do not want to build a deck from scratch: First Play, Special for 2 Players, For Tactical Players, and For Strategic Players. Each preset shows one card of each of the seven chosen types, illustrated with its icon, name and effect diagram, ready to be pulled straight from the deck box.
3. Turn of Game
Starting with the initial one, a player must perform these 3 steps in order:
- Perform an "Enter into combat" or "Move moles" action.
- Score lines of sight.
- Replenish cards in hand and/or the Line of Operations.
1.- Perform an Action
Choose one of these two possible actions: "Enter into combat" or "Move moles".
A- Enter into Combat
The player picks a barracks tile and a mole from her reserve and places them anywhere adjacent to the battlefield zone. After that, the player MUST play a card from her hand or from the Line of Operations and carry it out immediately over the active mole, the one who just entered in combat.
When a card is played from the Line of Operations, the player must adjust her Medals Track depending on the card's position.
B - Move Moles
Players can move all or some of their moles already on the battlefield at the beginning of their turns (and not any other mole incorporated from the reserve during the turn due to an action card). The player chooses on of their moles and moves it to an adjacent square, no matter if it is a barrack or if it is a neutral terrain.
If the square is occupied by another player's mole, both moles are eliminated and returned to their respective reserve. If the square is free, the player MUST choose one of these possibilities:
- To play a card from their hand of from the Line of Operations (as explained before) over the active mole, the one just moved.
- To change the tile under the active mole. If it is a barracks belonging to the player, it is turned over with the neutral side up. If it belongs to a rival or is a neutral terrain, the active player gives it back to her owner and replaces it with a barracks of her own.
Then, the player can repeat the whole process with the rest of her moles.
EXAMPLE: It is Red's turn, who decides to enter into combat with a new mole and uses the "Mortar Attack" card. The impact destroys the neutral terrain where the yellow mole stood. This attack leaves the battlefield divided into 2 zones, one with 4 and one with 5 squares. The 4 square part with the yellow and the blue mole is eliminated.
LAW OF WAR #1 — PERSONAL DISCARD PILE Played cards are discarded face up on a personal pile at each player's zone. Players can check their own discard pile at any time, but opponents can only see the last played card.
LAW OF WAR #2 — ALWAYS A MOLE AT THE BEGINNING OF YOUR TURN If a player's turn begins and she have not a single mole on the board, she MUST place a barracks with a mole adjacent to the battlefield. It is an identical movement to the one made at the initial battlefield setup.
After this, players can already perform their "Enter into Combat" or "Move Moles" action (obviously, in this second case just the recently placed mole) as normal.
Note: Maybe exterminating rivals completely is not a good idea, given that they can enter into combat in a much better position to score good lines of sight.
LAW OF WAR #3 — MISSING IN COMBAT A mole moved out of the battlefield is eliminated and returned to its owner's reserve.
LAW OF WAR #4 — JUST ONE BATTLEFIELD There can be just one battlefield on the board. If due to a square destruction (for instance, with a "Grenade" or "Mortar Attack" card) the battlefield is divided in into 2 or more parts, those with the less squares are eliminated. This represents the loss of communications and contact in battle.
If the parts have the same extension, the player who provoked the division decides which one remains and which one disappears.
Every squares and moles eliminated this way are returned to their owners' reserve.
LAW OF WAR #5 — FRIENDLY FIRE WILL BE PUNISHED! If an action carried out in your turn results in the loss of one or more of your own moles, you will suffer a 5 medals penalty by each of the casualties. Keep the following in mind:
- This penalty also applies to your moles eliminated as a result of a divided battlefield (See "Law of War #4").
- You will not suffer this penalty if you move a mole to a square occupied by a rival and both are eliminated, since they are considered "fallen in fair combat". This is war, isn't it?
- But you better watch out! If as a result of one of your actions one of your moles moves to a square with another of your moles, both will be eliminated due to the confusion and you will lose 10 medals.
2- Scoring Lines of Sight
A line of sight is a straight line over squares between two moles of the same army and not blocked by other moles or obstacles.
After performing the action, the player scores the new lines of sight formed by her moles on the battlefield. Since they are pretty much blind, moles get more medals the further they can see a comrade in arms.
The player scores 1 medal for each square in the line of sight and 1 additional medal for each barracks of her colour in that line. In both cases, squares under the two moles are included.
Example: 7 MEDALS (5 by Distance and 2 by Red Barracks) — a line of sight of five squares, two of them red barracks, between two red moles at either end.
If a player exceeds 50 or 100 medals, she will put her second score marker at the appropiate place in the Medals Track.
Note: There are special cards and actions which can make you win addictional medals in your turn or even during other players' turn.
LAW OF WAR #6 — NEW LINES OF SIGHT Lines of sight already formed at the beginning of your turn don't score at the end of the turn, unless they have been modified by moving some of the moles who make them up. Keep in mind that if you move one mole and, by means of cards actions, it returns to the same position, that line of sight is considered new.
3- Replenishing Cards
To end the turn, the player must replenish first the cards in her hand and then the cards in the Line of Operations:
- If she played one or two cards from her hand, she must draw new cards from the deck until having two.
- If she has used one or several cards from the Line of Operations, she must displace the remaining cards to the right and replenish the line with cards from the deck.
- In case no cards were used, either from player's hand or from the Line of Operations, the one at the right of the line is discarded, the rest are displaced to the right and the line is replenished from the deck.
Finally, it is next player's turn.
4. End of Game
(Printed on this page as "FINAL DE PARTIDA" — the stamp graphic was left untranslated in this English edition.)
When a player's hand or the Line of Operations is being replenished and the "Peace" card appears, the end of the game is activated. From that moment on, they will replenish just the Line of Operations, not their hands.
The round is played as usual until the player at the right of the initial one ends her turn. This way, everybody takes the same number of turns.
Cards at players' hands are returned to the box. Then, it is time to score the cards used by each player.
- CATHEGORIES: Players count how many cards from each cathegory have used (Combat, Movement, Expansion and Special). The player with more cards from each cathegory scores 3 medals. In case of a tie, each tied player scores 2 medals.
- SETS: Each player scores 2 medals for each set of 4 cards of different cathegory she has.
Example: Victor has got more Combat (+3 medals) and Movement cards (+3 medals). He is tied with Cesar in Special cards (+2 medals each). Cesar has got more Expansion cards (+3 medals).
Victor has gathered one group of 4 different cathegory cards (+2 medals) and Cesar has got two (+4 medals). At the end, Victor has obtained 10 extra medals and Cesar, 9.
The player with more medals is the winner. In case of a tie, the winner is the one with more barracks of her colour on the battlefield. If case of a new tie, the one with more cards in her discard pile is the winner.
5. The Cards
There are 22 types of cards divided into 4 cathegories: Combat, Movement, Expansion and Special.
Quick Glossary:
- Space: hexagon on the board, with or without a tile.
- Square: hexagon with a tile.
- Barracks: Tile with its molehill side up.
- Neutral terrain: Tile with its neutral terrain side up.
- Active mole: The mole who uses the card.
- Rival mole: Another player's mole.
LAW OF WAR #7 — ONLY VALID ACTIONS Playing a card whose action cannot be carried out is not allowed. For instance, you cannot play a "Short Range" card if there is not a rival mole adjacent to the active mole.
Combat Cards
They are used to eliminate rival moles or terrain tiles and everything on them.
BAYONET — Move your active mole to an adjacent square necessarily occupied by a rival mole (which is eliminated).
SHORT RANGE — A rival mole adjacent to the active mole is eliminated.
LONG RANGE — A rival mole, placed 2 or 3 squares in a straight line away from your active mole, is eliminated. There can not be obstacles or moles in the middle.
GRENADE — An adjacent square and any mole or element at it is eliminated.
MORTAR ATTACK — A square at 2 spaces in a straight line is eliminated. It is a parabolic attack, so it ignores if there is or not tiles, moles or any obstacles in between.
SLINGSHOT — A rival mole at 2 spaces in a straight line is eliminated. It is a parabolic attack, so it ignores if there is or not tiles, moles or any obstacles in between.
Movement Cards
They allow moles to move along the battlefield in different ways and also to move rival moles.
ADVANCE — Move your active mole to an adjacent square.
UNDERGROUND MANEUVER — Move your active mole to a tile 2 spaces away in a straight line. Ignore if there is or not tiles, moles or any obstacles in between.
MOTORBIKE PATROL — Move your active mole 2 squares away in a straight line. If there is a rival mole in the first square, this is eliminated (run over!).
PANIC ATTACK — Choose a direction from the active mole. Move every mole (allies and enemies) along that direction one space away from the active mole.
TUNNEL — Transport your active mole from one of your barracks to another one of yours, anywhere in the battlefield.
DECOY — Swap your active mole's position with a rival mole's position in an adjacent barracks.
Expansion Cards
They are used to deploy new barracks or moles, so you can grow your army and the battlefield faster.
BUILD BARRACKS — Deploy one of your barracks in any empty space adjacent to the battlefield.
ABANDONED BARRACKS — Deploy one of your barracks in an empty space adjacent to the active mole. Then, move the mole to the new barracks.
CONQUEST — Exchange a unoccupied rival barracks or a unoccupied neutral terrain adjacent to the active mole by one of your barracks.
BETRAYAL — Eliminate one rival mole adjacent to the active mole and replace it by another one from your reserve.
NEW SOLDIER — Deploy a mole from your reserve in a square 2 spaces in a straight line away from your active mole, ignoring everything in the first space. If you place it on a square occupied by another mole, both are eliminated.
Special Cards
(Printed on this page as "CARTAS ESPECIALES" — the header graphic was left untranslated in this English edition.)
They have different and very particular effects. Some of them requires the use of cards or special tiles.
PRISONER OF WAR — Capture a rival mole adjacent to the active one and place it in your reserve. Its owner can give you 3 of her medals to get it back anytime in her turn.
MEDAL OF HONOR — Choose one of your moles (but NOT the active one) to go back to your reserve and receive a medal for its services. You win 3 medals.
PRESS SUPPORT — When you play this card, you get the "Press" card. You win 1 medal at the end of everybody's turn as long as you have it under your power. Don't forget to score your medals! (Leave the "Press" card next to the board during the game setup.)
RED CROSS — Move "Red Cross" to the active mole square. "Red Cross" and any mole with it are immune to any direct attack. If the square under them disappears (by an explosion or by a battlefield division, for instance), "Red Cross" and the mole with it are retired from the board and the author of the attack loses 5 medals. If a mole with "Red Cross" moves, the second do not follow the first. Any mole can now enter that square and be under "Red Cross" protection. "Red Cross" blocks lines of sight like any other mole, except the ones from the mole in the same square. Keep in mind that you can still play cards over protected moles even though they are not eliminated, respecting "Law of War #7". (Leave the "Red Cross" mole next to the board during the game setup.)
FARMER IS COMING! — If this type of card is in the deck, the battlefield will be influenced by the farmer presence. Choose a Farmer card randomly and leave it face up. You can read the requirements to fulfill during the game setup at section 7: "Farmers", as well as what happens whenever a player activates this card. (Shuffle the Farmers Deck during the game setup.)
6. The Obstacles
Expert Variation!
The game includes some tiles with different terrains on both sides to build varied battlefields. There are four types of obstacles:
ROCK — No mole can move onto it. If a mole is pushed in that direction, it won't be moved. Rocks block lines of sight between moles.
PUDDLE — Any mole moved onto a puddle is eliminated. Puddles do not block lines of sight.
GAS — Any mole moved to a gas cloud is eliminated. This obstacle do not block lines of sight, but subtracts 1 medal to those lines score.
ICE — It allows a bigger movement. Any mole who steps on it slides in a straight line to the other side. If there is no square at the other side, the mole is out of the battlefield and eliminated. Ice does not block lines of sight.
After the initial battlefield setup, each player beggining from the last one can choose one obstacle tile and place it adjacent to any barracks already deployed. After that, players do it again in the same order, but placing the tiles on the board spaces marked with "X".
Obstacles tiles and special farmer tiles (explained after) can be eliminated from the board by explosions or if they are in the smallest part of a divided battlefield ("Law of War #4").
7. The Farmers
Expert Variation!
If one of the types of cards that takes part of the deck is "Farmer is coming!", you should choose one of the farmer cards, randomly or not.
Farmers are the owners of the fertil soil the moles are disputing. For this ones, farmers are like gods, able to poison the air, move mountains, control fire and water and so many incredible things. They are scary beings, so every mole will try to influence them in its benefit or to harm the enemy.
Each farmer is associated with a type of tile. Some of them use the obstacles commented above while others use special tiles.
Kings of Buckets
SETUP: Place the 4 "Puddle" tiles in the marked zones of the board. You must put a neutral terrain under each and everyone of them (one of each player in 4-player games or taken from a non used colour reserve otherwise).
USE: Move one "Puddle" tile on any unoccupied square. If the square has got a barracks, this is flooded and must be turned into neutral terrain.
EFFECT: As explained in Section 6: "Obstacles".
ELIMINATION: The "Puddle" tile is left out of the board. Another player with the use of a new card can move the "Puddle" tiles on the board o place this one again on the board.
The Crusher
SETUP: Place the 4 "Rock" tiles on the marked zones on the board. You must put a neutral terrain under each and everyone of them (one of each player in 4-player games or taken from a non used colour reserve otherwise).
USE: Move one "Rock" tile on any square in the battlefield. If there is a mole, it is eliminated. If the square contains a barracks, it is crushed and must be turned into a neutral terrain.
EFFECT: As explained in Section 6: "Obstacles".
ELIMINATION: The "Rock" tile is left out of the board. Another player with the use of a new card can move the "Rock" tiles on the board o place this one again on the board.
The Sprayer
SETUP: Place the 4 "Gas" tiles on the marked zones on the board. You must put a neutral terrain under each and everyone of them (one of each player in 4-player games or taken from a non used colour reserve otherwise).
USE: Move one "Gas" tile on any square in the battlefield. If there is a mole, it is eliminated. If the square contains a barracks, it is gassed and must be turned into a neutral terrain.
EFFECT: As explained in Section 6: "Obstacles".
ELIMINATION: The "Gas" tile is left out of the board. Another player with the use of a new card can move the "Gas" tiles on the board o place this one again on the board.
The Queen of Nature
SETUP: Place the "Turnip" tile at the centre of the board, on the neutral terrain.
USE: Move the "Turnip" tile on the active mole's square. If the square contains a barracks, this is buried and must be turned into a neutral terrain.
EFFECT: Feeding on this tasty vegetable improves moles sight. A mole on the "Turnip" tile will be granted with a 2 medal extra bonus in every line of sight scored. If the mole leaves the "Turnip" tile (either by moving or being moved), the turnip stands in its position and other moles could reach it to get the bonus.
ELIMINATION: The "Turnip" tile is left out of the board. Another player with the use of a new card can place it again on the active mole's location.
Lady Boom
SETUP: Place the "Dynamite" tile at the centre of the board instead of the neutral terrain.
USE: Eliminate any adjacent square and move the "Dynamite" tile to that place.
EFFECT: If a mole moves or is moved on the "Dynamite" tile is eliminated. The "Dynamite" tile does not block lines of sight.
ELIMINATION: The player who provokes the elimination of the "Dynamite" tile must place it immediately on any free space adjacent to the battlefield.
Trap Master
SETUP: Place the "Trap" tile at the centre of the board on the neutral terrain.
USE: Move the "Trap" tile on any unoccupied square in the battlefield. If the square has got a barracks, this is buried, so you must turn it into a neutral terrain.
EFFECT: Any mole who steps on the "Trap" tile is eliminated and the tile is placed out of the board. Adjacent moles are so worried not to step on it that they subtract 1 medal when scoring lines of sight. The "Trap" tile does not block lines of sight.
ELIMINATION: The "Trap" tile is eliminated everytime a mole steps on it. Another player can place it again wherever she wishes if a new card says so.
The Stomper
SETUP: Place the "Footprint" tile at the centre of the board on the neutral terrain.
USE: Move the "Footprint" tile to any adjacent square. If there is a mole, this is crushed. After that, every adjacent mole gets frightened and runs away 1 space from the "Footprint" tile.
EFFECT: Every mole who moves on the "Footprint" tile is eliminated. The tile does not block lines of sight.
ELIMINATION: The "Footprint" tile is left aside from the board. Another player can place it again wherever she wishes if a new card says so.
Lord of the Crates
SETUP: Shuffle the 4 "Crate" tiles and place them on the marked zones of the board, hiding their score. You must put a neutral terrain under each and everyone of them (one of each player in 4-player games or taken from a non used colour reserve otherwise).
USE: The player wins 1 medal and, besides, she can place any of the crates under the active mole and look the score on the reverse.
EFFECT: If the mole abandons the "Crate" tile for any reason, the tile stays in that position and other moles can reach it and look its score in secret. "Crate" tiles so not block lines of sight. At the end of the game the crate scores are revealed and moles on them receive the corresponding medals.
ELIMINATION: The "Crate" tile is retired from the game. If there are no more, the use of the card still grants 1 medal.