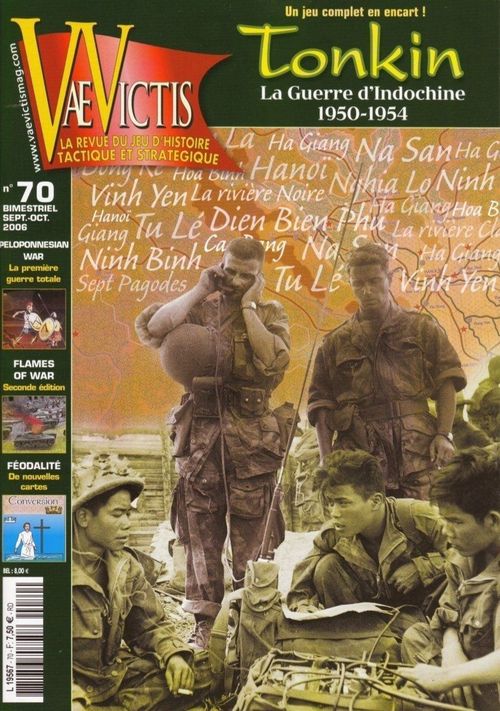
Tonkin: La Guerre d'Indochine 1950-1954
Tonkin: La Guerre d'Indochine 1950-1954 Rulebook
Table of Contents
Table of Contents
Basics
-
Tracing: Tracing a line or a road leading somewhere or to be within a certain number of hexes means a line uncut by enemy units, impassable hexes or hexsides. An exception is that VM may set up within 2 hexes of a mobilization hex even if there is a FEF unit in between.
-
Counters: The numbers on the counters represent strength, morale and movement points (black number is foot movement and red is motorized). On artillery counters, they represent barrage value, morale and movement. VM-groups, Pathet Lao and dummies are displayed with their hidden side up. If FEF attacks, overruns or receives a combat result through barrage against such a unit it has to be flipped over. If it is a dummy, just remove it to the dead box and FEF may advance into the hex. A dummy may not attack or retreat before combat (rule 6.5). VM may declare a dummy and remove it. VM-groups and Pathet Lao may flip back to hidden status as soon as there are no enemy units within 3 hexes. FEF HQ and Uncle Ho/Giap show their movement point value. A Desorg marker means the unit are Disorganized.
-
Zone of Control (ZOC): ZOC includes all 6 hexes within 1 hex of the unit. Every unit has a ZOC except supply units, FEF HQ and Uncle Ho/Giap. A unit's ZOC do not extend into a hex where that unit is not allowed to move (rule 5.12). Enemy ZOC will affect you when you move (rule 5.1 and 5.2). VM ZOC affects air transports/airdrops (rule 5.6). VM ZOC makes urban areas friendly to the VM (rule 4.1).
-
Stacking: You may stack 18 stacking points in clear and rough hexes and 11 points in forest or mountain hexes. If you stack 18 points in a clear/rough hex and you attack an enemy in a forest/mountain hex, only 11 points may attack or overrun. You may view what's in enemy stacks, except VM stacks in forest. VM troops and some FEF units have a white number showing the number of stacking points. If there is no number on the unit the stacking point is 1. Garrisons have a stacking of 1. Hidden dummies have a stacking of 2. Supply dumps, Uncle Ho/Giap and FEF HQ have a stacking of 0. When they are carried by a transport supply dumps will have a stacking of 3 and Uncle Ho/Giap and FEF HQ will have a stacking of 1. VM units and FEF units may not stack together although some units may pass through the enemy.
[Not in this document: the scenario setup lists and the individual scenario definitions, including the Dien Bien Phu scenario that the rules refer to.]
- Setup: Place the three force markers in their respective force box. Use them, if you wish, to replace a large stack on the map. If you do, place the units in the appropriate force box. Place the VM remplacement marker on number "0" on the VM replacement scale and the 2 VM equipement markers on number "0" on the VM equipment scale and on "0" on the minor equipment scale just below. Place the VM foot transport marker on the rightmost symbol on the foot transport scale. Place both points d'operation markers, the montagnard marker and both victoire markers on the Operation/Victory scale. Place points d'operation markers on "0" and place the montagnard marker and the victoire markers according to the scenario. Place the air transport and the appui aérien marker on the rightmost symbol on the air transport scale. Place the truck transport marker on the rightmost symbol on the truck transport scale. Place the VM truck transport marker on the VM truck transport scale. The dates show when new truck transports arrive, so check the date when the scenario starts. Place the mois and the année markers on the time scale, according to the scenario, and the météo marker on the weather scale. Finally, place the tour marker on "Météo" in the phase scale.
The Map
- Scale: Each hex is approximately 20 kilometers (12,5 miles) across.
- Terrain: Any specifics for forest also include rough/forest. Any forest hex within the rough area is considered rough/forest (difficile + jungle). You have these terrains: Clear (Clair) which is cream colored; Rough (Difficile) which is light brown; Forest (Jungle) shown with a forest symbol; Mountain (Montagne) which is dark brown.
- Navigable rivers, the coast and the delta: The rivers which are navigable are dark blue (Rivière navigable. Minor rivers are called Petite rivière). A coastal hex is a sea hex with some land in it, even islands will do. The delta includes all river hexes from, and including, Vinh Yen towards the sea. It also includes those 4 non-river hexes within this area.
- Mobilization hexes and supply centers: Mobilization hexes have a red star in them. Supply centers are marked with a red spot. One of them is the "Chinese railway supply center" (Chemin de fer chinois). If Lang Son is friendly to the VM and the railway is clear of FEF units, the VM may choose to regard Lang Son as the "Chinese railway supply center".
- Cities/Towns/villages: Cities (Ville principale) differs from towns (Ville) by having a red border around them (Hanoi, Haiphong, Nam Dinh and Luang Prabang). An urban area means any city, town or village. Harbors have an anchor symbol.
- Garrisons: Each urban area in the delta and along the coast has a garrison which consists of 2 steps with strength of 2 and morale of 3. Garrisons can only defend and they, as well as other units stacked with them, will not retreat. If VM occupies and then evacuates a garrison hex it will not regain its garrison. Mark the hex with a plus de garnison marker.
- Airstrips: Airstrips are represented on the map by an airplane symbol.
- The montagnard area: The montagnards ("highlanders", which are all the minority people, like the Muong, Meo etc) live in Vietnam and Laos in all the rough (with or without forest), mountain and along minor rivers flowing in non-clear hexes.
1.0 Gameturn Phases
- Weather and initiative
- Replacements and reinforcements
- Supply check
- 1st Player movement
- 1st Player operation
- Desorg marker cleanup
- 2nd Player movement
- 2nd Player operation
- Desorg marker cleanup
- 1st Player end movement
- 2nd Player end movement
2.0 Weather and Initiative Phase
Roll a die. If the result is within the span on the Weather table it is raining. This means FEF has half amount of air transports and airstrikes and that each airstrike has half strength. Rain during rain season (June to August) means that all movement costs are double. Rain during dry season (September to May) means that all movement costs are double except road/rail. Movement cost along rivers and along the coast at sea will not double during rain.
To get the initiative, roll a die. If the result is 1-3 then VM is the 1st player and FEF becomes the 2nd player. If the result is 4-6 then FEF will be the 1st player and VM the 2nd one. VM player goes first and the weather is sunny during the first gameturn in every scenario. The 1st player will place his reinforcements and replacements before the 2nd player.
3.0 Replacements and Reinforcements Phase
3.1 VM-group mobilization: Dead VM-groups and Pathet Lao may be placed (mobilized) on the map within 2 hexes of mobilization hex in their respective country, even if they are FEF-controlled. But no more than 4 per turn and 1 per mobilization hex. Deduct 1 equipment replacement for each unit. VM-groups may not be used as replacements on the same turn as they are mobilized (rule 3.2). Each mobilized VM-group adds 1 victory point (2 points from October-53). Place for free on the map the same amount of dummies (if any) from the dead box as you place real VM-groups or Pathet Lao.
3.2 VM regiment replacement: By removing a VM-group you may replace or rebuild 1-2 non-artillery regiment steps (depending on how many steps the VM-group has) in the same hex. A VM-group may replace two regiments one step each. One regiment can't replace or rebuild more than 2 steps at a time. You can be anywhere to replace. VM-groups may not be mobilized on the same turn as they are used as replacements (rule 3.1).
3.3 VM replacement points: VM receives 2 replacements every turn to replace 2 regiment steps on the map (including artillery) or to rebuild them from the temporary dead box (Unités détruites temporaires). No more than 6 replacements can be accumulated. For every replacement VM spends he has to spend 0,5 equipment replacement (artillery spends 1 equipment replacement for every 1 replacement).
To receive a replacement point or to rebuild, the regiment must be in supply and within 3 hexes of Uncle Ho/Giap, Thai Nguyen or Thanh Hoa. Replacing artillery must also be on a road leading back to a supply center. A unit may not rebuild in a FEF-friendly urban area (rule 4.1) and artillery must rebuild in a supply center in China. If VM looses "Uncle Ho", add 20 victory points, flip it over to "Giap" and place him on a VM regiment one gameturn later.
3.4 VM equipment replacements: VM receives equipment replacements as reinforcements or by attacking FEF units. If a FEF unit looses at least 1 step (not just retreats) and VM advances into the defender's hex, he receives 0,5 equipment replacement. He will also receive it by destroying a garrison and then advance into its urban area. VM may also receive 2 equipment replacements instead of receiving a supply dump or by capturing a FEF supply dump (rule 3.6). No more than 6 equipment replacements can be accumulated.
3.5 VM reinforcements: VM artillery reinforcements are placed on a supply center in China. Other VM regiment reinforcements are placed like rebuilt ones (rule 3.3).
3.6 VM supply dumps: VM receives 2 supply dumps (DR) every turn, unless all 9 are on the map. If VM controls 20 urban areas or more in the montagnard area (controlling the opium fields) he will receive a third supply dump. Roll a die for each one. If you roll 1-4, place it at the Chinese railway supply center. If you roll 5-6 you may place the supply dump at any supply center or at any coastal hex. All supply dumps and units at the Chinese railway supply center may, whenever VM wishes, automatically move to Lang Son if it and the railway is VM-friendly. If you capture a FEF supply dump, remove it, deduct 1 victory point and receive 2 equipment replacements.
3.7 FEF reinforcements: All FEF reinforcements are placed in the Standby zone. The FEF player may bring them in by deducting 0,5 victory point per battalion. The FEF player may refrain from bringing in a supply dump and bring in 4 battalions for free instead. When deducting victory points, round it up to the nearest whole point.
3.8 Placement of FEF reinforcements: Place Vietnamese units in any friendly city or harbor in Vietnam. Thai units are placed in a friendly urban area in the montagnard area in Vietnam, west of, and including, Red river valley. GCMA units are placed within 2 hexes of a friendly montagnard urban area (1 per urban area or 2 if there are too few urban areas). Laotian units are placed in Luang Prabang. If these conditions of placement are not met you can't place the above units. Place other FEF units at any friendly city or harbor or, by spending air transports, at any friendly airstrip (rule 5.3 and 5.6).
3.9 Withdrawals: Sometimes FEF has to withdraw 1-2 units to the Saigon zone on certain gameturns. It is written like "Withdraw" (Retirer) which means that FEF has to withdraw a unit from the delta. It can also be written like "With para" (Retirer 1 bataillon Para) which means that FEF has to withdraw an airborne unit from the delta. If there are none, withdraw 2 other units instead. The withdrawn unit may return. If so, move it one gameturn later to the standby zone and deduct 1 victory point. One additional gameturn later, FEF may bring it in as a reinforcement by paying 0,5 victory point.
3.10 FEF supply dumps: FEF receives 2 supply dumps (DR) every turn (3 dumps from Oct-53), unless all 15 are on the map. They are placed at any friendly city or harbor or, by spending air transports, at any friendly airstrip (rule 5.3 and 5.6). If FEF captures a VM supply dump, just remove it and add 1 victory point.
3.11 FEF replacements: The FEF player may pay 1-2 victory points to receive 4 replacement steps per victory point. Each unit on the map flipping back to full strength uses 1 replacement step. 2 replacement steps may be used to rebuild units from the Temporary dead box into the Standby zone, where they, 1 gameturn later, can be brought in as reinforcements (rule 3.7). Units from the Permanently dead box (Unités détruites permanentes) will cost 4 replacement steps. Units within 3 hexes of a friendly city, harbor or a HQ may replace. HQ may be used if it is on an airstrip or within 3 hexes of a friendly city or harbor. If replacement steps are used via an airstrip deduct air transports. Each step is 0,5 stacking point (rule 5.6). If FEF looses his HQ, deduct 4 victory points and place it in a friendly city one gameturn later.
GCMA may not replace, they can only rebuild.
4.0 Supply Check Phase
4.1 Friendly urban area: An occupied (including by a garrison) urban area is always friendly to the occupying side. Unless occupied by the FEF, an urban area is friendly to the VM if there is a VM unit (a dummy will do) within 1 hex of it. All urban areas in the montagnard area or any city are friendly to the FEF if there are no VM-units within 1 hex. Other urban areas are friendly to the VM.
4.2 VM supply trace: VM non-motorized units are in supply if they are in a trench or within 3 hexes of a friendly urban area or a supply center. VM-groups are also in supply anywhere in Vietnam. Uncle Ho/Giap is in supply anywhere. Pathet Lao are always in supply in Laos or within 3 hexes of a friendly urban area in Laos.
4.3 FEF supply trace: All FEF non-motorized units and garrisons are in supply if they are in a trench or within 3 hexes of a friendly city or harbor. Thai units are also in supply if they are within 3 hexes of a friendly urban area in the montagnard area west of, and including, Red river valley. Lao units are also in supply if they are within 3 hexes of a friendly urban area in Laos. GCMA units are in supply anywhere in the montagnard area.
4.4 Dump supply: FEF and VM units (including motorized) are also in supply if they are within 3 hexes of a friendly supply dump.
4.5 River supply: FEF-units may trace supply up to 5 hexes along navigable river and/or coastal hexes to a supply dump, friendly city or harbor if:
a) The only VM units along the river are VM-groups (VM units along the coast will not block the trace at all).
b) There is a Dinassaut placed at the source of the supply, the unit or somewhere in between.
One Dinassaut can supply several units as long as the conditions above apply. Dinassauts, themselves, draw supply like any FEF-unit or 5 hexes along navigable river/coast.
4.6 Out of supply: Units/garrisons out of supply are marked with an OoS marker and have their strength halved (round fractions up). OoS units can't make a double move (rule 5.2) or move at all if they are motorized. If they are already OoS, each unit will loose 1 step. If a garrison looses 1 step, you may take it from another unit within 3 hexes. If you don't or if there are none, the garrison dies.
5.0 1st Player Movement Phase
5.1 Movement: You move a counter from hex to hex. Movement cost for the terrain is different (except for motorized units) for FEF and VM units. See "Terrain table" on the map (Table des terrains). GCMA units move like VM units. You can always move one hex regardless of movement cost, even if it's an overrun (rule 6.4). Movement along road/rail (Route/Rail) has its own cost regardless of other terrain. Road movement cost is double in any non-clear hex. FEF units pay 1 extra for movement in VM ZOC.
If you enter a river hex you have to pay an additional +1/+2 movement cost (+2/+3 for motorized) unless you move along the river. But even if you do and there is another river coming in from the side you still have to pay for that river. No more than +1/+2 though (or +2/+3 for motorized), regardless of the number of rivers in the hex.
5.2 Double move: You have double movement allowance (including transports) if you don't start, pass or end your movement in an enemy ZOC (including garrison's and dummies' ZOC).
5.3 Transports: Truck, air and river transports can move non-motorized units and supply dumps. There is also ship transport (rule 5.7). Each transport can move units and/or supply dumps which are stacked together at the beginning of their move. They may be dropped off at different places. Each truck transport may move 2 stacks in 2 different hexes. You can't combine normal movement with transport movement, and the same unit/supply dump can't be moved more than once by transport during a movement phase or operation point. You can only move supply dumps by transport.
You can use up to 3 transports of one kind when you spend an operation point or during a movement phase.
5.4 Truck transport: A truck transport may move up to 6 stacking points of units/supply dumps, in 1 hex or split up in 2 hexes, 14 motorized movement points. Units/supply dumps can use a truck transport if:
a) They are within 3 hexes of a friendly city or a HQ, if the HQ itself is within 3 hexes a city (FEF).
b) They are on a road leading back to a supply center (VM).
5.5 Foot transport: VM has 2 foot transports for free every gameturn who will carry 1 supply dump each. They can't carry troops. Any supply dump, anywhere, may be carried 6 VM foot movement points. After you have spent both foot transports, you may reset the transport marker to 2 new transport points by adding 1 victory point. (VM had an enormous capacity to mobilize civilians anywhere and anytime).
5.6 FEF airtransport: An air transport can carry 3 stacking points between two FEF-friendly airstrips. From the Standby zone it's 3 times as expensive. No takeoff or landing is allowed if there is VM artillery, which is not Desorg, within 1 hex of the airstrip. It's twice as expensive to be carried by air to an airstrip if it has no trench and there is a VM regiment, which is not Desorg, within 1 hex (2 air transports carries 3 stacking points).
FEF player may also airdrop airborne units (they are marked with a "para" symbol) and supply dumps on any hex with no forest or mountain (well, not at an all-sea hex either ☺) regardless of VM presence within 1 hex. Double the cost of stacking points which are airdropped if there is VM artillery, which is not Desorg, within 1 hex. If you airdrop a supply dump within 1 hex of a VM unit, roll a die to see if it drops on the VM instead. If you roll 5-6, place the supply dump on a VM stack within 1 hex of the dropzone (a large part of the ammunition dropped at Dien Bien Phu ended up with the VM!).
5.7 Dinassauts – River transports: FEF has Dinassauts (DNA). They must move along navigable river or coastal hexes, and the movement cost is "1" per hex. They can keep units in supply (rule 4.5). They can attack enemy units along navigable river/coastal hexes. They can each carry 3 stacking points (even if it has lost a step). So, 3 battalions can stack with the DNA and join it in combat, including overrun. DNA, together with units which it carries, may pass through river hexes containing VM-groups. Pay 1 extra movement point for passing through. VM units of any kind do not bother DNA moving along coastal hexes.
DNA defending alone will always benefit from river combat dieroll modifier, even from attacks along the river. If they retreat, they have to retreat along the river/coast.
The FEF player has a ship transport. He may transport 3 stacking points (including motorized) between two harbors once every movement phase or by spending an operation point (rule 5.8).
5.8 When to transport: All truck, air, river, ship and foot transports can be used whenever you spend an operation point (rule 6.3) or during the two movement phases. But you can't use more air and truck transports than there are on the scales during one full gameturn.
5.9 1 Rec: The 1 rec unit may move along navigable rivers (not along coast by sea) and pass through VM-groups while moving along river (pay 1 extra movement point). It can also move overland through clear hexes.
5.10 GCMA: GCMA were actually anti-VM guerrilla units consisting of minority people in Vietnam and Laos. They are in supply anywhere in the montagnard area and they pay the VM movement cost. Like VM-groups they can retreat before combat (rule 6.5).
5.11 Infiltration: VM-groups/dummies and independent regiments (not part of a division), which are not Desorg, may pass through a hex containing only one FEF battalion/garrison with a strength of 2 or less. Pay 1 extra movement point for the infiltrated's hex. If you infiltrate, you can't use road/rail movement in the FEF unit's hex and ZOC.
5.12 Where to move: VM-groups, Vietnamese or Thai units may step into Laos as long as they are within 3 hexes of Vietnam. Pathet Lao and Lao units may step into Vietnam as long as they are within 3 hexes of Laos. GCMA units must stay in the montagnard area. The rest of the FEF units can move freely in Vietnam and Laos. All VM regiments, VM transports and Uncle Ho/Giap move wherever they wish (including China).
6.0 1st Player Operation Phase
6.1 Operation points: During this phase both players receive 10 operation points (use the "Operation/victory scale"). The 1st player throws a die, divides the result by 2 (rounded up) and that is the amount of operation points he may spend in a row. When those points are spent the 2nd player does the same followed by the 1st player and so on until both players have spent all their points. You are not forced to spend operation points. You can save some or all until later but if both players refuse to spend any at all after each other, then the player who was the first to refuse has to spend a point. If he doesn't, all remaining points, on both sides, are gone.
6.2 Activation: When you receive 10 points each, both players decide whether or not to spend a supply dump (only one and the 1st player decides first). If you spend a supply dump, flip the dump over and don't remove it until all 10 operation points have been spent. Spending dumps can be moved by using transports. If neither player spends a supply dump all 10 points on both sides are gone. Go to the "Desorg marker cleanup" phase.
6.3 Activation options: If you spend a supply dump then you may choose 1 of the 6 possibilities below each time you spend an operation point. If you don't spend a supply dump or if it's destroyed by an enemy unit, then you can only choose between options a), b), c) and d). The options are:
a) Move a stack of units and/or supply dumps. Units may overrun.
b) Remove up to 3 Desorg from stacks and/or hexes.
c) Place trench markers on up to 3 units/garrisons at or within 1 hex of a supply dump (not the spending supply dump) anywhere on the map. Remove that supply dump afterwards.
d) Make a barrage attack with an airstrike and/or navy.
e) Attack with troops which are within 3 hexes of the spending supply dump.
f) Spend 2 operation points when you attack with troops within 3 hexes of the spending supply dump, which allows you to first remove all the Desorg from all the participating attacking units before the attack.
g) Make a barrage attack with artillery with or without an airstrike and/or navy.
6.4 Overrun: Both sides can make an overrun, but only when activated during the operation phase. Those are resolved just like any combat. Pay for the terrain (not road/rail) and an extra 3 movement points. You don't have to pay the 3 movement points if the opponent turns out to be a dummy or if the unit retreats before combat, but you have to pay for the terrain. You can't overrun while using truck transport.
If the defender retreats or dies all units which participated in the attack must advance into the hex. They may, if possible, continue moving. Units not participating in an overrun may still move along with the overrunning units.
An airborne unit airdropping onto a VM unit is making an overrun. If the VM unit doesn't die or retreat, the FEF unit must retreat 1 hex or continue fighting. If he fights, deduct another operation point (even if those given by the dieroll have been spent). If there are none left, you have to retreat. Continue until either side dies or retreats.
6.5 Retreat before combat: When defending, a VM-group/GCMA, which is not Desorg, may retreat 1 hex before combat. If it does so the attacker may advance into the hex. VM-groups may not combine "retreat before combat" with ambush (rule 6.11). VM-groups/GCMA may only retreat once before an overrun.
6.6 Attacks: You can attack a single hex with enemy units in your ZOC with a barrage attack or a normal attack with troops. If you attack with barrage, add all barrage values (artillery, airstrike and navy may be combined). Consult the "barrage" table after you have consulted the "barrage dieroll modifiers" table (Modificateurs) and then roll 2 dice. The result will fall within one of the spans and unless you miss, the result might be a "DG" (Desorg) (rule 6.17). If the result is a "DG & DL" it means they will loose 1 step as well (1 step per stack only).
The restrictions are as follows:
a) Artillery, within 3 hexes of the spending supply dump, may attack enemy units in their ZOC.
b) FEF may attack VM units within 1 hex of a FEF unit with an airstrike. You can only make 6 airstrikes during a gameturn. Use the air transport scale to keep track.
c) Navy may barrage VM units in a coastal hex and within 1 hex of a FEF unit.
d) FEF may barrage a road hex anywhere with an airstrike. If the result is a 1 step loss, mark the hex with a Desorg counter. Neither side may use road movement there. VM can only remove the Desorg counter if it is within friendly supply and by spending an operation point. It may not be FEF occupied and not be in a FEF friendly urban area.
When troops attack enemy units in their ZOC the attacker may choose which units in a stack will participate. All defender strength points must be added, though. Add artillery's barrage value to the stack's strength when defending. Calculate the odds (rounded down in favour of the defender) and see if there are any dieroll modifiers by adding/subtracting the difference between the unit's morale (rule 6.9) and by consulting the "Terrain" table and the "combat dieroll modifiers" table (Modificateurs). Then throw 2 dice and consult the "combat" table to see the combat result. A modified dieroll result of "-1" is regarded as "0". The result will fall within one of the spans and give a certain combat result (rule 6.13).
You are not allowed to attack into a hex if you are not allowed to move into it (rule 5.12). No unit may attack or overrun across the Chinese border.
Calculate all dieroll modifiers in both normal and barrage attacks and then modify the end result to a maximum of +3 or –3. After the attack, check to see if anyone becomes Desorg (rule 6.17).
6.7 Attacks against garrisons: A garrison is a 2 step unit. It, and units stacked with them, will not retreat. Any losses must first be taken from other units stacked with the garrison. If there is only the garrison, it must loose 2 steps to permit the VM player to advance into the hex. If the garrison only receives one hit you may deduct a step from another FEF unit within 3 hexes. If you don't or if there is no unit, the garrison dies and VM may advance into the hex, if possible.
6.8 Terrain effects: The terrain in the defender's hex might modify in both barrage attacks and in normal attacks (see the "barrage dieroll modifiers" table and the "terrain" table). The defender only gets the modifier from river in normal attacks with troops unless the enemy attacks along the river, from the air as an airdrop or from both sides of the river. Please notice that rivers fork out occasionally which creates an "Y". If the defender sits on one and is being attacked along the first river he might still get the modifier thanks to the other river. Terrain modifiers are cumulative.
6.9 Unit morale: The unit's morale is the middle number in a red circle on the counter. In normal attacks and overruns, both sides (attacker first) choose one unit each which will lead the attack/defence. The difference between the attacker's and the defender's morale will become a dieroll modifier which will benefit the one who has the higher morale. Each side has to take their first step loss from the unit supplying the morale value. Unit morale may be reduced (rule 6.13 and 6.17) and it is always the modified unit morale that counts in every occasion.
6.10 Trench: There is a negative dieroll modifier when attacking units in a trench. Units benefit from being in a trench when they roll to see if they become Desorg after combat (rule 6.17). If a trench is evacuated or occupied only by DNA, it will disappear. Any unit moving into a friendly trench also becomes entrenched.
6.11 Ambush: A VM unit, which is not Desorg, defending in rough, forest or mountain may make an ambush dieroll before combat. He selects one of the FEF units and rolls a die. The FEF unit will loose a step if the dieroll is equal to or higher than the FEF unit's morale value. If VM rolls a "6" the ambushing VM unit will loose a step as well. VM can't ambush GCMA, artillery or airdropping units. VM-groups may not ambush a DNA.
6.12 "Bolshevik spirit": By loosing an extra step after combat (and before making any advance) the VM may receive a positive dieroll modifier when they overrun or attack with troops. Roll a die and the result is the positive dieroll modifier.
6.13 Combat results: Combat results are:
- 2AL (Attacker takes 2 steps loss)
- ExAL (Both sides take 1 loss each and then the attacker takes one additional loss)
- Ex (Both sides take 1 loss each)
- ExDL (Both sides take 1 loss each and then the defender takes one additional loss)
- 2DL (Defender takes 2 steps loss)
Most FEF battalions have 2 steps. When they receive a step loss it is flipped over or removed to the dead box if already flipped or if the backside is blank. VM regiments have 4 steps and VM-groups/Pathet Lao have 2 steps. When a VM unit receives its first hit, place a "-1" marker on it which means it will have one less in strength, morale value and stacking. When it receives its second hit you remove the "-1" marker and flip the regiment or remove the VM-group/Pathet Lao to the dead box. Place a "-1" marker on the flipped regiment counter when it takes its third hit (minimum strength and stacking is always "1" and minimum morale is always "0"). Remove the unit to the dead box when it takes its fourth hit.
Artillery may only take step losses if they are attacked by barrage or if there are only artillery units defending in a hex. Uncle Ho/Giap and FEF HQ have no steps. Eliminate them if the enemy walks into their hex.
6.14 Retreat after combat: After both sides have rolled for Desorg (rule 6.17) the defender may decide to retreat 1 hex, if possible, instead of taking 1 step loss. Artillery or supply dumps can never retreat (eliminate artillery and leave the supply dump behind if you do) or advance after combat. If the defender retreats the attacker may advance into the vacant hex. If you don't retreat, not only will you suffer the full combat result but you might loose an extra step if you have become Desorg (rule 6.17).
6.15 Elimination: If a FEF unit/garrison dies (loosing the second step) more than 3 hexes away from another supplied FEF unit, not counting other units in the same stack, then it is permanently dead (all taken as prisoners) and has to be rebuilt from scratch. FEF looses 1 victory point (this is why the French put so much effort in relief columns to save fellow soldiers in trouble). GCMA cannot be permanently dead.
If VM looses the last step in a regiment, add 1 victory point.
6.16 Victory points: When the FEF looses a victory point, he deducts it on the Operation/Victory point scale. When VM looses one, he adds it. It's the other way around when both players gain a point. Consult the "Victory points" table (Points de victoire) to see what you can gain or loose.
It is written on the map what you will gain for the higher value urban areas (blue number for the FEF, Red for the VM). If you leave a friendly urban area and it becomes unfriendly by default, you will loose victory points. VM also gains 1 point every time he occupies (not just passes) a railway hex (not including Haiphong or Hanoi). He only gets that point once every gameturn.
If VM gains control of 20 urban areas in Montagnard area he will not only receive a third supply dump (rule 3.6) but may also deduct 10 victory points. If FEF pushes VM back below 20 areas, add 10 victory points.
All victory points are gained or lost immediately, except victory points for urban areas which are gained or lost after the phase or after you have spent your 1-3 operation points.
If you, as VM, occupy Hanoi or, as FEF, kill Giap (Uncle Ho's replacement) then you win decisively at the end of the gameturn. If Giap is killed and VM occupies Hanoi at the end of the gameturn, VM wins the game. If FEF looses Hanoi but recaptures it during the gameturn, he deducts 20 points instead. The game stops immediately with a decisive winner if FEF reaches 100 or VM reaches 0 at any point during a gameturn.
6.17 Disorganized: After each combat, both sides check to see if their units become Desorg. Beneath the "combat result" table there are two dieroll spans which correspond with the combat result of the attack. Consult the "DG dieroll modifiers" table (Modificateur de Désorganisation) and the DG dieroll modifiers in the "Terrain" table (only terrain in the defender's hex counts).
There are some clarifications:
a) VM and GCMA do not get "+2" from forest.
b) The "-1" from trench only applies to the entrenched defender.
c) The "+1" from navigable river only applies to the attacker who attacks such a hex.
Both players consult their respective span and then roll one die each. If the result falls within the span all participating units, on the side throwing the die, are Desorg. Desorg halves the unit's strength and movement point value (rounded up) and subtracts "1" from the unit's morale. VM units may not ambush, VM-groups may not infiltrate and VM-groups/GCMA may not retreat before combat.
If only the defender (some or all units) is Desorg or becomes Desorg after combat and he decides not to retreat after receiving a step loss, he will loose an extra step. When deciding if the attacker is Desorg or not, don't count units in the stack which did not participate in the attack.
7.0 Desorg Marker Cleanup Phase
During this phase both players remove all Desorg markers.
8.0 2nd Player Turn and the End Movement Phase
The 2nd player movement phase and the 2nd player operation phase is played just like the 1st player movement and operation phase. After that there is an additional Desorg marker cleanup phase. Finally, both players have an end movement phase each where they move just like the ordinary movement phase (rule 5.0).
You check for victory at the end of the gameturn. Both players check the Operation/Victory point scale to see if either player has won decisively by reaching one of the outer limits. If the Victory marker reaches 100 (during 1950-51), FEF wins. VM wins at 0 points. Next year (1952) the outer limits are 10 (VM victory) and 90 (FEF victory). Then 20-80 (1953) and finally 30-70 (1954). Both France and the Viet Minh were getting war-weary and if either side had gotten the upper hand late in the war it would have forced the enemy to approach the negotiation table. If neither player has reached his outer limit, move the gameturn marker forward on the gameturn track.
If you reach the end of the scenario without a decisive winner, please compare the victory point with the "VM victory level" mentioned in that scenario (see Basics/scenario) to see who has won a marginal victory.
Units
- French: RCP, BPCP, RCC, RALP
- Colonial: BPC, RIC, DNA, RAC
- Foreign legion: BEP, REI, DBLE, REC
- Vietnamese: BPVN, BVN
- Thai: BT
- Minority people: GCMA
- Laotians: BPL, BIL, BCL
- African: RTS, ACF, AOF, BMTS
- Moroccan: RTM, RICM, RACM
- Algerian: BTA, RTA, RSA, GSAP
- Tunisian: RTT
Map Errata
There should be a "10,7" at Thai Nguyen and a "10,15" at Nam Dinh. The village of Tu Vu can be found at 0916. The 12..-row has two "1205", so the setup in 1205 in Dien Bien Phu scenario is the one two hexes east of Dien Bien Phu.