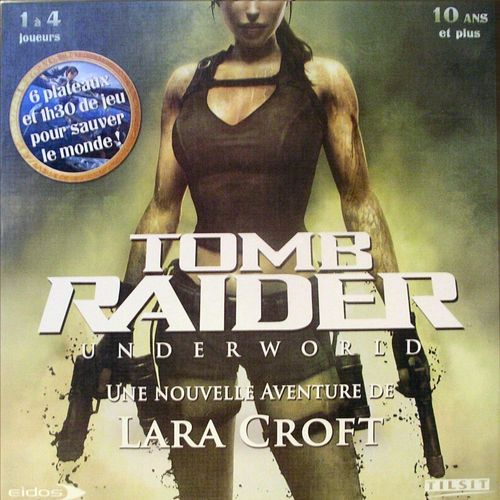
Tomb Raider: Underworld
Tomb Raider: Underworld Rulebook
Table of Contents
Table of Contents
- Goal of the Game
- Contents of the Game
- Setting Up the Game
- Turn Order
- Basic Rules
- Phase 1: Throw the Die of Progress
- Arriving in a New Region
- Phase 2: Take 0, 1 or 2 Actions
- Phase 3: Draw a Progress Card or Heal Lara
- The Effect of the Different Progress Spaces
- The Enemies
- Obstacles
- End of the Game
- Determination of the Victor
- Variants: Game for 2 Players
- Variants: Solo Game
- Obstacle Sections of the Region Boards
Goal of the Game
Lara Croft must cross all different regions of the game to reach Helheim, her final destination, and destroy "The Jörmungandr" by overthrowing the diabolic plans of Natla. Tomb Raider Underworld is a cooperative game.
Before reading the rules of the game, it's useful to know that the idea of the game is based on working together. It is important for the players to play together, rather than against each other. In Tomb Raider Underworld, all players play the figure of Lara Croft: they work together to develop her throughout the adventure, get her through obstacles, confront her enemies and finally complete the mission. If Lara fails, all players lose! The players therefore have to work together to increase Lara's chances of winning. For those who want to add a little of competition to the game, we included an additional mechanic which allows players to determine who amongst the victors did the most. If you like to play with this type of competition, the victor is the one who has most points at the end of the game (counting only the surviving players). Otherwise, everyone wins!
Contents of the Game
-
3 Boards, illustrated on both sides. Every board represents one of the regions of the game to be crossed:
- Board 1: Niflheim
- Board 2: Bhogavati
- Board 3: Manor Croft
- Board 4: Xibalbatray
- Board 5: Island Jan Mayen
- Board 6: Helheim
Every board consists of 3 tracks along which to progress. The main track is linked to Acrobatics, and two secondary tracks are linked to Combat and Trick. Every region also includes an Obstacle track which Lara will have to overcome.
-
1 Main game board, which follows Lara's progress in the adventure as well as the evolution of her physical state (health, adrenaline). Sites are also envisaged to put down the objects of Thor which you will find through the course of your adventures, as well as a game reference.
-
116 Cards, among which:
- 60 Progress Cards (20 Acrobatics, 20 Combat, 20 Trick) used to move forward in the regions on the different tracks of the boards.
- 20 Object Cards (which will be found in the various regions).
- 36 Enemy Cards (6 per region).
-
5 Cardboard figurines on stands: 4 Lara's and 1 Natla.
-
60 Plastic counters in 4 different colours:
- 35 Victory points (Green): used during the game and at the end to destroy "Jörmungandr" and indicate the victor.
- 15 Treasure Tokens (Yellow): gained on the Trick track of every region and used to replace a Progress Card to advance on the progress tracks.
Setting Up the Game
(See the set-up schema in the original rulebook.)
Place the main board on the table where everybody can oversee it. Place the blue cylinder and the white counter on the Health bar. Lara starts the game with 3 Life Points.
Put the red cylinder on the first space of the adrenaline bar. Put a Lara Croft character on the first region of the board, Niflheim.
Shuffle all Progress Cards and deal 6 to every player. Every player also gets 1 Health Token (grey counter).
Put Board 1 (Niflheim) in the centre of the table (see schema of installation). Put a Lara at the start of each of the three Progress tracks (Acrobatics, Fights and Trick) of Niflheim (see schema). Put the figurine of Natla on the Obstacle track of this board.
Take the Enemy & Object Cards of Niflheim. All cards have the name of the corresponding region written on their backs. Shuffle the Enemy Cards and put them face down next to the Main Board. Put the Object Cards of the region face up next to the board.
Play can now begin.
Turn Order
Determine the first player and then take turns going clockwise.
Basic Rules
It is necessary that Lara crosses the different regions as quickly as possible to reach Helheim and destroy Jörmungandr there. It will be necessary for you to sometimes slow down to recover certain useful objects needed to survive, but by doing so you risk having to overcome more obstacles. The objects that Thor left for you in certain regions will be very useful at the end of the game.
The turn of each player consists of 3 phases:
- Phase 1: Throw the white die of progress.
- Phase 2: Take 0, 1 or 2 actions.
- Phase 3: Draw 1 card or heal Lara.
After a player has taken his turn as described above, the player to his left continues.
Phase 1: Throw the Die of Progress
Every player starts his turn by throwing the die of progress (white die). This die can have two effects: move Lara forward on one of the Progress tracks of the current region, or trigger one of the obstacles of the board.
The faces of the white die mean:
- (Lara leaping): Move Lara forward on the track of Acrobatics.
- (Gun): Move Lara forward on the track of Combat.
- (Bag): Move Lara forward on the track of Trick.
- (Tomb Raider): Move Lara forward on a track of progress of your choice.
- (!): Move Natla forward on the Obstacle bar and apply its effect immediately.
- (1 and !): Remove one card from your hand, then move Natla forward on the Obstacle bar and apply its effect immediately.
The first objective for the players is to reach the end of the Acrobatics track, in order to move to the following region. The player who reaches the last space of this track applies the effects of that space and ends his turn. Then all players proceed to the next region.
The Combat and Trick tracks allow you to gain extras (objects, extra adrenaline, treasures) but do not allow you to move to another region. If you are already on the last space of the Combat or Trick track, and get a (Gun) or (Bag) result on the die, this has no additional effect. Lara remains on the last space of the Combat or Trick track (or both) until she finishes the Acrobatics track.
Another way of changing regions is by defeating all the obstacles in one region. The player who defeats the last obstacle moves on to Phase 3 (draw 1 card or heal Lara), then all players move to the new region.
Arriving in a New Region
Move the figurine of Lara forward on the main board to the next region. Take the board of this region and put it in the centre of the table. Figurines are put on every first space of the different tracks and Natla on the first space of the Obstacle track. All objects of the previous board which weren't collected by the players are lost.
All Enemy Cards that were not revealed are discarded. Revealed Enemies of the previous region are placed on the bottom of the new board. Next place the objects and Enemy Cards of this new region on the board.
Phase 2: Take 0, 1 or 2 Actions
In every turn, a player has the possibility of taking up to two actions. He can also decide to take none. It is allowed to take the same action several times. There are 3 types of action:
a) Play a Progress Card from your hand. An Acrobatics Card allows you to advance on the Acrobatics track, and the same goes for a Combat Card on the Combat track and a Trick Card on the Trick track.
Card translation (back of cards): Acrobatie = Acrobatics. Combat = Combat. Ruse = Trick.
b) Play a Treasure (yellow counters). You can play a Treasure to act as a Progress Card of your choice (Acrobatics, Combat or Trick). Treasures act as jokers. They work just as described under a), having moved the corresponding figure forward on the chosen track, and apply the listed effect.
c) Play an Object Card. You can use an Object Card in your possession. The recovered objects are laid face-up in front of you. Playing an Object Card is considered an action and every object can only be used once. Most of the objects allow you either to advance on one of the tracks, or to eliminate Enemies.
Particular case: the objects of Thor will be useful to you at the end of the game to destroy Jörmungandr. The player who earns them does not keep them laid down in front of him; he places them on the main board.
Phase 3: Draw a Progress Card or Heal Lara
During this phase, you can draw the top Progress Card from the pile and add it to your hand, or heal Lara by spending a Health Token. You can only take one of these actions, never both.
If you decide to heal Lara, remove one or more of your Health Tokens and move the blue cylinder 1 space towards the right on the Health Bar for every spent Health Token. You can never exceed the maximum health value (3 at first, +1 per found relic; see Relic below).
Do not forget that if Lara dies, the party is destroyed and all players lose!
The Effect of the Different Progress Spaces
During your progress in a region, every space (except the first one of every track) has an effect (you find an object, you throw the obstacle die, you earn a victory point). Apply the effect of every crossed space. If you cross several spaces in the same turn, apply the effects in order.
An explanation of the various symbols on the board:
a) Objects (grenade symbol). Take the corresponding Object Card and put it face up in front of you. To use an object is considered an action and can therefore only be done during Phase 2. The effects of objects are pointed out on their card. A great majority of objects are weapons which allow you to eliminate Enemies (see the chapter on Enemies).
b) Adrenaline (green/white Lara symbol). Move Lara 1 step forward on the Adrenaline track. If you arrive at the end of the track, move Lara forward 1 space on one of the tracks (Acrobatics, Combat or Trick) and on top of that, eliminate an enemy. Then place Lara on the first space of the Adrenaline track.
c) Health bags (grey case). Take a Health Token (grey counter). The Health Tokens are used to heal Lara (see Phase 3 of the game turn).
d) Victory points (green circle symbol). Take a victory point (green counter). The victory points are only used at the end of the game to destroy Jörmungandr and determine the victor. They can also be used to cross certain obstacles or eliminate enemies.
e) Treasures (yellow treasure symbol). Take a Treasure token (yellow counter). Treasure tokens act as jokers and can replace a Progress Card of your choice during Phase 2 of the game turn. To play a Treasure in this way is considered an action. A Treasure can act as a joker only on the progress track; under no circumstances can it replace a card when resolving an obstacle. On the other hand, certain obstacles can ask you to discard Treasures.
f) Draw cards (card with Lara on the back). Draw the top Progress Card from the pile and add it to your hand.
g) Relic (pot). At the end of the Trick track of certain regions, you can earn a Relic. For every acquired Relic, move the Relic counter (white counter) on the Health bar of Lara. It does not represent the actual health of Lara; it only increases the maximum health which she can attain. It will be necessary to use Health Tokens to get Lara to her maximum health.
h) The obstacle die (die with panther and heart). Each time you stop on this symbol, throw the obstacle die and apply its effect.
Die symbols (description of die picture in brackets):
- (X): Nothing happens.
- (Cracked heart): Lara loses 1 point of health.
- (Panther): Draw an Enemy and put it face up on the table under the current region (see the Enemies chapter). When you draw an Enemy, it is always placed at the end of the Enemy line of the concerned region.
- (Panther x2): Draw 2 Enemies and put them face up under the current region.
- (Card with a 1): Discard one card from your hand (only applied to the player who threw the die).
- (Card with a 2): Discard two of your cards from your hand (only applied to the player who threw the die).
Keep in mind: It is wise to keep cards in your hand, because if you ever have to discard cards from your hand while you don't have any (or enough), you are eliminated from the game. The party goes on without you!
The Enemies
a) The enemies and their effects. During the course of her adventures, Lara must confront numerous Enemies. Every Enemy is linked to a particular region pointed out on the back of the cards. When you play a region, shuffle the Enemy cards of this region and make a pile face down next to the Region board.
Each time you need to draw an Enemy Card, use this pile. Enemies drawn this way are put face up, underneath the region board, in order to create a line of cards starting on the right and growing towards the left of the board. The first Enemy is therefore put at the far right, the next is put to his left, and so on.
In small number, Enemies are not dangerous. But as their numbers grow, they can hurt or even kill Lara.
- Whenever there are 8 Enemies visible at the same time, Lara is immediately overwhelmed and the players lose the game!
If there are fewer than eight, the Enemies can really hurt Lara when she is changing regions:
- If 3 Enemies or fewer are visible when changing regions: nothing happens.
- If 4 or 5 Enemies are visible when changing regions: Lara loses 1 point of health.
- If 6 or 7 Enemies are visible when changing regions: Lara loses 2 points of health.
During the change of regions, do not forget to remove all Enemies who were not drawn and replace them with the Enemies for the new region. The visible Enemies are not removed; they follow Lara.
b) Eliminate the Enemies. There are two ways to eliminate the Enemies and to reduce the threat which they represent. The first is to use the weapons which you have; the second is to eliminate them using the means described on their cards. Enemies are always eliminated in order, starting with the Enemy located on the far right. Every eliminated Enemy gives you 1 victory point.
Weapons. Weapons allow you to eliminate 1 or 2 Enemies. To use them, discard the card being used and eliminate the number of Enemies described on the card. Using a weapon is an action and can therefore only be done during Phase 2 of the game turn. Enemies must always be eliminated in order, from right towards left.
Eliminate an Enemy using its card's description. It is possible to eliminate an Enemy using its card's description. If you complete the action as described on the Enemy card, it is removed. This is also done in the order in which the Enemies are placed (from right to left). But this method of eliminating Enemies is not considered an action, so you can eliminate as many as you can, as long as you can fulfil the card's description.
Obstacles
Obstacles are another important element in the game. They can put Lara in difficult situations, and it is better to avoid them than to cross them. There are always 6 obstacles on the Obstacle track of each region. If the players faced all 6 Obstacles of the region, they immediately move to the next region.
Every obstacle has an effect (often negative), but the means to counter it are always pointed out on the board. It is up to you to decide if you prefer being subjected to the adverse effect or countering it. Certain obstacles can be countered only by the player whose turn it is; others by all the players (this is specified in the text).
Three example obstacles are given in the rulebook, with their requirements as follows:
- [Caption missing in source: image-only label] Discard 2 Trick cards. Applies to the single player.
- [Caption missing in source: image-only label] Every player discards 1 Combat or throws the Obstacle die. Every player alternately must discard the requested element or be subjected to the specified effect.
- [Caption missing in source: image-only label] All players discard a total of 2 Trick and 2 Acrobatics, or throw the Obstacle die. This means that the players have to discard 2 Trick and 2 Acrobatics together, or throw the Obstacle die only once. Only the player who triggered the obstacle throws the die.
To prepare yourself for the different obstacles, it is recommended to read them beforehand to anticipate what they require, avoid elimination from the party, and counter the most dangerous obstacles.
End of the Game
The party can die in many ways. The players lose the game automatically in the following cases:
a) All players are eliminated. b) Lara loses all her points of health. c) 8 Enemies are put down face up at the same time. d) The players activate the last obstacle on the Helheim track; Natla achieved to conquer Lara. e) The players do not succeed in destroying Jörmungandr at the end of the game.
The players win if they destroy Jörmungandr on the track of Helheim. To destroy Jörmungandr, all the players must spend victory points:
- 7 victory points are enough if the players have all 4 objects of Thor (the 2 gauntlets, the belt and the hammer).
- For every missing object, the players have to spend 2 additional victory points. If they have none of the objects, they will therefore have to spend 15 victory points.
Determination of the Victor
If you played in cooperative mode and succeeded in destroying Jörmungandr, all players win the game (even those eliminated).
If you opted for a single victor, then the player who finishes the game with the most victory points after the destruction of Jörmungandr is declared victor. In that case, during the destruction of Jörmungandr, the players spend a victory point each, starting with the player who made Lara reach Jörmungandr and then continuing clockwise until the number of victory points required to win has been reached. The players who are eliminated during the course of the game do not participate in this phase and therefore cannot win.
Variants: Game for 2 Players
Every player starts the game with 8 cards instead of 6 and 2 Health Tokens instead of one.
Variants: Solo Game
Start the game with 8 cards instead of 6 and 3 Health Tokens instead of one. In Phase 3, draw 2 cards instead of one.
Obstacle Sections of the Region Boards
The translator notes that the rule book is done and that the obstacle section of each region board follows.
The City Gulped Down by Niflheim (Mediterranean Sea)
- Obstacle 1. Underwater Door. Discard 1 Trick + 1 Treasure, otherwise Lara loses 1 health.
- Obstacle 2. The Door of Niflheim. Every player discards 1 Acrobatics or rolls the obstacle die.
- Obstacle 3. Kraken. The players discard a total of 2 Trick + 2 Acrobatics or roll the obstacle die only once.
- Obstacle 4. The Door to the Gauntlet. If the Trick track is not finished, roll the obstacle die.
- Obstacle 5. The Room of Broken Columns. The players discard 3 Acrobatics in total or roll the obstacle die only once.
- Obstacle 6. Amanda's boat. Every player discards 1 Combat or rolls the obstacle die.
The City Lost by Bhogavati (Thai Coasts)
- Obstacle 1. Underway towards the Temple. The players discard 4 Acrobatics in total + 1 Combat, or roll the obstacle die only once.
- Obstacle 2. The Courtyard of Bhogavati. Every player discards 1 Combat or rolls the obstacle die.
- Obstacle 3. Hall Protonordique. Discard 3 Treasures to acquire the tranquilizing gun.
- Obstacle 4. The Gems of Shiva. The players discard 4 Trick Cards or roll the obstacle die only once.
- Obstacle 5. Right Hand of Shiva. Every player discards 1 victory point or rolls the obstacle die.
- Obstacle 6. The Card Room. Discard 2 Trick Cards or you are eliminated.
The Secrets of the Croft Manor (England)
- Obstacle 1. The Sarcophagus. Discard 2 Trick Cards or roll the obstacle die.
- Obstacle 2. The Lateral Doors. If the Trick track is ended, gain the tranquilizing gun; otherwise roll the obstacle die.
- Obstacle 3. Bat and Climbing. Every player discards 1 Acrobatics or rolls the obstacle die.
- Obstacle 4. The Mystery of the Chapel Door. Pick a card type (Acrobatics, Combat or Trick), then take the 1st card of the draw pile. If it isn't the card type you chose, discard all your cards.
- Obstacle 5. The Secret Office. Discard 1 victory point + 1 Treasure, or you're eliminated.
- Obstacle 6. The Runic Pillar. The players discard a total of 6 elements (Cards, victory points or treasures) or roll the obstacle die only once.
The Mayan City of Xibalba (Mexico)
- Obstacle 1. Head of the Jaguar and the Stone Skull. Every player discards 1 Acrobatics + 1 Combat, otherwise Lara loses 1 health.
- Obstacle 2. Home of the Jaguars. If the Trick track is finished, every player gets 1 card; otherwise roll the obstacle die only once.
- Obstacle 3. Home of Blades. The players discard 2 Acrobatics in total to avoid traps, otherwise Lara loses 1 health.
- Obstacle 4. Home of Fire. The players discard 2 Acrobatics in total to avoid fire, otherwise Lara loses 1 health.
- Obstacle 5. Crumbling Home. Discard 1 Acrobatics + 1 Trick, otherwise Lara is taken by the crushers and loses 2 health.
- Obstacle 6. Basin of Jörmungandr. If the Combat track is not finished, throw the obstacle die twice.
Island Jan Mayen (Sea of Norway)
- Obstacle 1. The Tower of Valgrind. Every player may discard 5 victory points to draw 2 cards, or roll the obstacle die.
- Obstacle 2. The Door of Death. Every player discards 1 Treasure or 3 victory points, otherwise he is eliminated.
- Obstacle 3. Maze. Discard 2 Trick Cards, otherwise you lose all your cards.
- Obstacle 4. The Bridge of Valhalla. Reveal the top card of the Progress Card pile; discard 2 cards of the same type, otherwise roll the obstacle die.
- Obstacle 5. Ballade in Hammer. Discard 3 Acrobatics Cards or roll the obstacle die twice.
- Obstacle 6. Footbridges and Yeti. The players discard a total of 5 Combat Cards, otherwise Lara loses 2 health.
Sea of Andaman (as printed after the Island Jan Mayen obstacles): Every player draws 2 cards before moving to Helheim.
Helheim (Arctic Ocean)
- Obstacle 1. Stones of Power. Discard 2 Trick Cards or roll the obstacle die.
- Obstacle 2. The Drawbridge. Every player discards 1 Acrobatics Card or rolls the obstacle die.
- Obstacle 3. Shooting in Thralls. The players discard in total 4 Combat Cards or roll the obstacle die twice.
- Obstacle 4. The Hordes of Helheim. The players discard in total 5 Combat Cards, otherwise Lara loses 2 health.
- Obstacle 5. The Central Tower. Every player discards 2 victory points or 2 treasures, otherwise they lose all their cards.
- Obstacle 6. Natla and the Heart of Jörmungandr. Natla speeds up the heart of Jörmungandr. All players lose the game.
Destroying Jörmungandr: Spend 7 victory points if you have the 4 objects of Thor, otherwise spend an additional 2 victory points for each missing object to win the game.