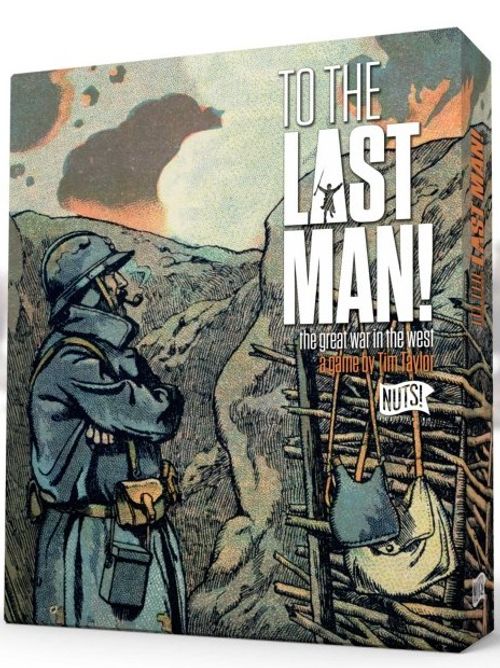
To the Last Man! The Great War in the West
To the Last Man! The Great War in the West Rulebook
Table of Contents
Table of Contents
- 1.0 Game Components
- 2.0 Sequence of Play
- 3.0 Winning the Game
- 4.0 Movement
- 5.0 Combat
- 6.0 Supply
- 7.0 Production
- 8.0 Unit Manifest
- 9.0 Card Manifest (55)
- 11.0 Getting Started
- 12.0 Playing the Game
- 13.0 Advanced Rules
- 14.0 Historical Rules
- 15.0 Optional Rules
- 16.0 Special Rules
- 17.0 Scenarios & Variant Campaigns
- 17.1 Historical Scenarios
- 17.2 Variant German Plans
- 17.2.1 Variant German Campaign Game #1: von Moltke the Elder's Plan (1879)
- 17.2.2 Variant German Campaign Game #2: von Waldersee's Plan (1888)
- 17.2.3 Variant German Campaign Game #3: von Schlieffen's First Plan (1899)
- 17.2.4 Variant German Campaign Game #4: von Schlieffen's Second Plan (1906)
- 17.2.5 Variant German Campaign Game #5: von Moltke the Younger's First Revision to Schlieffen's Plan (1912)
- 17.2.6 Variant German Campaign Game #6: Kaiser Wilhelm's Plan (1914)
- 17.3 Variant French Plans
- 17.3.1 Variant French Campaign Game #1: Plan XIV (1898)
- 17.3.2 Variant French Campaign Game #2: Plan XV (1903)
- 17.3.3 Variant French Campaign Game #3: Plan XV b (1907)
- 17.3.4 Variant French Campaign Game #4: Plan XVI (1909)
- 17.3.5 Variant French Campaign Game #5: Plan Michel (1911)
- 17.3.6 Variant French Campaign Game #6: Plan XVI b (1913)
- 18.0 Example of Play
- 19.0 Designer's Notes
- 20.0 Design FAQs
- 21.0 Bibliography
1.0 Game Components
1.1 Gameboard
The Gameboard has two main components: the Map and the Season and Year Tracks. The Season & Year Tracks allow players to keep track of the current Game Turn. The Map is divided up into separate Areas in order to facilitate combat and movement.
1.2 Playing Pieces
The playing pieces (also called units) represent frontline military forces. There are many kinds of pieces, but one type stands out - Armies. An Army acts like a container, holding other pieces within itself. Although it can contain many pieces, an Army and all its contents count as only one playing piece for stacking purposes.
1.2.1 Military Unit Types
Units represent front-line military forces of the major combatants of World War 1. The unit counters included are the maximum number available to each player. There are four different basic types of military units:
- Armies
- Infantry type units
- Auxiliary type units
- Forts
Armies contain other units, such as Infantry and Auxiliary pieces. Infantry comprise the main force in Armies, while Auxiliary units support the Infantry. Unlike other units, Forts represent installations and cannot move nor attack. Each type of unit is summarized in the Playing Pieces Characteristics Chart. For a detailed description of each unit type see section 8.0 Unit Manifest.
1.2.2 Area Stacking Limit
A maximum of three (3) Friendly units, regardless of type or size, can be in an area. Forts and empty armies do not count toward stacking limits. Stacking applies at all times even during movement. A unit may not move through an area that is already at its stacking limit.
1.2.3 Game Markers
Different types of markers are included to assist in play. Some markers are printed with different backs.
- Season marker: used to keep track of current turn.
- VP marker: used to track Victory Points.
- Counter-attack markers: see optional rule 15.2.2.b.
- Phase marker: used to keep track of current phase.
- Strategic Movement markers: indicate units so moved.
- Rail markers: place on units which use Rail Movement.
- Out of Supply markers: place on any unit that is not in supply in the Check Supply Status phase.
- Fortify markers: placed on Armies that are Fortified.
- Retreat markers: place on any units that retreat to an area with an unresolved battle to indicate that such units may not participate in this battle and may not retreat again this combat phase. Remove at the end of combat.
- Antwerp supply markers: In rare cases, Antwerp can be a supply source. Please see historical rules 14.2.3 and 14.2.5.
1.3 Cards
Cards are the heart of TO THE LAST MAN! The majority of actions can only be performed as the result of card play. Playing cards represents the logistical wherewithal needed to conduct military campaigns: ammunition, fuel, transport, and even reserves.
After playing a card, it is placed face up on the Discard Pile. Players draw any new cards from the unused portion of the deck, called the Draw Pile. The deck is reshuffled whenever the Draw Pile runs out of cards as well as at the end of every WINTER Seasonal Turn.
Players without the right cards are in trouble, and an empty hand usually indicates a retreat will soon follow. A player seeks to bankrupt his opponent's hand while maintaining his own hand with as many cards as he can. Players must purchase new cards for their next turn during the Production Phase. As a general rule-of-thumb, players should buy as many cards as they can - one less card means one less opportunity. Each type of card is described in section 9.0 Card Manifest.
1.4 Army Templates
Army Templates are off-map placeholders for holding all of the units contained within Armies. It's important not to confuse the contents of one Army with another.
Army Templates have two sections, Infantry rondels on the bottom and Auxiliary squares on top. Only Infantry and Stoßtruppen units may be placed in the Infantry section. Only Auxiliary units may be placed in the Auxiliary section.
The number of each type of unit permitted in an Army is limited to the number of spaces available on the template. These unit limitations simulate the differences between each nations' Armies.
2.0 Sequence of Play
I. PLACE REINFORCEMENTS II. FIRST PLAYER TURN
- Play "offensive" or "pass"
- Movement phase
- Declare battles
- Combat phase III. SECOND PLAYER TURN IV. REPEAT TURNS II & III V. PRODUCTION PHASE
- Check supply status
- Spend build points
- Discard excess cards
- Check for EFT box losses VI. ADVANCE SEASON MARKER
I – Place Reinforcements
Both players check the Game Events Chart to see if they get any Reinforcements, i.e., new units to place on the map. Arriving Reinforcements are placed in any Supplied Friendly or Disputed Areas within Stacking Limits.
II – First Player Turn
The First Player is always the German player unless advanced rule 14.2 Bidding for Initiative is in effect. Player Turns are subdivided into phases:
1. Play "Offensive" or "Pass"
In this phase, the player indicates whether or not he will conduct offensive operations, by playing an Offensive card of one of the various types.
Offensive: Playing an Offensive type card allows the player to move any or all Friendly units on the map or Army Templates subject to movement rules and restrictions. He may also initiate new battle(s) and conduct Combat rounds therein.
Passing: Not playing an Offensive card means there will be no Battles nor Combat Phases for the player that Turn. Not playing an Offensive card is called "Passing."
- The phasing player may move one unit only. This unit may not move into an Enemy Area even if that Area is empty; no Combat Phase occurs.
- Even though he doesn't play an Offensive card, the Passing player may play a …Crisis! card.
- A Strategic Reserves! card may be played, allowing a second unit to be moved.
- If the player plays no cards at all, he has the option to discard one or more unwanted card(s) and draw new card(s) from the deck to replace them. Any cards so drawn cannot be played until the next player turn.
2. Movement Phase
When an Offensive card is played, the Attacker (or Offensive) player may move any or all units. Otherwise, the player Passes and is still allowed to move one unit (some restrictions apply).
A unit may move up to its normal movement allotment (usually one Area except for Cavalry, Biplanes, and Rail Moves). Units are moved one at a time and must always obey Stacking Limits (1.2.2).
When moving from a Friendly area, a unit may move into any adjacent Friendly, Disputed, or Enemy area. When moving from a Disputed area, a unit may never move into an Enemy area. When a Friendly unit moves into an Enemy Area, that area becomes Disputed as well as a Battle Area.
3. Declare Battles
This phase is only used when an Offensive type card has been played. Newly initiated battles must be fought. That is, Enemy Areas which have just become Disputed this Player Turn must have a Combat round conducted. Whether there is Combat in any other Disputed Area is for the Offensive player to decide.
a. Announce Battle Areas. The Offensive player announces all Disputed Areas where he intends to battle. Players will fight one round of Combat in all such designated Battle Areas.
b. Play Cards. The Offensive player plays any combat enhancement cards (like Poison Gas! or Surprise Attack!) and designates which Battle Areas are affected by these played cards. The Defensive player may now also play any combat enhancement cards he wishes (e.g., Bad Weather or Poison Gas!), designating which Battle Areas are so affected.
4. Combat Phase
All designated Battle Areas go through a separate Combat phase. In a designated Battle Area, units fire at the opposing units by rolling dice, one die for each unit.
Any Hits a player rolls indicates the number of units (or other equivalents) the opposing player must lose. Losses can be satisfied in three ways: units, cards, or both.
NOTE: In all cases, the Attacker (or Offensive player) is the one whose Turn it currently is. The Defender (or Defensive player) is the other person.
Each Battle Area is resolved individually. Within a Battle Area each players' units fire in a strict order:
NOTE: Before any dice are rolled, Cavalry units from either side may retreat before combat (the Offensive player chooses first).
a. Dogfight Phase. When both players have Biplanes involved in the same Battle Area, all Biplane fire is resolved during the Dogfight phase. Opposing Biplanes in the same Battle Area must fire exclusively at each other. Dogfight fire is resolved simultaneously; both sides take any losses immediately.
NOTE: Losses inflicted by Dogfighting Biplanes target only enemy Biplanes and can never affect other units (see 5.3.4 Annihilation for further ramifications).
NOTE: Dogfighting Biplanes may not fire again later in this Combat phase, even if all opposing Biplanes are eliminated.
If neither player, or only one player, has Biplanes in the Battle Area, skip the Dogfight phase and move on directly to the next phase.
b. Offensive Player's Artillery Fire Phase. The Attacker's Artillery units fire. The Defender takes any losses incurred, by removing units or playing Ersatz card(s).
c. Defensive Player's Fire Phase. All of the Defender's units fire (except Dogfighters). Attacker takes any losses incurred, by removing units or playing Ersatz card(s).
Retreat instead of Firing: Defending units may Retreat into adjacent Friendly or Disputed Areas instead of Firing. Some units may Retreat while others stay to fight. Place a Retreat marker on retreating units to show they have retreated this Combat phase. A unit which retreats loses all firepower and may not contribute to battle for the remainder of that Combat phase. Units forced to Retreat twice in the same Combat phase are eliminated instead. See 5.4.4 Retreat Into Combat for more information.
d. Offensive Player's Fire Phase. All of the Attacker's units fire (except Dogfighters). Defender takes any losses incurred, by removing units or playing Ersatz card(s).
e. Retreat Phase. Either player may retreat any or all units from the Battle Area into one adjacent Friendly or Disputed Area (Attacker chooses first).
4a. "Surprise Attack!" Combat
NOTE: When a Surprise Attack! card is played, the Attacker specifies one Battle Area where a special Combat Phase is conducted. Below, you will find the sequence of play for this special Surprise Attack! Combat Phase:
a. Dogfight Phase b. Offensive Player's Fire Phase c. Defensive Player's Fire Phase d. Retreat Phase
III – Second Player Turn
The Second Player is always the Entente player unless advanced rule 14.2 Bidding for Initiative is in effect.
Repeat Player Turn Phases 1–4 above for the Second Player, i.e., the Entente player is now the Attacker.
IV – Repeat Turns II & III
Repeat Player Turns II and III, one after the other, until both sides "Pass" consecutively. Only after both sides Pass in turn, do you go on to the Production phase below.
V – Production Phase
In the Production Phase, players spend their allotment of Build Points (BPs) to buy new units, more cards, and/or Entrench units. Players must first ascertain whether any of their units are unsupplied.
1. Check Supply Status
Units are said to be "in Supply" when they can draw a line from Friendly Area to Friendly Area, no matter how long, to a Friendly Supply Source. Units that are not in Supply at this time are considered to be "Unsupplied."
NOTE: Disputed Supply Source Areas (i.e., Supply Source Areas occupied by both Friendly and Enemy forces) function as Supply Sources only for units in that Area.
- Unsupplied Forts are reduced by one
- Unsupplied Forts at one strength are eliminated
- Unsupplied Armies lose one unit of the player's choice
- Unsupplied Armies at one or zero strength are eliminated
- Unsupplied individual pieces are eliminated
2. Spend Build Points
Players consult the Build Points Chart (see map/Player Aid) for how many Build Points (BPs) they can spend this Production Phase. Players may replenish their hands with new cards or Entrench Armies and Infantry units. Players may also build new units in any Supplied Friendly or Disputed Area, even adding them to Armies however they want.
3. Discard Excess Cards
Every once in a while a player spends too much on cards and ends up with more cards than he can legally hold (please see Maximum # of Held Cards Chart). In these cases, he must discard any cards in excess of this maximum (his choice).
4. Check for EFT Box Losses
The EASTERN FRONT TRANSIT BOX represents the Russian Front in World War I. The German player may move his units into the EFT BOX in order to get a boost in Victory Points (see 3.0 Winning The Game).
However, units in the EASTERN FRONT TRANSIT BOX are subject to removal. Roll one die for every 5 BPs of units (or fraction thereof) in the EFT BOX. For every die roll of "1" the German player must eliminate one unit.
IMPORTANT: Do not use this phase if you are also playing with AT ALL COSTS!—the Great War in the East.
VI – Advance Season Marker
Advance the Season marker to the next season. Reshuffle the deck at the end of every WINTER season. New Seasonal Turns begin all over again with Game Phase I – Place Reinforcements. Check for Game Events in the upcoming Season.
NOTE: The 23rd Turn, WINTER 1919-20, is the last Seasonal Turn of TO THE LAST MAN! You will almost never see it, someone will usually have won before then.
3.0 Winning the Game
3.1 Victory Points (VPs)
Victory Points may be totaled at any time. Add together all Victory Points from German-Friendly Areas. VPs in Disputed and Enemy Areas are not counted. To this base VP total, add or subtract the Victory Point Modifications listed below. Reference this Modified VP total to the Victory Chart (located on the player's aid card) to determine the current Level of Victory.
Victory Point Modifications
- +1 VP for every currently eliminated Entente Army.
- -1 VP for every currently eliminated German Army.
- +1 VP for failing to remove Infantry required by an Entente Military Crisis! (for each occurrence).
- -1 VP for failing to remove Infantry required by a German Military Crisis! (for each occurrence).
- +1 VP for every 5 BPs worth of units in the EFT Box (1914-1917 only).*
* This 5BPs = 1VP modification is only used when playing solely with TTLM! Do not use this modification when linked with AT ALL COSTS! since events on the Russian front are directly represented there.
Total Blockade Effects on VPs by year
- -1 VP: SPRING 1916 to WINTER 1916-17
- -2 VPs: SPRING 1917 to WINTER 1917-18
- -3 VPs: SPRING 1918 to WINTER 1918-19
- -4 VPs: SPRING 1919 to WINTER 1919-20
3.2 Armistice - Ceasefire
Players can try to end the game at any time. Either player may request Armistice at any time, and if the other player agrees the game ends at the current Level of Victory. It's more likely that the other player will want to continue playing, striving for a better Victory. Regardless, the game ends when a Decisive Victory has been achieved.
3.3 Armistice - Surrender (player resignation)
A player may resign the game at any time, except when he is winning. This indicates a humiliating surrender and so the Level of Victory is considered one level worse for him. For example, if the German player resigns during a Stalemate it's considered a Marginal Entente Victory.
4.0 Movement
4.1 Procedure
When an Offensive type card is played, the Attacker may move any or all units.
Otherwise, the player Passes and is still allowed to move one unit (but not into an Enemy Area, even if empty). Although moving into or out of armies within in the same area counts as zero areas moved, it still counts as having moved a unit.
Movement must be from area to adjacent area, or into and out of an Army. A unit may move up to its normal movement point allotment (usually one Area except for Cavalry, Biplanes, and Rail Moves). Units are moved one at a time and must always obey Stacking Limits (1.2.2).
There are four kinds of Area status, based on who controls the Area in question:
- Friendly Area: Your units were the last ones to occupy or move through this Area. All Areas in your country are Friendly in Summer 1914. All Areas on your side of the frontline are Friendly when a scenario begins.
- Enemy Area: Your opponent's units were the last ones to occupy or move through this Area.
- Disputed Area: Both your units and your opponent's units currently occupy this Area. Sometimes this is referred to as a frontline Area or a Battle Area.
- Neutral Area: Neither player's units have occupied nor moved through this Area. Neither player owns this Area, and in some cases neither player's forces may move into this Area. For example, HOLLAND is a Neutral Area and may never be entered. In the Free Game and some Historical Variant set-ups, Belgium, Luxembourg, and the UK begin as Neutrals. See the THEATRE RULEBOOK.
Area status is checked prior to movement and changes immediately as a result of movement. Area ownership can be determined at any time.
NOTE: When a Friendly unit moves into an Enemy Area containing Enemy units, the area immediately becomes both a Disputed and a Battle Area — one round of combat must occur therein.
Example: GE 1st Army moves into the Antwerp area, changing its status. Antwerp had been a Friendly area for the Entente and an Enemy area for the German player. Now it is a Disputed area for both sides. Moving the German Army leaves the Liége area empty. Should the French Infantry unit in Namur move into Liége, it would still be entering an Enemy area since German units were the last ones to occupy or move through Liége. The Netherlands is considered a Neutral area and may not be entered by either side.
4.2 Restrictions
- Units may move from Friendly Areas to any other type of Area: Friendly, Disputed, and even Enemy (Neutral Areas are a special case).
- Units moving from Disputed Areas are more restricted in their movement options; they may only move to Friendly or Disputed Areas.
- Units may never move from a Disputed Area to an Enemy Area. Even units which may move more than one area (e.g., Cavalry and Biplanes) cannot move from a Disputed to an Enemy Area.
- Units may only enter an Enemy Area during a player turn where the Attacker has played an Offensive type card.
- The Strait of Dover, North Sea, and the Netherlands are not playable areas and units may never enter these regions.
4.3 Entrenchment Status
When an entrenched unit moves, it loses entrenched status (includes the optional Fortified units as well).
When an infantry-type unit moves into an entrenched Army, it immediately becomes entrenched as well (applies to Fortified Armies too).
When an empty army moves into an area containing an entrenched infantry unit, it may immediately incorporate the infantry unit into itself and become entrenched too.
4.4 Rail Movement
Rail Moves represent movement by rail (and to a lesser extent by road). All Rail Moves must follow rail lines, but since each area on the TTLM! mapboard contains rail lines connecting to all adjacent areas there's no need to show them on the map.
Rail moves allow units to move up to three (3) areas. To use rail movement a unit must begin the movement phase in a Friendly area, move only through Friendly areas, and end the move in a Friendly area. Rail moves cannot be combined with any other type of movement. All areas must have been Friendly at the beginning of the player's turn to be eligible for rail movement. Thus it's easier to remember if you do Rail Moves first. You can use Rail markers to show which units have moved by Rail already this turn.
IMPORTANT: Rail moves are limited to two (2) units per player turn.
4.5 Strategic Movement (Entente player only)
The Entente player has great flexibility in his movement to and from Friendly Entente Supply Source Areas. Strategic movement allows a unit to move from any Friendly Entente Supply Source area to any other Friendly Entente Supply Source area. Both supply source areas must have been friendly at the beginning of the Entente player's turn. Strategic Movement cannot be combined with any other type of movement. You may use Strategic Movement markers to show which units have used a Strategic Move already this turn.
IMPORTANT: Strategic Movement is limited to two (2) units per player turn (limited to 1 unit in Summer 1914).
4.6 UK Sea Movement
UK reinforcement Armies as well as any rebuilt eliminated UK Armies must appear in the ENGLAND Area. Such armies must then first cross the Channel before moving up to the front line.
UK units (only) can use sea movement at a rate of one unit per movement phase. Whether moved as part of an Offensive or as the Pass Move, one (1) UK army or unit can move from the ENGLAND area to any coastal Friendly or Disputed Entente Supply Source area. UK units may instead move from any coastal Friendly or Disputed Entente Supply source area back to the ENGLAND area. Sea movement cannot be combined with any other type of movement.
UK forces may never sea move into an Enemy-controlled Entente Supply Source Area (i.e., there are no invasions to the French or Belgian coasts).
IMPORTANT: Units cannot use Sea Movement to retreat during the combat phase.
NOTE: In the Campaign Game, the two units which begin set up in ENGLAND (1st UK Army and an infantry unit), must be kept separate while they remain in the ENGLAND Area. That is, while in ENGLAND, the infantry may not move into the 1st UK Army.
5.0 Combat
5.1 Battle Areas
5.1.1 Creating Disputed Areas
Disputed Areas are created when a Friendly unit is moved into an Enemy Area. Disputed Areas can only be created during an Offensive. Battles must be declared in newly created Disputed areas, and a round of Combat must be fought therein. Thus newly created Disputed Areas automatically become Battle Areas.
5.1.2 Declaring Battles
A player may announce as many battles as he wishes during the Declare Battles phase (exception: Limited Offensive cards which allow at most one Battle Area to be declared). Once a battle has been declared it must be resolved during the Combat Phase. A player cannot change his mind after other battles have gone badly for him — he must still fight all declared battles. As stated above, Battles must be declared in newly created Disputed areas.
All designated Battle Areas go through a separate Combat Phase. In a designated Battle Area, units fire at the opposing units by rolling dice. Any Hits a player rolls indicates the number of units (or other equivalents) which the opposing player must lose.
5.2 Fire Resolution
5.2.1 Firing
Each Battle Area is resolved individually. Before any dice are rolled, Cavalry units from either side may retreat before combat (Attacker chooses first). Please see section 5.4.3 Cavalry Retreat for more details.
Each players' units fire (i.e., roll dice) in a strict order:
a. Dogfight Phase b. Offensive Player's Artillery Fire Phase c. Defensive Player's Fire Phase d. Offensive Player's Fire Phase
NOTE: The Surprise Attack! order is somewhat different:
a. Dogfight Phase b. Offensive Player's Fire Phase c. Defensive Player's Fire Phase
NOTE: In all cases, the Attacker or Offensive Player is the one whose Turn it currently is, i.e., the one who played the Offensive card. The Defender or Defensive Player is the other person.
If there are multiple Battle Areas, the Offensive player decides the order in which combats are resolved. Combat in an area is always completely resolved before beginning with another area.
Units fire at each other by rolling one (1) six sided die for each unit in the Battle Area, in the order dictated by the Combat Sequence. Certain conditions may cause some units not to fire (e.g., a Siege Gun unit in a Battle where there are no Forts present).
5.2.2 Firepower
A unit's Firepower — F followed by a number — indicates what it needs to roll in order to Hit.
- F1 means that a Hit occurs on a die roll of "1."
- F2 means a Hit occurs on a die roll of "1" or "2."
- F3 a Hit occurs on a die roll of "1" or "2" or "3."
- [F#] means that the player rolls a die for that unit only in certain circumstances. Please see 8.0 Unit Manifest, as well as the Unit Capabilities Chart for further details.
5.2.3 Hits
Hits cause Enemy losses which must be removed immediately. Hits can be paid for by eliminating units and/or cards as detailed below.
5.3 Taking Losses
When a player rolls a hit during combat his opponent must satisfy the hit by taking a loss. Losses can be taken in the form of units, cards, or a combination thereof.
5.3.1 Unit Losses
One unit may be removed from the mapboard to pay for each Hit taken. Any units removed from the board are placed in the player's force pool. Unit losses are removed one at a time. Any unit losses must come from the strongest unit in that Battle Area (usually an Army or Fort). When units are of equal strength the player taking the loss decides which unit is removed.
Armies have a strength equal to the number of units on its army template. For example, an army with 3 infantry and 2 cavalry has 5 strength. Forts have a strength equal to the number on the fort counter on the map (e.g., the Verdun 4 counter has 4 strength). All other individual units on the map have a strength of 1.
Losses applied to an Army must come from the most numerous or prevalent type of unit in the Army. When units are of equal strength the player taking the loss decides which unit is removed. For example, if an Army containing 3 Infantry, 2 Artillery, and 1 Cavalry were forced to take 1 Hit it would have to lose 1 Infantry piece (the most numerous type).
NOTE: An Army that loses its last unit in Combat is eliminated.
Losses applied to a Fort reduce it by that number of Hits. For example, if the Antwerp Area Fort were forced to take a Hit, rotate the Antwerp 3 Fort marker so that the number 2 faces the owning player. If forced to take another Hit, rotate the Fort marker again so that the 1 faces the player. When a fort reaches zero (0) strength, it is removed from the game (except: see Sedan).
Example: The Entente player suffers 3 hits during a battle in the Verdun area. His forces consist of three units: an individual cavalry unit, an entrenched army (containing 3 infantry and 2 artillery), and the Verdun fort at 4. The first hit must come from the army since it has the largest strength of 5. Infantry units are the most numerous component of that army so an infantry unit must be taken as the first loss. The second loss can be taken from either the 4 fort or the army as it now has 4 units. The Entente player decides to reduce the 4 fort to a 3 fort satisfying the second loss. The third loss must now come from the army as it is once again the strongest unit. The player now has a choice of taking either an infantry unit or artillery unit for the loss since there are two of each. Because the army is entrenched (and he's on the defensive) the player elects to take an artillery unit for his third loss.
5.3.2 Card Losses
Ersatz cards can cover losses too. Playing an Ersatz 3 card is equal to taking up to 3 Hits. Likewise, an Ersatz 2 card equals up to 2 Hits. All other cards may be used as an Ersatz 1 to take a single hit. A player can use multiple cards to absorb losses. Any excess Ersatz left over is lost; it cannot be carried over into other battles or phases.
Example: If you use an Ersatz 3 to absorb two (2) hits in the Artillery Fire Phase the one (1) remaining Ersatz is lost and cannot be used.
5.3.3 Unit and Card Losses
Any combination of units and cards can be used to satisfy losses; all rules concerning Losses apply.
5.3.4 Annihilation
Players are never forced to play cards to satisfy remaining losses when all Friendly units are eliminated from a Battle Area. In other words, a player is never compelled to take losses in excess of the number of his pieces he has in the Battle - he can completely eliminate all his units in the Area, instead. This is a good way to cut losses.
Example: suppose the German 1st Army containing 5I and 2A, causes 3 Hits to a single French Infantry unit. The French player has the option to lose 3 Hits of Ersatz cards, thus allowing the unit to continue to exist. On the other hand, he can also choose to eliminate that one Infantry unit from the Battle and so not suffer the additional 2 Hits loss.
5.4 Retreats
There are three kinds of retreat in TO THE LAST MAN! - Retreat Instead of Firing, Retreat After Combat, and Cavalry Retreat. Place a Retreat marker on each unit that retreats; these are removed at the end of the Combat phase. A unit which retreats loses all firepower and has no effect on battles for the remainder of that Combat phase. Units may never retreat into an Enemy area.
5.4.1 Retreat Instead of Firing
The Defending player may retreat any number of units from a Battle Area instead of firing them (i.e., rolling dice). The defender can retreat any number of units and leave any number behind to fight normally. Retreating units can move to any adjacent Friendly or Disputed area, and such units may retreat separately into different areas.
NOTE: If all units retreat and the opposing player has cavalry in the area, the retreating units may be subject to Pursuit Fire (see 8.3.1 Cavalry as well as the Cavalry section of the Unit Capabilities Chart).
5.4.2 Retreat After Combat
Either player may retreat any number of surviving units from a Battle Area at the end of combat. Players can retreat any number of units and leave any number behind. The Attacking player chooses first whether to retreat.
Retreating after combat is more restricted than other types of retreat. All units in a single Battle Area which retreat after combat must be moved to the same adjacent Friendly or Disputed area.
5.4.3 Cavalry Retreat
Cavalry units can retreat before combat occurs. Before any dice are rolled, Cavalry units from either side may retreat (Attacker chooses first). Retreating units can move to any adjacent Friendly or Disputed area, and multiple units may retreat separately to different areas.
NOTE: Cavalry retreats are not subject to Pursuit Fire.
5.4.4 Retreat Into Combat
It is possible for units to retreat into an area where combat has not yet been resolved. Retreated units do not participate in combat nor can they take losses in this subsequent battle. Units forced to retreat twice in the same player turn are eliminated. This might occur in two ways:
- Retreated units left with no Friendly non-retreated forces in the area after Combat is resolved.
- Force-retreat for Empty Armies.
6.0 Supply
Military forces require supplies to function - they need ammunition, food, fuel and other equipment. If an army's supplies cannot reach it, the army will lose the ability to fight effectively. Units independent of armies will dissolve even more quickly without supplies.
6.1 Supply Sources
Supply Sources are the colored half filled-in circles along the Map edge. In TTLM!, Green Supply Sources are used by the German player while the Blue Supply Sources are for the Entente. Areas containing sources are called Supply Source Areas. Supply Source Areas represent rail links to the player's off-map Industrial Production Centers.
6.2 Checking Supply
Supply is checked once each turn during the Supply Phase. Units are in supply when they can draw a line of any length from area to area, solely through adjacent Friendly areas to a Friendly Supply Source Area. If a unit cannot do this, then it is considered to be Out of Supply (OoS).
6.3 Disputed Supply Sources
Supply sources in a Disputed area can only supply Friendly units in that area.
6.4 In Supply Effects
Armies and Infantry units that are in supply are eligible to Entrench. Areas that are in supply may receive newly built units during the Production Phase.
6.5 Out of Supply Effects
In the Production Phase, if a unit is found to be Out of Supply, place an OoS marker on the unit and it suffers the following attrition results.
- Forts are reduced by one (1) strength. Out of Supply Forts at 1 strength are eliminated.
- Armies lose one (1) unit of the owning player's choice. An Army that loses its last unit due to being Out of Supply is eliminated. Empty Armies are likewise eliminated.
- Individual units on the map are eliminated.
- Cannot receive reinforcements or newly built units.
NOTE: However, Out of Supply units can still entrench.
7.0 Production
Players consult the Build Point Chart to see how many Build Points (BPs) they can spend during the Production Phase. BPs may be spent on any combination of new units, entrenching, or more cards. Both players expend BPs at the same time. BPs must be used during the current Production Phase or they are lost.
7.1 Buying Cards
The Production Phase is your only opportunity to add cards to your hand. Players must announce how many cards are being bought before drawing them face down from the top of the draw pile. Only the announced number of cards can be drawn. Drawn cards cannot be viewed until all of a player's BPs are spent (this prevents players from continuing to draw cards until they get the card they want).
Players may not hold more cards than the maximum specified on the Card Limit Chart. If a player is found to have more than the limit, he must immediately discard any excess cards and place them face up on the discard pile. Any BPs expended on the extra cards are lost.
7.2 Buying Units
Units built during the Production Phase may be placed in any army or individually in any Friendly or Disputed area (must be in supply). Eliminated armies that get rebuilt are treated differently.
7.3 Rebuilding Armies
Armies ordinarily enter play as reinforcements according to the Turn Record Track. On the other hand, eliminated armies can only be rebuilt during the Production Phase. Rebuilt armies must be placed on the map in a Supplied, Friendly area within their home country.
EXCEPTION: US Armies, like all US units, are a special case; they treat France as if it were their home country.
Example: Since the Belgian army can only be rebuilt in a Supplied Friendly Belgian area, should no Belgian areas qualify, the Belgian Army may not be rebuilt.
7.4 Entrenching
A player may entrench up to four (4) units on the mapboard by expending one (1) BP during Production - flip these counters to their entrenched side.
IMPORTANT: Each player may spend only 1 BP on entrenchments in Seasonal Turns 1 and 2 (SUMMER 1914 & AUTUMN 1914). Seasonal Turn 3 (WINTER 1914-15) and thereafter have no such limitations on entrenching.
7.5 Upgrading Infantry to Stoßtruppen
When upgrading an Infantry unit to a Stoßtruppen unit, remove the infantry piece and replace it with a Stoßtruppen unit in the same area or Army Template where it came from. Put the infantry unit back in the German force pool.
7.6 Build Point Costs
One Build Point (1 BP) will purchase:
- 1 Card or
- 1 Army (Empty) or
- 1 Infantry unit or
- 1 Cavalry unit or
- 1 Artillery unit or
- 1 Biplane unit or
- 1 Siege Gun unit (German only) or
- 1 Paris Gun unit (German only) or
- Entrench 4 units (an Army equals 1 unit) or
- Upgrade 1 German Infantry into Stoßtruppen
- Fortify an Entrenched Army (optional).
Two Build Points (2 BPs) can buy:
- 1 Tank unit or
- 1 Stoßtruppen unit (German player only).
- Rebuild 1 Commonwealth Infantry (UK only).
8.0 Unit Manifest
The letters or symbols in parentheses below indicate the abbreviations used for these unit types on scenario sheets.
8.1 Army Units
Armies act as containers, holding other units within their command and control structure. Although many units may be contained within an Army, it only counts as one unit for Stacking Limit purposes. A single Army unit on the map represents all units placed on its off-map Army Template. An Army may only contain units of its own color or nationality (except US Infantry may be placed in any Entente Army).
Infantry and auxiliary type units may move freely into or out of Armies during the Movement Phase or when Retreating. In addition, Army contents may be altered during Production and Reinforcement Phases but no movement from area to area is allowed at this time.
Armies may move one Area in the Movement Phase. Armies have no intrinsic Firepower apart from their contents, and roll no dice in battle. The strength of an Army is the sum of the number of all units it contains.
Example: An Army containing 3 Infantry, 1 Cavalry, and 2 Artillery pieces has a strength of 6.
Empty Armies: An Army containing no units is considered to be "Empty." An Empty Army has a strength of zero and no Firepower. Empty Armies do not count toward area stacking limits.
Empty Armies, even when accompanied by other Friendly units, must always retreat from Disputed Areas by the end of the Movement (or as soon as possible when not occurring in the Movement phase).
Example: During the Production phase the Entente player reorganizes his armies in the Artois area, leaving the UK 2nd Army Empty and the British 1st Army with three Infantry units. Artois is also occupied by the German 4th Army and the German player declares Artois a Battle Area in his player turn. The UK 2nd army must be retreated during the Defensive Player's Fire Phase.
Should an Empty Army ever be in a Disputed Area without the presence of any Friendly Infantry type units, it is immediately eliminated.
IMPORTANT: An Army that loses its last unit (that is, becomes Empty), either due to Combat losses or from being Out of Supply, is eliminated.
Eliminated Armies: Eliminated Armies count toward Victory (see Victory Point Modifications in section 3.1). Eliminated Armies cost one Build Point (1 BP) to rebuild. Unlike other units, an eliminated Army may only be brought back in Friendly Areas within its home country (except US builds in Friendly areas in France). Rebuilt armies are Empty.
Entrenchment: In the Production Phase, Armies may be Entrenched by expending BPs. All Infantry pieces contained within an Entrenched Army are considered Entrenched as well, even recently moved units. Auxiliary units get no benefit from being in an Entrenched Army.
To Entrench an Army, flip the counter to its Entrenched side. Entrenched Armies that move lose their Entrenched status - flip the counter back to its mobile (i.e., not Entrenched) side.
NOTE: In the special case where an empty Army moves into an Area containing independent Entrenched Infantry unit(s), and takes in at least one of them, the Army also becomes Entrenched.
8.2 Infantry Type Units
Infantry type units are the basic ingredient of all Armies. Without Infantry as a backbone, an Army is fragile and can actually become something of a liability.
8.2.1 Infantry (I)
HISTORY: An Infantry piece represents from 1 to 3 Corps (2 to 6+ divisions), depending on quality, nationality, as well as how far advanced the war is. As the war progressed all units were worn down and dissipated, while certain nationalities fought better than others.
Infantry units may move one Area during the Movement Phase. Infantry pieces have an F1 Firepower, which means they inflict an Enemy loss on a die roll of "1." Infantry units cost 1 Build Point each to produce (in the Production phase).
IMPORTANT: Only removing Infantry type unit(s) will satisfy …Military Crisis! cards, when played. Failure to remove Infantry unit(s) from the mapboard or an Army Template in response to your opponent's playing a …Military Crisis! card results in a VP adjustment (see section 3.1 Victory Points).
Entrenchment: Infantry units have the ability to Entrench. In the Production Phase, Infantry units may Entrench by expending Build Points (BPs) — flip the unit to its entrenched side. Infantry pieces within an Entrenched Army are automatically Entrenched too. Entrenched pieces that move lose their Entrenched status - flip the unit back to its mobile (i.e., not Entrenched) side.
Entrenched Infantry units have an enhanced Defensive Firepower (i.e., Firepower when it's not the player's turn). Entrenched Infantry Fire Defensively at F2, that is they inflict a hit on a die roll of "1" or "2." Offensively, Entrenched Infantry still have a Firepower of F1.
8.2.2 Stoßtruppen (S)
NOTE: Stoßtruppen units are available only to the German player.
HISTORY: Stoßtruppen were troops specially trained to infiltrate front-line trenches. Their extensive training emphasized personal initiative in order to advance as far and as fast as possible. Taking full advantage of terrain and surprise, small formations of Stoßtruppen would avoid enemy strong-points, opting instead to infiltrate into the enemy's rear areas — leading to disruption, panic, and sometimes even to a breakthrough. Created by the nation bearing the brunt of fighting, the concept of German Stoßtruppen reflects a doctrinal approach to solving the problem of breaching the enemy's trenches. Stoßtruppen introduce the infantry tactics used 20 years later, in World War 2. Stoßtruppen units represent about 2 Corps (4 divisions).
Stoßtruppen units are treated like Infantry in all respects except Firepower, BP cost, and the ability to force defenders to retreat.
Stoßtruppen units have F2 Firepower, which means they inflict a Hit on a die roll of "1" or "2." Stoßtruppen units may move one Area during the Movement Phase.
Stoßtruppen units do not Entrench and receive no benefit from being part of an Entrenched Army (they don't need it anyway). Stoßtruppen also do not get the benefit of being within a Fortified Army.
Starting in the SUMMER 1917 Production Phase and thereafter, Stoßtruppen units may be built by the German player at a cost of 2 BPs each to produce. In addition, each Production phase the German player may opt to "upgrade" one standard Infantry piece into a Stoßtruppen unit at a cost of 1 BP. When upgrading, simply replace the infantry unit with a Stoßtruppen unit. The infantry unit is placed back in the German force pool.
NOTE: There are 10 Stoßtruppen units that enter the game as reinforcements in 1918. If there are less than ten available in the German Force Pool, then Infantry units may be substituted on a one-to-one basis. If there are not enough Infantry available then the shortfall is lost.
Forced Retreat: For every attacking Stoßtruppen unit that scores a Hit in a Battle Area, one of the Defender's Armies must Retreat After Combat (if not beforehand), regardless of how that Hit is paid for.
8.2.3 Commonwealth Infantry (I)
NOTE: Commonwealth Infantry units are available only to the Entente (UK) player.
HISTORY: Commonwealth forces served with distinction in WW1. To illustrate this, Commonwealth infantry units are differentiated from other UK infantry. These two units represent Canadian troops as well as ANZAC forces (Australian and New Zealand Army Corps).
Commonwealth infantry units are treated just like other UK infantry units except for Firepower and rebuild cost. Commonwealth units have an F2 Firepower (Offense and Defense) and cost 2 BPs to rebuild after being eliminated.
Initial Placement: The Canadian and ANZAC Infantry units enter play in a unique way. Rather than initially appearing as reinforcements or getting built in Production, instead they are substituted for UK infantry units already on the mapboard. Commonwealth units are swapped for an on-map UK infantry unit during the Reinforcement Phase of the Seasonal Turn below:
- Canadian unit: AUTUMN 1915 (Turn 6)
- ANZAC unit: SPRING 1917 (Turn 12)
NOTE: When setting up scenarios set later in the war, the Entente player may set up Commonwealth units just like any other UK Infantry.
8.3 Auxiliary Type Units
8.3.1 Cavalry (C)
HISTORY: By World War I, Cavalry's usefulness had been greatly diminished by the advent of machine-guns, barbed wire, and trenches. Accordingly, Cavalry units in this game usually have no Offensive Firepower. A Cavalry unit represents approximately 1 Cavalry Corps (3+ divisions).
Cavalry has no Offensive Firepower except as specified below. However, riders can dismount and deploy their weapons effectively in defense. So Cavalry has F1 Defensive Firepower. Cavalry units cost 1 BP to produce.
Cavalry units may move up to two Areas during the Movement Phase. When moving from the first Area to the second Area, they may not move from a Disputed Area to an Enemy Area.
Cavalry Retreat: Only Cavalry units have the capability to retreat before combat. Cavalry may retreat before any combat dice are rolled (Attacker retreats first). See section 5.4.3 Cavalry Retreat.
Raiding Fire: Cavalry units may attack at F1 when in a Battle Area containing no enemy Infantry type units.
Pursuit Fire: Cavalry may fire F1 against Retreating units. This is known as Pursuit Fire and can only be performed when enemy units retreat instead of firing in the Combat Phase. This die roll is in addition to any other Combat dice rolling and occurs immediately following your opponent's declaration to retreat his units from Battle.
IMPORTANT: If any enemy Infantry type units remain in the Battle Area or if there is Cavalry present in the retreating force, Pursuit Fire is not possible.
8.3.2 Artillery (A)
HISTORY: Heralding every battle, artillery barrages played a fundamental rôle in World War 1. While smaller guns are subsumed within infantry units, Artillery units comprise much heavier guns of 210mm or larger. An Artillery unit represents 2 or more Artillery regiments.
Artillery units normally have a Firepower of F1, which means they inflict a hit on a die roll of "1." Card play may increase this Firepower. Artillery units fire twice Offensively, once during the Offensive Player's Artillery Fire Phase and a second time during the Offensive Player's Fire Phase. The play of a Surprise Attack! card reduces this to only one attack.
Artillery units may move one Area during the Movement Phase. Artillery units, moving by themselves, cannot change Area ownership. That is, an Artillery piece cannot conquer or hold an Area all by itself. Artillery units each cost 1 Build Point to produce.
IMPORTANT: Artillery units unaccompanied by Friendly Infantry type units, when caught in an Area with Enemy Infantry type units, are eliminated at the end of the Movement or Combat phases.
Deployment Limitations: To reflect a more historical artillery doctrine and usage, the number of artillery units each army can hold is limited:
Max. # of Artillery units per Army by year & nation:
| Year | GE | UK | FR | US |
|---|---|---|---|---|
| 1914 | 1 | 1 | 1 | - |
| 1915 | 2 | 1 | 1 | - |
| 1916 | 3 | 2 | 2 | - |
| 1917 | 3 | 2 | 2 | - |
| 1918 | 3 | 2 | 2 | 1 |
| 1919 | 3 | 2 | 2 | 2 |
1918 UK Matériel Superiority (historical option): By 1918, UK armies enjoyed the most lavishly supplied heavy artillery formations of any nationality. To reflect this matériel superiority, beginning with the SPRING 1918 turn, all UK Artillery units fire F2 for their Defensive Fire. Poison Gas! cards increase UK Artillery Defensive Fire to F3. UK Artillery Offensive Fire remains unaffected.
NOTE: Flip UK Artillery units over in SPRING 1918.
8.3.3 Siege Guns (G)
NOTE: Siege Guns are available only to the German player.
HISTORY: Siege Gun units represent super-heavy howitzers firing 305mm or 420mm shells. Products of Krupp craftsmanship, even small numbers of these mammoth guns can pulverize stationary targets - like immobile Forts, for instance.
Siege Gun units may only roll dice during Offensive Fire in a Battle Area containing an Enemy Fort, otherwise they have no Firepower at all. When attacking Enemy Forts, Siege Guns have an F3 Firepower, which means they inflict a hit on a die roll of "1", "2", or "3".
NOTE: Siege Guns never fire Defensively.
Whenever a Siege Gun rolls a Hit, the Entente player must allocate that Hit to the Fort. Of course, Ersatz cards may be used to absorb these losses, just like any other Hits. However, if the Entente player does not have an Ersatz card to cover the hit delivered by the Siege Gun, then the Fort unit gets reduced a step (even if it ordinarily would not qualify as the strongest Entente unit in the area).
Siege Gun units fire twice Offensively, once during the Offensive Player's Artillery Fire Phase and once during the Offensive Player's Fire Phase, when Artillery fires. However, Siege Guns are not considered Artillery units and cards like Poison Gas! do not affect them.
Siege Gun units may move one Area during the Movement Phase. Siege Gun units each cost 1 BP to produce.
IMPORTANT: Siege Guns can never retreat and are eliminated if they are part of an army that does retreat.
IMPORTANT: Siege Guns, moving by themselves, cannot change Area ownership. That is, a Siege Gun unit cannot conquer or hold an Area all by itself.
IMPORTANT: Siege Gun units unaccompanied by Friendly Infantry type units, when caught in an Area with any Enemy units (except Forts), are eliminated at the end of the Movement or Combat phases.
8.3.4 Biplanes (B)
HISTORY: Used initially only for observation, biplanes (as well as monoplanes and tri-planes) eventually towered over all major battles on the western front. A Biplane unit represents 750–1000 Biplanes (depending on nationality) deployed in a supporting rôle.
Biplane pieces have an F1 Firepower, which means they inflict an Enemy loss on a die roll of "1." Biplane units may participate in combat in one of three ways, but only one method per battle may be used (see below).
Biplanes may move up to two Areas during the Movement Phase. When moving from the first Area to the second Area, they may not move from a Disputed Area to an Enemy Area.
Biplanes each cost 1 BP to produce. Biplanes may only be built in 1916 and thereafter. Individual Biplane counters are marked with the year they become available.
IMPORTANT: Biplanes may not participate in the Combat phase after a Bad Weather card has been played.
IMPORTANT: Biplanes, by themselves, cannot change Area ownership. That is, a Biplane piece cannot conquer or hold an Area all by itself.
IMPORTANT: Biplane units unaccompanied by Friendly Infantry type units, when caught in an Area with Enemy Infantry type units, are eliminated at the end of the Movement or Combat phases.
Deployment Limitations: Each Army can hold a maximum of one (1) Biplane unit (doctrinal limitations).
Biplane Battle Methods
- Dogfights: When Friendly Biplanes are in a Battle Area with Enemy Biplanes, a "Dogfight" must occur. When this happens all Biplanes fire only at each other during the Dogfight Phase. All Biplanes in the area must participate in this Dogfight even if players don't have an equal number of planes. Both players roll attack dice and resolve combat losses simultaneously in the Dogfight Phase. All Hits rolled apply only to Biplane units; other units remain unaffected by the Dogfight. Any Dogfighting Biplanes that survive may not fire again later during the Player's Fire phase.
- Ground Attack: When Friendly Biplanes are in a Battle Area and are unopposed by Enemy Biplanes, they may fire F1 normally in the appropriate Fire Phase.
- Defensive Reaction: When Biplanes are defending in an area without any attacking Enemy Biplanes (i.e., there is no Dogfight), they can react to the attack. Each Reacting Biplane forces the attacker to re-roll one successful hit by an Infantry type unit. Reacting Biplanes cannot also engage in Ground Attack.
Defender Scramble (Advanced rule 13.7): Defender's Biplane units in an area adjacent to a Battle Area (and not already embattled) may shift such Biplanes into that Battle Area to lend support (if Stacking Limits allow). This occurs just before a battle is resolved and can prove to be a very nasty surprise.
- If Enemy Biplanes are present, Dogfight ensues.
- Otherwise, all Biplanes which have scrambled into battle must use Defensive Reaction, Ground Attack is not allowed.
8.3.5 Tanks (T)
HISTORY: Tanks were a product of late-war desperation to pierce the front-line by any means possible. Created by nations with the greatest access to natural resources, Tanks reflect a mechanistic, industrial approach to solving the problems of breaching the enemy's trench-lines. A Tank unit represents 350-500 tanks (depending on nationality) employed in a supporting rôle.
Tank units attack with F2 Firepower, which means they inflict a hit on a die roll of "1" or "2" when firing in the Offensive Player's Fire Phase. Tank units firing defensively have a Firepower of F1, which demonstrates their limited defensive capabilities.
Tank units may move one Area during Movement. Tank units each cost 2 Build Points to produce.
Tanks may first be built by the UK and France starting in the SUMMER 1917 Production Phase. German Tanks may be built in Production of SPRING 1918 and thereafter. Finally, US Tanks become available in SUMMER 1918.
NOTE: Tank units cannot fire when in a Rough terrain area, although they may be taken as a loss.
IMPORTANT: Tank units unaccompanied by Friendly Infantry type units, when caught in an Area with Enemy Infantry type units, are eliminated at the end of the Movement or Combat phases.
Forced Retreat: For each attacking Tank unit that scores a Hit in a Battle Area, one of the Defender's Armies must Retreat After Combat (if not beforehand), regardless of how that Hit is paid for.
8.3.6 The "Paris Gun"
NOTE: The Paris Gun is available only to the German player.
HISTORY: The Paris Gun unit represents a single giant howitzer, the largest piece of ordinance to ever see action. Capable of firing shells up to 75 miles away, the Paris Gun became one of the first modern terror weapons when it targeted the French capital.
The Paris Gun unit has no Firepower — it's just one gun, after all. Its insidious effect is on civilian morale. The Paris Gun is not considered Artillery, and combat enhancing cards do not affect it. The Paris Gun unit may move one Area during the Movement Phase. It costs 1 BP to produce. The Paris Gun becomes an allowable build in SPRING 1918 and thereafter.
Terror Weapon: As long as the Paris Gun unit is in or adjacent to the Paris Area, add +1 VP to the German VP total. This is not cumulative, and only provides a total bonus of +1 VP for as long as the above conditions apply.
NOTE: The Paris Gun cannot be taken as a unit loss.
IMPORTANT: The Paris Gun can never retreat and is eliminated if it is part of an army that does retreat.
IMPORTANT: The Paris Gun, moving by itself, cannot change Area ownership. That is, the Paris Gun unit cannot conquer or hold an Area all by itself. It's just one gun.
IMPORTANT: The Paris Gun unit when unaccompanied by Friendly Infantry type units, and when caught in a Disputed Area with any Enemy units (except Forts), is eliminated at the end of the Movement or Combat phases.
8.4 Forts (F)
HISTORY: Fort counters represent extensive pre-war fortifications and other installations. Forts are special units, unlike any other units in the game.
- Forts may never move and may never join Armies.
- Forts do not count against the Area Stacking Limit.
- Forts are never forced to retreat.
- Forts may never be built up when damaged nor rebuilt if destroyed. Eliminated Forts are removed from the game and placed back in the box.
- Forts may never attack, they only roll defensive fire.
In Combat, Forts roll a number of dice equal to the current number on the Fort marker. Forts have an F2 Defensive Firepower, meaning they inflict a hit for every die roll of "1" or "2" in the Defensive Player's Fire Phase.
NOTE: The strength of a Fort equals its current number. For example, the Nancy 5 Fort marker is a 5 strength unit.
NOTE: The Paris and Nancy Fort markers are double-sided since they both have a strength greater than 4.
Forts lose strength by rotating the Fort marker to the next smaller Fort number. For example, when the Fort Nancy 5 takes 1 hit, it is rotated so the Nancy 4 side is now facing the player. If it were to take 3 more hits, then it would be flipped over to its Nancy 1 side. Of course, Ersatz cards can be used to satisfy losses, instead.
Single Strength Forts: Fort markers when they are at one (1) strength do not, in and of themselves, control an Area. In other words, when a single strength Fort is the sole Enemy unit in an Area containing Friendly units, that Area is not considered Disputed, but instead Friendly. A Cavalry unit can even pass through such an Area to an adjacent Enemy Area, since this would not be movement from a Disputed to an Enemy Area (which is prohibited), but rather from a Friendly to an Enemy Area.
NOTE: Supply may not be drawn through a Friendly Area which contains a 1 strength Enemy Fort. That is, Supply cannot flow through an Area containing an Enemy unit.
The "Sedan 0" Zero Strength Fort: This unit represents a handful of forts which acted as a supply hindrance to invading German forces during SUMMER 1914. Treat the Sedan 0 Fort marker as a Single Strength Fort (see above), except that it has no Firepower and rolls no dice. It is still considered a unit, but it's the last to be taken as a loss since it has a strength of zero (0).
9.0 Card Manifest (55)
Numbers in parentheses show the copies of this card in the deck. There are 55 cards in the TO THE LAST MAN! deck.
9.1 Offensive Type Cards
This is the most common type of card found in the deck (26 cards). There are several varieties, each is listed below.
9.1.1 Offensive (x16)
Offensive cards represent your ability to battle and maneuver to attack. Playing an Offensive card allows the player to move any number of his units and to conduct offensive operations. Since Combat only occurs when an Offensive has been played, this is the only way units may be moved into Enemy Areas, which then immediately become Disputed Areas.
Offensives allow a player to fight battles as well. Without playing an Offensive card, a player may not designate any battles in which to fight. Not playing an Offensive in your Turn is called "Passing."
Only the Attacker (Offensive player) may play an Offensive card. Otherwise, this card may be used as an Ersatz 1 by either player at any time.
NOTE: Bad Weather downgrades this to Limited Offensive.
9.1.2 Limited Offensive (x6)
Playing a Limited Offensive has the same effect as an Offensive card, with one major difference - only one Battle Area may be declared during the player's turn. That is, combat may occur only in one area.
IMPORTANT: Since newly created Disputed Areas must be designated as Battle Areas, when playing a Limited Offensive the player's units may only enter one Enemy Area (converting it to Disputed) - if more than one Enemy Area were entered, then this would necessitate multiple battles must take place, which is not allowed.
NOTE: Bad Weather downgrades this to Pass, plus move.
9.1.3 "The Big Push" (x1)
Only the Entente (UK) player may play "The Big Push." The German player treats it as an ordinary Offensive card.
HISTORY: The first large-scale UK offensive of the war, the Somme battle in summer 1916, saw the most massive concentrations of artillery up to that point in the war. The British generals called it "The Big Push."
Playing "The Big Push" card is the same as playing an Offensive, with a bonus for an attacking Entente player. The Entente player adds one (1) extra die of Artillery Firepower at F2 to the combat rolls of both his Offensive Player's Artillery Fire Phase and Offensive Player's Fire Phase in one designated Battle Area where a UK Army unit is present.
IMPORTANT: "The Big Push" card may only be played starting with the 1916 scenario (SPRING 1916) and thereafter. Before 1916, it's treated as a normal Offensive.
NOTE: Extra dice are added to the battle as a whole, not to each individual army in the battle.
9.1.4 "Gericht" (x1)
Only the German player may play the "Gericht" card. The Entente player treats it as an ordinary Offensive card.
HISTORY: "Gericht" in this case means "place of execution" as well as "tribunal." Operation "Gericht" was devised by von Falkenhayn as a way to bleed the French army white while they were defending Verdun. His plan was to rain artillery fire down upon the fortress defenders - actually capturing the objective was not seriously contemplated as it would push French forces out of the "Fleischhackmaschine" (meat grinder)!
Playing the "Gericht" card is the same as playing an Offensive, with a bonus for an attacking German player.
9.1.5 "Tout Le Monde À La Bataille!" (x1)
Only the Entente (French) player may play "Tout Le Monde À La Bataille!" Otherwise it's an Offensive card.
HISTORY: "Everyone to battle!" That was Foch's rallying cry. He intuited that after months of offensives, the German army was in actuality a spent force. He would mount an all-out attack to roll back the German line - in itself an uncanny reprise of four summers earlier…
Playing the "Tout Le Monde À La Bataille!" card is the same as playing an Offensive, with an added bonus for an attacking Entente player. The Entente (French) player adds two (2) extra dice of Tank Firepower at F2 to the combat rolls of his Offensive Player's Fire Phase.
9.1.6 "Friedensturm" (x1)
Only the German player may play the "Friedensturm" card. To the Entente player it's just an ordinary Offensive.
HISTORY: "Friedensturm," otherwise known as the oxymoronically named "Peace Offensive," was a surprise attack launched in mid-July 1918 under the command of Hindenburg-Ludendorff. This card represents these final reserves thrown in during the last Kaiserschlacht battles.
Playing the "Friedensturm" card is the same as playing an Offensive, with a bonus for an attacking German player. The German player adds two (2) extra dice of Stoßtruppen Firepower at F2 to the combat rolls of his Offensive Player's Fire Phase in one or two designated Battle area(s), usable only wherever a German Army unit is located. Being Stoßtruppen Firepower, each Hit inflicted will cause an Entente Army to Retreat After Combat.
IMPORTANT: "Friedensturm" card may only be played starting with the 1918 scenario (SPRING 1918) and thereafter. Before 1918, it's treated exactly like an ordinary Offensive card.
NOTE: Extra dice are added to each battle as a whole.
NOTE: Bad Weather changes this to an Offensive card.
9.2 Ersatz Cards
HISTORY: "Ersatz" is the German word for "substitute" or "replacement." These cards represent reserves behind the lines used to fill in any gaps. Playing Ersatz cards allows a player to take combat losses in terms of cards lost, rather than losing units from armies on the map.
9.2.1 Every Card is Ersatz 1
While there are no cards entitled "Ersatz 1," any card can be used as an Ersatz 1 - and thus absorb one Hit instead of losing one unit. Either player may use cards to satisfy losses during combat in this fashion.
9.2.2 Ersatz 2 (x10)
Playing an Ersatz 2 card counts as taking two (2) Hits.
NOTE: Unused Ersatz points are lost. For example, if an Ersatz 2 card is used to satisfy a 1 Hit loss, the extra point is lost and cannot be saved for later.
9.2.3 Ersatz 3 (x2)
As Ersatz 2, except this card satisfies up to 3 Hits loss.
9.3 Poison Gas! (x6)
HISTORY: Whether the chemical agent was chlorine, phosgene, or mustard gas the idea was the same - to exterminate enemy soldiers as if they were vermin.
In the Declare Battles part of each Combat phase, both players may play one (1) Poison Gas! card per Battle Area. Playing this card allows the player to designate one Battle Area as being supplied with gas shells. The player's Artillery Firepower in that Battle area then becomes F2 for the entirety of that one Combat round. Otherwise this card may be used as an Ersatz 1 by either player at any time.
IMPORTANT: Poison Gas! is playable starting in SPRING 1915. A Poison Gas! card cannot be combined with an Advanced Artillery Barrage! card.
IMPORTANT: Play of a Bad Weather card neutralizes all Poison Gas cards played this turn.
9.4 Advanced Artillery Barrage! (x2)
HISTORY: In the early stages of trench warfare, artillery fire patterns were plotted according to pre-arranged patterns, and not known enemy positions. Then when the offensive came, the guns would 'soften up' the front line for many days, sometimes even weeks on end. Inevitably, not only tactical but sometimes even operational surprise was forfeited during this extended barrage. Bruchmüller's artillery tactics pioneered on the eastern front emphasized short sharp attacks on targets previously registered. This allowed for tactical surprise to actually be exploited.
In the Declare Battles part of each Combat phase, either player may play one (1) Advanced Artillery Barrage! card per Battle area. Playing this card allows the player to designate one Battle Area where his Artillery Firepower is increased to F3 for that one round of Combat. Otherwise this card may be used as an Ersatz 1.
IMPORTANT: Advanced Artillery Barrage! is playable only in SPRING 1917 and thereafter. Advanced Artillery Barrages cannot be combined with Poison Gas! cards.
9.5 Bad Weather Cards (x3)
Played by the Defensive player in the Declare Battles phase, Bad Weather affects Biplanes, Offensives, and Poison Gas! cards. The Special Offensive cards (e.g., Gericht) become merely Offensive cards. An ordinary Offensive card becomes a Limited Offensive. A Limited Offensive card becomes a forced "Pass" with two important differences: 1– allows an unlimited number of units to be moved by the Offensive player instead of one, and 2– it does not contribute to ending the turn.
Bad Weather also negates all Poison Gas! cards the Attacker may have played. Finally, Biplanes never participate in combat when a Bad Weather card is in effect. Otherwise this card may be used as an Ersatz 1.
IMPORTANT: Bad Weather cannot be played on Turn 1.
9.6 Strategic Reserves! (x2)
HISTORY: Railroads crisscross each area on the map. Supplied with sufficient rolling-stock, an army can be railed to any distant area, providing a rather nasty shock.
A Strategic Reserves! card can be played by the Attacker either as part of a Pass Move or during the Movement phase of an Offensive. Playing a Strategic Reserves! card allows the player to move one (1) unit any distance — from a Friendly or Disputed Area, through Friendly Areas, to another Friendly or Disputed Area. Otherwise this card may be used as an Ersatz 1.
9.7 Surprise Attack! (x2)
HISTORY: Occasionally the element of surprise was not entirely lost in days of artillery barrages. The preliminary bombardment in these battles was limited to only a handful of hours. This allowed less time for the enemy to reinforce the sector. A whole new dynamic was thereby introduced.
Playing this card allows the Attacker to designate one Battle Area as a "Surprise Attack" for this Combat round. The Surprise Attack Combat Turn Order is used for this Battle. Otherwise this card may be used as an Ersatz 1.
9.8 Entente Military Crisis! (x1)
HISTORY: An Entente Military Crisis! card represents disasters off-map, elsewhere in Europe or the Middle East.
When this card is played by the German player, the Entente player must immediately remove the specified number of infantry units from the map, placing them back in his force pool. Infantry units removed must be of the nationality specified on the card. Failure to remove the Infantry required results in a +1 Victory Point adjustment (see 3.1 Victory Points), representing serious Entente setbacks in this other theatre of war. The Entente Military Crisis! card can be played at any time during the German player's turn, provided the current game year corresponds with an event year on the card.
- 1915 - Crisis in Gallipoli: remove 1 UK infantry.
- 1917 - Crisis in Italy (Caporetto): remove 3 UK or FR infantry.
- 1918 - Crisis in the Middle East: remove 2 UK or FR infantry.
Example: In 1917, the German player can only play this card as a Crisis in Italy, the Gallipoli Crisis can no longer be played. In 1914 or 1916, he cannot immediately play it as any sort of Crisis! - he must hold onto the card and wait until the appropriate year to play it.
The German Player may also use this card as an Ersatz 1, and in 1914 and 1916 it may only be played as an Ersatz 1. The Entente player can only use it as an Ersatz 1.
NOTE: After the 1918 crisis has been played, this card is permanently removed from play. Remove this card from play during the 1919 scenario.
9.9 German Military Crisis! (x1)
HISTORY: A German Military Crisis! card represents disasters off-map, elsewhere in eastern Europe.
When this card is played by the Entente player, the German player must immediately remove two infantry units (or Stoßtruppen) from the map, placing them back in his force pool. Failure to remove the required infantry type units results in a –1 Victory Point adjustment (see 3.1 Victory Points), representing serious German setbacks in another theatre of war. The German Military Crisis! card can be played at any time during the Entente player's turn, provided the current game year corresponds with an event year on the card.
- 1914 - Crisis in the East (East Prussia): remove 2 GE Infantry.
- 1916 - Crisis in Austria-Hungary (Galicia): remove 2 GE Inf.
- 1918 - Crisis in the Balkans: remove 2 GE Inf. or Stoßtruppen.
IMPORTANT: Infantry type units removed due to play of a German Military Crisis! card are not placed in the EFT Box; they are placed in the German force pool instead.
Example: In 1916, the Entente player can only play this card as a Crisis in Austria-Hungary, the Crisis in the East can no longer be played. In 1915 or 1917, he cannot immediately play it as any sort of Crisis! — he must wait until the appropriate year to play it.
The Entente Player may also use this card as an Ersatz 1, and in 1915 and 1917 it may only be played as an Ersatz 1. The German player can only use it as an Ersatz 1.
NOTE: After the 1918 crisis has been played the card is permanently removed from play. Remove this card from play during the 1919 scenario.
11.0 Getting Started
11.1 Game Contents
- 50 cm x 70 cm Map-sheet
- 55 Playing Cards
- 4 Counter-sheets
- 2 Rulebooks
- 2 Player Aids
- 4 six-sided dice
Military Units
GERMAN EMPIRE: 11 Armies, 35 Infantry, 15 Stoßtruppen, 4 Cavalry, 6 Artillery, 2 Siege Guns, 4 Biplanes, 1 Tank, 1 Paris Gun, and 5 Fort units.
FRENCH REPUBLIC: 10 Armies, 25 Infantry, 3 Cavalry, 3 Artillery, 3 Biplanes, 3 Tanks, and 10 Fort units.
UNITED KINGDOM: 5 Armies, 14 UK Infantry, 2 Commonwealth Infantry (Canadian and ANZAC), 3 Cavalry, 6 Artillery, 4 Biplanes, and 4 Tank units.
KINGDOM OF BELGIUM: 1 Army, 3 Infantry, and 3 Fort units.
UNITED STATES: 5 Armies, 30 Infantry, 1 Cavalry, 3 Artillery, 2 Biplanes, and 3 Tank units.
NOTE: The number of military units included in this game is a hard limit. That is, if all units of one type are already on the board, no more may be built. Game markers such as Retreat and Fortify are not limited in number. If you run out of game markers, simply use substitutes as needed.
Game Markers
1 Season marker, 1 Phase marker, 1 VP marker, 16 markers with different faces on each side (Fortify / Out of Supply / Retreat / Rail / Counter-attack / Strategic movement).
11.2 Setting Up the Game
Units
Carefully punch out and separate the playing pieces from the counter-sheets, grouping them by nation.
Cards
Shuffle the card deck and place it within easy reach of both players. The German player draws a number of cards per scenario instructions followed by the Entente player. Players should keep their cards hidden from their opponent. During play, players may even wish to keep the number of cards remaining in their hand hidden from their opponent as part of the "fog of war" effect.
Map
Unfold the map and place it between the players with the German player at the eastern (or southern) edge and the Entente player at the western (or northern) edge. The Map depicts a section of northwestern Europe known as the "Western Front" in World War I. The map is divided into Areas - each Area is named as an aid to setting-up scenarios. An Area's color indicates the country which controls that area at the start of the game (SUMMER 1914). The various countries are depicted in different colors — Germany is green, France is blue, Belgium is orange, UK is red, and Luxembourg is brown. Certain Areas contain additional symbols. Blue half-filled circles are Entente Supply Sources and Green half-filled circles are German Supply Sources. Numbers in hexagons indicate how many Victory Points that Area is worth if it is German-Friendly. Factory symbols represent industrial regions (used only with the Industry optional rule).
Army Templates
The German player places his Army Templates within easy reach and the Entente player does likewise. Not all Army Templates are available at the start of the game. Some arrive as reinforcements later. When playing with Advanced rule 13.1 Hidden Armies, each player hides his armies under a box lid.
11.3 Object of the Game
TO THE LAST MAN! covers all the World War I Western Front in a series of up to 23 seasonal turns, running from SUMMER 1914 to WINTER 1919-1920. During their turn, players play cards to move armies, fight battles, and try to deplete their opponent's hand of cards (which might lead to a breakthrough, possibly even surrender). Players can end the game at any time if they both agree to stop fighting. This is unlikely however, since one player will probably want to keep striving for a better victory. Victory mostly depends on control of Victory Point Areas.
12.0 Playing the Game
If you haven't done so already, please read the Core Rulebook before you begin playing the game.
12.1 Choose a Scenario
Players agree which scenario they will play. Place units in named areas or on the appropriate Army Templates, according to the scenario's instructions.
IMPORTANT: Play the 1915 scenario first if you're new to the game.
The Campaign Game starts with the SUMMER 1914 season, while other scenarios continue the war at later times. The other scenarios are:
- SPRING 1915 (initial stalemate)
- SPRING 1916 (battles of Verdun and the Somme)
- SPRING 1917 (General Nivelle's ill-fated offensive)
- SPRING 1918 (Kaiserschlacht battles)
- SPRING 1919 (hypothetical scenario)
NOTE: When playing one of the later war scenarios, it is helpful to check the Game Events Chart to see what has already happened in the game.
In addition to the scenarios listed above, 12 additional variant Campaign Game set ups are also provided. These variants describe official war plans from previous years. See 14.4.2 Variant Official Military Plans for more details.
12.2 Scenario Set Up
Players set up their units according to the scenario chosen placing them as indicated. Please see the Scenario section.
NOTE: Players set up units before examining their cards.
Free Set Up Games: When players choose to play free set up games (i.e. scenarios without set up restrictions) players are free to place their units in any of their Army Templates as well as any Friendly or Disputed Area.
IMPORTANT: In the "free set up" version of the Campaign Game, the German player is not forced to invade Belgium or Luxembourg. For more details see section 14.4.1 The "Free Set Up Game."
12.3 Players' Initial Hands
Each player makes sure they have the proper number of cards as specified by the scenario. Then they both look at their initial hand—the cards with which they'll begin play.
At the start of the scenario chosen, each player's initial hand is of vital importance. Players may agree to use one of the following methods to ensure that they don't start out the game burdened with a lousy hand!
12.3.1 Initial Hand Discard
Before play begins, when first examining his cards, if a player deems his hand to be utter trash, he may request a totally new hand. The player discards his entire hand and draws new cards. However, the player must accept this second hand, regardless of its quality. Be warned.
12.3.2 Hand Building
Players may want to construct their own hand, allowing for more individual input and control. If so, follow these steps:
Step 1: Draw fifteen (15) cards randomly from the deck and set them aside. This leaves 40 cards.
Step 2: Separate these remaining 40 cards into two half decks of 20 cards each.
Step 3: Each player chooses one of the resulting piles of 20 cards and examines it. Then they choose any cards they want to use, up to half of their initial hand of cards (rounded down). For instance, in the Campaign Game the German player would choose 7 cards (of his initial 15), while the Entente player chooses 4 (of 8 at start cards).
Step 4: The remaining cards from both piles, as well as the 15 cards set aside earlier, are reshuffled together into a new draw pile. Players then randomly receive the balance of their initial hands from this deck.
13.0 Advanced Rules
The Core Rules provide only the basic game experience. As soon as you feel ready for more depth of play, use these Advanced Game rules — they enhance the fun as well as increase simulation value. Although recommended, be aware, these Advanced rules also add some complexity.
13.1 Hidden Army Templates
Highly recommended! Only when using hidden Army Strengths does this game really come into its own. This rule adds a lot of realism, but at a small cost to playability. Essentially, only Armies and other individual units are openly placed on the map. Army Templates are hidden.
Fog of War: When using this rule, the contents of your opponent's Armies are unknown to you until the moment of combat. Players can see enemy Armies and other individual units on the mapboard, but they cannot view the contents of their opponent's Armies. Only when resolving Battles do the players get to view the contents of any Armies they're fighting. The moment of truth.
IMPORTANT: Keep your Armies hidden, under a box lid. Armies are presented to your enemy only during Combat.
NOTE: Place any Fortified markers on the Army Template, not on the Army units on the game board.
13.2 Bidding for the Initiative
Recommended. Beginning with AUTUMN 1914 and every Seasonal Turn thereafter, players Bid during the Reinforcement Phase to see who goes first rather than automatically assuming the German player has the First Player Turn. Players secretly note how many Offensive cards they are willing to play that Season. This number is their Bid. Reveal simultaneously. Whoever bids more Offensive cards is the First Player. Germans win ties.
The First Player must actually play at least a number of Offensive cards equal to the Bid during the course of this Seasonal Turn. Failure to do so results in a one (1) Victory Point penalty per occurrence. Keep track of this.
The player who has been outbid does not need to honor his losing bid; he may opt to not play the number of Offensive cards he bid or even Pass altogether.
13.3 Fortifications
Recommended. "Hindenburg Line" style Infantry Fortifications may be built in the WINTER 1916-17 turn and thereafter. A player may Fortify an already Entrenched Army by spending 1 BP. All infantry units (not Stoßtruppen) in a Fortified Army fire F3 when defending. Like Entrenched units, Armies lose their Fortified status as soon as they move.
13.4 Early Army Arrival
In the basic game, the turn of arrival for Reinforcement Armies is fixed. However, historically a few Armies did appear earlier than expected in response to an emergency situation (e.g., Foch's 9th Army in early September 1914 and the US 2nd Army in late September 1918).
This advanced rule allows players to potentially receive reinforcement Armies one Season early, but at the risk of having them appear late. At any time during his Player Turn, a player may attempt to bring in one Army one Season early (applies only to Armies). Roll one die:
| Die Roll | Effect |
|---|---|
| 1 or 2 | Army arrives 1 Season early, in current Turn |
| 3 or 4 | Reinforcement arrives as scheduled, next Turn |
| 5 or 6 | Army arrives 1 Season late, the Turn after next Turn |
NOTE: The player can roll only once for each Army.
NOTE: An Army reinforcement arriving early is placed just like a reinforcement - in any Friendly or Disputed Area (except UK armies, which appear in England).
13.5 Terrain Effects
There are two types of terrain in TTLM! Clear and Rough.
CLEAR TERRAIN: requires no modification to the rules.
ROUGH TERRAIN: Rough Terrain Areas feature hilly, forested, or other abundant defensive positions. Rough Terrain Areas are designated by having a red triangle near the Area's name. Defending forces in a Rough Terrain Area take one less Hit than is rolled against them. For example, defenders taking 2 Hits would suffer only 1 loss and 1 Hit would inflict no losses at all. There is no affect on the Attacker's losses.
NOTE: The Rough Terrain Defensive bonus does not apply to Dogfighting Biplanes.
13.6 Disputed Area-Side Limits
This advanced rule limits how many units may move into or out of a Disputed area. This limit is determined by the type of area-side through which the units move. Through any Clear area-side, a player may move two (2) units into and two (2) units out of a Disputed area. A Rough Terrain area-side (signified by red dotted lines) limits movement to only one (1) unit in and one (1) unit out. This limit affects only movement into or out of a Disputed area. Friendly areas have no restrictions on movement.
13.7 Defender Scramble
Defender's Biplane units which are adjacent to a Battle Area (and not already embattled) may shift such Biplanes into the Battle Area (if Stacking Limits allow). This occurs just before a battle is resolved and can be a nasty surprise.
- If Enemy Biplanes are present, Dogfight ensues.
- Otherwise, all Biplanes which have scrambled must use Defensive Reaction, no Ground Attack allowed.
13.8 The EFT Box
The Eastern Front Transit box represents Germany's Russian Front. Movement to or from the EFT box is treated in a special way. Units are simply removed from the map and placed in the EFT box. The earliest they may re-enter play is as reinforcements next Season (exception: units specified in the scenario set up must remain in the EFT box until next year). Only five (5) BPs worth of units may be removed from the EFT box per Season.
Victory Points Bonus: Before 1918, every five (5) BPs worth of units the German player has in the EFT box gets him a +1 VP bonus, but only while they remain therein (see 3.0 Winning The Game). Once units leave the EFT box they no longer count toward bonus VPs.
EFT Box Unit Losses: Units in the EFT box are subject to removal. Roll one die for every 5 BPs of units (or fraction thereof) in the EFT Box. Every die roll of "1" eliminates one unit of the German player's choice.
HISTORY: These lost units should not be thought of as having been eliminated in combat, but rather as being of integral importance to Russian front defenses. They just can't be released for duty on the Western Front.
NOTE: Do not use this rule when playing this game linked with AT ALL COSTS! — the Great War in the East.
14.0 Historical Rules
These rules add a great deal of historical flavor and enhance the simulation value of TTLM! When you feel comfortable with the Core Rules, use these rules.
14.1 Summer 1914 Weather
Bad Weather cards cannot be played on Turn 1.
14.2 Invasion of Belgium
The invasion of Belgium occurs when a player's forces moves into a neutral Belgium for the first time. In the historical campaign game (SUMMER 1914), the German invasion of Belgium has already automatically occurred.
14.2.1 Belgian Allegiance
Whoever invades Belgium is the Enemy of the Belgians. All Belgian forces become available to the other player.
14.2.2 Belgian Surprise
During the first Turn of invasion, the Belgians were caught off guard. To reflect this, on the SUMMER 1914 Turn any Belgian forces caught in Battle Areas without UK or French units as back up cannot use Ersatz cards to satisfy Combat losses. Any Hits delivered to Belgian units in this case must be paid for by losing the units themselves. Even one French or UK unit in the same Area with Belgian units allows the Entente player to use Ersatz cards.
14.2.3 Antwerp, Liége & Namur
Liége and Namur guard important rail lines. While either of the Namur and Liége forts exist, Antwerp is treated as an Entente Supply Source Area. Place the Antwerp Supply marker in Antwerp, Entente side up. When both Namur and Liége have fallen, Antwerp ceases to be an Entente Supply Source.
NOTE: TTLM! uses the old spelling of Liége rather than its modern form (Liège).
14.2.4 Antwerp Evacuation
If Antwerp is the sole remaining Belgian fort during a Production phase, the Entente player can voluntarily reduce it by 1 point and generate a Belgian Infantry unit from the force pool (if one is available). A player cannot reduce the Antwerp fort to zero in this way. This Belgian infantry unit enters during the reinforcement phase of the next season. This simulates the evacuation of Antwerp.
14.2.5 Belgium in the "Free Game"
In the "Free Game," Belgian Surprise rules apply only during the Seasonal Turn in which Belgium is invaded.
If France invades Belgium, the German player cannot expend cards in lieu of Belgian losses unless his units are physically present in the same Battle Area. Antwerp is a German Supply Source while Liége or Namur forts exist. Use the German side of the Antwerp Supply marker to show this.
14.3 US Units
14.3.1 US Infantry
US divisions were double to triple the size of other nations' divisions in WW I. This wealth of manpower was often used to plug gaps in Entente frontlines.
Ubiquity: US Infantry units may be placed in UK, French, or Belgian Armies as well as their own. US units remain US despite being part of another nation's Army.
Early Appearance: US troops trained throughout the French countryside, and often were called upon as scratch forces to shore up crumbling lines during the Kaiserschlacht battles of 1918. To reflect this, US Infantry units may appear earlier than their scheduled arrival Season — but at a price. At any time during the Season before a US Army is scheduled to appear, the Entente player may opt to send green US Infantry into combat. For every one (1) US Infantry unit placed on the map one Season early, the player removes two (2) US Infantry units from the upcoming US Army. US Infantry units may be placed at any time in any Friendly or Disputed Area (as if they were reinforcements).
Example: At any time during Spring 1918, the Entente player may bring US Infantry unit(s) into play from the US 1st Army (a Summer 1918 reinforcement), placing them in any French, UK, or Belgian Armies (or individually). However, the US 1st Army (ordinarily 6I/1A) would then be reduced by double that number of infantry units:
- 1I US used in Spring 1918 = US 1st arrives with only 4I.
- 2I US used in Spring 1918 = US 1st arrives with only 2I.
- 3I US used in Spring 1918 = US 1st arrives with zero I.
14.3.2 US Entry
US armies enter the game as reinforcements beginning with the SUMMER 1918 turn (turn 17) and thereafter, per the Turn Record Track. All scheduled US Armies arrive in Friendly or Disputed Areas (except rebuilt US Armies).
14.3.3 US Builds
No US units may be built until the Production Phase of SUMMER 1918 and thereafter. All built US units arrive in Friendly or Disputed Areas in France; except rebuilt eliminated US Armies which may only be placed in Supplied Friendly French Areas.
14.4 Variant Scenarios
14.4.1 The "Free Set Up Game"
The Free set up Game is for players who don't like to be shackled by historical realities. When setting up a scenario, players may agree to ignore the scenario's Army and unit placement restrictions.
NOTE: players may only deploy units available in the scenario, and only set up in Friendly or Disputed Areas.
In the Free Set up Campaign Game (SUMMER 1914), the German player has the option to place as many units in the Eastern Front Transit box as he wishes. However, for every two Infantry units assigned to the EFT box in excess of the base minimum EF force (1 army & 4I), the German player loses one card from his initial west front hand (i.e., the supplies follow the Armies). Conversely, for every two Infantry taken from the base minimum EF force, the German player gains one card at the start of the Campaign.
In SUMMER 1914, the German player also has the option of not invading Belgium and/or Luxembourg. If the German player decides not to invade Belgium, then England remains a Neutral country. England declares war and allies with the French only when a "1" is rolled in the Reinforcement Phase. As soon as that happens, the UK is at war with Germany and the UK 1st Army is placed in England as a reinforcement. Subsequent UK Game Events are bumped up by the number of Seasons already elapsed.
Similarly, the US remains Neutral when Germany does not invade Belgium. Starting with the SPRING 1917, roll one die during the Reinforcement Phase, on a "1" the US declares war. All US reinforcements are bumped the number of Seasonal Turns elapsed since SPRING 1917.
If France invades Belgium, England and the US remain permanently Neutral and Belgium is allied with Germany.
The German player may opt to invade The Netherlands. In this case, the German Autumn 1914 reinforcements are reduced by one (1) Infantry unit (i.e., only 2I arrive). This reflects the loss of the German "North" Army, garrisoning The Netherlands. Due to the loss of neutral markets, this invasion inflicts an automatic –2 VP penalty - so it had better be worth it! The only on-board effect is that invading The Netherlands allows movement from the Köln or Aachen areas directly to the Antwerp area and vice versa. The Netherlands remains unplayable. Very few players will want to take advantage of this possibility, but von Schlieffen seriously advocated for invading The Netherlands in his 1906 plan!
14.4.2 Variant Official Military Plans
In August 1914, the Germans attacked using von Moltke the Younger's second revision to von Schlieffen's 1906 plan. The French countered with their own "Plan XVII" — a full-on offensive. In addition to these historical plans, TTLM! includes a dozen other official military plans, six German and six French. Players may want to explore other historical possibilities by choosing to use any of these variant set-ups instead of the historical Campaign game.
NOTE: Any forces in the EFT box at start must remain there throughout 1914. In 1915 and thereafter, up to five (5) BPs worth of units may be transferred from the EFT box per Season, as usual.
14.4.3 Random Set Up Campaign
Players may want to set up using a randomly-generated variant scenario. This simulates the uncertainty concerning your opponent's plans. Before setting up, each player secretly rolls two dice. The number rolled indicates which variant military plan to use. Set up units accordingly.
| Dice Roll | French Plans |
|---|---|
| 2 | Variant #1: Plan XIV (1898) |
| 3 | Variant #2: Plan XV (1903) |
| 4 | Variant #3: Plan XV b (1907) |
| 5 | Variant #4: Plan XVI (1909) |
| 6 | Variant #5: Plan Michel (1911) |
| 7 | Historical: Plan XVII (1914) |
| 8 | Variant #6: Plan XVI b (1913) |
| 9 | Variant #1: Plan XIV (1898) |
| 10 | Variant #2: Plan XV (1903) |
| 11 | Variant #3: Plan XV b (1907) |
| 12 | Variant #4: Plan XVI (1909) |
| Dice Roll | German Plans |
|---|---|
| 2 | Variant #1: Moltke the Elder's Plan (1879) |
| 3 | Variant #2: Waldersee's Plan (1888) |
| 4 | Variant #3: Schlieffen's First Plan (1899) |
| 5 | Variant #4: Schlieffen's Second Plan (1906) |
| 6 | Variant #5: Moltke the Younger's 1st Plan (1912) |
| 7 | Historical: Moltke the Younger's 2nd Plan (1914) |
| 8 | Variant #6: Kaiser Wilhelm's Plan (1914) |
| 9 | Variant #1: Moltke the Elder's Plan (1879) |
| 10 | Variant #2: Waldersee's Plan (1888) |
| 11 | Variant #3: Schlieffen's First Plan (1899) |
| 12 | Variant #4: Schlieffen's Second Plan (1906) |
NOTE: Alternatively, simply roll one die - the number rolled indicates which variant campaign game to set up.
14.5 Historical Scenarios
To increase historical simulation value, use the following two rules when playing historical (or variant) scenarios.
14.5.1 Historical "At Start" Cards
For more historical flavor at the start of a scenario, players may request one or two cards indicative of events that occurred in the scenario's initial Seasons. Players may make this request only once per game, before the initial hand is dealt out. Of course, the requested cards count as part of the initial hand dealt; they are not received in addition to the cards a player would normally get.
| Scenario | Entente Cards | German Cards |
|---|---|---|
| 1914 | German Military Crisis! or Offensive! | Strategic Reserves! or Surprise Attack! |
| 1915 | Surprise Attack! or Ersatz 3 | Entente Military Crisis! or Poison Gas! |
| 1916 | German Military Crisis! or The Big Push | Poison Gas! or Gericht |
| 1917 | Surprise Attack! or Offensive | Ersatz 3 or German Military Crisis! |
| 1918 | Ersatz 3 or Tout Le Monde À La Bataille! | Advanced Artillery Barrage! or Friedensturm |
14.5.2 Historical Offensives
Even using historical set-ups and cards doesn't tell the whole story, though. There's still the motivations and intentions of the High Command to take into account. These scenarios don't happen in a vacuum; major events have transpired prior to the start of each scenario.
To best simulate this continuity with past events, players must start on the path originally taken by their historical counterparts. In other words, certain offensives on the initial turn of each scenario become mandatory.
Described below are the mandatory offensives players must conduct in their own first Player Turn of the scenario chosen. All subsequent Player Turns have no such conditions or restrictions; players are free to attack or not, after their first player turn of the scenario's first Season.
IMPORTANT: Remember these mandatory offensives apply only to the first player turn(s) of the first Seasonal Turn of a scenario. Do not perform these offensives when playing through later scenarios (e.g., while playing the 1914 or Campaign game, players would not have to perform the mandatory offensives of 1915, 1916, etc.)
Historical Scenario 1st Turn Requirements
1914 Scenario
GERMAN WARPLAN: Moltke the Younger's 1914 plan. On the German's initial Player Turn, he must play an Offensive card (and a Surprise Attack! if he holds it). The German player must attack into Belgium and Luxembourg.
ENTENTE WARPLAN: French Plan XVII (1914). On the Entente's initial Player Turn, he must play an Offensive card and must attack into at least two areas of Germany (if possible). Each Battle must contain at least one French Army. If the Germans invade Belgium, then at least one French army must also move into Belgium, attacking German forces (if possible).
OFFENSIVE BONUS: During the entire SUMMER 1914 Seasonal Turn, an attacking French player adds two (2) extra dice of Infantry Firepower at F1 to the combat roll of the Offensive Player's Fire Phase in all Battles that are within Germany and contain a French army. Extra dice are added to the Battle itself, not to the armies.
HISTORY: The Germans attacked Liége and Luxembourg. The French attacked into Lothringen, Mülhausen, and Semois. The goal of Plan XVII was to re-conquer Alsace and Lorraine, provinces lost in the Franco-Prussian War of 1870-71, regardless of the cost. This doctrine, known as "l'offensive à outrance," represented an all-out attack even in the face of prepared defenses. Against machine-guns, such facile tactics were sure to fail. French forces suffered appalling losses in these foolish assaults, armed as they were only with élan, the best 75mm artillery piece fielded by any army in the war, and let us not forget — nice bright blue & red uniforms!
1915 Scenario
GERMAN WARPLAN: The Second Battle of Ypres. In the initial German Player Turn, he must play at least a Limited Offensive card and must attack in Belgium.
ENTENTE WARPLAN: Battles of Neuve Chapelle, Festubert, Souchez & the Second Battle of Ypres. On the Entente's initial Player Turn, he must play an Offensive card and must designate at least one Battle.
NOTE: See the Example of Play for more information.
1916 Scenario
GERMAN WARPLAN: The Battle of Verdun. In the initial German Player Turn, he must play an Offensive card and continue battling in Verdun.
1917 Scenario
ENTENTE WARPLAN: The Nivelle Offensive. In the initial Entente Player Turn, he must play an Offensive card and must designate Aisne as a Battle.
HISTORY: French General Robert Nivelle, the brilliant artillerist of Verdun, said he knew "the secret" to breaking through German defenses. He attacked in the Aisne area, but only after the Germans had already retreated some 30 miles to the fortified Hindenburg Line. How clever is that?
1918 Scenario
GERMAN WARPLAN: Kaiserschlacht Battles. In the initial German Player Turn, he must play an Offensive card and must designate at least one Battle.
Variant Scenarios 1st Turn Requirements
Variant French plan #3: plan XVb (1907)
On the Entente's initial Player Turn, if the Germans have invaded Luxembourg, then at least one French army must also move into Luxembourg, attacking German forces (if this is possible).
Variant French plan #5: Plan Michel (1911)
On the Entente's initial Player Turn, if the Germans have invaded Belgium, then at least one French army must also move into Belgium, attacking German forces (if possible).
OFFENSIVE BONUS: During the entire SUMMER 1914 Seasonal Turn, an attacking French player adds one (1) extra die of Infantry Firepower at F1 to the combat roll of the Offensive Player's Fire Phase in all Battles that are within Belgium and contain a French army. Each extra die is added to the Battle itself, not to the armies.
Variant French plan #6: Plan XVIb (1913)
On the Entente's initial Player Turn, he must play an Offensive card and must attack into at least two areas of Germany (if this is possible). Each battle must contain at least one French Army.
OFFENSIVE BONUS: During the entire SUMMER 1914 Seasonal Turn, an attacking French player adds two (2) extra dice of Infantry Firepower at F1 to the combat roll of the Offensive Player's Fire Phase in all Battles that are within Germany and contain a French army. Extra dice are added to the Battle itself, not to the armies.
Variant German plan #1: Moltke's 1879 plan Variant German plan #2: Waldersee's 1888 plan
On the German's initial Player Turn, he must play an Offensive card and must attack into France.
Variant German plan #3: Schlieffen's 1899 plan
On the German's initial Player Turn, he must play an Offensive card and must attack into France, Belgium, and Luxembourg.
Variant German plan #4: Schlieffen's 1906 plan Variant German plan #5: Moltke's 1912 plan
On the German's initial Player Turn, he must play an Offensive card and attack into Belgium and Luxembourg.
14.6 German Unit Transfers
From late 1914 until early 1916, the German General Staff shuffled various units from the western front to the eastern front and then back again. It all more or less balances out in the end, and so this historical movement of forces is omitted from the basic game. Players wanting increased historicity, though, should consult the following chart for withdrawn, removed, and received German units.
German Unit Transfers from / to the Western Front
- Turn 2 (Autumn 1914): withdraw 1 German Cavalry.
- Turn 3 (Winter 1914-15): withdraw 1 German Infantry, withdraw 1 German Cavalry, remove 1 Siege Gun unit.*
- Turn 4 (Spring 1915): withdraw 2 German Infantry.
- Turn 7 (Winter 1915-16): receive 3 German Infantry.
- Turn 8 (Spring 1916): receive 1 German Infantry.
* one of the "German" Siege Gun units is actually on loan from the Austro-Hungarian Empire. They want it back!
Withdrawn units are placed in the Eastern Front Transit Box. All units Received, arrive as reinforcements from the EFT box first (and only then from the German force pool if necessary). Removed units are placed back in the force pool, ready to be built again later.
IMPORTANT: Units placed in the EFT box must remain therein until released in Turns 7 and 8.
NOTE: This rule is not used when playing AT ALL COSTS!
14.7 Historical Unit Options
These rules enhance the capabilities of certain units, but come into play only infrequently.
14.7.1 German Cavalry Conversion
In SPRING 1915 and any time thereafter, the German player may trade in two (2) Cavalry units for one (1) Infantry unit. The Infantry unit may immediately be placed in either of the areas from where the Cavalry units were removed. This may be done at any time. This conversion may not be reversed. This option is only available to the Germans.
14.7.2 Franco-Belgian Cooperation
French infantry units may be moved into the Belgian Army, whereupon they immediately become Belgian infantry units (i.e., simply replace the French infantry with Belgian infantry). This process is not reversible.
14.7.3 1918 UK Matériel Superiority
By 1918, the UK enjoyed the most lavishly supplied heavy artillery formations of any nationality. To reflect this matériel superiority, beginning with the SPRING 1918 turn, all UK Artillery units fire F2 for their Defensive Fire. Poison Gas! cards increase UK Artillery Defensive Fire to F3. UK Artillery Offensive Fire remains unaffected.
NOTE: British Artillery units' flip-sides show when this optional rule is in effect.
15.0 Optional Rules
Optional rules are just that — optional. You don't need them to have a good time. Use them only if you want to. Beginners should avoid optional rules altogether, until becoming more comfortable with the basic game rules. Although optional rules can add a great deal of historical flavor to the game, as with any spice — season to taste.
15.1 Combat Resolution Options
These optional rules modify the game's combat resolution system in one way or another. You should probably only use one of these optional rules at a time.
15.1.1 Averaged Combat Resolution
This game's standard combat system, sometimes derisively known as the "Buckets Of Dice" combat resolution method, is based on a statistical analysis of battlefield casualties throughout the war. On average, results mimic historical casualty rates — the key words here are "on average." So while using the BOD combat resolution method is quite exciting by adding uncertainty to play, it also allows for extreme results to occur. Although highly unlikely, it is possible to roll a series of hits, like rolling ten 1's in a row.
Such dice rolling will end the war very quickly and it's difficult to historically justify. Keep in mind though that this situation is akin to winning the lottery, so it's uncommon to say the least. However extreme results are possible and sometimes do occur.
Combat in TTLM! represents the clashing of armies, and so due to the vast forces involved, losses should cluster around the statistical average rather than allow for numerous outliers. The Averaged Combat Resolution smoothes out damage probabilities and truncates the bell curve. However, this combat resolution method requires a bit of calculation to implement.
The Averaged Combat Resolution optional rule cuts down drastically on the number of dice needed to resolve combat. At most only one die is rolled and it's possible that in some battles no dice will be rolled at all! This optional rule must be used in conjunction with the advanced rule 13.1 Hidden Army Templates.
When using this optional rule, statistical averages are used to determine the number of hits generated — instead of rolling six dice at F1, it's assumed that the results will be a 1, a 2, a 3, a 4, a 5, and a 6. Since only the '1' results in a Hit, it takes six units firing at F1 to automatically inflict one Hit.
To determine the number of Hits inflicted, multiply the number of units firing by their Firepower number. Add all of these FP numbers together. The resulting FP number is then divided by 6 to determine the number of Hits.
Which means that it requires:
- 6 units firing at F1 to inflict a Hit (6 x 1 = 6)
- 3 units firing at F2 to inflict a Hit (3 x 2 = 6)
- 2 units firing at F3 to inflict a Hit (2 x 3 = 6)
Example: Suppose 3 Infantry, 2 Stoßtruppen, a Siege Gun and 2 Artillery are attacking an Area with a Fort:
- 3 x Infantry = 3 x F1 = 3FP
- 2 x Stoßtruppen = 2 x F2 = 4FP
- 1 x Siege Gun = 1 x F3 = 3FP
- 2 x Artillery = 2 x F1 = 2FP
- 3FP + 4FP + 3FP + 2FP = 12FP in total.
Divide this number (12FP) by 6 to arrive at the number of hits inflicted. In this case, 2 Hits are delivered.
Remainder: Any remainder left over is dealt with by rolling a die to determine whether one (1) extra Hit is inflicted or not. Please reference the chart below:
| If the Remainder is: | one (1) additional Hit is inflicted on a die roll of: |
|---|---|
| 1FP left over (0.166...) | 1 |
| 2FP left over (0.333...) | 1–2 |
| 3FP left over (0.5) | 1–3 |
| 4FP left over (0.666...) | 1–4 |
| 5FP left over (0.833...) | 1–5 |
Example: The French attack with the 5th army (3I/1A) against the defending German 3rd army (2I/1C). The French have a total of 4FP (4 divided by 6 = .666...) and so they will inflict one Hit on a die roll of 1–4. The Germans have a total 3FP (3 divided by 6 = .5) and so they will inflict one Hit on a die roll of 1–3. Notice that using this combat resolution system precludes the possibility of getting more than one Hit in this example.
15.1.2 A D12 Combat System
Twelve-sided dice are perhaps a bit better suited to simulating combat in TO THE LAST MAN! Statistical analysis of battlefield casualty figures per side yields casualty rates which are surprisingly consistent throughout the war. The approximate combat values for the various units, for the most part, easily map onto a six-sided die based combat resolution system. However, some of these Firepower statistics do not model well onto a d6.
D12 unit Firepower values:
- Attacking Infantry FP = F2
- Defending Infantry FP = F3
- Entrenched Def. Infantry FP = F5
- Fortified Def. Infantry FP = F7
- Commonwealth Inf. FP = F4 (entrenched/fortified FP as Infantry)
- Stoßtruppen FP = F4 (in all cases)
- Attacking Cavalry FP = [F1]
- Defending Cavalry FP = F2
- Defending Fort FP = F4
- Artillery FP = F2
- Poison Gas! Artillery FP = F4
- Advanced Artillery Barrage! FP = F6
- Siege Guns FP = [F6]
- Attacking Tanks FP = F4
- Defending Tanks FP = F1
- Biplane FP = F2
15.1.3 "The Advantage"
HISTORY: Possessing "the Advantage" can reflect many things: material superiority, tactical advantage, great leadership, a fleeting technological edge, abundant supply, hidden reserves, weird twists of fate, and so on. It's always better to have "the Advantage" than not have it. This optional rule is included not only to mitigate outrageous dice-rolling, but also to allow for those moments in WW1 when "defeat was snatched from the jaws of victory."
Some players can roll wicked dice. These are the guys who will calmly roll five dice at F1, get five 1's (i.e., five Hits), and then yell something cute like "Yahtzee™!" If your opponent acts like that, but you still want to roll dice to resolve combat - try this rule instead of optional rule 15.1.1 Averaged Combat Resolution.
A player who holds "the Advantage" may redo one entire Battle immediately after it's finished; basically he can negate the outcome of one Battle and resolve it again. Treat this Battle as having not yet happened and roll dice all over again. This time the results are final. Think of the earlier outcome as illustrating what would have happened if the player had not used his Advantage. After having used it, the player hands "the Advantage" marker to his opponent. The other player now has "the Advantage" but cannot use it until next Season.
The player who begins play with "the Advantage" depends on which scenario you're playing:
| Scenario | Player with "the Advantage" |
|---|---|
| 1914 | Entente Advantage |
| 1915 | Entente Advantage |
| 1916 | Entente Advantage |
| 1917 | German Advantage |
| 1918 | Entente Advantage |
| 1919 | Entente Advantage |
NOTE: This optional rule can be a good way to balance things between players of differing abilities. You might start out the less-skilled player with "the Advantage" regardless of what the above chart says.
15.2 Infantry Options
These optional rules expand Infantry capabilities, but at the expense of increased complexity.
15.2.1 Entrenching at Any Time
A player may entrench Infantry unit(s) anytime during his Player Turn rather than waiting for the Production Phase. The newly Entrenched Infantry must remain motionless for the duration of this Season or lose its Entrenched status. Each Entrenchment costs 0.25 BP and is deducted from this turn's as yet unspent Build Points. Keep track of this.
15.2.2 Counter-Attack
HISTORY: When Infantry forces attack, they move out of their trenches and into an unfamiliar wasteland.
This rule reflects the vulnerability of advancing Offensive Infantry to an immediate counter-attack. Whenever a Battle is declared, mark any Offensive Infantry units using counter-attack markers. During the immediately following Enemy Player Turn, these same Infantry units (now Defenders) fire F1 regardless of Entrenched or Fortified status. Their Entrenched or Fortified status is not lost, it's just that the exposed infantry units are vulnerable to an immediate enemy counter-attack.
15.2.3 Scratch Forces (Kampfgruppen)
HISTORY: During times of emergency, scratch forces could be raised from local reserves and other rear area troops. Rather than feed green troops into veteran formations to replace losses, whole new kampfgruppen were created ad hoc. Lacking proper leadership, these temporary infantry formations were not very powerful. However, in times of need they proved invaluable at plugging gaps caused by enemy attacks.
To reflect this, at any time either player may elect to convert two (2) points worth Ersatz card(s) into one infantry unit. That is, any two cards worth Ersatz 1, as well as an Ersatz 2 or Ersatz 3 card can be turned into one Infantry unit. This Infantry unit is placed immediately in any Friendly or Disputed Area.
15.2.4 Russian Front Infantry
German Infantry units may be taken from the Eastern Front (at any time) beginning in the SPRING 1915 Seasonal Turn - but at a cost. For every two Infantry units (or fraction thereof) removed from the Eastern Front, the German player permanently loses 1 Victory Point (that is, –1 VP) per occurrence. Immediately place these Infantry units in any Friendly or Disputed Area(s).
NOTE: Use this rule only when TO THE LAST MAN! is played by itself. Do not play with AT ALL COSTS!
15.3 BP & VP Options
BP stands for Build Point. VP means Victory Point.
15.3.1 Industrial Areas
Certain areas contain a factory symbol representing large-scale industrial facilities. Some of a player's BPs come from these areas. Losing control of an Industrial Area means a loss of one BP during production for as long as the Area remains Enemy-controlled. For each formerly Friendly, but now Enemy-controlled Industrial Area, deduct 1 BP from your Build Point Allowance. Re-conquering an Industrial Area is treated like Capturing an Industrial Area; please see below.
HISTORICAL NOTE: Both sides have other off-board Industries as well. The BP allowance reflects how many total Builds this front can muster as a whole.
Captured Industrial Areas: When an Enemy Industrial Area is captured (i.e., made Friendly), the Enemy Build Point Allowance decreases by 1 BP immediately. However, the new owner does not automatically get a BP increase. Facilities must be repaired. Workers must be rounded up. These things take time. Every Reinforcement Phase, a player may check for the status of captured Industrial Areas. The player rolls a die - on a die roll of "1" the factory is repaired and now produces a Build Point every Season for its new owner.
IMPORTANT: The BP for Brussels has already been figured into the German Build Point Allowances, there's no need to modify it. Brussels begins producing 1 BP for the Germans in the 1915 scenario.
15.3.2 Saving Build Points
Players may opt to save BPs rather than spend them all in the Production Phase. Secretly keep track of unspent BPs.
15.3.3 The Ottoman Empire
Players may choose to include an off-board box for the Entente representing Ottoman Empire theatres of war. Four (4) UK or French infantry units may be placed in "The Ottoman Empire" box. As long as those four Infantry units remain, the Germans suffer a –1 VP penalty (total).
16.0 Special Rules
16.1 Tournament Rules
Players may want to play a series of games, switching sides and comparing their levels of victory. Each victory is worth Tournament Points (TPs). Whoever has the most TPs after a set number of games wins the tournament.
| Result | Tournament Points |
|---|---|
| Stalemate | both players get 1 TP |
| Marginal Victory | 2 TPs to the victor |
| Major Victory | 3 TPs to the victor |
| Decisive Victory | 5 TPs to the victor |
16.2 Three Player Games
16.2.1 Dividing Entente Command
To include a third player, the Entente command is split into the UK/Belgian commander and the French/US player. Either player may play cards from their joint hand, which affect both players. For instance, should the UK commander want to go on the Offensive, but the French player wants to Pass - that Offensive card is played!
NOTE: Both Entente players should try to agree. If they can't agree on how to spend their BPs, the German player chooses whose production plan to use!
The UK/Belgian and French/US players both win or lose together. However, if players must know who is top dog, the player with the most occupied Friendly Belgian or German Areas wins. In case of a tie, the UK player wins.
Entente Build Points: Players may want to separate Entente BPs into individual (i.e., national) BPs. When using this rule, the French can only use French BPs, the UK can only use UK BPs, etc. Any country's BPs may be used to buy cards, but a nation's cards can only be used by that nation. Exception: playing an Offensive card allows the whole Entente to attack. Players may freely trade cards between Entente nations on a 1-for-1 basis.
| Turn | FR | UK | US | U-Boat adj. | Total BPs |
|---|---|---|---|---|---|
| Summer 1914 | 4 | 2 | - | - | 6 |
| Autumn 1914 | 4 | 2 | - | - | 6 |
| Winter 1914-15 | 3 | 3 | - | - | 6 |
| Spring 1915 | 3 | 3 | - | - | 6 |
| Summer 1915 | 3 | 3 | - | - | 6 |
| Autumn 1915 | 3 | 3 | - | - | 6 |
| Winter 1915-16 | 3 | 3 | - | - | 6 |
| Spring 1916 | 3 | 4 | - | - | 7 |
| Summer 1916 | 3 | 4 | - | - | 7 |
| Autumn 1916 | 3 | 4 | - | - | 7 |
| Winter 1916-17 | 3 | 4 | 1 | (-2) | 6 |
| Spring 1917 | 3 | 4 | 2 | (-3) | 6 |
| Summer 1917 | 3 | 4 | 2 | (-2) | 7 |
| Autumn 1917 | 2 | 4 | 3 | (-2) | 7 |
| Winter 1917-18 | 2 | 4 | 4 | (-2) | 8 |
| Spring 1918 | 2 | 3 | 5 | (-2) | 8 |
| Summer 1918 | 2 | 3 | 6 | (-2) | 9 |
| Autumn 1918 | 2 | 2 | 6 | (-1) | 9 |
| Winter 1918-19 | 2 | 2 | 6 | (-1) | 9 |
| Spring 1919 | 2 | 2 |
NOTE: The negative number in parentheses is the U-Boat loss adjustment.
16.2.2 Kriegspiel
HISTORY: 'Kriegspiel' refers to the practice of double-blind, refereed war gaming prevalent in 19th century German High Command circles.
This optional rule requires the assistance of a third person called a referee, as well as two full sets of TTLM! The referee must be completely familiar with all of the rules being played. Advanced rule 13.1 Hidden Army Templates must be used, but only Enemy units in Battle Areas are visible to the player on his mapboard. All other Enemy units in Enemy Areas (i.e., behind the lines) are not placed on his mapboard at all — their positions are noted by the referee only on the Enemy's mapboard.
Any Friendly units moving into an Enemy Area occupied by Enemy units initiates an unexpected Battle; but this is revealed by the referee only after completing the Movement Phase (exception: Cavalry must stop upon entering an Area containing Enemy units).
To represent aerial reconnaissance, each player may question the referee about one Enemy Area adjacent to a Friendly or Disputed Area each player turn. If there are any Enemy units in this designated Area the referee informs the player of the presence of the Enemy forces (but reveals nothing about strength or composition of that force). This question is posed at the very beginning of the player's Movement Phase.
This rule adds a great deal of uncertainty to early game maneuvers and really allows Cavalry to perform its historical role of reconnaissance. The addition of a referee adds to the playing time, as well as increasing complexity.
16.3 Linking TTLM! and AAC!
TO THE LAST MAN! — the Great War in the West may be played with AT ALL COSTS! — the Great War in the East. AAC! is a not-yet-released companion game for TTLM!.
16.3.1 Military Crisis! Cards
You have 3 options for dealing with Military Crisis! cards:
- Remove the German Military Crisis! card. In the combined game, the German player decides whether to move forces between western and eastern fronts.
- Remove both German & Entente Military Crisis! cards.
- Leave the German Military Crisis! card in the deck. In addition, allow the German player to also play this card as a way to immediately transfer Infantry from the TTLM! map to the AAC! mapboard.
IMPORTANT: Cards may not be traded between the TTLM! and AAC! games.
16.3.2 German Infantry-Type Units
Due to their counter-mixes, TTLM! and AAC! when played together allow the German player to potentially field more Infantry units than is historically plausible. So it's important to limit the total number of Infantry units in the German force pool. German infantry-type units in play in both TTLM! and AAC! may never exceed a total of 50.
16.3.3 Build Point Transfers
The Entente player may not give BPs to the Russian player and vice versa. German Build Point Allowances may not be changed by more than 1 BP shifted between Western and Eastern Fronts per game year.
16.3.4 Russian Front Winters
Winter weather on the Eastern Front is very harsh, so a player may only move units from the EFT box to the WFT box (and vice versa) once during WINTER Seasonal Turns. This represents the fact that regardless of how many Offensives are played on the western front in WINTER, only one Offensive may be played on the Eastern Front.
16.3.5 Eastern Front Transit Box
Both the Eastern Front Transit box (in TTLM!) and the Western Front Transit box (in AAC!) are treated as the link between Western and Eastern Fronts. The Transit Boxes on both mapboards represent the part of the German Empire not depicted. Units may move from one game to the other via the EFT and WFT boxes. Movement to or from a Transit Box is treated in a special way. Units are simply removed from the map and placed in the Transit Box. This means they are en route to the other front. In a subsequent Player Turn, units may be transferred from the Transit Box of one front to the Transit Box of the other (as a Move). From there, they may be placed immediately in any Friendly or Disputed Area if an Offensive card is played or as reinforcements next Season.
IMPORTANT: Units moved to a Transit Box may not re-enter that same front again that same Season. That is, the German player cannot use the Transit Box as a surrogate Strategic Reserves! card.
17.0 Scenarios & Variant Campaigns
17.1 Historical Scenarios
1914 — "The Guns of August"
Germany attacked France using von Moltke the Younger's second revision of von Schlieffen's second (1906) plan, hoping for victory in six weeks. France relied on an all-out offensive (Plan XVII) to regain the provinces of Alsace and Lorraine, lost in 1871. "Revolving door" attacks developed with the Germans gaining the upper hand in late August, only to lose it in early September. By winter, both sides were worn down in fruitless assaults against well-entrenched enemy positions.
Game Start: Turn 1 - Summer 1914. Victory Level: Stalemate (11).
Starting Hand: GE 15 cards in hand (max hand 8); Entente 8 cards in hand (max hand 4).
NOTE: at the end of Production both players are bound by their hand size limitations, so any cards in excess are discarded.
Reinforcements: Autumn 1914: 3I GE, FR7th•(1I), FR8th•(1I), FR9th•(1I), FR10th•(1I), 1I UK. Winter 1914-1915: UK2nd•(1I-1C).
Seasonal Build Points: Summer 1914 through Winter 1914-1915: 5GE / 6Entente.
Special Rules: Germany may move into and through areas of Belgium and Luxembourg. Both Belgium and the United Kingdom are Entente powers. No combat enhancing cards (e.g., Poison Gas!) may be played until 1915 and later. See Game Events Chart. The British relied on an all-volunteer military until later in the war. The Entente player is limited to building only one UK unit each Production Phase. Only 1 BP may be spent on Entrenching in Summer '14 Production Phase. No limitations thereafter.
Options: Historical cards: Players may opt to start the scenario with certain cards automatically in their hands. Please see Optional Rules for details. Germany: Surprise Attack! or Strategic Reserves! Entente: German Military Crisis! or Offensive.
Semi-historical Set-up: Armies may set up in any area adjacent to their historical locations, within their own countries. Units may be freely distributed within these armies. GE: 28I, 4C, 4A, 2G. FR: 19I, 2C, 2A.
German Empire setup
| Area | Forces |
|---|---|
| Aachen | 1st•(5I-2C), 2nd•(5I-1A-1G), 3rd•(3I-1A) |
| Eifel | 4th•(4I) |
| Metz | 5th•(4I-1A-1C), 4F |
| Lothringen | 6th•(4I-1A-1C-1G) |
| Straßburg | 7th•(2I), 4F |
| Mülhausen | 1I, 2F |
| Köln | 2F |
| Mainz | 1F |
| Eastern Front Box | - [+0 VP] |
Entente setup
| Area | Forces |
|---|---|
| Belfort | 1I FR, 4F |
| Epinal | FR1st•(3I-1A-1C), 4F |
| Nancy | FR2nd•(3I), 1I FR, 5F |
| Verdun | FR3rd•(3I), 4F |
| Champagne | FR4th•(2I), 1F |
| Sedan | FR5th•(3I-1A-1C), 1I FR, 0F |
| Maubeuge | 1F |
| Artois | 1F |
| Langres | 1F |
| Calais | 1I FR |
| Paris | FR6th•(1I), 6F |
| Liége | 3F |
| Namur | 2F |
| Antwerp | 3F |
| Brussels | BEL•(1I) |
| England | UK1st•(2I-1C), 1I UK |
(Historical Setup uses von Moltke the Younger's revised Schlieffen plan and French Plan XVII — see 14.5.2 for the mandatory first-turn offensives.)
1915 — "The Death of Innocence"
France's attacks into Alsace, Lorraine, and the Ardennes all ended badly, with great loss of life. Although, the German Schlieffen plan seemed on the verge of success, Moltke's tampering doomed the German attack almost from the beginning. After German armies retreated from the Marne, both sides attempted to outflank each other. This "race to the sea" ended in battle at Ypres until munition shortages and mutual exhaustion set in. In 1915, the Germans hope for a breakthrough in Flanders, with the aid of chlorine gas. Meanwhile, the Entente are planning offensives in Artois & Champagne.
Game Start: Turn 4 - Spring 1915. Victory Level: Stalemate (15).
Starting Hand: GE 7 cards (max hand 8); Entente 4 cards (max hand 5).
Reinforcements: Summer 1915: UK3rd•(1I-1A).
Seasonal Build Points: Spring 1915 through Autumn 1915: 5GE / 6Entente. Winter 1915-1916: 6GE / 6Entente.
Special Rules: Underlined armies & units are Entrenched. Entrenched Infantry fire F2, but only when defending. The Poison Gas! combat enhancing cards may be played in Spring 1915 & thereafter. The British relied on an all-volunteer military until later in the war. The Entente player is limited to building only one UK unit each Production Phase. Since 5 BPs are in the Eastern front box, +1 VP. Canadian infantry replace UK infantry AUTUMN 1915 (Turn 6).
Options: Historical cards: Players may opt to start the scenario with certain cards automatically in their hands. Please see Optional Rules for details.
German Empire setup (underlined units below are Entrenched)
| Area | Forces |
|---|---|
| Flanders | 4th•(3I-2A) |
| Artois | 6th•(2I-1A) |
| Somme | 2nd•(2I) |
| Aisne | 1st•(1I), 7th•(2I) |
| Champagne | 3rd•(2I) |
| Verdun | 5th•(2I-1A) |
| Nancy | 1I |
| Epinal | 1I |
| Mülhausen | 2F |
| Köln | 2F |
| Mainz | 1F |
| Metz | 4F |
| Straßburg | 4F |
| Any Friendly or Disputed area | 1G |
| Eastern Front Box | 3I/2C = 5 BPs [+1 VP] |
Entente setup
| Area | Forces |
|---|---|
| Flanders | UK2nd•(2I-1C), BEL•(1I) |
| Artois | UK1st•(2I-1C), FR8th•(1I) |
| Somme | FR10th•(2I-1A) |
| Aisne | FR5th•(2I), FR6th•(2I) |
| Champagne | FR2nd•(2I-1A), FR4th•(1I), FR9th•(1I) |
| Verdun | FR3rd•(2I), 2F |
| Nancy | FR1st•(1I), 4F |
| Epinal | 4F |
| Mülhausen | 1I FR |
| Any Friendly or Disputed area | 1C FR, FR7th•(-) |
| Belfort | 4F |
| Langres | 1F |
| Paris | 6F |
1916 — "The Price of Glory"
German poison gas at Ypres did result in a tactical victory, however, without adequate reserves to exploit it, no strategic victory was forthcoming. France & the UK launched some minor attacks, which gained little ground at a terrific cost in casualties. And the trenchlines hardly moved all year. In 1916, Falkenhayn, German Commander-in-Chief, plans to close in on the fortresses of Verdun from three sides, raining down artillery upon the French defenders and thus "bleed the French Army white." The Great War's bloodiest battle has just begun.
Game Start: Turn 8 - Spring 1916. Victory Level: Stalemate (13).
Starting Hand: GE 8 cards (max hand 8); Entente 5 cards (max hand 6).
Reinforcements: Summer 1916: UK5th•(2I).
Seasonal Build Points: Spring 1916 through Autumn 1916: 7GE / 7Entente. Winter 1916-1917: 6GE / 6Entente.
Special Rules: Underlined armies & units are Entrenched. Entrenched Infantry fire F2, but only when defending. UK Conscription enacted. UK no longer limited to buying just one unit per Production Phase. Biplanes with "1916" on them may be built in the Production Phase of Spring 1916 and thereafter.
Options: Historical cards: Players may opt to start the scenario with certain cards automatically in their hands. Germany: Gericht or Poison Gas! Entente: The Big Push or German Military Crisis!
Semi-historical Set-up: Units may be freely distributed amongst armies, but armies must be set up in historical locations. GE: 25I, 4A, 1G.
German Empire setup (underlined units below are Entrenched)
| Area | Forces |
|---|---|
| Flanders | 4th•(3I) |
| Artois | 6th•(3I) |
| Somme | 2nd•(3I) |
| Aisne | 7th•(3I) |
| Champagne | 3rd•(3I) |
| Verdun | 5th•(5I-3A-1G), 1A |
| Nancy | 1I |
| Epinal | 1I |
| Mülhausen | 2F |
| Any Friendly or Disputed area | 1st•(3I) |
| Köln | 2F |
| Mainz | 1F |
| Metz | 4F |
| Straßburg | 4F |
| Eastern Front Box | 1C = 1 BP [+0 VP] |
Entente setup
| Area | Forces |
|---|---|
| Flanders | UK2nd•(2I), BEL•(2I) |
| Artois | UK1st•(2I-1A-1C), FR10th•(2I) |
| Somme | UK3rd•(2I-1A-1C), FR6th•(2I) |
| Aisne | FR5th•(3I) |
| Champagne | FR4th•(3I) |
| Verdun | FR2nd•(3I-2A), FR3rd•(2I-1A), 1F |
| Nancy | FR1st•(2I), 4F |
| Epinal | 1I FR, 4F |
| Mülhausen | FR7th•(1I) |
| Any Friendly or Disputed area | 1C FR, FR8th•(-), FR9th•(-) |
| Belfort | 4F |
| Langres | 1F |
| Paris | 6F |
| England | UK4th•(2I) |
1917 — "Dare Call It Treason"
French General Robert Nivelle, the brilliant artillerist of Verdun, said he knew "the secret" to breaking through German defenses. He attacked in the Aisne area, but only after the Germans had already retreated some 30 miles to the fortified Hindenburg Line. How clever is that? A weak United States has just declared war on Germany. But it'll be at least a year before US troops make any impact on the war.
Game Start: Turn 12 - Spring 1917. Victory Level: Stalemate (12).
Starting Hand: GE 8 cards (max hand 8); Entente 6 cards (max hand 7).
Reinforcements: None.
Seasonal Build Points: Spring 1917: 6GE / 6Entente. Summer 1917 through Autumn 1917: 6GE / 7Entente. Winter 1917-1918: 7GE / 8Entente.
Special Rules: Begin the 1917 scenario with the Entente Player Turn; treat the German's first Player Turn as a "Pass". Underlined armies & units are Entrenched. Entrenched Infantry fire F2, but only when defending. The Advanced Artillery Barrage! combat enhancing cards may be played in Spring 1917 & thereafter. Biplanes with "1917" on them may be built in the Production Phase of Spring 1917 and thereafter. German Stoßtruppen may be built in the Production Phase of Summer 1917 and thereafter. UK & French Tanks may be built in the Production Phase of Summer 1917 and thereafter (costs 2 BPs per unit). ANZAC infantry replace UK infantry SPRING 1917 (Turn 12).
Options: Historical cards: Players may opt to start the scenario with certain cards automatically in their hands. Germany: Ersatz 3 or German Military Crisis!
German Empire setup (underlined units below are Entrenched)
| Area | Forces |
|---|---|
| Flanders | 4th•(3I-1A) |
| Artois | 6th•(3I-1A) |
| Somme | 2nd•(3I-1A-1B) |
| Aisne | 1st•(1I-1A), 7th•(4I-1A-1B) |
| Champagne | 3rd•(3I) |
| Verdun | 5th•(3I) |
| Nancy | 1I |
| Epinal | 1I |
| Mülhausen | 2F |
| Any Friendly or Disputed area | 1G |
| Köln | 2F |
| Mainz | 1F |
| Metz | 4F |
| Straßburg | 4F |
Entente setup
| Area | Forces |
|---|---|
| Flanders | UK2nd•(2I-1A), BEL•(2I) |
| Artois | UK1st•(2I-1A-1C) |
| Somme | UK3rd•(2I-1A-1C-1B), UK4th•(2I-1A), UK5th•(1I) |
| Aisne | FR3rd•(1I), FR5th•(3I-1A-1B), FR6th•(3I-1A) |
| Champagne | FR4th•(2I-1A) |
| Verdun | FR2nd•(3I), 1F |
| Nancy | 4F |
| Epinal | 4F |
| Mülhausen | FR7th•(1I) |
| Any Friendly or Disputed area | FR8th•(-), FR9th•(-), 1C FR |
| Belfort | 4F |
| Langres | 1F |
| Paris | 6F |
| Marne | FR1st•(1I), FR10th•(1I) |
1918 — "To The Last Man"
Nivelle's disastrous offensive demoralized the French army into waiting for "Yanks and Tanks" to come to the rescue. UK attacks in Flanders and the Somme gained little at a huge cost in lives. Great numbers of German troops transfer from the Russian Front, building up for the Spring Offensive dubbed "Kaiserschlacht" (Kaiser's battle). This "Now or Never" offensive will hopefully win the war.
Game Start: Turn 16 - Spring 1918. Victory Level: Stalemate (11).
Starting Hand: GE 8 cards (max hand 8); Entente 7 cards (max hand 8).
Reinforcements: Summer 1918: GE9th•(1I-1S), US1st•(6I-1A). Winter 1918-19: US2nd•(6I).
Seasonal Build Points: Spring 1918: 8GE / 8Entente. Summer 1918: 8GE / 9Entente. Autumn 1918 through Winter 1918-19: 7GE / 9Entente.
Special Rules: Underlined armies & units are Entrenched. Entrenched Infantry fire F2, but only when defending. Biplanes with "1918" on them may be built in the Production Phase of Spring 1918 and thereafter. German Tanks may be built in Production Phase of Spring 1918 and thereafter (costs 2 BPs per unit). US units may be built in the Production Phase of Summer 1918 and thereafter. US Infantry may appear one Season early, but the arriving Army will be weakened (see 14.3.1). US Armies may possibly arrive one Season early, at the risk of arriving later (see 13.4).
Options: Historical cards: Players may opt to start the scenario with certain cards automatically in their hands. Please see Optional Rules for details.
German Empire setup (underlined units below are Entrenched)
| Area | Forces |
|---|---|
| Flanders | 4th•(2I-1S-1A-1B) |
| Artois | 6th•(3I-1A) |
| Somme | 2nd•(2I-2S-1A), 17th•(5I-1A-1B), 18th•(5I-1A-1B) |
| Aisne | 1st•(1I), 7th•(3I-1A) |
| Champagne | 3rd•(3I) |
| Verdun | 5th•(3I) |
| Nancy | 19th•(1I-1S), 1I |
| Epinal | 1I |
| Mülhausen | 2F |
| Any Friendly or Disputed area | 1G |
| Köln | 2F |
| Mainz | 1F |
| Metz | 4F |
| Straßburg | 4F |
Entente setup
| Area | Forces |
|---|---|
| Flanders | UK2nd•(3I-2A), BEL•(3I) |
| Artois | UK1st•(2I-2A-1C-1B) |
| Somme | UK3rd•(2I-1A), UK5th•(2I-1C-1B) |
| Aisne | FR5th•(2I-1C), FR6th•(2I-1A) |
| Champagne | FR4th•(2I-1A) |
| Verdun | FR2nd•(2I-1B), 1F |
| Nancy | FR1st•(1I), 4F |
| Epinal | FR8th•(1I), 4F |
| Mülhausen | FR7th•(1I) |
| Any Friendly or Disputed area | FR10th•(1I-1A-1B-1T), FR3rd•(-) |
| Belfort | 4F |
| Langres | 1F |
| Paris | FR9th•(-), 6F |
| Boulogne | UK4th•(1T) |
1919 — "Plan 1919"
The 1919 scenario is an entirely speculative situation. This "What-if?" scenario presupposes a successful German offensive in the Spring & Summer of 1918, during which the Channel ports fall and several Entente Armies are savaged. Thus in 1919 the Germans still have a shot at victory. All that stands in the way are massive US forces. "Plan 1919" refers to Lieutenant-Colonel J.F.C. Fuller's combined arms operations planned for Spring 1919.
Game Start: Turn 20 - Spring 1919. Victory Level: Stalemate (15).
Starting Hand: GE 8 cards (max hand 8); Entente 8 cards (max hand 9).
Reinforcements: Summer 1919: US4th•(6I). Autumn 1919: US5th•(6I).
Seasonal Build Points: Spring 1919: 7GE / 9Entente. Summer 1919: 7GE / 10Entente. Autumn 1919: 6GE / 10Entente.
Special Rules: Underlined armies & units are Entrenched. Entrenched Infantry fire F2, but only when defending. Biplanes with "1919" on them may be built in the Production Phase of Spring 1919 and thereafter. Remove both Military Crisis! cards from play. US Infantry may appear one Season early, but the arriving Army will be weakened (see 14.3.1). US Armies may possibly arrive one Season early, at the risk of arriving later (see 13.4).
German Empire setup (underlined units below are Entrenched)
| Area | Forces |
|---|---|
| Boulogne | 4th•(3I-1S-1A), 6th•(3I-1S-1A) |
| Somme | 2nd•(3I-1S-1A), 18th•(5I-1A) |
| Aisne | 1st•(2I-1A-1B), 7th•(2I-1S) |
| Champagne | 3rd•(3I) |
| Verdun | 5th•(2I) |
| Nancy | 19th•(1I) |
| Epinal | 9th•(1I) |
| Mülhausen | 2F |
| Any Friendly or Disputed area | 17th•(3I-1S-1A-1B-1T), 1G |
| Köln | 2F |
| Mainz | 1F |
| Metz | 4F |
| Straßburg | 4F |
Entente setup
| Area | Forces |
|---|---|
| Boulogne | UK1st•(3I-1A-1B-1T), UK3rd•(3I-1A-1B-1C-1T) |
| Somme | FR10th•(3I-1A-1B-1T), US1st•(5I-1A-1B-1T) |
| Aisne | FR5th•(1I-1A-1B), FR6th•(2I-1A-1T), US2nd•(6I-1A) |
| Champagne | FR4th•(2I-1B) |
| Verdun | FR2nd•(1I), 4F |
| Nancy | 4F |
| Epinal | 4F |
| Mülhausen | FR7th•(1I) |
| Any Friendly or Disputed area | US3rd•(6I), UK5th•(1I-1A-1B), FR3rd•(1I-1C), UK4th•(-), FR1st•(-), FR8th•(-), FR9th•(-) |
| Eliminated Armies | UK2nd•, BEL• |
| Belfort | 4F |
| Langres | 1F |
| Paris | 6F |
17.2 Variant German Plans
These variant Campaign Game set-ups replace the historical 1914 opening (von Moltke the Younger's revised Schlieffen plan) with one of six earlier German war plans. Use the SUMMER 1914 Campaign Game map setup and reinforcement schedule except as modified below.
17.2.1 Variant German Campaign Game #1: von Moltke the Elder's Plan (1879)
von Moltke the Elder, Kaiser Wilhelm I's strategist and victor of the Franco-Prussian war of 1870-71, felt that in the event of a two-front war Russia would be an easier target than France. Unlike Napoleon in 1812 or Hitler in 1941, von Moltke the Elder did not want to advance into the depths of Russia. He wanted only to crush the Russian armies on the border and then wait for a Russian surrender, accepted with lenient terms. Once Russia was neutralized, all German forces would fall upon the traditional enemy, France.
German Force Allocation: Western Front: 5 Armies - 23I - 1C - 4A - 2G pieces in play. Eastern Front: base EF force, plus 2 Armies - 5I - 3C [+2 VP].
Starting Hand: GE 12 cards (max hand 8).
Special Rules: German forces may never violate the neutrality of either Belgium or Luxembourg. See Campaign Game for dealing with a Neutral UK. Since 10 Build Points' worth of additional German forces are allocated to the Eastern Front, the German player gets a +2 Victory Point bonus.
Historical Offensive: On the German's initial Player Turn, he must play an Offensive card and must attack into France.
| Area | German Empire |
|---|---|
| Metz | GE1st•(5I-1A-1G), GE2nd•(5I-1A-1G), 4F |
| Lothringen | GE3rd•(5I-1A-1C) |
| Straßburg | GE4th•(5I-1A), 4F |
| Mülhausen | GE5th•(3I), 2F |
| Köln | 2F |
| Mainz | 1F |
17.2.2 Variant German Campaign Game #2: von Waldersee's Plan (1888)
von Waldersee, Moltke's successor, alarmed at Russia's growing strength would send nearly half of all German forces to the Eastern front. In tandem with Austro-Hungarian armies, the Germans would cut off Russian Poland, capture Warsaw, then accept surrender with lenient terms. Once Russia was no longer a threat, all German forces would mass for a war-ending offensive against France.
German Force Allocation: Western Front: 5 Armies - 18I - 1C - 4A - 2G pieces in play. Eastern Front: base EF force, plus 2 Armies - 10I - 3C [+3 VP].
Starting Hand: GE 10 cards (max hand 8).
Special Rules: German forces may never violate the neutrality of either Belgium or Luxembourg. See Campaign Game for dealing with a Neutral UK. Since 15 Build Points' worth of additional German forces are allocated to the Eastern Front, the German player gets a +3 Victory Point bonus.
Historical Offensive: On the German's initial Player Turn, he must play an Offensive card and must attack into France.
| Area | German Empire |
|---|---|
| Metz | GE1st•(4I-1A-1C), GE2nd•(4I-1A-1G), 4F |
| Lothringen | GE3rd•(4I-1A-1G) |
| Straßburg | GE4th•(4I-1A), 4F |
| Mülhausen | GE5th•(2I), 2F |
| Köln | 2F |
| Mainz | 1F |
17.2.3 Variant German Campaign Game #3: von Schlieffen's First Plan (1899)
von Schlieffen reversed earlier plans. Since Russia and France now seemed likely to attack Germany at the same time and since France was the greater danger, German forces should concentrate on defeating France first and only then turn east. He figured that owing to the vast expanse of Russia and her primitive railways, it would be at least 40 days before Russia invaded East Prussia. By that time France would have fallen.
German Force Allocation: Western Front: 7 Armies - 28I - 4C - 4A - 2G pieces in play. Eastern Front: base EF force [+0 VP].
Starting Hand: GE 15 cards (max hand 8).
Special Rules: German forces may move into and through areas of Belgium and Luxembourg. Both Belgium and United Kingdom are Entente powers. Since only the minimum base EF force of 1 Army & 4 Infantry units is allocated to the Eastern Front, the German player gets no Victory Point bonus [+0 VP].
Historical Offensive: On the German's initial Player Turn, he must play an Offensive card and must attack into France, Belgium, and Luxembourg.
| Area | German Empire |
|---|---|
| Aachen | GE1st•(5I-4C), GE2nd•(5I-1A-1G), GE3rd•(4I-1A) |
| Eifel | GE4th•(3I), GE5th•(3I) |
| Metz | GE6th•(4I-1A), 4F |
| Lothringen | GE7th•(4I, 1A, 1G) |
| Straßburg | 4F |
| Mülhausen | 2F |
| Köln | 2F |
| Mainz | 1F |
17.2.4 Variant German Campaign Game #4: von Schlieffen's Second Plan (1906)
After Russia's defeat on land and at sea by Japanese forces in 1905, von Schlieffen decided that Russia could safely be ignored. Accordingly, he denuded the eastern front of all but a token force. The full weight of German might would crush France in six weeks.
German Force Allocation: Western Front: 7 Armies - 30I - 4C - 4A - 2G pieces in play. Eastern Front: base EF force, less 2I [-1 VP].
Starting Hand: GE 16 cards (max hand 8).
Special Rules: German forces may move into and through areas of Belgium and Luxembourg. Belgium and United Kingdom are Entente powers. German troops have invaded The Netherlands. Although The Netherlands Area is still considered unplayable, units may move from the Köln or Aachen areas directly to the Antwerp Area (and vice versa). One of the German Infantry reinforcements of Autumn 1914 does not arrive (i.e., only 2I are received). German VPs are permanently reduced by two (-2VPs) due to loss of neutral trade. Since less than the minimum base EF force has been allocated to the Eastern Front, the German player suffers an additional -1 VP penalty. Thus, there is a cumulative -3 VPs penalty.
Historical Offensive: On the German's initial Player Turn, he must play an Offensive card and attack into Belgium and Luxembourg.
| Area | German Empire |
|---|---|
| Köln | GE1st•(5I-1A-1G), 2F |
| Aachen | GE2nd•(5I-1A-1G), GE3rd•(5I-1C) |
| Eifel | GE4th•(4I-1C), GE5th•(4I-1A-1C) |
| Metz | GE6th•(4I-1A-1C), 4F |
| Lothringen | GE7th•(3I) |
| Straßburg | 4F |
| Mülhausen | 2F |
| Mainz | 1F |
17.2.5 Variant German Campaign Game #5: von Moltke the Younger's First Revision to Schlieffen's Plan (1912)
By 1912, Russia was clearly recovering from her defeat in the Russo-Japanese war of 1905. Chief of Staff von Moltke the Younger modified Schlieffen's 1906 plan to increase the commitment to the Eastern Front. Otherwise, the plans were the same: a great wheeling sweep through Belgium, then on to Paris.
German Force Allocation: Western Front: 7 Armies - 26I - 1C - 4A - 2G pieces in play. Eastern Front: base EF force, plus 2I - 3C [+1 VP].
Starting Hand: GE 14 cards (max hand 8).
Special Rules: German forces may move into and through areas of Belgium and Luxembourg. Belgium and United Kingdom are Entente powers. Since 5 Build Points' worth of additional German forces are allocated to the Eastern Front, the German player gets a +1 Victory Point bonus.
Historical Offensive: On the German's initial Player Turn, he must play an Offensive card and attack into Belgium and Luxembourg.
| Area | German Empire |
|---|---|
| Aachen | GE1st•(5I-1A-1G), GE2nd•(5I-1A-1G), GE3rd•(3I) |
| Eifel | GE4th•(4I-1C) |
| Metz | GE5th•(5I-1A), 4F |
| Lothringen | GE6th•(2I-1A) |
| Straßburg | GE7th•(2I), 4F |
| Mülhausen | 2F |
| Köln | 2F |
| Mainz | 1F |
17.2.6 Variant German Campaign Game #6: Kaiser Wilhelm's Plan (1914)
At first, only the Russians and Serbs mobilized against Germany and Austria-Hungary, so Kaiser Wilhelm II sought to limit the scope of hostilities and avoid a general European war. The Kaiser wanted to discard pre-war plans, mobilizing German forces solely against Russia. If the French began mobilizing, German peacetime garrisons would defend the frontier. When von Moltke the Younger heard that the Kaiser intended to scrap the railway timetables so necessary for efficient army mobilization, the Chief of Staff threatened to immediately resign rather than risk his plan. Kaiser Wilhelm acquiesced; German troops invaded Belgium and the UK declared war, too. This scenario examines what would have happened if the Kaiser had followed his instincts and not the plan.
German Force Allocation: Western Front: 4 Armies - 13I - 1C - 2A pieces in play. Eastern Front: base EF force, plus 3 Armies - 15I - 3C - 2A - 2G [+5 VP].
Starting Hand: GE 7 cards (max hand 8).
Special Rules: German forces may never violate the neutrality of either Belgium or Luxembourg. See Campaign Game for dealing with a Neutral UK. Since 25 Build Points' worth of additional German forces are allocated to the Eastern Front, the German player gets a +5 Victory Point bonus.
| Area | German Empire |
|---|---|
| Metz | GE1st•(3I-1A), 4F |
| Lothringen | GE2nd•(4I-1C) |
| Straßburg | GE3rd•(3I-1A), 4F |
| Mülhausen | GE4th•(3I), 2F |
| Köln | 2F |
| Mainz | 1F |
17.3 Variant French Plans
Unlike German plans, the official French plans were not named after the general who had devised them. Always wary of a coup, the leaders of the French Third Republic did not want to confer such power and prestige upon any one general. Thus all responsibility was entrusted to the Superior Council of War, a group of both civilians and military personnel supervised by the Ministry of War and a general acting as Vice President.
17.3.1 Variant French Campaign Game #1: Plan XIV (1898)
This early French plan relies entirely on the defense to thwart a German invasion. Plan XIV assumes that German forces will attack along the same approaches used in 1870. Furthermore, Plan XIV ignores the possibility of German violation of neutral Luxembourg or Belgium, as such barbarism is just not done by the civilized Western nations.
Starting Hand: FR 8 cards (max hand 4).
Special Rules: French forces may not violate the neutrality of either Belgium or Luxembourg.
| Area | French Republic |
|---|---|
| Belfort | FR1st•(3I), 4F |
| Epinal | FR2nd•(3I-1A), 4F |
| Nancy | FR3rd•(3I-1C), FR4th•(2I), FR5th•(3I-1A), 5F |
| Verdun | 1I FR, 1C FR, 4F |
| Champagne | 1I FR, 1F |
| Neufchâteau | FR6th•(3I-1A-1C), 1I FR |
| Maubeuge | 1F |
| Artois | 1F |
| Langres | 1F |
| Paris | 6F |
| Sedan | 0F |
17.3.2 Variant French Campaign Game #2: Plan XV (1903)
While still primarily a defensive arrangement, Plan XV allows for a counterattack into Luxembourg, if that country's neutrality is violated by Germany. The focus of French forces generally shifts northward.
Starting Hand: FR 8 cards (max hand 4).
Special Rules: French forces may not violate the neutrality of either Belgium or Luxembourg.
| Area | French Republic |
|---|---|
| Belfort | FR1st•(3I), 4F |
| Epinal | FR2nd•(3I-1A), 4F |
| Nancy | FR3rd•(3I-1A), FR4th•(2I-1C), 5F |
| Verdun | FR5th•(3I-1C), 4F |
| Champagne | FR6th•(3I), 1F |
| Maubeuge | 1F |
| Artois | 1F |
| Langres | 2I FR, 1F |
| Paris | 6F |
| Sedan | 0F |
17.3.3 Variant French Campaign Game #3: Plan XV b (1907)
Plan XV b is the first to acknowledge that Germany might invade Belgium. However, the French Generals assume that Liège's ring of fortresses will present an impenetrable wall, channeling German troops southward into the Ardennes.
Starting Hand: FR 8 cards (max hand 4).
Special Rules: French forces may not violate the neutrality of Belgium. Luxembourg may be invaded, if desired.
Historical Offensive: On the Entente's initial Player Turn, if the Germans have invaded Luxembourg, then at least one French army must also move into Luxembourg, attacking German forces (if this is possible).
| Area | French Republic |
|---|---|
| Belfort | FR1st•(2I), 4F |
| Epinal | FR2nd•(2I-1A), 4F |
| Nancy | FR3rd•(3I-1A), FR4th•(3I-1C), 5F |
| Verdun | FR5th•(3I), 1I FR, 4F |
| Sedan | 1I FR, 1C FR, 0F |
| Champagne | FR6th•(2I), 1F |
| Maubeuge | 1F |
| Artois | 1F |
| Langres | 2I FR, 1F |
| Paris | 6F |
17.3.4 Variant French Campaign Game #4: Plan XVI (1909)
In Plan XVI, large formations are concentrated far from the borders, allowing the French to easily shift their armies toward the Ardennes, if the Germans invade Belgium.
Starting Hand: FR 8 cards (max hand 4).
Special Rules: French forces may not violate the neutrality of Belgium. Luxembourg may be invaded, if desired.
| Area | French Republic |
|---|---|
| Belfort | 1I FR, 4F |
| Epinal | FR1st•(2I-1A), 4F |
| Nancy | FR2nd•(3I-1C), 2I FR, 5F |
| Verdun | FR3rd•(2I-1A), 4F |
| Sedan | 1I FR, 1C FR, 0F |
| Champagne | FR4th•(3I), 1I FR, 1F |
| Châlons | FR5th•(3I) |
| Maubeuge | 1F |
| Langres | 1F |
| Artois | 1F |
| Paris | FR6th•(1I), 6F |
17.3.5 Variant French Campaign Game #5: Plan Michel (1911)
By 1911, the French had grown more certain that Germany would violate Belgian neutrality. General Victor Michel devised a radical redeployment of French forces all along their frontier with Belgium, as well as Germany. If Germany invaded Belgium, several French armies would counterattack them. There was even some talk of invading Belgium pre-emptively, if the situation called for it. General Michel's plan was never officially adopted by the French general staff, thus it has no numerical designation. Michel was dismissed for political reasons and Joffre took his place.
Starting Hand: FR 8 cards (max hand 4).
Special Rules: French forces may violate the neutrality of either Belgium or Luxembourg if desired. If the French invade Belgium, the UK and US remain forever Neutral countries.
Historical Offensive: On the Entente's initial Player Turn, if the Germans have invaded Belgium, then at least one French army must also move into Belgium, attacking German forces (if possible).
French Offensive Bonus: During the entire SUMMER 1914 Seasonal Turn, an attacking French player adds one (1) extra die of Infantry Firepower at F1 to the combat roll of the Offensive Player's Fire Phase in all Battles that are within Belgium and contain a French army. Each extra die is added to the Battle itself, not to the army.
| Area | French Republic |
|---|---|
| Belfort | 1I FR, 4F |
| Epinal | FR1st•(2I-1A), 4F |
| Nancy | FR2nd•(2I), 5F |
| Verdun | 2I FR, 4F |
| Sedan | FR3rd•(3I-1A-1C), 0F |
| Châlons | 1I FR |
| Calais | 1I FR |
| Maubeuge | FR4th•(3I), 1F |
| Artois | FR5th•(2I-1C), 1F |
| Paris | FR6th•(2I), 6F |
| Langres | 1F |
| Champagne | 1F |
17.3.6 Variant French Campaign Game #6: Plan XVI b (1913)
With Plan XVI b, French doctrine became entirely offensive in nature. Although it was assumed that Germany would invade Belgium, Joffre thought that German armies would never venture north of the Meuse for want of troops. Thus, only Fifth army would cover German moves into the Ardennes, while other French armies plunged headlong into the lost provinces of Alsace and Lorraine, intent on reconquest.
Starting Hand: FR 8 cards (max hand 4).
Special Rules: French forces may not violate the neutrality of Belgium. Luxembourg may be invaded, if desired.
Historical Offensive: On the Entente's initial Player Turn, he must play an Offensive card and must attack into at least two areas of Germany (if this is possible). Each battle must contain at least one French Army.
French Offensive Bonus: During the entire SUMMER 1914 Seasonal Turn, an attacking French player adds two (2) extra dice of Infantry Firepower at F1 to the combat roll of the Offensive Player's Fire Phase in all Battles that are within Germany and contain a French army. Extra dice are added to the Battle itself, not to the armies.
| Area | French Republic |
|---|---|
| Belfort | 1I FR, 4F |
| Epinal | FR1st•(3I-1A), 4F |
| Nancy | FR2nd•(3I), FR3rd•(3I-1C), 1I FR, 5F |
| Verdun | FR4th•(3I-1A), 2I FR, 4F |
| Sedan | FR5th•(2I-1C), 0F |
| Champagne | 1F |
| Paris | 6F |
| Langres | 1F |
| Artois | 1F |
| Maubeuge | 1F |
18.0 Example of Play
This example of game play represents the first Turn of an hypothetical 1915 Historical Scenario. The Entente player is called "Tommy" and the German player is "Fritz."
German Player Turn #1
1. Play an Offensive Card or Pass
Since Fritz plans attacking in only one area, he plays his Limited Offensive card.
2. Movement
- The Artillery unit in the 6th Army (Artois) moves to Flanders. This Artillery cannot join the 4th Army since it already contains 2 Artillery units (see 8.3.2), so it is placed as a second and separate unit in Flanders.
- An Infantry unit from the 6th Army (Artois) moves into Somme and joins the 2nd Army. This move is the beginning of a general shift to the south preparing for the large battles next year.
- The 1st Army (1I) moves off the front lines from Aisne to Maubeuge. By moving into a Friendly area, Fritz sets up the 1st Army to use a Rail Move (see 4.4) next turn. This move prepares for the future offensive Fritz envisions. He wants to transfer Artillery from the north to the Verdun area quickly, and an army can move two Artillery units at once.
- The Artillery unit in the 5th Army (Verdun) moves to Champagne and joins the 3rd Army. This move reinforces the Champagne area, scene of the last French battle.
3. Declare Battles
Since Fritz played a Limited Offensive, he may only attack one area. Fritz declares Flanders to be the battle area. Next, Fritz plays a Poison Gas combat enhancement card in the Flanders battle. As the attacker, he plays any cards first. Tommy does not play any combat enhancement cards.
4. Combat — Battle #1: Flanders
Fritz and Tommy present their forces within the Flanders battle area. Tommy can see he is quite over-matched in Flanders. He can muster 2I firing at F2 (entrenched defender) and 1C firing at F1. Meanwhile, Fritz will pummel him with 3I at F1 and 3A at F2 (Poison Gas lasts the whole battle).
Offensive Player's Artillery Fire Phase. Fritz has three Artillery units in the battle, so he is going to roll three dice. Since he has played a Poison Gas card, his Artillery firepower is F2 for this battle instead of F1. This means that each roll of a 1 or 2 on the dice will inflict a hit on Tommy's forces. Fritz rolls a 1, a 3, and a 5. This indicates Tommy's forces have taken 1 hit.
Tommy chooses to discard a card to pay for the loss. He could choose an Offensive, but they are too valuable to waste as an Ersatz 1. He could discard his Ersatz 3 card to cover the 1 hit loss, but that is also terribly wasteful. Tommy's best choice is to ditch the Surprise Attack card.
Defensive Player's Fire Phase. Instead of firing, Tommy retreats both the UK 2nd and Belgian armies to the Calais area. By retreating, these armies lose their entrenched status.
NOTE: If they had retreated into another battle area that had not yet been resolved, these armies would not count for firepower or losses. If that battle area were subsequently denuded of friendly units, these armies would be eliminated. They cannot retreat twice in the same player turn.
Offensive Player's Fire Phase. Fritz need not even roll his attack dice since there are no enemy units to hit.
Retreat Phase. In the Flanders battle area, Fritz "retreats" 1 Infantry and 1 Artillery unit from the 4th Army, along with the independent Artillery unit. These three units retreat into Artois, where they join the (previously weak) 6th Army.
NOTE: Since Tommy no longer has any forces in the Flanders battle area, Fritz may retreat units out of Flanders and into Artois without revealing which (if any) units have done so.
Entente Player Turn #1
1. Play an Offensive Card or Pass
Tommy plays an Offensive card. He plans on attacking in two areas.
2. Movement
- The UK 2nd and Belgian Armies move from the Friendly Calais area into the Enemy Flanders area, thereby creating a Disputed area and a Battle area as well.
NOTE: Only units moving from Friendly areas can enter Enemy areas.
NOTE: Since Flanders is once again disputed and no longer German-friendly, Fritz loses 1 VP.
- An Infantry unit from the French 6th Army (Aisne) moves into the Somme area and joins the French 10th Army. This Infantry immediately becomes entrenched.
- The French 10th Army in Somme moves to Artois.
NOTE: Artois is now at maximum stacking limits.
NOTE: The Infantry that was moved into the 10th earlier must remain behind in Somme; it cannot be moved twice. The Infantry left behind is still entrenched, though.
- The Infantry unit in the French 8th Army (Artois) moves to Flanders, leaving the 8th Army empty.
- The empty 8th Army moves out of Artois and into the Somme area, picking up the entrenched Infantry unit there. The 8th Army becomes entrenched.
- An Infantry unit from the French 5th Army (Aisne) moves into the Somme area, joins the French 8th Army and immediately becomes entrenched.
- An Infantry unit from the French 2nd Army (Champagne) moves into the Aisne area, joins the French 5th Army and immediately becomes entrenched.
3. Declare Battles
Tommy declares that he will battle in Artois and Flanders. He can resolve these declared battles in any order he chooses.
NOTE: The attack in Flanders is mandatory since Tommy just this player turn has moved into that Enemy Area, creating a new Disputed Area.
4. Combat
Battle #1 — Artois
Tommy and Fritz present their army templates from the Artois battle area.
Offensive Player's Artillery Fire Phase. Tommy has one Artillery unit in this battle, so he rolls one die. Tommy rolls a 6 and Fritz takes no losses.
Defensive Player's Fire Phase. Fritz rolls two dice for his Infantry (F2) and two for his Artillery (F1). Fritz rolls a 2 & a 2 for his Infantry and a 1 & a 5 for his Artillery, inflicting 3 hits! Tommy pays for the 3 hits by discarding his Ersatz 3 card.
Offensive Player's Fire Phase. Tommy rolls four dice for his Infantry (F1) and one die for his Artillery (F1), for a total of five dice at F1. Tommy rolls the dice and gets these results: 1, 1, 2, 3, 3. This inflicts 2 hits. Fritz pays for the two hit loss by discarding his Ersatz 2 card.
Retreat Phase. In the Artois battle area, Tommy retreats 1 Infantry from the FR10th Army into the Somme area, where it joins the FR8th Army. Fritz does not want to retreat any of his units.
NOTE: Since Fritz has forces in Artois, Tommy must reveal that he is retreating an Infantry unit out of the FR10th Army and into Somme.
NOTE: After this battle is finished, both players hide their army templates once again.
Battle #2 — Flanders
Offensive Player's Artillery Fire Phase. Since Tommy has no artillery in this battle, they skip this.
Defensive Player's Fire Phase. Fritz rolls two dice for his Infantry (F2) and one for his Artillery (F1). Fritz rolls a 6 & a 6 for his Infantry and a 5 for his Artillery, inflicting no hits!
Offensive Player's Fire Phase. Tommy rolls three dice for his multi-national Infantry (F1). Tommy rolls a 1 for the UK, a 4 for the Belgians, and a 4 for the French (inflicts 1 hit). Fritz pays for the 1 hit loss by discarding his useless Advanced Artillery Barrage card.
Retreat Phase. Neither player elects to retreat any units.
Then Fritz decides to Pass followed quickly by Tommy. By Passing after Fritz has just Passed, Tommy is ending the back-and-forth Player Turn Phases of Spring 1915. Play proceeds to the next Phase, Production, where both players spend Build Points on units and cards for use next Season.
19.0 Designer's Notes
My first concern was to make the game fun - a fast-paced blast meant to be played again and again. I wanted the sort of game where you say, "Let's switch sides and play again!" A close second was my desire to model the Grand-strategic experiences of World War 1. The common assumption is that all WW1 generals were idiots and so all decisions they made were foolish. In fact, generals on all sides were doing the best they could in very unfamiliar circumstances. In the game you don't know what your opponent's hand is like, so you don't know your exact situation. One more offensive really might bankrupt your opponent's hand and lead to breakthrough - or it might inflict losses you can't afford in a grueling battle of attrition. You'll never know unless you try, but should you try at all? This models the psychological processes that lead to the generals' decisions. TO THE LAST MAN! has been in design and development for more than 20 years. I went back to the drawing board many times in pursuit of the proper balance between these two concerns of mine.
Advice for New Players
Beginning players will have a natural tendency to run through their hands right away. The first time you're sitting there with no Offensive cards and a powerful need to move, you'll come to appreciate the wisdom of husbanding your cards, saving them for a rainy day. For example, consider a German player's attack in SPRING 1918. Suppose he decides to play lots of cards on current battles: Offensive, Surprise Attack, Poison Gas, and Advanced Artillery Barrage - that's four cards (out of a possible eight in his hand) used up on just one Player Turn. Add in the fact that some Ersatz cards will likely also be played and you're looking at a German player with only a couple of cards left in his hand after his turn. Those had better be some amazing battles! It is much better to wait for an auspicious moment to play a card, rather than just blow out your hand right away.
Always keep a spare Offensive card in your hand - this is insurance. The only time you might want to play your last Offensive is when your opponent's hand is empty. However, sometimes just bluffing that you have an Offensive card is enough to achieve your aims. Finally, remember to use Retreating to its full advantage. As the attacker you can gather your forces for a Battle and then, by retreating one or more units, add support to an adjacent Area afterwards. As the defender, you can retreat instead of suffering a withering attack or even leave one unit behind as a delaying tactic.
20.0 Design FAQs
Q: How many casualties does a Hit represent?
Each Hit inflicted represents approximately 50,000 killed, missing, captured, and permanently incapacitated. This varies by nationality as well as how far the war has progressed. How the Hit is paid for also determines the number of casualties, e.g., playing an Ersatz 3 card represents far fewer casualties than losing 3 infantry units.
Q: Cavalry can attack forts?
Only if there are no enemy infantry units present. Cavalry would not literally storm the battlements of a fort, but rather cut its communications and isolate it. Fear, uncertainty and crumbling morale would do the rest.
Q: Why are there no individual unit designations?
Since this is primarily an army-level game, "corps-aggregate" units are the main currency of the game. This method also syncs with the number of cards. In addition, this structure easily allows for the diminution of combat potential as war-weary divisions weaken steadily throughout the war. Rather than having many counters represent the same corps formation at different periods, an infantry piece is an infantry piece throughout the game. For example, the BEF starts the game as the toughest set of units (1 corps or 2 divisions = an Infantry unit). However, by 1917 it takes 2 corps (4 to 6 divisions) to equal an Infantry unit. This methodology accentuates the US forces in 1918, so you can see why the Germans gave up.
Q: Why is there no Naval sub-system in TTLM!?
Focus. This is a grand strategic land battle game. The focus needs to remain on the land battles in order to preserve the game's clean design. However, there are a great many reasons to skip naval actions in a WW1 game. Here are just a few:
- On the 26th of August 1914, the German cruiser SMS Magdeburg ran aground on an island in the Baltic. Shortly thereafter, the Russians captured German naval codebooks and ciphers that they then passed on to London. So the British Admiralty knew German Naval secrets right from the start of the war, ensuring their success.
- Due to the composition of both sides' naval forces (i.e., over-reliance on large capital ships at the expense of smaller, more versatile vessels), historically speaking the naval campaign is a foregone conclusion. The Entente blockade's success is assured for psychological as well as the above reasons. None of the admirals were willing to risk their expensive national fleets on a crapshoot. Remember that the battle of Jutland was, for the most part, an accident! Allowing players to send their capital ships out into a "War At Sea" style watery demolition derby would make for a fantasy game.
Q: No invasions? What about Gallipoli?
The reason that Entente forces cannot descend upon the occupied coast of France and Belgium is that the German High Seas Fleet would have intervened. Although in the early months of the war some British commanders imagined a landing on Germany's Baltic coast (!) the truth is that supply could not be guaranteed through enemy-infested waters. Any invasion, such as Haig's dalliance with a Flanders landing, would have been conducted in conjunction with inland forces (i.e., into a Disputed Area, which is allowed).
Q: Why is US entry automatic?
Unless Germany does not invade Belgium, the UK and US declare war as in history. It was unrestricted U-boat warfare as well as the foolish hubris of the Zimmermann telegram that set the US on the road to war. Neither of these events is in either player's purview. This was also done for play balance purposes.
Q: Why are there so many US forces, more than in any other WW1 game?
Research. US forces represent what the US might have fielded in 1919. General Pershing envisioned a 5 million man force divided into five armies to be ready by mid-1919. Additionally, US Armies are so tough with such plentiful infantry for two reasons. First, US divisions were two to three times the size of everyone else's divisions, basically corps-sized. Second, US soldiers were fresh and unbloodied — they hadn't suffered years of unspeakable horror and hardship, and so were willing to take risks. The artillery unit that comes in with the US 1st Army represents coastal artillery pieces cannibalized from forts on both US coasts and shipped to France. Interestingly, coastal artillery companies manned these guns, since they were most familiar with their operation.
Q: Players can agree to quit fighting at any time?
A: I wanted to illustrate why the warring parties couldn't stop the madness and simply end the war under peace terms called "status quo ante bellum" — as things were before hostilities broke out. Historically the combatants could have sought peace at any time. In practice, only the side that felt in a good position attempted peace feelers. The player believing himself to be in a temporarily poor position will likely decline the peace offer, hoping for a better victory.
21.0 Bibliography
21.1 Primary Sources
- Banks, Arthur. A Military Atlas of the First World War. Barnsley, England: Leo Cooper, reprinted 1997.
- McEntee, Girard Lindsley. Military History of the World War. New York: Charles Scribner's Sons, 1937.
21.2 Secondary Sources
- The Great War in Gravure: A New York Times War Portfolio. New York: New York Times, 1917.
- American Battle Monuments Commission. American Armies and Battlefields in Europe (including maps). Washington, D.C.: United States Government Printing Office, 1938.
- Barnett, Correlli. The Great War. New York: G. P. Putnam's Sons, 1980.
- Bond, P. S. Major and McDonough, M. J. Major. Technique of Modern Tactics. Menasha, Wisconsin: George Banta Publishing Company, 1914.
- Bourne, J. M. Britain and the Great War: 1914-1918. London: Edward Arnold Ltd., 1989.
- Cruttwell, C.R.M.F. A History of the Great War: 1914-1918. Chicago: Academy Chicago Pub., 1991.
- Everett, Susanne. World War I. New York: Exeter Books, 1980.
- Gilbert, Martin. The First World War - a complete history. New York: Henry Holt and Company, 1994.
- Gilbert, Martin. First World War Atlas. New York: Macmillan, 1971.
- Gray, Randall and Argyle, Christopher. Chronicle of the First World War; vol. 1: 1914-1916 & vol. 2: 1917-1921. Oxford, England: Facts on File / Curtis Garratt Ltd., 1991.
- Griess, Thomas E., editor. The West Point Military History Series: The Great War (including map book). Wayne, New Jersey: Avery Publishing Group Inc., 1986.
- Horne, Alistair. The Price of Glory: Verdun 1916. Middlesex, England: Penguin Books Ltd., 1962.
- Horne, Charles F. and Austin, Walter F., editors. Source Records of The Great War; vol. 2: 1914, vol. 3: 1915, vol. 4: 1916, vol. 5: 1917, vol. 6: 1918, vol. 7: 1918-1919. National Alumni, 1923.
- Keegan, John. The Face of Battle. New York: Vintage Books, 1976 (chapter on the Somme).
- Keegan, John. The First World War. New York: A. Knopf, 1999.
- Josephy, Alvin M. Jr., editor. The American Heritage History of World War I. New York: American Heritage Publishing Co., Inc., 1964.
- Livesey, Anthony. Great Battles of World War I. New York: Macmillan Publishing Co., 1989.
- Macdonald, Lyn. To the Last Man: Spring 1918. New York: Carroll & Graf Publishers, Inc., 1998.
- March, Francis A. History of the World War: An Authentic Narrative of the World's Greatest War. Philadelphia: The United Publishers of the United States and Canada, 1919.
- Natkiel, Richard & Pimlott, John, editors. Atlas of Warfare. New York: Gallery Books, 1988, pages 199-254.
- Paschall, Rod. The Defeat of Imperial Germany 1917-1918. North Carolina: Algonquin Books of Chapel Hill, 1989.
- Prior, Robin and Wilson, Trevor. The First World War. London: Cassell & Co., 2000.
- Reynolds, Francis J., Churchill, Allen L., & Miller, Francis Trevelyan. The Story of the Great War (in five volumes). New York: P. F. Collier & Son: Publishers, 1916.
- Ropp, Theodore. War in the Modern World. New York: Collier Books, 1959, pages 200-290.