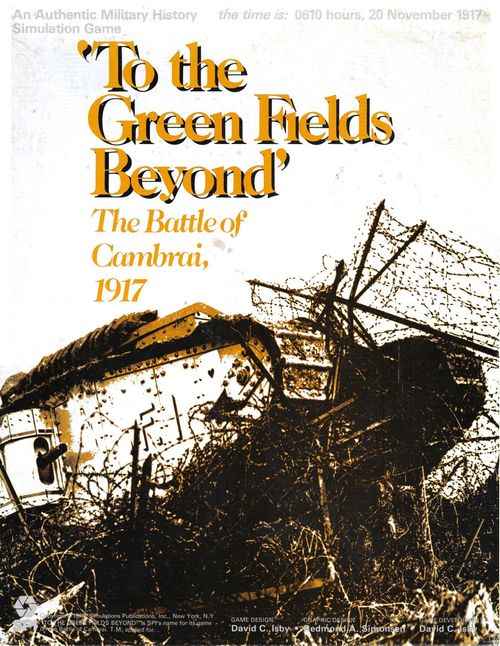
To the Green Fields Beyond: The Battle of Cambrai, 1917
'To the Green Fields Beyond' Rulebook
Table of Contents
Table of Contents
- [2.0] Game Equipment
- [3.0] Setting Up the Game
- [4.0] Sequence of Play
- [5.0] Movement
- [6.0] Zones of Control
- [7.0] Stacking
- [8.0] Ground Combat
- [9.0] Artillery
- [10.0] Undisrupting Units
- [11.0] Supply
- [12.0] Tanks
- [13.0] German Infiltration Tactics
- [14.0] British First Turn Surprise
- [15.0] German Counterattack
- [16.0] Continuous Line
- [17.0] Command Control (Campaign Game only)
- [18.0] Bridges and Bridging
- [19.0] French Participation
- [20.0] Reinforcements
- [21.0] Air Operations (Optional)
- [22.0] Victory Conditions
- [23.0] Master Reinforcement Schedule
- [24.0] Master Supply Point Schedule
- [25.0] Scenarios
- [26.0] Unit Designations
- Historical Notes
- Most Secret — Third Army Plan, Operation "GY"
- The Commanders
- Divisional Organizations
- Bibliography
- Designer's Notes
- Abbreviated Sequence of Play
- [27.0] Charts and Tables
- Terrain Effects Chart (referenced as Case 5.7)
- [8.41] Standard Combat Results Table
- [8.42] Mobile Combat Results Table
- [9.35] Drumfire Barrage Combat Results Table
- [9.44] Rolling Barrage CRT
- [11.43] Supply Point Cost Schedule
- [11.44] Supply Point Index
- [21.54] Air-to-Air Combat Results Table
- Turn Record Track
- Terrain Key
[2.0] Game Equipment
[2.1] The Game Map
The 22" x 34" map depicts the terrain in northern France where the battle of Cambrai was fought. The map stretches from Cantin in the north to Beaurevoir in the south, and from Etincourt in the west to Iwuy in the east. Several important charts, tables, and tracks are also printed on the map.
Note: The city of Cambrai is pronounced Cambray. Other places are pronounced much as spelled, except for Flesquires which is pronounced Flek-ears.
[2.2] Game Charts and Tables
Various visual aids are provided for the Players in order to simplify and illustrate certain game functions. These are: Standard and Mobile Combat Results Tables, Drumfire Barrage and Rolling Barrage Results Tables, Terrain Effects Chart, Air-to-Air Combat Results Table, and the Supply Point Cost Schedule.
[2.3] The Playing Pieces
The cardboard pieces represent the actual units that took part or could have taken part in the battle. The unit symbol designates what type a particular unit is (infantry, tank, etc.). Each unit also has three numbers printed on it. These numbers represent the Attack Strength, Defense Strength, and Movement Allowances of the unit. The reverse side represents the same unit in its disrupted form. Each artillery unit has five numbers: its Barrage strength, S.O.S Barrage Strength, range, Defense strength, and Movement allowance. Also included in the game are markers which help the players keep track of the state of certain units (breakdown, cadre, etc.).
[2.31] Sample Units
Typical Infantry Brigade — Front shows Division, Brigade, Unit Type, Set-up hex (or Game-Turn of Entry), Attack Strength, Defense Strength, and Movement Allowance. Back (Disrupted) shows the same unit with reduced Defense Strength and Movement Allowance and no Attack Strength.
Typical Artillery Regiment — Front shows Division, Regiment (or independent unit), Barrage Strength, S.O.S. Barrage Strength, Range, Unit Type, Set-up hex (or Game-Turn of Entry), Defense Strength, and Movement Allowance. Back (Disrupted) shows reduced values.
Typical Air Unit — Front shows Unit Designation, Aircraft Type (British only), Unit Type, Air-to-Air Strength, and Air-Ground Strength. Back (Disrupted) shows reduced values.
Note: All British artillery units are brigades and all German artillery units are regiments.
Unit Sizes: I = Company; II = Battalion; III = Regiment; X = Brigade.
[2.32] Summary of Counters
Counters include, in addition to combat units: Royal Horse Artillery, Tank, Stosstruppen Infantry, Corps Supply Depot, and Air Unit pieces (front and back shown for each), and the following markers: Supply Point Index Marker, Bridge / Bridge Destroyed, Tank Break-down / Cadre Strength, Interdiction / Bridge Destroyed, Action Taken / Shift (1, 2, 3) / Mnemonic, and Game Turn.
[2.4] Definition of Terms
Attack strength: The quantification of a unit's strength in terms of attack for the type of combat represented on the Combat Results Table.
Air unit: A counter representing a number of aircraft maintaining a standing patrol in an area. It is used only if the Optional Air Rules are in effect.
Barrage strength: The relative strength of an artillery unit, and is expressed in terms of Barrage strength points.
Disruption: A certain portion of a unit which is lost due to combat or other causes; requires that the unit in question be flipped to its reverse side. It can be Undisrupted.
Defense strength: The quantification of a unit's strength in terms of defense for the type of combat represented on the Combat Results Table.
Front Line: This refers to the front line at the start of Game-Turn One, the easternmost continuous line of British trenches and the westernmost continuous line of German trenches printed on the map.
Ground Combat: Combat between adjacent units. While normally they do not do so, artillery and air units may participate in Ground Combat in certain cases.
Marker: A counter that does not represent a military unit, which performs a game function by showing the status of a unit.
Movement allowance: The quantification of a unit's mobility in terms of Movement points. Basically, a unit expends one Movement point for each hex of clear terrain it enters.
Phasing Player: The Player who is assigned the current Player-Turn (e.g., the British Player is the Phasing Player during the British Player-Turn).
Range: The maximum number of hexes from the hex of an artillery unit using its Barrage strength or S.O.S. Barrage strength to the defending unit's hex.
Reinforcements: Units which do not begin the game in play, but appear at some scheduled time during the game.
Shift: A shift is a modification to a Combat Results Table that directs the Players, once they have found the correct column on the proper CRT, to "shift" a number of columns in either direction. Thus a 1-1 attack where the attacker may "shift 2" to the right becomes a 3-1 attack. Shifts in the odds columns are always made prior to the die roll for that attack.
Scenario: An organized description of Orders of Battle, deployments, and victory conditions and special rules that the Players will use to play a certain version of the game.
S.O.S. Barrage strength: The relative ability of an artillery unit to add to the Defense strength of Friendly units, and is expressed in terms of S.O.S. Barrage strength points. This is differentiated from the artillery unit's normal Barrage strength. It is used only to make S.O.S. Barrages.
Stosstruppen: Elite German infantry units that can perform actions impossible for other infantry units. Fully explained in Section 13.0 of these rules.
Supply Point Index: A track printed on the map where, by moving markers from box to box, Players may keep track of the number of Supply points each of their Corps Supply depots contains at any given moment.
Undisrupting: The act of restoring a previously Disrupted unit to its original, full strength.
Unit: A counter representing a military unit that took part in the actual battle. All units have different Strengths and a Movement allowance marked on them. Note that the term "units" when used in the rules does not refer to air units except when specifically noted. Units should also be distinguished from markers which do not represent actual military units.
Victory point: The method by which victory is measured; the "value" to the Players of accomplishing certain conditions.
Zones of Control: The six adjacent hexes surrounding a unit which that unit is said to control.
[2.5] Game Scale
Each hex on the mapsheet represents 1250 yards from side to side. Each Game-Turn is equivalent to 24 hours.
[2.6] Inventory of Game Parts
A complete game of To The Green Fields Beyond should contain:
- One Rules Booklet
- One Counter Sheet (400 pieces)
- One 22" x 34" Game-Map
- One Plastic Die
- One Game Box
Questions regarding the rules of To The Green Fields Beyond will be answered if accompanied by a stamped, self-addressed envelope, and if phrased to be answered by a simple one word answer.
[3.0] Setting Up the Game
In the Campaign Game and British Breakthrough Scenario, each German and British unit that has a hex number printed on it is placed on the map, hex number face up, in the hex corresponding to the number. Units that do not have a four-digit hex number printed on them are reinforcements. The one- or two-digit number printed on such counters is the Game-Turn of arrival.
In the Battle of Bourlon (23 Nov) and the German Counterattack (30 Nov) scenarios, there is a Section in the rules that lists the units and hex numbers that come after each one. That hex number is the set-up hex for that unit for that particular Scenario. The set-up hex numbers printed on the counters are ignored for these Scenarios. Units that do not start the game on the map and are designated to arrive on the map at a later Game-Turn arrive as they normally would (e.g., The Battle for Bourlon Scenario—23 November—starts on Game-Turn Four. All units and Supply points that are supposed to arrive on Game-Turn Four or later arrive normally).
[4.0] Sequence of Play
[4.1] The Game-Turn
To The Green Fields Beyond is played in Game-Turns. Each Game-Turn is composed of two Player-Turns, plus independent phases. Each Player performs a set sequence of activities during his Player-Turn, which is divided up into Phases. The Player whose Player-Turn is in progress is called the Phasing Player. Each Game-Turn proceeds strictly as indicated in the Game-Turn Sequence Outline.
[4.2] Game-Turn Sequence Outline
A. British Player Turn
-
British Reinforcement Phase: The British player consults the Reinforcement Track and places any new units he receives on the map. He also increases his Supply Point Index to reflect any new Supply points that he receives. He may also attempt to undisrupt Disrupted units.
-
British Tank Repair Phase: The British Player determines which of his tank units have been repaired and alters their status accordingly.
-
Command Control Phase (Campaign Game Only): Only the British Player has a Command Control Phase, and then only when the Campaign Game is being played (not the three Scenarios). In this Phase the British Player determines which actions he is compelled to perform due to the effects of Command control.
-
Initial Air Phase (Optional): If the Players are using the Optional Air Rules, the British Player now rolls the die for Aircraft Availability and moves all, some, or none of his air units. After the British Player has moved all the Air Units he wishes to move, the German Player may take any possible reaction moves. After the non-Phasing Player has performed this movement, Air-to-Air combat is resolved.
-
Initial Barrage Combat Phase. The British Player uses any of his artillery units he wishes to fire barrages against German units.
-
Initial Ground Combat Phase: The British Player may now attack any German unit that is adjacent to his units, using his units to attack the German units. The British Player may execute his attacks in any order he desires. Each attack is resolved as follows:
a. The British Player states the number and total Attack strength of his attacking ground units. b. The British Player states the number and Barrage strength of any artillery units that are providing Direct Support Barrages for the attack (if any). c. The German Player allocates S.O.S. Barrage strength (if he wishes) from his artillery units (if any). d. The combat odds ratio (ratio of total attacking strength to total defending strength) is calculated, the die is rolled and the indicated result (see Combat Results Table) is immediately applied. e. The German Player now moves his units if any Movement after Combat is required. f. The British Player may now engage in Movement after Combat if possible.
-
Initial Movement Phase: The British Player may move all, some, or none of his units as he desires within the limits and restrictions of the rules of movement, stacking, Zones of Control, terrain effects, and other rules. Units which participated in either the Initial Barrage or Initial Combat Phases may not be moved in this Phase, and a marker should be placed on top of such units as a mnemonic if players think it necessary.
-
Second Air Phase (Optional): The British and German Players both repeat the steps they performed in the Initial Air Combat Phase.
B. German Player-Turn
The German Player now becomes the Phasing Player. He repeats the actions the British Player performed in Phases 1 through 12, except his Player-Turn does not contain the equivalent of Phases 2 (Tank Repair), 3 (Command Control), and 12 (Tank Breakdown).
Game-Turn Record Interphase
The British Player advances the Game-Turn Record Marker one box to record the passing of a Game-Turn.
[4.3] Use of Mnemonic Markers
A number of mnemonic markers are provided with the game to aid players with memory functions. They are intended simply as a convenience, and their use is in no way mandatory.
One use of these markers is during the Barrage and Combat Phases of each Player-Turn. As units that attack or barrage during these Phases may not move during the subsequent Movement Phase, Players may wish to place a mnemonic marker on top of each unit or stack of units that is not eligible to move after having attacked or barraged. Players may also use the markers to keep track of which artillery units have fired S.O.S. barrages during an Enemy Combat Phase, even though there is no impairment to them for doing so. The markers may also be used to designate those enemy artillery units that have been suppressed by Drumfire barrages. In short, these markers are there to help the players as they best see fit.
[5.0] Movement
General Rule: During the Movement Phase, the Phasing Player may move as many or as few of his units as he wishes. During each of his Friendly Movement Phases, each unit may be moved as many or as few hexes as desired as long as its Movement allowance is not exceeded in a single Movement Phase. Unused Movement points may not be accumulated or transferred from unit to unit. It is important to note that units which take part in ground or barrage combat may not be moved in the Movement Phase that follows the Barrage or Ground Combat Phase in which they participated. A mnemonic marker should be placed on these units to reflect this status.
Procedure: Move each unit individually, tracing the path of its movement through the hexagonal grid. Except in the case of units executing an overrun, once a Player's hand is removed from a unit, movement for that unit is considered completed for that Phase.
Cases:
[5.1] How to Move Units
[5.11] During a Player's Movement Phase, all, some, or none of his units may be moved. Combat may not occur in this Phase (exception: see Overrun, Case 5.6).
[5.12] Movement is calculated in terms of Movement points. Basically, one Movement point of a unit's Movement allowance is expended for each clear terrain hex it is moved into. Other terrain requires more than one Movement point to be entered or crossed. These effects are summarized on the Terrain Effects Chart (5.7).
[5.13] Note that certain types of terrain in a hex impose an additional cost over and above the normal cost for entering a hex. These costs are cumulative.
[5.14] Units that have participated in ground combat or barrage combat in a Ground Combat or Barrage Combat Phase may not be moved in the Movement Phase immediately following these Ground Combat or Barrage Combat Phases, and a mnemonic marker should be placed on units so restricted. Note that units which take part in the initial Barrage or Ground Combat Phases but not in the Second Barrage or Ground Combat Phases of a Player-Turn are in no way restricted from participating in the Second Movement Phase so long as they did not participate in the Second Barrage or Ground Combat Phase as well.
[5.2] Movement Inhibitions and Prohibitions
[5.21] A Friendly unit may never be moved into a hex containing an Enemy unit (Exception: see Overrun, case 5.6).
[5.22] A unit must stop upon entering an Enemy-controlled hex. (Exception: see German Infiltration Tactics, Section 13.0.)
[5.23] A unit may not expend more Movement points than its total Movement allowance in any one Movement Phase. (Note that the units have two Movement Phases and may expend their full Movement Allowance in each phase.) Some or none of a unit's Movement points may be used in a given Movement Phase. However, a unit may not "save" Movement points for another Turn or Phase, nor may unused points be given to another unit.
[5.24] A unit may be moved only during Friendly Movement Phases. Although there may be some movement as a result of combat (in terms of advances and retreats), this is not considered movement per se and does not require the expenditure of Movement points.
[5.25] Units which start the Movement Phase unsupplied have their Movement allowances halved.
[5.26] If not otherwise prohibited (e.g., blocked by an unbridged canal hexside, Zone of Control) a unit may always be moved into a hex adjacent to the hex it began its Movement Phase in, even if it otherwise lacks sufficient Movement points.
[5.3] Road Movement
During the historical battle, both sides were able to utilize the major roads (all Roman-built) to expedite the movement of troops to some extent, but the presence of large masses of troops resulted in frequent traffic jams.
[5.31] When a unit is moved from one road hex to an adjacent road hex through a hexside intersected by a road, a special reduced rate of Movement point expenditure—the road movement rate of one Movement point per hex—may be utilized. This is defined as movement along a road. Only a unit that is moved along a road may be moved at the road movement rate; however in some circumstances, even a unit moved along a road may not be moved at the road movement rate (see Case 5.33).
[5.32] When a unit is moved at the road movement rate, no more than one Movement point need be expended for any hex it is moved into, regardless of any other terrain (besides the road) that may exist in that hex or along its hexsides.
[5.33] A unit being moved along a road may not be moved into a hex at the road movement rate—and the normal terrain Movement point cost(s) must be paid—under any of the following circumstances:
a. that hex is in an Enemy Zone of Control. b. that hex contains a Friendly unit (exception: see Case 5.36). c. that hex is adjacent to a "contiguous road hex" (see Case 5.34) which is occupied by a Friendly brigade or regiment-sized unit (exception: see Case 5.36).
[5.34] Road hexes are contiguous if it is possible to move a unit directly from one to the other at the road movement rate (i.e., the hexes must be adjacent and share a common hexside that is intersected by a road).
[5.35] The restrictions on using the road movement rate to move units outlined in Cases 5.31 and 5.33 apply also to the utilization of the road movement rate for the purpose of determining the length of Supply lines (see Case 11.22).
[5.36] Friendly artillery units which cannot be moved during a particular Movement Phase due to having participated in one of the immediately preceding Barrage or Ground Combat Phases do not limit road movement (exception to Case 5.33 b and c).
[5.4] Bridges
Units may not cross the canal except at bridges (see Terrain Effects Chart, 5.7).
[5.41] Bridges are classified according to the type of traffic they can accommodate.
[5.42] Bridges may be built or destroyed (see Bridges and Bridging, Section 18.0).
[5.5] Leapfrog Withdrawals
This tactic addresses the ability to link up with isolated units so that they might withdraw through areas covered by enemy fields of fire.
[5.51] A unit may always be moved out of an Enemy unit's Zone of Control during the Friendly Movement Phase through normal movement. A Leapfrog withdrawal enables the Player to move it from one Enemy Zone of Control hex through another Enemy Zone of Control hex controlled by the same Enemy unit to a hex not in an Enemy Zone of control. Such movement would otherwise be prohibited (see Case 6.2).
[5.52] All infantry, tank, and cavalry units make Leapfrog withdrawals. These units may be moved through Enemy Zones of Control while performing a Leapfrog withdrawal.
[5.53] To perform a Leapfrog withdrawal, a Player moves a unit that is in an Enemy Zone of Control directly into a hex containing a Friendly unit that is also in an Enemy Zone of Control and out of that hex (the one containing the Friendly unit which is also in the Enemy Zone of Control) and directly into a hex that is not in an Enemy Zone of Control. The withdrawing unit expends all its Movement allowance making a Leapfrog withdrawal.
[5.54] The Friendly unit occupying the hex that the unit making a Leapfrog withdrawal is being moved through may itself not be moved during that same Movement Phase, but it may have attacked in the previous Combat or Barrage Phase and may freely be moved or engaged in combat later in the same Player-Turn.
[5.55] A unit may make a Leapfrog withdrawal even if it would not normally have sufficient Movement points to be moved through the hexes through which it is withdrawn. Units may take part in Leapfrog withdrawals even if unsupplied, Disrupted, or at cadre strength. Units may move through only one hex while performing a Leapfrog withdrawal.
[5.56] Leapfrog withdrawals are precisely that, withdrawals. They may not be used to penetrate Enemy defenses or move further away from a Friendly supply source. Nor may they be used to move a unit out of supply.
[5.57] A Leapfrog advance is where the Phasing Player moves a unit into an Enemy-controlled hex and then attempts to move other Friendly units or trace supply through that hex. Leapfrog advances are prohibited. An example of a Leapfrog advance would be if there was a German unit in hex 0802, and a British unit moves into hex 0801 from 0701, ending its Movement Phase there (as required by the Zone of Control rules) while moving another unit to 0701. On the second British Movement Phase, the British player may not move the second unit from 0701 to 0801, and then move the unit starting in 0801 to 0901 and beyond. That would be considered a "leapfrog advance" and is hence prohibited.
Example of Leapfrog withdrawal: The German 2-4-8 begins its Movement Phase surrounded by two British brigades. The German player decides to make a Leapfrog withdrawal using the 4-6-8 to cover the withdrawal. He then moves the 2-4-8 from hex 0811, over the 4-6-8 in hex 0911 and ends by moving into hex 1011 ending the Movement Phase there. The 4-6-8 may not be moved at all. The 2-4-8 could have been moved either to hex 1010 or 1011, as both are not in an Enemy Zone of Control and are adjacent to the unit it moved over. The fact that the 2-4-8 may have lacked the Movement points (due to being unsupplied) to perform this maneuver normally is irrelevant.
[5.6] Overrun
Overruns take place during the Movement Phase. The British Player may perform overruns only during his Movement Phases of the First Game-Turn. The German Player may only conduct overruns in the Game-Turn in which he declares his Counterattack (Section 15.0). Overruns may be conducted in both Movement Phases of a Player-Turn. Only Enemy units that have been reduced to cadre strength may be overrun. The only British units capable of performing overruns are tank units. The only German units which are capable of performing overruns are Stosstruppen.
[5.61] The British Player may conduct overruns with his tank units only during the First Game-Turn. The German Player (only) may conduct Overruns with his Stosstruppen units during the Game-Turn during which he declared his Counterattack (Section 15.0).
[5.62] Overruns constitute an exception to the rule that states Friendly units may not be moved into the same hex as Enemy units (Case 5.21). It is also an exception to the rule that states units are moved individually. To conduct an overrun, the Player simply moves his eligible units into the hex containing the Enemy cadre unit and resolves an attack against that unit. The overrunning unit(s) must expend 2 Movement points in addition to the Movement point cost of entering that particular hex.
[5.63] All Friendly units stacked together in a hex adjacent to the Enemy cadre-strength unit being overrun may move into the hex together, as one unit. Example: If the British Player has three tank companies on hex 1525, and he wishes to use them to overrun a German cadre-strength unit on hex 1625, he may treat all three companies as one entity for the overrun and move them into hex 1625 stacked together.
The overrun is resolved during the overrunning units' Friendly Movement Phase. Units expend no Supply points to perform an overrun. Units performing overruns may not have the benefit of any barrages in the previous Barrage Combat Phase. Units being overrun cannot be aided by S.O.S. Barrages. The overrun is resolved as a normal attack, using the Mobile CRT. Overrunning Units have the benefit of one additional "shift" of one column on the CRT to the right in addition to any other shifts. "Defender Retreats" results are ignored in the case of an overrun.
[5.64] After the overrun against the Enemy Cadre-strength units is resolved, all overrunning units must move out of the hex containing the Enemy units they have just overrun if these Enemy units are still on the map. If they are still on the map, the overrunning units may not end their Movement Phase in that hex. If the overrun was successful, the Phasing Player may continue the overrunning unit's movement. If the overrunning units suffer an adverse result, the unit which attempted the overrun must be retreated at least one hex.
[5.65] Units performing an overrun are subject to full, normal Zone of Control rules. This means that an Enemy cadre-strength unit in an Enemy Zone of Control may not be overrun, as it would entail moving through an Enemy Zone of Control hex.
[5.66] Units performing a successful overrun may be moved into any hex adjacent to the unit which they overran (subject to Zone of Control restrictions) including the hex they started from. This is considered Movement as a Result of Combat (see Case 8.6) and costs no Movement points to the units so moving.
[5.67] If units performing an overrun suffer an adverse Combat Result, they must be retreated to the hex from which they were moved into the hex in which the overrun occurred. Thus, if a British tank unit beginning a Movement Phase in 1421 moved to 1420 and then entered hex 1419, unsuccessfully trying to overrun a German cadre-strength unit there, it would have to retreat to 1420 and end its Movement Phase there.
[5.68] Units may not perform overruns while being forced to retreat as a result of combat or while executing a Leapfrog withdrawal.
[5.7] Terrain Effect Chart
(see the Terrain Effects Chart on the map; reproduced in Charts and Tables, Section 27.0 below.)
[6.0] Zones of Control
General Rule: The six hexagons surrounding a hex constitute the Zone of Control of certain units occupying that hex. Hexes upon which a unit exerts a Zone of Control (ZOC) are called Controlled hexes, and they impede the movement of Enemy units.
Cases:
[6.1] Exertion of Zones of Control
Only units of regiment or brigade size exert a Zone of Control. Companies, battalions, and depot units do not exert a Zone of Control. Units reduced to cadre strength do not exert a Zone of Control. Units of battalion or company size can, however, exert a Zone of Control when there are three or more Stacking Points (see 7.1) of such units stacked together. They then function as a de facto brigade or Zone of Control purposes while so stacked.
[6.2] Effectiveness of Zones of Control
[6.21] Units reduced to Cadre status lose their Zone of Control the instant they are reduced.
[6.22] Friendly Zones of Control affect only Enemy units, never Friendly units.
[6.23] Zones of Control do extend across canal hexsides.
[6.24] There is no additional effect when more than one unit exerts its ZOC into a given hex.
[6.25] When both Friendly and Enemy units exert ZOC into a given hex, they have no effect on each other. Both ZOC's coexist, and the hex is mutually controlled by both Players.
[6.3] Zones of Control and Movement
[6.31] A unit moved into an Enemy ZOC must halt and be moved no further during that Movement Phase.
[6.32] A unit may not be moved from one Enemy-controlled hex to another if that hex is controlled by the same Enemy unit as the first hex. A unit may be moved from an Enemy-controlled hex directly to another Enemy-controlled hex if the second hex is not controlled by the unit which controlled the first hex (exceptions: see Section 13.0, German Infiltration, and Case 5.5, Leapfrog Withdrawal).
[6.33] There is an additional cost of 2 Movement points for a unit to enter an Enemy-controlled hex and 1 Movement point to exit an Enemy controlled hex, above the normal Terrain costs for a unit of that type.
[6.34] For movement purposes only, Enemy ZOC's do extend into Friendly-occupied hexes. For all other purposes, they do not. Thus, Friendly units may be retreated through Enemy Zones of Control and trace supply through Enemy Zones of Control so long as these Enemy Zones of Control hexes also contain a Friendly unit.
[6.35] Units may be moved freely and without penalty into and through hexes that are adjacent to Enemy units that do not possess a Zone of Control.
[6.36] German Stosstruppen units may, in certain circumstances, be moved through British ZOC's (see Infiltration, Section 13.0, for further explanations).
[6.37] There is no additional cost or restriction for a unit to simply leave an Enemy Zone of Control other than the Movement point cost given on the Terrain Effects Point Chart.
[7.0] Stacking
General Rule: Each Player is restricted as to the number of units he may have in any one hex at the end of any Phase. The normal Stacking limit is one brigade/regiment plus one battalion (or equivalent) per hex.
Cases:
[7.1] Stacking Points
[7.11] At the end of a Phase, the number of Friendly units that occupy a hex is limited to four battalion equivalents. As most of the units in the game are regiments or brigades, this normally means that one regiment or brigade may be stacked with one battalion or three companies (note that British artillery brigades count as only half a brigade for stacking purposes). For stacking purposes, battalion equivalents are as follow:
| Unit type | Battalion equivalent |
|---|---|
| Companies | 1/3 bn |
| Battalions (bn) | 1 bn |
| British Artillery Brigades | 1 1/2 bn |
| Brigades, Regiments, and Depots | 3 bn |
[7.12] No size symbol appears on artillery units. This is because all British artillery units are uniformly brigades and all German artillery units are uniformly regiments.
[7.2] Stacking Limitations
[7.21] Air units, bridges, and game markers of all types do not count towards the stacking limits.
[7.22] There is no limit to the number of units that may move through a hex during a Game-Turn, as long as the stacking limits are observed at the end of each Phase.
[7.23] Units of different types and nationalities may stack freely together just so long as they are not Enemies to each other (see Case 5.21).
[7.24] There is no additional Movement point cost to stack or unstack Friendly units.
[8.0] Ground Combat
General Rule: Ground combat occurs between adjacent, opposing units at the Phasing Player's discretion. Artillery units (see Section 9.0) are the only units which may attack units to which they are not adjacent. If the optional Air Rules (Section 21.0) are used, they too will have an effect on combat. The Phasing Player is termed the attacker, and the Non-Phasing Player the defender, regardless of the over-all strategic situation. For a unit to attack it must be in supply. The act of attacking requires the expenditure of Supply points (see Case 11.4, Supply Rules).
Procedure: Total the Attack strength and Barrage strength of all attacking units involved in a specific attack; then total the Defensive strengths (as modified by the terrain in the hex they are located in, see 5.7, Terrain Effects Chart) and the S.O.S. Barrage strength of all units which are the subject of the specific attack. State the comparison as a probability ratio: attacker's strength to defender's strength. Round off the ratio in favor of the defender to conform to the simplified odds found on the appropriate Combat Results Table, and make any odds shifts necessary. The Phasing Player then rolls the die and reads the result on the appropriate line under the correct odds column. Apply the result immediately before resolving any other attacks being made during that Phase. Note that Artillery Barrage combat (Section 9.0) uses a different procedure.
Cases:
[8.1] Which Units May Attack
[8.11] Units may attack only during their own Friendly Combat Phase (see also Overrun, Case 5.6). They may attack any and all Enemy units which are adjacent to them. Only artillery units may attack Enemy units which are not adjacent to them.
[8.12] Attacking is completely voluntary; units are never compelled to attack, and not every unit adjacent to an Enemy unit need participate in any attack. A Friendly unit in a stack that is not participating in a given attack is never affected by the results of that attack.
[8.13] An Enemy-occupied hex may be attacked by as many units as can be brought to bear in the six adjacent hexes, with possible artillery Barrage strength (see Case 9.6) and Air Support (see Case 21.4)
[8.14] No unit may attack more than once per Combat Phase and no Enemy unit may be attacked more than once per Combat Phase. Remember, overrun is not considered combat. (Exception: Displacement by retreating units may create a situation where a unit may be attacked more than once per Ground Combat Phase. See Case 8.76.)
[8.2] Multiple Unit and Multi-Hex Combat
[8.21] All units in a given hex must be attacked as a single Defense strength. The defender may not withhold a unit in a hex under attack. Different units in a hex may not be attacked separately, nor may one unit be attacked without involving the other unit in combat.
[8.22] All units in a hex that contains an attacking unit need not participate in that same attack or any other attack. Thus, when one unit in a stack is attacking a given hex, the other unit in the stack could attack a different hex or choose not to attack at all.
[8.23] If a unit is adjacent to more than one Enemy-occupied hex, it could attack all of them in a single combat. That is, units in a single hex may attack more than one hex. The only requirement is that all attacking non-artillery units be adjacent to all defending units.
[8.24] A unit's Attack and/or Defense strength is always unitary, i.e., it may not be divided among different combats either for attack or defense.
[8.3] Effects of Terrain on Combat
[8.31] Units defending in certain types of terrain may have their Defense strength increased. This is always expressed as a multiple of the Defense strength. (A unit with a printed Defense strength of four in a city defends with a strength of eight.)
[8.4] Combat Resolution
Combat odds are always rounded off in favor of the defender. For example, an attack with a combined Attack strength of 26 against a hex defending with a Defense strength of 9 (26 to 9) would round off to the next lowest odds columns on the CRT, "2 to 1." That column would be used for resolving the attack.
[8.41] Standard Combat Results Table
(see Charts and Tables, Section 27.0)
[8.42] Mobile Combat Results Table
(see Charts and Tables, Section 27.0)
[8.43] The Standard Combat Results Table (CRT) is used to resolve most attacks. The attacker (Phasing Player), however, has the option to use the Mobile CRT in place of the Standard CRT if he meets the following conditions: If the attacking Player is British, at least half the attacking units must be tank units for him to use the Mobile CRT. If German, at least half the attacking units must be Stosstruppen.
[8.5] Explanation of Combat Results
[8.51] All combat units (including air units) can be in one of three conditions: Normal (full) status, Disrupted (inverted) status, and Cadre status. Units can be reduced in status through the effects of combat. When a unit is Disrupted, it is flipped over so that its Disrupted, weaker, side is face up. If a unit is restored to full strength, this process is reversed. If a unit is reduced to Cadre strength, a "Cadre" game marker is placed on top of the unit, which has its Disrupted side face-up.
[8.52] Effect of Disruption
Disruption is noted by inverting the unit counter to show its weaker side. If a Disrupted unit is again Disrupted, it is reduced to Cadre strength. If a unit at Cadre strength is disrupted, it is destroyed and removed from play. Other than the reduction in strength, Disruption has no further effects. Disruption represents the state of a unit whose infantry is weakened, either by losses or fatigue, or a combination of both. In artillery and tank units, it means that a percentage of the weapons in the unit have been put out of action.
[8.53] Cadre Strength
A unit can be reduced to Cadre strength either directly as a result of combat or as the result of a Disrupted unit being Disrupted again. To designate a unit that has been reduced to Cadre strength, put its Disrupted side face-up and place a Cadre marker on it. All units at Cadre strength have a Defense strength of 1 and no Attack strength; an exception to this is a unit which has a Defense strength of zero when Disrupted. Such units also have a Defense strength of zero when reduced to Cadre strength. Units reduced to Cadre strength lose their Zone of Control at the instant they are so reduced. Units reduced to Cadre strength may not be Undisrupted (see Section 10.0), unlike Disrupted units, and they must spend the rest of the game at Cadre strength. A Friendly unit cannot be reduced to Cadre strength by Drumfire barrages if the defending unit is in a Friendly trench or artillery emplacement hex and there is no Enemy unit adjacent to it. Such units instead remain Disrupted. In certain Game-Turns, units reduced to Cadre strength may be overrun. German Stosstruppen reduced to Cadre strength lose the ability to perform infiltration. An artillery unit that is reduced to Cadre strength has its Barrage and S.O.S. Barrage strengths reduced to zero and its Defense strength to 1.
[8.54] Counterattack Result
A defending force may immediately attack one of the adjacent hexes from which the attack originated. It may not use any supporting artillery for any type of barrage. It may use any CRT or shifts it would normally be entitled to. If the defending force does not elect to so attack, it must retreat two hexes. This retreat is treated as a normal retreat as a result of combat. If the defending force does elect to attack, the units it is attacking may not use an S.O.S. barrage. If this attack itself also results in a Counterattack result, the original attacker simply repeats his original attack over again.
[8.6] Advance After Combat
[8.61] Whenever an Enemy unit(s) is forced to retreat (or is eliminated) leaving a hex vacant as a result of combat, any victorious units which participated in the combat or non-participating units that are stacked with units that participated in the combat may be advanced into the vacated hex.
The option to Advance after Combat must be exercised immediately before any other combat resolution. Advances are useful, as a result of this, in cutting the retreat routes of Enemy units whose combat has not yet been resolved.
[8.62] Victorious attacking units (and non-participating units stacked with them) may be advanced into a hex vacated by enemy units as a result of combat even if this means that the advancing units move from one Enemy Zone of Control hex to an adjacent Zone of Control hex of the same Enemy unit, which would otherwise be prohibited. Example: If there are German units in 2115 and 2116 and the unit in 2115 is forced to retreat by an attacking British unit in hex 2015, the British unit may advance into 2115.
[8.63] If the defeated unit(s) must retreat two hexes, the victorious attacking units may still only advance into the vacated hex.
[8.64] As with retreats, units being advanced as a result of combat do not expend any Movement points. The movement of units which did not participate in combat but were stacked with those that did is permitted, and this does not prejudice the ability to move these units in the subsequent Movement Phase. Advance after Combat is basically a "free ride."
[8.65] Unlike retreats as a result of combat, advance after combat is not required.
[8.66] A Player must never violate stacking restrictions as a result of an Advance after Combat.
[8.67] In the event of "Attacker Retreat" results, defending units may not Advance after Combat. In "Both Retreat" results, no units may Advance after Combat.
[8.7] Retreats
When a Combat Result requires a Player's unit(s) be retreated, the owning Player must immediately move these units one or two hexes away from their combat position. This movement is not normal movement and is subject to the restrictions and conditions set out in this section. If the unit is unable to retreat subject to these restrictions, it is destroyed instead and removed from play.
[8.71] Retreats are conducted by the owning Player. When stacked units must retreat, the stack retreats as a whole. It may only be split up if that is necessary in order to conform to the stacking limits. Retreating units must always be retreated the correct (either one or two hexes) distance away from the hex they were forced out of. Units must be retreated in the direction of the nearest Friendly supply source if possible. They are not eliminated solely because they cannot retreat toward the nearest Friendly supply source.
[8.72] Units may not be retreated across hexsides they could not ordinarily move across.
[8.73] Units may not be retreated into hexes containing Enemy units (except air units), nor may they retreat into Enemy Zones of Control unless the hex also contains a Friendly unit. The presence of Friendly units negates the effect of Enemy Zones of Control for retreat purposes.
[8.74] If possible, a unit should be retreated to the hex which has the highest retreat priority. Retreat priorities are as follows:
a. Hexes in the direction of a Friendly supply source. b. Hexes which would not force the retreating units to exceed the stacking limit or displace units. c. Toward the west edge of the map for British units, the east edge for German units.
A unit should always attempt to fulfill as many of these criteria as possible in selecting a hex to retreat to, but units are never eliminated if they cannot follow this list.
[8.75] A unit retreating two hexes may not end its retreat adjacent to the hex it started its retreat in.
[8.76] Retreating units must not be in violation of the stacking limit at the end of their retreat. If, however, the retreating unit(s) have no alternative but to overstack, they may move through other Friendly-occupied hexes, including those in Enemy Zones of Control, displacing as many Friendly units as necessary from the final hex it ends the retreat on to conform to the stacking limit. The displaced unit(s) is moved one hex (by the owning Player) as if it were itself retreating. This occurs only at the last hex the retreating unit enters. The displaced unit, in its turn, may displace other units; but if the displacement would cause any of the displaced units to be eliminated, the retreating unit is eliminated instead. Displaced units can themselves displace other Friendly units in sort of a chain reaction if that is the only permitted path open. A unit may be displaced more than once per Combat Phase, if necessary. A retreating unit may not displace other Friendly units if it is possible to retreat that unit without displacing any units.
[8.77] Note that displacement can create an exception to the rule that a unit may be attacked only once per Combat Phase. If a retreating unit displaces a unit that the Phasing Player had intended to attack, the Phasing Player may now attack the unit that displaced it and now occupies the hex instead, even if he had previously attacked the same unit when it occupied another hex.
[8.78] The owning Player may voluntarily elect to destroy a retreating (not displacing) unit rather than have it displace Friendly units.
[8.8] Units with a Defense Strength of Zero
Certain units have a Defense strength of zero. These include British tank units and cavalry battalions that have been disrupted, broken down, or have been reduced to Cadre strength; and the two British mobile bridge units, when not emplaced. Units with a Defense strength of zero do not exert a Zone of Control (see Section 6.0, ZOC). If they are stacked with a unit that has a Defense strength, the combat is resolved normally. If the units with a zero Defense strength are attacked alone, however, any and all units with an Attack strength of 1 or more may attack them using the 5-1 column of the appropriate CRT. The combat is then resolved normally. Artillery barrages against units with a Defense strength of zero are resolved normally.
[9.0] Artillery
Commentary: "Ubique" (everywhere) — motto of the Royal Artillery. Artillery caused 59% of the casualties in the First World War. Artillery shaped the Battle of Cambrai no less than the tanks did. The British employed a new fire control system that gave them the edge over the Germans throughout the battle. Players will find artillery crucial in the game, and they will have to plan each Barrage Phase exactly to ensure maximum effect, much as the Barrages were carefully planned in the actual battle.
General Rule: Artillery units may participate in combat either from adjacent or from non-adjacent hexes. The artillery unit's Barrage strength may be used to attack Enemy units within the range of the artillery unit. The artillery unit's S.O.S. Barrage strength may be used to supplement the Defense strengths of other Friendly defending units. In any case, artillery units must be within range of the defending unit, although they need not be adjacent to it. Each artillery unit has its own specific Range allowance printed on the counter (in hexes). An artillery unit may use both its Barrage strength and its S.O.S. Barrage strength in a single Game-Turn. When attacked, an artillery unit defends with its own Defense strength. All offensive (attacking) artillery combat is by Barrage. Artillery units are capable of firing the following types of Barrages, which will be explained in this section:
Drumfire Barrage—fired in Friendly Barrage Combat Phase;
Rolling Barrage—fired in Friendly Barrage Combat Phase;
Direct Support Barrage—fired in Friendly Combat Phase;
S.O.S. Barrage—fired in Enemy Combat Phase;
Interdiction Barrage—fired in Friendly Barrage Combat Phase.
In addition, some of these Barrages can be fired as especially severe Hurricane Barrages, which require the expenditure of triple supply points. All Barrages require that the firing artillery unit be in supply (see Section 11.0), and all but S.O.S. Barrages require that Supply points be expended (see Case 11.4).
Cases:
[9.1] Barrage Attacks
[9.11] Artillery units may attack non-adjacent Enemy units up to the extent of their Range allowance, but they are never forced to attack an Enemy unit merely because it is within range. Artillery units are subject to restrictions in firing at Enemy units that are more than seven hexes away from a Friendly unit or are "hidden" behind a ridge. See Case 9.2 for a full explanation.
[9.12] Range from the barraging artillery unit to the defending unit is counted by including the target hex (defending unit's hex) but not the barraging unit's hex.
[9.13] Artillery units may only attack a single hex when barraging, except when making a Direct Support Barrage with other units attacking from adjacent hexes.
[9.14] Artillery units defend in the same manner as other units. When attacking, however, they suffer no Combat results; they are never reduced or retreated as a result of their own attacks unless they were firing a Direct Support Barrage into an Enemy-occupied hex adjacent to the artillery unit. In this case, the artillery suffers the same results as the attacking units.
[9.15] Friendly artillery units may not attack during a Friendly Barrage Phase while adjacent to an Enemy unit. If at any time during a Barrage Phase that Enemy unit is removed, the artillery units may then attack. There is no restriction for artillery units wishing to fire a Direct Support Barrage during a Friendly Combat Phase. Friendly artillery units which are adjacent to Enemy units during an Enemy Combat Phase may not fire an S.O.S. Barrage.
[9.16] Except as noted elsewhere in this Section, results on Barrage CRTs are the same as those on the Standard and Mobile CRTs (see Case 8.5).
[9.17] An artillery unit may attack adjacent Enemy units by itself or in conjunction with other units by means of a Direct Support Barrage.
[9.18] The owning Player may decide the order of barrages or attacks within a particular phase.
[9.19] Artillery units which barrage in the Barrage Combat Phase may not attack in the subsequent Ground Combat Phase. Artillery units which barraged in either the Barrage Combat Phase or the Ground Combat Phase may not move in the subsequent Movement Phase. S.O.S. Barrages occur in Enemy Combat Phases and impose no subsequent restrictions upon units performing them.
[9.2] Visibility of Enemy Units
Artillery units must "see" a target hex to get full effectiveness in attacking it. To see a hex, the target hex must have a Friendly unit of any type within seven hexes of it. Spotting units may not, however, see over ridge hexsides unless they are adjacent to the ridge hexside they are looking over.
A German artillery unit Barraging an Enemy unit that no German unit can see has its Barrage strength reduced by 50%, dropping fractions. A British artillery unit firing at a target hex no British unit can see has its Barrage strength reduced by 1 (representing superior British techniques for "firing off the map").
This rule does not, obviously, apply to S.O.S. Barrages. It can be modified by use of the Optional Air Rules (21.41).
[9.3] Drumfire Barrage
A Drumfire Barrage is a pure artillery attack. It is performed during the Friendly Barrage Combat Phase and requires the expenditure of Supply points. Its function is mainly to disrupt Enemy units that are not in contact with Friendly troops, especially Enemy artillery units. Most counter-battery fire is conducted through Drumfire Barrages.
[9.31] A Player may elect to fire a Hurricane Drumfire Barrage. A Hurricane Drumfire Barrage, like a Hurricane Rolling Barrage, doubles the barrage strength of each unit making a Hurricane barrage for a particular attack, while expenditure of Supply points is tripled. (see Case 11.4, Supply).
[9.32] To perform a Drumfire Barrage, the attacking Player totals the Barrage points of all the artillery units barraging that particular hex. He then consults the Drumfire Barrage CRT (see 9.35) and, making any shifts necessary for the type of terrain the defending unit is in, rolls one die. The result is found by cross-indexing the die roll with the column bearing the appropriate number of Barrage strength points at the top of the column. The appropriate Combat Result is then applied immediately against all Enemy units in the target hex immediately. In certain cases, however, a shift may not apply to all the units in a hex. For example, if infantry and artillery units are stacked together in an Artillery Emplacement hex, only the artillery units receive the benefit of the shift — the infantry units are affected as if there were no shift.
[9.33] The Drumfire Barrage CRT allows the barraging Player to inflict "Suppressed" results on Enemy artillery units. Suppressed artillery units may not fire an S.O.S. Barrage in the Combat Phase immediately following the Barrage Phase.
[9.34] Units in Friendly trench or artillery emplacement hexes cannot be reduced to Cadre strength by a Drumfire barrage unless there is an Enemy unit adjacent to the target unit. Units which would otherwise be reduced to Cadre strength or destroyed instead remain Disrupted.
[9.35] Drumfire Barrage CRT
(see Charts and Tables, Section 27.0)
[9.4] Rolling Barrage
A Rolling Barrage "rolls" in, lifting at brief intervals to remain in front of advancing troops. While they presented coordination problems, by 1917 both sides were quite adept at performing such barrages. The function of such barrages is to soften up Enemy units that are to be attacked in the Combat Phase immediately following a Barrage Phase.
[9.41] Rolling Barrages are conducted according to the same procedure as Drumfire Barrages. The only difference is in the nature and effect of the Combat Results. The results on the Rolling Barrage Combat Results Table are expressed in terms of shifts. They show how many columns on the Standard or Mobile CRT any infantry, cavalry, tank, or direct support artillery may shift their attack in their favor. Thus, an attack which would ordinarily be a 2-1 attack becomes a 4-1 attack after a "shift 2" result on the immediately subsequent Combat Phase. Players keep track of this by use of Shift markers (9.42). If the defending units are in two different hexes, the shift used is the smaller shift obtained against one of the two hexes.
[9.42] Use of Shift Markers
The Shift markers are used in conjunction with Rolling Barrages. To remember what the effect of a Rolling barrage was against a particular hex, a Player should place a Shift marker on that hex. A Shift marker has a numeral printed on it that corresponds to the number of columns to the right the Phasing Player may shift the CRT when attacking that hex during the Ground Combat Phase.
[9.43] A Player may elect to fire a Hurricane Rolling Barrage. Like a Hurricane Drumfire Barrage, it doubles the Barrage Strength of each unit making a Hurricane Barrage for a particular attack, while supply expenditure is tripled.
[9.44] Rolling Barrage CRT
(see Charts and Tables, Section 27.0)
[9.5] Interdiction Barrage
Interdiction Barrages represent harassing and blocking fire intended to delay movement through an area more than to inflict casualties upon dug-in troops.
[9.51] Interdiction Barrages have no Combat Effects. They do not disrupt or in any way destroy Enemy units. Their sole function is in imposing an additional Movement point cost to enter the target hex. Units may not fire Hurricane Interdiction Barrages.
[9.52] Any artillery unit with a Barrage Strength of 2 or more may fire an Interdiction Barrage. To fire an Interdiction Barrage, the Phasing Player does not roll a die, he places an Interdiction marker in any hex within range. Each artillery unit capable of firing an Interdiction Barrage that does so may place one Interdiction marker per Barrage Phase. A maximum of two Interdiction markers may be placed in a hex at one time. Interdiction Barrage does not require that the target be spotted as in Case 9.2
[9.53] One Interdiction Barrage marker is removed from each hex containing such markers at the end of each Enemy Movement Phase. Thus, if the British Player were to place two Interdiction markers in a hex, one would be removed after the first German Movement Phase of the subsequent German Player-Turn, and the second after the German Second Movement Phase. If there were only one Interdiction marker in the hex it would, of course, have been removed after the first German Movement Phase.
[9.54] Any hex containing an Interdiction marker, regardless of the number of Interdiction markers present, increases the Movement point cost to any unit to enter or trace supply through the hex by one additional Movement point.
[9.6] Direct Support Barrage
A Direct Support Barrage represents artillery that has been assigned to support a particular attacking unit, and so its fire will be coordinated with the attack of the unit being supported. This is normally not direct fire, although direct fire was employed several times during the Battle of Cambrai, often at quite short ranges.
[9.61] Direct Support Barrages are the only Barrages that are fired during the Phasing Player's Combat Phase. Direct Support Barrage allows the attacking Player to add the Barrage strength of each artillery unit firing in Direct Support to the total Attack strengths of the infantry, cavalry, and tank units attacking an Enemy-occupied hex. Thus, it allows artillery to participate in "normal" combat using either the Standard or Mobile CRTs. This is the only way an artillery unit may attack in conjunction with other types of units. For an artillery unit to fire in Direct Support, it must be within two hexes of the Enemy unit it is attacking. If it is adjacent to the Enemy unit, the artillery unit is subject to any adverse combat results the attacking force might suffer. Players may not fire Hurricane Direct Support Barrages.
[9.62] Note that if the attacking non-artillery units are attacking more than one Enemy-occupied hex, the artillery unit firing a Direct Support Barrage may do the same. Example: British tank companies (2-1-8) in hexes 1809 and 1810 are attacked by a German Stosstruppen infantry regiment (6-6-8) in hex 1910. A German artillery unit (5-3-11/1-10) in hex 2010 is firing direct support. Assuming no S.O.S. Barrages aid the British, the Combat Odds Ratio is 11 (6+5) to 2, which reduces to 5-1.
[9.63] An artillery unit may make a Direct Support Barrage against an Enemy unit alone without infantry, cavalry, or tank units. Direct Support barrages do not count toward the 50% special unit type requirement for Mobile CRT use (see Case 8.54).
[9.7] S.O.S. Barrage
An S.O.S. Barrage was a pre-arranged defensive barrage by which a threatened unit, by sending up colored rockets or flares or by sending back runners, could call in supporting artillery to break up an Enemy attack.
[9.71] S.O.S. Barrages take place during Enemy Combat Phases. In such a Phase, a non-Phasing Player's artillery unit which has not been Suppressed and does not have an Enemy unit adjacent to it and has not yet been subject to an attack in the current Ground Combat Phase may use its S.O.S. Barrage Strength to supplement the Defense strength of Friendly units which are under attack.
[9.72] The Friendly defending unit must be in range of the artillery unit that is firing the S.O.S. Barrage in its aid. This range is computed to the hex occupied by the defending (Friendly) unit, not the hexes occupied by the attacking (Enemy) units.
[9.73] S.O.S. Barrage strength points are simply added to the Defense strength of the Friendly unit(s) receiving the benefits of the S.O.S. Barrage. These points are added after any doubling from the effect of terrain.
[9.74] When an artillery unit fires an S.O.S. Barrage, it neither benefits nor suffers from the Combat Result.
[9.75] No more than three artillery units may fire S.O.S. Barrages in aid of a single hex under attack.
[9.76] Players may not fire Hurricane S.O.S. Barrages. S.O.S. Barrages require no expenditure of Supply points.
[9.77] When an artillery unit is attacked, it uses its Defense strength, not its S.O.S. Barrage strength.
[10.0] Undisrupting Units
Disrupted units may be restored to full strength. During each of his Reinforcement Phases, the Phasing Player may roll one die for up to six of his Disrupted units which meet all the following criteria:
a. There are no Enemy units within four hexes of the unit. b. The unit did not participate in combat of any sort (including being the target of a barrage) in the preceding turn. c. If British, the unit is at least two hexes west of the original British front line trenches. If German, the unit to be Undisrupted must be in a city or village hex.
A die roll of five or six means that the unit is Undisrupted and may be flipped over to its full strength side and moved freely. If a Player rolls to undisrupt a unit and does not roll a five or six, then the unit may not be moved in either of the two subsequent Movement Phases of the Player-Turn.
[11.0] Supply
Commentary: Supply is the muscle and sinew of modern war. In the intense battles of the First World War, supply was of vital importance. By November, 1917, German industry was as hungry for raw materials as its workers were for food. Three years of war and a seemingly impregnable British naval blockade had rendered German industry incapable of meeting the huge demands placed upon it. The British were much better supplied, although they had problems as well. British industry was now achieving its full potential, though still suffering the effects of the U-Boat war. The British had expended most of their carefully stockpiled supplies in the Third Ypres earlier in 1917. At Cambrai, they would also have the problem of making their supply system, designed for trench warfare, support a mobile battle.
General Rule: To be supplied, a unit must be able to trace a supply line to a road hex at the edge of the map that was behind Friendly front lines at the start of the Campaign game. (This represents receipt of Class I, II, and IV supplies). In order for units to attack or fire Barrages, however, they must also trace a supply line to a Supply depot and draw Supply points from that depot. (This represents Class III and V supplies.) Players keep track of the number of Supply points each Supply depot has by using markers on the Supply Point Index. Thus, units can avoid the penalties of being unsupplied simply by tracing a supply line of any length to one of the supply sources (road exit hexes) listed in Case 11.11. To attack or barrage, units must in addition trace a supply line (and here the length of the supply line is important) to a Supply Depot that is itself supplied.
Procedure: Supply for a given Player's units is determined at various times during the course of a Game-Turn. Supply determination for movement purposes is made at the beginning of each Movement Phase. (Remember that each Player has two Movement Phases.) Supply determination for combat purposes is made at the instant of Combat. Thus, a unit that starts its Movement Phase out of supply is considered out of supply for that entire Movement Phase, even if it moves to a position where it could trace a supply line. Since supply determination for combat purposes is made at the instant of combat, movement as a result of combat may cut off the unit and make it impossible for it to trace a supply line.
Cases:
[11.1] Supply Sources
[11.11] For a unit to be supplied (and thus avoid the trials and tribulations of being considered unsupplied, for which see Case 11.6), it must be able to trace a Supply Line of any length to one of the following hexes (where roads exit the map):
British: 0601, 0114, or 0124
German: 1834, 3324, 3315, or 2401
[11.12] For a unit to attack or barrage, it must be supplied and, in addition, be able to trace a supply line to a Friendly Supply depot which is itself supplied. To attack or barrage requires the expenditure of Supply points stored in these Supply depots.
[11.2] Tracing a Supply Line
[11.21] A Supply line is always traced through a path of contiguous hexes from the hex occupied by the unit requiring supply, to the road exit hex or Supply depot that enables the unit to be supplied or to attack or barrage.
[11.22] Supply line length is measured in Movement points. The number of Movement points traversed by a Supply line is calculated according to the Terrain Effects Chart exactly as though a Supply depot were moving from the unit receiving the supplies through the hexagonal grid from the hex it occupies to and into the hex occupied by the supply source. The length of this line, in Movement points, is important only to units attacking or barraging (exception: see Case 11.24). The Movement point cost is calculated using the Supply Depot Movement Point Cost Column on the Terrain Effects Chart. For example, to trace a Supply Line through a woods hex would cost 3 Movement points.
Example: A British unit in hex 1915 wishes to attack a German unit in hex 1914, drawing supplies from the British Supply depot in 2017. The British Player determines the length of the Supply Line in Movement points by consulting the Supply Depot column of the Terrain Effects Chart and counting its route via hexes 1916 (1 MP + 2 for the trenches), 1917 (1 MP), and finally into 2017 (2 MP + 2 MP for the trenches), making the length of the Supply Line 8 Movement points. The attack would cost each attacking British unit 2 Supply points, as determined by consulting the Supply Point Cost Chart, (11.43).
[11.23] A Supply line may not be traced into or through unbridged canal hexes, nor through Enemy units or vacant Enemy-controlled hexes (exception: see Section 13.0, German Infiltration Rules). A Supply line may be traced into or through Friendly-occupied hexes which are in Enemy Zones of Control. Note that a Supply line may be traced across any type of bridge across the canal, counting it as one Movement point to cross.
[11.24] Players may never voluntarily move units, except for German Stosstruppen, out of supply, or into a hex that would result in their supply line being lengthened more than 10 hexes (this could happen if a unit moves so that it cuts its own supply line, but requires a much longer one in that hex). Such a prohibited move would occur if a unit entered a hex that would put it out of supply, except for the existence of a new supply line running to the hex to be entered. If the unit's new supply line is more than 10 hexes longer than the supply line it had in the previous hex, it may not enter that hex (unless, of course, it is a Stosstruppen unit).
[11.3] Supply Depots
Each Corps has one or two Supply depots. These are abstractions representing the complex rear-area network of logistic support that each Corps had.
[11.31] For each Supply depot unit on the map, a corresponding marker is placed on the Supply Point Index to indicate the number of Supply points which that Supply depot contains at a given moment. A Supply depot can only be drawn upon for Supply points by attacking or barraging units so long as it contains Supply points. As Supply points are added to a Supply depot or expended, the corresponding marker on the Supply Point Index is immediately adjusted to show its new Supply point total.
[11.32] Each Player receives Supply points as reinforcements during the Reinforcement Phase of his Player-Turn. These may be divided among the Supply depots on the map as the Player desires.
[11.33] If a Player cannot trace a Supply line from a Supply depot to a road hex at the edge of the map that was behind Friendly lines at the start of the game, it is considered unsupplied and may not receive any additional Supply points. Unsupplied supply depots may not be used to support attacks.
[11.34] If a depot unit is Disrupted, it suffers no additional adverse effects aside from those described in Case 8.52. If it is reduced to Cadre strength, it loses half the Supply points it has at the moment of it being reduced, rounding fractions down.
[11.35] Depot units may not be Disrupted or reduced to Cadre strength by Drumfire Barrage attacks. Drumfire Barrage attacks are ineffective against depot units.
[11.4] Expenditure of Supply Points
[11.41] The expenditure of Supply points is required whenever an infantry or cavalry brigade/regiment participates in an attack and whenever an artillery unit fires a barrage. The number of Supply points that are expended per attacking or barraging unit depends on the distance between the Supply depot from which the required Supply points are drawn and the Attacking or Barraging units. Supply point expenditure can also be increased by the use of Hurricane Barrages. The number of Supply points that must be expended per attacking or barraging brigade/regiment is shown on the Supply Point Costs Chart (11.43). Supplies may be drawn from any Friendly Supply depot, although this can affect the Supply point costs (see 11.43).
[11.42] Expenditure of Supply points is not required in the following situations:
a. When a unit of company or battalion size attacks. b. When an attack is mandated by a "Counterattack" result on the Standard CRT. c. When an artillery unit is firing an S.O.S. Barrage.
Units defending against an attack or barrage expend no Supply points.
[11.43] Supply Point Cost Schedule
(see Charts and Tables, Section 27.0)
[11.44] Supply Point Index
(see Charts and Tables, Section 27.0)
[11.5] Current Issue Supply
On Game-Turn One, the British Player need not expend any Supply points for attacks conducted by infantry units. (This is because the supply being expended is actually with the units — carried on the backs of the troops.) On the Game-Turn in which the German Player declares his Counterattack, he receives the special Current Issue supply. The units using special Current Issue supply do not have to trace a supply line to a depot unit.
[11.6] Effects of Being Unsupplied
Unsupplied units have their Movement allowance halved, may not attack, and run the risk of being eliminated if unsupplied for three Friendly Player-Turns (see 11.7). Players can keep track of this by a written record or by using shift markers.
[11.61] All unsupplied units have their Movement allowance reduced by 50%, losing fractions.
[11.62] Unsupplied units may not attack or barrage, including S.O.S. Barrages. The only exception to this is that units forced to counter-attack by combat results on the Standard CRT and unable to retreat may attack at half their normal Attack strength, rounding fractions up. Unsupplied Supply depots, regardless of how many Supply points they may contain, may not expend or receive any Supply points.
[11.63] The Défense strength of units is never affected by being unsupplied.
[11.7] Elimination of Units Through Lack of Supply
While there were no large-scale encirclements in the actual Battle of Cambrai, it still remains that units in 1917 were not set up for mobile warfare and could not survive long if cut off.
At the start of his Player-Turn, the Phasing Player rolls one die for each of his units that has been unsupplied for three or more consecutive Friendly Player-Turns. A die roll of one or two means the unit has been forced to surrender due to lack of supplies and is immediately eliminated and removed from the map. The Enemy Player collects the full number of Victory points for this unit.
[11.8] British Variable Supply
The number of Supply points the British Player receives each Game-Turn may vary from that in the Printed Schedule of Arrivals. Three turns after the British Triggered Withdrawal, the number of Supply points received is halved (rounding down) for the remainder of the game. On the turn subsequent to the German Player declaring his counterattack, the British receive a bonus of 15 Supply points. This bonus continues for the two following turns, making a total of three turns of the 15 Supply point bonus. After this, the British Player receives two turns of a 10-Supply point bonus, making a total of five Game-Turns in which the British Player receives bonus supplies.
[11.9] Optional Supply Rule Simplification
The Supply rules in the preceding Case, having been thoroughly researched and tested, represent the problems of the supply situation during the actual battle. If, however, Players find it tedious, such individuals may use the optional Supply rules, making changes as follows.
[11.91] Players using the Optional rule should substitute "hexes" for "Movement points" in determining the length of supply lines under 11.2.
[11.92] Players should reduce the number of Supply points received during the game or at least at the start of each scenario, but not those received at the start of Game-Turn One, by 20%, rounding fractions to the nearest whole number.
[12.0] Tanks
Cases:
[12.1] Tank Breakdown
Due to the low reliability of tanks in 1917, all tank units are subject to breakdown.
[12.11] During the Tank Breakdown Phase of each Allied Player-Turn, the Allied Player must roll one die for each tank unit on the map that is not currently broken down. If a 1 or 2 is rolled on the first turn, or a 1 on any subsequent turn, that particular tank unit has broken down.
[12.12] A broken down tank unit is designated by placing a "Tank Broken Down" marker on top of it. Such a unit has a combat strength of zero, both offensively and defensively, and a Movement allowance of 4. It exerts no Zone of Control.
[12.13] The British Player may remove Breakdown markers by successfully repairing his tank units. Tanks may only be repaired within two hexes of the towns of Metz and Gouzeaucourt (that's where they kept the parts). During each Tank Repair Phase, the British Player must roll one die for each broken down tank within two hexes of these two villages. If a six is rolled, the Broken Down marker is removed, and the tank can function normally.
[12.2] Capturing Tank Units
In the actual battle, the Germans were able to recover over 20 knocked-out British tanks. These were sent to Germany to be repaired and were used in the 1918 German offensives.
If the German Player attacks and destroys a tank unit and is able to move into the hex as a result of Advance after Combat, the German Player may opt to leave the destroyed tank units on the map. These represent knocked-out tanks. They have no effect on stacking, movement, or combat in any way. Their only effect is on Victory conditions, for if the knocked-out tanks are behind German lines at the end of the game, the German player receives triple Victory points for their destruction. Knocked-out tanks may be permanently destroyed (and removed from the map for the remainder of the game) by either Player by simply moving any unit into or through the hex containing the knocked-out tanks.
[13.0] German Infiltration Tactics
Commentary: The Germans developed infiltration tactics in 1917, and used them with devastating effect at the Battles of Riga and Caporetto. Cambrai marked the first use of such tactics in the West. Infiltration tactics were a great improvement over the linear formations used before.
Cases:
[13.1] Stosstruppen
[13.11] German units that are capable of performing infiltration tactics are known as Stosstruppen. All German infantry regiments with strengths of 6-6-8 on the front and 2-4-8 on the back of the counter and all German infantry battalions with a strength of 3-2-10 on the front of the counter, and 1-1-10 on the rear are Stosstruppen.
[13.12] Stosstruppen may move from one Enemy-controlled hex to an adjacent Enemy-controlled hex, even if that hex is controlled by the same Enemy unit as the hex it left. This, in effect, allows the Stosstruppen to ignore the limitations of the Zone of Control rule. They must, still, however, pay Movement costs for this movement from one Enemy-controlled hex to another (see Case 5.7). If reduced to Cadre status, Stosstruppen may not infiltrate.
[13.13] Attacks involving Stosstruppen allow the German Player to use the Mobile CRT in certain circumstances (see Case 8.43).
[13.14] Stosstruppen may trace supply through one Enemy-controlled hex even where there is no Friendly unit in that hex. This is an exception to Case 11.2 on Supply lines. (This represents the fact that Stoss units were more self-sufficient for their firepower.)
[13.15] Stosstruppen are subject to the same retreat limitations as all other types of units.
[13.2] Surprise Effect of Infiltration Tactics
Much of the effectiveness of the German Counterattack of 30 November came from the use of infiltration tactics. This imposed an operational constraint on the Germans not to reveal the new tactics too early.
The German Player may only use Infiltration tactics (by moving a unit from one Enemy-controlled hex to another of the same unit) twice (with two units) before he declares his Counterattack (see Section 15.0). This limit also applies to the British Offensive and Battle for Bourlon scenarios. This limit does not, however, affect German use of the Mobile CRT.
[14.0] British First Turn Surprise
In the actual battle, the British initial attack had the benefit of surprise which greatly added to its effectiveness. In both British Combat Phases of Game-Turn One, all British attacks and overruns (not including barrages) may be shifted one column to the right on the CRT, thus improving British odds on that turn. This is in addition to any other additions or subtractions in shifting.
[15.0] German Counterattack
Commentary: The German Counterattack was even more devastating than the initial British attack.
General Rule: At the start of his Player-Turn on Game-Turn Six or any subsequent Game-Turn, the German Player may announce that he is initiating his Counterattack. The German Player may execute any number of attacks throughout the course of the game without restriction, but the act of announcing the Counterattack on a particular Game-Turn gives the German Player advantages for that Game-Turn only. In addition, announcing the Counterattack has certain other effects.
[15.1] Counterattack Benefits to the German Player
[15.11] In both Friendly Combat Phases of the Game-Turn in which the German Player declares his Counterattack, all German attacks and overruns (not including Barrages) may be shifted two columns to the right on the CRT, in addition to any other additions or subtractions in shifting.
[15.12] On the Game-Turn during which the German Player announces his Counterattack, the German Player may ignore the Zones of Control of all British artillery units for movement purposes.
[15.13] The benefits of the German Counterattack pertain only to the one Game-Turn on which the German Player announces that he is making his Counterattack. Note that this must not be before Game-Turn Six.
[15.2] Additional Effects of the German Counterattack
The announcement of the German Counterattack may trigger or affect the following: British Variable Supply (Case 11.8), French Participation (Section 19.0), German Infiltration Tactics (Section 13.0), and various sections pertaining to Command Control (Section 17.0).
[16.0] Continuous Line
General Rule: The British Player must maintain a line of hexes, occupied or in the Zone of Control of one or more Friendly units, from hexrow xx01 to hexrow xx34. This line must end, at each end, in a hex that was on or behind the British front line trenches.
Cases:
[16.1] Continuous Line Procedure
[16.11] At the end of each British Player-Turn, the British Player examines the map to see if there is any point at which he cannot trace a continuous line of units or controlled hexes from any of hexes 0101-0701 (on the top edge, inclusive) to any of hexes 0134-1334 (inclusive) on the bottom edge. The line must begin and end in one of those hexes to be valid.
[16.12] For purposes of this continuous line, Zones of Control do extend into Enemy-occupied and Enemy-controlled hexes.
[16.13] The continuous British line need not be the "front line."
[16.2] Effect of Continuous Line
The only effect of the Continuous line is for Victory Conditions. Players should consult the Schedule of Victory Points for each scenario to see the number of Victory Points dependent upon the British requirement to keep such a continuous line.
[17.0] Command Control (Campaign Game only)
Commentary: Unlike many games, in To The Green Fields Beyond, the Players "step into the shoes" of actual commanders — General Julian Byng for the British, Feldmarschall Kronprinz Rupprecht Von Bayern for the Germans. The Command Control rules are not "stupidity rules." Rather, they represent the eventualities that were outside the control of the two commanding generals.
General Rule: The Command Control rules consist of several different components. These include:
Withdrawal of Units (British and German)
Cavalry Commitment (British only)
Fatigue (British and German)
Withdrawal of units includes both Mandatory and Triggered (British only) withdrawal, plus Recall of Withdrawn units.
Important Note: Command Control effects take place in the Command Control Phase of a Player-Turn. Command Control rules apply only to the Campaign Game. They do not apply in the Scenarios. (Exception: The Cavalry Commitment rule does apply in the British Breakthrough scenario.)
Cases:
[17.1] British Triggered Withdrawal of Units
[17.11] British Triggered Withdrawal can occur starting on Game-Turn Four. If, on Game-Turn Four or any subsequent Game-Turn, no British units have yet entered Cambrai or Bourlon city, the British Player must roll one die during the Command Control Phase of each British Player-Turn. A die roll of one triggers the British withdrawal of units. The British Player can stop rolling for Triggered Withdrawal once British units have entered Cambrai or Bourlon city, even if they do not remain there. British Triggered Withdrawal also brings into effect the British Variable Supply rule (see Case 11.8). Infantry, bridge, air, and battalion-sized cavalry units are not subject to triggered withdrawal.
[17.12] British Triggered withdrawal affects different units in various ways. At the start of each Movement Phase after British Triggered Withdrawal has occurred, the British Player must move all his tank units that are not adjacent to German units. These tank units must be moved at their maximum rate toward the villages of Metz and Gouzeaucourt and may be halted only when they come within two hexes of either village. In addition, the British Player must withdraw non-broken-down tank units from the map. A total of one-third (round fractions up) of the non-broken-down tank units on the map at the moment that British Triggered Withdrawal occurred must leave the west edge of the map as quickly as possible. Tank units which break down on their way from Metz/Gouzeaucourt to the west edge of the map must "limp off" at their reduced rate and they may be repaired off map. The tanks which remain in Gouzeaucourt/Metz sector must do so until the conditions in Case 17.3 are met.
[17.13] At the start of the Movement Phase after British Triggered Withdrawal has occurred, the British Player must withdraw any five Artillery units that have a Range of 8 or greater from the west edge of the Map as soon as possible.
[17.14] At the start of the Movement Phase after British Triggered Withdrawal has occurred, the British Player must withdraw three Cavalry divisions, including both their component Cavalry Brigades and Royal Horse Artillery Brigades attached to cavalry divisions. Two complete cavalry divisions must be withdrawn by way of the west edge of the map as quickly as possible. A third cavalry division must move so as to remain four hexes west of the British front-line trenches. This division may not approach closer than four hexes to the British front-line trenches, until the Recall occurs (see Case 17.3, Recall of Withdrawn Units).
[17.2] Mandatory Withdrawal of Units
On certain Game-Turns, each Player must withdraw an infantry division from the map. It does not matter if some component units of the division have been destroyed, disrupted, or reduced to Cadre strength. As long as all remaining units of the withdrawn division have exited the map by the end of the Game-Turn indicated, the requirement has been met. Only divisions that were on the map on Game-Turn One may be withdrawn to fulfill this requirement.
The British Player must withdraw an infantry division on Game-Turns Six and Eight. The German Player must withdraw an infantry division on Game-Turns Five and Six.
[17.3] Recall of Withdrawn Units
Only the British Player may attempt to Recall withdrawn units.
[17.31] The British may attempt to Recall units when any of the following two conditions are met:
a. The German Player has declared his counterattack. b. Four or more British brigades have been reduced to Cadre strength or eliminated, or a combination of Cadre and eliminated. c. There are two or more German units west of the British front line trenches (inclusive).
[17.32] It is not necessary for British Triggered Withdrawal to have occurred prior to attempting Recall.
[17.33] Procedure for Recalling Withdrawn Units
The British Player has a period of four Game-Turns during which he may attempt to Recall withdrawn units. In each British Reinforcement Phase of these four Game-Turns, the British Player rolls one die for each withdrawn tank unit, artillery unit with a range of 8 or greater, and infantry or cavalry division (including its attached divisional artillery unit). A die roll of one or two is required to Recall cavalry division and long-range artillery units. A die roll of one is required to Recall each infantry division or Tank unit. If the Recall attempt is successful, the Recalled unit enters the map immediately through hex 0124.
[17.4] Cavalry Commitment
In the actual battle, the use of cavalry divisions was attended with great confusion. As there had been no mobile battles for three years, the advances made in the first days of the offensive put great strains on the British Command structure. Note that die rolls for Cavalry Commitment occur in the Movement Phase and not in the Command Control Phase.
[17.41] At the start of both of his Movement Phases on Game-Turn One, the British Player rolls one die for each cavalry division. In the first Movement Phase, the die rolls have the following effect:
| Die | Result |
|---|---|
| 1-2 | The divisions may not be moved in the Movement Phase. |
| 3-4 | The division may be moved in the Movement Phase, but may not enter a German trench hex. |
| 5-6 | The division may be moved freely in the Movement Phase. |
On the Second Movement Phase, the die rolls have the following effect:
| Die | Result |
|---|---|
| 1-2 | The division may not attack any German units or be moved any further to the east than it now is. |
| 3-6 | The division may be moved normally. |
[17.42] The Cavalry Commitment rule does not apply on Game-Turn One to the 0-1-12 cavalry battalions nor to the Canadian Brigade (they knew what they were doing).
[17.43] At the start of his First Movement Phase of Game-Turn Two, the British player rolls one die that decides how his cavalry divisions must move.
| Die | Result |
|---|---|
| 1-2 | All cavalry divisions may be moved freely. |
| 3-4 | One cavalry division must be moved as quickly as possible to hexes nine or more hexes west of the British front line trenches and remain there. |
| 5-6 | As above, only two divisions are so affected. |
Note that the Canadian Brigade is affected by this result.
[17.44] If any cavalry divisions are required to be withdrawn nine or more hexes west of the British front line trenches, they must proceed there directly and as quickly as possible. Once there, they must remain nine or more hexes west of the British front line trenches until either one or both of the following conditions exist:
a. The British Player Recalls Withdrawn Units (case 17.3) b. The Triggered Withdrawal rule (Case 17.1) is not in effect, the British Player may roll one die for each cavalry division per Movement Phase. A roll of 1, 2, or 3 means the division may then be moved normally.
[17.45] Artillery brigades of cavalry divisions are not subject to this rule.
[17.5] Fatigue
In First World War battles, troops who were not relieved lost a great deal of effectiveness during an offensive, due to losses in the infantry, tired troops, and resupply difficulties. Much of the effectiveness of the German counterattack on 30 November was due to the fact that they hit tired troops.
Units Subject to Fatigue
To be subject to fatigue, an infantry division must fulfill the following criteria:
a. Have been on the map at the start of Game-Turn One. b. If British, it must have at least one infantry brigade in a hex that is in or to the east of the German front-line trenches.
Determining Fatigue
Beginning on Game-Turn Eight, each Player rolls a die for Fatigue during his Command Control Phase. A die roll of five or six means that one of the Phasing Player's infantry divisions that meets the criteria set out in 17.51 has become Fatigued during that Phase. Infantry divisions are the only type of divisions subject to fatigue. Cavalry divisions are not subject to fatigue, nor are artillery, tank, or air units. The owning Player determines which of his units that meets these criteria becomes fatigued.
Effects of Fatigue
All component infantry regiments or brigades (not the artillery) of a fatigued division are immediately Disrupted. Units already Disrupted are not affected. If any of the division's component units have been destroyed they, of course, are not affected. These fatigued units are treated like normal Disrupted units, and may be undisrupted in the same way.
[18.0] Bridges and Bridging
General Rule: Canal hexsides can be crossed only on a bridge. Bridges are classified on the Terrain Effects Chart as being either class A, B, C, or D, according to the load they can carry. A bridges can be crossed by all types of units; B bridges by all types of units except tanks; C bridges by infantry and cavalry only; and D bridges by infantry only.
Note that where a road crosses a ditch or stream hexside, all units being moved along the road may cross that hexside at road movement rate, ignoring the cost for crossing the hexside.
Cases:
[18.1] British Mobile Bridges
The British Player has two 0-0-8 mobile bridge units. One is carried on tanks and moves like a tank unit (but is not subject to Breakdown or Withdrawal). The other moves like an artillery unit. Both bridges are "A" rated.
To emplace a mobile bridge unit, the British Player must keep it, without moving, adjacent to the Canal hexside that he wishes to bridge. At the end of this Movement Phase, the bridge unit is inverted so that its Emplaced side shows, and it is placed across the hexside, where it functions as a normal Class A bridge. It may not be emplaced if there is an Enemy unit occupying or adjacent to either of the two hexes to be connected by the bridge.
At the start of any British Movement Phase in which there are no German units in or adjacent to the two hexes, the emplaced bridge unit is inverted again, so that the side with a Movement allowance is showing, thus enabling the bridge unit to move. It may not, however, be moved in the Movement Phase in which it is turned face up.
A Player may erect a bridge over a ditch hexside that is joined to an "endless" series of other ditch hexsides (i.e., the "dry" canal). You may not bridge the stream, as the movement cost for it is as a ditch-cum-bog, rather than a water obstacle.
[18.2] Construction of Bridges
Both sides may construct bridges. Each Player may have a maximum of two such constructed bridges on the map at the same time. All bridges constructed during the game are Class C bridges.
To construct a bridge, the two hexes that it is intended to link must both be occupied by Friendly infantry units for a complete Player-Turn, during which they have not moved or engaged in combat. During this Game-Turn, no Enemy unit may have been moved adjacent to them. At the end of the Player-Turn in which these conditions are met, a Bridge marker is placed to link the two hexes.
A bridge can be destroyed (see Case 18.3) or dismantled. Only dismantled bridges can be used again. To dismantle a bridge of this sort requires the same conditions to be met as constructing it, only the procedure ends with the Bridge marker being removed rather than being emplaced. This enables them to be constructed elsewhere later.
[18.3] Bridge Demolition
Units may attempt to destroy bridges with demolition charges at the end of the Second Combat Phase of each Player-Turn. Only units which have neither moved nor engaged in combat in that Player-Turn may attempt to destroy a bridge. A unit may attempt to destroy any or all of the bridges it is adjacent to, unless Enemy combat units are also adjacent to the bridges. A die roll of one is required to destroy a Class A bridge, and a one or a two is required to destroy a bridge of any other Class.
[19.0] French Participation
Note: French units are treated as British units except as noted below.
Commentary: Although the French offered to participate in the Battle of Cambrai, the British did not plan to use them until after the German counterattack, and even then they did not enter the area represented by the map.
General Rule: The entry of French units into the game depends on certain conditions (see Case 19.1) existing and the British Player rolling the correct number on a die (see 19.2).
Cases:
[19.1] Conditions for French Entry
French units may enter the game only if both the following conditions are met:
a. The German Player has declared his Counterattack. b. There are at least two German units in British trench hexes or in hexes west of the British front line trenches.
[19.2] Procedures for French Entry
[19.21] The British Player may attempt to secure the entry of French units during any British Reinforcement Phase in which the conditions of Case 19.1 are met. He does so by rolling one die. On a roll of one, all French units arrive two British Reinforcement Phases after the die roll except for the two French non-divisional artillery units which enter one British Reinforcement Phase after the successful die roll. A die roll of two, however, means that only the two non-divisional artillery French units arrive and are put into play.
[19.22] All French units arriving on the map enter through any map-edge hex within three hexes of 0134 subject to Section 20.0, Reinforcements.
[19.3] French Supply
[19.31] French units trace supply in the same manner as British units.
[19.32] The French depot has 16 Supply points at the moment of its arrival. It may be allocated additional British Supply points.
[19.33] Only French non-divisional artillery units may expend Supply points from British Supply depots. British units may not expend Supply points from French Supply Depots.
[20.0] Reinforcements
General Rule: Both Players receive Reinforcements. These appear during the owning Player's Reinforcement Phase on the Game-Turn indicated on the Master Reinforcement Schedule. The Reinforcement Schedule states the Game-Turn of appearance, the number of units, the designations of those units, and the specific hex on which they enter.
Procedure: During the Reinforcement Phase, the owning Player places reinforcement units in the scheduled hexes of the map edge.
Cases:
[20.1] Movement of Reinforcements
[20.11] Reinforcements are presumed to be poised adjacent to the map. When placed on the map, a reinforcing unit expends Movement points to enter the entry hex according to the Terrain Effects Chart. In cases where the Reinforcements are entered onto a hex which has a road leading off the map; these units expend Movement points at the road movement rate to enter the map.
[20.12] In several cases, more than one unit is scheduled to appear in the same hex in the same Game-Turn. These units are deployed off map one behind the other, with the lead unit poised adjacent to the map entry hex itself. A hypothetical road, or terrain of the type that is in the entry hex, may be presumed to stretch off the map, away from the entry hex.
[20.13] As each unit enters the map, it will pay the cost for entering the entry hex plus any additional cost for hypothetical road hexes that it would have to traverse in order to reach the entry hex.
[20.14] Once on the map, Reinforcements may be moved normally in the subsequent Movement Phase.
[20.2] Restrictions
[20.21] Reinforcements may not enter an Enemy-occupied or Enemy-controlled hex.
[20.22] If, and only if, a scheduled entry hex is occupied by an Enemy unit or by an Enemy Zone of Control, the reinforcing unit may enter the nearest unblocked mapedge hex to the scheduled hex in the direction of the nearest Friendly unit. However, reinforcements so blocked are delayed by one Game-Turn in their arrival (e.g., they appear in the next Friendly Reinforcement Phase).
[20.23] A Player may withhold Reinforcements from Game-Turn to Game-Turn.
[20.24] Regardless of whether or not a Reinforcement is brought into play on its scheduled turn, it must appear on its scheduled hex or alternate (see Case 20.22).
[20.25] The concept that Reinforcements are poised adjacent to the map is just a concept. Until they enter the map, reinforcements have no effect on play. They may in no fashion attack Enemy units or hinder their movement.
[20.26] The German Player is scheduled to receive many of his units "in any unoccupied Cambrai hex," indicating that the units have been brought to the city by railroad. These units are placed in unoccupied Cambrai city hexes during the Reinforcement Phase and are moved normally during the subsequent Movement Phase. The act of placing such units on the map costs no Movement Points.
[20.27] The German Player may not receive any reinforcements in Cambrai if:
a. There are one or more British units occupying a Cambrai hex. b. The rail line they are to arrive from has a British unit on or adjacent to it at at least one point between the map edge and Cambrai. Thus, units scheduled to arrive at Cambrai from the railroad beginning at 3325 could not be placed in a Cambrai hex if there were a British unit at, say, 2621.
If 20.27b occurs and the rail line is blocked, the German Player has the following options of how to place these Reinforcements:
a. He may have them appear during the Reinforcement Phase on any railroad hex between the edge of the map and the British unit cutting the railroad that is itself more than two hexes from a British unit. b. He may have the units enter the map in the same manner as normal reinforcements, entering the edge of the map from the designated edge hex.
Note that the German Player always has the option to have his Reinforcements that normally are placed in any Cambrai hex arrive on the map edge in the alternate hexes.
[21.0] Air Operations (Optional)
"The side which controls the air will control also the battlefield beneath it."—U.S.A.F.
"The Red Baron has been sighted over Cambrai. I must bring him down."—Snoopy, quoted by C. Schulz.
Commentary: Cambrai saw the first effective large-scale use of aircraft in modern combat. It could be said that Cambrai was also the first air-ground battle.
General Rule: The use of the Air Operations Rules is optional. If they are used, each Player has two Air Operations Phases in each of his Player-Turns.
[21.1] Movement of Air Units
[21.11] Air units are moved during Friendly Air Phases. (Exception: Aircraft on Patrol missions can make Reaction Movement during Enemy Air Phases; see Case 21.46.) Air units have an unlimited Movement allowance. They are never compelled to leave the map except by availability (21.3) or Combat results. Unlike ground units, air units may enter and exit the map freely and voluntarily.
[21.12] Air units remain on the map during all Phases of a Game-Turn, because they do not represent whole squadrons or Staffeln, but rather a standing patrol or general availability of aircraft in that area.
[21.13] Unlike regular, ground units, air units may be moved into, around, and through hexes containing Enemy ground units. Air units may be moved into, but not through, hexes containing Enemy air units. Air combat takes place between opposing air units in the same hex.
[21.14] Air units are not subject to Supply restrictions.
[21.15] All air units are differentiated as to function by a letter placed between their air-air (on the left) and air-ground (on the right) Combat strengths. These letter codes are as follows: f = fighter, b = bomber, r = observation, g = ground attack.
[21.16] All British Air units are present from Game-Turn One on. German Air units arrive according to the following order of appearance:
At Start: 5th Fighter Squadron; 25th, 9th, 24th Observation Squadron.
Game-Turn 3: 15th Fighter Squadron; 1SS Ground Attack Squadron.
Game-Turn 4: 4th, 6th, 10th and 11th Fighter Squadrons; 32 Observation Squadron; 3SS, 5SS Ground Attack Squadron.
[21.2] Air Operations Procedures
[21.21] Air units perform various missions (see Case 21.4). Each mission defines what actions the air units may perform in an upcoming Air Phase. Except for Fighter units undertaking a Patrol mission, Players need not designate what mission an Air Unit is making until it becomes necessary for that unit to engage in combat as a result of that mission. Example: An air unit on a Ground Attack mission need not be designated as such until it engages in combat in a Ground Attack role; similarly, air units which are performing an Escort mission need not be so designated until they actually engage in combat in that role. Air units assigned to Patrol missions, however, should be designated at the start of a Friendly Air Phase by placing a mnemonic marker under them.
[21.22] Subject to the procedure described in 21.21 above, an air unit may be assigned to a different mission in each Air Phase (see Case 21.4).
[21.23] The use of Air units never requires the expenditure of Supply points.
[21.24] Air units may not perform re-supply missions on behalf of ground units.
[21.25] Players may voluntarily withhold air units from the map and may voluntarily remove air units from the map during a Friendly Air Phase.
[21.26] German air units are not set up on the map at the start of Game-Turn One.
[21.27] No more than three Friendly air units may be stacked together in a hex. Air units do not count toward the stacking limitations of ground units, however. Nor do Friendly (or Enemy) ground units affect the stacking of air units.
[21.3] Availability of Air Units
[21.31] The Phasing Player must, at the start of his first Air Phase in each Game-Turn, roll one die for each of his air units currently in the game, whether or not they are on the map. A roll of one or two means that unit is not available for Air Operations that Game-Turn. A die roll of one, two, or three for Air Units that have been disrupted, and of one, two, three, four, or five for air units that have been reduced to Cadre strength means that such units are not available that Game-Turn.
[21.32] Air units that are unavailable due to an adverse die roll must be removed from the map, if they are on it. They may not appear on the map during that Game-Turn. On subsequent Game-Turns, they man re-enter, subject to availability. Eliminated air units may never re-enter.
[21.4] Air Missions
Each Air Phase, each Phasing air unit on the map may perform only one of the following missions.
| Mission Type | Eligible Aircraft Types |
|---|---|
| Artillery Observation | Observation |
| Ground Attack | Ground Attack, Fighter, Bomber |
| Bombing | Bomber |
| Interception | Fighter |
| Escort | Fighter, Ground Attack |
| Patrol | Fighter |
[21.41] Observation
Observation is adjustment of artillery fire by aircraft. Any artillery unit firing a Drumfire barrage that has a Friendly air unit flying an Observation Mission in the same hex as or adjacent to the target unit has its Barrage strength increased by 1 for purposes of firing on that target. Note that this applies only to Drumfire barrages. It does not apply to Hurricane Drumfire barrages (too much metal in the air to direct fire). Target hexes which have a Friendly observation air unit in them are exempt from the spotting requirement of Case 9.2.
[21.42] Ground Attack
To perform a Ground Attack Mission, an air unit is placed in the same hex as an Enemy ground unit. These air units may attack the Enemy units in the same way as Artillery units making either a Direct support or Drumfire barrage. The air units may not make Rolling or S.O.S. Barrages. Other than that, they engage in combat in the same manner as artillery, using their Ground Attack strength in the same way as an artillery unit uses its Barrage strength. Units on a Ground Attack mission may conjunction with non-Hurricane Drumfire barages or ground combat. Note that aircraft on Ground Attack missions are subject to losses by anti-aircraft fire (24.6).
[21.43] Bombing
Bombing occurs in the Barrage Phase. An air unit that is bombing must be in the same hex as the unit it is bombing. The Ground Attack strength of bombing air units is doubled. Bombing is treated exactly as a Drumfire barrage (it may be combined with artillery units). Units on Bombing Missions are not subject to anti-aircraft fire.
[21.44] Interception
Interception is the act of simply moving a fighter unit into the same hex as an Enemy air unit in order to engage it in air combat. The Enemy air unit may not leave the hex, regardless of its mission (including Patrol), and air combat is resolved at the end of all movement in that Air Phase.
[21.45] Escort Missions
An escort is an aircraft stacked with other aircraft simply for the purpose of adding its Air-to-Air Combat strength to that of the other air units if Enemy units on Patrol or Interception Missions engage the Friendly air units in that hex in air combat.
[21.46] Patrol Missions
Aircraft on Patrol Missions have an advantage. They may be moved up to three hexes during Enemy Air Phases after the Phasing (Enemy) Player has finished moving all his air units. This Friendly movement is a Reaction move. For an air unit to have been able to make a Reaction move, it must have been used on a Patrol Mission and may not have engaged in combat in its own previous Air Phase. Thus, a Player will usually fly Patrol Missions only in his Second Air Phase. Air-to-Air combat is resolved after all Reaction moves have taken place. After a Fighter unit on a Patrol Mission has made a Reaction move and engaged in air-to-air combat, it may then move back to the hex it started its Reaction move in if the owning Player so wishes. Players should designate which Fighter units are performing a Patrol Mission by putting a mnemonic marker under the Fighter unit. It is possible for Fighter units on a Patrol mission to engage in combat in both Enemy Air Phases during the Enemy Player-Turn.
[21.5] Air-to-Air Combat
[21.51] Conditions for Air-to-Air Combat
Air-to-air combat takes place when opposing air units occupy the same hex after all movement (including Reaction moves) has taken place during an air phase. All air-to-air combat is considered to take place simultaneously, and losses do not take effect until after all combat is resolved.
[21.52] Combat Resolution
Each Player rolls one die for each Air-to-Air Combat Strength Point he has in the hex. Each 6 that is rolled is considered a hit. After both players have finished, then roll one die for each hit and consult the Air-to-Air Combat Results Table (21.54). Air units may be disrupted or reduced to Cadre strength in the same manner as ground units. The effect of Disruption or reduction to Cadre strength has the same effect on air units as on ground units, but air units may never be Undisrupted. Cadre strength air units may not perform Observation missions. Disrupted and Cadre strength air units may, of course, be voluntarily withheld from the map — remaining on the ground at their off-map airstrips — in the same manner as full strength air units can.
[21.53] An air unit with an Air-to-Air Combat strength in parentheses may only attack Enemy air units which have attacked them or other Friendly air units in the same hex
[21.54] Air-to-Air Combat Results Table
(see Charts and Tables, Section 27.0)
[21.6] Anti-Aircraft Fire
[21.61] Only aircraft performing Ground Attack Missions (21.42) are subject to anti-aircraft fire.
[21.62] Immediately before resolving a barrage or ground attack that involves one or more Friendly air units, the Enemy Player rolls a die for each participating Friendly air unit. On a die roll of one or two, the air unit is Disrupted (by anti-aircraft fire) and must abort; any other result has no effect.
[21.63] Air units Disrupted by anti-aircraft fire must immediately abort their mission. They are removed from the map before they participate in combat. They may re-enter on the next Game-Turn subject to availability.
[22.0] Victory Conditions
Commentary: Any victory conditions are arbitrary and artificial. Victory and defeat have no objective criteria — except in games. Sometimes there is no doubt as to who won a battle (e.g., Waterloo) and such is usually the case with a War — victor and vanquished stand out in relief. Yet, accepting the basic artificiality and questionable validity of such quantifications, Victory Conditions are a means of determining if the Players have any desire to know or cannot decide between themselves, who "won" the game.
General Rule: Victory is awarded to a Player according to the Victory Point Schedule of the scenario being played. Normally, Victory points are awarded only at the end of a scenario, although some categories (e.g., points subtracted from the British Player's total for failing to maintain a continuous line) should be deducted during play. At the end of a scenario, both Players total the number of Victory points they are entitled to and compare the two sums. Each scenario has its own Victory Point Schedule. The Player with the greatest number of Victory points is the Winner. If the Winner has less than double the loser's Victory points, he has won a Level I Victory. If he has more than double but less than triple, it is a Level II Victory; if more than triple, a Level III Victory. A Level II Victory may shorten the War; a Level III may even win it.
Note: In all scenarios and the campaign game, units and objectives which are surrounded by Enemy units or unsupplied at the end of the game are considered destroyed or captured for Victory Point purposes.
[23.0] Master Reinforcement Schedule
General Rule: The Master Reinforcement Schedule is used in part for the three scenarios and in its entirety for the Campaign Game. See Section 20.0 for the procedure of placing Reinforcements. Reinforcements are listed here by:
Game-Turn of Arrival
Strength (Designation): Entry hex
Cases:
[23.1] British Reinforcements
Game-Turn 2 (21 November, 1917) 3 x 4-4-8 inf (40/119, 120, 121): hex 0114
Game-Turn 3 (22 November, 1917) 3 x 6-5-8 inf (G/1G, 2G, 3G); 1 x 4-2-7-2-10 art (G): hex 0114
Game-Turn 5 (24 November, 1917) 3 x 4-4-8 inf (2/5, 6, 99); 1 x 4-2-7/2-10 art (2): hex 0114
Game-Turn 8 (27 November, 1917) 3 x 4-4-8 inf (59/176, 177, 178); 1 x 4-2-7/2-10 art (59): hex 0114
3 x 3-3-8 inf (47/140, 141, 142); 1 x 3-1-7-2/2-10 art (47); hex 0114
Game-Turn 10 (29 November, 1917) 3 x 1-3-12 cav (4/Sia, Mho, Luc): hex 0124
Game-Turn 12 (1 December, 1917) 3 x 4-4-8 inf (21/64, 62, 110); 1 x 4-2-7/2-10 art (21): hex 0124 (see 23.12 for conditions of entry)
3 x 4-4-8 inf (61/183, 184, 185); 1 x 4-2-7/2-10 art (61): hex 0124
Game-Turn 14 (3 December, 1917) 2 x 5-5-8 inf (9/26, 27); 1 x 6-5-8 inf (9/SA); 1 x 4-2-7/2-10 art (9): hex 0124
3 x 5-5-8 inf (25/7, 74, 75); 1 x 4-2-7/2-10 art (25): hex 0124
1 x 4-1-13/10 art (150): hex 0114
[23.11] Arrival of 21st Division
The British 21st Division was on its way to Italy when diverted to the Cambrai Sector.
The British 21st Division may enter the game only on Game-Turn Twelve. It does so only if one of these two conditions have been fulfilled:
a. The German Player has already declared his Counterattack. b. There are two or more German units in or west of British front-line trench hexes.
[23.12] Arrival of 3rd Cavalry Division
The British 3rd Cavalry Division was the rearmost division of the Cavalry Corps and was never fully committed to action in the actual fighting.
The British 3rd Cavalry Division enters the game only in the Reinforcement Phase following the Game-Turn in which British units enter Cambrai or Bourlon town, or the British player has eight or more Cavalry units east of the canal and north of the stream.
[23.2] German Reinforcements
Game-Turn 2 (21 November, 1917) 1 x 3-5-8 inf (SQ KG): hex 3325 or any Cambrai hex
1 x 2-2-8 inf (6A KG): hex 2701 or any Cambrai hex
3 x 6-6-8 Stoss inf (119/46, 46R, 58); 1 x 3-2-6/2-10 art (119/237): hex 2401
Game-Turn 3 (22 November, 1917) 3 x 3-6-8 inf (214/50, 58, 363); 1 x 3-2-6/2-10 art (214/44): hex 3315 or any Cambrai hex
3 x 6-6-8 Stoss inf (3G/GF, Lhr, 9Gr); 1 x 4-2-7/2-10 art (3G/5G): hex 3325 or any Cambrai hex
3 x 4-6-8 inf (30/99, 105Sx, 143); 1 x 3-2-6/2-10 art (34/70): hex 3324
2 x 4-1-8/2-10 art (2, 20R); hex 2401
Game-Turn 4 (23 November, 1917) 3 x 4-6-8 inf (34/30, 67, 145); 1 x 3-2-6/2-10 art (34/70): hex 2701
3 x 3-6-8 inf (21R/80R, 87R, 88R); 1 x 3-2-6/2-10 art (21R/21R): hex 3315 or any Cambrai hex
2 x 3-1-11/1-10 art (9, 10): hex 3325 or any Cambrai hex
Game-Turn 5 (24 November, 1917) 3 x 6-6-8 Stoss inf (221/41, 60R, 1ER); 1 x 3-2-6/2-10 art (221/273): hex 3325 or any Cambrai hex
2 x 4-1-8/1-10 art (11B, 20): hex 3325 or any Cambrai hex
1 x 3-0-11/1-10 art (13M): hex 3324
Game-Turn 6 (25 November, 1917) 3 x 4-6-8 inf (49R/225R, 226R, 228R); 1 x 3-2-6/2-10 art (49R/49R): hex 2701 or any Cambrai hex
1 x 4-1-8/1-10 art (34LW): hex 2701 or any Cambrai hex
1 x 3-0-11/1-10 art (26): hex 1834
1 x 0-4-6 Corps Depot with 15 Supply points (Lewarde): any hex north edge of map.
Game-Turn 7 (26 November, 1917) 3 x 6-6-8 Stoss inf (28/40F, 109LGr, 11JGr); 1 x 4-2-7/1-10 art (28/14): hex 3325 or any Cambrai hex
1 x 3-2-10 Stoss inf (3Jg): hex 3325 or any Cambrai hex
1 x 3-2-10 Stoss inf (4): hex 1833
1 x 4-1-8/1-10 art (7R): hex 3325 or any Cambrai hex
1 x 3-0-11/1-10 art (8B): hex 3325 or any Cambrai hex
1 x 0-4-6 Corps Depot (Busigny): hex 3325, with 15 Supply points
Game-Turn 8 (27 November, 1917) 3 x 6-6-8 Stoss inf (208/25, 185, 65R); 1 x 3-2-6/2-10 art (208/267): hex 3325 or any Cambrai hex
3 x 4-6-8 inf (5G/3G, 3G Gr, 99); 1 x 3-2-6/2-10 art (5G/4G): hex 1833
1 x 4-1-8/1-10 art (7): hex 2701 or any Cambrai hex
Game-Turn 9 (28 November, 1917) 3 x 2-3-8 inf (9BR/11BR, 14BR, 3BE); 1 x 2-1-6/1-10 art (9BR/9BR): hex 2534
3 x 4-6-8 inf (220/190, 55R, 99R); 1 x 3-2-6/2-10 art (220/51): hex 3324
1 x 3-0-11/1-10 art (101): hex 3324 or any Cambrai hex
Game-Turn 10 (29 November, 1917) 1 x 4-1-8/1-10 art (63): hex 3315 or any Cambrai hex
Game-Turn 11 (30 November, 1917) 3 x 2-4-8 inf (185/186, 420, 442R); 1 x 2-1-6/1-10 art (185/185): hex 3324
Game-Turn 12 (1 December, 1917) 3 x 2-3-8 inf (24R/104R, 106R, 133R); 1 x 2-1-6/1-10 art (24R/24R): hex 3325 or any Cambrai hex
Game-Turn 13 (2 December, 1917) 3 x 4-6-8 inf (16R/29R, 65R, 28R); 1 x 3-2-6/2-10 art (16R/16R): hex 3328
[24.0] Master Supply Point Schedule
General Rule: These tables show the number of Supply points each depot has on Game-Turn One and how many each side receives on each Game-Turn. The amount of Supplies at the start of each scenario, however, is shown in the rules for that scenario.
Cases:
[24.1] Supply Point Allocations on Game-Turn One
| British Corps Supply Depot | Supply Points Allocated |
|---|---|
| IV-1 | 60 |
| IV-2 | 60 |
| III-1 | 60 |
| III-2 | 60 |
| VI | 40 |
| VII | 40 |
| German Corps Supply Depot | Supply Points Allocated |
|---|---|
| Caudry | 18 |
| Arras | 18 |
[24.2] British Supply Points Schedule
| Game-Turn | Supply Points Received |
|---|---|
| 2 | 8 |
| 3 | 16 |
| 4 | 15 |
| 5 | 15 |
| 6 | 15 |
| 7 | 10 |
| 8 | 10 |
| 9 | 10 |
| 10 | 10 |
| 11 | 10 |
| 12 | 10 |
| 13 | 10 |
| 14 | 10 |
| 15 | 10 |
| 16 | 10 |
| 17 | 10 |
[24.3] German Supply Points Schedule
| Game-Turn | Supply Points Received |
|---|---|
| 2 | 8 |
| 3 | 10 |
| 4 | 12 |
| 5 | 14 |
| 6 | 16 |
| 7 | 20 (+15 with Lewarde Depot) |
| 8 | 25 (+15 with Busigny Depot) |
| 9 | 30 |
| 10 | 25 |
| 11 | 20 |
| 12 | 18 |
| 13 | 12 |
| 14 | 10 |
| 15 | 12 |
| 16 | 12 |
| 17 | 10 |
[25.0] Scenarios
General Rule: There are three scenarios in To The Green Fields Beyond. These are the British Breakthrough, the Battle for Bourlon, and the German Counterattack. Each scenario lasts for a set number of turns, and is evaluated under its own Victory Conditions.
Cases:
[25.1] The British Breakthrough
This Scenario represents the crucial first 72 hours of the Battle of Cambrai, during which the British gained, then lost, the fleeting glimpse of a breakthrough, and which saw what might have been either a successful raid or a decisive offensive become neither.
[25.11] The British Breakthrough begins with the start of Game-Turn 1 (20 November) and ends at the conclusion of Game-Turn Three (22 November).
[25.12] The initial deployment used for this scenario is the same as for the campaign game and is printed on the counters.
[25.13] The British and German Supply Allocation at the start of the British Breakthrough scenario is given in Case 24.1.
[25.14] The Cavalry Commitment rule (Case 17.4) is in effect in this scenario.
[25.15] British Victory Point Schedule
The British Player receives the indicated number of Victory Points for each condition met. If a British unit was the last to occupy or pass through the following:
| Condition | VP's |
|---|---|
| Bourlon City: | 10 |
| Bourlon Wood (each hex): | 3 |
| Each other city hex: | 5 |
| Eight or more Cambrai hexes: | 40 |
| For each ridge hexside originally behind the German front line at the start of the Game that is now behind the British continuous line at the end of the game or that a British unit was last to pass over: | 1 |
| For each Attack (or Barrage) Strength point of German units destroyed: | 1 |
| For each Attack (or Barrage) Strength Point of German units reduced to Cadre Strength: | 1/2 |
| For each British Brigade east of the canal and north of the stream at the end of the scenario: | 1 |
| For each British Cavalry unit west of the 18xx hexrow and north of the xx16 hexrow, per unit per Game-Turn: | 1 |
| For each British unit west of the 21xx hexrow and north of the xx10 hexrow: | 2 |
[25.16] German Victory Point Schedule
The German Player receives the indicated number of Victory Points for each condition met.
| Condition | VP's |
|---|---|
| For each Attack or Barrage Strength Point of British units destroyed: | 4 |
| For each Attack or Barrage Strength Point of British units reduced to Cadre Strength: | 3 |
| For preventing British units from being the last to occupy or move through the following hexes: | |
| 1219: | 20 |
| 1419: | 18 |
| 1714, 1820 (both): | 12 |
| 2022, 2122 (both): | 7 |
| 2121: | 10 |
| 1715, 1815, 1716 (all three): | 7 |
| If no British units are west of the canal at the end of the scenario: | 30 |
| If the British fail to keep a continuous line, per turn: | 15 |
| If, at the end of the scenario, the British Player has less than ten supply points accumulated: | 5 |
[25.2] Battle for Bourlon
After the impetus of their initial breakthrough had faded away, the British renewed the attack on the morning of the 23rd. This time, the German positions around Bourlon, Fontaines, and Catigny were the objective. But German resistance had solidified, and losses were heavy on both sides. For five days, the fighting raged over Bourlon, with the British, due to the skill and bravery of the Guards Division, finally holding almost all of Bourlon Wood by the 27th. Yet Bourlon town still remained in German hands.
[25.21] The Battle for Bourlon scenario begins with the British Player-Turn of Game-Turn 4 (23 November) and ends at the conclusion of Game-Turn 8 (27 November, 1917). It is five complete Game-Turns in length.
[25.22] British Set-Up
Units whose listed strengths are coded "d" begin the scenario Disrupted; units coded "b" begin the scenario Broken.
| Hex | Designation | Strength |
|---|---|---|
| 0131 | 2 Cav | 2-2-5/2-12 |
| 0132 | 5/2 | 1-3-12 |
| 0133 | 4/2 | 1-3-12 |
| 0134 | 3/2 | 1-3-12 |
| 0202 | VI | 0-4-4 |
| 0307 | 16DV | 4-2-7/2-10 |
| 0314 | 187/62 | 4-4-8 |
| 0402 | 34DV | 4-2-7/2-10 |
| 0406 | 47/16 | 4-4-8 |
| 0424 | Sia/4Cav | 1-3-12 |
| 0503 | 102/34 | 3-3-8 |
| 0505 | 103/34 | 3-3-8 |
| 0507 | 48/16 | 4-4-8 |
| 0525 | Mho/4Cav | 1-3-12 |
| 0526 | 4Cav | 2-2-5/2-12 |
| 0607 | 49/16 | 4-4-8 |
| 0609 | 3DV | 4-2-7/2-10 |
| 0615 | 185/62 | 1-3-8d |
| 0624 | Luc/4Cav | 1-3-12 |
| 0702 | 101/34 | 3-3-8 |
| 0709 | 8/3 | 4-4-8 |
| 0711 | 9/3 | 4-4-8 |
| 0720 | 1/1 | 1-3-12 |
| 0721 | 2/1 | 1-3-12 |
| 0722 | 1Cav | 2-2-5/2-12 |
| 0813 | 56DV | 4-2-7/2-10 |
| 0815 | Nor Yeo | 0-1-12 |
| 0818 | V RHA | 4-1-9/1-8 |
| 0822 | III-2 | 0-4-4 |
| 0823 | A/A | 1-0-8db |
| 0823 | C/C | 1-0-8db |
| 0823 | B/B | 2-1-8b |
| 0823 | B/F |
[25.23] German Set-Up
Units whose listed strengths are coded "d" begin the scenario Disrupted.
| Hex | Designation | Strength |
|---|---|---|
| 0506 | 469/240 | 4-6-8 |
| 0603 | 73/111 | 3-6-8 |
| 0605 | 76/111 | 3-6-8 |
| 0606 | 270/240 | 4-6-8 |
| 0708 | 471/240 | 4-6-8 |
| 0802 | 164/111 | 3-6-8 |
| 0809 | 77/20 | 2-4-8 |
| 1010 | 79/20 | 2-4-8 |
| 1108 | 46/20 | 2-2-6/1-10 |
| 1203 | 94/111 | 3-2-6/2-10 |
| 1206 | 271/240 | 3-2-6/2-10 |
| 1211 | 92/20 | 2-4-8 |
| 1313 | 263/214 | 3-6-8 |
| 1411 | 44/214 | 3-2-6/2-10 |
| 1413 | 358/214 | 3-6-8 |
| 1514 | 58/119 | 6-6-8 |
| 1610 | 20R | 4-1-8/1-10 |
| 1614 | 52R/107 | 4-6-8 |
| 1615 | 46R/119 | 6-6-8 |
| 1626 | 418/183 | 2-4-8 |
| 1628 | 317R/74R | 2-4-8 |
| 1629 | 316R/79R | 2-4-8 |
| 1632 | 318R/79R | 2-4-8 |
| 1712 | 2 | 4-1-8/1-10 |
| 1713 | 237/119 | 3-2-6/2-10 |
| 1716 | Lehr/3G | 6-6-8 |
| 1812 | 10R | 5-3-11/1-10 |
| 1815 | 232R/107 | 4-6-8 |
| 1825 | 184/183 | 2-4-8 |
| 1828 | 183/183 | 3-2-6/2-10 |
| 1829 | 79R/79R | 3-2-6/2-10 |
| 1916 | 227R/107 | 4-6-8 |
[25.24] British Supply Point Allocations
At the start of Battle for Bourlon Scenario, 23 November 1917, the British Player has the following Supply points, distributed as indicated.
| Corps Supply Depot | Supply Points | Corps Supply Depot | Supply Points |
|---|---|---|---|
| IV-1 | 25 | III-2 | 15 |
| IV-2 | 20 | VI | 12 |
| III-1 | 20 | VII | 10 |
[25.25] German Supply Point Allocations
At the start of Battle for Bourlon Scenario, 23 November, 1917, the German Player has the following Supply points, distributed as indicated.
| Corps Supply Depot | Supply Points |
|---|---|
| Caudry | 15 |
| Arras | 17 |
[25.26] British Victory Points
The British Player receives the indicated number of Victory Points for meeting the following conditions.
| Condition | VP's |
|---|---|
| For being the last to occupy or move through the following hexes: | |
| 1714: | 20 |
| 1715, 1815, 1716, 2017: | 8 |
| 2016: | 6 |
| Three or more Cambrai hexes | 30 |
| Each village behind German lines at the start of the scenario: | 2 |
| For each Game-Turn the British Player has cavalry units west of the 18xx hex row and north of the xx16 hex row, per cavalry unit per Game-Turn: | 2 |
| For each Game-Turn the British Player has cavalry units west of the 21xx hex row and north of the xx10 hex row: | 4 |
| For each German Attack (or Barrage) Strength point destroyed: | 3 |
| For each German Attack or Barrage Strength point reduced to Cadre Strength: | 1 1/2 |
[25.27] German Victory Points
The German Player receives the indicated number of Victory points for meeting the following conditions.
| Condition | VP's |
|---|---|
| For each British Attack (or Barrage) Strength point destroyed: | 4 |
| For each British Attack or Barrage Strength point reduced to Cadre Strength: | 2 |
| For being the last to occupy or move through the following hexes: | |
| 1715, 1815, 1716: | 12 |
| 2017, 2016: | 6 |
| 1714: | 10 |
| For each Game-Turn in which the British Player fails to have a Continuous Line: | 10 |
[25.3] German Counter-Attack
The Germans went over to the offensive with a vengeance on the morning of 30 November. They succeeded in breaking the southern flank of the British line, but the British soon rallied, and in five days of fierce fighting, the lines stablized, with the British having lost many of their original gains and with heavy losses on both sides.
The German Counter-Attack Scenario begins with the start of the German Player-Turn of Game-Turn Eleven (30 November, 1917). The British Player is assumed to have completed his Game-Turn before the scenario begins. It ends with the end of Game-Turn Fifteen (4 December, 1917), and is 4 1/2 Game-Turns long.
The German is considered to have declared his Counter-Attack (see rule 15.0) at the beginning of his Player-Turn of Turn Eleven.
[25.31] British Set-Up
Units whose listed strengths are coded "d" begin the Scenario disrupted.
| Hex | Unit | Designation |
|---|---|---|
| 0202 | Corps Depot (VI) | 0-4-4 |
| 0307 | 16DV | 4-2-7/2-10 |
| 0314 | 187/62 | 4-4-8 |
| 0322 | Nor Yeo | 0-1-12 |
| 0402 | 34DV | 4-2-7/2-10 |
| 0418 | 2G | 6-5-8 |
| 0503 | 102/34 | 3-3-8 |
| 0505 | 103/34 | 3-3-8 |
| 0506 | 47/16 | 4-4-8 |
| 0507 | 48/16 | 4-4-8 |
| 0525 | A/B | 2-1-8 |
| 0525 | B/A | 2-1-8 |
| 0525 | B/C | 2-1-8 |
| 0525 | 3/2 | 1-3-12 |
| 0526 | 4/2 | 1-3-12 |
| 0607 | 49/16 | 4-4-8 |
| 0609 | 3DV | 4-2-7/2-10 |
| 0615 | 185/62 | 4-4-8 |
| 0624 | 2 CAV | 2-2-5/2-12 |
| 0702 | 101/34 | 3-3-8 |
| 0709 | 8/3 | 4-4-8 |
| 0711 | 9/3 | 4-4-8 |
| 0722 | 1 G | 6-5-8 |
| 0813 | 56DV | 4-2-7/2-12 |
| 0821 | D/A | 1-0-8d |
| 0822 | Corps Depot (III-2) | 0-4-4 |
| 0912 | 76/3 | 4-4-8 |
| 0916 | 62DV | 4-2-7/2-10 |
| 0918 | 186/62 | 4-4-8 |
| 0921 | Heavy Bridge | 0-0-8 |
| 0921 | Heavy Bridge on Tanks | 0-0-8 |
| 0922 | D/B | 1-0-8d |
| 0923 | E/A |
[25.32] German Set-Up
Units whose listed strengths are coded "d" begin the Scenario Disrupted.
| Hex | Unit | Designation |
|---|---|---|
| 0603 | 73/11 | 3-6-8 |
| 0605 | 76/11 | 3-6-8 |
| 0606 | 470/240 | 4-6-8 |
| 0707 | 471/240 | 4-6-8 |
| 0708 | 77/20 | 2-4-8 |
| 0802 | 164/111 | 3-6-8 |
| 0805 | 469/240 | 4-6-8 |
| 0809 | 79/20 | 2-4-8 |
| 1010 | 92/20 | 2-4-8 |
| 1108 | 46/20 | 2-2-6/1-10 |
| 1111 | 226R/49 | 4-6-8 |
| 1112 | 225R/49 | 4-6-8 |
| 1203 | 94/111 | 3-2-6/2-10 |
| 1206 | 271/240 | 3-2-6/2-10 |
| 1211 | 49R/49R | 3-2-6/1-10 |
| 1212 | 50/214 | 3-6-8 |
| 1312 | 228R/49 | 4-6-8 |
| 1313 | 363/214 | 3-6-8 |
| 1410 | 7 | 4-1-8/1-10 |
| 1411 | 44/214 | 3-2-6/2-10 |
| 1412 | 80R/21R | 3-6-8 |
| 1413 | 358/214 | 3-6-8 |
| 1506 | Corps Depot (Lewarde) | 0-4-6 |
| 1511 | 20R | 4-1-8/1-10 |
| 1512 | 21R/21R | 3-2-6/2-10 |
| 1513 | 88R/21R | 3-6-8 |
| 1514 | 41/221 | 6-7-8 |
| 1610 | 13 Mar. | 3-0-11/1-10 |
| 1612 | 87R/21R | 3-6-8 |
| 1613 | 60R/221 | 6-6-8 |
| 1626 | 65R/208 | 6-6-8 |
| 1627 | 4 | 3-2-10 |
The German Player may place two Class C bridges anywhere on the map.
[25.33] British Supply Allocation
| Corps Supply Depot | Supply Points |
|---|---|
| VI | 10 |
| III-1 | 10 |
| III-2 | 8 |
| IV-1 | 8 |
| IV-2 | 12 |
| VII | 10 |
| 1425, 1327, 0918, 0619, 1029, 0832, 1419, 1219: | 7 |
| 1125, 1525: | 14 |
| 0822: | 20 |
| 1715, 1726, 1820, 2022, 2122: | 2 |
| Each village behind the British continuous line of units at the start of the scenario | 2 |
| Each Game-Turn the British do not maintain a Continuous Line | 10 |
[25.34] German Supply Allocation
| Corps Supply Depot | Supply Points |
|---|---|
| Arras | 35 |
| Caudry | 40 |
| Lewarde | 20 |
| Busigny | 15 |
Note that the German Player still must allocate the Supply points he receives on Game-Turn 11.
[25.35] British Air Set-Up (Optional)
| Hex | Unit | Strength |
|---|---|---|
| 1715 | 3 | 2-1 |
| 1815 | 56 | 2-1 |
| 1916 | 64 | 2-1 |
| 1814 | 41 | 2-1 |
[25.36] Additional British Reinforcements
In the German Counterattack Scenario, the British Player receives additional reinforcements from those removed from the map. These are in addition to the reinforcements shown on the Master Reinforcement Chart. All enter hex 0124.
Game-Turn Twelve
3 x 3-5-8 (51/152,153,154) 1 x 4-2-7/2-10 artillery (51); 1 x tank unit; 1 x 4-1-13/1-10 art. unit; 9 x 1-3-12 cav (1/1, 3, 9) (4/Sia, Mho, Luc) (5/Sec, Amb, Can) 3 x 2-2-5/2-12 art. (1 Cav, 4 Cav, 5 Cav).
Game-Turn Thirteen
1 x 3-2-8/1-8 artillery; 1 x 4-1-13/1-10 artillery
Game-Turn Fourteen
1 x tank unit; 1 x 3-1-8/1-8 artillery
Game-Turn Fifteen
1 x 4-1-13/1-10 artillery
[25.37] British Victory Point Schedule
The British Player receives the indicated number of Victory Points for each condition met.
| Condition | VP's |
|---|---|
| For each Attack or Barrage Strength Point of German Units Destroyed: | 2 |
| For each Attack or Barrage Strength Point of German units reduced to Cadre Strength: | 1 |
| Each City hex which British units were last to occupy or move through: | 10 |
| For being the last to occupy or move through the following hexes: | |
| 1716: | 8 |
| 1715, 1815, 2017, 1819, 1824: | 12 |
| If there are 2 or more supplied British brigades east of the canal and north of the stream: | 10 |
[25.38] German Victory Points
The German Player receives the indicated number of Victory Points for each condition met.
| Condition | VP's |
|---|---|
| For each Attack or Barrage Strength Point of British Units Destroyed: | 1 |
| For each Attack or Barrage Strength Point of British units reduced to Cadre Strength: | 1/2 |
| For each British trench hex that German units were the last to occupy or move through: | 5 |
| For being the last to occupy or move through the following hexes: | |
| 1425, 1327, 0918, 0619, 1029, 0832, 1419, 1219: | 7 |
| 1125, 1525: | 14 |
| 0822: | 20 |
| 1715, 1726, 1820, 2022, 2122: | 2 |
| Each village behind German Lines at the start of the scenario | 2 |
| Each Game-Turn the British do not maintain a Continuous Line | 10 |
[25.4] Campaign Game
The campaign game represents all facets of the Battle of Cambrai. It is rather long and complex.
[25.41] The Campaign Game begins with the start of Game-Turn 1 (20 November) and ends at the conclusion of Game-Turn 17 (6 December).
[25.42] The initial set-up for all units or their subsequent Game-Turn of Arrival is printed on the unit counters.
[25.43] British Supply and German Allocation at the start of the Campaign Game is given in Case 24.1.
[25.44] British Victory Point Schedule
The British Player receives the indicated number of Victory Points for each condition met.
| Condition | VP's |
|---|---|
| For each German Attack or Barrage Strength Point destroyed: | 1 |
| For each German Attack or Barrage Strength Point reduced to Cadre Strength: | 1/2 |
| Each City hex that British units were the last to occupy or pass through: | 5 |
| For each Village behind German Lines at the start of the Game that British units were the last to occupy or move through: | 1/2 |
| For each Ridge Hexside behind German Lines at the start of the game that British units were the last to occupy or pass through or are to the west of the British continuous line at the end of the game: | 1/4 |
| For each Game-Turn the British Player has cavalry units west of the 18xx hex row and north of the xx16 hex row, per Cavalry unit per Game-Turn: | 1 |
| For each Game-Turn the British Player has cavalry units west of the 21xx hex row and north of the xx10 hex row: | 2 |
[25.45] German Victory Point Schedule
The German Player receives the indicated number of Victory Points for each condition met.
| Condition | VP's |
|---|---|
| For each British Attack or Barrage Strength Point destroyed: | 1 |
| For each British Attack or Barrage Strength Point reduced to Cadre Strength: | 1/2 |
| For each Village behind British lines that German units were the last to occupy or move through: | 3 |
| For each village containing trenches behind British lines that German units were the last to occupy or move through: | 3 |
| For each British trench hex that German units were the last to occupy or move through or occupy: | 1 |
[25.5] Other Scenarios
These scenarios represent variations on the actual historical placement of events.
[25.51] Free Set-Up
In this scenario, the Players are not required, at the start of Game-Turn One, to place their units on the set-up hexes printed on them. Instead, the German Player first sets up all of his units that begin Game-Turn One on the map with the following restrictions:
a. All units of the 107th Division must begin where they do historically. b. All German Front Line trench hexes north of the xx28 hexrow must contain a German unit or German Zone of Control. c. No German unit may be in or west of a British trench hex.
The British Player then sets up his units as he wishes, except that none may be placed in or to the east of German Front Line trench hexes. After the British Player has set up, the German Player may then move each of his units up to two hexes, but restrictions a, b, and c above must be maintained. Players should keep divisions and battalions coherent as possible and not intermix them.
[25.52] British Launch All-Out Offensive
Had the British been really smart, they would have discontinued the Third Ypres in August — when German resistance had solidified and the rains had set in — and concentrated instead on making Cambrai a decisive breakthrough. Of course, this would mean that more German divisions would have been available, as Third Ypres was almost as destructive to the Germans as it was to the British.
The British may add, at the start of the game, the following British Divisions: 61st, 31st, 3rd Cav Guards, 25th, 2nd, and 47th. The German Player may take any two additional divisions of his choice, neither of which may be Stosstruppen. All Supply Point totals are increased by one-third, rounding fractions upwards. The Command Control rules are not in effect. All Supply Point totals are increased by one-third, rounding fractions upward. The Command Control rules are not in effect. All Reinforcements scheduled to arrive on Game-Turns Four through Seven arrive one Game-Turn earlier. All reinforcements scheduled to arrive on Game-Turn Seven and later arrive two Game-Turns earlier.
[25.53] French Participation
If Players wish to see what would have happened if poor planning had not kept the French out, all French units may begin the game on the map. The French Supply depot has 25 Supply points to start the game with. All French units must be deployed south of the xx25 hexrow.
[26.0] Unit Designations
Commentary: Some divisions on both sides had name designations, although heavy losses had changed the territorial character of many of them. For example, 10% to 20% of the men of the 51st Highland division (depending on the sub-unit) were English or Irish!
Cases:
[26.1] Abbreviations
[26.11] British
Gds = Guards; Sec = Secunderabad; Amb = Ambala; Can = Canadian; Sia = Sialkot; Mho = Mhow; Luc = Lucknow; K.E. = King Edward's Horse (King's Overseas Dominion Regiment) Nor Hus = 1/1st Northumberland Hussars; RHA = Royal Horse Artillery; Gp HA = Group Heavy Artillery; SA = South African
[26.12] German
Br = Bavarian Reserve; R = Reserve; B = Bavarian; M = Marine; LW = Landwehr (German second-line troops); Gds = Guards; Sx = Saxon; S Q KG = St. Quentin Kampfgruppe; 6A KG = 6th Army Kampfgruppe; Jg = Jaegers (Light Infantry); GF = Guards Fusiliers (demonstration); Lhr = Lehr; Gr = Grenadiers; ER = Ersatz (Replacements); F = Fusiliers; LGr = Leib Grenadiere (Bodyguard Grenadiers); vR = von Richthofen's Flying Circus; SS = Shutzstaffel.
[26.13] French
CaP = Cuirassier a Pied (dismounted cavalry used as light infantry); Ch = Chasseur; Dr = Dragoon; Lg = Legere (Light); Cu = Cuirassier.
[26.2] Divisional Names
[26.21] British Divisions
4th Cavalry: Indian; 5th Cavalry: Indian; 9th: Scottish; 16th: Irish; 56th: 1st London; 36th: Ulster; 62nd: 2nd/West Riding (Yorkshire); 51st: Highland; 12th: Eastern; 55th: West Lancashire; 47th: 2nd London; 59th: 2nd North Midland; 61st: 2nd South Midland
[26.22] German Divisions
111th: Hannover; 20th: Brunswick; 107th: Brandenburg.
Historical Notes
In 1917, both sides had begun to falter under the strain of prolonged and bloody war. There was revolution in Russia. Italy's armies had been defeated at Caporetto and had to be supported by British and French divisions pulled from the Western Front. The French Army, its spirit sapped by years of bloodbath, had mutinied. Although the situation was quickly retrieved, the Allied leaders knew that their only force capable of offensive action in 1917 was the British Expeditionary Force. Sir Douglas Haig, its commander, chose the Ypres sector for an offensive that would keep the Germans from exploiting any success created by Allied setbacks. The Third Battle of Ypres was a five-month campaign that underscored the nature of modern warfare. In the nightmare landscape of the great mud seas, the British and German Armies bled each other white with an intensity not seen before or since.
The British had one weapon that had the potential to prove decisive, to break through the blood-drenched stalemates of earlier years. That was the tank. The Mark I tank had first gone into action on the Somme on 8 September, 1916. Despite its limited success and the opposition of many officers and politicians to it, Haig pushed for more production of improved models of tanks. They would be ready by the autumn of 1917.
Although the tank was scarcely a year old, the British Tank Corps was already highly advanced in tactical thinking. Under the effective leadership of Brig. Gen. H.J. Elles and his Chief of Staff, Lt. Col. J.F.C. Fuller, the Tank Corps had come to recognize both its own strengths and weaknesses. They realized that tanks could restore movement to a battlefield that had been long dominated by masses of firepower, yielding scant gains of battle-scarred territory for extremely high loss. Yet tanks had to operate as part of a combined arms team. Artillery was required to disable and suppress enemy artillery and support the flanks of the advance with interdicting and harrasing barrages. Infantry was needed to clean out trenches that tanks had moved over, and to prevent the tanks from being destroyed by enemy infantry using improvised weapons or, more importantly, from enemy field guns firing over open sights as anti-tank weapons. The tanks, in turn, could rip gaps in the barbed wire for the infantry to pass through and, with its six-pounder (57mm) guns and machine guns, it could destroy or suppress the fire of enemy strongpoints.
The British Army that would use these tanks had come a long way from the amateurs of 1916, who had to rely on courage and numbers instead of tactical skill. Tactical, operational, and logistical procedures had been improved. Among the most important of these innovations was a new artillery fire control system that allowed batteries moving into position to acquire distant targets without having to "range in" by firing spotting shells, thus disclosing their presence. The new system allowed, for the first time, accurate fire "off the map."
Throughout the spring and summer of 1917, the plans for a surprise attack using tanks en masse and the new British fire control system were developed. It would be the first use of the tanks as a massed weapon, to break the enemy positions, rather than functioning as an adjunct to the infantry. The Cambrai sector presented itself as the place most likely to yield effective results in such an attack.
On 13 October, with the Third Ypres entering its last and least successful phase, Haig gave orders for the Cambrai operation. The orders given General Sir Julian Byng's Third Army had varied in conception from a massive raid to an all-out offensive. This was one of the British mistakes — Haig and the high command, their attention fixed on Ypres, never fully defined what Cambrai was to be. This was to prove crucial during the battle. (The final plan is given as an appendix to these notes.) British forces were concentrated in great secrecy, including no less than 476 tanks, 374 of which were in the first-wave companies.
The Germans considered Cambrai a quiet sector, and it was thinly held, often by weak or under-strength units. Two things were in the Germans' favor — the artillery of one of the front line divisions had been specially trained in anti-tank tactics, and the 107th Division had arrived by rail from Russia to relieve other units. The Cambrai sector had no less than four trench lines, including the Hindenburg and Seigfried II positions which had been prepared after the Battle of the Somme. The Germans intended to hold what they had, and the trenches showed it — well sited, fully wired, with dug-outs up to 30 feet deep. The garrisons of these formidable defenses had only a few inklings of an impending attack when the storm broke.
At 0610 hours on 20 November 1917, 1003 British guns opened fire in an expertly planned barrage. Minutes later, the tanks in the first wave went forward, supported closely by the infantry. From the sector of the 36th Ulster division in the north, to the 55th West Lancashire Division in the south, the German front collapsed under the weight of the combined arms assault. Soon, crowds of bewildered prisoners were being shepherded back into the waiting cages. Only in two sectors were there checks to the British advance. In Lateau Wood, the Germans had resisted fiercely and delayed the advance. More important was the key city of Flesquires, which sat astride one of the roads that the cavalry divisions were to take in their exploitation. The crack 51st Highland Division was ordered to clear the road, but it suffered from a reactionary and hidebound commander who refused to closely cooperate with the tanks. As a result, the tanks and infantry attacked separately. The tanks went in first, suffered heavy losses and were halted. Then the infantry assaulted, but even the Highlanders could not shift the determined defenders. Flesquires held on grimly.
The Germans had not sat idly during the morning. The 107th Division was hurried into the front lines. Staff officers rallied mobs of fugitives into scratch formations, reinforced by clerks and bandsmen from the rear areas. Field guns were hauled out of their gunpits and sited for direct fire on the onrushing tanks. They were not long in arriving. The German artillerymen could not know that the Imperial Germany they served had less than a year to live, but they must have known that they would live but minutes if they manned their guns against the tanks. Man them they did, until silenced by point-blank fire from the tanks or the eighteen-inch bayonets of the infantry. But no less than 65 tanks were knocked out — almost half near Flesquires.
By late afternoon, the British 29th Division had forced a crossing over the canal at Masnieres. The way to the "green fields beyond" was open, but the roads were jammed, and the movement of the cavalry that was to push through was confused. The 1st Cavalry Division was vainly trying to push through Flesquires. Elements of the Canadian and 5th Cavalry brigades finally moved over the canal, but night and the Germans forced their withdrawal. To the north, the Yorkshiremen of the 62nd Division had been stopped short of their objective of Bourlon. As night fell, it was reported that 71 tanks had broken down, and 43 were stuck fast in trenches. German reinforcements were on their way from throughout the Reich. The golden moment had passed.
On the 21st, the attack resumed in the south, taking Crevecour, Noyelles, and Rue des Vignes. The 29th Division tried to enlarge its bridgehead. The advance on Bourlon continued. Flesquires was taken, but the British attacks were feeble and uncoordinated in comparison with the day before. The British now had to choose whether to hold or consolidate or to continue the offensive. The result, in effect, was a compromise. Orders were given for the British left flank and center to hold, and new efforts would be made to take Bourlon against toughening resistance.
The Battle of Bourlon began on 23 Novemeber (see scenario for deployment), after a day of consolidation and successful German local counterattacks. In three days of see-saw fighting, the British managed to gain much of the woods, but the town needed to secure the ridge — strategic Bourlon — remained in German hands. The Germans had also attacked thoughout the Battle, and had retaken the village of Fontaine.
As the Bourlon fighting drew to a close, the British began to assume the defensive, considering the battle almost finished. Most of the surviving tanks — breakdowns having taken a heavier toll than enemy action — were withdrawn. Heavy artillery was pulled out. Many British toops were fatigued — the units that had arrived after the 20th had mainly been committed to Bourlon and had suffered losses there. On the south and center, the same units were in the front line as at the start of the offensive. Supplies had also run low. This was the legacy of the weakness in the original plan and its execution — designed as alternately a raid or an offensive, it lacked the reserves and resources to take advantage of the tremendous potential offered.
The Germans had successfully contained the British advance with the skill born of three years defensive fighting. Now, with the supplies and fresh divisions the British lacked pouring in, the Germans were ready to take the offensive. General Luddendorf, the de facto Generalissimo, conferred with Kronprinz Rupprecht von Bayern, the German commander of the Cambrai battle, and General Kuhl, Rupprecht's Chief of Staff and the brains of his Second Army. They intended to pocket the entire British advance — from the 56th to the 55th division sectors with a pincers movement and then drive forward and dig in, waiting for the cut-off divisions to surrender from lack of supply. It was an ambitious and powerful plan, using as its cutting edge the specially trained Stosstruppen and the infiltration tactics that had proven so successful at Riga and Caporetto. Moving fast and striking hard, Stosstruppen would break through enemy lines at the weakest point and pour forward, leaving the strongpoints to be mopped up later. Working with Prussian efficiency, the plans were swiftly drafted, and the long feldgrau columns soon began to move up to the assigned places on the Lines of Departure. The British, who still maintained control of the air, were well aware of the preparations, but BEF HQ, their attention now diverted from Cambrai, took little notice of the reports.
The German barrage began at 0600 on 30 November. At 0700, the Stosstruppen started their advance, supported by low-flying ground attack aircraft. While the main weight of the offensive was in its northern pincer, aimed at Bourlon, the 55th, 20th, and 12th Divisions caught the full force of the German southern pincer. Despite savage resistance and despite heavy losses, the Germans broke through the three divisions and poured into the British rear areas. British artillery units suddenly found themselves in the front line. Some German units were halted by point-blank fire from the guns, but other batteries were cut off, and the guns captured. The German advance penetrated the original British trenches. Gonnelieu and, more importantly, Gouzeaucort were in German hands. From there, the Germans could cut off the British salient. The British quickly reacted. Committing the Guards Division, cavalry, and every available tank, they retook Gouzeaucort in a successful counterattack, blunting the German spearpoint.
Elsewhere the Germans were less successful. The British 6th and 29th Divisions saved themselves from being surrounded by skillful defensive fighting followed by effective counterattacks. On the Bourlon Front, the German northern pincer was stopped in its tracks by the British defense. German losses were very high and their gains limited. The double envelopment had failed. The German attack on the 30th was as much a lost opportunity as the British one had been ten days before, for the British, like the Germans, were now rushing reinforcements, including a French corps, toward the battlefield.
On the 1st, the British again counterattacked the German penetrations. Gauche Wood was retaken, but even the Guards were unable to carry Gonnelieu. Elsewhere, the rest of the German southern pincer still struggled forward. They were checked in most places, but it was decided to withdraw the 29th and 6th Divisions from their precarious positions. On the 2nd, renewed German attacks took La Vacquerie, and on the next day, the British finally pulled their troops back from the canal. After two more days of heavy fighting, the British decided to withdraw from Bourlon, where a precarious salient had been formed. Fearful of envelopment, the British withdrew from this position toward Flesquires from the 4th to the 6th. While fighting still went on along Welsh Ridge until the 6th, exhaustion, lack of supplies, and bad weather brought the battle to a close.
Cambrai was history's first blitzkreig. It showed how mobile warfare could return the decisive element to offensive warfare and prevent the bloodbaths of the Somme and Ypres. Despite the failings of the British command, and despite the fact that the British lost almost as much terain as they gained, the tank had proved its value to both the British and the Germans. The British were to use it effectively in the Battle of Amiens in August, 1918, which was to break the spirit of the German Army. The Germans had to wait until 1939 to show the world what they had learned at Cambrai.
Most Secret — Third Army Plan, Operation "GY"
-
The object of the operation is to break the enemy's defensive system by a coup de main; with the assistance of tanks to pass the Cavalry Corps through the break thus made: to seize Cambrai, Bourlon Wood, and the passages over the Sensee River and to cut off the troops holding the German front line between Havrincourt and that river.
-
The operation is designed to take advantage of the existing favorable local situation. Surprise and rapidity of action are therefore of the utmost importance.
-
The intention of the Army Commander is, therefore: First, to gain possession of the quadrilateral formed by the Canal de l'Escaut-Sensee River-Canal du Nord. Secondly, to clear up the area lying to the west of this quadrilateral.
-
The operation resolves itself into three stages:
(a) The infantry attack on the German organized lines, including the capture of the crossings over the Canal de l'Escaut at Masnieres and Marcoing, and of the Masineres-Beaurevoir line east of those places.
(b) The advance of the Cavalry to isolate Cambrai, and to seize the crossings over the Sensee River, and of IV Corps to capture Bourlon Wood.
(c) The Clearing of Cambrai and the quadrilateral Canal de l'Escaut-Sensee River-Canal du Nord, and the overthrow of the German divisions thus cut off.
-
The operation will commence on Z-day at hour Zero. The date of Z-day and the hour will be notified separately.
-
With a view to distracting the enemy's attention and weakening his power of resistance, subsidiary operations will be undertaken by VII, IV, and XVII Corps, according to instructions which have already been issued (some of these Corps are off the map).
-
(i) The preliminary task of breaking through the enemy's line is allotted to III and IV Corps.
(ii) The frontage of the attack, boundary between III and IV Corps and the first and second objectives are shown on the map attached (see game map).
(iii) The barrage timetable and barrage lifts for the preliminary task will be issued separately.
-
(i) III Corps will be responsible for establishing a defensive flank along the Gonnelieu-Bonavis-Crevecoeur Ridge. This flank will be pushed sufficiently far south to enable Twenty Two Ravine (SE of Gonnelieu) to be used by our Artillery.
(ii) As soon as the "brown line" is captured, III Corps will push forward troops to secure the passages across the Canal de l'Escaut at Masnieres and Marcoing, and the Masnieres-Beaurevoir line to the east thereof, in order to open a gap for the Cavalry to pass through. It is important that III Corps should occupy early the spur running down from Bonavis to Crevecoeur to facilitate the crossing of the Canal at Masnieres by the Cavalry. III Corps will take advantage of any weakening on the part of the enemy to seize the crossings at Crevecoeur with an advanced guard of all arms.
(i) Of securing our right by forming a defensive flank from our present front line, by the Gonnelieu-Crevecoeur-Seranvillers spur — as far as La Belle Etoile. This flank must be formed as early as it is possible to do so, so as to set free more of the Cavalry Corps.
(ii) Of widening the original breach by raiding southwards in the direction of Walincourt. For this purpose a cavalry detachment has been placed under the orders of III Corps Headquarters and other centres of activity should be rounded up.
- To IV Corps is allotted the task of widening the breach by extending the Cavalry and pushing westward against the rear of hostile troops holding the defended line opposite VI and XVII Corps.
In carrying out this task, the G.O.C. IV Corps will bear in mind:
(i) The importance of seizing Marcoing as soon as possible.
(ii) The importance of opening the Bapaume-Cambrai road as an avenue of approach for reinforcements and supply.
(iii) The German Headquarters at Saudemont should be put out of action as early as possible so as to dislocate the enemy defense.
(iv) Touch must be maintained with the left of the Cavalry Corps.
-
To reserve troops from V Corps will be allotted the task of advancing North and North-east to exploit success as far as the River Sensee and to push advanced guards across the Sensee River to gain and hold the heights north of the river.
-
It is not possible at present to lay down definitely the boundaries between Corps beyond the first stage.
-
Throughout the period of operations, G.O.'s IV Corps (on the front not immediately engaged), VI Corps and XVII Corps will keep a close look-out to take advantage of any weakening of the enemy to push forward advanced guards to clear the isolated area. Corps Commanders must, however, guard against delivering attacks against strongly defended positions without adequate artillery or tank support.
-
Corps and Divisional Commanders must be prepared to move their headquarters forward if the operations on Z-day are successful.
-
Separate instructions have been issued to all concerned for:
(i) Actions of the Artillery. (ii) Action of the R.F.C.
Third Army Report centre unchanged.
Louis Vaughan, Major General, General staff, Third Army
13th November, 1917. Issued at 7 a.m.
(Text in parentheses by game designer.)
Note:
British Corps Organization, 20 November
III Corps: 6th, 12th, 20th and 29th Divisions
IV Corps: 36th, 51st, 62nd, and 56th Divisions
VI Corps: 34th, 16th, and 3rd Divisions
VII Corps: 55th and 24th Divisions
Cavalry Corps: 1st, 2nd, and 5th Cavalry Divisions
The Commanders
To The Green Fields Beyond is almost, to use the current term, a role-playing game, as both players fill the boots, as it were, of the respective commanders.
General Sir Julian Byng, K.C.B., K.C.M.G
Born in 1862, Byng served as a cavalry officer in India, Sudan, and the Boer War. In 1914, he commanded the 3rd Cavalry division and later commanded Corps in Gallipoli and France. He led the Canadian Corps to their famous victory at Vimy Ridge in 1917. Like most British Army commanders, Byng was an aggressive commander who was limited by the tactical situation of the Western Front. A thoughtful, educated soldier, he was hardly the butcher popular legend makes him and his contemporaries out to be.
Kronprinz Rupprecht Von Bayern
The German commander in the Cambrai fighting was a competent commander, although it has been suggested that his Chief-of-Staff, General Kuhl, was the "brains" behind Rupprecht and that the Kronprinz owed his position to his birth rather than his talent. While it is true that he did owe his position to his title, he was a skillful defensive fighter, as was seen at Third Ypres and Cambrai.
Divisional Organizations
British Infantry Division (18,825 men)
Divisional HQ
Three Infantry Brigades
- Four Infantry Battalions (16 Lewis LMGs each)
- One MG company (16 Vickers MMG)
- One Lt. Trench Mortar Co. (8 x 3" Mortars)
HQ Divisional Artillery
- Two Artillery Brigades (16 x 18-pounders and 8 x 4.5" howitzers each)
- Three Med. Trench Mortar Batteries (4 x 2" mortars each)
- One Hvy. Trench Mortar Battery (4 x 9.45" mortars)
- One Divisional Ammunition Column
Divisional Engineers
- Three Field Companies
- One Signal Company
One Pioneer (Infantry) Battalion (with 8 Lewis LMGs)
One Divisional MMG Company (16 Vickers MMGs)
Three Field Ambulance Units
One Sanitary Section
One Mobile Veterinary Section
One Divisional Train (four companies)
German Infantry Division, Standard Organization (12,253 men)
Divisional HQ
One Infantry Brigade HQ
- Three Infantry Regiments
Divisional Artillery Command
- One Artillery Regiment (Two battalions of 77mm guns, one of 105mm howitzers, each battalion of three 4-gun batteries)
One Pioneer Battalion
- Two Field Companies
- One Searchlight Section
- One Trench Mortar Company
One Cavalry Squadron
One Telephone Detachment
One Divisional Motor Transport Column
One Bearer Company
Two Field Hospitals
One Veterinary Hospital
German Infantry Regiment
Regimental HQ
Three Infantry Battalions
- Four Infantry Companies (3 Bergmann LMG each)
- One MG company (12 Spandau MMG)
Bibliography
The research for Green Fields was fortunately straight-forward, centering around the official history and supporting works. These latter include the following:
Wilfred Miles. Military Operations France and Belgium, 1917: The Battle of Cambrai. London: 1948. (best single source)
Reichsarchiv. Der Weltkrieg, b. XIII. Berlin: 1942. (good appendices)
Reichsarchiv. Die Tankschlacht bei Cambrai. Berlin: 1929. (good)
Minstere de la Guerre. Les Armees Francais Dans le Grand Guerre, tomes VI, X. Paris: 1929-33. (for data on French)
Historical Section, Committee of Imperial Defense. Orders of Battle. London: 1929-38. (British OB data)
H.A. Jones. The War in the Air, Volume 4. Oxford: 1934. (for air data)
The following non-official works were consulted:
Robert Woollcombe. The First Tank Battle. London: 1917. (good)
Bryan Cooper. The Battle of Cambrai. New York: 1978. (fair)
War Office. Handbook on the German Army, 1917 and 1918 editions (reprints). London: 1973, 1976. (very useful)
The History of the 25th Division. London: 1922.
Balk. The Development of Tactics During the War. Leavenworth: 1927. (the best work on its subject)
B.H. Liddel Hart. The Tank, Volume 1. London: 1959. (good, but biased)
Shelford Biddel. Gunners at War. London: 1972. (artillery tactics)
John Foley. The Boiler-Plate War. London: 1963. (tank history)
G. Ludendorf. My War Memories, Volume II. London: 1920.
John Terraine. Haig: The Educated Soldier. London: 1966. (good on plans)
J.F.C. Fuller. Tanks in the Great War. London: 1927.
The following eye-witness account was used.
Mr. Thomas Phillips, M.M. and Bar (formerly of 1st Wiltshires, 7th Brigade, 25th Division).
Designer's Notes
Cambrai is a situation that really cried to be done. It had all the elements of a good game — both sides on the offensive and defensive, balance, a premium on player skill, the chance of something really decisive occurring. I was very pleased to be able to do a game on the subject. All that remains to be seen is whether you will be pleased with the result. The game itself was not easy to design and develop — few of them are — but it comes close, in my mind, to what was happening sixty Novembers ago in northern France.
There was another game on Cambrai. Published back in '74 by the late Rand Games Associates, it was a fun game, even if the OB was a bit off; the British could never duplicate their first day advance, and the whole thing was too mobile for 1917. I gave the chaps working on it some ideas, which they used to good effect, and I was left to ponder how a full-sized Cambrai game should be done.
I am going to go way out on a limb and say that I am not sure that the game you are holding is how it should have been done. I started the game fresh from Air War and the transition from one highly detailed game to another seemed natural. The weird combat phase system is basically designed to give you the option to attack/move, move/attack, move/move (for mobility) or attack/attack (for heavy fighting) for each unit. It's basically simple if looked at in those terms. The supply and artillery rules are relatively complicated, but this was mandated by the real situation. The barrage plans worked out before the battle were extremely complex, and this element of planning should be as much part of the game as moving the brigades and regiments. Similarly, supply was important, but not simple. Cambrai depended on surprise and was not intended to be a "big push" on the scale of the Somme or Passchendaele. The British could not build up the massive dumps or construct the transport and signal systems that they did before the larger, less successful offensives. Third Ypres and the U-boats had put a strain on British munitions production as did their contribution toward equipping the American Expeditionary Force, which had no worthwhile indigenous weapons except for small arms. The German economy was dying. Bread riots had started at home as early as the winter of 1915/16. Compounded by the massive expenditures during 1917 and the need to stockpile reserves of supplies for the 1918 spring offensives, the German logistic situation at Cambrai was even more difficult than the British.
Which may go to explain why both subjects are treated in such depth in the game, and, as a consequence, the game takes quite a long time to play, and a game-turn takes thirty minutes to an hour. To those who think that this detail has made cumbersome an essentially thrilling and suspenseful situation, I hope that you can see the reasons that I decided to approach the game the way I did. At the risk of sounding egocentric, I designed and developed the game to please myself. If you like it, that is excellent but secondary. The game is Cambrai as I have been given leave to see it, not Cambrai to a formula or Cambrai made into an exciting game. The game designer is a master of reality to an extent that would be the envy of every schizophrenic. I could have made the game as mobile and fluid as any of Rommel's masterpieces. And no one would have been the wiser. But I would not have liked that, so I resisted the impulse to turn the game into an historical novel.
The rules against "leapfrog advances" proved difficult to write, but it is really aimed at the British actions in the northern sector (56th Division on up) in the first few game-turns. These units should really not insinuate themselves through German lines or try to cut off German units by simply moving adjacent to them. That is not the way things were done in 1917. At least not by the British. I hope all the players will remember that they are supposed to beat the Germans and not the rules, so please do not get too unhistorical in this respect. Broken down tanks retain a Movement Allowance because all twelve tanks in the company have not broken down, and those that are still operating are dragging back those who are not. The British also had several Mark II tanks fitted with cranes and heavy Holt tractors that were employed in tank recovery work. The Germans did not capture many repairable tanks that were just lying around. I also gave a Defense Advantage to units defending in enemy trenches, even though the fire-steps and parapets face the wrong way and they are all ranged in by enemy artillery against just such an eventuality. Yet the basic protective effect of the trenches was still there, and the troops occupying them would soon consolidate the position, using the sandbags and whatever other material was to
Tank Comparison
This chart shows how the tanks used at Cambrai — the Mk IV Male and Female (the Females predominated) — compare with the M60A1, the current U.S. Army main battle tank.
| Mk IV Male | Mk IV Female | M60A1 | |
|---|---|---|---|
| Length | 26'5" | 26'5" | 30'6" |
| Width | 13'6" | 10'6" | 11'11" |
| Trench Crossing | 10'0" | 10'0" | 8'6" |
| Fording (unprep.) | 4'6" | 4'6" | 4'0" |
| Weight | 28 tons | 27 tons | 54 tons |
| Max. Armor | .5" | .5" | 8.4" |
| Suspension | unsprung | unsprung | torsion bar |
| Engine | 105 hp Daimler | 105 hp Daimler | Continental diesel 750 hp |
| Speed | 3.7 mph | 3.7 mph | 30 mph |
| Fuel | 70 gal | 70 gal | 375.2 gal |
| Range | 35mi | 35mi | 310.7mi |
| Armament | 2 x 57mm/23cal, 4 x 7.7mm | 6 x 7.7mm | 1 x 105mm/51cal, 1 x 7.62mm, 1 x 12.7mm |
| Crew | 8-9 | 8-9 | 4 |
| Miles Between Breakdowns | 20-35 | 20-35 | 200 |
| Ammo | 204 gun, 5640 MG | 12972 MG | 63 gun, 6850 MG |
hand (including the bodies of the former occupants).
As I write this, I am sitting at my typewriter in my extremely comfortable office, a mug of hot, sweet, tea by my right hand, and telling you what the Battle of Cambrai was like. That is a delusion. All I can do is provide you with cardboard pieces and a paper map, and instructions on what to do with them, and maybe some words of historical commentary. But if you really want to know what happened at Cambrai, you must seek and look further. Can you feel the confusion and chaos, the reports, false and true, that filled British headquarters when the counterattack hit? Can you think what it was like to see the ranks of feldgrau figures appear two hundred yards away, peering through the fogged eyepieces of a gasmask into the backsight of a Lee-Enfield rifle? I can only tell you what happened. I cannot tell you what was in the minds and souls of the men who fought the battle. I must leave it to the artists to tell you this. I am no artist. I design wargames. Despite all its admitted limitations and artificiality, if To The Green Fields Beyond gives you some insight into what happened in November, 1917 — not just the moving of units (or cardboard counters) but the wider forces, the entire context of the battle, and the war it was fought in — then neither your time or my own was wasted.
Abbreviated Sequence of Play
A. British Player Turn
Reinforcement Phase Tank Repair Phase Command Control Phase (Campaign Game) Initial Air Phase (Optional) Initial Barrage Combat Phase Initial Ground Combat Phase Initial Movement Phase Second Air Phase (Optional) Second Barrage Combat Phase Second Ground Combat Phase Second Movement Phase Tank Breakdown Phase
B. German Player Turn
Reinforcement Phase Initial Air Phase (Optional) Initial Barrage Combat Phase Initial Ground Combat Phase Initial Movement Phase Second Air Phase (Optional) Second Barrage Combat Phase Second Ground Combat Phase Second Movement Phase
C. Game-Turn Record Interphase
[27.0] Charts and Tables
Terrain Effects Chart (referenced as Case 5.7)
| Terrain Type | Infantry (MP) | Cavalry (MP) | Artillery or Depot (MP) | Tanks (MP) | Combat Effects |
|---|---|---|---|---|---|
| Clear | 1 | 1 | 1 | 1 | No effect |
| Road | 1 | 1 | 1 | 1 | No effect |
| Village | 1 | 1 | 1 | 1 | No effect |
| Swamp | 3 | 3 | P | P | Inf or Cav defender doubled |
| Trench | +1 | +2 | +2 | +1 | Inf or Cav defender doubled |
| Wood | 2 | 2 | 2 | 4 | Defender doubled |
| City | 1 | 1 | 2 | 2 | Defender doubled |
| Canal hexside | P | P | P | P | Prohibited |
| Ridge hexside | – | – | – | +1 | Tank units halved attacking across |
| Slope hexside | +1 | +1 | +3 | +4 | Tank units halved attacking across |
| Ditch | – | +2 | +3 | +4 | Tank units halved attacking across |
| Stream hexside | +1 | +1 | +1 | +4 | Tank units halved attacking across |
| Type A Bridge (All Arms) | +1 | +1 | +1 | +1 | |
| Type B Bridge (No Tanks) | +1 | +1 | +1 | P | |
| Type C Bridge (Cav & Inf) | +1 | +1 | P | P | Attacker halved attacking across |
| Type D Bridge (Inf) | +1 | P | P | P | Attacker halved attacking across |
| Artillery Emplacement | – | – | – | – | Artillery defender doubled |
Explanation: P = Prohibited; – = Not applicable (depends on other terrain in hex or on hexside. Note that units entitled to double defensive strength for two terrain types are tripled — not doubled twice.)
[8.41] Standard Combat Results Table
Combat Odds Ratio (Attacker to Defender)
| Die | 1-3 | 1-2 | 1-1 | 2-1 | 3-1 | 4-1 | 5-1 |
|---|---|---|---|---|---|---|---|
| 1 | Bd | Bd | Bd | Dd | Dd | Dd | Dc |
| 2 | CA | CA | Bd | Bd | Bd | Dd | Dd |
| 3 | Ad | Ad | CA | Bd | Bd | Bd | Dd |
| 4 | Ad | Ad | CA | CA | Bd | Bd | Bd |
| 5 | Ad | Ad | Ad | CA | CA | Bd | Bd |
| 6 | Ac | Ad | Ad | Ad | CA | CA | CA |
[8.42] Mobile Combat Results Table
Combat Odds Ratio (Attacker to Defender)
| Die | 1-3 | 1-2 | 1-1 | 2-1 | 3-1 | 4-1 | 5-1 |
|---|---|---|---|---|---|---|---|
| 1 | A1 | Dd | D1d | D2d | D2c | D2c | D2c |
| 2 | A1 | D1 | Dd | D1d | D2d | D2c | D2c |
| 3 | Ad | Ad | D1 | Dd | D1d | D2d | D2c |
| 4 | Ad | Ad | Ad | D1 | Dd | D1d | D2d |
| 5 | Ad | Ad | Ad | Ad | D1 | Dd | D1d |
| 6 | A2c | Ad | Ad | Ad | Ad | D1 | Dd |
Explanation (Standard and Mobile Combat Results): A = Attacker; D = Defender; 1 or 2 = All affected units must retreat one or two hexes as indicated; d = All affected units immediately Disrupted or, if already Disrupted, reduced to Cadre strength; c = All affected units immediately reduced to Cadre strength or, if already at Cadre strength or Disrupted, removed from play; Bd = Both Disrupted — all units of the weaker force immediately Disrupted (as in a d result), and units of the stronger force totaling at least an equal number of Attack Strength or Barrage points are immediately Disrupted (as in a d result); CA = Counterattack — defending force may immediately attack one of the adjacent hexes from which the attack originated, (but may not use any supporting artillery for barrage of any kind) using the Combat Results Table to which it would normally be entitled. If the defending force does not Counterattack, it must retreat two hexes; if the defending force does Counterattack, the unit(s) it attacks may not use S.O.S. barrage. Counterattacks may result in further Counterattack results, in which case the process is repeated.
Note: Results may appear in combination. For example, D2c = Defender retreat two hexes and reduce to Cadre strength.
[9.35] Drumfire Barrage Combat Results Table
Barrage Points
| Die | 1-2 | 3-5 | 6-11 | 12-17 | 18-23 | 24-29 | 30-35 | 36+ |
|---|---|---|---|---|---|---|---|---|
| 1 | D* | D† | D | D | D | Dc | Dc | Dc |
| 2 | – | – | S | D | D | D | Dc | Dc |
| 3 | – | – | – | S | D | D | D | Dc |
| 4 | – | – | – | – | S | D | D | D |
| 5 | – | – | – | – | – | S | S | S |
| 6 | – | – | – | – | – | – | – | – |
Explanation: D = All units in the barraged hex immediately Disrupted, reduced to Cadre strength or, if already at Cadre strength, removed from play (however, see Note); S = All units in barraged hex Suppressed (see Case 9.33); D* = Possible Disruption (roll die again and treat a roll of 1 or 2 as a D result; any other roll is No effect); D† = Possible Disruption (roll die again and treat a roll of 1, 2, 3, or 4 as a D result; any other roll is No effect); – = No effect. Note that any result (other than No Effect) on this table also functions as a Suppressed result.
The appropriate column for Drumfire Barrage resolution is shifted one to the left against:
- infantry or cavalry units in a trench or city hex
- artillery units in an artillery emplacement or city hex
The column is shifted two to the left against:
- infantry or cavalry in a combination trench-city hex
See Case 9.32 for different types of units occupying the same barraged hex.
[9.44] Rolling Barrage CRT
Barrage Points
| Die | 1 | 2 | 3-5 | 6 | 7-12 | 13-18 | 19-24 | 25-30 | 31+ |
|---|---|---|---|---|---|---|---|---|---|
| 1 | 1 | 1 | 2 | 2 | 3 | 3 | 3 | 4 | 5 |
| 2 | – | 1 | 1 | 1 | 2 | 3 | 3 | 4 | 4 |
| 3 | – | – | 1 | 1 | 1 | 2 | 2 | 3 | 4 |
| 4 | – | – | – | 1 | 1 | 1 | 1 | 2 | 3 |
| 5 | – | – | – | – | – | – | – | 2 | 3 |
| 6 | – | – | – | – | – | – | – | – | 2 |
Explanation: # = Number of columns that units of any kind belonging to the Phasing Player may shift to the left (to higher Combat Ratio) in the immediately ensuing Ground Combat Phase when attacking unit(s) to which Rolling Barrage result is applied; – = No effect.
Note: Unlike Drumfire Barrages, Rolling Barrages do not experience any Combat Results Table shifts.
[11.43] Supply Point Cost Schedule
| Action | Distance 0-7 | Distance 8-20 | Distance 21+ |
|---|---|---|---|
| Attacking (other than Barrage) | 1 | 2 | 3 |
| Rolling, Interdiction, Drumfire, or Direct Support Barrage | 1 | 2 | 3 |
| Hurricane Rolling or Hurricane Drumfire Barrage | 3 | 6 | 9 |
| S.O.S. Barrage | 0 | 0 | 0 |
Explanation: Costs are Supply Points per brigade/regiment to perform the action at the indicated distance (in Movement points) between unit and Supplying depot.
[11.44] Supply Point Index
A track numbered 1 through 60, used with markers to record each Supply depot's current Supply point total.
[21.54] Air-to-Air Combat Results Table
| Die | Effect |
|---|---|
| 1 | No Effect |
| 2, 3 | One Enemy air unit must abort its mission and be removed from the map (it may return on the first Air Phase of the owning Player's next Player-Turn, subject to availability). If more than one Enemy air unit occupies a hex, the owning Player selects the unit that aborts. |
| 4 | As on a roll of 2 or 3, with the additional stipulation that the aborted air unit is Disrupted as well. |
| 5 | One Enemy air unit is Disrupted (it is not forced to abort). |
| 6 | As on a roll of 2 or 3, with the additional stipulation that the aborted air unit is reduced to Cadre strength as well. |
Turn Record Track
Explanation: Scenario start and end points are referenced with the Case number of the particular Scenarios (25.1 = British Breakthrough; 25.2 = Battle for Bourlon; 25.3 = German Counter-Attack; 25.4 = Campaign Game). Reinforcements are keyed as B for British, G for German, and (b) for British reinforcements appearing only in the German Counter-Attack Scenario.
| Turn | Date | Scenario markers | Reinforcements |
|---|---|---|---|
| 1 | 20 Nov | Start 25.1, 25.4 | |
| 2 | 21 Nov | B,G | |
| 3 | 22 Nov | End 25.1 | B,G |
| 4 | 23 Nov | Start 25.2 | G |
| 5 | 24 Nov | B,G | |
| 6 | 25 Nov | G | |
| 7 | 26 Nov | G | |
| 8 | 27 Nov | End 25.2 | B,G |
| 9 | 28 Nov | G | |
| 10 | 29 Nov | B,G | |
| 11 | 30 Nov | Start 25.3 | G |
| 12 | 1 Dec | B,G,(b) | |
| 13 | 2 Dec | G,(b) | |
| 14 | 3 Dec | (b) | |
| 15 | 4 Dec | End 25.3 | (b) |
| 16 | 5 Dec | ||
| 17 | 6 Dec | End 25.4 |
Terrain Key
The map uses the following symbols: Clear, Wood, City, Village, Road, Railroad, Trench, Artillery Emplacement, Swamp, Canal, Stream, Ditch, Slope, Ridge, Bridge.