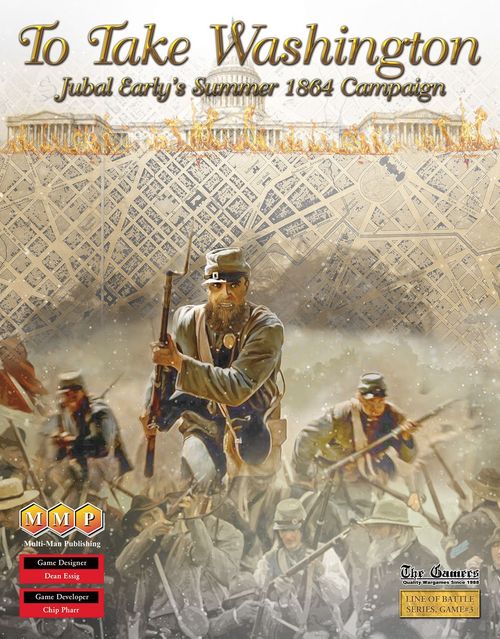
To Take Washington: Jubal Early's Summer 1864 Campaign
To Take Washington: Jubal Early's Summer 1864 Campaign Rulebook
Table of Contents
Table of Contents
- 1.0 Common Special Rules
- 2.0 Confederate Special Rules
- 3.0 Federal Special Rules
- 4.0 Linked Games
- 5.0 Optionals
- 6.0 Scenarios
- 6.1 The Monocacy and Fort Stevens Campaign
- 6.2 The Battle of Monocacy: Traditional Start
- 6.3 The Battle of Monocacy: Regular Start
- 6.4 The Battle that Saved Washington: Monocacy on the smaller scale
- 6.5 Buttermilk Rangers to the Rescue: McCausland's Attack
- 6.6 Hold the Bridges: Monocacy Junction
- 6.7 Short, Decisive, and Bloody: Gordon's Attack
- 6.8 The Whiz of Flying Iron: Monocacy 3:30pm start
- 6.9 Line of Retreat: Jug Bridge
- 6.10 The Battle of Fort Stevens: A Desperate Engagement
- Research Notes
- Developer's Notes
- Union Seniority List
- Confederate Seniority List
- Union Ft. Stevens OOA
1.0 Common Special Rules
1.0a Breastworks. Neither player can create any Breastworks markers during play.
1.0b Fortifications. Forts act as Protective Terrain on the Combat Table and count for the Terrain DRM on the Morale Table for fires entering their hex across their marked hexsides (including its corners). Apply LoB 1.7k here. They are also treated like Breastworks when charged.
Entrenchments and Rifle Pits act as Protective Terrain on the Combat Table and count for the Terrain DRM on the Morale Table but only for fires entering via the marked hexsides.
The only artillery units allowed in a Fort are those that set up there. The artillery in a Fort hex cannot be replaced. The artillery in a Fort hex (even a two hex Fort) cannot move from one hex to the other or change Facing. If there is no artillery remaining in a Fort hex, it is possible to put infantry into it. LoB 3.2d remains in effect.
The hR/SG guns in any Fort cannot move or Retreat (if they or their stack suffers a Retreat result in a Charge, the artillery is destroyed; ignore any Retreat or Loss results from regular Fire Combat generated Morale Table rolls). They cannot be captured. This rule only applies to the hR/SG artillery in a Fort hex, never to any other unit.
A LOS from outside a Fort can enter a Fort hex but can never pass through such a hex to any hex beyond it (including one in the same Fort).
Blockhouses are too small to be counted as fortifications of any sort for a field battle and are included only for historical interest. The entrenchments shown near Blockhouse #1 represent the effect of the railroad fills and cuts around it and the bridge.
1.0c Heavy Artillery Zone. The Heavy Artillery Zone includes all hexes south of the red line on the Ft. Stevens map provided that the hex is in the Frontal Fire Arc of any of the hR or SG artillery units in any of the Fort hexes. There is no LOS needed, merely being in the Frontal Fire Arc of at least one battery is enough. The only effect of this zone is that no Confederate unit can enter such a hex if it is in Column or Mounted Formation. Units with initial entry Move Orders to move within the Zone may deploy into Line and proceed to those positions, but remain under a Move Order and cannot advance into Small Arms range of Union forces. Once Ft. Stevens is taken, Confederate units may enter Column south of the Ft. Stevens hexrow starting at 48.xx, inclusive.
Exceptions: If a unit is forced into Column as part of a Skedaddle or as a Reserve (LoB 10.4c), the Heavy Artillery Zone does not restrict the ability of the unit to be in Column or Mounted Formation.
1.0d Mounted Cavalry. When Mounted Cavalry Charges other Mounted Cavalry, all the cavalry involved has all-around Frontal Facing during the execution of the Charge. Mounted Cavalry does get an Opening Volley, but do so on the Range 1 column and losses are not doubled.
Cavalry marked as Open Order (with a Bugle) remain Open Order when Mounted (Mtd). The following rules apply to Mounted Open Order Cavalry:
- LoB rules 9.4b (Open Order Cavalry may also be Mounted when not Capable), 9.4c, d, and h are in effect.
- LoB rule 9.4e applies to Open Order Capable Mounted Cavalry even when charged by Mounted Cavalry.
- Closing Rolls are required when Charging.
- They cannot conduct a Fire Activity.
If Confederate cavalry crosses the river at Worthington's Ford, it may not move EAST of the 32.xx hexrow (inclusive). The 8th Ill Cavalry and the Loudoun Rangers must withdraw to and remain EAST of the Georgetown Pike (inclusive) and SOUTH of the Railroad once any Confederate cavalry unit is within Small Arms range of Union Infantry.
1.0e Map Notes.
a) The various cemetery plots and boundaries on the map have no effect on play.
b) The Covered Bridge on the Monocacy River can be burned. The Union player can announce that he is attempting to set the Bridge Ablaze any time there is one or more Confederate units w/i 3 hexes of the bridge. Once this is announced, roll one die each turn at the start of the Union Player Turn to see if the bridge catches fire. On a roll of 5-6 the bridge lights; place the Bridge Ablaze marker on the bridge and the bridge is considered to be destroyed for the rest of the game. On any other roll, there is no effect but the player must roll again the next turn. If a Confederate unit enters the bridge before it is Ablaze, the bridge can never be torched (if the rolls are still occurring they cease). The Union player is never forced to set the bridge on fire if he chooses to never start rolling.
1.0f The Turn Record Chart. To make an accurate rendition of sunrise and sunset times, the Turn Record Chart guides the player from using the 15 Minute Track (most day turns) to the hour track itself before going to the 30 Minute Track (most night turns).
For example: At 6:00 p.m. in the evening, the player continues to use the 15 Min Track and marker. When you are about to start the 7:00 p.m. turn, set aside the 15 Min Track marker and use the Hour marker (only) for the 7:15, 7:30, 7:45, 8:00, 8:15, and 8:30 p.m. turns. The next turn after 8:30 p.m. is 9:00 p.m. at which point, the Hour marker will be in the 9:00 p.m. box and the marker used for the 15 Min Track earlier will go in the ":00" part of the 30 Min Track. Use this track normally until the process reverses itself at 4:00 a.m.
1.0g Supply Trains. There are no Supply Trains in this game, instead use the following:
Monocacy: No Replenishment takes place on either side during the battle. Batteries on both sides Deplete normally.
Ft. Stevens: Confederate batteries depleted at Monocacy are replenished before arriving at Ft. Stevens. There is no Replenishment during the battle; treat Confederate Depletion results normally. Ignore any Depletion results for any Union battery.
2.0 Confederate Special Rules
2.1 Command
2.1a Early. Early has "Normal" Awareness.
2.1b Corps Structure. Breckinridge's Corps is normal in all ways. Rodes commands both his Corps and his division. In his case, any orders his Corps accepts (regardless of type) are automatically accepted by his division at that same moment.
2.1c The Cavalry Division. Rebel Cav brigades can be issued orders to operate out of Ransom's Command Radius. Otherwise (with the exception of McCausland) they are normal (and all orders are still issued via Ransom; it is only their content that is affected by this rule).
At start at Monocacy, 25 Va, 37 Va Bn (McCsld/Cav) are out of Command Radius, handle them normally.
2.1d Confederate Command Peculiarities (Monocacy).
- McCausland. McCausland is independent and can issue himself any kind of order via Initiative, including orders to attack.
- Blackford. Blackford is a Brigade Leader.
2.1e Orders (Monocacy). Units must have Attack orders to be Committed (see 4.0d below, especially the Exception for Artillery Battalions). Early can issue Move Orders to any Confederate Command (even if Uncommitted).
When less than an entire division is committed, the order IS NOT reissued to the affected brigades; such orders go on Division acceptance. In cases where all or some of a Division Attacks (even one brigade), roll for Fluke Stoppage using the Division Leader.
Uncommitted Units. Uncommitted Artillery cannot Unlimber; Uncommitted Infantry or Cavalry can be in any Formation. Uncommitted units can follow behind with the Committed parts of their Division or Corps in No Orders status. These units can also remain in place, even if that means they will be out of Command Radius, should the player desire. In the latter case, if they move at all, they must move to be closer to being in Command Radius than when they started. Brigades that are not Committed can be used as Reserves for their division, but cannot 'take over the orders' of the division without being Committed themselves.
Committed Units. Committed brigade(s) of a partially Committed division which have 'fluked out' may not be used as a Reserve and remain in a No Orders status until the Division Leader achieves Attack Recovery for them. If desired, a previously uncommitted brigade(s) may be released to continue the original order. This is the only time an uncommitted brigade may be Committed without a new order.
2.1f Confederate Command Peculiarities (Ft. Stevens). No Sneaking through the Woods. Any Confederate unit south of the Milkhouse Road (vic. 46.xx) can only enter hexes where it can trace a path free of Union units or Union ZOCs to the Milkhouse Road or 7th Street Turnpike and then via roads to Entry Area A.
2.2 Other Confederate Special Rules
2.2a Armistead 'Lindsay' Long. BG Long is the commander of the Valley Army's Artillery. He can post any battery, act as an Artillery Leader, and give Initiative orders to any Artillery Battalion.
2.2b Evans and Atkinson. If Evans (Evans/Grd) becomes a casualty, replace him with Atkinson (Evans/Grd). Evans was wounded at Monocacy and Col. Atkinson finished the fight there and commanded at Ft. Stevens. If Atkinson becomes a casualty, use the regular Repl Leader.
3.0 Federal Special Rules
3.1 Command
3.1a Wallace. Wallace has "On Fire" Awareness. Wallace can issue orders to any of the subordinate leaders in 8th Corps and to Ricketts (3/6). Treat the 8th Corps HQ as an Army HQ if it must move.
3.1b McCook. McCook has "Normal" Awareness. McCook is the army commander over all the various formations at Ft. Stevens and can issue orders to any leader on that map.
The Monocacy River does not block Command Radius.
3.1c Lincoln. Lincoln is only present as historical color. He cannot issue orders or serve any game function. Place him on arrival in either hex of Ft. Stevens and remove him when the OOA requires it. On arrival, the Confederate player rolls one die. On a 5-6, Lincoln is hit by a sharpshooter. On any other roll there is no effect. Make only one roll to see if he is hit.
If Lincoln is hit, roll one die.
- On a 1-3, the wound is a trophy, nothing more.
- On a 4-5, Lincoln fights infection and is weakened for a month or more, but survives.
- On a 6, Lincoln dies of his wound. I will let the player speculate on the effect, if any, on the outcome of the war.
Results against Lincoln do not affect game victory.
3.1d Command Radius.
On the Monocacy map...
Union Cav operates freely without restriction based on Command Radius or orders. However, they cannot be used to 'jump' HQs. Leib Det (Cav/8) is not awarded this freedom and operates normally as part of Brown's Detachment below.
All 8th Corps units can trace Command Radius to any 8th Corps leader (Exception: Clendenin, 3.1e below) OR to the HQ. Use the Command Radius applicable to the Leader/HQ being used. Units can transfer freely from one leader to another at the player's will.
3/6 uses the 8th Corps HQ; otherwise 3/6 functions normally.
On the Ft. Stevens map...
Any Union unit within 6 hexes of any Fort hex is automatically in Command Radius. Orders are handled normally. Units can transfer freely from one Fort hex to another at the player's will. They must physically move on the map to do so.
Cav Depot units operate freely without restrictions based on Command Radius or orders if within 6 hexes of a Fort hex or south of the Union entrenchment lines. However, they cannot be used to 'jump' HQs.
3.1e Union Command Peculiarities (Monocacy).
- Brown. Brown and the units assigned to him in the scenarios are independent. Brown can issue himself any desired orders by Initiative, including orders to attack. The units must remain within Brown's Command Radius as a Brigade Leader. If at any time, all of Brown's units are destroyed and/or are within Command Radius of Tyler, remove Brown from play. If removed, he never returns and the units revert to Tyler's command.
- Tyler. Tyler is a Brigade Leader (1 SEP Brigade) acting as his own HQ. He is locked in position and depends on orders issued to him from Wallace with the exception that he can voluntarily withdraw to the 8th Corps HQ Command Radius and function normally from there. If he does the latter, any units using him for Command Radius must also withdraw with him.
- Clendenin. The 8 Ill Cav units operate without regard to Clendenin (as per 3.1d). He cannot be used to provide a Command Radius for infantry. His only purpose is to provide Morale effects for his Cavalry units.
- Wallace. Wallace is the Army Commander and the only source of non-Initiative orders. The 8th Corps HQ is a Corps HQ for the 8th Corps and 6th Corps units using it for Command Radius, but acts as the Army HQ for Wallace's orders. Wallace does not accept orders to himself for 8th Corps as a whole; instead, he issues them from the 8th Corps HQ and are then accepted and executed by the intended lower level units.
- No Orders Units. Numerous units have No Orders; in those cases, the LoB rules apply normally if the units are not exempt by other rules above.
- Out of Command Radius. As with the Confederates, numerous Union units will end up out outside of normal Command Radius. Any unit starting a player turn in such a situation can either lock down in place or move to be closer to being within Command Radius.
3.1f Union Command Peculiarities (Ft. Stevens).
- McCook and the HQ. McCook is the army commander and his HQ is the Army HQ. It is not the center of any Command Radius.
- The Separate Brigades. All brigades that are neither part of the Provisional Division nor 6th Corps are independent. The Brigade Leader in each case is the center of their Command Radius and must move and be positioned by orders from the Army HQ. The units can freely operate within that leader's Command Radius unless operating within the Command Radius extension of a Fort hex (3.1d).
- The Provisional Division. This division is a headquarter-less Command led by Meigs under the command of the Army HQ. Meigs himself marks the center of the divisional Command Radius and is bolted to the ground when he has no orders.
- 6th Corps. Wright and the 6th Corps HQ form a normal Command under the command of the Army HQ.
3.2 Green Units
3.2a Identification. Green regiments have a Green Box indicator on their counter.
3.2b Restrictions. There are several special requirements for Green regiments:
- They have a Line Movement Allowance of 4, not 6. They have a normal MA in Column.
- It costs all of their MA to change formation.
- Green regiments can freely close with enemy units (no Closing Roll).
- They cannot initiate a Charge unless Blood Lusted. If they do manage to pull that off and win, then they forego all remaining MA after entering the defender's hex and automatically trade their BL for a DG marker.
- They can never move and fire in the same phase (other than the rare possibility of a Charge).
- Green regiments never provide an Opening Volley.
- Green regiments cannot recover losses.
- When stacked with "non-Green" combat units, a Green unit must be on top.
4.0 Linked Games
Monocacy and Ft. Stevens can be played independently or as part of a campaign. For the latter, the use of the Confederate army at Monocacy will determine how rapidly Early can hit the works at Ft. Stevens. A big win there with the fewest troops will allow the Confederates to show up at Ft. Stevens the earliest with the most troops. But, as is obviously the case, using too few troops at Monocacy will make winning there earlier impossible to do. The Confederate player must find the best balance.
4.0a Baltimore or Washington? The Confederate player must select his strategic objective before Monocacy play begins. Once selected, it cannot be changed. The Union player is not to be informed of this choice until the battle of Monocacy terminates according to 4.0c below.
If the player chooses Baltimore, follow 4.0b and 4.0c below and if the Monocacy battle terminates with a Level B win using only the Level of Success Chart in 4.0d, the Confederates take Baltimore and win the campaign (otherwise the Union wins).
If the player chooses Washington, follow all three rules and the winner is determined by how the Ft. Stevens battle goes.
4.0b Commitment of Troops. Each formation the Confederate player commits to the battle at Monocacy uses 1 or more Commitment Points. The player can expend as many of these points as he wants, but their expense affects how rapidly his army can get to Ft. Stevens. No Commitment Points have been expended at the start of play. Once Committed, a formation remains Committed for the duration of the battle (no need to ever 'pay again'), but its usefulness will vary according the normal Fluke Stoppage and Attack Recovery rules as well as the orders its Command obtains). The Confederate player can Commit additional formations given the requirements below (they need to be under Attack Orders) at the start of any Confederate player turn.
Commitment Point Costs
- Cavalry Brigade or Artillery Battalion: 1 Commitment Point
- Infantry Division: 5 Commitment Points
- Infantry Brigade: 2 Commitment Points (Free if the entire division is later committed)
- Blackford's Sharpshooters (SS/Rodes): 1 Commitment Point (Free if Rodes' Division is committed)
Exceptions:
- Massie Battery (Nelson Bn) and Carpenter Battery (Carter Bn) can be posted by their leaders without any Commitment Point cost.
- Artillery Battalions are not issued Attack Orders. They become Committed when the player declares that he wishes to Commit them (for the 1 Commitment Point each). Once Committed, the Artillery Battalions maneuver normally (via orders or Initiative) and can become Unlimbered. Before Commitment (aside from the two batteries above), Artillery Battalions can move normally (including by Initiative), but CANNOT Unlimber.
A formation can only be Committed if its Command has been issued an Attack Order. A Command can be issued a Move Order, but such a Command cannot have any Committed formations within it. (A Command that obtains an Attack Order and Commits all or some of its sub-formations cannot later, in the Monocacy battle, make use of a Move Order.)
A Reserve established as part of an Attack Order per LoB 10.4c is Committed and suffers Fluke Stoppage if its division 'flukes out'. Uncommitted brigade(s) of a partially Committed division may serve as a Reserve for Fluke Stoppage rolls, but are not affected by Fluke Stoppage until they have been Committed (see 2.1e).
Units in a formation that is not Committed are restricted to only doing the following:
- Fire in place (if already in Command Radius)
- Change Formation (artillery units cannot, however, Unlimber, see Exceptions above) and Facing
- Normal morale functions (they Retreat normally, etc.)
- Follow a Move Order (if their Command is capable of having one)
- Move in order to stay in Command Radius but they cannot move within Small Arms range of the enemy.
- If it is neither following a Move Order nor moving to stay in Command Radius, such units are bolted to the hex they are already within.
4.0c Termination of Monocacy: The 7 Unit Rule. If the Confederates chose Washington as the strategic objective, the Battle of Monocacy ENDS when the Jug Bridge, the RR Bridge, and the Covered Bridge (if not burned) are in Confederate hands (meaning the Confederates were the last to move any unit into each hex the bridge connects across the river) at the end of any Confederate player turn.
If the Confederates chose Baltimore, apply the rule above but only the Jug Bridge must be taken.
Whether the bridges have been taken or not, the Battle of Monocacy ENDS automatically the instant there are 7 Union infantry and/or cavalry units Wrecked or Eliminated. This represents Wallace and his troops deciding that discretion is the better part of valor. Union cavalry which is Open Order Capable when it is Wrecked or Eliminated does not count toward the 7 units.
When this occurs, record the time and the number of Commitment Points used.
4.0d March on Washington (if chosen). Based on the Commitment Points used and the time at which the Battle of Monocacy terminates, use the chart below to determine the successfulness of the Monocacy Delaying Action. Select the highest numbered level of success that applies. For example, if the termination occurs at 4:00 (Level II) but 15 Commitment Points were used (Level III), the success level used in Level III.
| Level | Time | Commitment Points |
|---|---|---|
| I | Before 4:00 | 10 or less |
| II | 4:00-5:45 | 11-13 |
| III | 6:00-7:00 | 14-16 |
| IV | Never | 17 or more |
The Success Level determines the Entry times used for the Valley Army on the Ft. Stevens map. Other than the changes listed below and those in 1.0g, units arrive with the strength they had in play at the end of the Battle of Monocacy. There is no overnight Loss Recovery between Monocacy and Ft. Stevens (recover losses normally in the night between the two days of Ft. Stevens).
In a campaign game where play proceeds to the Ft. Stevens map, the Union player sets up his available units and play physically begins the turn the first Confederate unit enters the map OR 3:30 p.m., 11 July whichever happens first. (The latter is the entry time of the first 6th Corps units).
| Level | Initial Entry (Turn X) |
|---|---|
| I | 2:00 |
| II | 3:00 |
| III | 4:00 |
| IV | 6:00 |
Confederate Arrival at Ft. Stevens (All enter via Entry Area A)
Add to Confederate OOB: Imboden Cav Bde (Imb/Cav) Imboden, 18 Va, 23 Va, 62 Va, Unauthorized Va Cav (Imb/Cav), Lurty Arty Battery (Cav)
Remove from the Confederate OOB: McCausland's Cav Bde and Jackson's Battery
| Turn | Units |
|---|---|
| X | Early, Valley Army HQ, Long, Breckinridge, B Corps HQ, Ransom, Cav HQ, Imboden Cav Bde, Lurty Arty Battery (Cav) |
| X+1hr | 1x Infantry Division (Historically: Rodes Div (Rodes/R)), R Corps HQ, Nelson Arty Bn |
| X+2hr | 1x Infantry Division (Historically: Ramseur Div (Ram/R)), Carter Arty Bn |
| X+3hr | 1x Infantry Division (Historically: Gordon Div (Grd/B)) |
| X+4hr | 1x Infantry Division (Historically: Echols' Div (Brk/B)), King Arty Bn |
For each entering reinforcement group, the player may designate any hex north of 54.xx (inclusive) as its destination. Record the desired hex at the time of each group's entry.
Design Note: In most games, the Confederate player is allowed to bring on the Infantry Division of his choice in the slots above. Players can opt for the historical order if they wish. Allowing the player the freedom to create his own order allows him to select the divisional order based on how each division fared at Monocacy. This is exactly what Early did.
4.0e Ft. Stevens Union Restrictions. No Union unit can enter any hex north of 53.xx (inclusive) on 11 July. This restriction is removed at midnight on 11 July and does not affect play on 12 July.
4.0f Victory at Ft. Stevens. Whether played as a stand-alone game or as the termination of a campaign, victory in the Battle of Ft. Stevens is determined in the same manner. If the Army of the Valley HQ is inside any hex of Washington City at the end of play on 12 July 1864 and can trace a path off the north map edge free of Union units and their EZOCs, the Confederates win. Otherwise, they do not.
5.0 Optionals
5.1 Optional Units. These are all units that missed these actions for one reason or another. If the player wishes to include them, simply add them to the at start or OOA for the action being played as desired.
Confederate Optional Units:
- Johnson Cav Bde (Jhnsn/Cav). Johnson, 1 Md Bn, 8 Va, 21 Va, 22 Va, 34 Va Bn, 36 Va Bn Cav, Griffin Arty Battery (Cav). Sent to the off-map northern flank during Monocacy, then led the raid to Point Lookout and did not participate at Ft. Stevens.
- Jackson Cav Bde (Jksn/Cav). Jackson, 2 Md Bn, 19 Va, 20 Va, 46 Va Bn, 47 Va Bn Cav, McClanahan Arty Battery (Cav). Flank duties at Monocacy, off-map to the east at Ft. Stevens.
Union Optional Units:
- Staunton's Bde (Det/3/6). Staunton, 6 Md, 122 Ohio-b, 67 Penn. Detrained 6 miles from Monocacy and 'missed' the battle.
- Penrose's Bde (1/1/6). Penrose, 4 NJ, 10 NJ, 15 NJ (1/1/6). Arrived at Ft. Stevens 12 July with rest of 1/6 but was assigned to the Department of West Virginia and did not participate.
6.0 Scenarios
6.1 The Monocacy and Fort Stevens Campaign
This is the linked campaign encompassing both battles and utilizes rule 4.0.
General Information
- Maps Needed: All Maps
- Map Area: All
- First Turn: 10:00 am July 9th
- Last Turn: See 4.0
- First Player: Confederate
Set Up: Monocacy Maps
Confederate:
- A9.28: King, King Bn HQ, Bryan, Chapman, Lowry Batteries (King Arty Bn)
- A20.33: 12 Ala, 61 Ala (Btle/Rodes)
- A21.33: Battle, 3 Ala, 5 Ala, 6 Ala (Btle/Rodes)
- A22.32: 2 NC Bn, 45 NC, 53 NC (Grm/Rodes)
- A23.32: Grimes, 32 NC, 43 NC (Grm/Rodes)
- A24.31: 52 VA, 58 Va (Lilley/Ram)
- A25.31: Lilley, 13 Va, 31 Va, 49 Va (Lilley/Ram)
- A27.30: Rodes (Rodes & R), R Corps HQ
- A26.27: Cook, Cook Bde (Cook/Rodes)
- A27.28: 1 NC, 4 NC (Cox/Rodes)
- A28.28: Cox, 2 NC, 14 NC (Cox/Rodes)
- A29.29: 3 NC, 30 NC (Cox/Rodes)
- A29.26: Rodes Div-a (SS/Rodes)
- A30.27: Rodes Div-d (SS/Rodes)
- A32.28: Rodes Div-c (SS/Rodes)
- A32.26: Blackford, Rodes Div-b (SS/Rodes)
- A3.20: Patton, 22 Va, 23 Va Bn, 26 Va Bn (Ech/Brk)
- A3.19: Echols (Brk/B), 60 Va (Smth/Brk)
- A2.18: Smith, Thomas Lgn, 36 Va, 45 Va Bn (Smth/Brk)
- A2.17: Wharton, 30 Va Bn SS (Whtn/Brk)
- A2.16: 45 Va, 51 Va (Whtn/Brk)
- A11.19: Braxton, Carter Bn HQ, Carpenter, Cooper, Hardwicke Batteries (Carter Bn)
- A12.17: Early, A Valley HQ, Long (A Valley), Brcknrdge, B Corps HQ (B Corps), Ransom, Cav HQ (Cav)
- A14.17: Nelson Bn HQ, Kirkpatrick, Milledge Batteries (Nelson Bn)
Union:
- A55.34: 149 Ohio NG-c (1 Sep/8) (assigned to Brown)
- A44.21: 149 Ohio NG-a, 149 Ohio NG-b (1 Sep/8) (assigned to Brown)
- A47.20: Brown (Prov)
- A52.17: Leib Det (Cav/8) (assigned to Brown)
- A53.17: 144 Ohio NG (1 Sep/8) (assigned to Brown)
- A41.06: 3 Md PHB (1 Sep/8)
- A43.03: Tyler (1 Sep/8)
- B20.33: 8 Ill-a (Cav/8)
- B32.26: 11 Md-a (1 Sep/8)
- B32.25: 11 Md-b (1 Sep/8)
- B33.25: Blockhouse Battery (8 Corps)
- B33.26: Alex-a Battery (8 Corps)
- B26.24: 1 Md PHB (1 Sep/8)
- B33.22: Wallace, 8 Corps HQ, Ricketts (3/6)
- B31.21: 122 Ohio-a (2/3/6)
- B29.21: McClennan, 126 Ohio (2/3/6)
- B27.20: 110 Ohio (2/3/6)
- B32.19: 138 Penn (2/3/6)
- B31.19: 9 NY Hvy (2/3/6)
- B26.17: Truex, 151 NY (1/3/6)
- B27.17: Alex-b Battery (8 Corps)
- B27.16: 14 NJ (1/3/6)
- B23.15: 87 Penn (1/3/6)
- B27.15: 106 NY (1/3/6)
- B26.14: 10 Vt (1/3/6)
- B18.13: Loudoun Rgrs (Cav/8)
- B11.14: 8 Ill-c (Cav/8)
Ft. Stevens Map (if Washington is selected, see 4.0)
Confederate: None
Union:
- 39.35: 151 Ohio NG (-) (1 Bde)
- 39.34: Hardin, L/9 NY Hvy, A/1 Wisc Batteries (1 Bde)
- 40.29: 157 Ohio NG (1 Bde)
- 40.28: 147 Ohio NG (1 Bde)
- 47.25: 1 Maine Battery (2 Bde)
- 47.23: 9 Vet Res (1 Vet Res)
- 48.22: Invalids (2 Bde)
- 49.22: 13 Mich-a Battery (2 Bde)
- 49.21: Haskin, 13 Mich-b Battery (2 Bde)
- 49.20: K/150 Ohio NG (2 Bde)
- 49.19: Gile, 12 Vet Res (-) (1 Vet Res)
- 48.16: L/1 Ohio Battery (2 Bde)
- 47.20: McCook, Wash HQ (Wash)
- 50.07: G/150 Ohio NG (2 Bde)
- 51.07: 2 Penn Hvy Battery (2 Bde)
- 51.06: 14 Mich Battery (2 Bde)
- Anywhere south of 53.xx (inclusive): Lowell, Fry Prov, 8 Ill (Det), 2 Mass, 7 Mich-a, 7 Mich-b, 7 Mich-c, 25 NY-a, 25 NY-b (Cav Depot)
Reinforcements:
11 July
- 3:30 pm at C: Wright, Tompkins, 6 Corps HQ (6 Corps), Wheaton (2/6), Foster, 62 NY, 93 Penn, 98 Penn, 102 Penn (1/2/6), Bidwell, 7 Maine, 43 NY, 49 NY, 77 NY, 122 NY, 61 Penn (3/2/6), Grant, 1 Vt Hvy-a, 1 Vt Hvy-b, 2 Vt, 3 Vt, 4 Vt, 5 Vt, 6 Vt (Vt/2/6), Cowan Battery (6 Corps)
- 8:00 pm at C: Meigs (Prov Div), Rucker, Clerks-a, Clerks-b, Clerks-c, Clerks-d, Prov Bde (1/Prov), Paine, DC Depot, 2 DC-a, 2 DC-b, 12 Vet Res-a, 12 Vet Res-b (2/Prov)
- 9:00 pm at C: Price, Convelscnt-a, Convelscnt-b, Dist Camp-a, Dist Camp-b, Res Prov Bde-a, Res Prov Bde-b (3/Prov)
12 July
- 12 noon at 47.20: Lincoln
- 2:00 pm: Remove: Lincoln
- 2:30 pm at C: Russell (1/6), Upton, 2 Conn Hvy, 65 NY, 67 NY, 121 NY, 95 Penn, 96 Penn (2/1/6), Edwards, 6 Maine, 37 Mass, 23 Penn, 49 Penn, 82 Penn, 119 Penn, 2 RI, 5 Wisc (3/1/6)
Orders: All Union Reinforcements entering at C are to proceed to Ft. Stevens (any hex w/i 5 hexes and south of the fort hexes (inclusive) is allowed). If Ft. Stevens has been taken by the Confederates, assign the entering reinforcements any hex on or south of 18.xx as their initial destination. Once there, they must await new orders.
Victory Conditions: Use the Victory Conditions, 4.0
6.2 The Battle of Monocacy: Traditional Start
This is the standalone battle for Monocacy set at the 10:00am start with both sides idling waiting for orders.
General Information
- Maps Needed: Monocacy Maps A and B
- Map Area: All
- First Turn: 10:00 am July 9th
- Last Turn: 7:00 pm July 9th
- First Player: Confederate
Set Up: Use the Monocacy Maps set up of scenario 6.1 (Confederate and Union), as follows.
Confederate:
- A9.28: King, King Bn HQ, Bryan, Chapman, Lowry Batteries (King Arty Bn)
- A20.33: 12 Ala, 61 Ala (Btle/Rodes)
- A21.33: Battle, 3 Ala, 5 Ala, 6 Ala (Btle/Rodes)
- A22.32: 2 NC Bn, 45 NC, 53 NC (Grm/Rodes)
- A23.32: Grimes, 32 NC, 43 NC (Grm/Rodes)
- A24.31: 52 VA, 58 Va (Lilley/Ram)
- A25.31: Lilley, 13 Va, 31 Va, 49 Va (Lilley/Ram)
- A27.30: Rodes (Rodes & R), R Corps HQ
- A26.27: Cook, Cook Bde (Cook/Rodes)
- A27.28: 1 NC, 4 NC (Cox/Rodes)
- A28.28: Cox, 2 NC, 14 NC (Cox/Rodes)
- A29.29: 3 NC, 30 NC (Cox/Rodes)
- A29.26: Rodes Div-a (SS/Rodes)
- A30.27: Rodes Div-d (SS/Rodes)
- A32.28: Rodes Div-c (SS/Rodes)
- A32.26: Blackford, Rodes Div-b (SS/Rodes)
- A3.20: Patton, 22 Va, 23 Va Bn, 26 Va Bn (Ech/Brk)
- A3.19: Echols (Brk/B), 60 Va (Smth/Brk)
- A2.18: Smith, Thomas Lgn, 36 Va, 45 Va Bn (Smth/Brk)
- A2.17: Wharton, 30 Va Bn SS (Whtn/Brk)
- A2.16: 45 Va, 51 Va (Whtn/Brk)
- A11.19: Braxton, Carter Bn HQ, Carpenter, Cooper, Hardwicke Batteries (Carter Bn)
- A12.17: Early, A Valley HQ, Long (A Valley), Brcknrdge, B Corps HQ (B Corps), Ransom, Cav HQ (Cav)
- A14.17: Nelson Bn HQ, Kirkpatrick, Milledge Batteries (Nelson Bn)
Union:
- A55.34: 149 Ohio NG-c (1 Sep/8) (assigned to Brown)
- A44.21: 149 Ohio NG-a, 149 Ohio NG-b (1 Sep/8) (assigned to Brown)
- A47.20: Brown (Prov)
- A52.17: Leib Det (Cav/8) (assigned to Brown)
- A53.17: 144 Ohio NG (1 Sep/8) (assigned to Brown)
- A41.06: 3 Md PHB (1 Sep/8)
- A43.03: Tyler (1 Sep/8)
- B20.33: 8 Ill-a (Cav/8)
- B32.26: 11 Md-a (1 Sep/8)
- B32.25: 11 Md-b (1 Sep/8)
- B33.25: Blockhouse Battery (8 Corps)
- B33.26: Alex-a Battery (8 Corps)
- B26.24: 1 Md PHB (1 Sep/8)
- B33.22: Wallace, 8 Corps HQ, Ricketts (3/6)
- B31.21: 122 Ohio-a (2/3/6)
- B29.21: McClennan, 126 Ohio (2/3/6)
- B27.20: 110 Ohio (2/3/6)
- B32.19: 138 Penn (2/3/6)
- B31.19: 9 NY Hvy (2/3/6)
- B26.17: Truex, 151 NY (1/3/6)
- B27.17: Alex-b Battery (8 Corps)
- B27.16: 14 NJ (1/3/6)
- B23.15: 87 Penn (1/3/6)
- B27.15: 106 NY (1/3/6)
- B26.14: 10 Vt (1/3/6)
- B18.13: Loudoun Rgrs (Cav/8)
- B11.14: 8 Ill-c (Cav/8)
Victory Conditions: Use 4.0. Level determines level of Confederate victory.
- Level I: Decisive victory
- Level II: Major victory
- Level III: Minor victory
- Level IV: Loss
6.3 The Battle of Monocacy: Regular Start
This gets the battle going an hour after the traditional start with McCausland's Brigade having already "discovered" the Worthington Ford. The linked campaign game can be played simply by using this set up and using the set up for Fort Stevens from scenario 1 and following the rules and Victory Conditions in 4.0.
General Information
- Maps Needed: Monocacy Maps A and B
- Map Area: All
- First Turn: 11:00 am July 9th
- Last Turn: 7:00 pm July 9th
- First Player: Confederate
Set Up:
Confederate:
- A9.28: King, King Bn HQ, Bryan, Chapman, Lowry Batteries (King Arty Bn)
- A20.33: 12 Ala, 61 Ala (Btle/Rodes)
- A21.33: Battle, 3 Ala, 5 Ala, 6 Ala (Btle/Rodes)
- A22.32: 2 NC Bn, 45 NC, 53 NC (Grm/Rodes)
- A23.32: Grimes, 32 NC, 43 NC (Grm/Rodes)
- A27.30: Rodes (Rodes & R), R Corps HQ
- A26.27: Cook, Cook Bde (Cook/Rodes)
- A27.28: 1 NC, 4 NC (Cox/Rodes)
- A28.28: Cox, 2 NC, 14 NC (Cox/Rodes)
- A29.29: 3 NC, 30 NC (Cox/Rodes)
- A29.26: Rodes Div-a (SS/Rodes)
- A30.27: Rodes Div-d (SS/Rodes)
- A32.28: Rodes Div-c (SS/Rodes)
- A32.26: Blackford, Rodes Div-b (SS/Rodes)
- A41.25: 58 Va (Lilley/Ram)
- A41.24: 49 Va (Lilley/Ram)
- A40.23: 52 Va (Lilley/Ram)
- A40.22: Lilley, 31 Va (Lilley/Ram)
- A39.22: 13 Va (Lilley/Ram)
- A3.20: Patton, 22 Va, 23 Va Bn, 26 Va Bn (Ech/Brk)
- A3.19: Echols (Brk/B), 60 Va (Smth/Brk)
- A2.18: Smith, Thomas Lgn, 36 Va, 45 Va Bn (Smth/Brk)
- A2.17: Wharton, 30 Va Bn SS (Whtn/Brk)
- A2.16: 45 Va, 51 Va (Whtn/Brk)
- A11.19: Braxton, Carter Bn HQ, Carpenter, Cooper, Hardwicke Batteries (Carter Bn)
Union:
- A55.34: 149 Ohio NG-c (1 Sep/8) (assigned to Brown)
- A45.23: 149 Ohio NG-a (1 Sep/8) (assigned to Brown)
- A44.21: 149 Ohio NG-b (1 Sep/8) (assigned to Brown)
- A47.20: Brown (Prov)
- A52.17: Leib Det (Cav/8) (assigned to Brown)
- A53.17: 144 Ohio NG (1 Sep/8) (assigned to Brown)
- A41.06: 3 Md PHB (1 Sep/8)
- A43.03: Tyler (1 Sep/8)
- B20.33: 8 Ill-a (Cav/8)
- B32.26: 11 Md-a (1 Sep/8)
- B32.25: 11 Md-b (1 Sep/8)
- B33.25: Blockhouse Battery (8 Corps)
- B33.26: Alex-a Battery (8 Corps)
- B26.24: 1 Md PHB (1 Sep/8)
- B33.22: Wallace, 8 Corps HQ, Ricketts (3/6)
- B31.21: 122 Ohio-a (2/3/6)
- B29.21: McClennan, 126 Ohio (2/3/6)
- B27.20: 110 Ohio (2/3/6)
- B32.19: 138 Penn (2/3/6)
- B31.19: 9 NY Hvy (2/3/6)
- B26.17: Truex, 151 NY (1/3/6)
- B27.17: Alex-b Battery (8 Corps)
- B27.16: 14 NJ (1/3/6)
- B23.15: 87 Penn (1/3/6)
- B27.15: 106 NY (1/3/6)
- B26.14: 10 Vt (1/3/6)
Orders:
- McCausland's Bde is to capture Worthington Farm then C.K. Thomas' Farm.
- All other units have no orders.
Victory Conditions: Use 4.0. If just playing Monocacy, the Level determines level of Confederate victory.
- Level I: Decisive victory
- Level II: Major victory
- Level III: Minor victory
- Level IV: Loss
Confederates have so far used 3 Commitment Points from the following but have not yet captured any bridges (the Covered Bridge has not yet been burned): McCausland's Cav Bde, Lilley's Bde (from Ramseur's Div).
6.4 The Battle that Saved Washington: Monocacy on the smaller scale
This is the Battle of Monocacy on a smaller footprint. It uses only the southern map where most of the fighting took place.
General Information
- Maps Needed: Monocacy Map B
- Map Area: All
- First Turn: 10:00 am July 9th
- Last Turn: 7:00 pm July 9th
- First Player: Confederate
Set Up:
Confederate:
- B1.13: 25 Va (McCsld/Cav)
- B1.12: 37 Va Bn (McCsld/Cav)
Reinforcements:
- 10:15 am at B10.35: McCauslnd, 14 Va (McCsld/Cav), 16 Va, 17 Va (McCsld/Cav), Jackson Battery (Cav)
- 10:30 am at B19.35: Ramseur (Ram/R), Johnston, 5 NC, 12 NC, 20 NC, 23 NC (Jhnstn/Ram)
- 10:45 am at B19.35: Lewis, 6 NC, 21 NC, 54 NC, 57 NC (Lewis/Ram)
- 11:00 am at B19.35: Nelson, Nelson Bn HQ, Massie, Kirkpatrick Batteries (Nelson Bn)
- 12:00 pm at B19.35: Lilley, 13 Va, 31 Va, 49 Va, 52 VA, 58 Va (Lilley/Ram)
- 12:30 pm at B10.35: Braxton, Carter Bn HQ, Carpenter Battery (Carter Bn)
- 2:00 pm at B10.35: Gordon (Grd/B), Evans, 13 Ga, 26 Ga, 31 Ga, 38 Ga, 60 Ga, 61 Ga, 12 Ga Bn (Evans/Grd), Terry, Jones Bde, Steuart Bde, Stonewall Bde (Terry/Grd), York, Hay Bde, Stafford Bde (York/Grd), King, King Bn HQ, Bryan, Chapman, Lowry Batteries (King Arty Bn)
- 2:45 pm at B10.35: Cooper, Hardwicke Batteries (Carter Bn)
- 3:00 pm at B10.35: Echols (Brk/B), Patton, 22 Va, 23 Va Bn, 26 Va Bn (Ech/Brk), Smth Thomas Lgn, 36 Va, 45 Va Bn, 60 Va (Smth/Brk), Wharton, 30 Va Bn SS, 45 Va, 51 Va (Whtn/Brk)
- 3:30 pm at B19.35: Milledge Battery (Nelson Bn)
Orders:
- Early, Breckinridge, and Rodes and their respective HQ's are not set up on the map. Early can issue orders as normal and both Breckinridge and Rodes are always considered to be within Command Radius and always stacked with their HQs.
- McCausland's Bde is to cross the Monocacy River at Worthington Ford and to capture Worthington Farm then C.K. Thomas' Farm.
- Ramseur's Div is to clear the Union cavalry screen and then await further orders.
- Gordon's Div is to cross the Monocacy River at Worthington Ford and attack the Union positions north of the Georgetown Pike.
- Breckinridge's (Echols) Div is to move to B10.32 and go into reserve.
Union:
- A55.34: 149 Ohio NG-c (1 Sep/8) (assigned to Brown)
- A44.21: 149 Ohio NG-a, 149 Ohio NG-b (1 Sep/8) (assigned to Brown)
- A47.20: Brown (Prov)
- A52.17: Leib Det (Cav/8) (assigned to Brown)
- A53.17: 144 Ohio NG (1 Sep/8) (assigned to Brown)
- A41.06: 3 Md PHB (1 Sep/8)
- A43.03: Tyler (1 Sep/8)
- B20.33: 8 Ill-a (Cav/8)
- B32.26: 11 Md-a (1 Sep/8)
- B32.25: 11 Md-b (1 Sep/8)
- B33.25: Blockhouse Battery (8 Corps)
- B33.26: Alex-a Battery (8 Corps)
- B26.24: 1 Md PHB (1 Sep/8)
- B33.22: Wallace, 8 Corps HQ, Ricketts (3/6)
- B31.21: 122 Ohio-a (2/3/6)
- B29.21: McClennan, 126 Ohio (2/3/6)
- B27.20: 110 Ohio (2/3/6)
- B32.19: 138 Penn (2/3/6)
- B31.19: 9 NY Hvy (2/3/6)
- B26.17: Truex, 151 NY (1/3/6)
- B27.17: Alex-b Battery (8 Corps)
- B27.16: 14 NJ (1/3/6)
- B23.15: 87 Penn (1/3/6)
- B27.15: 106 NY (1/3/6)
- B26.14: 10 Vt (1/3/6)
- B18.13: Loudoun Rgrs (Cav/8)
- B11.14: 8 Ill-c (Cav/8)
Victory Conditions: Use the below Commitment Point Levels (NOT the version in 4.0). The times remain the same for taking the two bridges on the map (same rule applies for the Covered Bridge being burned). The Commitment Points are reduced to reflect the units on this smaller scale.
| Level | Time | Commitment Points |
|---|---|---|
| I | Before 4:00 | 7 or less |
| II | 4:00-5:45 | 8-10 |
| III | 6:00-7:00 | 11-13 |
| IV | Never | 14 or more |
6.5 Buttermilk Rangers to the Rescue: McCausland's Attack
Early had derisively called his cavalry buttermilk rangers, a term used for men who shirked their duties. "Tiger" McCausland would redeem himself by finding the lightly defended Worthington Ford to open up the left flank of the Union positions. His two follow-up attacks failed, but set the stage for Gordon's Division to be deployed to decisively decide the battle.
General Information
- Maps Needed: Monocacy Map B
- Map Area: South of Bxx.18 inclusive
- First Turn: 10:00 am July 9th
- Last Turn: 2:30 pm July 9th
- First Player: Confederate
Set Up:
Confederate:
- B1.13: 25 Va (McCsld/Cav)
- B1.12: 37 Va Bn (McCsld/Cav)
Reinforcements:
- 10:15 am at B04.18: McCauslnd, 14 Va (McCsld/Cav), 16 Va, 17 Va (McCsld/Cav), Jackson Battery (Cav)
Orders:
- McCausland's Bde is to cross the Monocacy River at Worthington Ford and capture the Worthington Farm then C.K. Thomas' Farm.
Union:
- B26.17: Truex, 151 NY (1/3/6)
- B27.17: Alex-b Battery (8 Corps)
- B27.16: 14 NJ (1/3/6)
- B23.15: 87 Penn (1/3/6)
- B27.15: 106 NY (1/3/6)
- B26.14: 10 Vt (1/3/6)
- B18.13: Loudoun Rgrs (Cav/8)
- B11.14: 8 Ill-c (Cav/8)
- B23.02: Clendenin, 8 Ill-b (Cav/8)
Orders:
- Clendenin's cavalry is to defend the Monocacy River and the Worthington Farm.
- Truex has no orders.
Victory Conditions: Confederates win if they take C.K. Thomas' Farm and the road junction at B30.18 by the end of the scenario.
6.6 Hold the Bridges: Monocacy Junction
General Information
- Maps Needed: Monocacy Map B
- Map Area: North of Bxx.19 inclusive
- First Turn: 10:30 am July 9th
- Last Turn: 2:30 pm July 9th
- First Player: Confederate
Set Up:
Confederate: None
Reinforcements:
- 10:30 am at B19.35: Ramseur (Ram/R), Johnston, 5 NC, 12 NC, 20 NC, 23 NC (Jhnstn/Ram)
- 10:45 am at B19.35: Lewis, 6 NC, 21 NC, 54 NC, 57 NC (Lewis/Ram)
- 11:00 am at B19.35: Nelson, Nelson Bn HQ, Massie, Kirkpatrick Batteries (Nelson Bn)
- 12:00 pm at B19.35: Lilley, 13 Va, 31 Va, 49 Va, 52 VA, 58 Va (Lilley/Ram)
- 12:15 pm at B10.35: Braxton, Carter Bn HQ, Carpenter Battery (Carter Bn)
Orders: Ramseur's Div is to clear the Union cavalry screen and then await further orders.
Union:
- B20.33: 8 Ill-a (Cav/8)
- B32.26: 11 Md-a (1 Sep/8)
- B32.25: 11 Md-b (1 Sep/8)
- B33.25: Blockhouse Battery (8 Corps)
- B33.26: Alex-a Battery (8 Corps)
- B26.24: 1 Md PHB (1 Sep/8)
- B33.22: Wallace, 8 Corps HQ, Ricketts (3/6)
- B31.21: 122 Ohio-a (2/3/6)
- B29.21: McClennan, 126 Ohio (2/3/6)
- B27.20: 110 Ohio (2/3/6)
- B32.19: 138 Penn (2/3/6)
- B31.19: 9 NY Hvy (2/3/6)
Orders: None.
Victory Conditions: Confederates win a Decisive Victory if they capture the Covered Bridge if it is not on fire before the end of the scenario. They can win a Minor Victory if they otherwise capture the Railroad Bridge but not before 1:30pm.
6.7 Short, Decisive, and Bloody: Gordon's Attack
General Information
- Maps Needed: Monocacy Map B
- Map Area: South of Bxx.23 inclusive
- First Turn: 3:30 pm July 9th
- Last Turn: 5:30 pm July 9th
- First Player: Confederate
Set Up:
Confederate:
- B14.23: Braxton, Carpenter Battery (Carter Bn)
- B20.23: Nelson, Massie Battery (Nelson Bn)
- B8.18: Jackson Battery (Cav)
- B15.14: Terry, Steuart Bde, Stonewall Bde (Terry/Grd)
- B16.13: Jones Bde (Terry/Grd)
- B16.11: King Bn HQ
- B17.12: Hays Bde (York/Grd)
- B18.11: Gordon (Grd/B), York, Stafford Bde (York/Grd)
- B19.14: Bryan Battery (King Bn)
- B19.13: King, Chapman (King Bn)
- B20.11: 13 Ga (Evans/Grd)
- B21.11: 26 Ga (Evans/Grd)
- B21.10: 38 Ga (Evans/Grd)
- B20.09: Lowry Battery (King Bn)
- B22.09: Evans, 60 Ga (Evans/Grd)
- B22.08: 61 Ga (Evans/Grd)
- B22.07: 12 Ga Bn (Evans/Grd)
- B22.06: 31 Ga (Evans/Grd)
- B20.03: 16 Va, 25 Va (McCsld/Cav)
- B20.02: McCauslnd, 14 Va (3), 17 Va (3), 37 Va Bn (McCsld/Cav)
Orders:
- Gordon's Div is to attack the Union positions north of the Georgetown Pike.
- McCausland's Bde has no orders.
Union:
- B29.22: Bridge Ablaze marker
- B33.22: Wallace, 8 Corps HQ, Ricketts (3/6)
- B27.20: 110 Ohio (2/3/6)
- B27.19: 9 NY Hvy (2/3/6)
- B29.19: Alex-b Battery (8 Corps)
- B28.17: 138 Penn (2/3/6)
- B27.17: 122 Ohio (2/3/6)
- B27.16: McClennan, 126 Ohio (2/3/6)
- B25.14: 14 NJ (1/3/6)
- B25.13: Truex, 151 NY (1/3/6)
- B25.12: 106 NY (1/3/6)
- B26.11: 87 Penn (1/3/6)
- B27.10: 10 Vt (6) (1/3/6)
- B29.09: 8 Ill-a (Cav/8)
- B30.08: Clendenin, 8 Ill-b (Cav/8)
- B30.07: 8 Ill-c (Cav/8)
- B31.07: Loudon Rgrs (Cav/8)
Orders: None.
Victory Conditions: The Confederates win if they have taken the Covered Bridge (even if it's on fire) and the Railroad Bridge before the scenario end.
6.8 The Whiz of Flying Iron: Monocacy 3:30pm start
This is the situation at the climax, Gordon's Division is poised to attack the Union left flank and Ramseur's Division is proceeding slowly towards Monocacy Junction. The linked campaign game can be played simply by using this set up and using the set up for Fort Stevens from scenario 1 and following the rules and Victory Conditions in 4.0.
General Information
- Maps Needed: Monocacy Map B
- Map Area: All
- First Turn: 3:30 pm July 9th
- Last Turn: 7:00 pm July 9th
- First Player: Confederate
Set Up:
Confederate:
- A30.07: 12 Ala, 61 Ala (Btle/Rodes)
- A31.27: Battle, 3 Ala, 5 Ala, 6 Ala (Btle/Rodes)
- A32.26: 2 NC Bn, 45 NC, 53 NC (Grm/Rodes)
- A33.26 Grimes, 32 NC, 43 NC (Grm/Rodes)
- A35.25: Rodes (Rodes & R), R Corps HQ
- A37.23: Cook, Cook Bde (Cook/Rodes)
- A37.24: 1 NC, 4 NC (Cox/Rodes)
- A38.24: Cox, 2 NC, 14 NC (Cox/Rodes)
- A38.25: 3 NC, 30 NC (Cox/Rodes)
- A39.21: Rodes Div-a (SS/Rodes)
- A40.22: Blackford, Rodes Div-b (SS/Rodes)
- A41.24: Rodes Div-c (SS/Rodes)
- A42.25: Rodes Div-d (SS/Rodes)
- A12.17: Early, A Valley HQ, Long (A Valley), Brcknrdge, B Corps HQ (B Corps), Ransom, Cav HQ (Cav)
- A10.02: Patton, 22 Va, 23 Va Bn, 26 Va Bn (Ech/Brk)
- A10.01: Echols (Brk/B), 60 Va (Smth/Brk)
- B10.34: Smith, Thomas Lgn, 36 Va, 45 Va Bn (Smth/Brk)
- B10.33: Wharton, 30 Va Bn SS, 50 Va (Whtn/Brk)
- B10.32: 45 Va, 51 Va (Whtn/Brk)
- B10.29: Hardwicke Battery (Carter Bn)
- B10.28: Cooper Battery (Carter Bn)
- B10.26: Carter Bn HQ
- B14.24: Braxton, Carpenter Battery (Carter Bn)
- B22.33: 52 Va, 58 Va (Lilley/Ram)
- B21.33: Lilley, 31 Va, 49 Va (Lilley/Ram)
Orders:
- Gordon's Div is to attack the Union positions north of the Georgetown Pike
- McCausland's Bde has no orders
- Johnson's Bde is to attack the Blockhouse #1
Union:
- A55.34: 149 Ohio NG-c (1 Sep/8) (assigned to Brown)
- A44.21: Brown (Prov), 149 Ohio NG-a (1 Sep/8) (assigned to Brown)
- A43.20: 149 Ohio NG-b (1 Sep/8) (assigned to Brown)
- A45.23: 144 Ohio NG (1 Sep/8) (assigned to Brown)
- A43.18: Leib Det (Cav/8) (assigned to Brown)
- A41.06: 3 Md PHB (1 Sep/8)
- A43.03: Tyler (1 Sep/8)
- B32.26: 11 Md-a (1 Sep/8)
- B32.25: 11 Md-b (1 Sep/8)
- B33.25: Blockhouse Battery (8 Corps)
- B33.26: Alex-a Battery (8 Corps)
- B29.24: 1 Md PHB (3) (1 Sep/8)
- B29.22: Bridge Ablaze marker
- B33.22: Wallace, 8 Corps HQ, Ricketts (3/6)
- B27.20: 110 Ohio (2/3/6)
- B27.19: 9 NY Hvy (2/3/6)
- B29.19: Alex-b Battery (8 Corps)
- B28.17: 138 Penn (2/3/6)
- B27.17: 122 Ohio (2/3/6)
- B27.16: McClennan, 126 Ohio (2/3/6)
- B25.14: 14 NJ (1/3/6)
- B25.13: Truex, 151 NY (1/3/6)
- B25.12: 106 NY (1/3/6)
- B26.11: 87 Penn (1/3/6)
- B27.10: 10 Vt (6) (1/3/6)
- B29.09: 8 Ill-a (Cav/8)
Orders:
- When Tyler arrives, he takes overall command and Brown reports to him.
Victory Conditions: Use 4.0. If just playing Monocacy, the Level determines level of Confederate victory.
- Level I: Decisive victory
- Level II: Major victory
- Level III: Minor victory
- Level IV: Loss
Confederates have so far used 14 Commitment Points from the following but have not yet captured any bridges (the Covered Bridge has been burned): Blackford's Sharpshooters (SS/Rodes), McCausland's Cav Bde, Ramseur's Div, Gordon's Div, King's Battery, Nelson's Battery.
6.9 Line of Retreat: Jug Bridge
General Information
- Maps Needed: Monocacy Map A
- Map Area: North of Axx.10 inclusive
- First Turn: 4:30 pm July 9th
- Last Turn: 7:00 pm July 9th
- First Player: Confederate
Set Up:
Confederate:
- A30.07: 12 Ala, 61 Ala (Btle/Rodes)
- A31.27: Battle, 3 Ala, 5 Ala, 6 Ala (Btle/Rodes)
- A32.26: 2 NC Bn, 45 NC, 53 NC (Grm/Rodes)
- A33.26 Grimes, 32 NC, 43 NC (Grm/Rodes)
- A35.25: Rodes (Rodes & R), R Corps HQ
- A37.23: Cook, Cook Bde (Cook/Rodes)
- A37.24: 1 NC, 4 NC (Cox/Rodes)
- A38.24: Cox, 2 NC, 14 NC (Cox/Rodes)
- A38.25: 3 NC, 30 NC (Cox/Rodes)
- A39.21: Rodes Div-a (SS/Rodes)
- A40.22: Blackford, Rodes Div-b (SS/Rodes)
- A41.24: Rodes Div-c (SS/Rodes)
- A42.25: Rodes Div-d (SS/Rodes)
Reinforcements:
- 6:00 pm at A53.10: Lewis, 6 NC, 21 NC, 54 NC, 57 NC (Lewis/Ram)
Orders:
- Rodes is to attack and take Jug Bridge.
- When Lewis' Bde arrives, it is to attack and take Bartonsville.
Union:
- A55.34: 149 Ohio NG-c (1 Sep/8) (assigned to Brown)
- A44.21: Brown (Prov), 149 Ohio NG-a (1 Sep/8) (assigned to Brown)
- A43.20: 149 Ohio NG-b (1 Sep/8) (assigned to Brown)
- A45.23: 144 Ohio NG (1 Sep/8) (assigned to Brown)
- A43.18: Leib Det (Cav/8) (assigned to Brown)
Reinforcements:
- 4:30 pm at A53.10: Tyler, 3 Md PHB (1 Sep/8)
Orders: None.
Victory Conditions: The Union wins if they prevent the Confederates from taking Entry Area A.
6.10 The Battle of Fort Stevens: A Desperate Engagement
This scenario is the historical start for the Battle for Fort Stevens with Early achieving a game Level III victory at Monocacy.
General Information
- Maps Needed: Ft. Stevens Map
- Map Area: All
- First Turn: 4:00 pm July 11th
- Last Turn: 7:00 pm July 12th
- First Player: Confederate
Set Up:
Confederate: None
Confederate Arrival at Ft. Stevens (All enter via Entry Area A)
- 4:00 pm: Early, Valley Army HQ, Long, Breckinridge, B Corps HQ, Ransom, Cav HQ, Imboden, 18 Va, 23 Va, 62 Va, Unauthorized Va Cav (Imb/Cav), Lurty Battery (Cav)
- 5:00 pm: Rodes (Rodes & R), R Corps HQ, Cook, Blackford, Rodes Div-a, Rodes Div-b, Rodes Div-c, Rodes Div-d (SS/Rodes), Cook Bde (9) (Cook/Rodes), Cox, 1 NC, 2 NC, 3 NC, 4 NC, 14 NC, 30 NC (Cox/Rodes), Grimes, 32 NC, 43 NC, 45 NC, 53 NC, 2 NC Bn (Grm/Rodes), Battle, 3 Ala, 5 Ala, 6 Ala, 12 Ala, 61 Ala (Btle/Rodes), Nelson, Nelson Bn HQ, Massie, Kirkpatrick, Milledge Batteries (Nelson Bn)
- 6:00 pm: Ramseur (Ram/R), Johnston, 5 NC (3), 12 NC, 20 NC (3), 23 NC (Jhnstn/Ram), Lilley, 13 Va, 31 Va, 49 Va, 52 VA, 58 Va (Lilley/Ram), Lewis, 6 NC, 21 NC, 54 NC, 57 NC (Lewis/Ram), Braxton, Carter Bn HQ, Carpenter, Cooper, Hardwicke Batteries (Carter Bn)
- 7:00 pm: Gordon (Grd/B), York, Hay Bde (6), Stafford Bde (3) (York/Grd), Terry, Jones Bde (5), Steuart Bde, Stonewall Bde (Terry/Grd), Atkinson, 13 Ga (2), 26 Ga (5), 31 Ga (2), 38 Ga (3), 60 Ga (3), 61 Ga (1), 12 Ga Bn (6) (Evans/Grd)
- 8:00 pm: Echols (Brk/B), Patton, 22 Va, 23 Va Bn, 26 Va Bn (Ech/Brk), Smith, Thomas Lgn, 36 Va, 45 Va Bn, 60 Va (Smth/Brk), Wharton, 30 Va Bn SS, 45 Va, 50 Va, 51 Va (Whtn/Brk), King, King Bn HQ, Bryan, Chapman, Lowry Batteries (King Arty Bn)
All entries can make use of any hex the player desires as the location they are ordered to move to that is north of 54.xx (inclusive). Record the desired hex at the time of each group's entry.
Union:
- 39.35: 151 Ohio NG (-) (1 Bde)
- 39.34: Hardin, L/9 NY Hvy, A/1 Wisc Batteries (1 Bde)
- 40.29: 157 Ohio NG (1 Bde)
- 40.28: 147 Ohio NG (1 Bde)
- 47.25: 1 Maine Battery (2 Bde)
- 47.23: 9 Vet Res (1 Vet Res)
- 48.22: Invalids (2 Bde)
- 49.22: 13 Mich-a Battery (2 Bde)
- 49.21: Haskin, 13 Mich-b Battery (2 Bde)
- 49.20: K/150 Ohio NG (2 Bde)
- 49.19: Gile, 12 Vet Res (-) (1 Vet Res)
- 48.16: L/1 Ohio Battery (2 Bde)
- 47.20: McCook, Wash HQ (Wash)
- 50.07: G/150 Ohio NG (2 Bde)
- 51.07: 2 Penn Hvy Battery (2 Bde)
- 51.06: 14 Mich Battery (2 Bde)
- Anywhere south of 53.xx (inclusive): Lowell, Fry Prov, 8 Ill (Det), 2 Mass, 7 Mich-a, 7 Mich-b, 7 Mich-c, 25 NY-a, 25 NY-b (Cav Depot)
Reinforcements:
11 July
- 3:30 pm at C: Wright, Tompkins, 6 Corps HQ (6 Corps), Wheaton (2/6), Foster, 62 NY, 93 Penn, 98 Penn, 102 Penn, 139 Penn (1/2/6), Bidwell, 7 Maine, 43 NY, 49 NY, 77 NY, 122 NY, 61 Penn (3/2/6), Grant, 1 Vt Hvy-a, 1 Vt Hvy-b, 2 Vt, 3 Vt, 4 Vt, 5 Vt, 6 Vt (Vt/2/6), Cowan Battery (6 Corps)
- 8:00 pm at C: Meigs (Prov Div), Rucker, Clerks-a, Clerks-b, Clerks-c, Clerks-d, Prov Bde (1/Prov), Paine, DC Depot, 2 DC-a, 2 DC-b, 12 Vet Res-a, 12 Vet Res-b (2/Prov)
- 9:00 pm at C: Price, Convelscnt-a, Convelscnt-b, Dist Camp-a, Dist Camp-b, Res Prov Bde-a, Res Prov Bde-b (3/Prov)
12 July
- 12 noon at 47.20: Lincoln
- 2:00 pm: Remove: Lincoln
- 2:30 pm at C: Russell (1/6), Upton, 2 Conn Hvy, 65 NY, 67 NY, 121 NY, 95 Penn, 96 Penn (2/1/6), Edwards, 6 Maine, 37 Mass, 23 Penn, 49 Penn, 82 Penn, 119 Penn, 2 RI, 5 Wisc (3/1/6)
Orders: All Union Reinforcements entering at C are to proceed to Ft. Stevens (any hex w/i 5 and south of the fort hexes (inclusive) is allowed). If Ft. Stevens has been taken by the Confederates, assign the entering reinforcements any hex on or south of 18.xx as their initial destination. Once there, they must await new orders.
Victory Conditions: Use 4.0
6.11 Rebels at the Gates! The Battle of Fort Stevens that wasn't
This assumes that Early achieved a Level I victory at Monocacy which players may find difficult to achieve in the linked campaign game.
General Information
- Maps Needed: Ft. Stevens Map
- Map Area: All
- First Turn: 2:00 pm July 11th
- Last Turn: 7:00 pm July 12th
- First Player: Confederate
Set Up:
Confederate: None
Confederate Arrival at Ft. Stevens (All enter via Entry Area A)
- 2:00 pm: Early, Valley Army HQ, Long, Brcknrdge, B Corps HQ, Ransom, Cav HQ, Imboden, 18 Va, 23 Va, 62 Va, Unauthorized Va Cav (Imb/Cav), Lurty Battery (Cav)
- 3:00 pm: Rodes (Rodes & R), R Corps HQ, Cook, Blackford, Rodes Div-a, Rodes Div-b, Rodes Div-c, Rodes Div-d (SS/Rodes), Cook Bde (9) (Cook/Rodes), Cox, 1 NC, 2 NC, 3 NC, 4 NC, 14 NC, 30 NC (Cox/Rodes), Grimes, 32 NC, 43 NC, 45 NC, 53 NC, 2 NC Bn (Grm/Rodes), Battle, 3 Ala, 5 Ala, 6 Ala, 12 Ala, 61 Ala (Btle/Rodes), Nelson, Nelson Bn HQ, Massie, Kirkpatrick, Milledge Batteries (Nelson Bn)
- 4:00 pm: Ramseur (Ram/R), Johnston, 5 NC (3), 12 NC, 20 NC (3), 23 NC (Jhnstn/Ram), Lilley, 13 Va, 31 Va, 49 Va, 52 VA, 58 Va (Lilley/Ram), Lewis, 6 NC, 21 NC, 54 NC, 57 NC (Lewis/Ram), Braxton, Carter Bn HQ, Carpenter, Cooper, Hardwicke Batteries (Carter Bn)
- 5:00 pm: Gordon (Grd/B), York, Hay Bde (6), Stafford Bde (3) (York/Grd), Terry, Jones Bde (5), Steuart Bde, Stonewall Bde (Terry/Grd), Atkinson, 13 Ga (2), 26 Ga (5), 31 Ga (2), 38 Ga (3), 60 Ga (3), 61 Ga (1), 12 Ga Bn (6) (Evans/Grd)
- 6:00 pm: Echols (Brk/B), Patton, 22 Va, 23 Va Bn, 26 Va Bn (Ech/Brk), Smith, Thomas Lgn, 36 Va, 45 Va Bn, 60 Va (Smth/Brk), Wharton, 30 Va Bn SS, 45 Va, 50 Va, 51 Va (Whtn/Brk), King, King Bn HQ, Bryan, Chapman, Lowry Batteries (King Arty Bn)
All entries can make use of any hex the player desires as the location they are ordered to move to that is north of 54.xx (inclusive). Record the desired hex at the time of each group's entry.
Union: Use the same set up as 6.8
Reinforcements: Use the same reinforcements as 6.8
Victory Conditions: Use 4.0
6.12 After the 36th Shot: Wheaton's Counterattack
VI Corps' Horatio Wright ordered Wheaton to clear the front of the enemy. Bidwell's Brigade would lead the assault and would commence after the thirty-sixth shot of a three-salvo artillery barrage. The attack was costly but did persuade Early to abandon his advance on Washington, D.C.
General Information
- Maps Needed: Ft. Stevens Map
- Map Area: All
- First Turn: 4:30 pm July 12th
- Last Turn: 7:00 pm July 12th
- First Player: Union
Set Up:
Confederate:
- 62.23: Early, Valley Army HQ, Ransom, Cav HQ
- 61.24: Carter Bn HQ
- 61.21: Brcknrdge, B Corps HQ
- 62.29: 1 NC, 3 NC (Cox/Rodes)
- 62.28: 2 NC (Cox/Rodes)
- 62.27: Cox, 4 NC (Cox/Rodes)
- 62.26: 14 NC (Cox/Rodes)
- 62.25: 30 NC (Cox/Rodes)
- 59.24: Long, Carpenter Battery (Carter Bn)
- 59.23: Braxton, Cooper Battery (Carter Bn)
- 59.22: Hardwicke Battery (Carter Bn)
- 59.21: Rodes (Rodes & R), R Corps HQ
- 57.30: Ramseur (Ram/R)
- 51.34: 52 Va (Lilley/Ram)
- 51.33: 31 Va (Lilley/Ram)
- 51.32: Lilley, 49 Va (Lilley/Ram)
- 51.31: 58 Va (Lilley/Ram)
- 52.30: 13 Va (Lilley/Ram)
- 53.30: 5 NC (3) (Jhnstn/Ram)
- 54.29: Johnston, 20 NC (3) (Jhnstn/Ram)
- 55.29: 12 NC (Jhnstn/Ram)
- 56.29: 23 NC (Jhnstn/Ram)
- 56.32: 57 NC (Lewis/Ram)
- 56.31: Lewis, 6 NC (Lewis/Ram)
- 57.31: 21 NC (Lewis/Ram)
- 58.30: 54 NC (Lewis/Ram)
- 58.28: King Bn HQ
Orders: No Orders.
Union:
- 39.35: 151 Ohio NG (-) (1 Bde)
- 39.34: Hardin, L/9 NY Hvy, A/1 Wisc Batteries (1 Bde)
- 40.29: 157 Ohio NG (1 Bde)
- 40.28: 147 Ohio NG (1 Bde)
- 44.34: 2 Mass (Cav Depot)
- 45.33: Lowell, Fry Prov (Cav Depot)
- 50.26: 8 Ill (Det) (Cav Depot)
- 51.25: 25 NY-a (Cav Depot)
- 51.23: 25 NY-b (Cav Depot)
- 52.12: 7 Mich-a (Cav Depot)
- 52.10: 7 Mich-b (Cav Depot)
- 52.08: 7 Mich-c (Cav Depot)
- 46.31: 6 Vt (Vt/2/6)
- 47.30: 5 Vt (Vt/2/6)
- 47.28: Grant, 4 Vt (Vt/2/6)
- 47.25: 1 Maine Battery (2 Bde)
- 47.24: 3 Vt (Vt/2/6)
- 47.23: 2 Vt (Vt/2/6)
- 43.26: 1 Vt Hvy-a (Vt/2/6)
- 42.26: 1 Vt Hvy-b (Vt/2/6)
- 49.25: 2 RI, 49 Penn (3/1/6)
- 49.24: Edwards, 37 Mass (3/1/6)
- 49.23: 6 Maine, 23 Penn (3/1/6)
- 48.25: 119 Penn (3/1/6)
- 48.24: 5 Wisc (3/1/6)
- 48.23: 82 Penn (3/1/6)
- 48.22: 9 Vet Res (1 Vet Res)
Orders:
- Bidwell's Bde is to attack and clear the enemy from J. Seldon, I. Carbery, and S. Reeve houses.
- Edwards' Bde is to support Bidwell's Bde.
There are no reinforcements for either side.
Victory Conditions: The Union wins if they control the J. Seldon, I. Carbery, and S. Reeve houses by the end of the scenario.
Research Notes
Just because this will cause entirely too much, yet perfectly understandable, head scratching: 122 Ohio-a and 122 Ohio-b are assigned to two different brigades in 3/6. Yes, this is correct.
Developer's Notes
How the battle unfolded: Rodes committed only Blackford's Sharpshooters and a single brigade to a demonstration towards the Jug Bridge. At the same time, Ramseur committed only Johnson's Brigade against the Railroad and Covered Bridges during the morning hours. In the afternoon Ramseur's entire division prepared to assault. This was one Corps with orders to send different divisions toward different objectives.
Then we have McCausland's cavalry brigade crossing at Worthington's Ford and launching a dismounted attack. Seeing that advance, Early ordered Breckinridge to send Gordon's entire division across to attack the Union infantry which had driven McCausland's troopers back, and take the Monocacy bridges.
The fight between Gordon's and Ricketts' divisions constituted the main action of the battle and ended in the collapse of the Union position.
The special rules revolved around the non-standard (for LoB) manner in which forces were committed and the fact that this is not just a game of the one battle, but a campaign game where the results here affected how the Confederates enter the Ft Stevens game.
Testing indicated that any victory worse than a Level II made it almost impossible for Early to take Ft. Stevens (let alone Washington DC). Even at Level I the odds are not favorable to the boys in butternut.
First there were modifications to the Command and Orders system to handle what today we would call an Economy of Force situation. That led to the rules covering commitment of a single brigade to the attack while letting the uncommitted brigade(s) count as the Reserve and allowed commitment of those brigades in sequence should the committed brigade roll Fluke Stoppage, all without getting new Orders issued but paying the points. You will have to figure out how you wish to capture the two objective areas (the Jug Bridge and the RR/Covered Bridges) with the two Corps at your disposal within the time and force constraints.
Second, as indicated, what happens on the Monocacy impacts what happens at Ft. Stevens. The Union will lose on the Monocacy (to one degree or another), but the amount of delay and Confederate losses drastically impact what can happen at Ft. Stevens. The 7 units rule (4.0c) is designed to give the Confederates a chance to reach Ft. Stevens early enough (and with enough strength) to have a chance at taking Washington. Having Union cavalry which is not Open Order Capable count towards the 7 was done to keep them from being used ahistorically. The 7 units rule is based on the average size of Union infantry regiments and the losses they represented compared to the losses reported in the fight. It is to be remembered that most losses occurred in Ricketts' division and when they broke the Union force routed. A complete disaster was only avoided by Tyler's impressive rear guard action on the Baltimore Pike.
Finally, this is the first game in the series where mounted combat becomes likely. Dean also stipulated that Open Order Cavalry is still Open Order when it is mounted. This required some adjustments to both the LoB Open Order and the Cavalry Rules. The changes were driven by the need to permit the Union cavalry to perform its historical delay and screening functions while providing McCausland the opportunity to force the river and conduct his historical dismounted attack towards the Georgetown Pike and the bridges. The geographical restrictions are to prevent both forces from non-historical actions once the infantry fight starts.
Union Seniority List
Wallace's Command
| Unit | Commander | Rank | Date of Rank |
|---|---|---|---|
| 8th Corps | Wallace | MG | 21 Mar 62 |
| 1st Separate Brigade | Tyler | BG | 13 Mar 62 |
| 1st Separate Brigade | Brown | Col | - |
| 3/6 Division | Ricketts | BG | 21 Jul 61 |
| 3/6 Division | Truex | Col | - |
| 3/6 Division | McClennan | Col | - |
| 3/6 Division |
Washington Defenses
| Unit | Commander | Rank | Date of Rank |
|---|---|---|---|
| Washington | McCook | MG | 17 Jul 62 |
| 1st Brigade | Hardin | BG | 2 Jul 64 |
| 2nd Brigade | Haskin | Col | - |
| 1st Vet Res Bde | Gile | Col | - |
| Cavalry Depot | Lowell | Col | - |
| Provisional Div | Meigs | BG | 15 May 61 |
| Provisional Div |
Confederate Seniority List
Army of the Valley
| Unit | Commander | Rank | Date of Rank |
|---|---|---|---|
| Army | Early | LTG | 31 May 64 |
| Breckinridge Corps | Breckinridge | MG | 14 Apr 62 |
| Gordon Division | Gordon | MG | 14 May 64 |
| Gordon Division | Evans | BG | 19 May 64 |
| Gordon Division | Terry | BG | 19 May 64 |
| Gordon Division | York | BG | 31 May 64 |
| Gordon Division |
Notes: Three leaders mistakenly identified as BG in the records and shown as such in the counters.
- Never actually promoted to BG
- Promoted on 5 Aug 64
- Promoted 19 Dec 64
Union Ft. Stevens OOA
11 July
| Time | Area | Units |
|---|---|---|
| 3:30 pm | C | Wright, Tompkins, 6 Corps HQ (6 Corps), Wheaton (2/6), Foster, 62 NY, 93 Penn, 98 Penn, 102 Penn, 139 Penn (1/2/6), Bidwell, 7 Maine, 43 NY, 49 NY, 77 NY, 122 NY, 61 Penn (3/2/6), Grant, 2 Vt, 3 Vt, 4 Vt, 5 Vt, 6 Vt (Vt/2/6), Cowan Battery (6 Corps) |
| 8:00 pm | C | Meigs (Prov Div), Rucker, Clerks-a, Clerks-b, Clerks-c, Clerks-d, Prov Bde (1/Prov), Paine, DC Depot, 2 DC-a, 2 DC-b, 12 Vet Res-a, 12 Vet Res-b (2/Prov) |
| 9:00 pm | C | Price, Convelscnt-a, Convelscnt-b, Dist Camp-a, Dist Camp-b, Res Prov Bde-a, Res Prov Bde-b (3/Prov) |
12 July
| Time | Area | Units |
|---|---|---|
| 12 noon | 47.20 | Lincoln |
| 2:00 pm | - | Remove: Lincoln |
| 2:30 pm | C | Russell (1/6), Upton, 2 Conn Hvy, 65 NY, 67 NY, 121 NY, 95 Penn, 96 Penn (2/1/6), Edwards, 6 Maine, 37 Mass, 23 Penn, 49 Penn, 82 Penn, 119 Penn, 2 RI, 5 Wisc (3/1/6) |
Orders: All Union Reinforcements entering at C are to proceed to any hex w/i 5 and south of Ft Stevens (inclusive). If Ft Stevens has been taken, assign the entering reinforcements to got to any hex on or south of 18.xx. In either case, they have a Move Order that expires once they get to the assigned destination above.