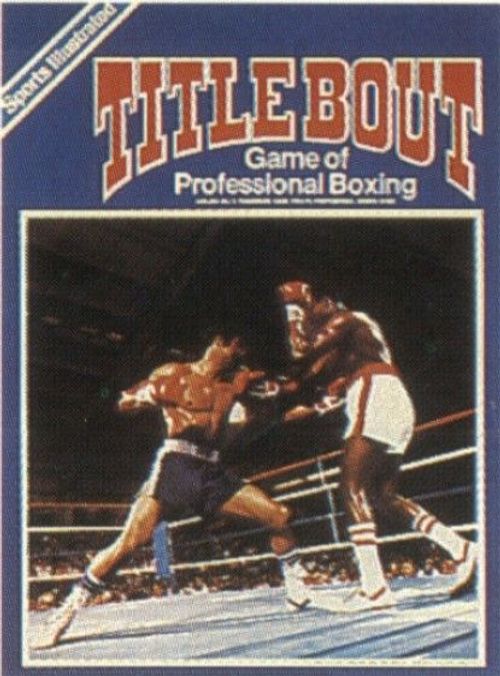
Title Bout
Title Bout Rulebook
Table of Contents
Table of Contents
- Game Equipment
- How to Play
- Control Factor Conversion Chart
- Scoring
- Knockdowns
- Knockouts
- More Than One Knockdown in a Round
- Knockdown Recovery Chart
- Endurance
- Using Up Endurance
- Cuts
- Using the Scoresheet
- Winning the Fight
- Which Scoring System to Use
- Important Note on Winning Rounds
- Boxer Ratings
- Optional Rules
- Fighting a Boxer Out of His Normal Division
- Reduced Hitting Effectiveness
- Advanced Scoring Option
- A Few Notes on Playing the Game
- Things to Remember While Playing
- Sample Cards
- Important Abbreviations
- Last Second Additions and Clarifications
Game Equipment
- Rules Folder
- Mounted Playing Board with Reference Charts and Tables
- Boxing Action Cards (80)
- Boxer Cards representing over 400 all-time great and current boxers
- Scorepad
- Pawns (three colored, two white)
- Strategy Cards (6 for each player)
How to Play
The Set-Up
Lay out the playing board on a table or other flat surface. If two are playing, it is easiest for both players to read all of the charts on the board if they are sitting side by side.
Each player should take two of the pawns provided with the game and place them on the squares marked "0" in the "Points per Round" section of the board. These will be used to indicate the points each fighter scores in each round, and will be adjusted as more points are scored. The top line, "x1", is for multiples of one, while the lower line, "x10", is for multiples of ten. If a fighter had a "3" indicated in the top line, and a "2" indicated in the lower line, he would then have scored 23 points.
Next, carefully tear apart the sheets of Boxer Cards and Boxing Action Cards. It is advisable to separate the fighters into their respective weight classes at this time so they will be easily found when wanted for future use. A rubber band wound round each deck will be of great benefit here.
The Boxing Action Cards should be well shuffled and then separated into two groups of 40 cards each. One of these placed aside, and the other placed face down on the game board in the space marked "Boxing Action Cards". These will both control the action of the game and at the same time serve as the timing system.
Note: For easy reference, the old-time boxers have their cards bordered in yellow (and because of space limitations, so do a few current heavyweights). They can also be easily told apart from the current boxers because most of the old-timers have their complete records and biographies printed on the reverse side of their cards. None of the current boxers have their biographies given.
Once you have chosen the two boxers you wish to play with, enter their names, Control Factors (CF), Hitting Power (HP), Punches Landed (PL), Endurance (END), KDR 1, and Aggressiveness (AGG) on the scoresheet. When using the optional STRATEGY USE CHART, you will also wish to enter the strategies available to each fighter in the appropriate spaces.
CFB/S: To determine which CF to use, check to see what type of fighter your opponent is. If he is a boxer (B) use the number before the slash. If he is a slugger (S) use the number after the slash. If he is a boxer/slugger (B/S) his manager (either you or your opponent, depending upon whether or not you are playing solitaire) must declare prior to the fight which style his fighter will use for this particular fight.
HP/KI: The Hitting Power is the number before the slash. If the fighter is a B/S and he chooses to be a slugger his HP is the number on the card. If he chooses to be a boxer, reduce the HP number on the card by one. KI will be explained later.
END: The number on the card for Endurance is for ten rounds. If a 12 round fight is to be fought, simply multiply the END by 1.2; for a 15 rounder multiply the END by 1.5.
Punches Landed (PL): When filling in this number be sure to subtract or add your opponent's Defensive Rating (DEF) to your PL area. For example, if your fighter's PL is 1-45, and his opponent has a DEF of −5, the new PL becomes 1-40. Conversely, if his opponent has a DEF of +5, that would raise the PL to 1-50.
AGG: Use the AGG number on the fighter's card.
KDR 1: Use the KDR 1 number on the fighter's card.
Playing the Game
Before reading any further find the James Jeffries and Jack Johnson cards among the heavyweights. We will be using them for examples as the rules are presented.
TITLE BOUT is played using the unique interaction of the Boxing Action Cards and the Boxer Cards. IMPORTANT NOTE: EACH ACTION CARD IS USED ONLY ONCE EACH ROUND AND ONLY ONE READING IS TAKEN FROM EACH CARD.
The first thing you do is determine the aggressor at the beginning of the fight. This is done using the following order of priority:
A. The fighter with the higher Aggressiveness Rating as found on his card (AGG).
B. If the Aggressiveness Ratings are equal, the fighter with the higher Boxer Rating will begin the fight as the aggressor, and then each round after the first winner of the previous round will be the aggressor. The Boxer Rating is the number at the top of the fighter's card next to his name.
C. If both the Aggressiveness Ratings and the Boxer Ratings are equal, pick a Boxing Action Card for each fighter and the one with the higher Random Number the first round as the aggressor. In each round thereafter the winner of the previous round will be the aggressor. If the round was a draw, the aggressor is the last fighter to have won a round prior to the round just completed.
The aggressor begins action in the first round and if (and only if) he has a higher Aggressiveness Rating than his opponent, he is awarded one point at the beginning of each round. EXAMPLE: Jeffries is a 9 AGG, and Johnson is a 7 AGG. Therefore, Jeffries is awarded one point at the beginning of each round. Record this under the AGG column on the scoresheet.
The Basic Game Is a Simple Three or Four Step Procedure...
STEP ONE: After determining which fighter will begin the fight, flip the first Boxing Action Card and check that fighter's CF number. If the CF number is lower than or equal to the CF on the fighter's card, that fighter is considered to be in control. EXAMPLE: The CF on the Action Card is 6 and the CF on the fighter's card is 10—the fighter is in control.
If the CF number is higher than the CF on the fighter's card, the fighter is considered to be out of control. EXAMPLE: The CF on the Action Card is 12 and the CF on the fighter's card is 10—the fighter is out of control.
Control Factor Conversion Chart
Printed below is the Control Factor Conversion Chart. This chart is used to change the Control Factors of the fighters when two fighters of different CF are fighting one another. See notes at the end of the game for a further explanation.
| Fighter CF | Opponent CF | Revised CFs |
|---|---|---|
| 12 | 12 | 10-10 |
| 12 | 11 | 10-9 |
| 11 | 11 | 10-10 |
| 11 | 10 | 10-9 |
| 9 | 9 | 10-10 |
| 9 | 8 | 10-9 |
| 9 | 7 | 10-8 |
| 8 | 8 | 10-10 |
| 8 | 7 | 10-9 |
| 8 | 6 | 10-8 |
| 7 | 7 | 10-10 |
| 7 | 6 | 10-9 |
| 7 | 5 | 10-8 |
| 6 | 6 | 10-10 |
| 6 | 5 | 10-9 |
| 6 | 4 | 10-8 |
All other CF combinations remain the same. Note that if a fighter with a CF of 10 is fighting someone with a lower CF there is no change.
EXAMPLES:
Ali (12 CF) fighting Marciano (12 CF). Both fighters will use a revised CF of 10.
Jack Dempsey (11 CF) fighting Luis Firpo (10 CF). For this fight Dempsey will use a revised CF of 9.
Muhammad Ali (12 CF) fighting Alejandro Lavorante (9 CF). Both fighters will use the CFs on their cards. Since the 12-9 combination is not found on the chart there is no change.
STEP TWO: Flip the second Action Card and check the Random Number (RN). If the fighter is in control, apply the number to the Action section of his card. If he is out of control apply the number to the Action section of his opponent. This determines what action takes place.
EXAMPLE: Assume that Jack Johnson is in control and the RN is a 33. This means that Johnson has landed a punch. If Johnson had been out of control, you would have used the RN result to check Jeffries' card. In this case, with an RN of 51, the result would have been a missed punch.
Other Possible Results
Punches Missed: Indicate on scoresheet. At the end of each round, add your fighter's total points scored to the total of his opponent's punches missed, and deduct the total from your opponent's endurance.
Clinching: Used only in optional rules.
Ring Movement: Used only in optional rules.
Fouls: A Random Number result of 79 indicates that there is a chance of a foul against the fighter currently in control. Check the Foul Chart on the playing board for the proper procedure to follow. If no foul results, treat as a missed punch.
Injury: A Random Number result of 80 indicates that there is a chance of injury to the fighter currently in control. Draw another Boxing Action Card and refer to the Injury Chart to see the result. If there is no injury treat as a missed punch.
Please note that all injuries, fouls, or foul warnings should be noted on the scoresheet in the column headed "Fouls/Cuts Conditions".
STEP THREE: Flip the next Action Card and check the CF just as you did in Step One to see if the fighter who was last in control remains in control.
After this simply repeat Steps Two, Three, etc., and then keep repeating this procedure until 40 Boxing Action Cards are used up and the round is ended. This basic procedure is interrupted only if a cut, knockdown, foul, or injury occurs. These things will be explained further in the rules.
As soon as the first round has ended, use the second deck of 40 cards for the second round. Then after that round is over, reshuffle all of the cards together, and divide again into two equal decks of 40 cards.
Note: If you are in the middle of some part of the basic procedure (such as determining if there is an injury, or cut) and all of the cards for that round are used up, simply reshuffle the deck and continue to use the cards until that phase is over. This would include anything that would happen before a punch landed (in other words, if the last card picked is only the one giving a result (knockdown, no knockdown, knockout, etc.) had been determined.
Scoring
A fighter scores points by landing punches. At the bottom of each fighter's card is a variety of punches listed either two or three points. Some fighters have only two-point punches. When a punch lands check the number opposite RESULT on the next Action Card and apply it to the HITTING VALUE section of the fighter's individual card. This gives you the type of punch and the points scored. The letters "L" or "R" preceding the number tells whether the fighter scores with his left or right hand. EXAMPLE: Jim Jeffries has a punch land, and opposite RESULT on the next Action Card you find L-38. This means that Jeffries has connected on a left cross, in this case worth three points. You therefore add the "Points per Round" section of the game board to show an addition of three points to his total.
Knockdowns
When a knockdown appears as the RESULT of a punch landed, this means that there is a chance of a knockdown. The following procedure is used to see if it actually occurs:
A. Check the number opposite KD on the next Action Card. If the KD number is higher than the HP rating on the fighter's card, score the points for the type of punch landed and continue with the basic procedure (checking the CF, etc.). If the number is less than or equal to the HP rating on the fighter's card refer to the KNOCKDOWN AND KNOCKOUT CHART on the game board.
B. Check the KDR number on the next Action Card and cross-reference it with the KDR 1 rating of the fighter who has been hit (these numbers run down the left side of the KNOCKDOWN AND KNOCKOUT CHART). This will provide you with either a number or the letter "K".
C. If a "K" appears the fighter has been knocked down. You must then check for a knockout (see next section in the rules). If there is no "K" result, there will instead be a "4" or "5". If a "4" appears score 4 points for the fighter who landed the punch and continue with the regular procedure. If a "5" appears use the Killer Instinct rule.
KILLER INSTINCT: This is used only after a knockdown or a five-point punch has been scored. The KI number is used as follows: Count out cards (taken from the top of the pile of unused Action Cards) equal to the KI number of the fighter who has scored the KD or the five-point punch. These cards are flipped up and the Random Number is applied directly to action without reference to the Control Factor. While using his Killer Instinct a fighter is always assumed to be in control. When these cards are used up return to normal play. NOTE: If while using Killer Instinct another action occurs which would normally cause KI to apply, ignore it. KI is added cumulatively to other KI. If the Killer Instinct is in use, and the cards run out before all KI is used, the round ends immediately unless a punch has already landed, in which case the results of that punch are found, and then the round ends.
Knockouts
Every time a fighter is knocked down there is a chance that he has been knocked out. If a fighter has suffered a knockdown you must:
A. Check the KOR number on the next Boxing Action Card and the KOR rating of the fighter who has been knocked down.
B. Using the same procedure as that used to check for a knockdown, cross-reference the KOR number taken from the Action Card with the number taken from the fighter's card.
C. If a "K" is the result, the fighter has been knocked out and the fight is over. Count the number of cards which have been used in this round and apply that number to the KO TIME CHART to see at what point in the round the knockout occurred.
D. If a number appears the fighter was not knocked out and is back on his feet. In such a case check the Random Number on the next Action Card and apply it to the KNOCKDOWN COUNT. This gives you the count the fighter was down for and the points awarded to his opponent for the knockdown. (NOTE: KNOCKDOWN COUNT is on playing board).
More Than One Knockdown in a Round
If a fighter succeeds in knocking down his opponent, and there is a second knockdown chance in the same round, you should add his opponent's KDR 2 and KDR 1 numbers together, and then use this total in exactly the same way you would use the KDR 1 when checking for a knockdown the first time. EXAMPLE: Jim Jeffries is knocked down in the seventh round. Later in the same round, there is another chance for a knockdown. The KD number on the next Action Card is 6, which is less than Jack Johnson's KDR 1 number. So now Jeffries' KDR 1 and KDR 2 numbers are added together (for a total of 2), and this number is cross-referenced with the next Action Card number in the normal manner.
Knockdown Recovery Chart
The KNOCKDOWN RECOVERY CHART is used to see if the effects of a knockdown in one round carry over into the next round. At the end of any round in which a knockdown occurs be sure to check the KNOCKDOWN RECOVERY CHART printed on the playing board.
Endurance
A fighter's endurance is very important. It reflects his stamina, ability to pace himself and his ability to take a punch. Endurance is used up in two ways:
A. The number of punches he misses during the fight.
B. The number of points the fighter's opponent scores against him.
In each round of the fight, keep track of the punches each fighter misses in the PM section of the scoresheet. At the end of each round, the number of points the fighter has scored is added to the number of punches his opponent has missed. This total is then subtracted from the opponent's endurance. EXAMPLE: At the end of Round One Jack Johnson has scored 13 points and Jim Jeffries has missed four punches. Jeffries' initial END was 110. Adding Johnson's points and Jeffries missed punches together, we come up with 17, which is then subtracted from 110 to leave 93. This is Jeffries' remaining END. When his END reaches 0, it is used up.
Using Up Endurance
Once a fighter's END is used up two things happen:
A. His HP decreases by 1 each round.
B. His Punches Landed (PL) decreases by 1 each round.
EXAMPLE: At the end of Round 9 Jeffries has scored 81 points and Johnson has missed 14 punches. This is a total of 95, which means Johnson's END is used up.
For Round 8: Johnson's HP is a 6 and his PL is 1-49 (don't forget opponent's DEF).
For Round 9: Johnson's HP is a 5 and his PL is 1-48.
For Round 10: Johnson's HP is a 4 and his PL is 1-47.
If more rounds were to be fought, then the HP and PL keep decreasing (down to 1, if possible, though this will rarely if ever occur) until the fight is over.
Cuts
To determine if a fighter has cut his opponent, follow these steps:
A. If a punch lands followed by a cut (EXAMPLE: R-(Cut-3)-19), this means a cut MAY have occurred.
B. If the Cut Number (in this case "3") is less than or equal to the CO of the fighter landing the punch, consult the PRIMARY CUT CHART.
C. Check the RN on the next Boxing Action Card (find this number going down the PRIMARY CUT CHART) and check the CH rating of the fighter who has been hit (go across the top of the PRIMARY CUT CHART to find this number).
The result is where the two numbers meet. If the space there is black there is no cut. If there is a letter in the space refer first to the CUT DESCRIPTION and, if necessary to the TKO CHART FOR CUTS (both on the game board).
Using the Scoresheet
The scoresheet is for the most part self-explanatory. At the top you will find spaces for the optional strategy rules, with parentheses for the strategies available under them below where you can indicate how many of each type of strategy you have actually used.
Under that is a series of boxes which are used to keep track of total points scored. Note that these do not include punches missed by one's opponent; this is important only for endurance.
Under the boxes write the number of points scored in each round. This is particularly important because if a certain number of points are scored in one, two, or three rounds, there is a chance of an automatic TKO (see table in lower right-hand corner of game board). The "FIGHTING INSIDE EFFECT CHART" is printed on the board merely because it is easier to read there than to rummage through the rules looking for it, and the board was already crowded with tables and charts. This chart merely shows you what to do when a fighter who is using the FIGHTING INSIDE strategy outlined in the optional rules wins a round.
Fouls/Cuts Conditions: If a fighter is cut in a particular round, put the letter symbol that indicates what type of cut it is in this box. If he receives a warning put a "W" in the box for each warning, and if he commits a foul put an "F" in the box.
CF, HP, PL, AGG, KDR 1: In each of these boxes, it is the case that there will be a temporary or permanent change to one or several of these ratings, in which case you write the new rating in the appropriate column in the box opposite the round in which it was received. EXAMPLE: In Round 10 a fighter loses his END, in round 11 his PL is now one less than it was in the previous round (going for 1-46 to 1-45, for example), and his HP also one less than it was.
PM: Put a mark in this box for each punch missed per round.
TP + OPM: Put the total points scored plus the opponent's points missed. This should be a cumulative total (in other words, add the TP + OPM for one round to that of all previous rounds), and when this total equals your opponent's initial END he has lost his endurance and begins to suffer the reductions described elsewhere in the rules.
J1, J2, R: Depending upon which scoring system is being used, write how that particular judge or the referee scored the round and write in the points or "H", "L", or "E" if appropriate as indicated in the section of the rules on scoring.
Comments, Fighter's Record: This is for whatever information you wish to record on the scoresheet (such as time of KO, etc.) for posterity.
Winning the Fight
There are four ways in which the outcome of a fight can be decided. These are:
A. One fighter knocks out the other.
B. One fighter scores a TKO (technical knockout) against the other, either due to a cut or too much punishment (see the TKO AND CONDITION CHART for details).
C. One fighter wins on points, using one of the three points systems listed on the SCORING CHART.
D. One fighter wins on rounds, using the Rounds System listed on the SCORING CHART.
Which Scoring System to Use
The One-Point System is used in California. Massachusetts, Ohio, and Texas use the Ten-Point Systems. New Jersey uses the Rounds System, and so does New York, unless there is a draw, in which case they then refer to the One-Point System to determine the winner. In all other cases for fights fought in the United States use the Five-Point System. For fights fought overseas we suggest that you check to see what sort of scoring system is used in the country in question, and if not able to find that, use the New York system of scoring.
The scoring systems are for the most part self-explanatory. When the word "Check" appears beside a point spread, this means to refer to the bottom of a randomly chosen Boxing Action Card (just pull one out of the deck you used for the round just concluded) to find out the effect. "HS" means the high scorer, and "LS" means the low scorer, while "E" means that the round was judged even. EXAMPLE: Johnson beats Jeffries by 4 points, using the Five-Point System. The chart says "Check", which means you refer to a randomly chosen Action Card. At the bottom of the card you will find the initials "J1", "J2", and "R", with either "H", "L", or "E" after them. If the card you referred to said "J1:H, J2:L, R:E", this would mean that the first judge gave the round to the high scorer (Johnson), the second judge gave it to the low scorer, and the referee called the round even. You would then immediately write this on the scoresheet, and at the end of the fight, add up all the points each fighter received from each scorer. The fighter with the most points wins, unless there has already been a victory from other causes (such as a KO or TKO; see above).
Important Note on Winning Rounds
The only exception to the SCORING CHART on the game board is as follows: If the margin in a round is between 0-5 and a knockdown has been scored by one of the fighters, there is no check—the fighter who has scored the knockdown automatically wins the round. The reasoning here is that a knockdown is so dramatic that even in a closely fought round, the scorers of the fight are strongly influenced by it and the judges would reflect that in their scoring of the round.
Boxer Ratings
The Boxer Rating is the number that appears immediately following the fighter's name on the front of each Fighter Card. For example, Jack Johnson has a Boxer Rating of 12, and Jim Jeffries has a Boxer Rating of 11. These ratings are provided solely to give you an idea of the overall ability of one fighter versus others in his weight class. A fighter who is rated at 5 or less will probably never beat one who is rated higher, but there is always a chance.
The Boxer Ratings will be helpful in setting up tournaments, when you would seed the highest fighter against the lowest, the second highest against the second lowest, etc. You can also give a fighter points equal to the Boxer Ratings of all opponents he has beaten, and thus keep a running total and rank your fighters accordingly.
Optional Rules
Optional rules are just that. They are not required for play of the game, and will tend to add somewhat to the length of a fight. On the other hand, they will add to the realism of the game, and in the case of the optional ring strategies, make the game much more suitable for two players. After having mastered the basic game, you may wish to use any or all of these options.
Strategy
Whether playing TITLE BOUT solitaire or head-to-head, you may wish to take a more active part in "managing" your fighter by using certain strategies available to you. There are five basic strategies that you may employ:
-
The Cover-Up: This is a defensive strategy that is used to avoid being seriously hurt or suffering a TKO in a particular round. For example, if your fighter has been knocked down and you think that he might not last the round, you may cover up for a portion of the round being fought or a portion of all of the next round.
-
Fighting Inside: This form of strategy is designed to score points and theoretically attack your opponent's body while at the same time taking the chance that your own defense will be somewhat weakened. Used when points are needed quickly.
-
Fighting Outside Defensively: This strategy avoids your opponent's power and reduces his accuracy, but it cuts drastically your punching effectiveness. Good when you have a solid lead late in the fight.
-
Fighting Outside Offensively: This strategy helps avoid your opponent's power and also helps defensively, but not to the extent to which fighting outside defensively does. It is easier, however, to score points and win the round.
-
Knockout: This strategy is designed to work in two ways. If used early in the fight while your fighter still has his endurance, it can bring about an excellent shot at a knockdown and possible knockout. If used after your fighter's endurance is gone, the chance is not nearly so great. Going into the late rounds of a fight and knowing you can't win on points, you may wish to go all out for a knockout. Or perhaps you are fighting an opponent with little hitting power and wish to attempt a knockout at minimum risk to yourself (because of your opponent's lack of power) so you decide to open up early in the fight.
These are your basic choices. In addition, you can always choose "No Strategy", which means that your fighter sticks to his basic style, with no changes in any of his ratings. Before using any of the strategies, you should study the Strategy Cards thoroughly in order to fully understand the strengths and weaknesses of each one, for each card has both its strong points and weak points, depending upon how it is used.
How to Use Strategy
In order to use strategy in a fight, at the beginning of each round you should select the Strategy Card you wish to use from the deck and refer to the appropriate area on the card to find out the effect your strategy will have. Of course, this effect will vary depending upon your opponent's strategy.
In certain cases, you will see the legend "Cannot Occur" opposite one of the strategies. This means that if you choose the strategy at the top of the card, and your opponent chooses the one listed with "Cannot Occur", that you simply play the round as if you had chosen a "NO STRATEGY THIS ROUND" card. If this should occur, you may still use that strategy in a later round.
When to Use Strategy
All of the strategy options may be used at any time during the course of the fight, but all of them with the exception of the Cover-Up may be chosen secretly and then revealed before the round in which they are to be used. The Cover-Up may be declared at any time during a round except when Killer Instinct is being used.
Frequency of Strategy Use
Strategy Cards cannot be chosen in every round. You may, however, choose them subject to the following limitations:
- 10 Round fight—up to 5 strategies
- 12 Round fight—up to 6 strategies
- 15 Round fight—up to 7 strategies
Of course, these numbers are maximums. You may use one, two, three or none; it's entirely up to you.
Strategy for the Individual Fighter
On each fighter's card, you will find the following abbreviations: CU, for Cover-Up; KO, for Knockout; FO, for Fighting Outside; and FI for Fighting Inside. These abbreviations will be followed by a number which represents how many times that particular fighter may employ each type of strategy in one fight. EXAMPLE: On Jim Jeffries' card you will find the following: FI: 3, FO: 3, CU: 0 and KO: 3. During the course of the bout, he may fight inside or outside, or go for a knockout three times. He may not use the Cover-Up as a strategy. Please note that although there are two types of Fighting Outside, the use of either one would count against the total allowed for that fighter (in this case three).
Note on Strategy Effects
There may be some confusion over the exact meaning of the words "Increase" and "Reduce" on the Strategy Cards. "Reduce" means to subtract the number mentioned from the boxer's defense number (so a DEF of −2 reduced by 2 becomes −4). Increase means just the opposite. A DEF of −2 increased by 2 would become 0.
Ring Position
Ring Position is easy to use. Begin by putting the extra colored pawn on the space marked "ring center" in the boxing ring printed on the game board. When a Boxing Action Card appears during a round and the word "Check" is printed next to the legend "RING POSITION," you check the next Action Card to see what the Ring Position is.
Note that any checks for Ring Position are in addition to whatever other readings are taken off the cards. In other words, you won't use a separate card to just find the ring position. Once you have determined where the action is taking place, and moved the pawn (if necessary) to the new area, the following effects occur:
-
If the fighters are in ring center, there is no change and play continues as normal.
-
If the action has shifted to the near or far ropes, or into one of the corners, the fighter who is currently in control adds his opponent's In Corner/On Ropes rating to his own Control Factor. This advantage remains in effect until either a new ring position check is made or until a Random Number drawn under ACTION falls in the Ring Movement range of the fighter who has been trapped against the ropes or in a corner. The better a fighter is off the ropes, the lower his In Corner/On Ropes rating will be and the less of an advantage will be gained by his opponent.
EXAMPLE: Jack Johnson with a Control Factor of 12 traps Jim Jeffries against the ropes. Jeffries' In Corner/On Ropes rating is "2". Adding this number to Johnson's CF makes Johnson's new CF "14". As long as Jeffries is on the ropes Johnson keeps this CF.
Note that a fighter can have his opponent trapped and still lose control. This does not mean that his opponent has moved away; it simply means that the fighter is fighting back. If the fighter who had originally trapped his opponent regains control, he still keeps the addition to his CF unless one of the two conditions listed in #2 above is met.
Special Note: Some copies of the first edition of TITLE BOUT do not have the word "Check" printed on the Boxing Action Cards. To remedy this, if you wish to use the RING MOVEMENT option print the word "Check" on 8 of the Action Cards as follows: 4 on cards marked "Ring Center", and the other 4 on any cards with other ring positions (but no more than one each of, for example, "Right Neutral", "Near Ropes", etc.). Do not put "Check" on any cards marked with a knockdown chance.
Adjusting the KDR According to Opponent's HP
This option allows the more powerful hitter to score more knockdowns and the lighter hitter to score fewer knockdowns. This is simple to use, yet it adds more realism and accuracy to the game. Use the chart below:
- If fighter A's HP is 10 add 2 to fighter B's KDR 1
- If fighter A's HP is 9 add 1 to fighter B's KDR 1
- If fighter A's HP is 8 or 7—no change
- If fighter A's HP is 6 subtract 1 from fighter B's KDR 1
- If fighter A's HP is 5 subtract 2 from fighter B's KDR 1
- If fighter A's HP is 4 subtract 3 from fighter B's KDR 1
IMPORTANT: Never subtract from or add to a fighter's KDR 2 or his KOR. Also, no KDR 1 can ever be reduced below 1.
Fighting a Boxer Out of His Normal Division
TITLE BOUT contains fighters from all of the major weight classes. Normally a fighter boxes at one weight throughout his entire career, but on occasion a fighter outgrows a division and moves up to a higher weight class. In very rare cases a fighter comes along who dominates two divisions the way Sugar Ray Robinson and Henry Armstrong did (Armstrong actually held three division crowns simultaneously!).
TITLE BOUT has incorporated this aspect in the following manner. The primary division the fighter boxed or boxes in is the one that he is listed for on his card. In the case of several fighters, there are two cards available.
If you wish to fight a boxer out of his division, either one he did historically or just to see what might happen, use the chart below.
Key to Changing Divisions
Fighting one division below normal—Add one to CF and one to HP. Subtract one from KDR and KOR.
Fighting one division above normal—Subtract two from CF and HP. Add two to KDR and KOR.
As a rule, only fighters known to have fought out of their regular weight class should do so. Never fight a boxer more than one division above or below his primary one unless designated on one of his cards. Also, never reduce any area on the fighter's card to zero (0).
Reduced Hitting Effectiveness
After a fighter has become fatigued (in other words, his endurance is used up) subtract one point from his point total in the first round he is fatigued, two in the second round, and subtract three points for each round for the remainder of the fight. EXAMPLE: Johnson tires in the 6th round. In the 7th round, he scores 13 points. Adjust that to 12 points. In the 8th round, he scores 16 points. Adjust that to 14 points. In the 9th round, he scores 8 points. Adjust that to 5 points. And so forth until the fight is over (remember—never more than 3 points per round). This represents the loss of sting from his punches.
Advanced Scoring Option
Ring Movement and Clinching: In general, clinching is usually done when a fighter is in trouble, hurt, frustrated, tired or confused. It is generally frowned upon by the judges. Ring movement, on the other hand, is usually indicative of control and ring generalship. Record the number of clinches and ring movements per round on a separate sheet of paper and add one point to the fighter's scoring total in each round that he moves more than clinches, and subtract one point from his total if he has clinched more than he has moved.
Championship or Home Town Bout: The old saying goes something like this; "You aren't given the crown, you have to take it!" This type of thinking has been in vogue throughout the history of boxing and has especially been evident in some of Ali's last fights and even Victor Galindez' last several defenses. If the round is close, it's going to go to the champion.
Another truism, fair or unfair as it may be, is that it's tough to win a decision in an opponent's home town. Again, the close rounds just seem to go the way of the home town favorite. To illustrate this in TITLE BOUT, use the regular scoring instructions except that when the champion or home town fighter (you can designate one, if you aren't refighting an historical contest) wins a round by a margin of 1-5 points, don't check as you normally would. Instead assume that he has automatically won the round (unless there was a knockdown against him). If scoring by rounds, and the champion or home town fighter wins by a margin of 3-5 points, assume that he has won the round.
REMEMBER! THESE OPTIONS DO NOT HAVE TO BE USED AT ALL, NOR DO THEY ALL HAVE TO BE USED TOGETHER. YOU MAY USE THE ONES THAT APPEAL TO YOU OR NONE AT ALL.
A Few Notes on Playing the Game
Boxer vs. Slugger: Generally, a player will choose to have his fighter be a boxer or a slugger depending upon how well his opponent's fighter can handle one type or the other. For instance, if George Foreman has a rating of 9/11 for his CFB/S, and he is fighting Archie Moore, who can be either a boxer or a slugger, Moore's manager will probably choose to have him fight as a boxer. Even though Moore's HP would be reduced by one, this would be more than offset by the reduction from 11 to 9 of Foreman's CF. Note that you cannot change from one type to another during the fight.
The Control Factor: The Control Factor is the key to TITLE BOUT. To go into great detail on how the CF was arrived at would take too long to explain here; it is enough to say that the main purpose of the CF rating is to keep the better fighter in enough control and command of the fight to bring the other factors on his card into play. Obviously, for example, a fighter's accuracy and power are greatly affected by his ability to stay in control and land his punches. A fighter with an HP of 10 and a CF of 12 is more dangerous overall than a fighter with an HP of 10 but a CF of 8. Although the latter will punch harder he won't get as many chances because he won't be in control as often.
Regarding the modification of the CF, this is essential because of the delicate balance of the game. Although a CF of 12 versus a CF of 6 will present the player with an accurate picture of the relative abilities of the two fighters, two 12's fighting each other will not, because whomever gets in control will tend to stay there. Conversely, two fighters each with a CF of 7 will not be in control enough, which will make for a rather boring battle of counterpunching. Using the conversion chart will provide the most realistic results and the most enjoyable fights.
The Strategy Cards: Although the Strategy Cards provide a great deal of fun for the players, and are essential to a two-player game, it should be pointed out that TITLE BOUT is, at its heart, a statistical game in which the best fighters will tend to prevail. Once the Strategy Cards are introduced into the game the variation they will produce in results will, of necessity, cause some effect upon the realism of the game. On the other hand, they will also allow a player to outwit his opponent and, after all, is often boiled down to parlaying inferior talent into victory through superior use of that talent. Incidentally, the reason that the Cover-Up is not available to all fighters is not because they were unable to do it, but because certain fighters (the great Joe Louis, for example) were so good on offense that if they were forced on the defensive they sometimes had trouble merely by virtue of the fact that they were so unused to it.
Things to Remember While Playing
a) Check condition chart if 20 points have been scored by one fighter during the round.
b) Watch the 2 and 3 round totals for a possible TKO (any two or three consecutive rounds—ex. 1, 2, 3-7, 8, 9 and so on).
c) Lower HP and PL after stamina is used up (endurance).
d) If a gash is opened or reopened, check for stoppage due to cut at the end of the round.
e) Don't forget to add aggressiveness points to round scores if there are any.
f) Remember, a fighter must be in control to do anything, except immediately after the opponent goes out of control.
g) Check to see if there is any carry over effect into the next round from a knockdown.
h) Check to see how long the fighter was down after the knockdown.
i) When scoring, if the margin is 1-5 but a knockdown was scored by one of the fighters, the fighter who scored the knockdown automatically wins the round.
j) Count your missed punches as they come off your own endurance.
Sample Cards
Boxer Card
JAMES JEFFRIES—11(S)
1896-1921 Heavyweight

CFB/S: 10/11        CO/CH: 5/2
HP/KI: 9/8           TKO: 1
KDR 1: 1             AGG: 9
KDR 2: 1             END: 110
KOR: 1               DEF: +4
FI: 3  FO: 3  CU: 0  KO: 3

ACTION
Punches Landed: 1-43
Punches Missed: 44-62
Clinching: 63-70
Ring Movement: 71-78
Foul Rating: (A)

HITTING VALUE          3        2
Jab: 1-7                        8-12
Hook: 13-23                     24-30
Cross: 31-45                    46-56
Combination: 57-60              61-62
Uppercut: 63-73                 74-80

In Corner/On Ropes: 2
Boxing Action Card
RING POSITION: In ring center

CF: 13          RN: 71

RESULT: L-22

KD: 17

KDR: 9

KOR: 20

J1: E   J2: H   R: E
Important Abbreviations
On Boxer Card
- CFB/S: control factor against a boxer/control factor against a slugger
- HP/KI: hitting power/killer instinct
- KDR 1: knockdown rating 1
- KDR 2: knockdown rating 2 (used after a fighter has been knocked down one time already in the round)
- KOR: knockout rating
- CO/CH: cutting the other fighter/cut susceptibility himself
- TKO: technical knockout rating (used with TKO chart)
- AGG: aggressiveness rating
- END: endurance rating
- DEF: defense
- STRATEGY: FI: fighting inside, FO: fighting outside, CU: cover-up, KO: knockout
- FOULS: A, B, C ratings used with foul chart
On Boxing Action Card
- CF: control factor
- RN: random number
- R: right handed punch
- L: left handed punch
- KD: knockdown (used with HP)
- KDR: knockdown (used with knockdown chart)
- KOR: knockout
- J1: judge 1
- J2: judge 2
- R: referee
- H: high scorer
- L: low scorer
Last Second Additions and Clarifications
-
When referring to the FIGHTING INSIDE EFFECT CHART in a bout using the Rounds System of scoring, figure out the result for that particular reference as if the Five-Point System were in use. In other words, determine the winner of the round based upon the Five Point System, and then refer to the chart.
-
When the TKO AND CONDITION chart calls for the TKO rating of a fighter, use the TKO rating of the fighter who has been scored against to determine if there is a TKO or injury.
-
If the PRIMARY CUT CHART calls for a one-point cut to be reopened, and only two-point cuts have been scored, treat as no cut.
-
When a warning or foul occurs, put the Random Number chosen for that foul or warning on the scoresheet next to the "W" or "F", as this may have some effect upon a fighter's chances for disqualification. In other words, keep track of whether there was a low blow, rabbit punch, etc.
-
The FOUL CHART lists a result labeled "INTERNATIONAL BUTT". Although it does not affect the play of the game, it should be noted that this is a minor error. It should read "INTENTIONAL BUTT".