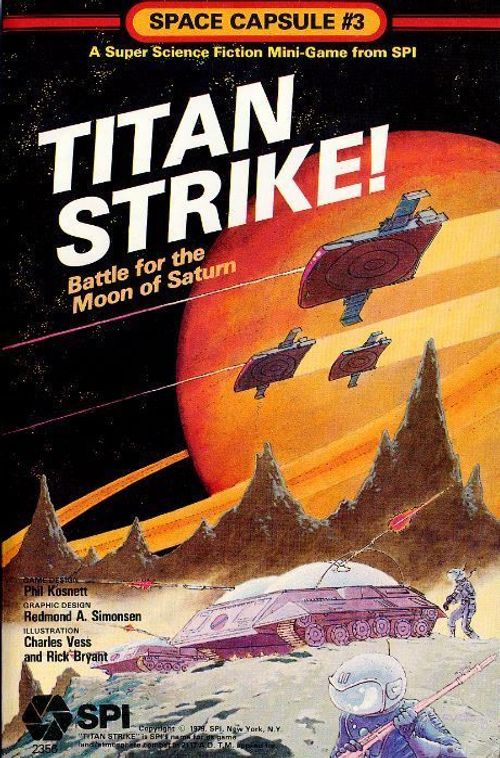
Titan Strike! Battle for the Moon of Saturn
Titan Strike! Battle for the Moon of Saturn Rulebook
Table of Contents
Table of Contents
- 1.0 Introduction
- 2.0 The Playing Pieces
- 3.0 Setup for Play
- 4.0 Sequence of Play
- 5.0 Electronic Warfare
- 6.0 Sky Combat
- 7.0 Skydive
- 8.0 Anti-Sky
- 9.0 Ranged Combat
- 10.0 Line of Fire
- 11.0 Land Movement
- 12.0 Close Combat
- 13.0 Ammonia Flooding
- 14.0 TECV/Drone Concealment
- 15.0 Ambush (Optional)
- 16.0 Drone Capture (Optional Rule)
- 17.0 Scenarios
1.0 Introduction
The introduction (section 1.0) is the flavour text in the Table of Contents block above.
2.0 The Playing Pieces
General Rule:
There are 100 die-cut cardboard playing pieces (counters), which represent the Land and Sky units of the EEC and HEA. The pieces are moved across the game-map during play. Each hexagon (hex) on the map represents an area 1000 meters in diameter.
If no die is available, players may use the randomizer chits included in the countersheet. If a die roll is called for, draw one of these chits at random to give a number from 1 to 6.
Sample Units: The printed rules show a sample Land Unit (with Ranged Combat Strength, Range, Close Combat Strength, and Movement Allowance) and a sample Sky Unit (with Standoff Strength, Range, Vertical Drop Strength, Sky Combat Strength, and Maneuver Rating).
Summary of Unit Types (as printed; each counter's stats read Ranged Combat Strength and Range across the top, Close Combat Strength and Movement Allowance across the bottom for Land units, and Standoff Strength, Range, Vertical Drop Strength, Maneuver Rating and Sky Combat Strength for Sky units):
Note on this transcription: the printed Summary of Unit Types is a graphic of counters, and the stat numbers on the Surface-to-Sky Missile, Support Skimmer and Howitzer counters are too small in the scan to read with confidence. Those values are not reproduced here; consult the printed counter sheet.
Land units: TECV (Ranged 1, Range 4; Close 3, Movement 6). Laser (Ranged 0, Range 20; Anti-Sky Rating A; Close 0, Movement 3). Heavy Infantry (Ranged 2, Range 1; Close 4, Anti-Sky Rating B, Movement 4). Engineer Infantry (Ranged 0, Range 1; Close 2, Anti-Sky Rating C, Movement 3). Drone (Ranged 1, Range 4; Close 2, Movement 6). Hopper (Ranged 1, Range 3; Close 3, Movement 3H; see Section 11.1 for hops). Hover Platform (Ranged 1, Range 1; Close 4, Movement 6).
Sky units: Fighter Skimmer (Standoff 2, Range 9; Vertical Drop 3, Maneuver Rating C, Sky Combat Strength 7). Attack Skimmer (Ranged 4, Range 2; Vertical Drop 6, Maneuver Rating A, Sky Combat Strength 3).
3.0 Setup for Play
General Rule:
Each scenario (different version of the game) gives instructions for setup. In a scenario, a Player's units may begin the game on the map or enter the map on the first or a later Game-Turn. The number and type of units a Player receives is detailed in the scenario instructions. Scenarios are given in Section 19.0.
The printed text reads "Section 19.0"; the scenarios are in Section 17.0 in this printing.
Cases:
[3.1] Rolling for Initiative
In certain Phases (which are a particular segment or part of a Game-Turn), Players are instructed to roll for Initiative. Each Player rolls a single die, and the Player with the higher number goes first in that Phase, either moving a unit, placing a unit on the map, or attacking, depending on the Phase. The other Player then executes his function for that Phase. If both Players roll the same number, they simply roll again.
[3.2] Range
Each unit has a Range number. The unit may attack Enemy units up to that number of hexes away; e.g., a unit with a Range of 4 could attack an Enemy unit between 0 and 4 hexes away in the Anti-Sky or Ranged Fire Phases. In the Close Combat Phase, units may only attack units in the same hex; i.e., at a Range of 0. Units in the same hex are at a Range of 0, adjacent units are at a Range of 1, and so on.
Important note: Titan Strike has no Combat Results Table. The procedure used to resolve land combat is explained in the Ranged Combat rules.
4.0 Sequence of Play
Titan Strike is played in Game-Turns. Each Game-Turn is divided into seven distinct Phases, which are executed in strict order. Each Game-Turn represents six minutes of real time.
-
Electronic Warfare Phase. Players simultaneously allocate their Electronic Warfare Points in an attempt to jam the Enemy Player's communications. Jamming effects last until the end of the Game-Turn.
-
Sky Combat Phase. Players simultaneously commit Sky units, and consult the Lock-On Chart to determine the number of rolls each Player makes on the Hit Table to attempt to eliminate Enemy Sky units.
-
Skydive Phase. Players may alternate placing those Sky units which participated in Sky Combat on the map.
-
Anti-Sky Phase. Players alternate attacking Enemy Sky units with their Land units.
-
Ranged Fire Phase. Players alternate attacking Enemy Land units with their Land and Sky units using Ranged Combat. All Sky units are then removed from the map.
-
Land Movement Phase. Players alternate moving their Land units up to the limits of each unit's Movement Allowance.
-
Close Combat Phase. Players alternate attacking Enemy Land units with their Land units in the same hex. At the end of this Phase, all Disrupted units are Undisrupted. (Hexsides are never undisrupted; see Section 13.0.)
5.0 Electronic Warfare
General Rule:
Electronic Warfare describes the use of jamming gear to disrupt Enemy communications. At the beginning of every Electronic Warfare Phase, each Player notes (secretly, on paper) which frequency his units will use during that Game-Turn. The HEA Player chooses any frequency from 1 to 6; the EEC Player chooses any frequency from 7 to 12. In addition, each scenario assigns each Player a number of Electronic Warfare (EW) Points to use during each EW Phase. During this Phase, both Players secretly allocate their EW Points to defend the frequency being used, and/or jam any number of Enemy frequencies suspected of being used. EW Points have no effect beside jamming. At a given time one, both, or neither Player may be jammed.
Example: The HEA Player is assigned 5 EW Points, the EEC Player 3 Points. The HEA Player writes "using freq. 4, defending with 2 Points, 1 Point jam freq. 10, 2 Points jam freq. 11," using up his 5 Points. The EEC Player writes "using freq. 12, not defending, 3 Points jam freq. 4." The HEA Player fails to jam. The EEC Player has jammed the HEA Player by jamming the frequency in use, frequency 4.
Cases:
[5.1] Determining Net EW Superiority
If a Player jams the Enemy frequency in use, the number of defending EW Points is subtracted from the number of EW Points jamming that frequency, yielding the Net EW Superiority, expressed in terms of Net EW Superiority Points. (In the above example, 3 Points jamming minus 2 Points defending equals +1.) There may be negative Net EW Superiorities, but these only affect Sky Combat.
[5.2] Effects of Jamming
Each additional positive Superiority Point above zero has these effects on all units of the jammed Player, excluding drones and hoppers: (1) reduces their Movement Allowance by one; (2) reduces the Anti-Sky Ratings of SSMs, infantry, and engineers by one level (e.g., from B to C); (3) reduces the standoff strengths to Skimmers by one. Jamming also affects Sky Combat, as is explained in the Sky Combat rules. Jamming effects last until the start of the next Electronic Warfare Phase.
[5.3] Effects of Jamming on Drones
Each positive Superiority Point above zero reduces the drone Movement Allowance by two. Drones jammed by three Superiority Points are immobilized and cannot attack.
[5.4] Effects of Jamming on Hoppers
Hopper movement is reduced by one hop for every two Superiority Points. No unit's Movement Allowance is ever reduced below one Movement Point (or one hop) except a drone, which can be reduced to zero.
6.0 Sky Combat
General Rule:
During the Sky Combat Phase, Players simultaneously select all, some, or none of their Skimmers to participate in Sky Combat. (Units that do not participate may not enter the map in this Game-Turn's Skydive Phase.) Players (a) determine the Attacker's Combat Differential and (b) consult the Lock-On Chart, which tells Players how many rolls on the Hit Table each may make. Players then consult the Hit Table and roll to eliminate Enemy units. Players choose which of their units will be eliminated when losses are called for.
Procedure:
Players simultaneously reveal their choice of units and compare their total Sky Combat Strengths; the smaller total strength is subtracted from the larger, yielding the Attacker Combat Differential. The Player with the larger Strength is the attacker, the other the defender. (For example, the HEA Player commits two fighters with a total strength of 16, the EEC Player one fighter and one support with a total strength of 11. The HEA Player is the attacker with a Differential of 5.) If the Differential is zero, either Player may be the attacker; it makes no difference which. Consult the Lock-On Chart (6.2) to determine the number of rolls on the Hit Table (6.3) each Player may make.
Cases:
[6.1] Using the Hit Table
Each Player makes all his rolls on the Hit Table (6.3) before either Player takes any losses. Each hit eliminates one Skimmer of his choice. The rolling Player uses that column of the Hit Table which corresponds to that Player's Net EW Superiority, which was determined in the Electronic Warfare Phase.
[6.2] Lock-On Chart
The Lock-On Chart is printed on the separate "Charts and Tables" sheet, which is not part of this scan. It is not reproduced here.
[6.3] Hit Table
The Hit Table is printed on the separate "Charts and Tables" sheet, which is not part of this scan. It is not reproduced here.
7.0 Skydive
General Rule:
During the Skydive Phase only, units that participated in Sky Combat may be placed on the map. Players alternate placing one unit at a time on any hex(es) of the map. Each Player rolls a die; the Player with the higher number has Initiative and places his units first. Players are not obligated to place Skimmers and skymobiles on the map. If one Player wishes to place more units than the other, his "excess" units are placed after the other units have been placed in alternation. A Player may not "pass;" if he declines to place a unit or has no more to place, the other Player may continue to place his eligible units. Any number of HEA and EEC Skimmers may occupy a single hex. Terrain has no effect on Skimmers.
8.0 Anti-Sky
General Rule:
During the Anti-Sky Phase, land units may fire on Enemy skimmers and skymobiles on the map, within range. Players roll for Initiative. The first Player declares and executes all his attacks, then the second Player does so. All attacks are declared before execution; if two land units are assigned the same target and the first attack eliminates it, the second land unit may not be reassigned another target. A land unit may attack once per Phase; a Sky unit may be attacked any number of times.
Procedure:
Cross-index the Anti-Sky Rating of the firing land unit (remembering to modify for jamming effects, if any) with the Maneuver Rating of the target Sky unit on the Anti-Sky Table (8.2) and roll two dice. If the result is within the range given on the table, the Sky unit is eliminated.
Cases:
[8.1] Modifications
A unit with no Anti-Sky Rating, or one reduced below E by Jamming, cannot make Anti-Sky attacks. An HEA Laser (only) in the Power Station hex may make two attacks per Phase, at the same or different units, at full strength.
[8.2] Anti-Sky Table
The Anti-Sky Table is printed on the separate "Charts and Tables" sheet, which is not part of this scan. It is not reproduced here.
9.0 Ranged Combat
General Rule:
During the Ranged Combat Phase, land and sky units may fire on Enemy land units which are within range. Players first roll for Initiative, and the Player with Initiative declares and executes a single attack, then the other Player declares and executes a single attack. Attacks alternate until one Player has completed all his attacks, then the other Player executes all his remaining attacks. A unit may make only one attack per Phase; a unit may be attacked any number of times. Units may not combine their strengths for a single attack. All combat is considered simultaneous: all units attack before any disruptions and eliminations take effect. Note that Players declare one attack at a time, not all attacks at once.
Procedure:
A unit attacks by rolling a single die. If the target is a TECV, hopper, or hover platform, add 1 to the attacking unit's Ranged Combat Strength. If attacking a drone, SSM, laser, or howitzer, add 2. (These modifications are listed in Case 9.4.) The Terrain Effect Chart is then consulted for other modifications. If the die roll result is less than or equal to the attacking unit's modified Ranged Combat Strength, the target unit is disrupted. Denote this disruption by turning the counter 180°.
Cases:
[9.1] Effects of Disruption
A disrupted unit cannot attack. Its movement allowance is halved, rounding up. (Any jamming subtraction is made after halving and rounding.) A disrupted unit that is disrupted a second time is eliminated. A unit disrupted in the Ranged Combat Phase could be disrupted a second time in either the Ranged Combat or Close Combat Phases. (A unit disrupted in the Close Combat Phase could be eliminated through disruption only if disrupted again in the same Phase.)
[9.2] Attacking at Zero Range
A land unit attacking at a range of zero (i.e., the target is in the same hex) in the Ranged Combat Phase, uses its Ranged Combat Strength, not its Close Combat Strength. A skimmer attacking at a range of 0 uses its Vertical Drop Strength; at longer Ranges it uses its Standoff Strength. Note that Vertical Drop Strength is not reduced by jamming. All skimmers are removed from the map at the end of the Ranged Combat Phase; they are available for use the next Game-Turn.
[9.3] Split Fire
Units with a printed Ranged Combat strength of 0 may not attack. Howitzers and attack skimmers may execute Ranged combat in two ways. They may make single attacks at normal strength (6 for the former, 6 or 4 for the latter) or they may split fire. A unit that splits its fire makes two attacks at half strength (2 x 3, or 2 x 2). The two attacks may be made against the same or different targets. Any strength modifiers (for unit type, terrain) are made in full to both attacks. The two attacks count as separate attacks for Initiative alternation purposes, and a Player may choose to have a unit split fire at any point in the Ranged Combat Phase.
[9.4] Combat Strength Modification Summary
The Combat Strength Modification Summary is printed on the separate "Charts and Tables" sheet, which is not part of this scan. It is not reproduced here. The modifications it summarises are stated in the Ranged Combat Procedure above.
10.0 Line of Fire
General Rule:
A unit may attack only if it has a Line of Fire to the target. Skimmers, howitzers, and units making Anti-Sky attacks may attack any unit within Range regardless of terrain. Other land units must obey these rules:
- A unit in a mesa hex may fire into or through any terrain.
- A unit in a clear, ammonia, or dry sea hex may always fire into or through the same terrain.
- A unit in a dry sea hex may fire into or through another dry sea hex only if a straight line drawn from the center of the firing unit's hex to the center of the target's unit's hex does not pass through a clear, ammonia, or mesa hex.
- A unit in a clear or ammonia hex may fire into an adjacent dry sea hex. It may always fire through dry sea.
- A unit in a clear, ammonia, or dry sea hex may fire into, but not through, a mesa hex or through any number of other hexes.
- A unit may fire into a cavern hex if it is in an adjacent hex. A unit in a cavern may fire out, but only in a straight line (e.g., from hex 1007 to hex 0609).
- Installations (power and survey stations, HQ, skimmer strip, sensor, and power cable) have no effect on Line of Fire.
- Units themselves do not block Line of Fire.
11.0 Land Movement
General Rule:
Players may move all, some, or none of their land units during the Movement Phase. Players roll for Initiative, then the Player with Initiative may move a single unit, then the other Player, then the first, etc. Movement is alternated until a Player has moved all of the units he wishes, at which point his movement is completed. If a Player does not move a unit during his Movement, his Movement is considered completed. The other Player may then complete his remaining Movement. Four land units of each nationality (eight in all) may occupy a single hex at one time (exception: see Case 12.2).
Procedure:
A unit moves by expending Movement Points from its Movement Allowance to enter each hex; the cost of each hex in Movement Points is given on the Terrain Effects Chart. A unit may move less than its full allowance each Game-Turn and may move in any direction or combination of directions. Movement Points may not be saved from Game-Turn to Game-Turn or be transferred among units. A unit may not enter a hex without spending the proper number of Movement Points.
Cases:
[11.1] Hopper Movement
Hoppers have no Movement Allowance, expend no Movement Points, and may never enter a cavern. However, a hopper may make up to three hops per Movement Phase. A unit that hops is removed from the map and placed on any hex exactly three hexes away. A roll is made on the Hopper Crash Table to determine if the hopper has crashed, i.e., is eliminated. If not, it may make a second hop (and crash roll) and a third hop (and crash roll). Heavy Infantry units make a single three-hex hop once per game (instead of regular movement for that Game-Turn); Heavy Infantry does not roll for crash.
[11.2] Cavern
Only one unit of each nationality may occupy a cavern hex. Think of a hex containing a cavern hex as two hexes: a cavern hex and a mesa hex. (Eight units may occupy the mesa hex.) A unit may only enter and exit a cavern hex from another cavern hex or a clear hex. When a unit enters a hex containing a cavern, the owning Player must declare whether it is entering the cavern or the mesa. In the former case, rotate the unit 60° as a reminder. Units in the cavern hex and the mesa hex above it do not affect each other in any way.
[11.3] Slope Climbing
When a Player attempts to move a unit (except infantry, engineer, or hopper) from a dry sea to a clear or ammonia hex, or from a clear or dry sea to a mesa hex, roll a die. On a roll of 1-4, the unit may move into the hex; on a 5-6, it is stuck at the bottom of the slope. It remains in the hex it was attempting to leave and may move no further during that Game-Turn. Add 1 to the roll if the hex being entered is Enemy-occupied. Subtract 2 if the hex being entered contains a Friendly engineer. Note that entering a cavern is not slope climbing.
[11.4] Leaving Enemy-Occupied Hexes
A unit must stop upon entering an Enemy-occupied hex and move no further during that Game-Turn. A unit beginning its Movement in an Enemy-occupied hex may leave it, with these exceptions:
- Hoppers may not leave hexes occupied by Enemy hoppers.
- TECVs, drones, howitzers, and hover platforms may leave hexes occupied by any Enemy unit except hoppers, TECVs, drones, howitzers, or hover platforms.
- Lasers may not leave hexes occupied by any Enemy unit except Enemy lasers.
- SSMs, engineers, and heavy and skymobile infantry units may not leave hexes occupied by any Enemy unit except lasers or engineers.
- Units may always leave hexes occupied only by Enemy drones immobilized by jamming.
[11.5] Hopper Crash Table
The Hopper Crash Table is printed on the separate "Charts and Tables" sheet, which is not part of this scan. It is not reproduced here.
[11.6] Terrain Effects Chart
The Terrain Effects Chart is printed on the separate "Charts and Tables" sheet, which is not part of this scan. It is not reproduced here.
12.0 Close Combat
General Rule:
During the Close Combat Phase, Players roll for Initiative. The Player with Initiative declares and executes a single attack, then the second Player declares and executes a single attack, and so on, as in the Ranged Fire Phase. Attacks are resolved according to the procedure for Ranged Fire, except that units may only attack units in the same hex, at a Range of 0, using their Close Combat Strengths instead of their Ranged Combat Strengths. Combat is considered simultaneous: all units fire before disruptions and eliminations are recorded. At the end of the Phase, all disrupted units are returned to normal, i.e., are undisrupted. (Note that howitzers may split fire in close combat with a strength of 2 x 4.)
13.0 Ammonia Flooding
General Rule:
Units may attack hexsides (marked on the map) separating the Great Ammonia Sea from the dry sea. To attack a hexside, a unit must be within range of both hexes containing the hexside (for ranged combat) or in one of the hexes adjoining the hexside (for close combat). Units attack normally, subtracting 1 from their strength. An engineer automatically disrupts a hexside it attacks. A hexside disrupted three times is broken and a flood begins, with these effects:
- All dry sea hexes within a six hex radius of the break are immediately converted to ammonia. A hex is only converted if a path of dry sea hexes exists between the break and the hex. (For example, if hexside 0920/1020 is broken, the dry sea hexes up to 0815, 0915, and 1016 are flooded.)
- At the completion of the next Movement Phase, the flood extends itself another six hexes. (Continuing the example, to 0610, 1313, and 1321.) At the end of each succeeding Movement Phase, the flood extends itself another six hexes, until all dry sea hexes are converted to ammonia.
- Any land unit which is in a dry sea hex when that hex is flooded by ammonia is eliminated.
14.0 TECV/Drone Concealment
General Rule:
EEC drones and TECVs are deployed (or enter the map) inverted so the HEA Player cannot tell them apart. An inverted unit is flipped to reveal its type when: (1) it attacks, (2) it is attacked, or (3) it becomes adjacent to any HEA land or sky unit. Once its type has been revealed, it is not inverted again. (Note that since jamming reduces drone Movement Allowances more than TECV Movement Allowances, moving a jammed inverted unit farther than a drone can move reveals the unit to be a TECV.)
15.0 Ambush (Optional)
Cases:
[15.1] Placing Units in Ambush
In scenarios in which heavy infantry or engineer units begin the game on the map, they are deployed in ambush. The owning Player secretly notes their hex number locations, but does not place each unit on the map until it moves or an Enemy unit enters the hex. In the latter case, the moving Enemy unit must stop, and may move no further. The infantry or engineer unit immediately executes an ambush. It executes two full strength close combat attacks, and receives the first strike benefit, i.e., a unit it disrupts or eliminates is considered disrupted or eliminated before making its own close combat attack in the Close Combat Phase. Other Friendly units in the hex do not receive first strike. A unit may make only one ambush per game.
[15.2] Ambush Suppression
A unit may expend two extra Movement Points of its allowance in entering a hex (the owning Player clearly states that it is doing so). If the unit enters an Ambush hex with this extra expenditure, the ambushing unit does not receive first strike. If the first unit to enter an ambush hex is infantry or hover platform, the ambushing unit makes only one close combat attack (regardless of whether the moving unit expended extra Movement Points). Thus, a skymobile infantry unit expending 3 Movement Points to enter a clear hex containing an ambush cancels the ambush.
16.0 Drone Capture (Optional Rule)
General Rule:
Drones are programmed to turn themselves off when heavily jammed (lest they respond to the Enemy's orders). If the turn-off mechanism fails, they will respond to Enemy orders. When a drone is jammed by a superiority of three or more, roll a die. On a 6, the turn-off has failed. The Enemy Player controls the drone as if it were his own unit, suffering the same jamming effects as his own units. He controls it for one Game-Turn only, until the next EW Phase. Note that it is possible for both Players to be jammed by 3 or more Superiority Points, in which case drones cannot function at all.
17.0 Scenarios
General Rule:
Each scenario is a separate game. Players are urged to make up their own by varying the type and number of units, time and place of entry, victory conditions, the number of Electronic Warfare Points assigned each Player. Players are encouraged to submit interesting new scenarios for possible publication in SPI's MOVES magazine.
Guidelines:
Units listed as "entering on a mapedge" enter on any hex or hexes of that mapedge, paying normal Movement Point cost to enter the mapedge hex. Hoppers enter on any hex(es) one, two, or three hexes from the mapedge. Units may freely exit the map at any time by paying a cost in Movement Points (or hopper crash roll) for entering terrain identical to the hex left. A land unit that leaves the map may not re-enter or attack.
Players are awarded Victory Points for accomplishments listed in each scenario. At the end of the game, compare VP totals as a ratio (e.g., 26:9 = 2:1). The Player with the greater total is the victor, according to this schedule: less than 1.5:1 = Draw; 1.5:1 = Marginal Victory; 2:1 = Substantive Victory; 4:1 = Decisive Victory.
Titan Strike can easily be played solo. The only rule that need be modified is Electronic Warfare. The solo Player should decide how many EW Points each nationality will allocate to Defense and jamming, and how many frequencies to jam. Instead of actively choosing which frequencies to defend and jam, determine this by die roll.
Cases:
[17.1] Skirmish
Small armor forces en route to raids on Enemy spaceports or mining stations often detected each other by sensor and sped to short, fierce, bloody battles, concluded before skimmers could reach the area. Forces tried to break through to their targets.
Forces and Deployment: Both Players receive 6 TECVs, 5 hoppers, and 3 hover platforms. All units enter on Game-Turn 1. HEA units enter on the East mapedge, while the EEC units enter on the West mapedge.
Sky Units Available: None.
EW Points (per Game-Turn): Zero.
Victory Points Awarded: For each Enemy unit eliminated: 3 VPs. For each Friendly unit exiting the mapedge opposite its mapedge of entry: 6 VPs on or before Game-Turn 7; 4 VPs on or before Game-Turn 12; 1 VP on or before Game-Turn 15.
Game Length: The game ends when one side has no units on the map, all being either eliminated or exited from the map.
Special Rules: Ignore all installations.
[17.2] Strike on Titan-Prime
Titan-Prime was the HEA's most important base. Its Headquarters controlled all operations on Titan, its skimmer strip based most of the cargo skimmers on the moon, and emergency supplies and equipment were stockpiled under T-Prime's mesa. When an EEC force fought its way into striking range of the base, the HEA garrison counter-attacked ferociously.
Forces and Deployment: The following HEA units set up anywhere on the map: 3 TECVs; 2 hover platforms; 1 howitzer; 2 lasers; 2 heavy infantry (in ambush). The following EEC units enter the East mapedge on Game-Turn 1: 6 TECVs; 2 hoppers; 3 drones; 2 lasers; 2 hover platforms; 2 engineers.
Sky Units Available: All skimmers.
EW Points (per Game-Turn): 3 EEC; 5 HEA.
Victory Points Awarded: The HEA Player receives 3 VPs for each Enemy engineer or drone eliminated, 5 VPs for each hopper, TECV, or hover platform eliminated; 7 VPs for each SSM, laser, skimmer, or skymobile eliminated. The EEC Player receives VPs for each installation hex occupied by an EEC unit at the end of the game: power station, 20 VPs; survey station, 10 VPs; skimmer strip, 10 VPs; HQ, 30 VPs; sensor, 10 VPs. If an EEC hover platform occupies one or more power cable hexes at the end of the game, he receives 10 VPs. If EEC units enter each hex of the cavern at any time, he receives 30 VPs. If the EEC Player does not score at least 50 VPs, the HEA Player achieves a Decisive Victory regardless of the VP ratio.
Game Length: Ten full Game-Turns (ended because of overwhelming HEA reinforcements to arrive on Game-Turn 11).
Printed text reads "EAH reinforcements" in the scenario; transcribed here as "HEA" (the Hegemony of East Asia, as used throughout).
[17.3] Meeting Engagement
After the victory at Titan-Prime, HEA Command decided on a push north to the EEC mining complex at "New Saar." EEC intelligence detected the column moving north in time for the EEC to gather its scattered forces for a decisive battle on the shore of the Great Ammonia Sea, 15 kilometers south of New Saar.
Forces and Deployment: Before each Electronic Warfare Phase, each Player rolls a die (openly). On a 1-2, he receives two land units of his choice that Game-Turn. On a 3-4, he receives four such units. On a 5-6, he receives six such units. Each Player makes his choice (secretly) from his whole countermix. His choice is revealed when the units enter the map in the Land Movement Phase. Players may not delay the entry of their units. Roll a die at the start of the game. On a 1-4, EEC units enter on the north mapedge; on a 5-6, they enter on the east mapedge. HEA units always enter on the mapedge opposite EEC entry. This continues until all units have entered the map.
Sky Units Available: All skimmers and skymobiles.
EW Points (per Game-Turn): 5 EEC; 5 HEA.
Victory Points Awarded: For each Enemy infantry, engineer, drone, or skimmer eliminated: 4 VPs. For each Enemy hopper, TECV, SSM, or hover platform eliminated: 6 VPs. For each Enemy laser or howitzer eliminated: 10 VPs. For each Friendly infantry or engineer exiting the mapedge opposite the mapedge of entry: 2 VPs. For each hopper, TECV, hover platform, or drone exiting the opposite mapedge: 3 VPs. For each laser or howitzer exiting the opposite mapedge: 5 VPs.
Game Length: The game ends when all land units have entered the map and one side has no land units on the map, all either eliminated or exited.
Special Rules: Ignore all installations.