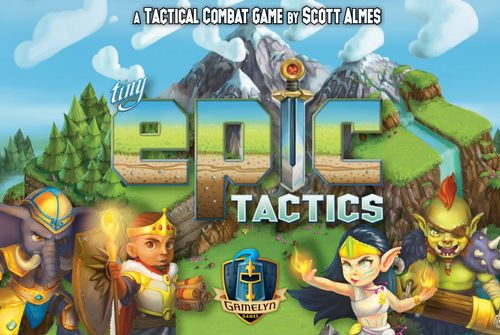
Tiny Epic Tactics
Tiny Epic Tactics Rulebook
Table of Contents
Table of Contents
- Components
- Assembling the Evergreen Forest
- Unit Cards and Stats
- Game Modes
- Game Setup (for 2-4 Player Competitive)
- Game Overview
- Turn Order
- Taking Actions
- Weakened Units
- Capturing Units
- Action: Movement
- Action: Melee Attack
- Action: Missile Attack
- Action: Cast a Spell
- Reaction: Countering
- Tactic Cards
- Game End and Scoring
- Securing a Control Area
- Variant Game Modes
- Terrain Quick Reference
Components
- 32 Unit Cards (double-sided)
- 16 Tactic Cards
- 1 Control Card / Time Tracker Card (double-sided)
- 16 Unit Tokens (4 unique shapes in each color)
- 16 Health Trackers
- 8 Ammo Trackers
- 4 Mana Trackers
- 10 Weakened Tokens
- 3 Flag Tokens (each unique)
- 3 Action Dice
- 1 Map Scroll (double-sided)
- 6 Map Boxes (of various sizes)
Solo Game Components:
- 9 Solo Enemy Cards
- 6 Dungeon Cards
Assembling the Evergreen Forest
Unroll the Scroll onto a surface.
A. Place the 8x5 box as shown.
B. Place the 8x1 box on top of the 8x5 box.
C. Place the 3x2 box.
D. Place the 5x4 box.
E. Place the 1x2 box on top of the 5x4 box.
F. Place the 2x2 box.
Make sure all art is oriented the same way.
Unit Cards and Stats
Each unit's stats are recorded on their Unit Card. On the cards' outside edges are resource tracks where a resource tracker moves up and down, noting the amount of Health, Ammo, and Mana an individual unit has at any time. A tracker cannot exceed the highest number on the track, and if the value becomes "zero" it is temporarily removed from the track.
Units have stat values listed on the cards and special abilities given in the text boxes at the bottom. These are represented as icons:
- Movement (see pg. 8)
- Melee Attack (see pg. 10)
- Missile Attack (see pg. 11)
- Cast a Spell (see pg. 12)
- Reactive Ability: Triggers in response to being attacked or taking damage. This takes effect immediately.
- Passive Ability: It is always active and triggers when the ability's condition is met.
Game Modes
This game has 5 different modes of play:
- 2-4 Player Competitive
- 2 vs 2 Player Team Play
- 2-4 Player Battle Mode
- 1 Player Solo Adventure
- 2 Player Cooperative
The 2-4 Player Competitive game is described first in the rulebook in Game Setup (see pg. 4). The other game modes are played with minor changes. These are described in Variant Game Modes (see pg. 16).
Game Setup (for 2-4 Player Competitive)
-
After assembling the Realm Map (see pg. 2), give each player:
A. 4 Health Trackers, 2 Ammo Trackers, and 1 Mana Tracker.
B. 4 Unit Tokens in their chosen color.
-
Separate the Unit Cards into their individual class decks: Fighters, Wizards, Rogues, and Beasts.
-
Shuffle each deck under the table and randomly deal each player 1 Unit Card from each class. Each player places their cards in a row in front of them, with the normal side facing up ("Solo Enemy" side facing down).
-
On the Unit Cards, place a matching tracker on the highest value of each track:
C. A Health Tracker on each unit's health track.
D. An Ammo Tracker on the ammo tracks of the Fighter/Rogue.
E. A Mana Tracker on the mana track of the Wizard.
-
Players then place their Unit Tokens onto starting locations:
F. The first player (either the youngest or determined randomly) selects any 4-space starting location within the Realm and places one of their unit tokens on each space with a star.
G. Player setup is continued clockwise until all players have chosen a starting location.
In a two-player game, players use 2 starting locations: they place 2 of their units onto one and then place the other 2 in the starting location diagonally opposite of the first location.
-
Shuffle the Tactic Cards and deal each player 2 Tactic Cards face-down. Each player secretly chooses 1 to keep in their hand and discards the other (H) face-down. The discarded cards are collected and, without being revealed, shuffled back into the Tactic Card deck. The deck is then placed face-down within reach of all players.
-
Place the 10 Weakened Tokens and 3 Action Dice within reach of all players.
The first player is now ready to begin the game!
Game Overview
Each player's goal is to earn victory points by capturing enemy units and securing the realm's three Control Areas. Over a series of rounds, players take turns until one of two game conditions is triggered; at this point, the active player finishes their turn, and all other players play one final turn in order (see Game End, pg. 13):
- Securing Control Areas (see Securing Control Areas, pg. 14):
- In a 4-player game: All 3 Control Areas are secured.
- In a 3-player game: 2 Control Areas are secured.
- In a 2-player game: 1 Control Area is secured.
- All of one player's units have been Captured (see pg. 7).
Turn Order
On your turn, perform these steps in order:
- Check if you hold a Majority Control in any Control Area that has been triggered, and, if so, advance its Flag Token (see pg. 14).
- Take up to 3 actions with your units.
- After taking actions, remove Weakened Tokens from any units that didn't take any actions during your turn (see pg. 7).
- Draw a Tactic Card, add it to your hand, and discard down to 2 cards if needed (see Tactic Cards, pg. 13).
Then the next player in clockwise order takes their turn.
Taking Actions
There are four types of actions your units can take: Movement, Melee Attack, Missile Attack, and Cast a Spell.
- On your turn, a unit may take one action without penalty. It may then take a second, different, action, but it becomes Weakened. Place a Weakened Token on its card (see Weakened Units, pg. 7). For example, the same unit cannot attack twice even if it's a different type of attack.
- A single unit may not take the same action twice in one turn. For example, the same unit cannot move twice.
When you only have TWO units in play: As soon as you only have two units in play, immediately remove all Weakened Tokens from your units. Your units are no longer Weakened by taking two actions. However, you can still only take a maximum of two actions with any single unit.
When you have only ONE unit in play: You may take all three actions with that unit and it is not Weakened for doing so. You may also take the same action up to three times.
Weakened Units
A Weakened unit cannot take any actions during your turn until the Weakened Token is removed (see below):
- When a unit becomes Weakened, it must remain Weakened for the rest of that turn. Starting on that player's next turn, they may elect to have a Weakened unit lose 2 Health to remove the Weakened Token and allow that unit to take actions this turn. You cannot do this if you have 2 or fewer Health. Otherwise, the token is automatically removed at no cost at the end of that turn.
- You may use abilities, spells, or tactics that cure Weakness.
Capturing Units
When a unit's health is reduced to zero, that unit is captured. The player causing this immediately takes the unit's card, placing it face up in their player area, and returns the Unit Token and Tracker Tokens to the box. Note: you cannot capture your own units.
A captured unit is worth 2 victory points at the end of the game.
Action: Movement
A unit has movement points equal to the value on its card. Units move into adjacent spaces orthogonally (up, down, left, and right) and not diagonally.
Effects of Terrain
Only one unit may occupy any single space at one time. Each space typically costs 1 movement to enter, but certain terrains have different effects:
- Spaces with Allies: You may pass through a space with an ally (counting that space as movement), but you may not end your movement in that space.
- Spaces with Enemies: You cannot pass through or end your movement on a space with an enemy unit.
- Climbing: Moving in Elevation up a cliff (onto a higher level) costs +1 movement, regardless of the level (whether it is a big box or a little box, it is always +1). Moving down a level costs no additional movement. (Note that climbing onto a Peak, Water, or Ballista space still costs an additional 1 movement, see below.)
- Plains/Bridges: No effect.
- Water: Entering each Water space costs +1 movement, but moving out of Water costs no additional movement. Units in Water take +1 damage each time they are attacked.
- Forest: While in a Forest, your unit takes -1 damage from any attack (the unit can take cover there).
- Peaks: Entering costs +1 movement, but moving out of a Peak costs no additional movement. While on a Peak, your unit has unlimited range. They may target ANY unit on the Realm Map with a Missile or Spell Attack. A unit on a Peak may also Counter (see pg. 12) with a Missile or Spell Attack.
- Villages: If a unit passes through or ends movement in a Village, it immediately regains 4 Health AND fully replenishes all its Ammo or Mana (if applicable to their character class).
- A unit cannot benefit from the same Village twice in a turn.
- A unit does not benefit from starting its turn in a Village.
- For each Village that you have a unit on at the end of the game, you score 1 victory point.
Special Action: Fire the Ballista
Choose any enemy unit within a range of 4 spaces (count spaces as if performing a Missile Attack, pg. 11), deal the target 1 damage, and then Knock Back that enemy 1 space in any direction (see rules for Knock Back, pg. 10). They then may Counter. If a unit starts its turn on the Ballista space, it may use the Ballista but cannot move out and back into the Ballista space on the same turn.
Action: Melee Attack
Any unit may perform a Melee Attack against an enemy in an orthogonally adjacent space at the same Elevation (not on a higher or lower level). The target enemy immediately takes damage equal to the amount listed on the attacking unit's card stats.
Roll for Knock Back: After dealing damage in a Melee Attack, you may now elect to roll dice in an attempt to inflict a Knock Back on your target. Note the number of red squares under the unit's Melee stat. You must roll that many dice. For each Knock Back rolled, move the enemy that many spaces in a straight line away from your unit.
- Initiating a Knock Back is optional, but once rolled, you MUST Knock Back the full amount rolled.
- Targets cannot be Knocked Back up to a higher level, but they will fall down to a lower level, if applicable.
- Targets encountering a cliff wall, the edge of the map, or another unit while being Knocked Back immediately stop. If this reduces the distance they travel, they lose 1 Health.
- If they are Knocked Back into a Portal, they do not enter it and instead lose 1 Health as if hitting a cliff wall.
- Being Knocked Back into or through a Village, Peak, Water, or Ballista space will not trigger immediate benefits, or inflict penalties.
Action: Missile Attack
Fighters and Rogues have the ability to perform Missile Attacks. The attacking unit must pay 1 Ammo to initiate the attack. To determine whether a target is within range:
- Your Range is the number value listed in the Missile stat, adjusted for Elevation. This adjustment is +1 if you are at a higher Elevation than your target, and -1 if you are at a lower Elevation. Your target is then in range if the distance to it, determined by counting the number of orthogonal spaces (you may "zig-zag" orthogonally but not count diagonally) from your unit to the target, is less than or equal to your Range.
- You MUST have at least 1 Ammo in order to perform a Missile Attack.
- Ignore units that are not the target when determining range for the Missile Attack (you will shoot "through" them). Reminder: units on a Peaks space have unlimited range.
Roll for Misses: After determining that your target is in range, you must then roll the dice to see if you are successful. Note the number of green squares under the unit's missile stat. You must roll that many dice. For each Miss rolled, you must pay 1 Ammo (in addition to the 1 Ammo for initiating the Missile Attack).
- If you have enough Ammo to pay for your roll, then you hit your target, dealing damage as listed in your Missile stat.
- If you do not have enough Ammo, then you have missed your shot and do not hit your target. Immediately deplete your Ammo to "zero." Your Missile Attack action is then finished.
Action: Cast a Spell
Wizards may cast spells that cost Mana. You must first pay 1 Mana to initiate the spell effect listed on the card. If you do not have at least 1 Mana, then you cannot cast the spell.
Powering Up a Spell: After paying the initial 1 Mana to cast the spell, you may pay 1-3 additional Mana to power it up. For each additional 1 Mana you pay, you will roll 1 die in an attempt to roll magic icons. Depending on the Wizard's ability, magic icons can deal additional damage or boost other effects. You must pay all of the Mana at once before you roll and cannot pay individual Mana to roll one die at a time.
Spell Ranges: Note the Wizard's range value listed in its magic stat and count the spaces as if it were a Missile Attack (see pg. 11). Some spells do not have a range and instead have special effects listed in the ability text.
Area of Effect: Some spells have passive effects in the area within a certain number of spaces from a certain space. Units in this area are not the "primary target" and therefore cannot Counter. Damage dealt by an Area of Effect ability does not affect your allies.
Reaction: Countering
If your unit is a primary target that directly takes damage from a Melee, Missile, or Spell Attack, you may Counter against the unit that attacked you.
- First, note any reactive abilities of your unit. These trigger AS SOON as your unit takes damage, but do not trigger if your unit is captured.
- Countering occurs after the attacker has completed their entire attack (including Knock Back and any ability effects).
- You may Counter with a Melee, Missile, or Spell Attack. You must be in range to Counter. For Missile and Spell Attacks, you must be able to pay the ammo or mana needed to be successful.
- You may ONLY attack the target that attacked you. You cannot move to attack, or cast spells that do not make your attacker the primary target. However, any passive abilities that deal damage to other enemies or aid your allies still apply.
- A Weakened unit may Counter; however, it must first lose 2 Health to remove its Weakened Token.
- You cannot Counter a Counter. After resolving the Counter, the attacking player continues their turn.
Tactic Cards
You may reveal Tactic Cards from your hand when you achieve their condition(s). Your hand holds a maximum of two cards. After fulfilling the "IF" section on the card, you may then perform the "THEN" action. This is a free action and does not count as an action on your turn.
In some instances, the "IF" section can be fulfilled on another player's turn. If this is the case, that player must pause their turn for you to perform the "THEN" action, after which the active player continues the remainder of their turn. Once you have performed the "THEN" action, discard the card onto a face-up discard pile next to the Tactic Deck.
At the end of your turn, you always draw one Tactic Card from the deck and add it to your hand. If drawing causes you to have three cards, you must discard down to two cards. Place the discarded Tactic Card face-up on the top of the Tactic Card discard pile. After the last Tactic Card is taken from the deck, shuffle the discard pile and create a new deck to draw from.
Game End and Scoring
The end of the game is triggered one of two ways:
- One player has had all of their units captured, OR...
- One player has taken the final Flag Token (based on the number of players; see pg. 15)
Play continues, each other player taking a turn until it is the player's turn who triggered the game's end. That player does not take a turn; instead, the game ends and players calculate their final scores to declare a winner:
- 5 points for every Flag Token captured.
- 2 points for every unit you have that survived.
- 2 points for every unit that you have captured.
- 1 point for each Village in which you have a unit.
If there is a tie, use the following tie-breakers in order to resolve a winner. First: having the most surviving units. Second: having the most captured units. Third: having the most Flag Tokens. Fourth: having the highest total health in all surviving units. If there still is a tie, then victory is shared.
Securing a Control Area
Your force will attempt to secure the Realm's 3 Control Areas, each comprised of six spaces marked with a flag icon. Each Area also contains a Trigger Space with a larger and more prominent flag icon. This is the Trigger Space of that Control Area. To secure a Control Area, a player must secure the Flag Token (see pg. 15).
Activating a Trigger Space: Move a unit onto the Control Area's Trigger Space. If your unit is on the Trigger Space at the START of your turn, check if you have Majority Control of the Control Area. Majority Control means that you have more units in a Control Area than any other player. Ties for the most are not considered a "majority."
If so, immediately advance the matching Flag Token on the Control Card's "START" space to the "ROUND 1" space.
Once a Control Area has been triggered, it is considered to remain triggered for the rest of the game even if no unit occupies the Trigger Space. The Trigger Space is considered as a part of the Control Area when checking for Majority Control.
Advancing Control: At the START of your turn, if you have Majority Control in a triggered Control Area, advance its Flag Token forward one space on the Control Card.
Stealing Control: At any time, another player may steal majority control of a Control Area. This can happen by Knocking opponents' units out of the Control Area, capturing units, or by moving enough units into the Control Area to claim majority. The Flag Token does not reset if a player steals control of the Control Area, it remains where it's at on the track.
If there are no units in a triggered Control Area at the start of a player's turn, the Flag Token will not advance and instead will remain where it is on the track.
Securing the Flag: If the Flag Token reaches the final "CONTROL" space on the Control Card, the Area is secured. The player who had Majority Control when it became secured collects that Control Area's Flag Token.
Flag Tokens are worth 5 victory points at the end of the game. Flag Tokens cannot be stolen once earned.
In a 4-player game, all 3 Flag Tokens must be collected to trigger the end. Play continues until it gets back to the player who secured the final Control Area. That player does not get another turn and the game ends.
In a 3-player game, 2 Flag Tokens must be collected to trigger the end of the game. As in the 4-player game, once the end of the game is triggered, play continues until it gets back to the player who triggered the end. That player will not get another turn and the game ends.
In a 2-player game, once 1 Flag Token is collected, the end of the game is triggered. The player who collected the token does not take another turn. The other player then takes one more turn and the game ends. Therefore it is possible for the other player to secure a Control Area, too, on their final turn, but the game then still ends.
Variant Game Modes
Competitive Mode: Team Play (4 Players)
In this mode players divide into two teams, working together as allies to achieve a joint victory.
Component Changes: None
Setup Changes: Players sit so that turns alternate between teams. Usually this means you will be sitting across from your teammate. Place your units on "diagonally opposite" sides of the Map. Player 1 and Player 3 form Team 1; Player 2 and Player 4 form Team 2, seated so each player is diagonally opposite their teammate.
Gameplay Changes: During the game, your teammate's units are considered your allies; however, you cannot take actions with them on your turn. Your units' abilities (such as healing) can affect them. Likewise, you can move through spaces their units occupy. You can never attack or damage an allied player's units.
Securing Control Areas: Control Spaces are triggered the same as they are in the base game. Your control is advanced when a unit of your color is in the Control Area at the start of your turn, and your TEAM has more units in the Control Area than the opposing TEAM.
End Game and Scoring Changes: Like a 4-player game, all 3 Control Areas need to be secured to trigger end game. The game can also end when all of one player's units (not the units of an entire team) are captured. The active player finishes their turn, and all other players play one final turn in order. Add up the total points of surviving units, captured units, and occupied Villages for the whole team. The Flag Tokens are counted only once for a team.
Battle Mode: Free-For-All (2-4 Players)
This mode is different from Competitive Mode in that you are not securing Control Areas. Instead, capturing units and controlling the Artifact is the aim of the game!
Component and Setup Changes:
- The Control Card and 2 Flag Tokens are not needed. Only 1 Flag Token is used, and it is called the "Artifact."
- Use the reverse side of the scroll with the central Artifact space. Place the Flag Token onto the Artifact space, and then build a unique Realm Map following the guidelines below.
Realm Builder Rules:
- You may use any map from any map expansion, BUT you are not required to use all of the boxes.
- You may ignore the art's orientation when placing boxes.
- DO NOT place boxes covering the central Artifact space or any of the Control Areas' Trigger Space icons on the scroll.
- You may cover up any map spaces like Water, Bridges, Peaks, and Villages. Portals are marked only by the white line on cliffs.
- Boxes can sit on the mat or sit on one other box but may not sit on two different boxes.
- All the boxes and maps should complete a continuous map. There should be no spaces that are unreachable.
- Consider these rules as suggestions. They do not have to be followed for all of your map setups. If all players agree, you may enjoy exploring unique and creative arrangements with the addition of house rules, as needed. Please tell us about them!
Gameplay Changes: When players are choosing the starting location spaces, consider the 4 corners of the Realm Map farthest away from the Artifact as starting locations, even if those corners are on elevated terrain.
Pick Up the Artifact: When a unit ends their movement on the Artifact's space, it picks it up. Place the Artifact on that unit's card. It becomes the Artifact Bearer. An Artifact Bearer gains the following effects:
- -1 to Movement
- +1 to Missile and Spell Attack
- +1 to Melee Attack
Losing the Artifact:
- If the Artifact Bearer is successfully Knocked Back with a Melee Attack (and only a Melee Attack), then the unit that Knocked them Back steals the Artifact and places it on their card (its +1 for Attacking does not apply).
- If the Artifact Bearer is captured, the Artifact is dropped onto the space that unit is on before the unit is removed from the map.
- You cannot drop the Artifact or pass it between your units. Once a unit picks it up, the Artifact will stay with that unit until it is either stolen with a Knock Back or the Artifact Bearer is captured.
End of Game and Scoring: The game end triggers after any player has captured 3 enemy units. Then each other player takes one additional turn, but the player who triggered the end will not get an extra turn. For scoring, players score as normal for surviving units, captured units, and occupied Villages. In addition, the player who holds the Artifact gains 3 victory points.
Battle Mode: Team Play (4 Players)
This mode combines most of the rules from Battle Mode (see pg. 17) mixed with many others from Team Play (see pg. 16).
Setup Changes: Build your Realm Map as if it were a Battle Mode: Free-For-All game (see pg. 17) and place the Artifact in the center space. When choosing starting locations, teammates start on diagonally opposite sides of the Map.
End of Game and Scoring: The game end still triggers after any one player has captured 3 enemy units. To score, sum the points earned by both players of a team for surviving units, captured units and occupied Villages. Add 3 victory points for holding the Artifact.
Solo Adventure Mode (1 Player)
You are alone in this quest to rescue the arcane crystals, each locked away in the realm's six dungeons, deep underground. Beware of the terrible minions that roam above and below the ground, for you must act quickly before time runs out!
Additional Solo Components:
- 9 Solo Enemy Cards
- 6 Dungeon Cards
Setup Changes: Set up a normal 2-player game for Competitive Mode (choosing 1 set of Unit Tokens for yourself and 1 set for the Solo Enemy) with these changes:
-
When dealing Unit Cards, deal yourself 2 cards of each class:
A. Then for each class, select which card you want to keep, and give the other card to the Solo Enemy.
B. Flip those given cards to the "Solo Enemy" side and place them in a single line separate from your own, arranged from left to right in this order: Fighter, Beast, Rogue, then Wizard.
C. Place a Health Tracker on the highest space of each health track and do not place Ammo or Mana Trackers.
D. Set aside the unused decks of Unit Cards for later use.
-
Shuffle the 9 Solo Enemy Cards to form a face-down deck, and place it next to the row of Unit Cards. Allow an area next to the deck for discarded cards to be placed.
-
Place the 6 Dungeon Cards in a row so their red Solo Enemy sides are face-up, and place the "Crystal of Glory" in the rightmost spot (the order of the other Dungeon Cards is not important as they do not have to be completed in any specific order).
-
Flip the Control Card to reveal the "Time Tracker" side, and then place 1 unused Mana Tracker on the "7" space. This will be known as the Time Token. Set aside the Flag Tokens for later use.
-
Deal yourself Tactic Cards as normal, but do not deal them to the Solo Enemy. It will not use Tactic Cards in this mode.
-
You may choose any starting location, but as in a 2-player game, place two of your units in one location and the other two in the diagonally opposite starting location.
Placing the Solo Enemy Units:
-
Take all 4 Solo Enemy Unit Tokens into your closed hands and lightly shake them. Then without looking, gently drop one token into the box's open top lid.
-
Then take the 3 Flag Tokens and shaking them the same way, drop one into the lid.
-
Place that unit onto the corresponding Control Area's Trigger Space, and set aside that Flag Token.
-
Repeat this twice more with the remaining Unit Tokens and Flag Tokens until you have placed 3 units. The fourth and final unit will be placed in a space adjacent to the last unit placed. Draw the top Solo Enemy Card from its deck and use the "decision compass" to determine which adjacent space to place it in.
-
Finally, shuffle the used Solo Enemy Card back into the deck, set aside the Flag Tokens for later use, and you are ready to begin!
Gameplay Overview: You do not gain victory points in this mode, but instead your goal is to capture all six crystals from the dungeons before the time runs out. Each round, you and the Solo Enemy each take a turn (you always go first). The Solo Enemy's goal is to capture all of your units or to hold out until the timer expires.
On Your Turn: First advance the Time Token one space on the Time Tracker Card. Then, take your 3 actions just as you do in a normal game. When the Time Token reaches the "zero" space, then the game is over and you immediately lose.
Enter a Dungeon: When you enter a Portal, you have the option, instead of traveling to a remote location, to enter the dungeon inside that box:
- There must be no units of any type from any player on top of the box. Other boxes may be stacked on top, but they too must not have units on them.
- The dungeon's matching Dungeon Card (icon at the top left matches the box shape and dimensions) must be red side up.
If these requirements are met, then flip the box over (placing any stacked boxes from on top to the side). Place your unit on the Entrance space (see below). If you have movement points remaining, you may continue moving in the dungeon.
Exploring the Dungeon: You may only have one unit in a dungeon at a time. While a dungeon is occupied, the spaces that the box would have covered are considered impassable. Units are not able to move on top of or enter the box in any way; nor can they go on top of other boxes that may have been set aside.
Outside the dungeon, if units are Knocked Back onto a flipped over box, they stop and take damage as if they were knocked into a cliff wall.
You must follow all the normal rules for taking actions in the dungeon. It is likely the unit will be in the dungeon for several turns before they complete it. After resolving the effects of a dungeon space, you may still move if you have movement points remaining. The several types of dungeon spaces are:
- Entrance: When first entering a dungeon, your unit is placed here.
- Crystal Treasure: You have captured the crystal from the dungeon. Exit the dungeon and flip the Dungeon Card to the green Control side.
- Water: Entering costs +1 movement, but moving out of Water costs no additional movement.
- Random Monster: Draw a monster card from the Solo Enemy deck. Resolve the effect at the bottom of the card, then discard it to its discard pile. This does not count as taking an action, and you may continue moving if you have movement points remaining.
- Cave-In: Before entering this space, roll the number of dice allowed to you as if you were performing a Knock Back attempt. If you roll at least 1 Knock Back, you may enter the space. If you roll none, then you lose 2 in your movement and can try again if you still have movement points.
- Trap: When you enter this space, roll 3 dice. For each Knock Back you roll, lose 2 Health. You may still move after the encounter if you have movement points remaining.
- Locked Door: Only a Rogue may enter this space.
- Magic Barrier: Only a Wizard may enter this space, and you must pay 2 Mana to do so.
Capturing a Dungeon's Crystal: When a unit enters the Crystal Treasure space, it immediately exits the dungeon. Restore the boxes to the original setup, placing the unit on any open Portal space for the box containing the dungeon just completed. If all Portal spaces are blocked, place the unit on a space that is one space away from such a Portal space (must be on the same Elevation). The unit may continue moving if it has movement points remaining. You may immediately perform the one-time bonus effect listed on the crystal's card (it cannot be performed later). Then flip the matching Dungeon Card from the red to the green side, showing that you have captured it.
The Final Dungeon: The Crystal of Glory: Capturing the largest dungeon's crystal does not have a normal bonus, but instead is necessary to win. To enter this dungeon, you must have captured all 5 other crystals (as noted on its Dungeon Card).
The Solo Enemy's Turn: After you take your turn, the Solo Enemy takes a turn, activating only one of its units. Draw a Solo Enemy Card, which shows which unit activates (see below). The drawn card is placed underneath the corresponding Unit Card.
- If that unit has already been activated, or the card says "Leftmost" instead of a unit class, then the leftmost inactivated unit in the row is activated instead.
- At the start of the Enemy's turn, if all units have Solo Enemy Cards underneath them (have been activated), take ALL Solo Enemy Cards, including ones in the discard pile, and shuffle them to form a new draw deck. If the draw deck becomes empty, just shuffle the discard pile to form a new one.
- When playing cards it is important to keep the cards parallel to the Realm Map, since they bear a compass on the cards used to make enemy decisions.
Activating a Solo Enemy Unit: When a Solo Enemy Unit is activated, it goes through these Activation Steps in order:
- Check for Melee Attack
- Check for Missile or Spell Attack
- Perform Movement
- *Check for Melee Attack
- *Check for Missile or Spell Attack
*Steps 4 and 5 are skipped if the unit is Weakened (see pg. 24).
It attempts these in order until it either makes an attack or runs out of options. Its turn then ends.
Weakened Solo Enemy Units: If an Activated Enemy Unit is Weakened, it still takes a turn, but will stop after step 3 in the Activation Steps, and will not proceed to steps 4 and 5. At the end of the active unit's turn, the Weakened Token is removed.
Bonuses from Activation: Listed on each Solo Enemy Card are bonuses that grant additional damage or movement points to the unit, if applicable. Note these bonuses when taking actions.
Step 1 (and 4): Check for Melee Attacks: If the Enemy Unit is adjacent to one of your units, it will perform a Melee Attack. The Solo Enemy always chooses to roll the dice for Knock Back based on the number of icons shown on its card. If there are multiple targets adjacent to the Enemy Unit, it will use the Decision Compass of the drawn Solo Enemy Card to decide: starting from the direction indicated by the arrow, proceed clockwise until a target is found to attack.
Step 2 (and 5): Check for Missile and Spell Attacks: If the enemy has a Missile or Spell Attack (noted on their card), it will attempt to perform that type of attack. Note which of your units are within range of the Enemy Unit, and use the decision compass to decide which one it will attack. As with a Melee Attack, it decides by starting where the compass arrow is pointing and goes clockwise.
- Units in dungeons cannot be targeted by Missile or Spell Attacks.
- For Missile Attacks, the Enemy never rolls dice. For Spell Attacks, the Solo Enemy always rolls 3 dice.
- The Solo Enemy does not use Mana or Ammo. You however can still "steal" Ammo/Mana from the appropriate enemy type if your ability allows you to do so.
Solo Enemy Counterattack: After you attack an Enemy Unit, it will always check if it can Counter your unit. First it checks if it can Melee Attack, and if it cannot, it checks if it can Missile or Spell Attack. If it is Weakened it will lose 2 Health to remove the Weakened Token in order to Counter (as long as it has 3 or more Health).
Step 3: Perform Movement: If a Solo Enemy is not able to attack after steps 1 and 2, it then performs a Move action on step 3. It always tries to move towards your closest unit, counting orthogonal spaces from its starting location. To determine a target:
- Ignore all terrain effects when calculating movement.
- A Solo Enemy will, if possible, move to a location from which it can attack on steps 4 and 5. If no such space exists (because of terrain or other factors) it will look at the next closest unit. If no attack is possible on any unit, it will move towards the closest unit.
- Ties between equidistant targets are broken using the compass, as with selection of a unit to attack.
An Enemy Unit immediately stops its movement if it enters a space adjacent to one of your units.
Moving with the Compass: An Enemy Unit moves towards its target as far as its movement points and the rules below allow. This happens in two steps, under the guidance of the compass:
- The compass direction determines whether it moves first along its Column (North or South) or its Row (East or West):
- N/S: it first moves vertically until it is in the same column as its target.
- E/W: it first moves horizontally until it is in the same row as its target.
- It then turns and moves on the other axis towards its target.
Solo Enemy Movement Special Cases:
- They cannot enter Portals, but if they end their movement on a Portal space, that Portal is blocked.
- If it does NOT have the movement points to enter a space (ex. a Peak or Water) it will stop short of entering.
- When choosing a target, if all of your units are in dungeons, it will simply not move.
The "Climb" Card: When the card with the Solo Enemy bonus "Climb" is drawn, instead of moving normally the Enemy Unit will attempt to increase its Elevation. It will determine the closest space that is higher than the space it starts from, with ties broken as usual by the compass. The unit then moves towards that space.
- An Enemy Unit may descend from an Elevation in order to reach another, higher Elevation point.
- If there is no higher Elevation, it will instead target and move towards your closest unit.
Solo Enemy Capture and Time Increase: When you capture an Enemy Unit, immediately move the Time Tracker backward 2 spaces, gaining more time to capture the Crystals from the dungeons (this is your reward for capturing Enemy Units instead of victory points). You cannot, however, move higher than the "7" space on the Time Tracker Card.
Shuffle the captured Unit Card back into its matching deck, discard any activated Solo Enemy Cards underneath it to its discard pile, and temporarily set the Unit Token and Health Tracker aside. Then, without looking, randomly draw a new Unit Card from its deck. Place the new card in the row and place a Health Tracker on the highest health space.
To place this new unit into the Realm, take the 3 Flag Tokens in your hand, shake, and drop one into the box lid. Place the Unit Token onto that Trigger Space. If the space is occupied, draw and discard a Solo Enemy Card. Use its compass to determine on which adjacent side of the Trigger Space you will place the Unit Token.
Solo Game End: The game will end either in victory or defeat in one of three ways:
- You win by capturing the Crystal of Glory from the largest dungeon.
- You lose if the Solo Enemy captures all of your units.
- You lose if the Time Token ever reaches the "zero" space.
Cooperative Adventure Mode (2 Players)
Time: 90 min
It is dangerous to quest alone, so why not go with a friend? You and another player can work together to dive into dungeons and capture crystals from the enemy's clutches before time runs out. This mode uses rules from the Solo Adventure Mode mixed with rules from Team Play.
Setup Changes: Set up the game for a Solo Adventure, but now using all of the Unit Tokens:
- Each player chooses a set of player components of one color for themselves, and chooses one for a Solo Enemy that they will manage, for a total of two Solo Enemies.
- Each player is dealt 2 Unit Cards of each class, keeping one and giving the other to the Solo Enemy they are managing. Then set up each of the Solo Enemies' card rows, placed so that they alternate with human players in seated turn order, as in Team Play. The Solo Enemy Card deck is placed in reach of both players.
- Each player places their units onto starting locations as if it were a 2-player game: with two of their units in diagonally opposite locations.
- When placing Solo Enemy Units, one player will place all the Solo Enemies in the color they chose, then the other player will do the same for the other set of Solo Enemies. Use the same method described in the setup (pg. 20) for placing Solo Enemies Units using the "compass."
- Place a Time Token on the "11" space of the Time Tracker Card instead of on the "7". In this mode, "11" is the highest space the Time Token can reach if you gain more time from capturing Enemy Units.
Gameplay Changes: A round of play rotates between Player 1, Solo Enemy 1, Player 2 and finally Solo Enemy 2. At the start of each player's turn, advance the Time Token down one space on the track. For each Solo Enemy's turn, draw a Solo Enemy Card from the deck and place it underneath the unit card. If there are no cards to draw at the start of a Solo Enemy's turn, shuffle any cards in the discard pile (not from below the Solo Enemy Units) to form a new draw deck. Dungeons may be occupied by only one player's unit at a time.
Cooperative Game End: Like the Solo Adventure, the game ends in one of three ways:
- You win by capturing the Crystal of Glory from the largest dungeon.
- You lose if the Solo Enemies capture all of one player's units.
- You lose if the Time Token ever reaches the "zero" space.
Terrain Quick Reference
- Climbing: Costs +1 movement to move to a higher Elevation.
- Higher Ground: +1 damage if target is on a lower Elevation.
- Lower Ground: -1 damage if target is on a higher Elevation.
- Plains/Bridges: No effect.
- Water: Costs +1 movement to enter. Your unit takes 1 additional damage from all attacks.
- Forest: Your unit takes 1 fewer damage from all attacks.
- Peaks: Costs +1 movement to enter. For Missile or Spell Attacks you have unlimited range (can target anyone in the Realm).
- Village: When entering, heal 4 Health and replenish your Ammo/Mana to full. Worth 1 victory point if occupied at the game's end.
- Portals: Enter an unblocked Portal and exit through any other unblocked Portal.
- Ballista: Costs +1 movement to enter. You may then take a second action to Fire the Ballista (see pg. 9).
Check out other Tiny Epic Games: GamelynGames.com