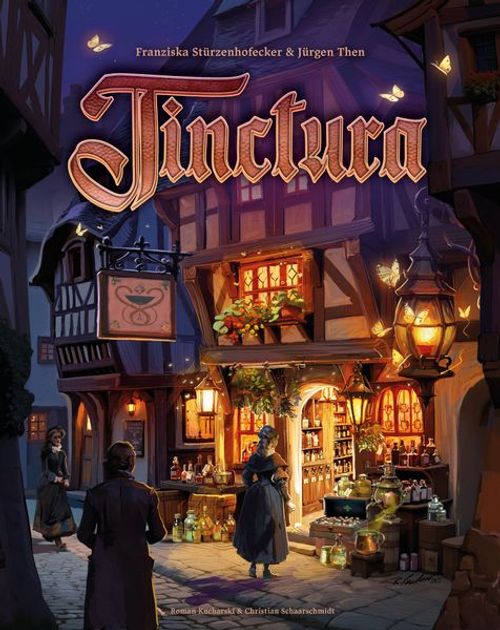
Tinctura
Tinctura Rulebook
Table of Contents
Table of Contents
- Components
- Setup — General
- Setup — Per player
- Components & symbols
- Game Flow
- Planning Phase
- Work Phase
- Actions in the Village
- The Bonus Tracks
- Actions in the Pharmacy
- Training an Apprentice into a Journeyman
- Produce Tea
- Actions in the Forest
- Discarding and Trading Plants
- Experimenting
- End of the Day
- End of the Game
- Solo Mode
- Optional Game Variants
- Appendix — Personality Cards
- Appendix — Events
- Appendix — Private Goals
- Appendix — Open Goals
Components
Important: This rulebook shows the components of the standard version of the game. Some components of the deluxe version may look different, but are functionally identical.
General material
- 1 game board with three areas (pharmacy, village, forest)
- 112 plant tiles with bag
- 12 furnishing items with bag
- 2 experiment markers
- 2 mortars
- 1 day marker
- 1 die
- 48 planning markers in three colors
- 12 blossom tiles (optional)
- 4 "Blocked Apprentices" cards (double-sided)
- 12 event cards (optional)
- 5 tiles for the merchant's opening hours
- 4 alternative bonus tracks (optional, double-sided)
- 3 open goal markers (optional)
- 12 private goal cards (optional)
- 8 open goal cards (optional)
Per player
- 4 player boards for time planning (1 per player)
- 4 screens (1 per player)
- 4 player boards for skills (1 per player)
- 44 patient cards
- 24 apprentice cards (double-sided)
- 4 tea markers in player colors (1 per player)
- 16 bonus markers in player colors (4 per player)
- 36 time markers in player colors (9 per player)
- 4 recovery point markers in player colors (1 per player)
- 24 skill markers in player colors (6 per player)
- 8 apprentice planning markers in player colors (2 per player)
- 13 continuing-education cards
- 8 personality cards
- 4 player aids (1 per player)
- 9 merchant cards
- 4 markers for 100 recovery points (1 per player)
Solo play
- 12 solo cards
- 1 priority card
Setup — General
If the number of players is relevant during the game, this is made clear through player-count icons (2/3/4) printed alongside the text.
-
Place the large game board within easy reach of everyone, in the middle of the play area.
-
Sort the patient cards by illness value (the number in the top right corner of the card). Shuffle each stack by illness value separately. Then remove from each individual stack: 1 card each with 4 players, 2 cards each with 3 players, 3 cards each with 2 players.
Place the patient cards face down on the waiting area, starting with illness value 6 and descending to illness value 1, so that the cards with the lowest illness value now lie face down at the very top of the stack.
Now reveal individual cards and place them on the patient spaces. With 3 players, 1 space remains free; with 2 players, 2 spaces remain free (the setup shown is for a 3-player game).
-
Sort the apprentice cards by color and form 4 stacks from them, which you shuffle separately and place next to the game board.
With 2 or 3 players, also shuffle the 4 "Blocked Apprentices" cards, draw one of them, place it next to the game board, and turn it to the side matching the number of players. It shows which apprentice spaces remain free on the respective day. The other 3 cards go back in the box; they are not needed.
Now place the top apprentice card from the corresponding stack on every space that does not remain free.
-
Shuffle the continuing-education cards and place them face down on the corresponding space of the game board. Draw the top 2 cards and place them face up next to the two continuing-education spaces of the game board. Sorting them by time of day makes it clearer which one takes place first.
-
Find the two mortars among the furnishing items and place them on the merchant's mortar spaces on the game board.
-
Put the other 12 furnishing items in the blue bag and draw, depending on the number of players, 8 items (4 players), 6 items (3 players), or 4 items (2 players).
Place the drawn items in any arrangement on the merchant spaces. They are now available for purchase there.
In this example game, the apprentice space for special recipes remains free on day 1.
Setup — Per player
-
Each take one player board for skills and one for time planning and place them in front of you. Place a screen around your time-planning board.
-
Place your 6 skill markers of your color on the 4 skill tracks and the mortar track, each on the number 1, as well as on the starting space of the plant-knowledge track. These markers show your current level of training in the skills Mixing, Pressing, Filtering, and Heating (the number below the column your plant-knowledge marker is currently on) and the number of your mortars. The markers may never be moved past the end of a track — if this would happen, you have simply reached the maximum level of training.
-
Take 3 planning markers each in the colors blue, green, and white, as well as the 2 apprentice planning markers in your player color. The remaining planning markers are set aside as a general supply.
-
Each of you now draws plant tiles from the bag and places them face up in front of you. Whoever is first in turn order takes 1 plant. Whoever is in second position takes 2 plants. All other players take 3 plants.
-
Take the 9 time markers in your color and place them ready next to your player boards.
-
Place your recovery-point marker on the starting space of the recovery-point track on the game board (on zero). Stack the markers in any order on top of each other.
-
Take the tea markers from all players, randomly determine an order, and place them stacked on top of each other on space "0" of the tea track on the game board. This is the turn order at the start of the game.
-
Place the 4 bonus markers of your color on the starting spaces of the 4 bonus tracks on the game board, one per track.
If this is not your first game, now shuffle the 8 personality cards and deal 2 cards to each player.
Choose one of these cards for yourself and put the other, along with any undealt cards, back in the box. The card you keep grants you a personal bonus for the entire game.
Descriptions of the personal bonuses can be found in the appendix.
Important: Leave out the personality cards in your first game, to reduce the complexity somewhat.
Components & symbols
Plants
- Herbs
- Berries
- Mushrooms
- Roots
Medications
- Ointment
- Tablets
- Tincture
- Special recipe
Skills / Actions
- Pressing
- Heating
- Mixing
- Filtering
- Plant knowledge
- Experiment
- Mortar level
Merchant items
- Books
- Certificate
- Shelves
- Scale
Patient cards
- Illness title
- Illness value
- Recovery points (RP)
- Medication and its level
- Required resources
- Required skills
Apprentice / journeyman cards
- Specialization
- Bonus (permanent or one-time, see page 18/19)
- Penalty if still in training
Continuing-education cards
- Improved skills and/or a gained experience marker and experiment action
- Number of the improvement
- Start time of the continuing education
- Required time
Game board areas
- Recovery-point track
- Bonus track
- Day of the week
- Merchant opening hours
- Patient display
- Apprentice display
- Continuing-education display
- Tea track
- Plant availability
- Merchant items
Further symbols
- Pharmacy (house icon)
- Village (town icon)
- Forest (trees icon)
- Recovery point (RP) — caduceus icon
- Any ingredient — question-mark icon
- Merchant item — crate icon
- Continuing education — scroll icon
Game Flow
Tinctura is played over 5 days. Each day consists of 9 hours. In each of these hours you can carry out exactly 1 action. Some actions even require 2 hours.
At the start of each day you secretly plan the day's actions behind your screen, by placing planning markers on the spaces of the time-planning board. This is the planning phase. Only the area of the action (pharmacy, village, forest) is planned in advance here, not the exact action. Once everyone has finished planning, the screens are removed.
In each hour of the day you now carry out the actions one after another, whereby in each hour you are committed to the area you planned in advance, but within it you may still freely choose the action, depending on availability. This is the work phase. Turn order here is determined by the tea track and can change every hour.
At the start of the next day, a few administrative actions are carried out before you start the new day with the same sequence.
At the end of the game comes the final reckoning. Whoever has gathered the most recovery points (from here on abbreviated as RP, the symbol on the cards = the caduceus icon) wins the game.
Planning Phase
In the planning phase you secretly plan the sequence of the day's 9 hours. To do this, set up your screen in front of the time-planning board so the others cannot see it.
Then, on each hour space of the pocket watch, place a planning marker in the color of the location you want to visit during that hour. You do not yet need to commit to the exact action you will carry out at that location at that point.
A white marker ① means that you want to work in the pharmacy during that hour. A blue marker ② takes you to the village. A green marker ③ signifies that you want to go to the forest.
You do not have an unlimited number of markers of each color available, so you cannot visit every location as often as you like. During the game you can acquire additional markers.
If you have an apprentice that you were unable to train into a journeyman the day before, then you must occupy one of the hours of the day with the apprentice planning marker in your player color ④. During this hour of the day you cannot later carry out an action, because you are occupied with looking after the apprentice. This time is "lost" to you in the game.
Once everyone has finished planning, the planning phase ends. Now remove the screens from in front of your time-planning boards.
Work Phase
In each hour of the work phase you carry out your previously planned actions one after another.
In this example, light blue goes first, followed by red, and finally yellow.
The order of your tea markers on the tea track is decisive here. Whoever is furthest ahead there gets to carry out an action first, followed by the others in the order of their tea markers. If several tea markers are on the same space, then whoever's tea marker is higher up is always first. The order of the tea markers — and thus the turn order — can change from hour to hour.
Depending on the color of the planning marker, you now carry out one action in the pharmacy (white), in the village (blue), or in the forest (green). The actions available there are described in detail afterward. Additionally, with any type of planning marker you may choose the Experiment action, provided it has not already been carried out twice that day. It then becomes available again only on the next day.
If you had to place an apprentice planning marker in your player color during the current hour in order to look after an apprentice who is not yet trained, then you cannot carry out an action.
Once all players have carried out their action, play continues to the next hour of the day, until all 9 hours have passed. After each action you take the corresponding planning marker back into your supply.
In what follows, all the actions you can carry out in the village, in the pharmacy, and in the forest are now described.
Actions in the Village
The following actions are available in the village:
- Visit continuing education
- Visit individual training
- Hire an apprentice
- Visit the merchant
Visit Continuing Education
Through continuing education you can improve your skills in Mixing, Pressing, Filtering, and Heating.
Each continuing-education course begins at a specific time and always lasts 2 hours. You must therefore have placed a planning marker for village actions on both of these hours during your planning.
In the second hour of the continuing-education course, you then improve your skills according to the information on the continuing-education card — that is, you move your markers forward on the skill tracks of your skills board, as far as this is still possible and you have not yet reached the end of the track.
You may also visit the same continuing-education course together with several other players.
In some continuing-education courses you receive 1 or 2 additional planning markers ①. Take the indicated number of planning markers and add them to your supply of planning markers. These allow you to carry out more actions of the same type during the planning phase. If you do not want to take the planning markers, you may instead experiment once ②. This is in addition to the two experiment opportunities allowed per round; no experiment marker is removed for this.
Important: For one particular continuing-education course you may experiment twice. This is in addition to the two experiment opportunities per round; no experiment marker is removed for this.
Important: You cannot improve the Plant Knowledge skill through continuing education — only by gathering plants in the forest or by experimenting.
Visit Individual Training
Through an individual training session you can improve one skill (Mixing, Pressing, Filtering, or Heating) by one point.
To do this you must pay one plant tile of your choice. The individual training session takes only one hour.
Hire an Apprentice
If you want to hire an apprentice, choose one of the openly displayed apprentice cards and place it in front of you, apprentice side face up. A new apprentice card is not immediately drawn to restock the display.
You may only hire apprentices for a medication type for which you don't already have an apprentice or journeyman. That is, you may only have one apprentice or journeyman of each medication type at a time.
Furthermore, you may have at most 2 apprentices hired at the same time.
To be able to hire another one, you must first train at least one of your current apprentices into a journeyman. The card is then flipped over (see page 18).
You already receive the bonus depicted on the apprentice card as soon as you produce the corresponding medication type and thereby train the apprentice into a journeyman.
You then get a one-time bonus in the form of RP, or permanent advantages when producing that medication type.
In this example, apprentices for ointments and special recipes are available to choose. For tablets and tinctures, an apprentice or journeyman respectively has already been hired.
Visit the Merchant
At the merchant you can buy furnishing items, which let you advance on the 4 bonus tracks of the game board and thereby earn bonuses.
You can identify the matching track by the background color of the item.
You can also acquire additional mortars there.
The merchant is only open during the hours indicated on the opening-hours sign. You can only carry out this action within that time interval.
The items and mortars are laid out as tiles at the merchant. You can acquire up to 3 items and mortars per visit. 1 item or mortar costs 1 plant, 2 cost 2 plants, and 3 cost 4 plants. The kind of plants used does not matter.
Important: If you buy during the first hour of the opening hours, you pay 1 additional plant of your choice in total. If you buy during the last hour, you may pay 1 plant less.
For each furnishing item purchased, you advance your bonus marker by 1 space on the corresponding bonus track. The item then goes back into the bag provided for it.
For each mortar purchased, you advance your marker on the mortar track of your skills board by 1 space. The mortar is then kept next to the game board until the next day, and returns to the offer on the following day.
The Bonus Tracks
On the bonus tracks, depending on your progress, you receive advantages — either one-time, or for the rest of the game, or directly RP, which you immediately advance on the RP track with your marker. Once you have reached the last space of a bonus track, you can no longer advance further there, so a corresponding item brings you nothing more. Advantages you receive for the rest of the game naturally still apply even as your marker continues to advance on the bonus track.
For the standard game, the tracks are printed directly on the game board. If you later want to play with other bonus tracks, look in the appendix under the optional components. Only the properties of the standard tracks are described here.
On the first space of each track you receive a small advantage for the rest of the game:
- White → You may immediately, and once only, advance 1 step on the tea track.
- Blue → You may immediately, and once only, advance 1 step on your mortar track.
- Purple → You may immediately, and once only, experiment once, without removing an experiment marker.
- Green → You may immediately, and once only, draw 2 plants from the bag.
On the second and fourth space of each track you receive RP, which you advance immediately on the RP track (2 RP / 4 RP / 6 RP).
On the third space you receive, among other things, RP that depends on the current day on which you earn this advantage (Monday 1 RP, Tuesday 2 RP, and so on).
There is also a major advantage to be gained there:
- White → Once per day, you may carry out one action you perform in the pharmacy twice — i.e. produce tea twice, take on two patients, or produce two medications. This ability applies until the end of the game.
- Blue → You immediately, and once only, receive 2 mortars, i.e. you advance on the mortar track of your skills board by 2 spaces.
- Purple → Once only, you may distribute 3 skill points among skills of your choice and advance the corresponding markers on your skills board accordingly (not Plant Knowledge).
- Green → Once per day, when taking an action in the forest, you may take one additional plant of your choice. This ability applies until the end of the game.
Actions in the Pharmacy
The following actions are available in the pharmacy:
- Take on patients
- Produce medication
- Produce tea
Take on Patients
Take one of the patient cards displayed on the game board, place it next to your skills board, and place a time marker showing the current time on it.
You have now accepted an order and must at some point produce the corresponding medication.
You may have at most two active patient cards in front of you. Only once you have fulfilled at least one of them can you take on new patients again.
Now a new patient card is drawn from the stack and placed on the space that has become free.
If there are no more patients in the stack, then only the patients still displayed can be taken on. The stack is not reshuffled from discarded patient cards.
The information on the patient cards is explained in the following section.
Produce Medication
You must choose this action to serve a patient you have taken on and placed as a card next to your board.
After taking the card, you have exactly one day to do this. You must therefore produce the medication at the latest during the hour of the following day corresponding to when you placed the card. The time marker you placed on the card also reminds you of that time.
If you succeed, you receive the reward indicated on the card. If you fail, the patient is dissatisfied and you receive a negative RP point.
Once you have served the patient, or the deadline has expired, remove the card from your board again. It is removed from the game. Take the time marker back into your supply.
You may also, at any time, voluntarily decline a patient you have not yet served and discard the card. In that case, however, you must also give up 1 RP.
If you give up a patient — whether by voluntary refusal or by exceeding the 24 hours — this always happens at the start of the current hour, before your action. You can then immediately reuse the time marker showing the current hour if your current action is "Take on Patients."
To serve patients correctly, you must pay attention to the information on the patient cards.
On the patient card you will find the information on which medication is needed ①, and what is required for production (plants ② and skills ③).
There are the medication types Tablets, Ointments, Tinctures, and Special Recipes.
For some patients you can choose between two medications (see example). In this case, only one of the two medications is needed.
Of the plants shown, 1 specimen each is needed. For special recipes, you may freely combine a total of 3 plants from the plant types roots, herbs, and mushrooms. The plants used are taken from your supply and placed in a plant discard area next to the game board.
For every medication, it is indicated what minimum level the required skills must have. This is the number in the black seal on the left ④. A corresponding level in Plant Knowledge is always required; the other skills vary depending on the medication type.
Important: If you do not have the required continuing-education levels for the needed skills, you cannot produce this medication at the moment. Nevertheless, you may of course still take on this patient in principle.
The produced medication has, at the time of production, a certain quality level, which corresponds to your lowest skill among those required for production.
Example: If you produce a tablet and your Plant Knowledge skill is at level 4 and your Pressing skill is at level 3, then the tablet has quality level 3 after production.
When producing tinctures, you may add any number of additional mushrooms to increase the quality level by 1 point each. However, for each mushroom used you must give up 1 RP. This can also be used to reach the necessary minimum level: for each point of difference between your relevant skills and the minimum level, you would need to use one mushroom. This does not raise the skills on your board, only temporarily raises them for this medication.
Example: You want to produce a tincture with a minimum level of 5. Your Plant Knowledge skill is at 4 and Filtering at 3. So, in addition to the usual plants, you must use at least 3 mushrooms (and give up 3 RP) in order to be able to produce the tincture (1 for Plant Knowledge and 2 for Filtering).
If you can produce the medication within the deadline, then you receive a corresponding reward according to the information on the card.
The following types of reward occur:
Fixed Amount
If you produce the medication successfully and within the deadline, you receive the number of RP indicated on the card.
Quality-Based
If you produce the medication successfully and within the deadline, you receive the number of RP indicated on the card, depending on the quality level the medication reaches at production (i.e. corresponding to your lowest skill required for production): quality 1 = 2 RP, quality 2 = 4 RP, quality 3 = 6 RP, quality 4 = 8 RP.
Time-Based
If you produce the medication successfully and within the deadline, you receive the number of RP indicated on the card, depending on the time that has passed since the order. Only active hours count — that is, hours in which you carried out actions (or had to look after an apprentice).
Example: If you take on a patient in the afternoon at 3 o'clock (15:00) and produce the medication the next day at 10 o'clock, then 4 hours have passed (3 to 4 o'clock, to 8 o'clock, to 9 o'clock, to 10 o'clock).
Reward scale: 1-3 hours = 8 RP, 4-7 hours = 4 RP, 8+ hours = 2 RP.
Multiple
Here you may also produce the medication multiple times. To do so, however, you must spend the corresponding number of plants per unit. Depending on the number produced (maximum three times) you then receive your RP: 1× = 5 RP, 2× = 9 RP, 3× = 14 RP.
Mortar Level
Here, in addition to the normal conditions, you also need a minimum level on your mortar track. If you have not reached it, you cannot produce this medication (example: 5+ = 10 RP).
Maximum Level
Here, for scoring the RP, the highest level among the skills required for production is used. The condition for production, however, still applies as always to the least-trained skill: level 5 = 5 RP, 6 = 6 RP, 7 = 7 RP, 8 = 8 RP, 9 = 10 RP.
Quick Recipe
This recipe can also be produced directly from the display on the game board, without first taking the patient to you with an action. But of course, as with every recipe, you must fulfill the conditions and hand over the corresponding plants. If you cannot or do not want to do this, you may also take the card to you like any other, using the "Take on Patients" action, and serve it normally. The point value remains the same either way (example: 9 RP — can be treated directly from the display).
Training an Apprentice into a Journeyman
Training apprentices into journeymen is not an action you choose. If you have hired an apprentice and you subsequently produce the medication required on the apprentice card, the apprentice is automatically promoted to journeyman.
Turn the apprentice card to its journeyman side. You now receive the corresponding advantage, either once or for the rest of the game.
You may only own and train one apprentice of each medication type, so you can own at most 4 different journeymen.
Journeymen bring you advantages in the game, either one-time or permanent. Permanent advantages also apply immediately on the day you trained the journeyman.
The following advantages are possible:
- 4 RP — You receive a specific number of RP, once.
- +2 Plant Knowledge — Whenever you produce a certain medication, you may advance 2 spaces on the Plant Knowledge track.
- +1 skill — Whenever you produce a certain medication, you may advance 1 space on a certain skill track (Heating, Filtering, Pressing, Mixing).
- When producing Ointment: 4 RP — Whenever you produce a certain medication, you receive a certain number of additional RP.
- Two additional teas (ingredients must still be paid) — Once per day, at any time of your choosing, you may produce up to two additional teas without using an action, but you must still pay the normal plants for them.
- Make 1× Experiment per day — Once per day, at any time of your choosing, you may experiment once. This is allowed in addition to the two experiment opportunities per round; no experiment marker is removed for this.
- Receive 1× a leftover item for 1× any ingredient, after closing time — Once per day, directly after the hour in which the merchant closes, you may acquire one of the leftover items, but must give up any plant for it. If no items remain at the merchant, this option lapses for that day. If someone else has the same ability via a personality card, the personality-card holder takes precedence and may choose first.
- Draw 2× any ingredient per day from the bag — Once per day, at any time of your choosing, you may draw 2 plants from the bag.
Produce Tea
To improve your position on the tea track and thus be earlier in turn order, you can produce tea. A change in order takes effect immediately in the next hour of the day.
Per action, you may produce at most as much tea as the number of mortars you own, i.e. corresponding to the position of your marker on the mortar track of your skills board. You may, however, also produce less tea.
For each tea produced, you must give up either 1 root tile or 1 herb tile.
You then advance your marker one space on the tea track for each tea produced. If markers are already on the target space, you place your marker on top of them.
So that the tea track has enough space, the markers are always shifted back toward the start of the track whenever none of you still has a marker on the starting space of the track.
Example: Before the Produce Tea action, your markers were at the following positions: light blue at 0, yellow at 2, red at 6.
Now the light blue player, whose marker is still at 0, produces 3 units of tea. She moves her marker to space 3 of the track. Afterward, all markers are shifted 2 spaces toward the start of the track, so that the lowest marker — here the yellow marker, which was previously at space 2 of the track — is now at space 0. Light blue is now at 1 and red at 4. The distances between the markers remain the same, but the track can now be used again further toward the top.
You may not produce so much tea with this action that you would have to move beyond the end of the track. If your marker is stacked together with others at the end of the track and you produce tea, the marker still moves to the very top of the stack in any case.
At the end of the game you receive RP according to your position on the tea track. This is described in the section Game End (see page 23).
Actions in the Forest
Only one action is available in the forest:
- Gather plants
Gather Plants
Depending on the time of day at which you visit the forest, you may take a certain number of plant tiles of your choice from the display in the forest.
From 8 to 10 o'clock you may take 1 plant; from 11 to 13 o'clock you may take 2 plants; at 14 o'clock then 3 plants; and at 15 o'clock even 4 plants.
The remaining plants are divided equally among all who chose this action at 16 o'clock. In the current turn order, you may each choose one plant in turn, repeating until all the remaining plants from the forest have been distributed.
Place these in front of you; you can now use them for many kinds of actions. There is no limit to the number of plants you may own.
Plant Knowledge
By gathering plants you can improve your Plant Knowledge skill.
You may advance the marker on your skills board by one space whenever the plant you just gathered ① matches the image on the next free space of the track ②. In this case you do not have to give up the plant.
You may also advance the marker by one space if the gathered plant does not match the image on the next free space ③. In this case, however, you must give up the plant. This is thus a way to improve in Plant Knowledge if you cannot or do not want to gather the matching plant. This option is voluntary, and is only available during the action in the forest, not at other times.
The current level of your Plant Knowledge skill is always shown below the scale ④ and corresponds to the column your marker is currently in.
Important: Plant Knowledge only increases this way through gathering plants in the forest. On all other occasions when you receive plants, Plant Knowledge does not increase.
Discarding and Trading Plants
All plants that you must give up do not go directly back into the bag, but are kept next to the game board.
Only when the bag becomes empty while refilling the forest at the end of the day are the plants collected in this way put back into the bag.
Important: You may at any time trade two plants of your choice, even different ones, for another plant, even repeatedly. To do so, place the two plants you want to give up next to the others beside the game board, and take the plant you want, either from the discarded plants or from the bag if it is not available among the discarded plants.
Experimenting
For this action it does not matter which location (pharmacy, village, forest) you visit at the corresponding time. You can experiment with any type of planning marker.
However, this action can only be carried out twice per day in total, by all of you combined.
Each time it is carried out, you remove one of the two markers ① lying next to this action on the game board, and place it beside the game board.
Once both markers have been removed, this action can no longer be carried out that day.
To experiment, you roll the die once. The table ② then tells you which of your skills you have improved with it:
- Roll of 1 = 2× Plant Knowledge
- Roll of 2 = 1× Mixing
- Roll of 3 = 1× Pressing
- Roll of 4 = 1× Heating
- Roll of 5 = 1× Filtering
- Roll of 6 = choose any skill of your choice
You advance the corresponding marker on your skills board, provided it has not reached the end of the scale.
On a roll of 6, you may choose any skill and increase it by 1 space (or by 2 spaces in the case of Plant Knowledge).
End of the Day
Once all of you have carried out your last action of the day at 16 o'clock, the current day ends. Now a few things are prepared for the next day. If it is already Friday, the game ends. Then continue with the section End of the Game.
-
Refill the forest with new plant tiles from the bag, according to the number of players. If the bag becomes empty while doing so, put all the plant tiles collected next to the game board back in.
-
Remove the two continuing-education cards and lay out two new ones.
-
Remove the current tile with the merchant's opening hours. The next tile is now revealed and applies for the coming day.
-
Put all furnishing items still at the merchant back into the bag. Then draw new items according to the number of players and lay them out.
-
Place the two mortars back on the corresponding spaces of the merchant.
-
Lay out new apprentices according to the number of players. Apprentices still on display are not removed, so no new apprentices are placed on those spaces. Exception: with 2 or 3 players, if one or more of the still-displayed apprentices are blocked for the coming day, those apprentices are removed and placed back on the corresponding stack.
Remember: for every apprentice you were unable to train into a journeyman on the previous day, you must block one hour of the coming day with a marker in your player color during the planning phase.
-
Move the day marker forward by one day. The new day begins with the planning phase.
In this 3-player game, the apprentices for special recipes are blocked on the upcoming day 2. Therefore only the empty spaces 1 and 3 are newly filled. The apprentice already present on space 2 remains.
End of the Game
Once all of you have carried out the last action of Friday, the game ends and the final reckoning begins. Advance your RP marker on the track according to the RP you now receive. If you reach the end of the track, take a 100-marker and continue advancing accordingly.
Before that, however, you still have the opportunity to use your remaining plants to produce further medications for patients whose cards are still lying at your board. For these you then receive RP according to the level and type of the finished medications:
| Tablets | Ointment | Tincture | Special Recipe | |
|---|---|---|---|---|
| Level 1–5 | 1 RP | 1 RP | 3 RP | 2 RP |
| Level 6–7 | 2 RP | 2 RP | 4 RP | 3 RP |
| Level 8–9 | 3 RP | 3 RP | 5 RP | 4 RP |
Note: For medications produced this way, any apprentices you may still have are no longer trained into journeymen.
For every patient you can no longer serve, you must deduct 1 RP.
- According to your position on the tea track, you now receive the following RP: 10 RP for first position, 6 RP for second position, and 3 RP for third position. In case of a tie, whoever's marker is on top of the others is again considered ahead.
- In addition, you receive as many RP as your marker's position on the tea track indicates. Example: if your marker is on space 7 of the track, you receive an additional 7 RP for that.
- If you have reached the end of the Plant Knowledge track with your marker, you receive 8 RP for that.
- For your journeymen you receive RP according to this table. For untrained apprentices you receive no RP.
| Number of journeymen | 1 | 2 | 3 | 4 |
|---|---|---|---|---|
| Recovery points | 0 | 4 | 9 | 18 |
- For your least-trained skill (including Plant Knowledge, but excluding the mortar track) you receive RP according to this table.
| Skill level | 2 | 3 | 4 | 5 | 6 | 7 | 8 | 9 |
|---|---|---|---|---|---|---|---|---|
| Recovery points | 3 | 6 | 10 | 14 | 19 | 24 | 30 | 36 |
Whoever has thereby achieved the most RP wins the game.
In case of a tie, whoever among the tied players is furthest ahead on the tea track wins.
Solo Mode
So that you can also play Tinctura alone, the game includes additional material for solo mode. In solo mode you play against a fictional co-player: Melanie. She is controlled via solo cards and has certain priorities for actions.
Solo mode has 4 difficulty levels. For your first solo game, we recommend playing at level 1.
Additional game material: 12 solo cards, 1 priority card, 9 merchant cards, 3 apprentice markers (3 skill markers of an unused player color).
Setup
- Set up the game as for a normal 2-player game.
- Melanie and you each also get a skills board, which is set up normally.
- Only you get a board for time planning; Melanie doesn't need one.
- Shuffle the merchant cards and place them next to the merchant as a face-down stack.
- Shuffle the solo cards and place the stack face down in front of you.
- It must be randomly determined which of the two displayed apprentices receives one, and which receives two, apprentice markers. Roll the die for this: on a 1–3, place one apprentice marker on the first apprentice and two on the second apprentice. On a 4–6, do it exactly the other way around.
- Place the priority card in view. It serves as information for you.
- Your tea marker lies on top of Melanie's, on the starting space of the tea track.
- You may draw 1 ingredient from the bag for yourself and 2 ingredients for Melanie.
Game Flow
When a new day begins, you plan your day's schedule completely normally.
Then, depending on placement on the tea track, you carry out your and Melanie's actions in the correct order.
When it's Melanie's turn, you reveal a solo card. Place the revealed cards side by side so that you can always tell clearly which card you drew in which hour.
On a solo card, the three action areas of the game board are listed in a specific order. The additional texts refer to difficulty levels ② through ④. Please ignore them in your first solo game. They are explained further below.
You must first try to carry out an action from the top area ① of the card. If this is not possible, then you carry out an action from the middle area ② of the card. If that is also not possible, the bottom area ③ takes its turn. Should that also not work, Melanie will choose the "Experiment" action. She may do this as often as needed and is not bound by the limit of 2 experiments per day.
Within each area there is likewise a priority for which actions Melanie prefers (see priority card). You go through the priorities in order to determine the possible action. If none of them is possible, move on to the next area as described above.
The priorities are:
- Pharmacy: Produce recipe, take patient, produce tea.
- Village: Visit continuing education, visit merchant, take apprentice, individual training.
- Forest: Take ingredients.
Actions in the Pharmacy (Melanie)
Here you will find the details of Melanie's actions in the pharmacy:
Produce Recipe: If Melanie has the plants and the required levels for a recipe, it is produced.
Patients are not subject to the 24-hour rule in this case. They remain until the recipe is produced. If both patients could be served, the recipe that was taken earlier is produced first (i.e. the patient lying to the left of the other).
For time-based rewards, the middle time level is always assumed. For medications with different quality levels, the highest possible level is produced. For multiple recipes, as many as possible are produced. Melanie does not produce quick recipes, but can take them normally as a patient.
Take Patients: If Melanie does not yet have 2 patient cards in front of her, she takes another patient. The patient taken earlier always lies to the left of the second.
The patient is taken for whom the least increase in skills is necessary to complete. If there is a tie, the patient for whom more ingredients are already available in supply is taken. If there is still a tie, you choose a patient.
Produce Tea: If Melanie has at least one root or one herb, she produces tea.
She always produces as much tea as she has matching plants available for, and her mortar level allows. "Available" here means the plants must not be reserved for patient cards (see below).
Actions in the Village (Melanie)
Here you will find the details of Melanie's actions in the village:
Visit Continuing Education: If a continuing-education course is taking place during the current hour, Melanie takes part in it. She only needs one hour for this. If she has already visited a particular continuing-education course in its first hour, she cannot take part in it again during its second hour.
Should an additional planning marker be part of the continuing-education course's reward, Melanie will experiment instead.
Visit Merchant: If the merchant is open and Melanie has at least one freely available plant, she visits the merchant.
For this, reveal a merchant card. It indicates how many items Melanie can acquire at most ①. She then buys as many as she is allowed and her freely available plants make possible.
The merchant card marks which items Melanie buys and in what order ②.
If Melanie is supposed to buy a mortar, but buying a blue item would also get her a mortar via the bonus track, she buys the blue item instead of the mortar.
If the merchant card stack is used up, simply reshuffle it.
Take Apprentice: If Melanie has fewer than 2 apprentices, she will take another one, if a suitable one is available, of a type for which she doesn't already have an apprentice or journeyman.
She prefers the apprentice with 1 apprentice marker on it. If that one doesn't fit, she takes the other one (as far as it fits).
Exception: If she already has a patient displayed whose recipe type matches the apprentice with 2 apprentice markers (and no patient of the type matching the apprentice with 1 marker), she prefers that apprentice.
Individual Training: If Melanie has at least one freely available plant, she visits an individual training session.
She pays in the following priority order, as available: Berries → Mushrooms → Herbs → Roots.
For selecting which skill she improves, the following priority applies:
- A skill she needs for a displayed patient. The longer-displayed patient card is preferred. For patients with two recipes to choose from, the type requiring the least increase is preferred. In case of a tie, you decide.
- If this is not necessary, Melanie chooses the least-trained skill. In case of a tie, the order on the board applies: Pressing, Heating, Mixing, Filtering.
Actions in the Forest (Melanie)
Here you will find the details of Melanie's actions in the forest:
Take Ingredients: Melanie takes as many plants as the current time of day allows. She follows these priorities:
- The plant is needed to fulfill patient cards.
- If this is not necessary, she takes the plant type that is least available in the forest.
- In case of a tie, she chooses a root or an herb, since she needs these for the tea action. The root takes precedence.
- For every plant gathered, Melanie advances the marker on the Plant Knowledge track by one step. The plants printed there are ignored in this case.
End of the Day (Solo Addendum)
In addition to the normal end-of-day activities, in solo mode you also carry out the following actions:
- Collect the solo cards again and shuffle them for the next day.
- Take the two apprentice markers back and redistribute them on the currently displayed apprentices. On the fifth and last day of the week, no apprentice markers are distributed anymore, since no apprentice space is blocked now.
Further Special Rules
You must also observe these points in solo mode:
- Whenever Melanie receives plants, you check whether they are needed for producing recipes. If so, you place the plants directly on the patient cards (the one taken first is preferred). If she takes a new patient and has matching ingredients in supply, these are likewise placed directly on the card. These ingredients are now "no longer available" for other actions (see above).
- For patients, the longer-displayed card always has priority.
- For patient cards with two recipes, the upper one is prioritized, but if the lower one is possible before the upper one, it is produced instead.
- In general, when it comes to plants of any kind, Melanie prefers to spend the ones not needed for tea. So she tends to keep roots and herbs.
- Advantages from journeymen that are not already tied to specific actions are used by Melanie as early as possible. The same applies to permanent abilities she has reached on the bonus tracks.
- Melanie does not trade plants using the normal trade rule (2:1).
- In solo mode, no additional cards (personalities, events, private or open goals) and no alternative bonus tracks are used. Of course you may do so at your own "risk" — in that case, the "golden rule" simply applies (see below).
Difficulty Levels
The notes for difficulty levels ② through ④ are marked accordingly on the solo cards.
A note only applies if it appears in the area of the card and also matches the action that is determined to be carried out by the priority process described above. Otherwise you can ignore the note. At higher difficulty levels, those below remain active as well (i.e. when playing at level 4, levels 1, 2, and 3 are also applied).
The Golden Rule
If situations ever arise in solo mode that are not explained by this rulebook, the following golden rule applies:
You decide for Melanie yourself. Let your common sense and your knowledge of the game guide you.
Optional Game Variants
To make the game even more varied and exciting, we have included some optional components that you can add or leave out depending on the game. These are briefly described below.
Depending on your preference, you can also combine the variants and play with several or all of them.
Events
At the start of the game, shuffle the 12 event cards and place the stack face down next to the game board.
At the start of each day, draw a card from this stack and place it face up next to it. The drawn event now applies for the entire day and changes a few things.
The description of the events can be found in the appendix.
Private Goals
At the start of the game, shuffle the 12 private goal cards and deal 2 cards face down to each player.
Everyone now looks at their own 2 cards and chooses 1 of them. The other card is put back in the box together with the cards that were not dealt.
Keep this goal secret until the end of the game.
If you have fulfilled it by the end of the game, you receive the RP indicated on the card in addition. If you have not fulfilled it, nothing happens.
The description of the private goals can be found in the appendix.
Open Goals
At the start of the game, shuffle the 8 open goal cards and lay out 3 of them face up next to the game board.
These are now goals that all of you can fulfill during the game. For doing so you then receive RP depending on how many players have already fulfilled the goal before you. The faster you fulfill these goals, the more points you receive.
Now place one of the open-goal markers on the first space of each of the 3 displayed cards.
Each time one of you fulfills one of the goals, you receive the RP indicated at the marker's position. Then move the marker on to the next space.
If several of you reach a goal at the same time, the current order on the tea track applies, as always.
Some goals can also still be achieved at the end of the game, during the final reckoning.
The description of the open goals can be found in the appendix.
Alternative Bonus Tracks
If you do not want to play with the printed standard bonus tracks, there are two alternative sets for this.
You should always replace all 4 tracks, i.e. always use a complete set. The two sets are found on the front and back of the 4 included cardboard tracks.
One of the sets simplifies the bonuses compared to the standard. The other set introduces a new medication type: Powder.
The Simple Set
Here you receive a reward directly on every space:
- White → You may immediately, once, advance spaces on the tea track and also receive RP for it (the 4 spaces grant progressively more tea advancement and RP).
- Blue → You receive RP immediately, once (2 RP / 3 RP / 5 RP / 8 RP across the 4 spaces).
- Purple → You may immediately, once, increase any skill of your choice by 1 or 2 points (not Plant Knowledge, and not two different skills).
- Green → You may immediately, once, draw plants from the bag (1 / 2 / 3 / 4 plants across the 4 spaces).
The Powder Set
This set introduces a new medication type that you can only produce using the bonus tracks: Powder.
There are no patient cards or apprentices for this. Instead, you produce powder whenever you advance on the white bonus track.
For this you need either normal plants or a new plant type, blossoms. You can obtain these via the green track; they earn you more points when producing the powder.
You likewise receive more points if you have advanced in the powder-production skill level via the purple track.
Finally, via the blue track you can also acquire equipment that grants you extra points for powder production.
-
White → You may now produce 1 (or, on the last space, 2) powder(s). For this you receive RP according to the following table:
- 1 / 3 / 6 RP for level I / II / III — i.e. your position on the purple bonus track (not cumulative).
- 1 / 3 / 6 RP if you own the Basin / Oven / Mill on the blue bonus track (not cumulative).
- 1 / 3 / 6 RP if you give up a normal plant / 1 blossom / 2 blossoms.
Alternatively, on the white track, you may also treat 1 (or, on the last space, 2) of your displayed patients — i.e. produce a normal recipe as with the corresponding action.
-
Blue → You receive an item for powder production that grants you a bonus in production (there is no tile or similar for this — you simply have the item because you are on the corresponding space of the bonus track). In addition, you receive RP immediately, once.
-
Purple → Your level for powder production increases and grants a bonus when you produce your powder. On the last space, the level no longer increases (stays at 3), but you may immediately, once, increase any skill by 1 point (not Plant Knowledge).
-
Green → You immediately receive blossoms, once, which you can use for a bonus when producing powder. Take the corresponding number of blossom tiles. Blossom tiles are not limited; if they run out, improvise accordingly. If you do not want to take blossoms, you may alternatively immediately draw the indicated number of plants from the bag instead, once.
Appendix — Personality Cards
Personality cards give each player a personal bonus for the entire game (see "Setup — Per Player").
Fell off the Cart — When something is left over at the merchant, you get an item for free.
After the merchant closes, you may take one item for free, without paying for it (if at least one item remains). This takes precedence over a corresponding journeyman ability; in this case you may choose first.
Single Hour — When you are the only one visiting a continuing-education course, you can level up a skill.
If you attend a two-hour continuing-education course and no one else does, you may increase any skill (not Plant Knowledge) by one point.
Big Brew — Whenever you produce at least 2 tea, you may move the tea marker one space further.
This applies whenever you produce 2 or more tea within one action, but only once per action.
Key to the Lab — You may use the Experiment action once every day.
Once per day, at any point in time (when it's your turn), you may experiment in addition to your normal action. This is allowed in addition to the two experiment opportunities per round; no experiment marker is removed for this.
Green Thumb — When you advance two or more steps in Plant Knowledge at once, you may advance one additional step.
This applies whenever you advance 2 or more steps in Plant Knowledge within one action, but only once per action.
One Hand Washes the Other — You can also visit the merchant after its opening hours.
With a village action, you can still go to the merchant even after the opening hours are over — however, not before the opening hours. You can also use this ability multiple times a day if you use multiple actions for the merchant. However, if there are no more items on offer, you cannot buy any this way either.
Masterful Tea Ceremony — If you are level with another person on the tea track, you always go first.
If you are on the same space as another person on the tea track, you always go first. This applies at all times and for every action where the tea track is consulted.
Premonition — Once a day, you may look at the next three patients and choose 1 (Action: Take Patients).
When you carry out the "Take on Patients" action, once a day you may look at the top 3 patients from the face-down stack and take one of them. Put the other two back face down on the stack in any order. If you do not want to take any of them, you may instead take a patient normally from the display. This bonus action is nevertheless used up for the day either way.
Appendix — Events
At the start of each day, one event card is drawn and applies for the whole day (see "Optional Game Variants — Events").
A Wild Night — Today there are fewer apprentices to choose from.
At the start of the day, remove the apprentice furthest to the left from the game board.
Drought — Determine a plant type by drawing from the bag. There are at most 2 of them in the forest today.
If you draw further plants of that type while refilling the forest, place them in the discard area instead. All spaces of the forest are still filled regardless.
Thieves in the Forest — Determine a plant type by drawing from the bag. There is none of it to be found in the forest today.
If you draw plants of that type while refilling the forest, place them in the discard area instead. All spaces of the forest are still filled regardless.
Private Appointment — The merchant has an important appointment and closes 2 hours early today.
The merchant closes 2 hours earlier. The discount for the last hour then applies correspondingly 2 hours earlier as well.
New Spa — Suddenly everyone in town is so healthy. Patients will not be restocked today.
If a patient is taken from the display, no patient card is restocked that day. If no patients remain on display, none can be taken on either. Refill the entire display at the start of the next day.
Lab Damage — Today, experimenting is not possible at all.
The Experiment action cannot be chosen. Also, experimenting is not possible even when other actions include it as a bonus.
Bountiful Harvest — Determine a plant type by drawing from the bag. The plants of that type lying in the forest are dealt out at the beginning of the day, starting with the start player.
Deal out the plants in the order of the tea track, one per player at a time, until all are distributed. The spaces in the forest are not refilled.
Rapid Growth — Determine a plant type by drawing from the bag. If someone takes one of that type in the forest, they may take one additional plant of that type.
Take the extra plants from the discard area, or, if none are available there, by choosing from the bag.
Surplus — The merchant restocks directly whenever an item is bought (as long as possible).
After every item purchased, draw a new one from the bag to restock — even multiple times if someone buys several items. If none remain in the bag, this instruction lapses.
Master Class — The master teaches in person today. The training sessions only last one hour.
Both two-hour training sessions only take their first hour, so only one planning marker is needed per course. The result, however, remains the same.
Gratitude — All recipes bring in 2 points more.
Every recipe produced earns 2 RP more.
Secret Ingredient — The water in the well has healing powers. All recipes need one fewer plant of any kind.
When preparing a recipe, you may omit one of the required plants.
Appendix — Private Goals
At the start of the game, each player is secretly dealt 2 private goal cards and keeps 1 (see "Optional Game Variants — Private Goals").
- Produce one recipe for each illness value (1–6).
- Be on at least space 3 on all bonus tracks.
- Train at least three skills (excluding Plant Knowledge) to at least level 7.
- Be in the lead on the tea track at the end of the game.
- Produce at least one recipe of each medication type. — If you are playing with the Powder bonus track, Powder does not necessarily need to be produced to achieve this goal.
- Advance your mortar track to at least 6.
- Serve at least 6 patients.
- Gather at least four more plants once your Plant Knowledge track is at its maximum. — You must still have the plants in your supply at the end of the game.
- Produce at least 3 ointments.
- Produce at least 3 tinctures.
- Produce at least 3 tablets.
- Produce at least 3 special recipes.
Appendix — Open Goals
At the start of the game, 3 of the 8 open goal cards are shuffled and displayed face up (see "Optional Game Variants — Open Goals").
- Train Filtering and Mixing to at least level 7.
- Train Pressing and Heating to at least level 7.
- Brew at least 4 tea at once. — This must happen in a single action.
- Train at least 3 journeymen.
- Produce at least 2 tinctures and 2 ointments.
- Produce at least 2 tablets and 2 special recipes.
- Advance to space 4 on the White and Green bonus tracks.
- Advance to space 4 on the Blue and Purple bonus tracks.