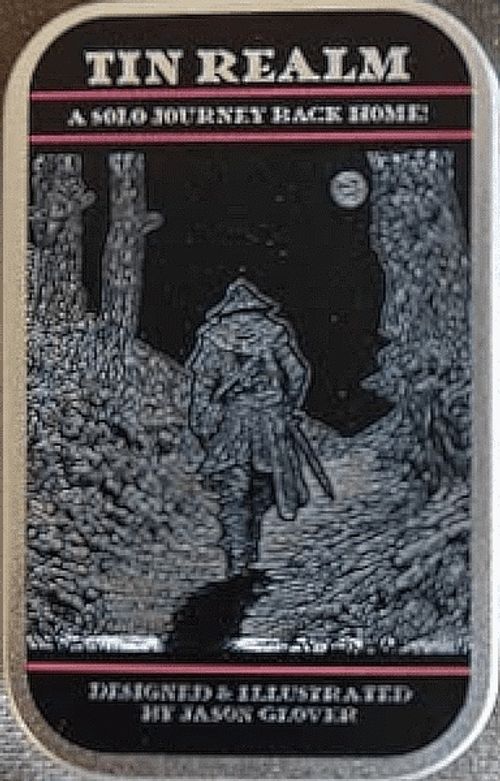
Tin Realm
Tin Realm Rulebook
Table of Contents
Table of Contents
Objective
You have managed to collect all 3 Shards of Brahm and break the curse cast upon the clerics of the Red Cloth. Now you must travel to the city of Oakinshelm to relay the news to the Baron and to get some well earned rest. This journey will not lack agony. You must make your way through harsh landscapes and reach Oakinshelm within 7 days, or die trying.
Contents
- 12 Exploration Cards
- 4 Map Cards
- 9 Enemy Cards
- 8 Loot Cards
- 3 Trapping Cards*
- 3 Race/Class Cards
- 4 Tracking Cards
- 4 Reference Cards**
- 7 Tracking Cubes
- 2 Dice
- 1 Meeple
* Look like Loot Cards, but have an item on each side.
** These white cards are double-sided and titled Altar, Campsite, etc.
Setup
Set out the four Map Cards, the Loot Deck and the Enemy Deck, the Tracking Cards, and the Wanderer card as shown. Leave reserved space for placing Exploration Cards during play.
-
Separate all cards and bits by type.
-
Locate the double-sided map cards. Each side of a map card represents the same portion of the map, but one side has 3 spaces and the other has 4. You can adjust how difficult your journey will be by deciding which side you want to use. The more spaces you have to travel through during the game, the more difficult your adventure will be. When building the map, you will start with the card with the "S" (Start) on it. Place this card to the left, and then place the other cards in a row, connecting the roads, until you place the fourth and final card with the "F" (Finish). Place the meeple on the start position.
-
Place the 4 tracker cards face-up, in a row, under the map cards.
-
Find the Race/Class cards. The side with the portrait is the race side. You must first pick a race to play as. Once you have done this, flip the remaining cards over and choose a class. These two cards represent your adventurer.
-
Determine your total starting health by combining the values indicated on both cards next to the heart icon. Place a red cube on the health tracker to show your starting health.*
Place the green cube (poison cube) on the skull on the health tracker. As you gain poison this cube will move up your health tracker. If your health is ever equal to, or less than, your poison level, you die immediately.
- Determine your total starting energy by combining the values indicated on both cards next to the lightning icon. Place a blue cube on the energy tracker to show your starting energy.*
* During play, your health and energy may never exceed these starting values.
-
Check to see if your adventurer starts with any food by looking for a value next to the ration icon on the race card. If you do start with food, place the orange cube on the corresponding value on the tracker. If you do not, place the cube below the space with the value of 1. You cannot carry more than 5 food.
-
On the bottom of your class card you will find your starting trappings. Locate those two cards and place them next to your adventurer cards.
-
Place the yellow cube on the "1" space of the sundial tracker. The sundial tracks your days of travel. Each time you cycle through the exploration cards, a day passes.
-
Place the other red cube somewhere near the tracker (1-12) below the sundial tracker. This area may be used during combat to track enemy health.
-
Place the white cube on the favor tracker below the space with the value of 1. You start with zero favor.
-
Place the reference cards, enemy deck, and loot deck in a place easily reachable.
-
Place the two dice near your adventurer cards, and then shuffle all 12 Exploration cards and place them in a central location with the illustrated sides facing up. Leave a space for building a horizontal card tableau with your Exploration cards during play.
You are now ready to play!
HINT: Take a moment to read your race's special ability and your trappings cards. This will help you make wise choices during play.
Exploration
Tin Realm is played in rounds called "Days," which represent a full day of your journey. Each day is made up of six turns called "Locations," which represent places of interest you have traveled through within each day. The end of the day is triggered after you resolve the sixth and final location within that day.
Turn Sequence
Your Exploration deck should be in a single stack with the illustrated side face-up to begin a new day.
- Looking at the top card you must determine if you want to resolve this location or skip it. Take note of the icons in the lower portion of the card, as they will give you an idea of what is at the location.
(Resolve) So you have decided to resolve the top (first) card. Take this card from the top of the deck and place it just to the side of the Exploration deck, keeping it face-up. Now take the next card in the deck and flip it to its result-side and place it next to the first card. This is called creating a location. You now have the first card illustration-side up and the second card flipped to the result side. Now you must resolve each icon on the Exploration card by referring to the corresponding icons on the result card. Icons must be resolved from left to right. More on how each icon works to be discussed later.
(Skip) So you have decided to skip the top (first) card. You now must take the top card from the deck and flip it to its result side and place it to the side of the Exploration deck. Now take the next card in the deck, keeping it illustration-side up, and place it next to the result card. Now you can resolve the second card using the results on the back of the first card.
Because there are twelve cards in the Exploration deck, and creating a Location required two (Illustrated side of one and result side of the other), each day will consist of six locations.
Exploration Icons
Let's look at the six different icons you will run into on your journey and how to resolve them.
ENEMY - Determine which enemy you are fighting and locate the corresponding enemy card. Engage in combat.
TRAP - Check the result card to determine what type of damage, and how much, and adjust your tracker the indicated amount.
RANDOM ENCOUNTER - Check the result card to see what random encounter you must face (sometimes an enemy). If it is an enemy, find that enemy card and engage in combat. For other random encounters refer to the double-sided reference cards for details as to how to resolve.
LOOT - Refer to the result card to see what loot you have found. Locate the loot card and place it by your character. Sometimes you will find an empty chest.
CAMPSITE - You may either rest or search at the camp. If you rest, you gain 2 health and 1 energy. If you search you gain 1 food.
WATER - You can always look for food when you find water. Roll 1 dice and if the result is either a 5 or a 6, you gain 1 food.
The Journey Tableau
After you have resolved a location, you discard the card that was used for that locations results. Form a discard pile if this was the first location of the day. The other card, the one you chose to resolve, must be added to the journey tableau. If this is the first location card being placed in the tableau, you may place it anywhere. Subsequent cards will be added to either side, creating a panoramic scene.
Each time you place a new card to the journey tableau, you must either place it on the far left or far right of the tableau. You may never wedge it between two previously placed cards. Once six cards have been placed, the end of the day will be triggered.
When you place cards into the journey tableau, you will want to pay attention to the icons on the side edges of each card. Matching these icons when placing a card will trigger one of two outcomes. Whenever you match a Forest, Water, or Mountain icon, you will advance your meeple one space on the map cards. Reaching Oakinshelm, at the "F" space, is the only way to win Tin Realm, and this is one of the best ways to advance your meeple along the map. In the very rare occurrence that you match up a skull icon, you lose half your life and must move back 3 spaces on the map cards.
Exploration Examples
Here are a few examples of how icons may align during play when adding cards to the journey tableau.
- Often times icons simply will not match. This does not trigger any action, but is perfectly legal.
- Whenever a Forest, Water, or Mountain icon match up, you advance your meeple on the map cards.
- Matching half of a skull icon with any landscape icon has no effect.
- Matching two skull icons will result in you losing half of your current life and having to move back 3 spaces on the map cards.
Moving Along the Map
Whenever you are asked to move along the map cards, simply move from one node to the next the number of spaces required. If you land on, or pass, the campsite or water icons on the map cards, you may take that action as if you had found them in the Exploration deck. If at any point you reach the node with the "F" on it, you win and the game ends immediately!
Combat
The first thing you will have to do to engage in combat is to locate the enemy card of the foe you are fighting. Take note of their special power in the lower portion of the card.
Health - To determine the enemy's health take the value next to the heart icon and add the current position on the sundial. You may use the enemy health tracker to keep track of their health.
Attack - The value next to the dagger icon is extra damage this enemy will inflict if they successfully hit.
Defense - Subtract the value next to the shield icon from your attacks.
Favor - If you defeat the enemy you gain favor equal to the value next to the Ankh symbol. Adjust your favor tracker.
If an enemy card has a skull icon in the bottom right corner it tells you this foe is undead.
In combat you will always get to attack first, except when an enemy's special power says otherwise.
Before you roll dice to attack you must decide how much energy you want to expend on your attack. On your class card you will see the chart (for example, 2 / 5 / 7 next to one, two and three lightning icons). Each value has a lightning icon next to it. The more energy you spend the more force you will put behind your attack. In the example above if you spend 1 energy you will add 2 damage to a successful hit.
Once you have decided on how much energy you want to spend, adjust your energy accordingly and then roll both dice. Doubles always miss and you will do zero damage. In all other cases subtract one die from the other. This equals the raw attack value.
Now take this raw attack value and add the extra damage dealt from the energy you spent and this sum is your total attack damage. Check to see if your enemy has any defense and subtract that. Now subtract that from the health of your enemy. If they have zero or less health, you have defeated them and you gain favor as indicated on their card. If you fail to defeat them, they get to attack you. If you have zero energy, or if you so choose, you may deal 1 damage that your foe cannot defend against.
Enemies attack by rolling the dice. Doubles are always a miss, unless otherwise indicated. Subtract the results of both dice and that is the damage they deal to you. Make sure to add any bonus damage. If you have a helm you may subtract 1 damage. Now adjust your health tracker accordingly. If you have zero or less health, you are dead and the game ends. If you are still alive you get to attack again. Combat continues in this back and forth manner until either the enemy is dead or you are.
Ending the Day
Once you have worked your way through all 12 Exploration cards, your day ends. Follow the steps below.
-
Move the cube on the sundial tracker 1 space. You must reach Oakinshelm before the end of day 7 or you lose.
-
Feed your adventurer by consuming 1 food. If you have zero food, you suffer 3 damage to your health.
-
Shuffle all 12 Exploration cards and create a new pile of cards, illustration side up, to form the next day in your journey. You are now ready for the next day!
Food & Poison
At any time you may eat 1 food to raise either your health or your energy by 1.
Anytime you gain poison, move the poison cube the appropriate number of spaces up your health tracker. You start with zero poison, but the first time you gain it, you will move to the "1" space on the health tracker. If you ever have as much poison as you have health, you die immediately.
Ending the Game
The moment you reach the space marked "F" on the map cards, you game ends, and you reach Oakinshelm. You are victorious! Check your score below.
If at any point you run out of health, or your poison level reaches the level of your health, or the seventh day ends, you lose. Check your score below.
Scoring
Tally your score using the following parameters.
- 10 points for reaching Oakinshelm.
- Points equal to the sum of your health, energy, food and favor.
- 2 points for each node you have discovered on the map cards.
- Subtract 1 point for each poison you have and 2 points for each day that has passed.
Refer to the Ranking chart to see how you ranked.
Ranking
Using your score you may see how well you managed on your journey and to what profession you will take up.
| Score | Rank |
|---|---|
| 0 - 20 | Ratcatcher |
| 21 - 30 | Laborer |
| 31 - 40 | Guard |
| 41 - 50 | Performer |
| 50 - 60 | Merchant |
| 61+ | Mayor |