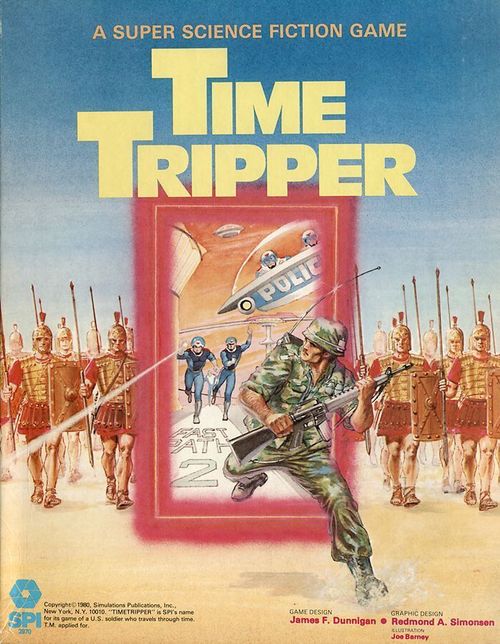
TimeTripper
TimeTripper Rulebook
Table of Contents
Table of Contents
- Read This First
- Contents
- [1.0] Introduction
- [2.0] Description of the Game Components
- [3.0] How to Set Up the Game
- [4.0] Basic Procedure
- [5.0] Random Time Travel
- [6.0] Setting Up the Battles
- [7.0] Movement, Zones of Control, and Stacking Restrictions
- [8.0] Combat
- [9.0] Historical Soldier & Animal Detection
- [10.0] Command Time Travel
- [11.0] Endurance
- [12.0] Experience
- [13.0] TeamTripper (Optional Rule)
- [14.0] Treasure Hunting (Optional Rule)
- [15.0] Negotiation (Optional Rule)
- [16.0] Winning the Game
- [17.0] How to Use a Timemaster
- Battles
- [6.1] Past TimeTripper Battles
- 1. Dinosaur Combat (81,267,234 BC)
- 2. Sabertooth Tiger (456,321 BC)
- 3. Cro-Magnon Buffalo Hunt (23,568 BC)
- 4. Meggido (1469 BC)
- 5. Siege of Troy (1184 BC)
- 6. Carche Mish (609 BC)
- 7. Marathon (490 BC)
- 8. Zama (202 BC)
- 9. Alesia (52 BC)
- 10. Gladiator Games (108 AD)
- 11. Adrianople (378)
- 12. Siege of Paris (885)
- [6.2] Future and Fantasy Battles
- 37. Cairo (1974)
- 38. Hells Angels (1983)
- 39. Easy Going Infantry (1993)
- 40. Mind Police (2027)
- 41. Inselons (2178)
- 42. Mutant Spearmen (2396)
- 43. The Magician of Dublin (Fantasy)
- 44. The Dragonlord (Fantasy)
- 45. Buffalo Castle (Fantasy)
- 46. Gunfight at the Bionic Corral (Fantasy)
- 47. The Seraglio of Sitri (Fantasy)
- Charts and Tables
Read This First
The rules to TimeTripper are organized by major topics arranged in the order in which they occur in the play of the game. Each such major topic is given a number and a name below which is given (usually) a General Rule or Description which summarizes the rules in that section. This is usually followed by numbered paragraphs called Cases, which give the specifics of the rules. Note that the numbering of the Cases is a decimal form of the Major Section number. Players should examine the map and counters and then quickly read the rules (without trying to memorize them). Then the game should be set up to play and a "trial run" made. TimeTripper is designed to be played solitaire or with up to four players.
Contents
1.0 Introduction; 2.0 Description of Game Components (2.1 Sample Counters, 2.2 The Battle Display, 2.3 The Time Displays, 2.4 The Record Track, 2.5 The Charts and Tables and Battle Sheet); 3.0 How to Set Up the Game (3.1 Setting Endurance, 3.2 Choosing Weapons and Equipment, 3.3 Setting Weight and Movement Allowance); 4.0 Basic Procedure; 5.0 Random Time Travel (5.1 When Random Time Travel Occurs, 5.2 Travel from the Past to the Future and Vice Versa, 5.3 Regaining the Present); 6.0 Setting Up the Battles (6.1 Past TimeTripper Battles, 6.2 Future and Fantasy TimeTripper Battles, 6.3 Restrictions on Deployment, 6.4 Strength Values, Endurance Levels, and Numbers of Opponents, 6.5 "Cleaning Up" Between Battles, 6.6 Optional Random Set-Up Procedure); 7.0 Movement, Zones of Control and Stacking Restrictions (7.1 Movement Allowances, 7.2 Zones of Control, 7.3 More than One Unit Per Hex (Stacking), 7.4 Movement and Other Actions); 8.0 Combat (8.1 Weapons Chart, 8.2 Missile Weapon Combat, 8.3 Melee Combat, 8.4 Grenade Combat, 8.5 Recovering Weapons, 8.6 Accuracy Table, 8.7 Combat Results Table, 8.8 Combat Results); 9.0 Historical Soldier and Animal Detection (9.1 Detection, 9.2 Movement of Historical Soldiers and Animals as a Result of Detection, 9.3 Attacks by Historical Soldiers and Animals as a Result of Detection, 9.4 Detection Table); 10.0 Command Time Travel (10.1 Command the Flux, 10.2 Conjuring the Flux, 10.3 Moving the Flux, 10.4 Aligning the Flux, 10.5 Jumping the Flux, 10.6 Special Rules Concerning the Flux); 11.0 Endurance; 12.0 Experience; 13.0 TeamTripper (Optional Rule) (13.1 TeamTripper Equipment Restrictions, 13.2 Random Selection of Team Equipment, 13.3 TeamTripper Weapon Selection Chart); 14.0 Treasure Hunting (Optional Rule); 15.0 Negotiation (Optional Rule) (15.1 Restrictions on Negotiations, 15.2 Effects of Negotiation, 15.3 Negotiation Results Table); 16.0 Winning the Game; 17.0 How to Use a TimeMaster.
[1.0] Introduction
(The introduction consists of the story summarized in the Table of Contents note above.)
[2.0] Description of the Game Components
GENERAL RULE:
A complete game of TimeTripper includes the rules, Battlefield Display, Past and Future Time Displays, Record Track, 100 die-cut playing pieces, and two dice.
CASES:
[2.1] Sample Counters
The playing pieces (also called "counters"), representing TimeTrippers, historical soldiers, and animals, are often referred to as "units." Additional counters serve as markers used in the play of the game.
Melee Soldier / Melee Weapon. Each counter represents a soldier armed with a melee weapon (sword, axe, etc.). When the soldier is killed or disabled, the counter is turned over, and then represents that soldier's weapon, which a Tripper may subsequently pick up and use.
Missile Soldier / Missile Weapon. Each counter represents a soldier armed with a missile weapon (bow, rifle, etc.). These units are used in the same manner as melee soldier counters.
Animals. (Examples: Tyrannosaurus Rex, Horse.)
Tim. One side represents Tim (a Tripper) alive, the other Tim dead.
Tim Current Endurance. This marker is placed on the appropriate box on the Record Track to indicate Tim's current Endurance Level. The lower a Tripper's Endurance Level, the slower he can move and the less he can carry. If his Endurance Level reaches "0," he is dead.
Tim Weight Carrying. This marker is placed on the appropriate box on the Record Track to indicate the portion of that Tripper's current Endurance Level that is dedicated to carrying weight. Note: The more weight a Tripper carries, the slower he can move.
Tim Experience. This marker is placed on the appropriate box of the Record Track to indicate that Tripper's Current Experience Level (the number of times that Tripper has "jumped the flux"; see 12.0).
.357 Magnum Pistol / .25 Cal Pistol. This counter represents a pistol held by a Tripper. It is not placed on any display, but is kept by the Player where he can see it. When a pistol is empty (i.e., unloaded), the Player should place the pistol counter on top of the Pistol Ammo Marker (on the Record Track) to indicate it is empty.
Ammo markers (.357 Ammo, .25 Cal Ammo, M16 Ammo, Shotgun Ammo, Missile Weapon Ammo). An Ammo Marker is placed on the Record Track to indicate how many reloads the Tripper possessing a weapon has for that particular weapon, and also whether that weapon is currently loaded or not.
M26 Grenades / M1 Grenades. These markers indicate how many grenades a Tripper has.
Trees and Bushes / Shellholes. These counters are deployed on the Battle Display to represent either trees and bushes or shellholes.
M16 Loaded, Shotgun Loaded, Radio, Claymore. Other counters in TimeTripper include the M72 Rocket Launcher, the Ankylosaur (300 series), Buffalo (500 series) and Sabertooth (601).
Flux / Flux Aligned. This counter is used on the Battle Display to represent the flux (see 10.0).
Tripper in Time. This marker is used to represent the Tripper's "Location" in time on the Time Displays.
Stun / Move Away. This marker is used to indicate a stunned soldier or one that is in the process of moving away (or fleeing).
[2.2] The Battle Display
The Battle Display represents the physical area in which the battles are fought. Each hexagon represents about 5 meters across (each turn represents 5-10 seconds). Each hex on the Battle Display has a unique number on it. In addition, some hexes have a number/letter combination (like "5B", "3A", etc.). These hexes are used to deploy counters randomly as described in 6.0. The numbers along the edge of the Battle Display are also used to deploy counters (see 6.0). The "T" hex in the center of the Battle Display is the hex the Tripper always lands on in solitaire play. The numbers on the hexsides of that hex are used when a counter must be moved randomly.
[2.3] The Time Displays
The two Time Displays represent the areas in time through which the TimeTripper may travel. One represents the past and the other the future. Each is composed of 37 hexes, representing 36 positions in time (each of which corresponds to a potential "battle") plus a "Time Hole." The only counter ever placed on the Time Displays is the Tripper in Time Marker.
[2.31] Past Time Display (see mapsheet)
[2.32] Future Time Display (see mapsheet)
[2.4] The Record Track
The Record Track is used to indicate the current status of each TimeTripper in terms of Endurance, Ammo, and Speed. This display has four columns, one for each Tripper's markers.
[2.5] The Charts and Tables and Battle Sheet
The rules booklet includes two pullout sheets. One sheet includes all the Charts and Tables needed to play the game, plus Designer's Notes. The second is a Battle Sheet on which all 72 battles may be found.
[3.0] How to Set Up the Game
GENERAL RULE:
There are two methods of playing TimeTripper: either solitaire or with teams of two to four players ("Trippers"). If you are playing with a team, consult the "TeamTripper" rules Section (13.0). Sections 3.0 through 12.0 deal with TimeTripper solitaire play.
PROCEDURE:
In order to set up a game of TimeTripper, a Player must first set his Tripper's Endurance and then choose a mix of weapons and equipment that will accompany him on his journey through time.
CASES:
[3.1] Setting Endurance
Before the start of the game, a Player must set his Tripper's Endurance Marker on the box marked 20 on any of the four columns of boxes on the Record Track (2.4).
[3.2] Choosing Weapons and Equipment
After setting his Tripper's Endurance Marker, a Player must choose a mix of weapons and equipment that will accompany him throughout the game. This mix may be no more than 50 pounds (although the Tripper is not obligated to take exactly 50 pounds).
[3.21] Every Tripper must carry the following equipment in each game of TimeTripper:
- A. One M16 rifle (7 pounds); and
- B. One radio (16 pounds).
Note: These two pieces of equipment are represented in the game by individual counters. These counters should be kept in front of the Player to indicate that the Tripper possesses them.
[3.22] In addition to the equipment required according to the instructions of Case 3.21, each Tripper may choose any combination of available weapons (see 8.1, Weapons Chart) and ammo reloads before the start of play, as long as the total weight of equipment carried (including the M16 rifle and radio) does not exceed 50 pounds. The weight of each weapon is listed on the Weapons Chart; ammo reloads (regardless of weapon) weigh one pound each.
[3.23] The M16, shotgun, .357 and .25 caliber pistols, the M72 LAW and the Claymore mine are represented by individual counters that the Player should keep off to the side.
[3.24] For each ammo reload or grenade chosen, the Player should place the corresponding "Ammo" or "Grenade" Marker in the appropriate box of the Record Track (2.4). Example: If the Tripper takes four .357 Magnum pistol ammo reloads with him, the ".357 Magnum Pistol Ammo" Marker would be placed in the box numbered 4 on the Record Track.
[3.25] If the Tripper takes a bayonet or insect repellant with him, this fact must be noted on a separate sheet of paper.
[3.3] Setting Weight and Movement Allowance
Before the start of the game, the Player must set his Tripper's Weight Carrying Marker on a box of the Track Display to indicate the number of Endurance Points that are devoted to carrying weight and hence not available for movement (see 7.1). The Player totals the weight of everything carried by the Tripper (weights are listed on the Weapons Table, 8.1) and divides by five, dropping any fractions. The result is the number of Endurance Points devoted to carrying weight; that number is subtracted from 20 to determine what box the Weight Carrying marker is placed in. The box the Weight Carrying marker is in on the Record Track indicates the Tripper's current Movement Allowance (the number printed in the box). Example: If a Tripper is carrying 43 pounds, 8 Endurance Points (43 / 5 = 8 and 3/5ths) would be dedicated to carrying weight. The Weight Carrying marker would (at the beginning of the game, when the Tripper's Endurance Level is 20) be placed in the "12" box, and the Tripper's Movement Allowance would be 4.
[3.4] How to Start the Game
Place the Tripper in Time Marker on the Time Hole hex of the Past Time Display (2.31). The Tripper in Time Marker is then moved randomly through time, as per 5.0.
[4.0] Basic Procedure
GENERAL RULE:
The basic action in TimeTripper is the movement of the Tripper in Time from situation to situation as he attempts to get "home" to the present. Each potential situation is represented by a hex on one of the time displays, and is called a "battle." Play of the game consists essentially of a series of battles, punctuated by "jumps" through time by the TimeTripper between those battles. Each jump through time and corresponding battle is considered to be a "Game-Turn."
Game-Turn Outline
Each Game-Turn must proceed strictly as described below.
1. TIME TRAVEL STAGE
The Player resolves the Tripper's travel through time, adjusting the placement of the Tripper in Time Marker on the Time Display to indicate the Tripper's new position in time. Note: If the Tripper returns to the present in this stage, the game is over. If not, when the movement of the Tripper in Time Marker is completed, the appropriate battle is set up, as per 6.0.
2. BATTLE STAGE
A. Tripper Phase
The Tripper may move and/or fire one of his weapons (see 7.0 and 8.0). The Tripper may also (or alternately) attempt to control or otherwise manipulate the flux (see 10.0), or negotiate (optional rule, see 15.0). (Exception: In the first Tripper Phase of a given battle, the Tripper may not move, although he may fire his weapon.)
B. Historical Soldier (or Animal) Phase
Historical soldiers (or animals) may detect, move, and perform combat (see 8.0 and 9.0). Historical soldiers or animals perform these actions individually, not together. (Exception: In solitaire games, there is no Historical Soldier Phase in the First Battle Stage of each Game-Turn.)
C. Stun Marker Removal Phase
If the Tripper jumped the flux (see 10.5), the Game-Turn is over, and play proceeds to the Time Travel Stage (1) of the next Game-Turn. If not, all Stun Markers on historical soldiers or animals are removed, and another Battle Stage (2) is begun.
Note that while there may never be more than one Time Travel Stage in a given Game-Turn, there is no limit to the number of Battle Stages which may occur in any one Game-Turn.
[5.0] Random Time Travel
GENERAL RULE:
Throughout the course of the game, the Tripper will travel through time one or more times. All time travel is kept track of on the Time Displays (2.31 and 2.32). The "Tripper in Time" (TT) Marker is used to record the position of the Tripper on the Time Display. This is the only marker ever placed on the display, and the hex it occupies indicates the current position of the Tripper in time. Trippers move through time involuntarily to begin the game and voluntarily by "jumping the flux" (see 10.5) at the end of each Battle Stage. Movement through time is either "random" (wherein the Tripper has no control) or "commanded" (whereby the Tripper has a variable degree of control). This Section concerns random time travel; commanded time travel is covered later (see 10.0).
PROCEDURE:
Random time travel occurs during any Time Travel Stage during which it is required as per 5.1.
A. The Tripper rolls one die. The resulting number is the direction in which the TT Marker will move on the Time Display (the Tripper should consult the numbers adjacent to the hexsides of the Time Hole hex in order to determine what direction this die roll indicates).
B. The Tripper again rolls one die; the resulting number indicating the number of hexes the TT Marker must move on the Time Display. If an outer hex on the Time Display is reached and the TT Marker can move no further in the indicated direction, turn the TT Marker two hexsides to the right (120 degrees) and continue movement in the new direction.
CASES:
[5.1] When Random Time Travel Occurs
[5.11] The Tripper is moved randomly through time to begin the game, after it has been set up (see 3.0).
[5.12] Whenever the Tripper jumps the flux and it has not been aligned (10.4), he is moved randomly through time.
[5.13] Whenever the TT Marker lands (i.e., finishes its movement) on the Time Hole hex and the Tripper fails to regain the present (see 5.3), the Tripper must be moved randomly through time.
[5.14] Whenever the TT Marker lands on a numbered battle hex on the Time Display that has already been visited by that Tripper (the Player must keep track of which numbered battle hexes on the Time Display have been landed on during the course of the game), the Tripper must be moved randomly through time. Note: The effect of this rule is to make it harder and harder to return to the present, the more battles that are fought. However, see also 5.31.
[5.2] Travel from the Past to the Future and Vice Versa
If, during movement on the Time Display, the TT Marker passes (but does not land directly on) the Time Hole hex, the TT Marker has passed to the Future Time Display (if the TT Marker currently occupies the Past Time Display) or to the Past Time Display (if the TT Marker currently occupies the Future Time Display). The TT Marker is immediately shifted to the opposite Time Display, while continuing to move the number of hexes (in the same direction) dictated by its random movement.
Example: The TT Marker occupies the 29 hex on the Past Time Display. During random movement, the Tripper rolls a "3" for direction and a "4" for travel length. Moving the TT Marker on the Past Time Display, the TT Marker passes over the Time Hole hex. It is immediately shifted to the Future Time Display and, proceeding to move in the same direction, finishes its movement on hex 48 of this display.
[5.3] Regaining the Present
[5.31] If, by virtue of aligned movement on the Time Display (see 10.4), the TT Marker ends up directly on the Time Hole hex, there is a possibility that the Tripper may reach the present day (Vietnam) again. In order to determine if the present has been regained, the Tripper should roll two dice. If the dice roll is equal to or less than the number of flux jumps the Tripper has made during the course of the game (this is kept track of using the Experience Marker; see 12.0), the Tripper has reached the present day again. If not, the TT Marker is immediately subject to random movement on the Time Display (see 5.13).
[5.32] If the TT Marker lands on the Time Hole hex through random movement, the Tripper is not eligible to regain the present (see 5.13).
[6.0] Setting Up the Battles
GENERAL RULE:
There are two groups of battles, each one corresponding to one of the two Time Displays. Each specific battle is represented by a particular hex on the Past or Future Time Display. Each battle may only be fought once during the course of a game (see 5.14).
Each battle listing includes its title and date (if known), negotiation ratings (see 15.0), treasure (if any; see 14.0), a deployment option for the opposition (either "Random" or "Enter"), the strengths and number of any opponents, and notes.
PROCEDURE:
After movement of the Tripper in Time Marker (as per 5.0 or 10.0) has been completed, the battle corresponding to the hex the marker occupies is set up. In solitaire play, the Tripper counter is always placed on the "T" hex (0707). Random set-up is always used for any loose equipment belonging to the Tripper (see 13.0), and any historical soldiers inadvertently along for the ride (see 10.62). Depending on the battle, opponents may be deployed using Random set-up or Enter set-up. All units that are to be deployed using Random set-up are deployed first, and then any using Enter set-up.
RANDOM SET-UP
A. The Tripper(s), loose equipment, historical soldiers or animals along for the ride, and the opponents from the present battle (if they are to be deployed randomly) are divided into groups of six, and the counters in each group arranged in order.
B. A letter between "A" and "F" is selected.
C. A die is rolled.
D. The first counter in the first group is placed in the hex on the Battle Display corresponding to the combination of the number and letter (e.g., "3D"). Each of the other counters in the group are in turn placed in one of the other five hexes with the same number.
Example: The letter "D" is selected and the die roll result is "3." The first counter in the group is deployed in hex "3D," the second counter in the group is deployed in hex "3E," the third counter is deployed in "3F," the fourth in "3A," the fifth in "3B" and the last in "3C." See 6.33.
E. Repeat steps "B" through "D" for each group.
ENTER SET-UP (HISTORICAL SOLDIERS OR ANIMALS ONLY)
A. A die is rolled.
B. The Player places each historical soldier or animal counter on any one of the border hexes of the Battle Display which contains the number corresponding to the die roll result.
C. If there are more historical soldiers or animals than appropriately numbered hexes, repeat steps "A" and "B" until all have been deployed.
CASES:
[6.1] Past TimeTripper Battles
(see removable insert)
[6.2] Future and Fantasy TimeTripper Battles
(see removable insert)
[6.3] Restrictions on Deployment
[6.31] No more than one counter may be placed on any one hex during set-up of a battle. Exception: See 6.32.
[6.32] When horses are called for, each historical soldier counter in the given battle is stacked with a horse counter.
[6.33] Random Set-up Chart. This chart lists the hexes used for Random set-up as per the Procedure. (See mapsheet).
[6.4] Strength Values, Endurance Levels, and Numbers of Opponents
[6.41] Four values are listed for each opponent (see 6.1 and 6.2). These values are, respectively, Attack Strength, Accuracy (for firing a ranged weapon), Defense Strength, and Detection Value. An "X" indicates a value of "0" or no value (e.g., a horse has no detection value).
[6.42] Any historical soldier (or animal) with an Endurance Level (listed in the notes of the battle) takes casualties like a Tripper (use a marker for it on the Record Track; see 8.8).
[6.43] The number following the four listed values indicates how many of a given opponent will be present in a battle. If a specific number is given, it is the exact number of opponents. Alternately, a formula giving the number of dice to be rolled and any adjustments to be made to the result may be listed; in such a case, the number of opponents is variable depending on the die roll result. Example: "2D + 2" means that the number of opponents is equal to the sum of the result of the roll of two dice plus two; i.e., any number between 4 (if both dice results are "1") and 14 (if both dice results are "6").
[6.5] "Cleaning Up" Between Battles
Whenever all opponents in a battle have been killed, the Tripper is considered to be free to regain endurance (see 11.0, Procedure), collect treasure, pick up loose equipment and/or weapons, and flux on to the next battle (or home) at his leisure. The rationale behind this is that, with no one to interfere with him, he can do as he pleases.
[6.6] Optional Random Set-Up Procedure
The random set-up procedure given above has the disadvantage of limiting the deployment of the counters to those hexes which are numbered with the big numbers. The following procedure, though slower, provides more variation.
A. Roll two dice and add the results. The total (i.e., some number between "02" and "12") indicates the first two numbers of a hex.
B. Roll two dice again and add the results (again). The total indicates the second two numbers of a hex.
Example: The first total is "3" and the second total is "11." The indicated hex is "0311."
C. If the hex is unoccupied, place a counter in it. If not, repeat steps "A" and "B."
D. Repeat steps "A" through "C" for each counter to be deployed by random set-up.
[7.0] Movement, Zones of Control, and Stacking Restrictions
GENERAL RULE:
Movement of the Tripper and historical soldiers and/or animals (opponents) on the Battle Display occurs as part of resolving each battle. Movement of the Tripper is dependent on his Endurance Level (the lower it is, the less he can move); however, Tripper movement is performed at the option of the Player. Movement of opponents is strictly defined by results of (mandatory) attempts by each historical soldier or animal to "detect" the Tripper (see 9.1). Movement by the Tripper affects his ability to perform other actions (such as combat). Movement is generally limited by the presence of Zones of Control and other units.
PROCEDURE:
Units are moved one at a time, hex-by-hex, in any direction or combination of directions desired (for the Tripper) or required (for opponents), up to the limit of the applicable Movement Allowance.
CASES:
[7.1] Movement Allowances
[7.11] Each historical soldier has a Movement Allowance of three hexes and each historical animal has a Movement Allowance of six hexes per Historical Soldier Phase, unless otherwise indicated (see 6.1 and 6.2).
[7.12] During each Tripper Phase, the Tripper may normally move a certain number of hexes on the Battle Display. This number is called the Tripper's "Movement Allowance." A Tripper's Movement Allowance is indicated on the Record Track by the position of that Tripper's Weight Carrying Marker (see 3.3). Note: A Tripper's Movement Allowance depends on his current Endurance Level and the weight he is carrying.
[7.13] A Tripper may increase his calculated Movement Allowance by a maximum of 4 (up to a total Movement Allowance of 6) by decreasing his endurance by one for each additional Movement Point used that turn. Example: A Tripper with a Movement Allowance of 2 and an Endurance of 12 could move 6 hexes that Tripper Phase by losing 5 Endurance Points (1 for normal activity and 4 for the extra movement).
[7.14] A Tripper may carry a (disabled) human (important in TeamTripper) a maximum of one hex per Tripper Phase. This can be done only if the carrying Tripper has a Movement Allowance of at least 2 (but see 7.13); this is the only movement allowed the Tripper that Phase.
[7.15] The Tripper is not obligated to expend his Movement Allowance completely, although he may do so. Historical units must move their full Movement Allowance when the applicable detection result allows them to move at all. (Exception: 7.16.)
[7.16] If a "Flee" result forces an historical soldier or animal to the edge of the display, he stops; soldiers or animals may not leave the Battle Display except as a consequence of time travel (see 10.62).
[7.2] Zones of Control
[7.21] Unstunned units exert a "Zone of Control" into all six adjacent hexes at all times. When a unit enters an Enemy unit's Zone of Control, it must stop and move no further.
[7.22] When a unit is in an Enemy unit's Zone of Control, it may not move until the adjacent Enemy unit is stunned, killed or disabled. (Exception: 7.23 and 7.24.) Stunned, killed, or disabled units have no Zones of Control.
[7.23] A unit in an Enemy Zone of Control may be "fluxed" out of the current battle without restriction (see 10.0).
[7.24] Rampaging elephants (battle 8), the brawlball (battle 48), pongball (battle 50), and cars (battle 62) are totally unaffected by Zones of Control.
[7.3] More than One Unit per Hex (Stacking)
[7.31] A unit may not end its movement stacked in the same hex with any unit that is not dead or disabled. (Exception: Riders on horses.)
[7.32] During movement a unit may not pass through a hex occupied by an Enemy unit that is not dead or disabled. (Exception: 7.34.)
[7.33] A unit that is dead or disabled does not affect stacking in any way. Units may stack without restriction on top of an unlimited number of dead or disabled units.
[7.34] Rampaging elephants, the brawlball, pongballs, and cars may enter a hex containing an Enemy unit that is not dead or disabled (but may not end movement in such a hex).
[7.4] Movement and Other Actions
[7.41] As long as he is not dead or disabled, once each Tripper Phase a Tripper may both drop anything he is carrying and (Movement Allowance permitting) move.
[7.42] Regardless of whether or not a Tripper drops anything and/or moves in a given Tripper Phase, he may perform only one of the following actions:
- A. Attempt to command the flux (see 10.0);
- B. Use any single weapon he is carrying (however, to use a weapon during movement will degrade accuracy to some extent; see 8.23D);
- C. Reload a weapon;
- D. Pick up a weapon or the radio.
[7.43] (Optional rule: See 15.0) The Tripper may choose to negotiate during a Tripper Phase, but if he does so, no other activity except an attempt to command the flux is allowed.
[7.44] Historical soldiers and animals may only move, detect (see 9.0), and attack. Horses automatically move along with their rider. A horse whose rider is killed or disabled remains in that hex for the rest of the battle. (A Tripper may never ride a horse.) Also, see 8.34.
[8.0] Combat
GENERAL RULE:
On the Battle Display, the Tripper may attack historical soldiers and animals or vice versa. Combat is of three types: Missile Weapons Combat, Melee Combat, and Grenade Combat. Successful combat may result in the enemy target unit being wounded, stunned, disabled or killed. A Tripper's Attack Value depends on the weapon he uses; his Defense Strength is always "4." The Attack Value and Defense Strength of each historical soldier and animal is listed in 6.1 or 6.2.
CASES:
[8.1] Weapons Chart
(see charts and tables)
[8.2] Missile Weapon Combat
All weapons listed in 8.1 that have an accuracy value of anything other than the letter "X" are missile weapons. A missile weapon may be used to attack an enemy unit anywhere on the Battle Display without restriction (unless otherwise noted in the specific battle rules).
[8.21] Missile Weapon Attack Procedure
A. The Player determines the accuracy rating of the weapon being employed;
B. The Player determines the range in hexes from the firing unit's hex (exclusive) to the target hex (inclusive);
C. The Player consults the Accuracy Table (8.6) and rolls two dice, reading the result immediately;
D. If the dice roll is a number equal to or greater than the number appearing at the cross-reference of the range and accuracy rating, the attack is successful; i.e., a "hit" is achieved. If the dice roll is less than the number appearing at the cross-reference between the range and accuracy rating, the attack is unsuccessful; skip step "E."
E. If an attack is successful, (i.e., a "hit" has been obtained on the target), the target unit's Defense Strength should be subtracted from the firing weapon's Attack Value. The resulting number is matched to a corresponding number on the Combat Results Table (8.7). The Player rolls two dice, crossreferencing this column with the dice roll and reading the result. See 8.8 for an explanation of each combat result. The combat result, if any, is applied against the target immediately.
F. Regardless of the result of the attack, the Player must immediately roll two dice in order to determine if the firing weapon runs out of ammunition (see 8.22). A weapon runs out of ammunition if the dice roll is equal to a figure indicated on that weapon's "Empty Roll" column on the Weapons Chart.
[8.22] If a weapon runs out of ammunition (see 8.21F), the Ammo Marker corresponding to that weapon on the Record Track should be turned sideways, indicating that it is empty. In order to fire that weapon again, it must be reloaded (assuming reloads are available).
[8.23] The dice roll used to determine the accuracy of missile combat is modified under the following circumstances:
- A. If the target is a horse, tiger, buffalo, or ankylosaur, add two to the dice roll;
- B. If the target is a horse with a man on it, add three to the dice roll;
- C. If the target is a Tyrannosaurus rex, add four to the dice roll;
- D. If the Tripper is moving while firing, subtract one from the dice roll for each hex the Tripper entered during that Tripper Phase.
[8.24] If a Tripper fires at a soldier and horse, the Player must choose which one of them is actually the object of the attack before it is resolved.
[8.3] Melee Combat
All weapons listed in 8.1 that have an accuracy value of "X" may only be employed in melee combat; i.e., an attack against a unit in an adjacent hex. Such a weapon may never be used to attack a target unit that is not in an adjacent hex (i.e., for missile combat, it is not considered effective to throw a sword at someone).
[8.31] Melee Combat Procedure
A. Subtract the target unit's Defense Strength from the attacking weapon's Attack Value;
B. Consult the Combat Results Table, crossreferencing the column corresponding to the figure obtained in step "A" with a dice roll (two dice are rolled);
C. Read the result and apply it immediately (see 8.8).
[8.32] A unit without a weapon may participate in melee combat with a constant attack value of 1. (This is real "hand-to-hand" combat.)
[8.33] If more than one attacking unit is adjacent to the same defending unit, the attackers' strength may be combined into a single value and one attack resolved against that defending unit.
[8.34] The Attack Strength of a horse (or anything else an historical soldier is riding) is added to the soldier's strength in any melee combat. Riderless horses may never attack. If a horse and rider are the object of a melee attack, the Player must decide prior to resolving the attack which one of them the attack is specifically directed against. (See also 7.44.)
[8.4] Grenade Combat
Grenades are basically one shot missile weapons.
[8.41] There are three types of grenades in TimeTripper:
- A. M26A1 (Regular fragmentation grenades). See 8.42.
- B. M1 (illumination grenades). See 8.43.
- C. Claymore (a horizontal land mine which functions like a large shotgun). See 8.44.
[8.42] M26A1 Grenade Procedure
A. A target hex anywhere within six hexes of the Tripper is selected;
B. Any unit (including the user, if applicable) in the target hex is attacked with an Attack Value of 12 and an Accuracy Level of A;
C. All units adjacent to the target hex are attacked with an Attack Value of 8 and an Accuracy Level of A;
D. All units two hexes away from the target hex are attacked with an Attack Value of 6 and an Accuracy Level of A.
Note: All these attacks are carried out as soon as the target hex is declared.
[8.43] M1 Grenade Procedure
A. A target hex anywhere within six hexes of the Tripper is selected;
B. All units in the target hex are attacked with an Attack Value of 5 and an Accuracy Level of E;
C. On the Battle Stage after it is thrown (and five Battle Stages thereafter), the grenade "burns." A burning grenade inhibits the detection capability of historical soldiers and animals (see 9.1).
[8.44] Claymore Mine Procedure
A. The user must declare that the Claymore is being set-up in a particular hex on the Battle Display (this is considered the same as "using a weapon");
B. During any subsequent Battle Stage, the user may declare that the Claymore is being fired. The user may declare that the Claymore is being fired only when he is within two hexes of it and no sooner than one Stage after the Claymore was dropped.
C. When employing a Claymore, the Claymore counter must be pointed in its intended direction of use. When fired, it attacks all units in a 60 degree arc in the direction it is pointing, all the way to the Battle Display's map-edge. All hexes are attacked with an attack value of 12 and an accuracy level of G.
Example: A Claymore is set up in hex 0512 (with the "tips" pointed towards hex 0511) and fired. It attacks all of the following hexes; 0511, 0410, 0510, 0610, 0710, 0609, 0509, 0409, 0310, and so on to the edges of the Battle Display (i.e., out to hexes 1207 and 0209). The blast can affect practically the entire Battle Display.
[8.45] When resolving the attack of a grenade on the Accuracy Table, a range of 1 is always assumed.
[8.5] Recovering Weapons
[8.51] A Tripper may recover a weapon from a dead or disabled historical soldier. This action is considered "picking up a weapon" (see 7.42D).
[8.52] If a missile weapon is recovered, the Player should roll a single die in order to see how many ammo reloads can be picked up with the weapon (each reload weighs one pound).
[8.53] A Tripper may never carry more than one recovered weapon at a time.
[8.6] Accuracy Table
(see charts and tables)
[8.7] Combat Results Table
(see charts and tables)
[8.8] Combat Results
Combat results only affect living things, never weapons or equipment.
[8.81] STUN: The Tripper loses one Endurance Point (only). A soldier or animal has a Stun marker placed on its counter and may not move, detect, exert a Zone of Control or attack during the Historical Soldier (or Animal) Phase of the current Battle Stage. If a horse is stunned, it stays put and the mounted soldier cannot move (but may attack).
[8.82] WOUND: If the Tripper was the target of the attack, one die is rolled and the result is the number of Endurance Points immediately lost. If the target is a soldier or animal, a single die is rolled. A roll of 1-3 indicates that the soldier or animal is disabled; a roll of 4-6 indicates that the soldier or animal is stunned.
[8.83] DISABLE: If the Tripper was the target of the attack, two dice are rolled and the result is the number of Endurance Points lost. For soldiers and animals, flip their counters over, indicating that they may take no more actions for the remainder of the game. They lose their Zone of Control. In addition, their weapons may be taken by the Tripper (if the weapons are taken, remove the Soldier counter from the display).
[8.84] KILL: The target is dead. If the target is a soldier or animal, the effect is the same as disable. If the target was a Tripper, there is a possibility that he may be raised from the dead (see 10.63, TeamTripper only). If a horse is disabled or killed, the rider incurs a wound result (which is the only way a rider can "dismount").
[9.0] Historical Soldier & Animal Detection
GENERAL RULE:
Historical soldiers and animals are restricted in the number and type of actions that they may perform during the Historical Soldier (or Animal) Phase. Basically, each such unit must attempt to detect the TimeTripper during each Historical Soldier Phase. The result of that detection attempt defines what further actions (if any) that unit will perform in that phase.
PROCEDURE:
At the beginning of each Historical Soldier Phase, a detection attempt is resolved for each historical soldier and/or animal. First, the Detection Level of the soldier or animal is determined (this will be a letter from A to I). Next, two dice are rolled and the Detection Table (9.4) is consulted. The dice roll result will fall into the range of one of four detection results. These include "away," "stop," "towards," and "attack."
CASES:
[9.1] Detection
[9.11] Each soldier and animal has a Detection Value (see 6.1 and 6.2). Each soldier and animal must attempt to detect the Tripper as its first action of the Historical Soldier Phase. Exception: 9.31B. (In TeamTripper - see 13.0 - the soldier or animal attempts to detect the Tripper nearest to it.)
[9.12] A detection dice roll is modified under the following circumstances:
- A. If the soldier or animal is two hexes away from the Tripper, add two to the dice roll;
- B. If the soldier or animal is three hexes away from the Tripper, add one to the dice roll;
- C. On the first Battle Stage after an M1 grenade is thrown (see 8.43C), subtract two from the dice roll; during the second Battle Stage after the grenade is thrown, subtract three; during the third Battle Stage after the grenade is thrown, subtract four; during the fourth Battle Stage after the grenade is thrown, subtract five; during the fifth Battle Stage after the grenade is thrown, subtract six. Following the fifth Battle Stage after the grenade was thrown, there are no modifiers to detection dice rolls (the illumination grenade has gone out).
[9.2] Movement of Historical Soldiers and Animals as a Result of Detection
Each soldier or animal may only move if a "towards," "away," or (sometimes) "attack" result occurs due to this soldier or animal's detection attempt. The movement required by this result must be performed immediately.
[9.21] If an "away" result is obtained for a detection attempt, the detecting soldier's or animal's counter immediately has a Move Away Marker placed on it, and is immediately moved the maximum possible distance in hexes away from the Tripper it was attempting to detect.
[9.22] A soldier or animal may never leave the battle display due to an "away" result. If the map-edge is reached (or the soldier or animal already occupies a map-edge hex), the soldier or animal immediately stops its movement and the Move Away Marker is removed. It may perform no more actions for the remainder of the Game-Turn.
[9.23] If a soldier or animal may move away from a Tripper in a variety of directions, it is up to the moving Player to determine the soldier or animal's movement, as long as the requirements of 9.21 and 9.22 are met.
[9.24] If a "towards" result is obtained due to a detection attempt, the detecting soldier or animal immediately moves in the most direct path possible towards the Tripper it was attempting to detect. This movement continues until the soldier or animal's Movement Allowance is expended or the soldier or animal has entered the Tripper's Zone of Control. At this point, the soldier or animal may immediately attack (see 9.3).
[9.25] If an "attack" result is obtained due to a detection attempt, a soldier who possesses an "X" Accuracy Rating (that is, is armed with a non-missile weapon) moves towards the nearest Tripper as if a "towards" result had been obtained. Those soldiers who possess missile weapons who obtain an attack result immediately fire their weapons from the hex the attack result was obtained in (unless the range is so long that the missile weapon has no chance of having any effect, in which case the missile soldier acts like a soldier with an "X" accuracy; see 9.3).
[9.26] If a "stop" result is obtained due to a detection result, the soldier or animal attempting this detection may not move for the duration of the Game-Turn (and may not attack).
[9.3] Attacks by Historical Soldiers and Animals as a Result of Detection
[9.31] A soldier or animal must attack the nearest Tripper under the following circumstances:
- A. The soldier or animal possesses a missile weapon and an attack result is obtained due to a detection attempt; or,
- B. The soldier or animal is in a Tripper's Zone of Control. (Note: In this case, there is no detection attempt made for that soldier or animal).
[9.32] Soldiers and animals perform combat exactly as described in 8.0.
[9.33] A soldier that performs combat against a Tripper with a missile weapon may not move in the current Game-Turn.
[9.4] Detection Table
(see charts and tables)
[10.0] Command Time Travel
GENERAL RULE:
A Tripper moves from battle to battle by "jumping the flux" (a pulsating column of light that makes possible travel through time). In order for a Tripper to jump the flux, it is necessary for him to "command" it. A Tripper may attempt to "command the flux" during a particular Tripper Phase on the Battle Display. A Tripper who attempts to command the flux may only move (or negotiate; see 15.0) in addition to that attempt; see 7.42 and 7.43. If the flux is commanded by the Tripper during a given Battle Stage, there are four actions that the Tripper may take with the flux during that battle stage: conjure it, align it, move it, or jump it. If the flux is commanded, one of these four actions may be taken "for free" (i.e., in addition to commanding the flux and moving or negotiating).
PROCEDURE:
If, as one of his actions during a Tripper Phase, the Tripper attempts to command the flux, the Flux Command Table (10.14) must be consulted in order to see if the Tripper has gained command of the flux for the duration of the current Battle Stage. Two dice are rolled and the results totaled. The Tripper's Experience Points (if any) are deducted from the total (see 12.0). Taking into consideration the type of actions performed by the Tripper (or against him) during the current Battle Stage, a range of numbers can be found on the Flux Command Table. If the total of the dice results falls within this range, the flux is considered to be commanded by the Tripper for the duration of the Tripper Phase.
CASES:
[10.1] Command the Flux
[10.11] Only a Tripper who is carrying the radio may attempt to command the flux.
[10.12] Command of the flux lasts only for the duration of the Tripper Phase in which it is commanded. The flux must be "re-commanded" each Tripper Phase that a Tripper desires to command it.
[10.13] A Tripper who successfully commands the flux in a given Tripper Phase may also conjure, move, align or jump the flux. The one action of these four that the Tripper performs (if any) is in addition to any movement or negotiation that Tripper performs in the Tripper Phase.
[10.14] Flux Command Table
(see charts and tables)
[10.2] Conjuring the Flux
[10.21] If the Tripper has successfully commanded the flux during a particular Tripper Phase, he may immediately "conjure" the flux. This means the flux counter is brought onto the Battle Display (see 10.22). In order to conjure the flux, the Tripper simply states this fact. Note: Once the flux is conjured, it remains on the Battle Display until it is jumped (although it may not be commanded all the while).
[10.22] If the flux has been conjured, the flux counter is brought randomly onto the Battle Display according to the same procedure described in 6.0 (random set-up) when bringing the soldiers or animals onto the Battle Display.
[10.3] Moving the Flux
[10.31] If the flux has been successfully commanded by the Tripper during a particular Tripper Phase, he may decide to move the flux counter on the Battle Display (assuming, of course, it has already been conjured onto the display).
[10.32] If the Tripper decides to move the flux, it may be moved up to six hexes in any direction(s) on the Battle Display. See also 10.61.
[10.4] Aligning the Flux
[10.41] If the Tripper has successfully commanded the flux during a particular Tripper Phase, he may immediately "align" the flux. Aligning the flux means that once the flux has been jumped and the Tripper travels through time, this travel is more accurate than if the Tripper jumped the flux without first aligning it.
[10.42] If the Tripper wishes to align the flux, he states this fact. He then positions the TT Marker on the Time Display and "points" the flux down any hexrow on this display that the Tripper wishes. When the flux is eventually jumped (see 10.5), the TT marker will automatically move down this hexrow (instead of a random direction of movement, which would occur if the flux were not aligned before jumping it). Only the Tripper that aligns the flux during a particular battle may jump the flux. If the Tripper that aligned the flux is unable to jump (because of death, etc.), another Tripper must take up the radio and align the flux before jumping it (or not align it first, if he's really in a hurry).
[10.43] It is permissible to jump the flux without first aligning it.
[10.5] Jumping the Flux
[10.51] If the Tripper has successfully commanded the flux during a particular Battle Stage, he may jump the flux. When the Tripper jumps the flux, the current battle immediately ends, and the Tripper travels through time on the Time Display to another battle.
[10.52] If the flux was not aligned (see 10.4) before it is jumped, the Random Time Travel procedure is performed each time the flux is jumped (see 5.0, Procedure). When moving on the Time Display, the TT Marker is fully subject to the rules and restrictions of 5.2 and 5.3.
[10.53] If the flux was aligned before it was jumped, the same procedure described in the Procedure of 5.0 is followed, except step (A) is skipped. Instead, the TT Marker moves on the Time Display in the direction indicated by the Tripper when he previously aligned it (see 10.4).
Example of jumping the flux: If the TT Marker was on the hex 19 of the Time Display (and had previously been aligned in the direction of hexes 20, 21, and 5), the TT Marker would move through hexes 20, 21, 5, 22, 33 to hex 34, assuming a 6 was rolled when determining length of movement.
[10.54] If the flux has been aligned before it has been jumped and the TT Marker completes its movement on the Time Display by landing directly on the Time Hole hex, the Tripper may immediately attempt to land back in the present (Vietnam). In order to determine if the present has been regained, the Player should roll two dice. If the dice roll is equal to or less than the number of flux jumps the Tripper has made during the course of the game, the Tripper has reached the present. If not, the TT Marker is immediately subject to random movement on the display (see 5.1).
[10.55] If the TT Marker completes its movement on the Time Display by landing directly on the Time Hole hex without the flux first being aligned, there is no dice roll in order to determine if the Tripper has regained the present. Instead, the TT Marker is immediately subject to random movement on the Time Display (see 5.1).
[10.56] Each battle may be "visited" only once; see 5.14.
[10.57] A Tripper who has aligned the flux (only) uses his Experience to attempt to control the flux, as he jumps it (see 12.0). If successful, step B of the Procedure of 5.0 is amended to allow the Player to move the Tripper in Time Marker as many hexes (up to six) in the aligned direction as he chooses.
[10.6] Special Rules Concerning the Flux
[10.61] Once the flux is conjured and is in the same hex as the Tripper with the radio, the flux automatically stays with the Tripper on the Battle Display (unless the Tripper commands it to move away).
[10.62] Any living creature (only) that finds itself adjacent to or in the same hex as the flux is immediately removed from the Battle Display and held aside until the flux is jumped to the next battle. Such creatures subsequently are set up randomly on the Battle Display for the next battle. Creatures thus transported may not detect, move or attack during the first Battle Stage of the new battle. These transported creatures are moved during the Historical Soldier Phase and only detect and attack Trippers (or historical soldiers controlled by Trippers). See 6.0. (Exception: See 10.63.)
[10.63] Dead Trippers that find themselves adjacent to or in the same hex as the flux on the Battle Display are subject to being transported to the next battle as described in 10.62. If a dead Tripper is transported in this manner, it is set-up in the next battle randomly. It is considered alive with an Endurance Point total of five (see 11.0). Note: This rule applies to TeamTripper only.
[11.0] Endurance
GENERAL RULE:
The Tripper and some historical soldiers and animals have an Endurance Level. Combat results deduct from Endurance Levels; the Endurance Level of the Tripper only is reduced due to certain activities. Similarly, only the Tripper may increase his Endurance Level by a lack of activity.
PROCEDURE:
Each Tripper's maximum Endurance Level is set at 20 at the beginning of the game. Some of it must be used for carrying things (place the Weight Carrying Marker at the level of Endurance Points needed to carry all that is being carried). The rest may be used for movement; see 3.1 and 3.3. A Tripper with "0" endurance is dead. Each Battle Stage a Tripper does anything, one Endurance Point is expended (move the Endurance Level Marker down one on the track). Each Tripper Phase a Tripper does nothing, he gains back three Endurance Points (but he can never exceed 20).
Combat results also cause loss of Endurance Points. Each time a Tripper lands in a new battle his endurance is increased 50% from what it was when he left the last battle (losing fractions; however, a Tripper's Endurance Level may never exceed 20). A dead Tripper landing in a new battle starts off with an endurance of "5" (See 10.63).
[12.0] Experience
GENERAL RULE:
Experience is gained each time a Tripper jumps the flux. Experience is then used to control the movement of the flux on the Time Display and to enable a Tripper to land on the Time Hole and return to the present.
PROCEDURE:
Each time a Tripper jumps the flux, the Tripper's individual experience goes up one. This is kept track of with an Experience Marker on the Record Track. Experience can only be used if the Tripper, after aligning and jumping the flux, (but before moving the Tripper in Time Marker on the Time Display) rolls two dice to see if he has successfully controlled the Tripper in Time Marker. If the dice roll is equal to or less than the Tripper's current Experience Level, the Tripper in Time Marker is controlled and the Player may move it as many hexes in the aligned direction (up to six hexes) as is wished.
Once on the Time Hole, a Tripper may use his Experience Level to go back to the present. See 5.31. If the attempt to return to the present is unsuccessful, the Tripper in Time Marker is moved on the Time Display randomly, as per 5.13.
Experience is also used when attempting to command the flux. The number of Experience "Points" (as shown by the position of the Tripper's Experience Marker on the Track Display) the Tripper has is deducted from his dice roll when using the Flux Command Table.
[13.0] TeamTripper (Optional Rule)
GENERAL RULE:
Two or more TimeTrippers may go off as a team. Other than limitations on the amount of weapons and ammunition they may carry, they operate just as an individual TimeTripper would.
PROCEDURE:
Before starting, the team must agree on what weapons and ammunition they will take. The team total, including the radio, must not exceed 50 pounds (but see also 13.2).
When the team lands on the Battle Display, use random set-up (see 6.0) for Trippers and the Radio, M16, shotgun, Claymore, M72 and any recovered historical weapons. All other weapons, treasure, and ammunition stay with the Tripper who was carrying them.
Players may decide among themselves the order in which they will move during the Tripper Phase.
When a Tripper picks up the radio on a battlefield and commands the flux, the other Trippers leave the battlefield just like any other non-Tripper object, by passing through the flux (or having the radio Tripper with the flux pass through their hex).
One Tripper does not have to use the radio throughout a battle. Each "commanding" of the flux is a separate action and a different Tripper may conjure, move, and align/jump the flux. (However, remember 10.42.) Only the Tripper that jumps the flux, however, gets the benefit of experience for it.
CASES:
[13.1] TeamTripper Equipment Restrictions
[13.11] The team must take the M16, shotgun and radio (but only one of each). The team may take one Claymore and one M72.
[13.12] Only one Tripper may carry the ammunition for the M16 or shotgun (though each ammo type may be carried by a different Tripper).
[13.13] Each Tripper may take one pistol, one bayonet and one insect repellant container.
[13.14] The team may take as much ammunition and grenades (but only one type, M26 or M1, per Tripper) as they wish.
[13.2] Random Selection of Team Equipment
To determine what equipment the team will carry (in addition to the M16, shotgun, and radio), use the TeamTripper Weapon Selection Table (13.3).
Note: With four Trippers, there are only five pounds available per man for "non-mandatory" weapons. This was done purposely so that teams would not be able to blast their way back home too easily (that's no fun; it's not much of a game either). Players have the option, however, to increase the team's weight of "non-mandatory" weapons. Testing of the game resulted in the above restrictions (50 pounds total). Some Players have found the game still challenging with up to 70 pounds. Players should feel free to pick any weight limit between 50 and 70 that works for them. Mandatory weapons should be retained. Players should keep in mind that the way for a team to survive with only 50 pounds is to pick up weapons along the way.
[13.3] TeamTripper Weapon Selection Chart
(see charts and tables)
[14.0] Treasure Hunting (Optional Rule)
GENERAL RULE:
Aside from survival in the midst of historical battles, there is also the possibility of historical treasure hunting. Each battle has assigned to it a value for an historical artifact ("Treasure") as well as its weight listed in tenths of a pound. To determine the weight of all artifacts carried by a Tripper, total the values and divide by ten, rounding up to the nearest pound. Artifacts may be collected only after every historical soldier or animal on the Battle Display has been killed or disabled. Each artifact must be carried by a Tripper back to the present. Players must keep track of which artifacts are being carried by which Tripper either mentally or on a separate sheet of paper.
[15.0] Negotiation (Optional Rule)
GENERAL RULE:
In any Tripper Phase, a Tripper may, instead of moving or firing, attempt to negotiate with the historical soldiers on the Battle Display.
PROCEDURE:
During any Tripper Phase in which the Player decides to negotiate, he rolls two dice and consults the Negotiation Results Table (15.3). The dice roll total is cross-indexed with the Negotiation rating letter (see explanation on Battle Sheet) that applies for that particular battle (as listed in 6.1 and 6.2). A letter result (R, L, F, A1, or A4) will be indicated; this yields the result of the negotiation.
CASES:
[15.1] Restrictions on Negotiations
[15.11] Only one awe result ("A1" or "A4") may be obtained per battle. Thus, if an awe result is obtained on the Negotiation Table, the table may not be used again during that battle. It doesn't matter whether or not any of the historical soldiers are actually awed.
[15.12] Animals are not subject to awe results (except for elephants, indirectly, which have human handlers).
[15.13] Awed soldiers, when fluxed to another battle, may not move or fire on the first turn of a battle.
[15.2] Effects of Negotiation
Negotiation results affect all historical soldiers on the Battle Display.
[15.21] If an "A4" result is obtained, one die is rolled for each historical soldier on the map. A die roll of 1-4 indicates that that soldier is in awe of the Tripper and is under his control for the rest of the game (or until the Tripper or the soldier is killed). A soldier previously in awe of a dead Tripper, even after that Tripper is brought back to life, is like any other historical soldier that has been transported; that is, the soldier is then hostile to all Trippers. On a die roll of 5-6, the soldier flees. Awed soldiers are treated like Trippers. The Player who rolled the awe result controls them.
[15.22] An "A1" result is the same as "A4," except a die roll of "1" awes a soldier; a die roll of "2" through "6" causes him to flee.
[15.23] If a "Flee" result is obtained, the historical soldiers move away from the Tripper until they reach the map edge, where they stop for the rest of the Stage and do nothing.
[15.24] If a "Left" result is obtained, consider a Game-Turn to have passed (for the purpose of other Trippers regaining endurance) and roll again on the Negotiation Table using the column to the left of the one previously used (or the same column if column A was just used). Historical soldiers do nothing. Trippers may not move or fire (but may reload, conjure the flux, etc.).
[15.25] If a "Rage" result occurs, the soldiers attack (if missile troops), or move (if not adjacent to a Tripper) if a melee soldier. Attacks are resolved on the Combat Results Table one column to the right of the one they would normally use.
[15.3] Negotiation Results Table
(see charts and tables)
[16.0] Winning the Game
GENERAL RULE:
In order to win the game, the Tripper must get back to the present alive. Any one of the following victory options may be chosen by the Tripper before the start of play:
A. Minimal Resource Victory: Attempt to get back to the present alive with less than 50 pounds of weapons and equipment (the lower the weight you carry at the beginning of the game, the better you have performed).
B. Quick Return Victory: Attempt to get back to the present alive in the shortest number of battles. (Six is normally the absolute minimum, but anything under ten is very good.)
C. Personal Best Victory: Using the same equipment configuration, attempt to get back to the present alive in a shorter period than you did in your last trip.
D. Treasure Hunting Victory: Using the treasure hunting rules (see 14.0), attempt to get back to the present alive with the largest amount of treasure.
E. TeamTripper Victory Conditions: The same as above, except variants may be employed at the whim of the Players involved. For example, the "Tontine" method may be employed, in which only one member of the team wins by getting back to the present alive - alone.
[17.0] How to Use a Timemaster
GENERAL RULE:
In this version of the game one Player assumes the role of the "Timemaster." The Timemaster performs the following functions:
A. Rearranges the battles on the future and past time displays so that the Trippers have to use their experience to find out where the various battles are. The Timemaster also places the Time Holes in different locations (on each display).
B. The Timemaster may devise new battles to replace some, or all, of the battles already used in the game.
C. The Timemaster may speed up play of the game by performing all of the historical soldier and/or animal movement and attack resolutions.
When the Trippers are using "blind" Time Displays (known only to the Timemaster), they may use their Experience Level once per Game-Turn (at the end of the Battle Stage in which the flux is aligned) to attempt to discern what battles are "near" (in time) to theirs. After the flux is aligned, roll two dice for each adjacent hex (on the Time Display), and if the resulting die roll is equal to or less than the number of times the radio Tripper (who is using the radio during this battle) has jumped the flux, the Tripmaster must reveal and describe the adjacent hex's battle.
The Timemaster is free to develop any battles he wishes. He may even change the size of the Time Displays. Basically, the Timemaster can do whatever he wishes to the game. It is important, however, that when "new" Time Displays are being used, that all movement on them be kept secret from the Trippers. They must draw their own "map" of history on a blank Time Display.
Battles
There are 36 Past Battles and 36 Future and Fantasy Battles. Each battle includes the following information: negotiation values, treasure, method of appearance, number and values of opponents, and notes.
Negotiation: Most battles have three letters. To determine which letter will be used for negotiation during the battle, roll a die. On a roll of 1 or 2, the first letter is used; on a roll of 3 or 4, the middle letter is used; on a roll of 5 or 6, the third letter is used. In some battles (see battle 49, Jaws 27) no negotiation is allowed. Negotiation is optional.
Treasure: Most battles have a treasure of some kind. The name of the treasure is given, followed by two numbers. The first number is the value of the treasure; the second number is the weight of the object in tenths of a pound. Treasure is optional.
Random/Enter: The historical soldiers/animals come into play either by Random or Enter set-up. Players may use either the Random set-up in 6.0, Procedure, or 6.6, Optional Random set-up. For Enter set-up, see 6.0, Procedure.
Opponents: The names of the opponents and their abilities are listed, plus the number of units to be brought into play. The four values of the historical soldiers/animals are: Attack Strength, Accuracy (for firing a range weapon), Defense Strength, and Detection Value. Example: In battle 26, Mons, the German infantry have the following values: 15B1F; 1D. They have an Attack Strength of 15, an Accuracy of B (remember that an X means "0," no value), a Defense Strength of 1, and a Detection Value of F. One die is rolled to determine how many German infantry are brought into play.
Notes: Historical information about past battles is given in addition to any special rules used in each specific battle.
[6.1] Past TimeTripper Battles
1. Dinosaur Combat (81,267,234 BC)
- Negotiation: Not allowed
- Treasure: T rex tooth, 50-5
- Enter
- Opponents: Tyrannosaurus rex: 15X15C; 1. Ankylosaurus: 8X10A; 1D-1.
- Notes: The Tyrannosaurus rex has endurance of 20.
2. Sabertooth Tiger (456,321 BC)
- Negotiation: Not allowed
- Treasure: Tiger tooth, 40-4
- Random
- Opponents: Sabertooth: 12X12E; 1. Buffalo: 8X12A; 1D.
- Notes: The sabertooth has endurance of 10.
3. Cro-Magnon Buffalo Hunt (23,568 BC)
- Negotiation: EFG
- Treasure: Cro-Magnon spear head, 30-3
- Random
- Opponents: Cave men: 5X1D; 1D+3. Buffalo: 8X12A; 1D.
4. Meggido (1469 BC)
- Negotiation: EFG
- Treasure: Egyptian necklace, 25-3
- Random
- Opponents: Spearmen: 5X2E; 2D+2.
- Notes: The Egyptian Pharoah Tutmosis III crushed a confederation of Syrian princes at the Canaanite city of Megiddo in this, the first recorded battle in western history. Clad only in a linen kilt, each Egyptian spearman carried a 3-foot long, round-topped shield of painted wood. In addition to his 5 to 6-foot spear, he could carry an Akas or bronze bladed throwing axe.
5. Siege of Troy (1184 BC)
- Negotiation: EFG
- Treasure: Trojan bracelet, 25-4
- Random
- Opponents: Trojans: 6X5F; 2D.
- Notes: The climactic siege and conquest of Troy by the Greeks was the zenith of the Heroic Period in preclassical Greek history. The typical weaponry of the Greeks, as well as the Trojans, was a pair of javelins, a sword, and an oval shield.
6. Carche Mish (609 BC)
- Negotiation: EFG
- Treasure: Chaldean coins, 20-3
- Enter
- Opponents: Chaldean archers: 6C3G; 1D+2.
- Notes: The Asiatic holdings of Egypt were lost when Pharoah Necho was crushed by Nebuchadnezzar and his Chaldean army. The Chaldean or Neo-Babylonian archer wears a cuirass of rectangular metal plates over a fringed tunic, and a conical metal helmet; he carries an angular short bow but no secondary weapon or shield. They were barefooted and often fought in pairs.
7. Marathon (490 BC)
- Negotiation: DEF
- Treasure: Hoplite crest insignia, 20-4
- Random
- Opponents: Hoplites: 7X5F; 1D. Peltasts: 5B2G; 1D.
- Notes: The Athenian phalanx under Callimachus repelled a mighty Persian invasion force commanded by Artaphernes near the city of Marathon. The Athenian hoplite carried a 9-foot thrusting spear and sword, a 3-foot diameter round shield, bronze leg greaves, a cuirass of leather reinforced with iron scales, and a "kilt" composed of leather strips called Pteruges. The peltast wore no armor; his only defense was the Pelta, a small crescent-shaped shield. He fought with two throwing javelins and perhaps a dagger.
8. Zama (202 BC)
- Negotiation: DEF
- Treasure: Libyan knife, 20-4
- Random
- Opponents: Libyan spearmen: 6X2G; 2D. Elephants: 10X12E; 1D.
- Notes: If hit, an elephant will rampage. It moves randomly (see battle 48) and it attacks all units in hexes it enters as it moves. Hannibal of Carthage, with an army of 40,000 including 80 war elephants, lost to the Roman army of Scipio in this battle that terminated the great Carthaginian Empire. The Libyan spearman wore a short-sleeved red tunic and carried a small, circular, hide-covered shield and either a long 9-foot stabbing spear or a pair of short javelins. The war elephant was often equipped with a war tower which could contain up to four warriors carrying bows, javelins, and 9-foot spears.
9. Alesia (52 BC)
- Negotiation: DEF
- Treasure: Roman good luck charm, 20-5
- Enter
- Opponents: Roman legionaires: 6C5H; 2D.
- Notes: After firing the first time, each Roman unit converts into: "7X5H." Julius Caesar, in command of a Roman army numbering over 60,000, laid seige to a Gallic army under Vercingetorix at Alesia. After repeated attempts by a 250,000 man Gallic relief army to break through the Romans met with no success, the Gauls in the beseiged city surrendered. The Roman legionaire of this period wore a bronze helmet and a long, iron mail corselet over a red tunic. He carried a dish-shaped oval shield, a heavy throwing spear (Pilum), a short sword (Gladius), and a dagger (Pugio).
10. Gladiator Games (108 AD)
- Negotiation: DEF
- Treasure: Gallic arm bracelet, 15-4
- Enter
- Opponents: Slingers: 6A1E; 1D. Gallic swordsmen: 8X2G; 1D.
- Notes: The slinger would wear a waist cloth, a belt holding a pouch for several sling pellets, and his sling. The Gallic swordsman (the Samnite or Myrmillo) would carry a shield and sword - each of varying size - sometimes a helmet, and could wear greaves and/or a metal cuirass.
11. Adrianople (378)
- Negotiation: DEF
- Treasure: Ostrogoth ring, 15-2
- Enter
- Opponents: Mounted spearmen (Ostrogoths): 6X5G; 1D+4. Horses: 2X2X.
- Notes: The Emperor Valens of Rome was defeated by a mainly cavalry army of Ostrogoths and Visigoths. This defeat, which cost the Emperor his life, portended Rome's decline and led to the sacking of the "Eternal City." The Ostrogoth cavalry typically wore an iron-reinforced leather helmet; a large round shield; a 7 to 9-foot stabbing spear; sword; and frequently, a long, iron mail shirt, or any other armor they happened to come by.
12. Siege of Paris (885)
- Negotiation: DEF
- Treasure: Viking insignia, 10-3
- Random
- Opponents: Viking axemen: 9X4I; 1D+2.
- Notes: The Carolingian Frank King, Charles the Fat, refused to face the Viking longship raid heading along the Seine River to Paris. The Count of Paris, Eudes, fought them, defeated them, and thus ended the reign of Charles the Fat. The Viking Huscarl wore a short mail corselet, a conical helmet and carried a 3-foot diameter, circular shield. His weaponry consisted of a sword; knife; long, one-handed, bearded axe; and two light spears (darts).
13. Augsburg (910)
- Negotiation: DEF
- Treasure: Magyar lasso, 10-3
- Enter
- Opponents: Mounted bowmen (Magyars): 8G2G; 1D+3. Horses: 2X2X.
- Notes: The Magyar hordes descended upon King Ludwig's German army and defeated it in piecemeal fashion. The Magyar usually wore what he liked - frequently a long loose coat, trousers and boots. They ceremoniously scarred their faces for psychological effect. They wore little armor but carried a curved sword, a composite bow with 24 to 80 arrows, as many as four light javelins, a lasso, and an axe.
14. Hastings (1066)
- Negotiation: FGH
- Treasure: Norman dagger, 10-2
- Enter
- Opponents: Norman mounted men-at-arms: 7X5E; 1D+2. Horses: 2X2X.
- Notes: William, the bastard Duke of Normandy, finally defeated Harold of the Saxons in this monumental battle for the realm of England. The Norman cavalry carried a 9-foot long spear and a sword; occasionally up to two "spares" were slung from the saddle. A long mail hauberk or shirt was worn, in addition to a conical helmet with nasal or nose guard. The 3 to 4-foot kite shield was rounded at the top and came to a point at the bottom.
15. Manzikert (1071)
- Negotiation: FGH
- Treasure: Seljuk dagger, 10-2
- Enter
- Opponents: Mounted cataphract: 9B6G; 1D+2. Armored horses: 3X4X.
- Notes: When adjacent to another unit, each cataphract becomes a "6X6G." The powerful Byzantine Empire's army was soundly defeated at the battle in which Romanus IV Diogines commanded against Alp-Arslan, second sultan of the Seljuk Turks. The Seljuk cataphracts wore a long mail shirt, the tall Persian helmet with aventail, metal greaves and vambraces. Each carried a sword, lance, dagger and mace. His horse was on occasion fully armored, covering its head, neck, and body to its knees; this armor was usually leather or felt, but was sometimes reinforced with metal plates.
16. Liegnitz (1241)
- Negotiation: EFG
- Treasure: Mongolian cape, 10-2
- Enter
- Opponents: Mongolian horse archers: 9C4E; 2D. Horses: 2X2X.
- Notes: The Poles, under Henry II of Silesia, bravely mustered an army of but 20,000 to face the Mongols, who were commanded by Caidu and numbered over 100,000. Nearly all of the Poles, including Henry, were slaughtered. The Mongol horse archer wears a cuirass of black, lacquered leather bands, carries a small wicker shield, a metal and fur helmet, a composite bow with 60 arrows, sword, axe, and two javelins.
17. Agincourt (1415)
- Negotiation: FGH
- Treasure: Yeoman necklace, 8-1
- Enter
- Opponents: British yeoman: 10A3F; 1D+2.
- Notes: For the third time in less than 100 years, England defeated France in combat. The triumph of the longbow and English defensive tactics over the inane head-long rush of the French cavalry clearly decided this victory. The English yeoman archer wears a helmet and perhaps a leather gambeson or coat. In addition to his 6-foot longbow, he carries a small 1-foot diameter buckler, a dagger, and either a sword or perhaps an axe or maul.
18. Ravenna (1512)
- Negotiation: EFG
- Treasure: German hat, 8-4
- Random
- Opponents: German Landsknechts: 9X5E; 2D.
- Notes: In one of the bloodiest battles of the Renaissance era, the Papal-Spanish army under Raimund Cardona was defeated by a French army commanded by Gaston de Foix. Contributing largely to this victory were the German Landsknechts employed by the French. The German Landsknecht, a "Doppelsoldner," wears a metal cuirass and hip armor over brightly colored, baggy sleeves and hose. His main weapon is a murderous two-handed sword, supplemented by another 2-foot long sword.
19. Breitenfeld (1631)
- Negotiation: DEF
- Treasure: Swedish boot, 7-7
- Enter
- Opponents: Swedish musketeers: 6D2G; 2D.
- Notes: After each man fires, he becomes a "4X2I." In the first major victory by the Protestants over the Catholics in the Thirty Year War, Gustavus Adolphus's Swedish-Saxon army overcame the Count of Tilly's army of the Holy Roman Empire. The Swedish musketeer carries an early musket, or arquebus, with up to twelve "charges" of ammunition, plus a short sword.
20. Blenheim (1704)
- Negotiation: CDE
- Treasure: Bavarian uniform buttons, 7-2
- Random
- Opponents: Bavarian infantry: 7D1H; 2D.
- Notes: After each man fires, he becomes a "4X1G." One of the decisive battles in history, the Duke of Marlborough's victory over the French, commanded by Tallard and Marsin, drove the French back to the Rhine, saved the city of Vienna, and forced Bavaria out of the War of the Spanish Succession. The Bavarian infantry wore a blue coat, large cuffs, a musket, cartridge pouch and short sword.
21. Monmouth (1778)
- Negotiation: FGH
- Treasure: American powder horn, 6-2
- Random
- Opponents: American infantry: 7E1E; 2D+2.
- Notes: After each man fires, he becomes a "4X1F." The longest battle of the American Revolution was fought between the Continentals, commanded by Lee, and the British under Clinton. Only Washington's timely arrival saved the Continental Army. As it was, the British retired from the field in this inconclusive battle. The patriots frequently wore hunting shirts of linen or buckskin instead of uniform coats, a cartridge box that held up to 24 rounds, a canteen, a bayonet and musket - either the English "Brown Bess" or the French "Charlesvilles."
22. Waterloo (1815)
- Negotiation: DEF
- Treasure: Yeoman necklace, 8-1
- Enter
- Opponents: Mounted French hussars: 6X1H; 2D. Horses: 2X2X.
- Notes: In one of the best known battles in history, Napoleon's French were defeated in a three-day battle by the Duke of Wellington's Anglo-Allied army and Von Blucher's Prussians. The hussars wore a splendidly colored uniform, with much lace and decorative panoply. His weaponry consisted of a sabre, and a single shot lightweight "carbine." Occasionally as many as two (a brace) of single shot pistols could also be carried.
23. Blood River (1838)
- Negotiation: EFG
- Treasure: Zulu assegai fragment, 5-3
- Enter
- Opponents: Zulus: 7X3I; 2D+2.
- Notes: Fleeing from English injustices, the Boer (Dutch) in African Cape Colony migrated northward. In so doing they encountered the fiercesome Zulus under Dingaan. Andres Pretorius made a stand along the Blood River, with 500 Boers standing against repeated assaults by 10,000 Zulus. Three thousand Zulus fell, and the Boers remained to found the Republic of Natal the following year. The Zulu wears ornamental feathers and furs indicating rank and marital status. He carries an assegai or short stabbing spear up to two feet long. His lozenge-shaped, rawhide-covered shield measures 3 to 4 feet.
24. Battle of Shiloh (1862)
- Negotiation: DEF
- Treasure: Union document, 5-1
- Enter
- Opponents: Union infantry: 10B1E; 1D+2.
- Notes: After each man fires, he becomes a "4X1F." Johnston's Confederates surprised Grant's encamped Federal army and nearly engulfed it. The confusion of the terrain, the stubborn Federal defense, and a morning counterattack finally threw the Confederates back in defeat. The Federal, or Union soldier carried an 1861 Springfield musket, bayonet, cartridge pouch, canteen, and haversack.
25. Little Bighorn (1876)
- Negotiation: CDE
- Treasure: Sioux beadwork, 4-3
- Enter
- Opponents: Sioux warriors: 5X1G; 1D+2. Sioux bowmen: 5A1E; 1D.
- Notes: In the worst defeat of the US Army in its Indian Wars, Custer's detachment of 200 cavalry were wiped out. Reno and Benteen's detachments were only rescued when two other columns of troops arrived. The victors of this encounter were the Confederation of tribes of the Sioux and Cheyenne under Sitting Bull, Crazy Horse and Gall. The Sioux warrior was dressed in buckskin trousers, loincloth, occasionally a bone-cuirass, a circular hide-shield, a small axe, a spear and/or a captured musket, rifle or Sharps, Spencer, or Winchester repeater carbine.
26. Mons (1914)
- Negotiation: CDE
- Treasure: German documents, 3-2
- Enter
- Opponents: German infantry: 15B1F; 1D.
- Notes: Place 5 "trees and bushes" markers on the map randomly (see 6.0); a marker adds 8 to the defense of a unit in the same hex. These markers do not affect movement in any way. A Line of Sight must be used; a unit may not fire through (but may fire into) a hex with a "tree or bush" marker in it. In the opening month of World War I, the Franco-British and German offensives clashed head-on. German infantry wore the spiked helmet (the Pickelhaube), and carried a Mauser 1898 rifle and bayonet, canteen, bread-bag, haversack, entrenching tool, and 160 rounds of ammunition.
27. Verdun (1917)
- Negotiation: DEF
- Treasure: French postcards, 3-1
- Enter
- Opponents: French infantry: 15C2E; 1D.
- Notes: Place 5 shellholes on the map randomly, as per 6.6; they add 8 to the defense of a unit in the same hex. Units must stop when they enter a shellhole hex but may move normally out of a shellhole hex. On every Battle Stage, roll for artillery fire (one shell per turn, with dice rolls as per 6.0 indicating the hex it lands on). A shell does damage as follows: In the hex of impact, strength of "14" and accuracy of "A;" 1 hex away, strength of "10" and accuracy of "A;" 2 hexes away, strength of "8" and accuracy of "A;" 3 hexes away, strength of "6" and accuracy of "A." For six months the Germans sought to bleed the French army white by continuously assaulting a position to draw more and more French into its defense. The ploy succeeded in killing 315,000 French, but also cost the Germans a tidy 280,000, all to no real purpose. French infantry wore a long trench coat, helmet, the 1886 Lebel or 1917 Lebel rifle, bayonet, canteen, gas mask and about 100 rounds of ammunition.
28. Warsaw (1920)
- Negotiation: DEF
- Treasure: Cossack cap, 2-3
- Enter
- Opponents: Mounted Russian cossacks: 12B1E; 1D+2. Horses: 2X2X.
- Notes: At the close of WWI, the Poles sought to break away from Russian dominance and finally succeeded. The Poles, under Pilsudski, smashed a Russian army under Budenny, and the Russian army disintegrated. The Russian cossacks were armed with the sabre, as many as three six-shot revolvers, a rifle, or carbine, and numerous other bits of captured weaponry.
29. Guadalajara (1937)
- Negotiation: DEF
- Treasure: Flask of wine, 2-2
- Enter
- Opponents: Italian infantry: 12D1D; 2D+2.
- Notes: In the Spanish Civil War, a Nationalist army of Italians under General Mario Roatta attacked a Republican army under Colonel Jurado, with Guadalajara as the objective. The Italians broke under the counterattack by the Republicans, who were aided by Russian aircraft and tanks; the thrust on Guadalajara ended. The Italian soldier was rather well equipped with a Mannlicher-Carcano 1891 rifle and bayonet, helmet, canteen, and ration bag.
30. Kiev (1941)
- Negotiation: CDE
- Treasure: Copy of Pravda, 1-2
- Enter
- Opponents: Russian infantry: 12B1F; 1D+2.
- Notes: The rapid German advance in the early fall of 1941 created one of the largest "pockets" of enemy troops ever encircled. Nearly 600,000 Russians were killed or captured between September 9 to the 16th. The Russian soldier carries either a M91/30 rifle (7.62mm, 9rds/min., range 500m) or PPSH machine pistol (7.62mm, 80rds/min., range 100m), helmet, canteen, bread bag, and possibly a hand grenade or two.
31. Alam Halfa (1942)
- Negotiation: DEF
- Treasure: Tin of beef, 1-2
- Enter
- Opponents: British infantry: 15C1G; 1D+1.
- Notes: British infantry will not attack unless fired at first or unless they are within two hexes of a non-British infantry unit. They will advance on a Tripper, however. Rommel's advance in North Africa ended, when, at this battle, his veteran Panzers were stopped by Montgomery's British. Rommel was crushed at El Alamein two months later. The British infantryman carried the excellent Lee-Enfield MIII bolt action rifle, long bayonet, steel helmet, entrenching tool, canteen and bread bag.
32. Falaise Gap (1944)
- Negotiation: DEF
- Treasure: Iron Cross, 10-1
- Random
- Opponents: German fugitive infantry: 12D1C; 2D.
- Notes: The St. Lo breakthrough after the D-Day invasion of Normandy finally allowed Patton and Creran to encircle the German defensive positions. The Falaise Pocket cost the Germans 60,000 in dead and prisoners. The German soldier, a fugitive attempting to escape the encirclement, would carry the SG44 assault rifle (7.92mm, 80rds/min., 200m range) or the MP41 machine pistol (9mm, 90rds/min., 100m range), a few hand grenades, canteen, knife, entrenching tool, helmet, gas mask, and bread bag.
33. Guam (1945)
- Negotiation: CDE
- Treasure: Katana, 30-10
- Enter
- Opponents: Japanese banzai troops with rifle: 12C2I; 2D+1.
- Notes: Japanese troops will only fire on a roll of 2 or 3; otherwise they will charge with bayonet at a strength of 5X2I. The American 3rd Amphibian Corps, commanded by General Geiger, after a bloody fight finally recaptured the island from the Japanese defense, commanded by General Takashina. The Japanese soldier was not well equipped, as the war caused severe hardships to Japanese supply capabilities. He would carry either the Arisaka M38 (6.5mm, 12rds/min., range 500m) or the model 99 (8.8mm, 12rds/min., range 600m) and a bayonet. His other gear could include grenades, canteen, bread bag, or even a Nambu 1914 pistol (8mm, 36rds/min., 75m range).
34. Iron Triangle (1950)
- Negotiation: DEF
- Treasure: Cap insignia, 10-1
- Enter
- Opponents: Chinese infantry: 10E1F; 2D+1.
- Notes: From their "staging area" in the Iron Triangle, the Chinese-North Koreans launched a massive offensive that drove the ROK and UN troops south for five days. Only after a savage fight and counterattack did the UN troops push the Communists back to the Triangle. The Chinese soldier would carry any variation of the submachine gun, such as the Russian PPSH (7.62mm, 80rds/min., range 100m), two or more grenades, knife, canteen and other field gear.
35. Golan Heights (1967)
- Negotiation: DEF
- Treasure: I.D. bracelet, 5-1
- Random
- Opponents: Syrian infantry: 15E1C; 2D+1.
- Notes: The Israelis, seizing the initiative, simultaneously unleashed a massive air and armor strike against the UAR, Jordan, and Syria. This strike preempted an offensive by those nations upon the smaller and numerically weaker Israeli army. The strike was successful on all fronts. The Syrian soldier was well armed, but not very well trained. He carried a Russian made AK-47 assault rifle (7.62mm, 60rds/min.). He may carry several 30-round magazines, plus grenades.
36. Lebanon Border (1970)
- Negotiation: EFG
- Treasure: None
- Enter
- Opponents: Palestinian terrorists: 10D1D; 1D+3.
- Notes: The turn after somebody fires, roll for Israeli mortar fire. One mortar shell per Battle Stage impacts randomly (see 6.6). They do damage to the hex of impact and 1st, 2nd and 3rd hexes from impact as follows: 14, 10, 8, 6; their accuracy is A in every hex (see battle 27, Verdun). Spurred by the Israeli territorial expansion in 1967, the Palestine Liberation Front terrorists stepped up their sporadic raids upon Israeli frontier establishments. The terrorists may carry the AK-47, pistols, grenades, bayonets, "Molotov cocktails," or even the RPD machinegun (7.62mm, 66rds/min., range 600m, weight 15lbs).
[6.2] Future and Fantasy Battles
37. Cairo (1974)
- Negotiation: DEF
- Treasure: None
- Random
- Opponents: Egyptian militia: 12C1B; 2D.
38. Hells Angels (1983)
- Negotiation: EFG
- Treasure: Angel colors, 10-2
- Enter
- Opponents: Hells Angels: 5X1G; 1D+3. Motorcycles: 2X4X.
- Notes: Use horse counters for cycles.
39. Easy Going Infantry (1993)
- Negotiation: EFG
- Treasure: Some EGI drugs, 10-3
- Enter
- Opponents: EGI: 5B5H; 2D+2.
- Notes: Infantry use rubber bullets because they don't really want to hurt anybody seriously; they just want to go home and get stoned. For EGI weapons only, all wound and disable effects on CRT count as stun; kill counts as wound.
40. Mind Police (2027)
- Negotiation: BCD
- Treasure: Police manual, 20-2
- Enter
- Opponents: Mind Police: 6X4I; 1D+4.
- Notes: Mind Police use a cattle prod-type device. Their normal mind control weapons do not work against the mentally primitive and deranged Trippers.
41. Inselons (2178)
- Negotiation: CDE
- Treasure: Starsoldier crest, 30-3
- Random
- Opponents: Inselons: 10X10E; 1D+3. Starsoldiers: 15A10C; 1D.
- Notes: Starsoldiers will not attack a Tripper unless the Starsoldier is transported to another battle. Insect repellant is quadrupled in effect when used against Inselons.
42. Mutant Spearmen (2396)
- Negotiation: FGH
- Treasure: Finger with two nails, 20-1
- Enter
- Opponents: Spearmen: 8X4D; 1D+3.
43. The Magician of Dublin (Fantasy)
- Negotiation: EFG
- Treasure: Magician's wand, 15-3
- Random
- Opponents: The Magician (no weapon): 2X10X; 1. Leprechauns (armed with clubs): 8X6H; 2D.
- Notes: The Magician has endurance of 20. The Magician himself does not "detect;" the Leprechauns do it for him. Each time the Magician is attacked (after the results of the attack are applied), roll one die for more Leprechauns (random entry) up to the counter-mix limit (14). Once the Magician is dead, the Leprechauns cannot detect but will, as always, attack if adjacent.
44. The Dragonlord (Fantasy)
- Negotiation: DEF
- Treasure: Dragon's nostril, 15-4
- Random
- Opponents: One Dragonlord: 12F14I; 1.
- Notes: A Dragonlord is a fire-breathing serpent with an endurance of 20. It only detects a unit in or adjacent to a treasure hex or within three hexes of the Dragonlord. Five treasures are placed randomly as per 6.0.
45. Buffalo Castle (Fantasy)
- Negotiation: Not allowed
- Treasure: Buffalo chip, 5-5
- Random
- Opponents: Five shellholes (representing exits from Buffalo Castle): placed randomly as per 6.0. Buffalo: 10X12I.
- Notes: A "towards" or "attack" result (on a detection resolution for an exit) will cause a buffalo to come out of the exit. Buffalo is placed next to exit and automatically detects any Tripper. Only five buffalo counters may be in play at any one time.
46. Gunfight at the Bionic Corral (Fantasy)
- Negotiation: ABC
- Treasure: Bionic eyeball, 25-1
- Random
- Opponents: Bionic gunsligers (armed with pistols that only function when used by bionic gunsligers): 10E2H; 1D+3.
47. The Seraglio of Sitri (Fantasy)
- Negotiation: BCD
- Treasure: Handmaiden's whip, 10-1
- Random
- Opponents: Sitri (one of King Solomon's demons): 5X10G; 1. Handmaidens: 5X1I; 2D, 5X1I; 2D.
- Notes: The Sitri is armed only with muscle and has an endurance of 10. The handmaidens are armed with whips and wear only an evil smile. Against handmaidens, male Trippers may not attack when adjacent and subtract three from accuracy die roll. Female Trippers may attack when adjacent and add 2 to accuracy die roll when fighting handmaidens; also female Trippers have defense of only 1 in this scenario (one of Sitri's powers was to make women show themselves naked).
48. Rollerbrawl (Fantasy)
- Negotiation: DEF
- Treasure: Brass knuckles, 5-4
- Random
- Opponents: The Brawlball: 10X10X; 1. Rollerbrawlers: 8X5I; 2D.
- Notes: The Brawlball moves randomly each turn. Roll one die for direction and two dice for the number of hexes it moves in that direction. If the ball hits the edge of the display, it ricochets out of that hex and rebounds two hexsides to the right of the hexside from which it attempted to exit the display. Example: The Brawlball starts in hex 0904; a 2 is rolled for direction and a 10 for the number of hexes. The ball moves into 1003, 1103, 1202, 1203, 1204, 1205, 1206, 1207, 1208, 1209. The ball attacks anyone in a hex it moves through or in a hex it lands on. Rollerbrawlers are armed with brass knuckles and muscle; rollerbrawlers move at a rate of 6.
49. Jaws 27 (Fantasy)
- Negotiation: Not allowed
- Treasure: Shark tooth, 5-3
- Random
- Opponents: Landmobile sharks: 10X12H; 1D+2.
50. King Pong (Fantasy)
- Negotiation: Not allowed
- Treasure: None
- Random
- Opponents: Pongballs: 10X10X; 1D+3.
- Notes: Pongballs move randomly each turn and attack anyone in a hex they move through. They move just like a brawlball (see battle 48).
51. The Autozoo (Fantasy)
- Negotiation: Not allowed
- Treasure: Weird animal parts, 25-5
- Random
- Opponents: The animals of the Autozoo: 1D+2.
- Notes: Roll two dice for attack and defense strengths. All have "X" accuracy. Roll two dice for their detection rating. 2=A, 3=B ... 9=H, 10-12=I. Roll for each creature's values.
52. The Last Supper
- Negotiation: EFG
- Treasure: None
- Enter
- Opponents: Zombies (armed with teeth and a taste for live flesh): 8X12I; 2D+2.
- Notes: Any Tripper that gets a wound or disable result from a zombie loses one additional Endurance Point per Stage until the end of the battle.
53. Attack of the Nylon Warriors
- Negotiation: EFG
- Treasure: Zapper, 8-2
- Enter
- Opponents: Nylon Warriors: 12E6H; 2D.
- Notes: On a Stop or Away detection result, Nylon Warriors move randomly (roll die for direction and then move two hexes in that direction). Each Nylon Warrior is armed with a zapper that only works for that warrior.
54. In the Hall of the Mountain King
- Negotiation: BCD
- Treasure: Drindl's nose ring, 12-3
- Random
- Opponents: Alrod (throws lightning bolts): 8E12I; 1. Drindl (wields a 300 pound tree trunk): 12X11G; 1. Trundls (no weapons, they grab you): 5X14E; 1D. Note: These creatures are not animals.
55. The Timepolice Squad Room
- Negotiation: ABC
- Treasure: Timepolice coffee mug, 2-2
- Random
- Opponents: Timepolice: 10A5I; 2D.
- Notes: The Timepolice are armed with stunpistols, which only stun, and have one Fluxrestraint model AQ12G, XC8I, placed randomly. If a Timepolice unit moves adjacent to the AQ12G (in responding to a detection result), he stops. When the flux appears, the Timepolice unit automatically operates the immobile AQ12G against the flux. If it accurately hits, the flux jumps (without the radio Tripper, if he is with it). Any previously fluxed Trippers return to the battlefield randomly and must then re-conjure the flux to get it back.
56. Tehran
- Negotiation: DEF
- Treasure: Communist Party card, 5-1
- Random
- Opponents: Unarmed citizens: 3X2E; 2D. Revolutionary militia: 12E2H; 1D+2.
- Notes: Citizens are routed from the main mosque by revolutionary militia with automatic weapons.
57. The Robot Factory
- Negotiation: Not allowed
- Treasure: Robot data plate, 20-1
- Random
- Opponents: Transbots: 4X12H; 2D. Sanibots: 10E10H; 1D.
- Notes: Transbots pick up and carry any non-robot thing. A Tripper is too heavy to carry, so the transbot stops when adjacent to one and tries to pick him up. Sanibots destroy any living matter.
58. Timepolice Squad Room (see 55)
59. Timepolice Mobile Team
- Negotiation: ABC
- Treasure: Timepolice belt buckle, 10-1
- Random
- Opponents: Timepolice: 10A6I; 1D+2. Fluxfixrig: XB6G; 1D.
- Notes: Timepolice (move at 6) have stunpistols (see 55). Mobile Fluxfixrigs (move at 3) are used only against the flux; a successful hit (only the accuracy roll is used) will jump the flux (see 55).
60. The Battle of the Gate (Fantasy)
- Negotiation: ABC
- Treasure: None
- Random
- Opponents: Energy creatures: 7C5G; 2D.
- Notes: All effective results against energy creatures are stuns. Passing the flux through an energy creature's hex eliminates it from the battle (returns it to its own dimension). Use of the flux ripped open a dimensional gate which allowed pure energy creatures in.
61. Timepolice Mobile Team (see 59)
62. Los Angeles Freeway
- Negotiation: Not allowed
- Treasure: None
- Random
- Opponents: Cars: 11X15X; 1D.
- Notes: Do not use detection. On initial placement, only one car may be placed in each hex row. Cars move 6 hexes per turn down that hex row towards the bottom of the display, attacking any Tripper in its path (without stopping). A car reaching the lower edge of the display immediately re-enters the same hex row at the top of the display.
63. Timepolice Squad Room (see 55)
64. Psionic Flesh Eating Plants
- Negotiation: Not allowed
- Treasure: None
- Random
- Opponents: Plants: 5X5F; 2D.
- Notes: Plants do not move. Detection "away" results are "stop" and "towards" results are "attack." One plant may telepathically control more than one Tripper. A Tripper may be controlled by only one plant (the nearest) at a time. Plants make Trippers move towards them at top possible speed. The Trippers may not be commanded to do anything else. A stun result (or greater) on a plant releases the Trippers it controls for one stage. Plants may attack more than one adjacent Tripper per stage at full strength, resolving each attack separately.
65. Timepolice Mobile Team (see 59)
66. The Timelord's Lair
- Negotiation: ABC
- Treasure: Timelord's ring, 10-1
- Random
- Opponents: The Timelord: 8C12D; 1.
- Notes: The Timelord attempts to detect the flux, if it is present, or the Tripper, if one is within two hexes of the Timelord. If he detects the flux, he will attempt (if successful with his accuracy roll) to jump it, with or without the Tripper. The Timelord never jumps with the flux. A Tripper(s) carried with the flux randomizes (as a group) on the Time Display, remains in that battle for "1D" Game-Turns, then randomizes again. This is repeated "1D" times. If the Tripper in Time Marker lands on the Time Hole hex, the Tripper returns to the present. In TeamTripper, the radio Tripper, if left behind, must re-conjure the flux, jump it, and try to link up with any of his group that the Timelord jumps, if he wishes.
67. Timepolice Squad Room (see 55)
68. Crypt of Midnight
- Negotiation: ABC
- Treasure: Vampire's cape, 15-2
- Random
- Opponents: Vampire: 8X10F; 1.
- Notes: If disabled or killed, the vampire (endurance: 20) returns at full strength after one complete Stage of death (during which you can't kill him, he's already dead). At the end of 12 Battle Stages, dawn arrives, and the battle ends.
69. Timepolice Mobile Team (see 59)
70. Pack of Maxiwolves
- Negotiation: Not allowed
- Treasure: None
- Enter
- Opponents: Giant wolves: 10X10H; 2D+2.
71. East Side Story
- Negotiation: EFG
- Treasure: Copy of Zap #0, 10-1
- Random
- Opponents: Militarized street urchin gang, with home made weapons: 7X3G; 2D & 8F3H; 1D+1.
72. Black Hole
- Notes: All Trippers in a TeamTripper game must roll for their weapons' mix all over again (using Chart 13.3) and randomly start from the Time Hole. Solitaire Tripper regains all ammunition and starts again. All experience and treasure are lost. No negotiation possible; no treasure.
Charts and Tables
[8.1] Weapons Chart
| Tripper Weapon | Mode of Use | Accuracy Level | Attack Value | Weight | Empty Roll (2 Dice) | Maximum |
|---|---|---|---|---|---|---|
| M16 Automatic Rifle | Single | A | 15 | 7 | 2 | 1 |
| Rapid | C | 15 | 7 | 2-4 | ||
| Burst | D | 25 | 7 | 5-6 | ||
| Shotgun (Remington Model 11-48 12 Gauge) | Single |
NOTES: Trippers always defend with a value of "4." The full name of each Tripper weapon is listed under "Tripper Weapon."
Mode of Use = The method of firing the weapon; see Combat (8.0). Single Shot = May fire once into one hex. Rapid = May fire up to four times into the same hex or into four adjacent hexes, one after another; after each firing, two dice must be rolled to determine if weapon is out of ammunition. Burst = Same as "Rapid" except that the weapon continues to fire until it runs out of ammunition; after each firing, two dice are rolled to determine if weapon is out of ammunition. Melee = Hand-to-hand combat weapon.
Accuracy Level = Accuracy of weapon; see Combat (8.0). Before using the Combat Results Table (8.7), the Accuracy Chart (8.6) must be used for missile weapons.
Attack Value = Strength of weapon in combat; see Combat (8.0). When using the Combat Results Table (8.7), the Attack Value is subtracted from the defender's Defense Value before resolving combat.
Weight = Weight of the weapon, assuming a loaded weapon. Ammo reloads weigh one pound each.
Empty Roll = Dice range to determine if weapon is empty.
Maximum = Maximum limit on number of weapon type that may be carried per Tripper. Note that weight considerations may in effect lower these limits.
Note: Some weapons may be used only once ("One Shot"), and Recovered Melee Weapons and Bayonets are never checked for ammo. Weapons themselves may never be damaged or destroyed.
[8.6] Accuracy Table
Range to Target (hexes); "6 to 8" is the sixth column and "9 or more" the last.
| Accuracy Rating | 1 | 2 | 3 | 4 | 5 | 6 to 8 | 9 or more |
|---|---|---|---|---|---|---|---|
| A | 3 | 4 | 5 | 6 | 7 | 8 | 9 |
| B | 4 | 5 | 6 | 7 | 8 | 9 | 10 |
| C | 5 | 6 | 7 | 8 | 9 | 10 | 11 |
Note: Numbers under 2 or over 12 apply when modifiers are used. Grenade and shells always use column 1.
[8.7] Combat Results Table
Combat Differential (Defense Value minus Attack Value), as printed.
| Dice | 0 or less | 1 | 2 | 3 | 4 | 5 to 6 | 7 to 9 | 10 or more |
|---|---|---|---|---|---|---|---|---|
| 2 | Stun | Wound | Wound | Wound | Wound | Dsble | Kill | Kill |
| 3 | Stun | Wound | Wound | Dsble | Dsble | Kill | Kill | Kill |
| 4 | Stun | Stun | Wound |
- = No effect; Dsble = Disabled.
[9.4] Detection Table
| Detection Rating | Away | Stop | Towards | Attack |
|---|---|---|---|---|
| A | 2-6 | 7-11 | 12 | 13+ |
| B | 2-5 | 6-10 | 11 | 12+ |
| C | 2-6 | 7-9 | 10 | 11-12+ |
| D | 2-5 | 6-8 | 9 | 10-12+ |
| E | 2-4 | 5-7 | 8 | 9-12+ |
| F |
- = Not applicable. Determine the Detection Level for the historical soldier/animal and roll two dice; the result of the roll determines the reaction.
Die Roll Modifiers: If units are adjacent, "Attack" happens automatically. If the detecting unit is two hexes away from the target unit, 2 is added to the die roll; if it is three hexes away, 1 is added to the die roll.
[10.14] Flux Command Table
| Tripper Activity | Control Flux |
|---|---|
| None | 2-9 |
| Move only | 2-7 |
| Shot at | 2-5 |
| Negotiate | 2-6 |
Use two dice; if dice roll falls within indicated range, the flux is controlled. Always use the least favorable activity for Trippers.
[13.3] TeamTripper Weapon Selection Chart
| Item | 1 | 2 | 3 | 4 | 5 | 6 |
|---|---|---|---|---|---|---|
| M16 Ammo Reload | 1 | 2 | 3 | 4 | 5 | 6 |
| Shotgun Reload | 0 | 1 | 1 | 2 | 2 | 3 |
| .357 Pistol (Each Player rolls) | 1 | 1 | 1 | - | - | - |
| .25 Pistol (Only Players who did not roll a .357) | 1 | 1 |
- = No weapon.
[15.3] Negotiation Results Table
Battle Negotiation Rating:
| Dice | A | B | C | D | E | F | G | H |
|---|---|---|---|---|---|---|---|---|
| 2 | R | F | L | F | L | A1 | A4 | A4 |
| 3 | R | F | F | L | A1 | A4 | A4 | A4 |
| 4 | R | L | L | F |
R = Rage; L = Left; F = Flee; A1, A4 = Awe 1, 4. Roll a die to determine which of the three negotiation letters are to be used during the battle. A roll of 1 or 2 means the first letter is used in negotiation; a roll of 3 or 4 means the second letter is used; and a roll of 5 or 6 means the third letter is used. Roll two dice and cross-index the resulting number with the Battle Negotiation Rating to determine the final reaction. See 15.2 for effects of negotiation.