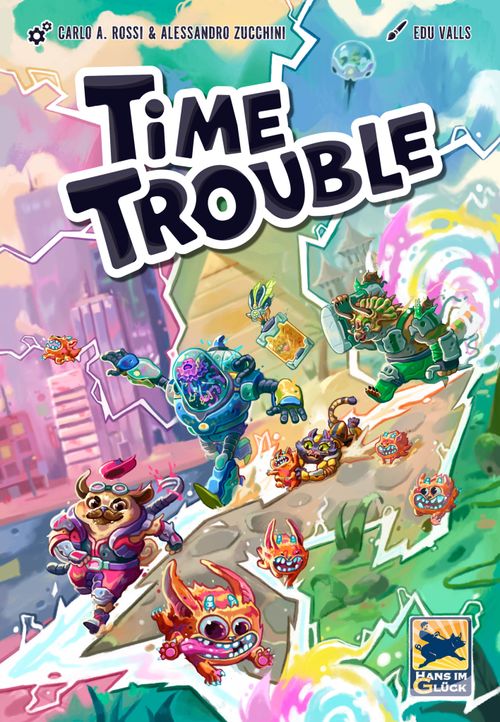
Time Trouble
Time Trouble Rulebook
Table of Contents
Table of Contents
About this rulebook
We recommend that you take your time to read this rulebook, then set up the game, and only afterwards explain the game to your fellow players. The rules are written as you would explain them to others. Examples and Special cases are written in italics. Special cases are helpful for reading up on when you have specific questions. Particularly important rules are indicated with "Important". So, in case of questions, have a look at these first.
Components
- 1 computer (assembly: carefully fold the 4 side pieces towards the center. Stick the side pieces into the base, as shown. Make sure that the side of the base without illustrations is facing up.)
- 1 character board
- 11 boards
- 30 cards
- 1 reminder bar
- 4 reminder tokens
- 4 characters
- 10 energy
- 10 damage
- 12 Fluffies
- 7 locks
- 5 snails
- 10 gifts
- 1 walkie talkie
- 2 shields
- 2 cave tiles
- 1 glitch tile
- 1 Mama Fluffy
- 1 tuck box (after the game: place the cards in the computer and all the wooden pieces and tokens into the tuck box)
Game Setup
Here, we'll show you how to set up the first level. Any changes to later levels will be explained for each level (from the Level Overview onwards).
Important: For a 2-player game, there is a modification for step 11. Otherwise, setup is the same for any number of players.
- Assemble the computer and place it in the center of the table, within reach of all players.
- Place both pieces of the round character board together. Put the character board next to the computer.
- There is a symbol with a number on the bottom left of all the boards. The symbol indicates the level and the number indicates the number of the board. The symbol to the right shows what is on the back of the board. Find the boards that have the base symbol. The starting board of the first level is 1. Place this board above the character board. The goal board of the first level is 2. Place this board to one side within easy reach. Put the other boards back in the box. Place each of the 4 wooden character figures on their corresponding start spaces on the starting board.
- Find the boards that show the middle ages symbol on the bottom left. Place the 1 board to the right of the starting board. Place the 2 board on top of the goal board 2 next to the play area. You won't need any of the other boards for the first level so place them back in the box.
- Place 1 Fluffy on the Fluffy space on the 1 board. Keep 2 more ready as a supply. You won't need the other 9 until the later levels so place them in the tuck box.
- Place 1 lock on the lock space on the 1 board. Place the rest in a supply.
- Place 6 energy in the center of the character board. This is your supply. Place the remaining pieces in the general supply.
- Place 1 snail on the appropriate space on the character board. Place the rest in a supply.
- Take the walkie talkie and place it in front of you. You're the boss for this round.
- Place the following components in the tuck box, as you won't need them in the first level: The gifts, the glitch tile, Mama Fluffy, the cave tiles, and both shields. From level 2 on: Take your unlocked starting bonuses.
- 5 of the 30 cards show special-card symbols. You don't need them for the first level so return them to the box. Shuffle the rest of the cards face down, i.e. with the colorful side facing down. Deal 3 cards to each player. Modification for a 2-player game: Deal 4 cards to each player. Use the remaining cards to make a draw pile face down next to the computer.
- Place the reminder bar and the 4 reminder tokens to the left of the computer.
Playing with the app
In the DIZED app, along with the interactive tutorial, you'll find the free Time Trouble Extra. It makes the game easier and offers extra content. However, it's not vital to play the game. Everything that has to do with the app is marked with a purple box.
Aim of the Game
With the help of your cards, move the 4 characters together through a total of 7 levels that increase in difficulty. The boards are different for each level and give you new challenges each time. You must all catch a different amount of Fluffies depending on the level. The more the better!
The first levels last around 25 minutes, while the later levels sometimes take longer. The game is not intended to be played in one sitting. You can simply start with the next level the next time you play. You don't even have to play with the same group of people – we just recommend that at least one of you has played before and can give the other players a few hints.
Play the levels in the order specified. You can start again from level 1 at any time or build your own levels. Use the level generator in the app to create new levels based on your own ideas!
The Characters
Your team is made up of 4 characters who were carefully chosen to be members of the Time Travel Agency. Each one comes from a different time and is an expert in their era. Each character has a color and a special ability. The characters are also unique in how much space for Fluffies and damage they have.
Important: You all "control" the characters together so there are no individual colors.
- Franky is an expert in the present day and is the leader of the team. Therefore, she always moves first. Her task is to open locks.
- Jell-E is from the future. The cyber-jellyfish is responsible for the energy supply of the team.
- Spike is getting on a bit in years. With the help of his sticky snails, he can slow down both himself and others.
- Cleo comes from mystical Ancient Egypt. Her ability allows her to heal herself and other characters.
The Cards
The cards show footprints in 4 colors. Each footprint matches a character. Hold your cards in your hand so that the other players can't see the front. The cards you play determine which footprints are visible where. When moving, each character takes as many steps as there are footprints visible in their color (more on that under Playing cards).
Communication rules
You may talk to each other during the game. But there are restrictions: You may not tell the other players the exact number and position of the footprints on your cards. You may however tell the other players whether you have many, a few, or no footprints of a color in your hand. That can help you with your plan.
But all that chatter won't help much anyway – you'll soon see why!
Gameplay
The number of rounds you play depends on you (and on the level). You finish the level once enough Fluffies are collected and brought to the goal. In each round, one player is the boss. As you have the walkie talkie in front of you, you are the boss. You go first this round (more on that under Playing cards).
If you're playing with the app, you may leave the walkie talkie in the box and pass the phone around instead.
Each round has 4 phases: 1 Briefing, 2 Action phase, 3 Energy phase, 4 Shift change.
1. Briefing
At the beginning of each round you may all discuss and decide on your goals together. Decide together how many steps the characters should take.
Example: You must consider whether Spike or Franky should take 7 steps. You say: "I have lots of green but only a few pink." So you decide in favor of Spike.
Reminder bar. To better remember your goals for each round, you may use the reminder bar and the 4 reminder tokens. Place the matching colored tokens next to the number of steps each character should take. Each token also has a ! on the back. Use this to indicate what's important to everyone.
You must set your priorities! Otherwise, everybody will just do whatever they want!
Note: You may place multiple tokens next to the same number. You don't have to use all the tokens. You can also get creative when placing the tokens, i.e. placing them between 2 numbers.
Important: The tokens serve only as reminders and do not affect the game. It can happen that a character does not take the number of steps planned. Don't worry too much about it!
Example: You decide together: Franky must take 3 steps. Jell-E should take 2 steps and Spike should take 4 or 5. Cleo should take as many steps as possible.
2. Action Phase
Playing cards
-
Together, you all have exactly 40 seconds to play cards. To keep track of time, you may use the app, an egg timer, or your phone. The boss starts the timer when everyone is ready. (The timer in the app makes it easy to keep track of time and lets you know when time is running out.)
-
To play a card, place it in the computer. If there are already cards in there, place yours on top. You decide in which orientation to place your card. You can turn it 180 degrees, but the front must be face up. There are therefore always 2 ways to play a card.
-
The boss goes first and must play 1 card. Then the next player in a clockwise direction takes their turn and must also play 1 card. Keep going until there are exactly 3 cards in the computer. It doesn't matter how many players are playing.
Note: In a 2-player game, the boss plays 2 cards. In a 3-player game, each player plays a card. In a 4-player game, the last player doesn't have to play a card.
-
After this, the order in which you play is up to you. You all can play in any order (or one player can play 2 cards in a row).
-
You all can play as many cards as you like until time runs out. If you have no more cards in your hand, you cannot play any more cards.
-
You may hold the card you wish to play above the computer while you decide in which orientation to play it. You may also take it back in your hand if you decide not to play it. The other players can give you advice. But be careful: That might cost you valuable time!
-
Important: Once you've played a card, you may not take it back out of the computer.
-
Special case: It can happen that fewer than 3 cards are played before time runs out. Then the boss takes 1 random card from the hand of each player that should have played a card but didn't. The boss places these cards into the computer without looking at them.
Example (4 players): Player 1 is the boss and must play a card first. Then player 2, to their left, must play a card. Finally, player 3 plays a card. Now, the order is completely up to you. So, player 1 plays another card and then player 4 plays a card. Then time is up.
Moving characters
Once time is up or you don't want to play any more cards, you move the characters. How far they move depends on the cards that have been played.
Important: You only look at the "total result". The cards remain in the computer until the end of the round.
- You move each character the exact number of steps as footprints of their color that are visible in the computer.
- The characters move along the white line from space to space. Each space counts as 1 step.
- You always move the characters in the same order: First Franky, then Jell-E, then Cleo, and finally Spike. Note: You'll find a reminder of this order on the computer.
- You move the characters in a clockwise direction, so from left to right on the board. They may not move backwards.
- You must always take the complete number of steps shown and may not stop before completing them. At forks in the path, you must always choose one direction. You may choose for each character individually. Locks block a character's path.
- The characters may "overtake" each other. An occupied space still counts as a normal step.
- Only 1 character can exist on a space at a time. If a character lands on an occupied space, they must instead stop on the first empty space before this space. The character must stay on the path they were on and may not change paths.
- Important: You may choose a path on which a character is occupying the space the moving character will land on, even if there is another path they could have moved further on. You may not choose a path which is locked.
- Special case: If you can move more spaces but have reached the edge of the board, then the character remains on the last empty space.
Example: Franky takes 3 steps. Then Jell-E takes 2 steps. Cleo takes 4 steps. Finally Spike takes 3 steps. This space and the one before it are already occupied, so Spike stops 2 spaces before. Therefore, he only takes 1 step.
Spaces
On the boards, there are general spaces and character spaces. If a character lands on a space matching their color, they can use their ability. General spaces affect every character that lands on them.
Important: Spaces are only triggered when a character stops directly on a space. This is called landing on a space. Nothing happens when passing through a space. If a character doesn't move, the space they're on doesn't get triggered.
Special case: If a character cannot move because the space in front is occupied, this does not count as a movement.
Always move the character and then carry out the space's effect. After that, move the next character.
General spaces
Neutral space. The character simply lands there. Nothing else happens.
Fluffy space. Hooray, you caught one! Take the Fluffy from this space and place it in the inventory of the character that's on the space. If the character has no more room in their inventory, the Fluffy stays where it is. Only 1 Fluffy can be collected from each Fluffy space. If there is no Fluffy left on the space, nothing happens. Every time you add a board, place a Fluffy on each space that shows a Fluffy.
Damage. Ouch! The character takes 1 damage. Take 1 damage from the supply and place it on one of the intended spots of this character on the character board. You may not give the damage to another character.
Knock out! As soon as you place 1 damage on the last empty damage spot of a character, the character is k.o.'d. Immediately remove the character's wooden figure from the board and place it on their picture on the character board. They cannot move anymore and cannot bring their collected Fluffies to the goal. The Fluffies remain in their inventory, however. Once 3 characters are k.o.'d, you lose the game. You can revive characters (more on Healing below).
Example: Franky is k.o.'d after taking 2 damage (she has 2 spaces for damage).
Lock. Some paths are locked. As long as a lock is visible, no character may move through or land on this space. The characters must choose a different path. As soon as the lock is opened, the path is clear. Then, flip the lock over and the space now counts as a neutral space (more on this under Opening locks). Every time you add a board, place a lock from the supply, with the front side face up, on each space that shows a lock.
Character spaces
If a character lands on a space of their color, their ability is activated and you must carry it out immediately. If another character lands on this space, nothing happens (the space is "blocked" until the character has moved further on).
Opening locks (Franky). If Franky lands on a key space, immediately flip 1 lock from the same board over, so that the side with the neutral space is face up. The path is now clear.
New energy (Jell-E). If Jell-E lands on an energy space, immediately take 1 energy from the general supply and place it in your supply in the center of the character board. What the energy is used for is explained in the Energy phase.
Healing (Cleo). If Cleo lands on a healing space, you may heal 1 damage. To do this, remove 1 damage from any character (even Cleo) and place it back in the general supply. If none of the characters have any damage, you cannot carry out the heal action and nothing happens.
Revival. You can bring characters that are k.o.'d back into the game through healing. Remove 1 damage from the character. Then place the character onto the space Cleo is on. In this case, the characters share 1 space. You can continue playing with the revived character as normal. Any Fluffies the character has collected remain in their inventory. Now they can bring them to the goal.
Note: If you revive Spike, he can move immediately. Franky and Jell-E can move again in the next round.
Sticky snails (Spike). If Spike lands on a snail space, take 1 snail from the general supply and place it in your supply on the character board. You can place up to 5 snails in your supply.
Using the snails. At any point when moving, you may give up 1 snail from your supply to move any character 1 step fewer. This does not count as a movement in itself, you are simply reducing the number of steps for this character by 1 per snail. You may use as many snails as you like, even multiple per character. You may never reduce the number of steps below zero, i.e. you may not move backwards.
Example round 1: (1) Franky lands on the key space. Flip over the lock and the path is clear. Super! Next, Jell-E lands on the energy space. Take 1 energy and place it in your supply. (2) Cleo lands on a neutral space. Spike plans to take 3 steps but he must stop 2 spaces before because this space and the space before are occupied. He takes 1 damage, which you place on a damage space next to Spike on the character board. (3) In the next round, Franky lands on a Fluffy space. Take the Fluffy from this space and place it in Franky's inventory. Jell-E takes 0 steps and remains where he is. The energy space is not triggered again. Cleo would take 2 steps. Instead, in order to land on the healing space, you decide to use 1 snail. Then remove 1 damage from Spike. Finally, Spike takes 4 steps and you receive 1 snail.
3. Energy Phase
Occupied boards cost you energy. Boards that all characters have passed through give you energy. Carry out 3 actions in a row: Add boards, remove boards, and pay energy.
Add board. The level is built during gameplay. If at least 1 character has moved to the foremost board, a new board is added. Take the next board from the pile and place it to the right hand side of the foremost board. Reminder: You already sorted the boards during setup. Finally, place a lock on each lock space and a Fluffy from the supply on each Fluffy space.
Removing boards. Once all the characters have left the rearmost board, place it back in the box. For each board put back in the box, you receive as much energy as indicated on the top right of the board (1-3). Locks must be returned to the supply. Leftover Fluffies can no longer be collected; place them back in the tuck box.
Special case: If the characters leave multiple boards in a single round, remove all of these boards.
Paying energy. Now you must pay 1 energy for each board that has at least 1 character on it. Take the appropriate amount of energy from your supply in the center and place it back in the general supply.
Important: If you don't have enough energy to pay, you lose the level and must start again.
Note: If your supply is empty, you haven't lost yet; not until you cannot pay.
Example: All the characters have left the starting board. Place it back in the box. Take the indicated 2 energy and place it in your supply. Now check how much you all must pay. The characters are standing on only 1 board, so you only have to pay 1 energy.
4. Shift Change
Place all cards that are in the computer onto a face-up discard pile. Give the walkie talkie (or the phone) to the next player in a clockwise direction. This is the new boss. Additionally, each player draws cards so that they have 3 cards in their hand again.
Important: In a 2-player game, both players have 4 cards in their hand.
If there aren't enough cards in the draw pile, shuffle the discard pile and create a new draw pile. The round is now over. Begin a new round with phase 1.
End of Game
Victory: In each level, you must collect a certain number of Fluffies and bring them to the goal. In level 1, you must collect 2 Fluffies.
Defeat: The game ends immediately if you cannot pay enough energy or if 3 characters are k.o.'d at the same time.
The Goal Board
The goal looks a little different in some levels but always follows the same principle. The orange spaces are goal spaces.
- To finish a level, at least 2 characters must be standing on the goal spaces at the end of the action phase.
- At least 1 character must be standing on a space with a buzzer.
- All characters standing on the goal spaces must together have the required number of Fluffies in their inventories. Then you have won the level, hurray!
Important: Fluffies in the inventories of characters that are k.o.'d or not standing on a goal space do not count towards the total.
Crossing over: The goal spaces are arranged in a circle, so you count them as usual. You must however immediately pay 1 energy as soon as a character moves past the last goal space. If you cannot pay, you lose immediately.
If you fulfill the victory conditions, the game ends after the action phase (the energy phase does not take place). Even if you fulfill the victory conditions, you do not have to end the game and can continue to play, in order to bring the other characters to the goal or to collect the remaining Fluffies. You can receive a bonus for this (more on this below).
Example: Franky moves 2 spaces and crosses over. You must therefore pay 1 energy. Luckily there are 2 left in your supply. Jell-E also moves 2 spaces and lands on a goal space. Then Cleo moves 1 space and lands on a buzzer space. Spike is k.o.'d and doesn't move. Spike's Fluffies don't count, so you collected 2 Fluffies in total. You have won the level and the game ends immediately. Well done!
Collecting Stars
Together you receive stars according to how well you complete a level. You can use these to unlock bonuses for later levels. On the rulebook's page 11 you can mark how many stars you receive for each level.
Note: You don't receive any stars for levels you design yourselves.
- If you successfully complete a level, you receive 1 star.
- For each extra Fluffy you collect, you receive another 1 star.
- If all 4 characters survive and they all land on a goal space, you receive another 1 star.
For each star you receive, you may cross off 1 star for a bonus of your choice. You may divide the stars among the bonuses. At the beginning of the game, you will receive all bonuses for which you have crossed off all the stars. If you play a level again, you only receive more stars if you collect more stars than before. You also find an overview of the stars online: www.cundco.de/spielregeln/hig-spiele-erweiterungen. (To print out yourself.)
Example: You have completed level 1 and brought all 3 Fluffies to the goal. However, 1 character is k.o.'d. So you collected 2 stars. Cross these off on the left. Then you may also cross off 2 stars on the right. You choose the energy bonus. You need a total of 4 stars for this, so you don't yet receive any extra starting bonus for level 2.
The Shield
If you unlock a shield, take a shield from the tuck box after finishing the setup. Place it on 1 character of your choice on the character board. If this character takes 1 damage, remove the shield rather than suffer the damage. Then place the shield back in the tuck box. You can choose which character to give the shield to in each new game. Each character may only have 1 shield.
Star table ("Cross off here")
Note: this sheet is mostly icons. As printed, each level row shows its Fluffy goal and the stars you can cross off: Level 1 (2/3): 3 stars; Level 2 (3/4): 3 stars; Level 3 (4/5): 3 stars; Level 4 (5): 2 stars; Level 5 (5/7): 4 stars; Level 6 (5/7): 4 stars; Level 7 (6): 2 stars. The header shows a "+1 energy" bonus costing 4 stars alongside the goal/star columns. The Start Bonus column lists five bonuses, each "+1", costing 3, 4, 4, 5 and 5 stars (the first and last show a shield icon).
Now you can finally begin playing! Read through the instructions for level 1. On the following pages you will find the rule changes for later levels, but these aren't yet relevant. On the last page you will find a summary of the most important rules. (Tired of reading? You can use the app to listen to the introductions to the level instead!)
Level Overview
Level 1: Kaltenstein
You find yourselves in the small village of Kaltenstein. It smells stale and musty. You look around in confusion. Do any of you recognize this place? The walkie talkie crackles: "Welcome to the middle ages! The expert for this era is unfortunately… well, incapacitated. But you'll manage by yourselves!" Just then, you notice a Fluffy peeking out of a wagon of hay. It gives you a cheeky look before disappearing...
- Starting boards: 1 (base) + 1 (middle ages)
- Pile: 2 (middle ages) + 2 (base goal board)
- Goal: 2 of 3 Fluffies
- Changes to set up: None.
- Special spaces or rules: None.
Have you completed level 1? Super, then read on. So you don't get bored, we have 6 more levels for you to play. Each one brings new rules and challenges with it. Will you manage to win all levels?
The base setup is the same for each level. The boards, however, are different and new components are added. The starting board and goal board are always a base board. You will therefore need these several times.
Reminder: Always place 1 starting board and 1 level board above the character board. Place the rest in a pile next to them. The goal board is always at the bottom of the pile. Also place 6 energy and 1 snail in your supply. You will need a different number of Fluffies for each level. Leave any extras in the tuck box.
Note: You will only need all the Fluffies for levels you design yourselves.
Important: For each level, there are special rules that only apply for that level. There are also rules and components that are introduced in a level and apply from that level onwards, i.e. for all following levels.
We will now explain which boards you need and what changes you must consider for each level.
From Level 2
Changes to set up: Take the 10 gifts and shuffle them face down. Place them face down in a pile.
Detours. You can now bypass some locks. The small spaces count towards the length of the path but characters cannot stop on them. If the character doesn't have enough movement to complete the detour, they stop on the space before the detour. As soon as the lock is opened, you are no longer allowed to use the detour.
The gifts. If a character lands on a gift space, take 1 gift and flip it over. Then place it face up on one of the two spots on the character board (space for gifts).
Special case: If you receive a gift and both spots on the character board are already filled, you must choose one of the gifts to throw away (this can be the new gift).
The gifts give you different bonuses which you can use during the game. You may use a gift at any time, unless otherwise stated. Once you have used a gift, place it face up in a separate discard pile. Each gift is explained in "Hooray, a gift!" below.
Special case: If there are no more gifts in the draw pile, shuffle the discard pile and create a new draw pile.
Level 2: Pyramid Polka
A hot wind blows against your faces as you poke your heads outside the portal. "Ahh, I'll never get tired of seeing the pyramids!", says Cleo. "Just watch out for the quicksand — especially you, Franky-short-legs, ha ha!" She grins cheekily and bounds ahead.
- Starting boards: 3 (base) + 1 (Egypt)
- Pile: 2 + 2 (Egypt, base goal board)
- Goal: 3 of 4 Fluffies
Special rule: Quicksand. When moving: If a character doesn't move while on a quicksand board, they take 1 damage. It also counts when the character has footprints but doesn't take any steps.
Double space: Best Bandages. Cleo knows where to find the best material for healing. If she lands on this space, you can heal up to 2 damage. You can heal one character up to 2 damage or two characters by 1 damage each.
From Level 3
Changes to set up: Shuffle the 5 special cards (indicated with special-card symbols) with the other cards. Deal them out as usual.
Special cards. At the end of the action phase: You receive as many gifts and damage as are visible in the computer. You can separate the damage as you wish among the characters.
Empty Fluffy space. If a character lands on an empty Fluffy space, this character may place 1 Fluffy from their inventory on the edge of the character board. This Fluffy counts as collected. This functions like the gift Save the Fluffy.
Level 3: Spacelantis
"Home at last!", cries Jell-E, as he splashes happily with his tentacles. "I hope you brought some underwater-proof clothing – otherwise we can go get some from a sales-shark. Let's see where the little creatures are hiding around here!" You find yourselves in the middle of a sci-fi aquarium. Too bad that Fluffies can swim...
- Starting boards: 1 + 1
- Pile: 2 + 3 + 4
- Goal: 4 of 5 Fluffies
Special rule: Thalassophobia. If a character is alone (without another character) on a board at the end of movement, you must pay 1 extra energy for this board during the energy phase. It can happen that you must pay extra energy for multiple boards.
Double space: Jellyfish Power. Jell-E is particularly powerful here. If he lands on this space, take 2 energy and place it in your supply.
Level 4: Time Warp
"Oh dear, what's going on here?! Even I'm feeling a little queasy!" says Franky, looking a little green. You've been caught in a time warp. You're still getting your bearings when a Fluffy whizzes past Spike's horn. Quick, after it!
- Goal: 5 Fluffies
- Changes to set up: Instead of the starting board and the piles, place the following boards in this order in a circle: 1 + 2 + 1 + 2 + 3.
- Place Franky and Jell-E on the first space on the first (1) board. Place Cleo and Spike on the first space on the second 1 board. There are therefore 2 characters starting on the same space.
- Place 1 Fluffy on the top space on one of the 2 boards. Place another 1 Fluffy on the first space on another 2 board.
- As usual, place 1 lock on each lock space.
Special rule: Round trip. In the energy phase, you neither have to add boards, nor remove old ones. You must however pay energy as usual. Once 5 Fluffies are on the character board, you win immediately. You don't have to bring them to the goal.
Note: Fluffies in the inventory of k.o.'d characters do not count.
Move the characters as usual in a clockwise direction.
Special rule: Jumpies. After collecting 1 Fluffy from a board, immediately place 1 new Fluffy on an empty space on the next board. Therefore, there are always 2 Fluffies on the game board.
After the action phase, both Fluffies "hop" from their board to the next. First, take the Fluffy furthest along the board in a clockwise direction and place it on an empty space on the next board. If there are multiple Fluffy spaces, you must always choose the one on the upper path. If there is no empty space on the next board, check the following board in a clockwise direction and so on. Then move the second Fluffy, following the same rules.
Important: The special rules of the boards also apply here. Quicksand and Thalassophobia are active on their respective boards. All spaces retain their effects, including the double spaces from levels 2 and 3.
Fluffy Power. If a character lands on a Fluffy space, you receive 2 energy. It doesn't matter if the Fluffy space is empty or occupied by a Fluffy. Then you collect the Fluffy as usual or you can "save" a Fluffy if the space is empty.
Level 5: Back to the Present
"Home sweet home!" says Franky, flapping her ears. After the chaos they just experienced, everyone is looking forward to spending time in the present. Only Spike dislikes the hustle and bustle. "There's nothing sweet about all this hullabaloo", he grumbles.
- Starting boards: 5 + 1
- Pile: 2 + 3 + 6
- Goal: 5 of 7 Fluffies
- Changes to set up: None.
Special rule: Turning Point. Always, when a turning-point board is the rearmost board, it is turned 180°, after the action phase. Turn it, so that the turning-point side is always face up. Any characters and tiles on this board remain in position and are rotated with the board. The characters always move in the direction of the foremost board (now in the other direction, i.e. still in a clockwise direction). If the board is the "wrong way round", it will be turned back at the end of the next action phase, as long as it doesn't get removed.
Magnets. If a character lands on a magnet space in their color, the character of the other color shown is immediately moved to this space (i.e. they share 1 space). It doesn't matter where the character is.
Special case: If the character is k.o.'d, the effect is ignored.
The character that was pulled by the magnet then takes their movement as usual (if they have not moved yet in this round).
Double space: Locksmith. Franky is a lock expert! If Franky lands on this space, you may unlock 2 locks on her board.
Level 6: Troublesome T-Rex
A deafening roar sounds in the distance. "Who or what in the world was that?", squeaks Cleo, hiding behind Spike. "Quickly, get to that cave!", shouts Franky. "Or we'll end up as tasty dino food for that T-Rex!"
- Starting boards: 5 + 1
- Pile: 2 + 3 + 4
- Goal: 5 of 7 Fluffies
- Changes to set up: Place the cave board next to the other boards. Place the cave entrance to the left and the cave exit to the right. This is the cave. Place the lock and the Fluffies on their respective spaces on the board as usual.
Special rule: T-Rex attack. If a character (other than Spike) is on a T-Rex board without Spike at the end of movement, they take 1 damage. The cave is not a T-Rex board, so you are safe there.
The cave. If a character lands on a cave space, you must move them immediately to the corresponding starting space of the cave entrance. Movement and spaces function as usual inside the cave. For the board in the center of the cave, you must pay energy according to the usual rules, but not for the entrance and exit. The cave is never removed. After exiting, the characters continue their movement. Continue to count the spaces as usual. The next space is the rearmost space of the rearmost board. Spaces are triggered as usual.
Note: It can happen that a character exits a cave and immediately goes back inside in the same move.
Special case: If all the characters that aren't k.o.'d are in the cave, no boards are removed during phase 3.
Double space: Old Friends. If Spike lands on this space, take 2 snails from the general supply and place them in your supply.
Level 7: Fiery Finale
"Wow, that's hot!", hisses Jell-E. You have traveled to the beginning and the end of time to return the Fluffies to Mama Fluffy. Hopefully, she'll take better care of them this time, and these tiny fluffy beasts won't escape again...
- Starting boards: 3 + 1
- Pile: 2 + 3 + 6
- Goal: This time, everything's different! Return 6 Fluffies.
- Changes to set up: Place Mama Fluffy directly to the right of the 1 board. Place the glitch tile in the computer. Fill all the characters' inventories with Fluffies, until all 6 spots are filled. The other Fluffies remain in the tuck box.
Special rule: Mama Fluffy. Mama Fluffy has two spots for Fluffies. You can only add a new board once you have placed 2 Fluffies from your inventory there. Until then, skip the "Add board" step. As soon as you have placed the Fluffies, add a new board. Then move Mama Fluffy to the end of the new board and place both Fluffies in the tuck box. Continue doing this until you reach the goal board. If a character's movement would take them past the final space of the foremost board, they take 1 damage. They remain on the last empty space.
Returning a Fluffy. If a character would take 6 or more steps, they may instead place 1 Fluffy from their own inventory on Mama Fluffy. In that case, the character does not take a movement.
Special rule: The floor is lava. After the action phase: You take as much damage as can be seen in the computer (lava symbols). You may share the damage.
The double spaces function as in previous levels.
If you create your own levels, it is best to swap out individual boards of existing levels. The special rules for each level apply when a character is on a corresponding board.
Hooray, a gift!
(The gift tiles are identified by icon only; they are listed here in the order printed.)
- Extra steps: During movement: You may move one of the characters shown 1 or 2 additional steps. This does not count as its own movement, but in addition to the computer's result. You may divide the 2 steps between both characters or only move 1 step.
- Extra card: During the briefing: Each player receives 1 extra card in their hand. This gift may be used after everybody has drawn their cards but before the action phase begins.
- Cover a space: During the action phase: You may place this gift on an empty space (i.e. a space without a token or a character). The covered space now counts as a neutral space. The characters may land on this space as normal. The token remains on the space until you remove the board.
- Face-down card: After playing your cards, before movement: After time has run out, the boss may play 1 more of their cards face down. The card must be placed in the computer with the gray side facing up. Covered (i.e. gray) spaces do not count as footsteps.
- "Save the Fluffy": Take one of the Fluffies already collected from the inventory of any character. Place it on the neutral area in the center of the character board. This Fluffy counts as collected and doesn't take up space in the inventory. You may also take a Fluffy from the inventory of a character that is k.o.'d.
- Grab a Fluffy: Before or after the movement of a character, you may collect 1 Fluffy, located exactly 1 space away (in both directions) from that character. Place the Fluffy in this character's inventory.
- Swap: Swap any character with a Fluffy located on a board. The character may not be k.o.'d.
Summary
Oof, that's a lot to remember! Can you give it to me in a nutshell?
Briefing
- Use the reminder bar to keep track of your goals for this round.
- You may only tell the other players whether you have no, a couple, or a lot of footprints of a color.
Action phase
- You have 40 seconds. You may decide in which orientation to play your card.
- You must play 3 cards in turn order. Then, the turn order is up to you and you may play as many cards as you wish.
- When time is up, move each character exactly as many steps as there are visible footprints in their color.
- Move the characters in the following order: Franky, Jell-E, Cleo, Spike.
- Only 1 character can exist on each space. Spaces are only triggered when a character lands directly on a space.
- General spaces affect all characters. Each character has their own ability that is activated on spaces of their color.
Energy phase
- If you reach the foremost board, place down a new one from the pile.
- Once all the characters have left a board, remove it and claim the indicated energy.
- You pay 1 energy for each board that has at least 1 character on it.
Shift change
- Give the walkie talkie to the next player. Draw cards until you have 3 (respectively 4) in your hand.