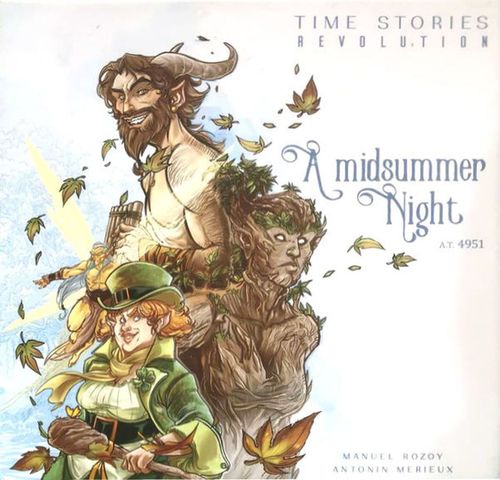
TIME Stories Revolution: A Midsummer Night
TIME Stories Revolution: A Midsummer Night Rulebook
Table of Contents
Table of Contents
Contents
- 1 token punchboard (keep facedown)
- 1 rulebook
- 26 Azrak crystals
- 107 Story cards
- 60 Common cards
- 60 Personal cards
Do not flip the token punchboard. Only punch the tokens out when instructed. Once punched out, place the tokens faceup.
Receptacle
A receptacle is a character that a player inhabits during the game. Even though you are playing as the TIME agent connected to a receptacle, you will use the receptacle's attributes and back story.
A receptacle is always defined by:
Their name: Some characters in the adventure will recognize your receptacles and interact with them in a particular way.
Their attributes: They define the receptacle's skills as well as their strengths and weaknesses, both physical and mental. Each receptacle also has a pool of Azrak that represents the power of the link between them and the controlling agent, as well as a pool of Magick.
Their back story: The agent takes control of the receptacle at a specific moment. This text provides a short summary of their life before the agent intervention. It may have information that will help the agent to fulfill their mission to the best of their ability.
A receptacle card shows: the character's name; their attributes (Cunning, Smooth Talk, Strength/Combat); their Azrak and Magick pools' starting levels; and their back story.
Setup
To start playing TIME Stories Revolution - A Midsummer Night, resolve the following steps in order.
Open the deck of STORY CARDS.
Steps 1 to 9:
- Set aside the flash card of the deck, then read the Mission Order (back) and the Mission Return (front). Place this card on the table, Mission Return faceup 1.
- Place, without reading them, the Moon 2 and the Starry 3 cards facedown: read the text of each card out loud.
- Looking at their backs in the least possible way, place the 14 Mystery cards in a facedown pile without reading them 4.
- Line up the 6 Prologue cards to create a panorama 5.
- Each player chooses a receptacle (the character they will play during the mission) and reads both sides of their card 6. Return any non-chosen receptacles to the box. They will not be used during the mission.
- Each player takes the number of Azrak corresponding to the starting level indicated on their Receptacle card. This forms their supply 7.
- The central area is called the Vortex. When playing with less than 4 players, place the remaining Azrak in the Vortex 8.
- One player keeps the rest of the deck and leaves the Game Round / Icon Reference card on top: they will be the Time Captain for the first round of the game 9.
Open the deck of PERSONAL CARDS.
Steps 10 to 13:
- Set aside the flash card of the deck.
- Each player takes all cards belonging to the receptacle they will inhabit 10:
- Each player places their Power card faceup in front of them 11, next to their Receptacle card.
- Each player places their Snap Recall card facedown (without reading it) 12 next to their Power card.
- Each player places their Interaction cards (without reading them) in a facedown pile 13 next to their Receptacle card.
Open the deck of COMMON CARDS.
Steps 14 to 20:
- Set aside the flash card of the deck.
- Place the 4 Map cards faceup above the panorama 14.
- Take the 6 Destiny cards (without reading them), shuffle them, and place them in a facedown pile 15. Leave space nearby for the discard pile.
- Place the Item cards facedown (without reading them) 16 near the Destiny cards.
- Punch out the Magick tokens and deal them as follows: 3 Magick tokens per receptacle when playing with 4 receptacles 17; 4 Magick tokens per receptacle when playing with 3 receptacles; 5 Magick tokens per receptacle when playing with 2 receptacles.
- Punch out the Damage tokens (black tear shape). Place them and the facedown punchboard near the Item cards 18.
- Place the box bottom above the Map. Place there the cards you remove during your mission 19. Please note that some cards feature the Mystery symbol. After you have read them, place them vertically - faceup - between the box bottom and the cardboard block as shown below.
- The Time Captain follows the instructions written at the top of the first panorama card 20.
You can now begin the game!
We recommend that you finish reading the game rules before starting your mission.
(The setup diagrams on these pages show the table layout for 4 players, for 3 players, and for 1 or 2 players, with the numbered callouts 1-20 above marking where the Mission Return card, Moon and Starry cards, Mystery pile, Prologue panorama, receptacle cards, Azrak supply, Vortex, deck, Power card, Snap Recall card, Interaction cards, Map, Destiny deck, Item cards, Magick tokens, Damage token punchboard, and box bottom are placed on the table.)
Playing the Game
A game of TIME Stories Revolution is played in several rounds. Each round consists of 3 phases resolved by the whole group in the following order:
1. TIME CAPTAIN PHASE The Time Captain decides which location the group will visit. This phase consists of 3 steps.
- Choose a location
- Display the location
- Read card A
2. DISCOVERY PHASE Players read their cards, share the contents with each other, and then act. This phase consists of 3 steps.
- Location recon
- Agent telepathy
- Actions
3. BETWEEN LOCATIONS PHASE Players leave their current location and prepare for the next round. This phase consists of 3 steps.
- Standard Update (optional)
- Swaps (optional)
- Change of Time Captain
Once phase 3 is complete, begin a new round with phase 1. Continue this process until the end of the mission or until all agents lose control of their receptacles.
1. Time Captain Phase
Choose a location
After consulting with the other players, the Time Captain chooses an available location on the Map for the group to visit, on which they place 1 Azrak taken from their pool.
If the location already has 1 Azrak, the Time Captain places their Azrak on the Mission Return card.
Display the location
The Time Captain fans through the Story deck to find the chosen location, identifiable by its card A. Upon finding it, they take all of that location's cards and display them (as above) so they are visible to all players.
The top card of each location is card A, which indicates the location's name (or number) in the top corners 1. The bottom of the card lists how many cards form the location's panorama 2.
At this time, do not flip any of the panorama's cards.
Read card A
The Time Captain flips over card A and reads its text aloud, accenting any words written in bold font, as these identify the key elements of the panorama, from left to right. Then they replace card A so other players can look at it.
2. Discovery Phase
Location recon
To recon a location, each player must take a card from the panorama at no cost, read it secretly, and place it facedown in front of them. During this step, the agent does not interact with their card: they ignore its game instructions (initiating a test, taking an Item, etc.). As with all group decisions, players may freely discuss before deciding which player takes which card.
Agent telepathy
All agents can communicate telepathically during the mission. To simulate this, the players take a moment to recount what they have discovered or what has happened to them. They may look at the card in front of them but must not read its text aloud. Agents are encouraged to use their telepathy during the mission, but everyone must do so during this step. This procedure is imposed by the Agency in order to offer each agent a superior understanding of the situation at hand.
Actions
This rather atypical step is the heart of the game. The players are free to perform whichever actions they choose, even simultaneously, if they wish. No turns, time limit, or other order of play is required. Some will read their cards faster than others, and that's fine. What might appear as joyful chaos to some might very well be indicative of good coordination between team members. It is up to you when to act, and when to stand by and watch others. One piece of advice: if you wish to be efficient, listen to each other!
To begin with: If the panorama card placed in front of an agent includes game injunctions ("Take an Item", "Read your Interaction card", etc.), you must follow them now. However, if the wording gives a choice to the agent ("If you want to", "You may", etc.), they are free to follow the instructions or not. When a choice must be made, telepathy is often the best ally.
Then: Each player can perform any of the following actions, whenever they wish and as many times as they want:
1. Explore A player can explore any available card in the panorama. To do so, they must spend 1 Azrak from their pool (by placing it in the Vortex), return the card in front of them (if any) to the panorama, then take a new card, and secretly read it. If that new card includes game instructions, the player must follow them immediately.
2. Initiate a test See the corresponding section under Specific Procedures, below.
3. Stand by A player who wants to support another one during a test must stand by. In order to do this, they must return the Story card placed in front of them to the panorama (it is now available for another player to explore). As long as they do not have a panorama card in front of them, they are able to support other players.
A player who is standing by can:
- Support another agent during a test (see Specific Procedures, below);
- Give 1 or more of their Items and/or tokens to other agents (see Items and Tokens, below).
Important: Some cards feature a conflict icon (personal or group), which can prevent you from performing actions as you normally would. See the corresponding section, below.
You can remain in a location as long as you wish (and while your Azrak last). To leave, make sure no players have a panorama card in front of them. Proceed with the Between Locations phase.
3. Between Locations Phase
Standard Update
Players can collectively decide to perform a Standard Update to replenish their Azrak. See the corresponding section under The Azrak, below.
Swaps
Players can swap Items and tokens at their convenience.
Change of Time Captain
The Time Captain stows the current panorama under the Story deck, and passes the deck to the receptacle on their left, who becomes the new Time Captain.
A new round begins!
Spending, losing, or gaining Azrak
When you spend or lose Azrak, place the corresponding crystal(s) in the Vortex. When you gain Azrak, take the corresponding crystal(s) from the Vortex. You cannot exceed your starting level of Azrak at any time. If the Vortex does not contain enough Azrak for you to regain the specified amount, you only gain what is left.
Specific Procedures
Tests
A test is represented by a box, the center of which displays the attribute being tested (a colored symbol), the test's difficulty level (the higher the value, the more difficult the test), and up to three different results depicted in cells (generally, from left to right: failure, critical success, and success).
A test box shows: the Difficulty Level (value) and the Attribute (color) at the top, and three result cells below - Failure, Critical success, and Success.
If a player reads a card depicting a test, they can attempt the test by initiating it. To do so, follow the instructions below:
- Initiate a test: The receptacle attempts the test. The agent spends 1 Azrak to use the value of their attribute corresponding to the test.
- Boost: The agent can spend as many Azrak as they wish to increase the value of their attribute. For each spent Azrak this way, they receive a +1 bonus.
- Support: The agent asks for support. Any player standing by (i.e. who has no panorama card in front of them) can support by spending, at most, 1 Azrak to give a +1 bonus during this test (see Two or Three Player Games for games with less than 4 players).
- Destiny: Once all supports are resolved, the agent whose receptacle is attempting the test reveals a Destiny card and applies the indicated modifier to obtain their final value. Then, discard the Destiny card faceup. Shuffle discarded Destiny cards into their pile when instructed.
- Resolution: To determine the test's outcome, compare the result to the test's difficulty level:
- If the value is less than the difficulty level (failure), the receptacle obtains the result indicated in the left cell (associated with the "-" symbol).
- If the value is greater than the difficulty level (success), the receptacle obtains the result indicated in the right cell (associated with the "+" symbol).
- If the value is equal to the difficulty level (critical success), the receptacle obtains the result indicated in the lower cell (associated with the "=" symbol).
The receptacle who attempts the test, not any of the supporting agents, suffers the consequences.
Example: James tries to convince his interlocutor (Smooth Talk test). His Smooth Talk attribute is 2. - He spends 1 Azrak to use his attribute (value 2). - He spends 2 additional Azrak to boost himself. - Tess supports him by spending 1 Azrak. - James draws a Destiny card of value -1. - Final value = 4 Or 2 (Smooth Talk attribute), +2 for the boost, +1 for the support, -1 for the Destiny card. He obtains a critical success since the result is equal to the difficulty level and takes ITEMS 4 and 5.
Sometimes, the results for success and critical success are identical, as depicted on the box to the right. Sometimes, the cell of a result is empty, which means nothing happens.
Conflicts
Personal conflicts
A personal conflict is resolved the same way as a regular test, with one exception. The player who reads the card must keep it in front of them and must resolve the conflict before doing anything else (stand by, explore another card, change location, etc.).
Group conflicts
A group conflict is a type of conflict that is resolved differently from a personal conflict.
When a card featuring this icon is read, all players must stop what they are doing to resolve a group conflict. Before beginning, players may freely swap Items and/or tokens. Once the group conflict has begun, no further swapping is allowed.
A group conflict is often a turning point in a mission, and takes place over one or more turns. For the duration of the conflict, in an order determined by the Time Captain, each player (regardless of where they are, or if they are locked in a personal conflict) must attempt one of the tests depicted on the group conflict card and apply its results.
Players can still support each other even if they have a Story card in front of them.
Once each player has made the test of their choice, the turn ends and the above procedure is repeated. A group conflict ends when the adversary with whom the group is in conflict has sustained damage equal to or greater than their life points. Once the group conflict is resolved, the adventure resumes.
The Azrak
The Azrak is the magickal or mystical energy that links the agent (the player) to their receptacle (the host). Each player must always have at least 1 Azrak in their pool, or this link breaks.
Standard Update
As the adventure progresses, players will spend Azrak from their pool.
During the Between Locations phase, players can choose to voluntarily reset the link between agents and receptacles to gather Azrak. To do so, follow the instructions below:
One player moves 1 Azrak from the Vortex to the Mission Return card.
Then, that player retrieves all remaining Azrak from the Vortex (i.e. all spent Azrak that are not on the Mission Return card or on the Map), and divides them among all players, however they wish (a player may not have more Azrak than their starting level allows). It is recommended that the Azrak be shared as fairly as possible.
Certain game effects will allow you to perform an Update at no cost. If so, follow the instructions above, but do not move an Azrak to the Mission Return card.
Example: James has 2 Azrak. Tess has 5 Azrak. There are 8 Azrak left in the Vortex. Tess moves 1 Azrak from the Vortex to the Mission Return card. The Update enables James and Tess to retrieve all the Azrak from the Vortex. None of them can exceed their starting level. They choose to divide the available Azrak among themselves so that each of them has an equal number of Azrak. James takes 5 Azrak from the Vortex and Tess takes the remaining 2. Each agent now has 7 Azrak.
Broken link
When an agent spends or loses their last Azrak, they must choose one of the following two options:
Request Emergency Update The player can choose to request assistance from the Agency. To do so, they place the Azrak they just spent or lost on the Mission Return card, then refill their agent's Azrak pool up to its starting level with Azrak from the Vortex. (Note: Other players do not retrieve Azrak during an Emergency Update, making it far less advantageous than a Standard Update.)
Lose Receptacle Control The agent loses control of their receptacle. The Azrak they just spent or lost is placed in the Vortex. If the Azrak was spent for an action, the agent performs that action until its completion. Then, that agent is ejected from the current location (see below).
Important: If all agents lose control of their receptacles in the same location, the mission ends in failure. The players must restart the game from the beginning.
Being ejected from a location
An agent is ejected from their location when they lose control of their receptacle (in which case they are wandering - dazed - between realities) or when specifically instructed by a card. The consequences are the same in both instances: the agent can no longer act (no actions, no support, no swapping, etc.), but can still communicate with the others. Ejected agents return to the game during the Between Locations phase. If this ejection results from a loss of control, the agents must perform a Standard Update.
Items and Tokens
Items
During the game, players will come across Item cards. When the game instructs you to take an Item card, search the Item deck for it. If the game instructs you to take an Item that another player has already claimed, ignore it.
Items and their functions within the game are sorted into four colors:
- Green - A green Item is most often a physical object a receptacle can take. It can be swapped, and is placed faceup in front of the player who has it.
- Yellow - A yellow Item is most often a personal event. It is read secretly and communicated telepathically by the player who took it. Once read/resolved, it is immediately stowed.
- Red - A red Item is most often a group event. It is read aloud by the player who took it. Once read/resolved, it is stowed.
- White - A white Item might modify the map or even the game itself (e.g. adding a new mechanism). Some expand the map (use the symbols on the edge of these cards to do so), while others are placed on top of map cards already in play. If required to cover an existing part of the map, any Azrak covered in this way are placed in the Vortex. An Item that modifies the game in any other way is placed faceup within view of all players.
Some white Items are called Replacement: they replace the attributes of your receptacles till the end of the mission. When an agent reveals such a card, they immediately put it on top of their Receptacle card to cover their back story and their three attributes.
A Replacement card:
- is always allocated to the receptacle of the agent who drew it;
- remains on the Receptacle card till the end of the mission (Replacement cards cannot be swapped between receptacles).
When an agent draws a Replacement card while their receptacle is covered by a Replacement card previously drawn, they replace the old one with the new one.
Mysteries
Mystery cards are Story cards with their own behavior. They are placed in a facedown pile during setup. Draw them when instructed to do so.
Depending on the type of the card, proceed as follows:
Red or yellow mystery: identical behavior as the Items of the same color.
An agent who draws a Mystery with the box-bottom symbol must read it out loud. Once read, the card is placed vertically - faceup - between the box bottom and the cardboard block. These cards can be looked at and they remain in that position till the end of the mission. They include icons summarizing their box.
When an agent draws a Mystery featuring the replace-card symbol, they first remove their current Story card. Then, they read their Mystery and resolve it, if necessary. When standing by or exploring, the agent replaces the previously removed Story card with this Mystery in the panorama.
Tokens
The game contains a token punchboard. It must be kept facedown. During the game, players will be instructed to take tokens. When instructed to do so, punch the corresponding token out. Group tokens are hexagonal. All others are personal tokens.
Group tokens affect all the agents. Once punched out, they are placed faceup above the panorama so that all players can see them.
Personal tokens remain the property of the player who took them. They are placed faceup. They can be given and swapped under certain conditions (most often during the Between Locations phase).
Swapping Items and Tokens
During the Between Locations phase, players can swap or give Items or personal tokens they own.
By spending 1 Azrak, an agent who stands by during the Actions step can give one or more of their Items and/or tokens to another agent at that same location.
Personal Power cards cannot be swapped.
Group tokens belong to the group and cannot be swapped.
Magick Tokens
At the beginning of the mission, each agent has a Magick starting level determined by the number of played receptacles: 3 when playing with 4 receptacles, 4 when playing with 3 receptacles, and 5 when playing with 2 receptacles.
The stowed tokens are placed in the supply, next to the token punchboard.
When an agent gains 1 or more Magick, they take them from the supply without ever exceeding their starting level. The tokens in excess are lost.
It is prohibited to swap Magick tokens.
Stowing an Item or a Token Return the card or token to its starting position determined during setup.
Removing an Item or a Token Remove the card or token from the game. Feel free to place it in the box, as it will not be needed again during this mission.
Two or Three Player Games
Each player chooses a single receptacle.
When playing with 2 receptacles:
- Each agent may perform 1 of their Explore actions at no cost during each round's Actions step.
- During the mission, 2 Updates (Standard or Emergency) can be performed at no cost.
- During each test, the supporting agent can spend up to 3 Azrak to give a +1 bonus for each spent Azrak.
- Each receptacle has a Magick starting level of 5.
When playing with 3 receptacles:
- The Time Captain may perform 1 of their Explore actions at no cost during each round's Actions step.
- During the mission, 1 Update (Standard or Emergency) can be performed at no cost.
- During each test, 1 supporting agent can spend up to 2 Azrak to give a +1 bonus for each spent Azrak.
- Each receptacle has a Magick starting level of 4.
Solo Games
A solo player chooses 2 receptacles and plays according to the two-player rules. For obvious reasons, rules regarding telepathy between agents can be disregarded.
Premature Mission End
It is possible, although rare, that the players fail the mission. For instance, the mission ends in failure if all agents lose control of their receptacles at the same location. Or, if the players took a wrong turn early on, they might choose to end the mission prematurely in order to start the adventure again from the beginning. In this case, the game must be completely reset. The elders call these "runs".
Glossary
Agent: Each player plays the role of an agent who visits and explores universes as diverse as they are exotic. To do so, the agent takes control of a receptacle they use to interact with a distant reality.
Attribute: Each receptacle has a set of attributes that are used during tests. Each attribute has a value and a color (to easily determine which is used during any given test). The higher the value, the more likely the receptacle is to succeed in tests of that type.
Azrak: Each player has a quantity of Azrak that represents the link between the receptacle and the agent controlling them. It is a resource (that cannot be transmitted or swapped) that players use to perform actions during the game.
Azrak pool: A receptacle's unspent Azrak. A receptacle's starting Azrak is printed on its card.
Common cards: A deck consisting of maps, Item cards, and Destiny cards.
Conflict: Indicates a mandatory test. The player(s) must resolve it before they are allowed to perform other actions. These come in two types; personal conflicts and group conflicts.
Critical success: During a test, if the final value is equal to the test's difficulty level, it is a critical success. Resolve the instructions in the lower cell.
Damage Points: They measure the damage inflicted to the opponent during a conflict.
Deck: A TIME Stories mission consists of three decks: the Story deck, the Common deck, and the Personal deck.
Destiny cards: These cards are found in the Common deck. They add an element of uncertainty to the resolution of tests. The strip on the bottom of each Destiny card (front) indicates both the number of cards in the deck, as well as the deck's highest and lowest values. Destiny cards are discarded faceup. Players can look through the discarded Destiny cards at any time.
Difficulty level: The higher the number, the more difficult the test.
Ejection from a location: Certain events can trigger an ejection, but more commonly an agent will be ejected from a location after losing control of their receptacle. An ejected agent wanders - dazed - between two realities. This state is temporary (see Being Ejected From a Location, above).
Emergency Update: Rather than losing control of their receptacle when spending or losing their last Azrak, an agent can choose to perform an Emergency Update by placing that Azrak on the Mission Return card. Then, they regain as many Azrak as possible from the Vortex without exceeding their starting level and keep on playing.
Failure: During a test, if the final value is lower than the test's difficulty level, it is a failure. Resolve the instructions in the left cell.
Final value: This is the value compared to the difficulty level during a test. It consists of the value of a receptacle's attribute, optional boost, optional support, and the value of the revealed Destiny card.
Flash card: A card placed on top of and/or under a deck to maintain the secrecy of its contents.
Gaining Azrak: Unless stated otherwise, the Azrak players gain are taken from the Vortex. An agent can never exceed their starting level.
Group: When a game component indicates that the group must or can take action, all the agents are concerned. If it is specified that the group can spend an Azrak or stow a Magick token, each agent can participate in reaching the indicated amount.
Group conflict: A conflict all players are required to participate in. Players must continue performing actions corresponding to the group conflict until it is resolved (see Conflicts, above).
Group tokens: Group tokens can be recovered during the mission. Group tokens are always hexagonal and affect the entire group. They are placed faceup above the panorama when obtained so that all players can see them. A token that is removed or stowed is put back facedown.
Interaction cards: Each receptacle has a deck of Interaction cards. These cards are only to be looked at when instructed to do so by the game. Looking at an Interaction card is always done at no cost. After looking at an Interaction card, stow it in its original deck.
Item and token swap: Items and tokens can be swapped at no cost during the Between Locations phase, and before starting a group conflict. An agent standing by during the Actions step can spend 1 Azrak to give one or more Items/tokens to another agent.
Item cards: When the game instructs you to take an Item card, search the Item deck for that card, unless another player already has it. There are four types of Items (see Items and Tokens, above).
Life points: During a conflict, each opponent will have a certain amount of life points. Usually, when an opponent has accumulated damage equal to or greater than their life points, the conflict ends.
Losing Azrak: The Azrak players lose are placed in the Vortex.
Loss of control: When an agent spends or loses their last Azrak, they lose control of their receptacle and are ejected from the location. If they spend their last Azrak to perform an action, this action is performed until its completion.
Magick tokens: Each agent has a Magick starting level that is determined by the number of receptacles in play. When an agent uses Magick, they must stow any spent token in the supply next to the token punchboard. It is impossible to swap or to exceed your starting level.
Map: A Common card indicating the locations that the agents can visit. When a location already has 1 Azrak, the Time Captain places their Azrak on the Mission Return card instead. If an existing part of the map is covered by another card, any Azrak covered in this way are placed in the Vortex.
Mystery cards: Mystery cards are Story cards with their own behavior. Placed in a facedown pile during setup, players can only draw them when instructed to do so (see Mysteries, above).
Personal cards: This deck contains the Power card, the Snap Recall card, and the Interaction cards of each receptacle. As their names suggest, it is prohibited to read or take the Personal cards of a receptacle belonging to another agent.
Personal conflict: A conflict involving only one agent (see Conflicts, above).
Personal tokens: Personal tokens remain the property of the player who took them. They are placed faceup. They can be given and swapped under certain conditions (most often during the Between Locations phase). Removed or stowed tokens are put back facedown.
Power cards: Each receptacle has a power they can use during the adventure. They cannot lend or give it to another receptacle.
Prologue: The Prologue is a kind of pre-opening credits in the form of read-aloud cards that immerses players in the universe in which the mission will take place. Once read, it is placed aside and can be looked at during the entire mission.
Reading a card: A player who is 'reading a card' cannot support other players during a test. There are several types of cards (see Items and Tokens, above).
Receptacle: A character under the control of an agent (i.e. the player). Each receptacle has attributes, an Azrak pool, a Magick pool, and a back story. Although each receptacle is an autonomous character in their own universe, the controlling agent decides which actions the receptacle performs. It is possible for a receptacle to regain control over their own body and mind (see Snap Recall cards below).
Remove: Return the relevant game component to its original game box. It will never be used again.
Replacement cards: These white Items replace the receptacles' attributes till the end of the mission (see Items, above).
Resolving a test: Five-step specific procedure (see Tests and Conflicts, above).
Snap Recall cards: Each receptacle possesses a scattered memory of their past. Snap Recall cards represent a small portion of that past. Players are strongly advised against sharing any of the information contained on these cards, except in rare emergencies, determined at the player's sole discretion.
Spending Azrak: The Azrak players spend are placed in the Vortex.
Stand by: The status of an agent who has no Story card in front of them. An agent in stand by can spend 1 Azrak to support another player during a test (see Two or Three Player Games for games with less than 4 players). An agent in stand by can spend 1 Azrak to give one or more Items/tokens to another agent.
Standard Update: During the Between Locations phase, one agent may move 1 Azrak from the Vortex to the Mission Return card. Then, that agent retrieves all remaining Azrak from the Vortex and divides them among all agents.
Story cards: The Story deck contains the Mission Order, Icon Reference, Prologue, Receptacles, and Locations.
Stow: Place the corresponding card or token in the space assigned to it during setup.
Success (standard): During a test, if the final value is greater than the test's difficulty level, it is a success. Resolve the instructions in the right cell.
Support: A player in stand by can spend 1 Azrak to support another player during a test (see Two or Three Player Games for games with less than 4 players).
Telepathy: During the mission, all the agents can communicate telepathically by freely telling what they have discovered. During the Discovery phase, each agent must use telepathy to tell their Story card.
Test: An action that must be initiated and resolved before determining its result. As an action, a player in possession of a test can choose to attempt it. However, tests that are part of conflicts are mandatory.
Tokens: Components that are punched out when the game instructs a player to do so. Hexagonal tokens belong to the group. All other tokens are personal tokens. Stowed tokens are returned to the punchboard. Removed tokens are returned to the box.
Update: An action that allows agents to refill their Azrak pools. A standard update is more efficient than an Emergency Update (see The Azrak, above).
Update at no cost: An Update performed without moving an Azrak from the Vortex to the Mission Return card.
Vortex: All Azrak spent or lost during the game are placed in the Vortex. Players can divide Azrak in the Vortex among themselves by performing Updates. Azrak placed on the Mission Return card or on locations can never be divided this way.
Taking Notes
You are free to take notes while playing the game. However, taking photographs is strictly forbidden.
A Few Words About
Antonin Merieux
"Antonin was kidnapped in his cradle by Korrigans, who replaced him with yours truly. Well, believe me, it is not easy for a fairy child to live in your technocratic and liberticidal world, where the mind is replaced by algorithms! Well, it's not easy either for human children, now that even the game has something to do with it… I hope you can at least enjoy it."
Julien Carette
"I was born last century, I also time travel. I will briefly introduce myself… I spent my childhood immersed in comics, shamelessly devouring and copying the collection of my father's comic strips. Self-taught man, I first became a graphic designer before embarking on the adventure of comics and illustration via cartoons. I have two comic strips series to my credit: "Nomad 2.0" published by Glénat and "Le Bourreau" ("The Executioner") published by Delcourt. I had the opportunity to illustrate games such as "Gazobu", "Can't Stop", "Hero I.K.", "Guardian Chronicles" and this new TIME Stories scenario. I hope you will enjoy it as much as I enjoyed illustrating it."
Manuel Rozoy
"Time Stories Revolution could have never seen the light of day without all those who have tirelessly walked the time corridors, confronting countless time flaws with legendary benevolence. Eternal thanks to Arnaud, Augustin, Cédric, Emmanuel, Erwan, Germain, Hervé, Igor, Jessica, Karina, Lia-Sabine, Ludo, Mathias, Matthieu, Melanyne, Natacha, Patcho, Peggy, Philippe, Stéphanie, Thibald, Tom, Ulric, Vincent, Virginie. Special thanks to Antonin for his witty writing style!"
Game Components' Good Usage
When an agent uses the components made available to them, it is their duty to comply with the following rules of use:
1. STORY CARDS (large format)
- Panorama - Read out loud. Can be looked at by all players. Telepathy.
- Mystery - Usage according to the color or the icon (see Mysteries, above).
2. COMMON CARDS (medium format)
- Green - The agent who takes it keeps it faceup. Can be looked at by all players. Can be swapped.
- Yellow - Telepathy. Stowed once read/resolved.
- Red - Read out loud. Can be looked at by all players. Stowed once read/resolved.
- White - Read out loud. Can be looked at by all players. Placed faceup above the panorama.
- White (Replacement) - Placed faceup on the Receptacle card until the end of the mission.
3. PERSONAL CARDS (small format)
- Power - Can be looked at by all players. Kept faceup.
- Snap Recall - Telepathic communication possible only in case of extreme emergency. Kept facedown.
- Interaction - Telepathy. Kept facedown.
TOKENS
- Hexagonal - Can be looked at by all players. Placed faceup above the panorama.
- Magick - Personal. Stowed in the supply. Cannot be swapped.
- Damage Points - Placed on the opponent's card during a conflict. Stowed once the conflict is resolved.
- All others - The agent who takes it keeps it faceup. Can be looked at by all players. Can be swapped.
This product has been manufactured with all possible care. However, if a component is missing or is damaged, please contact our Customer Service at [email protected]. Your problem will be solved in a timely manner.
TIME Stories is a game published by JD Éditions - SPACE Cowboys, 47 rue de l'Est, 92100 Boulogne-Billancourt - France © 2020 SPACE Cowboys. All rights reserved.
Find out more about TIME Stories and SPACE Cowboys on www.spacecowboys.fr.