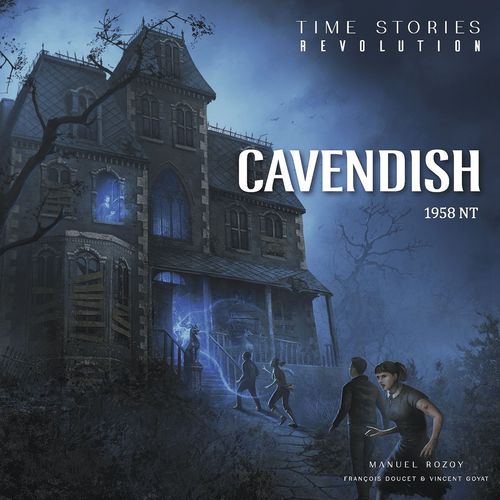
TIME Stories Revolution: Cavendish
TIME Stories Revolution: Cavendish Rulebook
Table of Contents
Table of Contents
- Important
- Contents
- Receptacle
- Setup
- Playing the Game
- 1. Time Captain Phase
- 2. Discovery Phase
- 3. Between Locations Phase
- Specific Procedures
- Items, Tokens, and Tiles
- OR/AND Cost
- Two or Three Player Games
- Solo Games
- Premature Mission End
- End of Mission: Final Score
- Glossary
- Protocol: Game Components' Good Use Policy
Important
- Do not flip Punchboard #2.
- Only punch the tokens and tiles out when instructed.
- Once punched out, place the tokens and tiles faceup.
Contents
- Punchboard #1 - Tokens
- Punchboard #2 - Location tiles (keep Punchboard #2 facedown)
- This Rulebook
- 31 Azrak crystals
- 90 Story cards
- 65 Personal cards
- 65 Common cards
The Experience icon is for the optional TIME Stories Revolution: EXPERIENCE box. Ignore this icon if you do not have this box or do not wish to play the mission with it. In TIME Stories Revolution: EXPERIENCE, your agents will evolve and take part in a fight for humanity's survival. If you wish to use it, start your adventure by reading the TIME Stories Revolution: EXPERIENCE rules.
Note: You can play the TIME Stories Revolution missions in any order.
On the back of the flash card of the Story deck, you will find a Mission Log. Once the mission is over, you can write down the player names and your final score. If, later on, you purchase the EXPERIENCE box, the above information will be useful to start EXPERIENCE after you have played one or more missions.
Each time you see the CA icon in the rules, the paragraph in question is specific to that mission.
Please refer to the Glossary, at the end of this rulebook, when you discover a new term or need to refresh your memory during the game.
The Three TIME Golden Rules
- You are all on the same team!
- Keep your mission objectives in mind at all times.
- The Time Captain is always right.
Receptacle
A receptacle is a character that a player inhabits during the game. Even though you are playing as the TIME agent connected to a receptacle, you will use the receptacle's attributes and backstory.
A receptacle is always defined by:
- Their name: Some characters in the adventure will recognize your receptacles and interact with them in a particular way.
- Their attributes: Attributes define the receptacle's strengths and weaknesses, both physical and mental. Each receptacle also has a pool of Azrak that represents the power of the link between them and the controlling agent. The attributes are Strength, Confidence, and Dexterity. The Receptacle card also shows the receptacle's name, the Azrak pool starting level, and a backstory.
- Their backstory: The agent takes control of the receptacle at a specific moment. This text provides a short summary of the receptacle's life before the agent's intervention. It may have information that will help the agent fulfill their mission.
Setup
To start playing TIME Stories Revolution - Cavendish, resolve the following steps in order.
Open the deck of STORY CARDS (steps 1 to 6)
- Set aside the flash card of the deck, then read the Mission Order (front) and the Mission Return (back) on the next card. Place that card on the table, Mission Return faceup (1).
- Line up the 3 Prologue cards facedown to create a panorama (2).
- Each player chooses a receptacle (the character they will play during the mission) and reads both sides of their card (3). With 1 or 2 players, only Anton and Amy are available. With 3 players, Anton and Amy must be chosen, but the 3rd receptacle can be either Jennifer or Doug.
- CA: Each player takes a number of Azrak corresponding to the starting level indicated on their Receptacle card. This forms their pool (4).
- When playing with fewer than 4 players, place the Azrak of the unplayed receptacles in the central area called the Vortex (5).
- The remaining Azrak are returned to the box.
- When playing with fewer than 4 players, unplayed receptacles are returned to the box as they will not be used during the mission.
- The player controlling Anton takes the rest of the deck, leaving the Game Round/Icon Reference card on top as an aid during the game: they will be the Time Captain for the first round of the game (6).
Open the deck of PERSONAL CARDS (steps 7 to 10)
- Set aside the flash card of the deck.
- Each player takes all cards belonging to the receptacle they will inhabit, indicated by the receptacle's picture on the back of the cards (7):
- CA: Each player reads their Talisman card and places it faceup in front of them, next to their Receptacle card (8).
- Each player places their Snap Recall card facedown (without reading it) next to their Talisman card (9).
- Each player places their Interaction cards (without reading them) in a facedown pile next to their Receptacle card (10).
Open the deck of COMMON CARDS (steps 11 and 12)
- Set aside the flash card of the deck.
- Take the 6 Destiny cards without reading them, shuffle them, and place them in a facedown pile (11). Leave space nearby for a discard pile.
- Place the Item cards facedown without reading them near the Destiny cards (12).
Punchboard #1
Remove the central part (containing the tokens) from the outer frame.
Steps 13 to 16
- Place the frame to make it easily accessible to all: this is the House Plan on which the group will be moving around (13).
- Punch out the Damage tokens (black teardrop shape) and the Fear tokens (distorted faces) from the central part (14).
- Each player takes the token corresponding to their receptacle and places it in front of them (15). You will find out their purpose during the mission. The unused Receptacle tokens are returned to the box.
- Keep Punchboard #2 facedown and within reach (without looking at the front): you will punch out the appropriate locations when prompted to do so.
- The Time Captain reveals the first card of the panorama (16) and reads it aloud. They repeat this step with the next two cards.
You can now begin the game! We recommend that you finish reading the game rules before starting your mission.
The setup diagrams show layouts for 1 or 2 players, 3 players and 4 players. Before playing with 2 or 3 players, remember to read the rules for 2 or 3 players (see below).
Playing the Game
A game of TIME Stories Revolution is played over several rounds. Each round consists of 3 phases resolved by the whole group in the following order:
- Time Captain phase
- Discovery phase
- Between Locations phase
Once phase 3 is complete, begin a new round with phase 1. Continue this process until the end of the mission or until all agents lose control of their receptacles.
1. Time Captain Phase
The Time Captain decides which location the group will visit. This phase consists of 3 steps to be resolved one after the other and in the following order:
- Choose a location
- Display the location
- Read card A
Choose a Location
After consulting with the other players, the Time Captain chooses a location on the House Plan that can be identified by its letter surrounded by a colored halo and places 1 Azrak from their reserve there, even if the location already includes other tokens (Azrak or Fear).
Any revealed location may be chosen, regardless of whether it is adjacent to the last visited location or not.
Connecting a new location: As you progress through your mission, you will discover new locations that depict the rooms of the Cavendish mansion. Each time you are prompted to connect a Location tile, punch out and reveal the corresponding tile and then place it so as to match the color of the two connection markers. For more details, see "Location tiles" below.
Display the Location
The Time Captain searches through the Story deck to find the chosen location, identifiable by its card A. Upon finding it, they take all of that location's cards and display them so they are visible to all players.
The top card of each location is card A, which indicates the location's name (or its title: Location B, etc.) in the top corners. The bottom of the card lists how many cards form the location's panorama.
At this time, do not flip any of the panorama's cards.
Read Card A
The Time Captain flips over card A and reads its text aloud. Then they replace card A so other players can look at it. Players may look at card A at any time while at the location.
2. Discovery Phase
Discover the location and perform actions until you leave it. This phase consists of 3 steps to be resolved one after the other and in the following order:
- Location recon
- Agent telepathy (optional)
- Actions
Location Recon
To recon a location, each player must take a different card from the panorama, read it secretly, then place it facedown in front of them. As with all group decisions, players may freely discuss before deciding which player takes which card.
Agent Telepathy (Optional)
All agents can communicate telepathically during the mission. To simulate telepathy, players take a moment to recount what they have discovered. They may look at the card in front of them but must not read its text aloud: they simply recount what is happening to them.
Although agents are allowed to use their telepathy during the entire mission, the Agency recommends using it during this step in order to offer each agent a superior understanding of the situation at hand (thus avoiding reckless individual acts).
Actions
This rather atypical step is the heart of the game. The players are free to perform whichever actions they choose, even simultaneously, if they wish. No turns, time limit, or other order of play is required. Some will read their cards faster than others, and that's fine. What might appear as joyful chaos to some might very well be indicative of good coordination between team members. It is up to you when to act and when to stand by and watch others. One piece of advice: if you wish to be efficient, listen to each other!
To begin with: If the Panorama card placed in front of an agent includes game instructions ("Immediately take an Item", "Read your Interaction card", etc.), they must follow them now. However, if the wording gives a choice to the agent ("If you want to", "You may", etc.), they are free to choose whether to follow the instructions or not. When a choice must be made, telepathy is often the best ally. Remember, don't read the actual text aloud when using telepathy.
Then: Each player can perform any of the following actions as many times and in whatever order they wish:
- Explore. A player can explore any available card in the panorama. To do so, they must spend 1 Azrak from their pool (by placing it in the Vortex), return the card in front of them (if any) to the panorama, then take a new card and secretly read it. If that new card includes game instructions, the player must follow them immediately.
- Initiate a test. See "Tests" below.
- Stand by. A player who wants to support another player during a test must stand by. In order to do this, they must return the Story card in front of them to the panorama (it is now available for another player to explore). As long as they do not have a Panorama card in front of them, they are able to support other players. A player who is in stand by can:
- Support another agent during a test; and/or
- Give 1 or more of their Items to other agents.
Important: Some cards feature a conflict icon (personal or group), which can prevent you from performing actions as you normally would. See "Conflicts" below.
The players may remain in a location as long as they wish (while their Azrak lasts). To leave, all players must be in stand by (with no Panorama card in front of them). Once all players are in stand by and are done taking actions, proceed with the Between Locations phase.
3. Between Locations Phase
This phase consists of 3 steps to be resolved one after the other and in the following order:
- Standard Update (optional)
- Swaps (optional)
- Change of Time Captain
Standard Update
Players can collectively decide to perform a Standard Update. See "Standard Update" below.
Swaps
Players can swap Items anytime during this phase.
Change of Time Captain
The Time Captain stows the current panorama by placing all cards underneath the Story deck and passes the deck to the player on their left; this player becomes the new Time Captain. A new round begins!
Specific Procedures
Spending, Losing, or Gaining Azrak
When you spend or lose Azrak, place the corresponding crystal(s) in the Vortex. When you gain Azrak, take the corresponding crystal(s) from the Vortex. You cannot exceed your starting level of Azrak at any time.
Tests
A test is represented by a box, the center of which displays the attribute being tested by a colored symbol, the test's difficulty level (the higher the value, the more difficult the test) and up to three different results (generally, from left to right: failure, critical success, and success). Some tests may show several attributes; if so, you choose which one to use.
If a player reads a card depicting a test, they can attempt the test, but success is not necessarily required. To do so, follow the instructions below:
- Initiate a test: The receptacle attempts the test. The agent spends 1 Azrak to use the value of their attribute corresponding to the test.
- Boost: The agent can spend as many additional Azrak as they wish to increase the value of their attribute. For each additional spent Azrak this way, they receive a +1 bonus.
- Support: The agent asks for support. Any player in stand by (i.e. who has no Panorama card in front of them) can support by spending, at most, 1 Azrak to give a +1 bonus during this test (see "Two or Three Player Games" for games with fewer than 4 players).
- Destiny: Once all supports are resolved, the agent whose receptacle is attempting the test reveals a Destiny card and applies the indicated modifier to obtain their final value. Then, discard the Destiny card faceup. Shuffle discarded Destiny cards into their pile when instructed.
- Resolution: To determine the test's outcome, compare the result to the test's difficulty level:
- If the value is less than the difficulty level (failure), the receptacle obtains the result indicated in the left cell (associated with the "-" symbol).
- If the value is greater than the difficulty level (success), the receptacle obtains the result indicated in the right cell (associated with the "+" symbol).
- If the value is equal to the difficulty level (critical success), the receptacle obtains the result indicated in the lower cell (associated with the "=" symbol).
Only the receptacle attempting the test resolves the consequences of the test; supporting agents do not.
Sometimes, the results for success and critical success are identical. In such cases, both results will be connected to the same outcome box. Additionally, sometimes the cell of a result is empty; this means nothing happens if this result occurs.
Example: James tries to dodge a projectile (Dexterity test). His Dexterity attribute is 2. The test has difficulty level 4, with failure "Take ITEM 4.", critical success "Take ITEMS 4 and 5." and success "Take ITEM 4."
- He spends 1 Azrak to use his Dexterity attribute value (2).
- He spends 2 additional Azrak to boost this value.
- Tess supports him by spending 1 Azrak.
- James draws a Destiny card showing a modifier of -1.
- Final value = 4.
In other words 2 (Dexterity attribute), +2 for the boost, +1 for the support, and -1 for the Destiny card. He obtains a critical success since the result is equal to the difficulty level, and takes ITEMS 4 and 5.
Conflicts
Personal conflicts. A personal conflict is resolved the same way as a regular test, with one exception: the player who reads the card must keep it in front of them and must resolve the conflict immediately, before doing anything else (stand by, explore another card, change location, etc.).
Group conflicts. A group conflict is a type of conflict that is resolved differently from a personal conflict, and represents a conflict against an adversary that the entire group must overcome. When a card featuring this icon is read, all players must stop what they are doing to resolve a group conflict. Before beginning the conflict, players may freely swap Items. Once the group conflict has begun, no further swapping is allowed. A group conflict is often a turning point in a mission and takes place over one or more turns. For the duration of the conflict, each player (regardless of where they are, or if they are locked in a personal conflict) must attempt one of the tests depicted on the group conflict card and apply its results. The Time Captain determines the order in which players make their attempts.
During a group conflict, players can support each other even if they have a panorama card in front of them.
Once each player has made the test of their choice, the turn ends and the above procedure is repeated. A group conflict ends when the adversary is defeated. Once the group conflict is resolved, the adventure resumes.
The Azrak
The Azrak is the magical or mystical energy that links the agent (the player) to their receptacle (the host). Each player must always have at least 1 Azrak in their pool, or this link breaks.
Standard Update
As the adventure progresses, players will spend Azrak from their pool. During the Between Locations phase, players can choose to voluntarily reset the link between agents and receptacles to gather Azrak. To do so, follow the instructions below:
One player moves 1 Azrak from the Vortex to the Mission Return card. That player then retrieves all remaining Azrak from the Vortex (i.e. all spent Azrak that are not on the Mission Return card or on the House Plan), and divides them among all players, however they wish, though a player may not have more Azrak than their starting level allows. If there is any Azrak remaining after all players have reached their maximum, the remaining Azrak is returned to the Vortex. It is recommended that the Azrak be shared as evenly as possible.
Certain game effects will allow you to perform an Update at no cost. If so, follow the instructions above, but do not move any Azrak to the Mission Return card.
Example: James has 2 Azrak. Tess has 5 Azrak. There are 5 Azrak left in the Vortex. Tess moves 1 Azrak from the Vortex to the Mission Return card. The Update then enables James and Tess to retrieve all remaining Azrak from the Vortex. Neither of them can exceed their starting level. They divide the available Azrak as follows: James takes 2 and Tess the remaining 2.
Broken Link
When an agent spends or loses their last Azrak, they must immediately choose one of the following two options:
Request Emergency Update. The player can choose to request assistance from the Agency. To do so, they place the Azrak they just spent or lost on the Mission Return card, then refill their agent's Azrak pool up to its starting level with Azrak from the Vortex. The other players do not retrieve Azrak during an Emergency Update, making it far less advantageous than a Standard Update.
Lose Receptacle Control. The agent loses control of their receptacle. The Azrak they just spent or lost is placed in the Vortex. If the Azrak was spent for an action, the agent completes that action before losing control. That agent is then ejected from the current location (see below).
Important: If all agents lose control of their receptacles in the same location, the mission ends in failure. The players must restart the game from the beginning.
Being Ejected from a Location
An agent is ejected from their location when they lose control of their receptacle (in which case the agent is wandering - dazed - between realities) or when specifically instructed by a card.
The consequences are the same in both instances: the agent cannot take actions, support other agents, swap items, etc. But can still communicate with the others.
Ejected agents return to the game during the Between Locations phase. If this ejection resulted from a loss of control, the agents must perform a Standard Update.
Items, Tokens, and Tiles
Items
During the game, players will come across Item cards. When the game instructs you to take an Item card, search the Item deck for it. If the game instructs you to take an Item that another player has already claimed, ignore it.
Item cards are divided by color:
- A green Item is most often a physical object a receptacle can take. It is placed faceup in front of the player who has it, and it may be swapped.
- A yellow Item is most often a personal event. It is read secretly and communicated telepathically by the player who took it. Once read and resolved, it is immediately stowed unless the card text indicates otherwise.
- A red Item is always read aloud by the player who took it and can be looked at by all players. Once read, it is stowed unless the card text indicates otherwise.
Some Items add an attribute bonus to their owner (these bonuses are cumulative). Example: an Item showing a Strength bonus of +1 increases the receptacle's Strength by 1.
Fear Tokens (CA)
During your mission, your receptacles may face situations and threats likely to root the most cowardly of them to the spot. To symbolize these moments of fear endured by your receptacle, you may be instructed to take 1 or more Fear token(s). Take any such Fear tokens from the supply, placing them on your Receptacle card. If the total number of Fear tokens on your receptacle exceeds your Confidence attribute, place the excess on the House Plan at the location currently visited by the group. The number of Fear tokens on a tile will be relevant later in the mission.
Example: The agent controlling Doug's receptacle faces a nightmarish situation: they must take 3 Fear tokens. Having a Confidence of 1, they place 1 Fear token on their card and the other 2 on the current location.
Location Tiles (CA)
As you progress through the mansion, you will discover new rooms and explore them as described above. Each time you are asked to "connect the tile...", carefully punch out the corresponding tile from Punchboard #2 (kept facedown), reveal that tile, and place it on the House Plan so as to match the color of the two connection markers. The group will now be able to visit this new location during the "Choose a location" step of the Time Captain phase.
Swapping Items
During the Between Locations phase, players may freely swap Items they own.
During the Actions step of the Discovery phase, an agent who is in stand by may spend 1 Azrak to give one or more of their Items to another agent at that location.
Talisman cards cannot be swapped.
Stowing an Item or a Token
Return the card or token to its supply or deck, as described during setup.
Removing an Item or a Token
Remove the card or token from the game. Feel free to place it in the box, as it will not be needed again during this mission.
OR/AND Cost
Some cards display a choice between OR/AND. You can choose between:
- OR: Choose 1 option at no cost;
- AND: Choose both options by spending 1 Azrak. In such a case, you must remove the card offering that choice.
It is quite possible to choose only 1 option, then, after looking at it, decide to spend 1 Azrak to choose the second one. In that case, don't forget to remove the card.
Example: "If you want to hear Vincent's pun: take ITEM 77." OR/AND "If you want to listen to François: read your Interaction card XXV."
Two or Three Player Games
Each player chooses a single receptacle as described below.
When playing with 2 players:
- Anton and Amy must be the selected receptacles.
- Each agent may perform 1 Explore action at no cost during each round's Action step.
- The group may perform 2 Updates at no cost (Standard or Emergency) during the mission.
- During each test, the supporting agent can spend up to 3 Azrak to give a +1 bonus for each spent Azrak.
When playing with 3 players:
- Anton and Amy must be selected by two of the players; the third player may choose either Jennifer or Doug.
- The Time Captain may perform 1 action at no cost during each round's Actions step.
- The group may perform 1 Update at no cost (Standard or Emergency) during the mission.
- During each test, 1 supporting agent can spend up to 2 Azrak to give a +1 bonus for each spent Azrak.
Solo Games
A solo player will play as 2 receptacles, otherwise following the two player rules described above. For obvious reasons, rules regarding telepathy between agents can be disregarded.
Premature Mission End
It is possible, although rare, that the players fail the mission. For instance, the mission ends in failure if all agents lose control of their receptacles at the same location. Sometimes, if the players took a wrong turn early on, they might choose to end the mission prematurely in order to start the adventure again from the beginning. In this case, the game must be completely reset. The elders call these "runs".
End of Mission: Final Score
(Read only when instructed.) Before reading the Cavendish epilogue, adjust the number of Azrak on the Mission Return card as follows, and then determine your final score.
- Did you rescue Damien? If so, remove 1 Azrak from the Mission Return card. Leaving him to his fate is not rescuing the young boy!
- Did you find the elixir of eternal life (this is done by assembling the handwritten notes - ITEMS 1, 17, 26, 37, 43, and 48 - and reading the words written in capital letters)? If so, remove 1 Azrak from the Mission Return card.
- Did you free Anigimas, the Agency's enemy, by giving him the emerald? If so, add 2 Azrak to the Mission Return card. If you play with TIME Stories EXPERIENCE: take ITEM 44.
- Is Anton dead? If so, add 1 Azrak to the Mission Return card.
Glossary
Agent: Each player plays the role of an agent who visits and explores universes as diverse as they are exotic. To do so, the agent takes control of a receptacle they use to interact with a distant reality.
Attribute: Each receptacle has a set of attributes that are used during tests. Each attribute has a value, a color, and an icon (to easily determine which is used during any given test). The higher the value, the more likely the receptacle is to succeed in tests of that type. The attributes are Strength, Confidence, and Dexterity.
Azrak: Each player has a quantity of Azrak that represents the link between the receptacle and the agent controlling them. It is a resource (that cannot be transmitted or swapped) that players use to perform actions during the game.
Azrak pool: A receptacle's unspent Azrak. A receptacle's starting Azrak is printed on its card. The quantity of Azrak in the receptacle's pool can never exceed this starting value.
Common cards: A deck consisting of Item cards and Destiny cards.
Conflict: Indicates a mandatory test. The player(s) must resolve it before they are allowed to perform other actions. There are both personal conflicts and group conflicts.
Critical success: During a test, if the final value is equal to the test's difficulty level, it is a critical success. Resolve the instructions in the bottom cell, indicated by the "=" symbol.
Damage Points: These tokens measure the damage inflicted on the adversary during a conflict.
Deck: A TIME Stories scenario consists of three decks: the Story deck, the Common deck, and the Personal deck.
Destiny cards: These cards are found in the Common deck. These cards add an element of uncertainty to the resolution of tests. The front of each Destiny card is the same, and has a strip at the bottom indicating the number of cards in the deck, as well as the deck's highest and lowest values. The back of each Destiny card shows a modifier that is applied during a test. Destiny cards are discarded value-side up. Players can look through the discarded Destiny cards at any time. However, they can never look through the Destiny deck. Shuffle the discarded Destiny cards to form a new pile when prompted.
Difficulty level: The higher the number, the more difficult the test.
Ejection from a location: Certain events can trigger an ejection, but more commonly an agent will be ejected from a location after losing control of their receptacle. An ejected agent wanders - dazed - between two realities. This state is temporary (see "Being Ejected from a Location"). Ejected agents cannot act, but may still communicate telepathically with other players.
Emergency Update: Rather than losing control of their receptacle when spending or losing their last Azrak, an agent can choose to perform an Emergency Update by placing the last Azrak spent or lost on the Mission Return card. They then regain as many Azrak as possible from the Vortex without exceeding their starting level and continue playing.
Failure: During a test, if the final value is lower than the test's difficulty level, it is a failure. Resolve the instructions in the left cell, indicated by the "-" symbol.
Fear tokens (CA): Fear tokens can be retrieved during the adventure. They are personal and cannot be swapped. If the total number of Fear tokens exceeds the Confidence attribute of the receptacle in question, the excess is placed on the tile of the current location. If an effect reduces the Confidence of a receptacle, their number of Fear tokens must immediately be adjusted: the excess is placed on the tile of the location.
Final value: This is the value compared to the difficulty level during a test. It consists of the sum of the value of a receptacle's attribute, optional boost, optional support, and the value of the drawn Destiny card.
Flash card: A card placed on top of and/or under a deck to maintain the secrecy of its contents.
Gaining Azrak: Unless stated otherwise, any Azrak the players gain are taken from the Vortex. An agent can never exceed their starting level.
Group: When a game component indicates that the group must or can take action, all the agents are involved. If it is specified that the group can spend Azrak or use an Item, each agent can participate.
Group conflict: A conflict all players are required to participate in. Players must continue performing actions corresponding to the group conflict until it is resolved (see "Conflicts").
House plan (CA): Game area defined by the frame of Punchboard #1 and which, during the mission, will be filled with Location tiles depicting the rooms of the Cavendish mansion.
Interaction cards: Each receptacle has a deck of Interaction cards. These cards are only to be looked at when instructed to do so. Looking at an Interaction card is always done at no cost. After looking at an Interaction card, stow it in its original deck.
Items: Items can be swapped at no cost during the Between Locations phase, and before starting a group conflict. An agent in stand by during the Actions step can spend 1 Azrak to give one or more Items to another agent.
Item cards: When the game instructs you to take an Item card, search the Item deck for that card, unless another player already has it (in which case, do not take the item). There are three types of Items (see "Items").
Life points: During a conflict, each adversary will have a certain amount of life points. Usually, when an adversary has accumulated damage equal to or greater than their life points, the conflict ends.
Location tiles (CA): When a Location tile comes into play, it is punched out from Punchboard #2, revealed, and placed in the House Plan area to match the color of the two connection markers. The group can visit this new location during a future "Choose a location" step of the Time Captain phase, regardless of distance (it is not necessary for the new location to be adjacent to the current location).
Locations: The locations are explored during their mission. A location is represented by a card, and is identifiable by a letter surrounded by a colored halo. If a location has already been visited (i.e., 1 or more Azrak or Fear tokens have been placed there) it can be visited again by placing an Azrak there.
Loss of control: Instead of requesting an Emergency Update to replenish their Azrak pool, an Agent can choose to spend their receptacle's last Azrak to perform a final action. After doing so, the agent loses control of their receptacle and is ejected from the location.
Losing Azrak: Any Azrak the players lose are placed in the Vortex.
Personal cards: This deck contains the Talisman card, the Snap Recall card, and the Interaction cards of each receptacle. As the word "personal" suggests players are prohibited from reading or taking the Personal cards of a receptacle belonging to another agent.
Personal conflict: A conflict involving only one agent (see "Conflicts").
Prologue: The Prologue is an introductory set of read-aloud cards that immerses the players in the universe in which the mission will take place. Once read, it is placed aside and can be reviewed throughout the entire mission.
Reading a card: A player who is "reading a card" cannot support other players during a test. There are several types of cards (see the Protocol below).
Receptacle: A character under the control of an agent (i.e. the player). Each receptacle has attributes, an Azrak pool and a backstory. Although each receptacle is an autonomous character in their own universe, the controlling agent decides which actions the receptacle performs. It is possible for a receptacle to regain control over their own body and mind (see Snap Recall cards).
Remove: Return the relevant game component to its original game box. It will never be used again.
Resolving a test: See "Tests" for details regarding this procedure.
Snap Recall cards: Each receptacle possesses a scattered memory of their past. Snap Recall cards represent a small portion of that past. Players are strongly advised against sharing any of the information contained on these cards, except in rare emergencies, as determined by the player's sole discretion.
Spending Azrak: Any Azrak the players spend are placed in the Vortex.
Stand by: The status of an agent who has no Story card in front of them. An agent in stand by can spend 1 Azrak to support another player during a test (see "Two or Three Player Games" for games with fewer than 4 players). An agent in stand by can spend 1 Azrak to give one or more Items/tokens to another agent.
Standard Update: During the Between Locations phase, the agents may move 1 Azrak from the Vortex to the Update space of the Mission Return card in order to divide the remaining Azrak in the Vortex among their receptacles' Azrak pools.
Story cards: The Story deck contains the Mission Order, Icon Reference, Prologue, receptacles, and locations.
Stow: Place the corresponding card or token back to where it was placed during setup.
Success (standard): During a test, if the final value is greater than the test's difficulty level, it is a success. Resolve the instructions in the right cell, indicated by the "+" symbol.
Support: A player in stand by can spend 1 Azrak to support another player during a test (see "Two or Three Player Games" for games with fewer than 4 players).
Swap: A card that can be swapped may be given to another player. This includes trading with the player and receiving something in return, as well as giving the card outright and getting nothing back.
Talisman cards (CA): Each receptacle has an object they can use during the adventure. They cannot be swapped with another receptacle.
Telepathy: During the mission, all the agents can communicate telepathically by freely telling what they have discovered. During the Agent telepathy step, each agent must use telepathy to tell their Story card. Card text should not be read verbatim when communicating with other agents.
Test: An action that must be initiated and resolved before determining its result. As an action, a player in possession of a test can choose to resolve. Tests that are part of conflicts are mandatory and must be resolved immediately.
Update: An action that allows agents to refill their Azrak pools. A Standard Update is more efficient than an Emergency Update. See "Standard Update".
Update at no cost: An Update performed without moving an Azrak from the Vortex to the Mission Return card.
Vortex: All Azrak spent or lost during the game are placed in the Vortex. Players can divide Azrak in the Vortex among themselves by performing Updates. Azrak placed on the Mission Return card or locations can never be divided this way. If players cannot perform an update because the Vortex is empty (all Azrak are on the Mission Return card and/or the plan), the mission is failed (see Premature Mission End).
Protocol: Game Components' Good Use Policy
When an agent uses the components made available to them, it is their duty to comply with the following rules of use.
Story Cards (large)
- Mission Order / Location cards (read aloud): is read out loud and can be looked at by all players.
- Panorama: is shared by telepathy only.
Common Cards (medium)
- Green: is placed faceup in front of the agent who takes it. All agents may look at it. May be swapped.
- Yellow: is shared by telepathy, then stowed once read/resolved.
- Red: is read aloud and can be looked at by all agents. Is stowed once read/resolved.
Personal Cards (small)
- Talisman: is kept faceup in front of the agent. May be looked at by all players. Cannot be given to other agents.
- Snap Recall: is kept facedown in front of the agent. Telepathic communication possible only in case of extreme emergency.
- Interaction: is kept facedown, and only shared by telepathy.
Tokens
- Damage points: are placed on the opponent's card during a conflict. Stowed once the conflict is resolved.
- Fear (CA): are placed on the agent's Receptacle card. If the total of Fear tokens exceeds the Confidence attribute of the receptacle in question, the surplus is placed on the Location tile currently visited.
Tiles
- Location tile (CA): is punched out from Punchboard #2 only when it comes into play, and is then revealed and then placed on the area of the House Plan to match the color of the two connection markers.